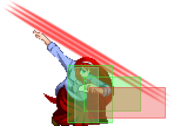
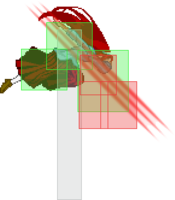
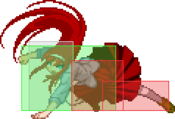
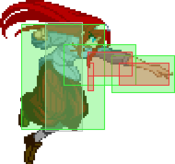
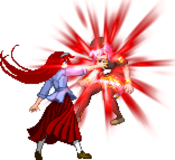
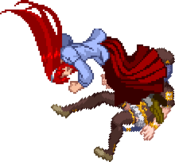
Melty Blood/MBAACC/Akiha Vermilion/Full Moon
Character Page Progress
This page is mostly complete, consider joining as an editor to help finish it up. Please update this character's roadmap page when one of the editing goals have been reached.
| In Progress | To-do |
|---|---|
|
Overview
| Strengths |
|
| Weaknesses |
|
General Gameplan
Movement
FVAkiha is one of the most mobile characters in all of Melty Blood. Her mobility is one of the biggest reasons she's as good as she is. Of course, with great mobility comes great responsibility - you must make sure that you're not moving yourself into harm's way, as VAkiha's extremely low life means any mistake you make can mean the end for you.
Ground
FVAkiha's walkspeeds are above average, but no one simply walks around in Melty Blood so it is what it is.
Her ground forward dash is extremely fast, has very little startup (ie it doesn't take her long before she starts moving, as opposed to say PCiel, whose dash has a long amount of time at the beginning where she isn't moving), and has a bit of low profile ability, allowing her to dash under some characters who are trying to jump in with buttons towards you, and potentially run behind someone and 5A them on the other side. This dash coupled with her strong frame data allows her to also tick throw quite effectively.
Her ground backdash is average, it's invincible just like everyone's else. It can be useful to increase the distance between you and your opponent if you really can't afford the time to jump and air backdash. Not much more to say about it.
Move Descriptions
| Frame Data Help | |
|---|---|
| Header | Tooltip |
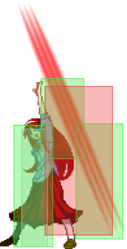
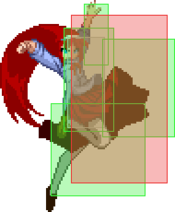
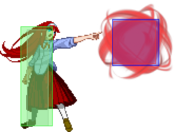
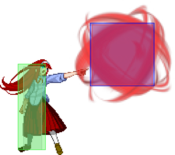
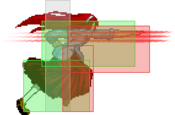
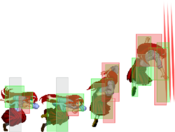
| Move Box Colors |
Light gray = Collision Box (A move lacking one means it can go through the opponent's own collision box). |
| Damage | Base damage done by this attack.
(X) denotes combined and scaled damage tested against standing V. Sion. |
| Red Damage | Damage done to the recoverable red health bar by this attack. The values are inherently scaled and tested against standing V. Sion.
(X) denotes combined damage. |
| Proration | The correction value set by this attack and the way it modifies the scaling during a string. See this page for more details.
X% (O) means X% Overrides the previous correction value in a combo if X is of a lower percentage. |
| Circuit | Meter gained by this attack on hit.
(X%) denotes combined meter gain. |
| Cancel | Actions this move can be cancelled into.
SE = Self cancelable. |
| Guard | The way this move must be blocked.
L = Can block crouching |
| Startup | Amount of frames that must pass prior to reaching the active frames. Also referred to as "True Startup". |
| Active | The amount of frames that this move will have a hitbox. (x) denotes frame gaps where there are no hitboxes is present. Due to varied blockstuns, (x) frames are difficult to use to determine punish windows. Generally the larger the numbers, the more time you have to punish. |
| Recovery | Frames that this move has after the active frames if not canceled. The character goes into one frame where they can block but not act afterwards, which is not counted here. |
| Advantage | The difference in frames where you can act before your opponent when this move is blocked (assuming the move isn't canceled and the first active frame is blocked). If the opponent uses a move with startup that is at least 2 frames less than this move's negative advantage, it will result in the opponent hitting that move. |
| Invul | Lists any defensive properties this move has.
X y~z denotes X property happening between the y to z frames of the animations. If no frames are noted, it means the invincibility lasts through the entire move. Invicibility:
Hurtbox-Based Properties:
Miscellaneous Properties
|
Normal Moves
Standing Normals
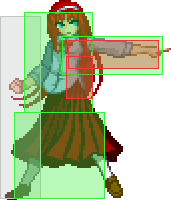
5A
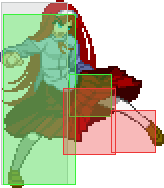
5B
5C
5C
5[C] |
|---|
Crouching Normals
2A
2B
2B 2B~2B~2B 2B 2B 2BB 2BB 2BBB 2BBB
|
|---|
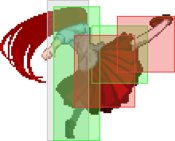
2C
Aerial Normals
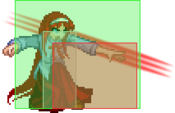
j.A
j.B
j.C
Command Normals
3C
4C
6C
Universal Mechanics
Ground Throw
Ground Throw
6/4A+D |
|---|
Air Throw
Air Throw
j.6/4A+D |
|---|
Shield Counter
Shield Counter
236D after a successful Shield (Air OK) |
|---|
Shield Bunker
Shield Bunker
214D in neutral or blockstun |
|---|
Blood Heat
Blood Heat
A+B+C during MAX |
|---|
Circuit Spark
Circuit Spark
A+B+C during hitstun/blockstun at MAX |
|---|
Special Moves
Grounded Specials
236X
623X
214X
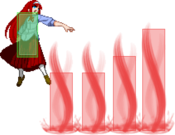
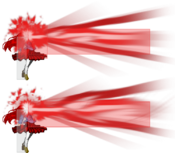
Piercing the Moon
(EX: Piercing the Waxing Moon) 214A/[A]/B/[B]/C |
|---|
22X
(Hitboxes trigger the Pit on opponents in hit/blockstun) (Hitboxes trigger the Pit on opponents in hit/blockstun) ~22A/B/C(~6) ~22A/B/C(~6)
|
|---|
Aerial Specials
j.236X
Brilliant Impetus - Fire Curtain
j.236A/B/C |
|---|
j.214X
Piercing the Moon (Air) (EX: Piercing the Waxing Moon) j.214A/[A]/B/[B]/C A A [A] [A] B B [B] [B] EX EX
|
|---|
j.22X
(Hitboxes trigger the Pit on opponents in hit/blockstun) (Hitboxes trigger the Pit on opponents in hit/blockstun) ~j.22A/B/C(~6) ~j.22A/B/C(~6)
|
|---|
Arc Drive
Red Mistress - Ubiquitous
41236C during MAX/Heat |
|---|
Another Arc Drive
Red Mistress - Ubiquitous
41236C during Blood Heat |
|---|
Last Arc
Red Mistress Ubiquitous - Hill of the Crimson Banquet
Grounded EX Shield during Blood Heat |
|---|
Air
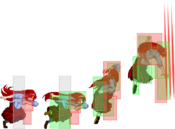
FVAkiha's air mobility is second only to F Hime who has flight. In addition to having two average trajectory jumps and two above average airdashes, she also has puffballs (j.236A/B), pits (j.22A/B/C) and pillars (j.214A/B), and using a combination of all these options can make the opponent's life a nightmare.
Her jumps cover a standard amount of distance and float for a standard amount of time. Her dash jump covers a long distance so dash jumping to poke the opponent out of anything slow in the air is a valid strategy if you have the hard read to back it up. Having two dashes in the air allows you to bait out big normals an come back in and punish.
Puffball (j.236A/B) can be done indefinitely in the air. A version floats you towards where you are facing and B version floats you away from where you are facing. They basically have no hurtbox where her arms are, so it's an extremely good option while moving around if your opponent is anywhere below you, since it's really difficult to challenge from that angle. Choosing between the A and the B version depends on the situation - do you want to go forward or go backward? Using a puffball disallows you from air backdashing till you land, so it's extremely important to know which version of the puffball you want to use. Also note that puffballs' momentum changing is affected by what jump you are doing, so doing a dash jump puffball can make the A version puffball go way ahead and the B version puffball barely move backwards if at all.
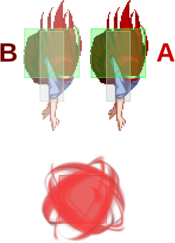
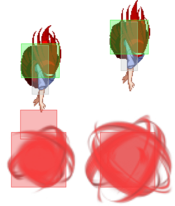
Pit (j.22A/B/C) can also be done indefinitely in the air. All versions make you float slightly upwards and backwards, overriding all previous momentum. This is great as a brake in the air, so you can just pause and make yourself not land on a potential anti air, which is great when you're air teching and you've used up all your movement options and someone's making you land onto a normal for a ground to air combo. Pits have great recovery and let you keep all your movement options so they're great to just move around with, and they also have the added benefit of activating and putting the opponent in huge amount of blockstun if you push them into pits while in blockstun.
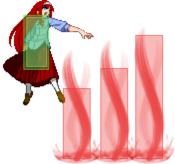
Pillars (j.214A/B) are similar to ground pillars, except done in the air. They're a great way to protect your landing if someone's running towards you to anti air you out of the air, but if someone jumps over the pillar you're in deep trouble because you are in full recovery till you land AND you have extra recovery when you land. They're also good to bully opponents who like to stay on the ground from far, though this is Melty Blood so you wouldn't find players like those often.
Offense
FVAkiha's offense is extremely potent, with F moon's standard extremely good frame data coupled with a really fast dash that allows her to tick throw very well. Just like most characters in Melty Blood, FVAkiha is at her best when she's forcing the opponent to block all of her stuff, creating strings that look like they have no way out, and punishing the opponent for trying.
Pressure
FVAkiha, being an F moon character, has very good frame data on most of her normals (See #Normal Moves).
Her throw is really good and provides a ton of different mixups, while healing her red life, which can be useful if you're trying to make a comeback and you don't have IH.
Her 2A, standard low poke, is +3 on block. +3 is a LOT, considering most C and H moon characters' 2A's are usually 0 or -1 on block. This allows you to do 2A delay 2A as a frame trap.
5A is +4 on block, one frame extra. Coupled with the fact that you can't duck it on block if you play a viable character (sorry Necos), this makes it an excellent tool to catch late jump outs and get a mini combo.
5B and 5C, while negative on block, are excellent frame trap normals, since 5B on counter hit links to another 5B, and 5C on counter hit can lead to massive damage using j.22x.
4C is another frame trap tool that you can chain into if they block your 5B or 5C as another thing to try. Same for 623A, except you can do that after 4C as well.
TK air puffball is a fantastic tool on offense that does frankly too much stuff for a move that is that safe (essentially fully safe). It has a great tendency to just eat Dragon Punches on wakeup due to how the DP interacts with her hurtbox (or rather, lack of thereof). Super jump puffball isn't that good. You want to normal jump tk puffball, you do this by either 412369A or [2]369A (hold 2 for a little while before doing the rest of the motion). After normal jump TK air puffball, you want to chain into j.B for a safe blockstring, or land and 2A if you've conditioned them to always take the j.B high option.
IAD j.C is an option you can use if you're too far away for TK air puffball and your opponent gives you enough time and doesn't mash out a normal to stop you. It is also cancelable into lots of air stuff, including but not limited to dj.22A, j.214A, dj airdash j.C, and so on.
Pairing these together, you can create strings limited by your imagination and your opponent's willingness to escape your pressure. Some examples:
- 2A, tick throw
- 2A, delay 5B/5C
- 2A, TK air puffball, j.B, dash 2A
- 2A2A, tick throw
- 2A2A, delay 5B
- 2A2A, IAD j.C > dj.22A, j.22B, land, tick throw
As you can see, the possibilities are endless. The key is to mix up enough stuff to where your opponent thinks, "Oh jeez I can't just keep blocking all this because my guard bar is depleting," or they can just not think and mash 2A or mash dragon punch or try to jump out because they don't care, and your job as the aggressor is to punish that (more detail near the end).
Okizeme
FVAkiha's okizeme is very potent and extremely safe for how damaging it can be. Below are some of the more common knockdowns you'll land, and the general options you have off them. Do note that this isn't everything; be creative and/or watch match videos to see what top level players do.
Air throw
Air throw is one of the more common knockdowns you will be landing, so it's important to know what kinds of oki options you get. Do note that it's not as much advantage as j.236C, so unless you don't have the meter, it's usually advised to end air combos with j.236C to get as much advatage off the combo as possible.
- 66 2A
- While not strictly meaty depending on the character, it does beat wake up mashing by everybody. 2A is +3 on block as well, so even if they don't mash, you can run with the advantage.
- 214[B]
- If you predict your opponent to just wake up DP, but still want to retain some sort of advantage, you can do 214[B] and make their reversal whiff (or make them hit a pillar, in which case if it hits as a counter hit you can combo off it) while still putting them in blockstun. If they block it you have enough time to run up and do a 2A as part of the blockstring from the pillar. Do note that pillars are not strictly meaty and they can jump out, but they'll have to block them in the air which leads to an unblockable 4C.
Once the opponent starts respecting these you have the option to run up throw, IAD j.C, run up puffball, etc, but note that these two are the primary options you have.
j.236C combo ender
If you want a good knockdown midscreen you'll most likely go for this. For 100% it's not a bad investment. Your options include:
- j.A(w), j.214[A].
- Creates lots of blockstun for your opponent to deal with as you dance around them and do whatever you want.
- float away during j.236C, j.66, j.214A
- Same concept except not as easy to shield on reaction and punish.
- float away during j.236C, j.66, j.A(w), land 2A
- Cheeky low.
Corner 623B
Ender to Momiji loop and hard knockdown. This can lead to a really good mixup that's relatively safe. The most standard way to pressure off this is to regular jump towards the opponent, do j.22A then do:
- j.C for your standard high.
- Land and 5B for your empty jump low.
- j.236A for puffball that will, just like it does basically everywhere, go through DP's or Heat activations, which you can then land and punish.
j.C and 5B both become super + on block and really easy to hit confirm (and lead to pit loops) because you have a pit right on top of them. This mixup does somewhat lose to wake up backdash, but you can simply delay your timing if you expect a wake up backdash, or input an backdash option select (for FVAkiha, 2A2C) upon landing and catch that backdash.
Air Puffball
Often landed as a frame trap or as a combo ender
- Corner 623A > j.22A, j.236A / j.236A / dash momentum j.236B
- You're right on top of them as you land this, you get the option to neutral double jump and go for sandoori by holding [4]/[6]. Sandoori is a Japanese term, identical in meaning to the American which-way, describing a left right mixup with three different options.
- dj8~[4], late j.C (so you land before j.C becomes active), 2A
- dj8~[6], late j.C (so you land before j.C becomes active) 2A
- dj8~[4], j.66 j.C
- dj8~[6], j.236B (to bait DP's)
- These options create a three way mixup that's relatively safe (you can use the different floats to confuse which way to enter 623 for DP's, or j.236B to flat out beat DP's).
- 4C > j.AC > sdj.236B
- You're slightly further away from them so you can't go for sandoori. Your options include airdashing forward and:
- j.214A
- Pillars that they have to block as you land safely and try to go for another mixup.
- whiff j.A, land 2A
- Cheeky low.
Ground throw
Ground throw with FVAkiha is really good. It fills back your red life and gives a hard knockdown that you can set up a lot of mixups from.
- j.66 > j.44 > j.236A/B (left/right, good to mess up 623 DP inputs)
- Meaty 2A
- Meaty puffball
- "Meaty" j.66 j.C (shield bait)
- Walk back, j.66:
- j.B(w), 2A (cross up low)
- j.C (overhead)
- j.236A/B (dp bait/another left/right)
Ground throw has a lot of potential and you basically get to do whatever you want.
Escaping pressure
Escaping FVAkiha's pressure is pretty tough. Here are some theories as to how to avoid it. (WIP)
Defense
As the character with the lowest life in the game, you really don't want to be put into a position where you have to rely on defense. However, if you do get caught in such a position, namely having to anti air and having to deal with someone's offense, here are some strategies.
Anti air
Anti air in Melty is more preemptive and soft read based than purely reactionary. That being said, FVAkiha has a few anti air options available to her.
- Air to air j.A/j.B
- Classic Melty anti air. If you get a counter hit with these you can turn it into big damage and/or corner carry into good mixups. If you don't get a counter hit you can still do good damage, however you have to choose whether you think you'll get the counter hit so you can just do a j.A or j.B, land and do a full combo, or you think you won't get a counter hit, in which case you can chain into other normals and end the combo with air throw or j.236C for the knockdown. Whether you're going for the counter hit or the basic chain depends on you and how hard a read you have on getting that counter hit. The counter hit combo will lead to a lot more damage and better positioning and oki situation on counter hit, but without counter hit doesn't net you anything, while the basic chain works all the time but gives much less damage and worse positioning. j.B has a better air to air hitbox in front of and above her (the upward leg doesn't have a hurtbox) but is slightly slower than j.A (j.A is i5 while j.B is i7).
- Air throw
- Air throws in Melty are a really good anti air, similar to Guilty Gear. However, the difference is that in Melty Blood if you whiff an air throw you're stuck there swinging for all eternity, have additional landing recovery and are fully in counter hit state as you're flying across the screen, whiffing your air throw. However they do lead to decent combos, for FVAkiha at least, and they are (almost?) instant, much faster than j.A or j.B, so if you think someone is going to airdash at you and you won't have time to get out a j.A or j.B or they're going to do an empty airdash trying to bait your anti air shield, you can get an air throw (and possibly yell "SCOOOOOOOPS!" when you get it). Do note that you can air throw to the left or the right by holding that direction when you input your air throw, so if you're in the corner and you see someone jump at you, it might be a decent idea to air throw them backwards into the corner.
- Ground normals (ie 5A, 5C, 3C)
- Ground normals generally don't tend to be amazing anti airs in Melty due to how fast and well designed for air-to-ground jumping normals are and how much ground normals aren't designed for great anti air use (you won't find anything like a Guilty Gear 6P with upper body invincibility, for example).
- 5A isn't a great anti air in terms of hitboxes(the hitbox is the underside of her arm, while the hurtbox is the whole arm and slightly above it), but if someone's airdashing at you really low, there might be a chance you can 5A them out of it and get a small combo or an air tech situation. 5A is also a good anti air if you were able to dash under the opponent, since their normal will then come out on the other side and there's no risk of their jump normal hitting you out of your 5A (unless their jump normal hits behind them), and as FVAkiha's dash has a bit of low profile starting from frame 8, there are quite a few situations where you can use dash under 5A as an anti air.
- 5C is a better anti air in terms of hitboxes, but it is a slow normal so you can't really use it as a raw reaction anti air - it is a soft read (ie prediction + reaction, "I think they'll air dash at me; oh they airdashed, I'll 5C.") anti air. Same with 5A, if they get hit by this you can jump cancel it and get a small combo, or let them tech for an air tech situation.
- 3C is extremely slow but its saving grace is that it reaches extremely high when 5A and 5C do not, so if someone's flying above your head high enough where you can't 5A or 5C them but not super high so you can't reach them at all, you might be able to get 3C as a little hit. Same with 5A and 5C, you can jump cancel it and get a small combo (do note that jump cancelling with 8 after 3C gives you a super jump, which might be necessary for you to get a combo off it) or let them tech for an air tech situation.
- All these normals on counter hit lead to full air combos similar to counter hit air to air j.A or j.B.
- Shield
- Shield is the universal anti air, and since you're F moon you can input 236D after your shield and get a basic combo after it. if you think someone will air dash at you and you don't have time to air throw them or j.A them, and you're sure that they will hit an air normal, you can let it out and get decent rewards if they do the air normal. However if they just empty jump or air dash again or use some other method to bait shield, causing your shield to whiff, you're going for a ride, as shields are punishable by counter hits during recovery. Be extremely careful when using shield as an anti air against good opponents, as they will blow you up extremely hard if you mess up.
- Avoid the scenario
- Melty Blood is an aerial game and you're FVAkiha so you have some of the best air movement in the whole game. The best way to anti air is to not get caught in situations where you have to rely the above tools to try to get out. Try to be above the opponent whenever possible (and avoid their air normals). Use pits and puffballs to maintain aerial superiority. Use your good air normals and puffballs if someone below you want to challenge you. Use your two airdashes, one double jump and air specials to completely avoid whatever situation your opponent has set out for you down below. This is not to say that there will never be scenarios where you have to rely on the above options to escape your opponent jumping at you, but like the old proverb says, "The best cure is prevention." Don't be there for your opponent to jump at you.
Post block reversals
She only has 623C as an invincible reversal, which on hit gives fairly good rewards, but during recovery is counter hit punishable and is relatively slow so it's easy to safejump (however it is air unblockable so they actually need to do a decent safejump - they can't just air block it).
She also has shield just like every character, however as with every character, it's a huge risk if it gets baited because she's in counter hit state during recovery.
Her shield bunker slides very low to the ground and there are chances that you can avoid some stuff with it but it's generally not a great option because C and F shield bunkers are not fully invincible like H shield bunkers are. Her backdash is good; it's faster than average and becomes airborne early to avoid throws, but again, if it gets baited you are going for a ride.
As an F moon character she does not have access to EX shields and dodges.
Her 2A is 5 frames so it's not as good a mash-out-of-jail-free card as it is for some other characters with faster 2A's, but you can always find situations where you can make use of it to abare out of the opponent's pressure.
While her defensive options are just as lackluster as a majority of the cast, the problem with FVAkiha's stuff is that if it gets baited it hurts a lot, lot more than it hurts everyone else, because her life is extremely low and her defense modifiers are really high (as in she eats a lot more damage per hit than most characters). Be very careful while trying to make a defensive read with these tools. The safest way to defend with FVAkiha is to use your reactions and reads to block and EX guard whenever you can to recover your guard meter, get more meter, and push the opponent away further, and read if someone wants to throw you and avoid it, either with throw techs, abare 2A's, or jumping out.
Combos
| Combo Notation Help | |
|---|---|
| Disclaimer: Combos are written by various writers, so the actual notation used in pages can differ from the standard one. | |
| X > Y | X input is cancelled into Y. |
| X > delay Y | Must wait for a short period before cancelling X input into Y. |
| X, Y | X input is linked into Y, meaning Y is done after X's recovery period. |
| X+Y | Buttons X and Y must be input simultaneously. |
| X/Y | Either the X or Y input can be used. |
| X~Y | This notation has two meanings.
|
| X(w) | X input must not hit the opponent (Whiff). |
| j.X | X input is done in the air, implies a jump/jump cancel if the previous move was done from the ground. Applies to all air chain sections:
|
| sj.X | X input is done after a super jump. Notated as sj8.X and sj9.X for neutral and forward super jumps respectively. |
| dj.X | X input is done after a double jump. |
| sdj.X | X input is done after a double super jump. |
| tk.X | Stands for Tiger Knee. X motion must be buffered before jumping, inputting the move as close to the ground as possible. (ex. tk.236A) |
| (X) | X is optional. Typically the combo will be easier if omitted. |
| [X] | Input X is held down. Also referred to as Blowback Edge (BE). Depending on the character, this can indicate that this button is held down and not released until indicated by the release notation. |
| ]X[ | Input X is released. Will only appear if a button is previously held down. This type of input is referred to as Negative Edge. |
| {X} | Button X should only be held down briefly to get a partially charged version instead of the fully charged one. |
| X(N) | Attack "X" should only hit N times. |
| (XYZ)xN | XYZ string must be performed N times. Combos using this notation are usually referred to as loops. |
| (XYZ^) | A pre-existing combo labelled XYZ is inserted here for shortening purposes. |
| CH | The first attack must be a Counter Hit. |
| Air CH | The first attack must be a Counter Hit on an airborne opponent. |
| 66 | Performs a ground forward dash. |
| j.66 | Performs an aerial forward dash, used as a cancel for certain characters' air strings. |
| IAD/IABD | Performs an Instant AirDash. |
| AT | Performs an Air Throw. (j.6/4A+D) |
| IH | Performs an Initiative Heat. |
| AD | Performs an Arc Drive. |
| AAD | Performs an Another Arc Drive. |
This video contains all combos for FVAkiha, including character specifics. The notes below contains the basics but if you're looking for full on character specifics then it might be worth checking it out. Do note that it is in Japanese without English translations. Sooner or later I'd like to translate these notes and put them here but until then there's just this video.
Normal Combos
Meterless Combos
Metered Combos
Corner Combos
Misc. Combos
OTG
FVAkiha doesn't really use OTG's because her corner knockdown game is strong, however they are an option, and are especially useful to know if you land a 2C in neutral. You usually want to OTG in the corner, so these are corner only.
Midscreen you can do:
Counter hits
FVAkiha makes use of ground and air counter hits very well, using them to get extremely high damage or turn air to air encounters to full corner carry combos.
- Anti air counter hit (ie anti air 5A counter hit, air to air j.A or j.B counter hit)
You have a few options but most of them are tricky to land as they depend on the height of the opponent as you hit them after the counter hit.
- Air to ground counter hit (ie j.C counter hit)
If you have a double jump remaining you can turn this j.C into massive damage. An easy version is:
- Ground counter hit
5B and 5C on counter hit lead to a lot of damage.
Character Specifics
- Necos
Standard combos don't work, do this instead:
- Characters that 2C, 623C doesn't work on midscreen
These include Tohno Shiki, Ryougi Shiki, Archetype Earth (Hime) (works on Hime at max range but not closer)
Pit loops
The main reason most people consider her an S+ theory character (alongside C-Roa and F-Hime). Without this she is 'merely' S, alongside C-Kohaku, C-Seifuki, C-Satsuki, C/F-Nero, and others. This is the only true infinite left in the PC version of the game (the Ringwide version, played in Japan arcades, is slightly older and has a C-KohaMech infinite), and as such, is extremely damaging. However it is extremely difficult to execute and has very specific starters, so it's not like Marvel vs Capcom 3 where Zero can take any hit and convert it to full corner carry and sougenmu lightning loops. Pit loops can also be used on block as block pressure, but right now we're discussing only on hit.
I want to preface this by saying this THIS IS ABSOLUTELY NOT NEEDED IF YOU WANT TO BECOME A DECENT FVAKIHA! There is no necessity for you to ever learn this unless you are trying to become the greatest FVAkiha player ever. Learning how the character actually functions is a ton more useful than learning how to do this. If you're a new player, I highly suggest working on your neutral game and basic BnB consistency instead. While it does help to know the basics of pit pressure for blockstrings, it is absolutely not a necessity with this character. If you do want to take the plunge though, Acido has written a guide on how to do pit loops along with video examples and inputs that you can find here. There's also a ton of other useful information about neutral and okizeme.
Infinite basics
Before we delve into how to actually do the infinite, we need to note a few things:
- The infinite has very specific starters. You can't take any random hit and turn it into 8k with pit loops.
- After 33 hits, the opponent gains more meter than you do for every hit. This, coupled with circuit sparks (bursts) makes sure you can't ToD any character from full life with this infinite.
Starters
- Counter hit 5C
- Counter hit j.C
- Pushing someone in hitstun into a pit behind them.
- Hitting someone with low-to-the-ground charged air pillars.
- High airdash j.C > j.22A
- j.C > dj.22A~4/6 (Frame perfect. Requires holding 4/6 for the 1f faster pit startup.)
The first two starters are counter hits, so they require the opponent to cooperate with you.
The third starter often requires either the corner, or ending the combo extremely short midscreen (ie 2C jump airdash forward j.22A, airdash back cross back over to original side).
The fourth starter is relatively impractical.
The fifth starter requires a relatively high j.C, which everyone in the game can crouch to avoid.
The sixth starter is frame perfect and unsafe if you input the pit too early.
As you can see, you can't really just land a hit from round start and go into the infinite and kill. It requires some kind of setup or a counter hit.
Enders
The best way to end pit loops is with a knockdown, preferably in the corner. After doing enough reps, land and do a ground combo, such as dash 2C623A etc. It's not possible to ToD someone from the infinite so the thing is to just take a well positioned knockdown off it.
For 5C specifically, where you have spent your jump cancel to get the pits, you can't turn that into a great knockdown, since comboing off 623A and 4C requires that you have a jump cancel. If you're really gung-ho about getting the corner you can do 2C 623B dash OTG 623C into stuff, but ending the combo in 623B is still fairly decent.
How to do loops
One of the main things to note with loops is you can't keep doing pit loops without needing at least one pit to push away. This is accomplished by doing either pit input~6 or 6 right before the pit input.
The first one looks like this
- 22X~6
The second one looks like this
- 22~6~X
There's no real difference in which input you want to use. Pick whichever input feels more comfortable and natural to you.
Once you can do that, it's just a matter of knowing how to push people and doing pillars extremely low to the ground for the least amount of recovery, so you can jump up and do them again. A basic example that you might want to try is:
- CH j.C > dj.22A~6, j.22B, j.214B, land 66 j.22C, j.22B, j.214B
How you want to position people during pit loops depends entirely on your positioning, execution and creativity.
There are also other things you might want to learn for pit loops, such as pit airdash pit (executed by j.22X > j.66 > j.22X) that open up new and even swaggier routes for the loops, but if you're just beginning to learn pit loops, just keep it simple.
Block pressure
Pit loops are also useful for block pressure, not just raw damage. You can cancel j.C to pit if you double jump cancel it, and if you have an airdash left you can do blockstrings such as:
- j.C > dj.22A, j.22B > j.66 > j.22A, j.22B, land TK j.22B > j.66 > j.22A, j.22B etc.
Do note that pit airdash pit is often not an airtight blockstring and you might get air thrown or poked out of it, but you can discourage this by j.C'ing after the airdash instead.
Most of the time pit block pressure doesn't have mixups in itself; the way most people get opened up by it is that they get fidgety and try to escape it but fail and get hit, which then the FVAkiha player confirms and goes into pit loops on hit. Simply blocking and ex guarding it is a very safe option to deal with it, but then FVAkiha can air dash j.C, land and go for a ground mixup instead.
Video examples
Players such as Yukichi and Tobari are really good at pit loops and Yukichi especially tries to do pit loops whenever he can, whether as block pressure or getting a hit. This match in particular shows how pit loops work for block pressure as well as on hit.
There are far more examples in combo videos and match videos, but keep it simple at the start, and delve into more swag loops when you get really good at everything else.
Additional Resources
F-V.Akiha Match Video Database
@DRK_Player: Playing F-VAkiha. A PDF mirror of the document is available here.
F-Akiha Vermillion Tech Guide by Acido
Notable Players
| Name | Color | Region | Common Venues | Status | Details |
|---|---|---|---|---|---|
| Acido | Brazil | Netplay | Active | Best active F-VAkiha to watch. Very good BR player. | |
| c00ruj4 | Brazil | Netplay | Active | Best of F-Vakiha | |
| HaileyHime | North America | Lunar Phase, Netplay | Inactive | ||
| hato (はと) |
Japan | A-cho | Inactive | ||
| kou (コウ) |
Japan | A-cho, Kirisugu | Inactive | Watching Kou's old vids, especially, can teach you a lot about how to play F-VAkiha without relying on the scam stuff. | |
| kuga (くが) | Japan | A-cho, Port 24 Yagoto | Active | Strong, technical, pit pressure enjoyer. Recent footage currently not well documented on melty.games. In addition to aforementioned arcade channels, sometimes plays at Port 24 during streams on Yume's channel. | |
| tobari (とばり) |
Japan | Athena Nipponbashi, KorewaMelty | Active | Technical monster. | |
| UltraToast | North America | Copefest, Netplay | Inactive | ||
| yukichi (ゆきち) |
Japan | A-cho, Athena Nipponbashi, KorewaMelty | Active | Technical monster. |
- ↑ 1.0 1.1 @DRK_Player: Playing F-VAkiha 2.1 Move Overview
