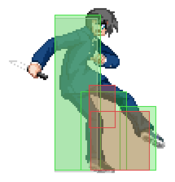
Character Page Progress
This page is almost complete, consider joining as an editor to help finish it up. Please update this character's roadmap page when one of the editing goals have been reached. When no main goals are left, please remove this section from this page.
| In Progress
|
- Overview:
- Add a short summary of this character with a list of strengths and weaknesses
- Combos:
- Add damage, meter gain/given numbers and video links to the pre-existing combos.
|
Overview
Playstyle
 C-Tohno is a mid-range all-rounder that does well in neutral and has tools to handle a variety of situations. C-Tohno is a mid-range all-rounder that does well in neutral and has tools to handle a variety of situations. |
| Pros |
Cons |
- Easy to learn: Good introduction character for Melty Blood in that his gameplan and basic execution are mostly simple, but do well to teach the general system.
- Metered conversions: Can convert into pretty good damage in the corner with good routing using 214C, or squeeze damage out of any stray knockdown with 214C/236C.
- Good buttons: Has some of the better horizontal game in the cast. The trademark example is his 2C. Active on frame seven, goes far, and is pretty versatile for offense.
- Quick dash: His grounded dash is a strong fast burst movement with decent range, allowing it to bolster the range on his normals, increase his mid-range presence, and quickly redash in pressure.
- Defense: With a long 2A and fast 2C for abare, a DP that leads to a full combo on counterhit (that can be EX cancelled to become safe!), a frame one low profile special move, C-Moon mechanics, and above average guts, C-Tohno has almost everything you can ask for on defense.
|
- Pressure: Bad pressure on normals alone and substandard pressure altogether. Tohno's pressure largely lacks ways to open up a patient opponent. As such, his offense relies almost entirely on strong fundamentals; commanding the mid-range with good timing, spacing, situational familiarity, and conditioning.
- Neutral: While Tohno's tools for neutral is versatile, many of them can be specific in application and most of them are fairly committal. As such, he's liable to fall behind in neutral against characters with more general-purpose and lower commitment tools. Additionally, Tohno's movement, while good in the mid-range, can struggle traveling longer distances that can't be covered with just one dash.
- Damage: While Tohno's damage potential can get very high with 214C combos in the corner, the opportunities for these combos can be limited as Tohno sometimes struggles to score "clean" hits against much of the cast. Additionally, his reliance on rebeat both in combos and in pressure can often result in the following combo doing below average damage even with good routing.
|
Move Descriptions
| Frame Data Help
|
| Header
|
Tooltip
|
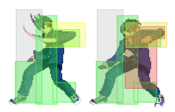
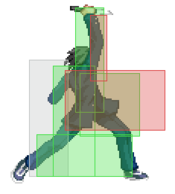
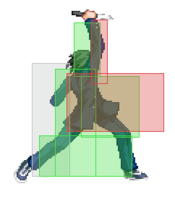
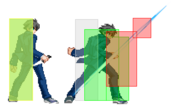
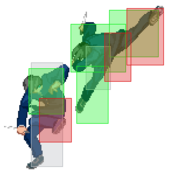
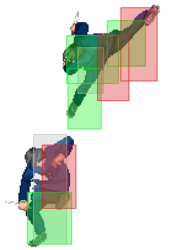
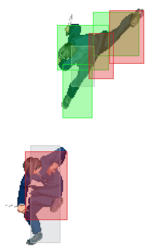
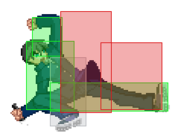
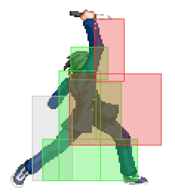
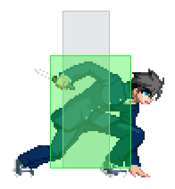
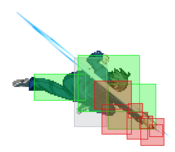
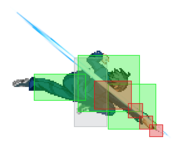
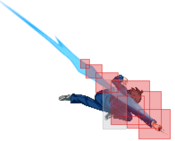
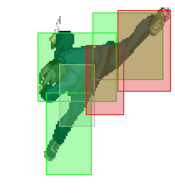
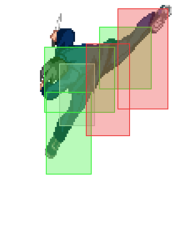
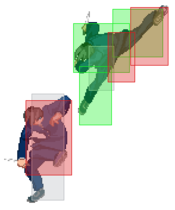
| Move Box Colors
|
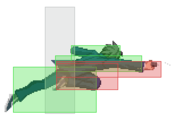
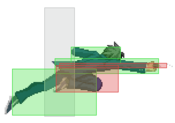
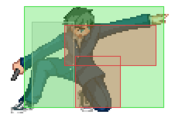
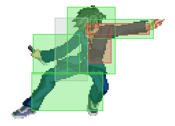
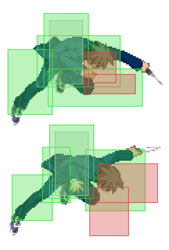
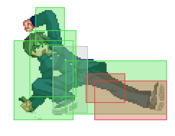
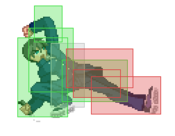
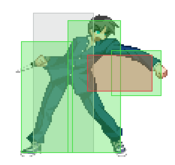
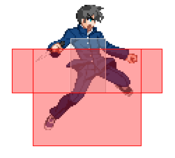
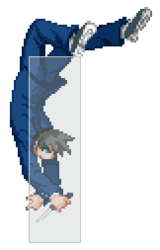
Light gray = Collision Box (A move lacking one means it can go through the opponent's own collision box).
Green: Hurt Boxes.
Red: Hit(/Grab) Boxes.
Yellow: Clash Boxes (When an active hitbox strikes a clash box, the active hitbox stops being active. Multi-hit attacks can beat clash since they will still progress to the next hitbox.)
Magenta: Projectile-reflecting boxes OR Non-hit attack trigger boxes (usually).
Blue: Reflectable Projectile Boxes.
|
| Damage
|
Base damage done by this attack.
(X) denotes combined and scaled damage tested against standing V. Sion.
|
| Red Damage
|
Damage done to the recoverable red health bar by this attack. The values are inherently scaled and tested against standing V. Sion.
(X) denotes combined damage.
|
| Proration
|
The correction value set by this attack and the way it modifies the scaling during a string. See this page for more details.
X% (O) means X% Overrides the previous correction value in a combo if X is of a lower percentage.
X% (M) means the current correction value in a combo will be Multiplied by X%. This can also be referred to as relative proration.
|
| Circuit
|
Meter gained by this attack on hit.
(X%) denotes combined meter gain.
-X% denotes a meter cost.
|
| Cancel
|
Actions this move can be cancelled into.
SE = Self cancelable.
N = Normal cancelable.
SP = Special cancelable.
CH = Cancelable into the next part of the same attack (Chain in case of specials).
EX = EX cancelable.
J = Jump cancelable.
(X) = Cancelable only on hit.
-X- = Cancelable on whiff.
|
| Guard
|
The way this move must be blocked.
L = Can block crouching
H = Can block standing.
A = Can block in the air.
U = Unblockable.
|
| Startup
|
Amount of frames that must pass prior to reaching the active frames. Also referred to as "True Startup".
|
| Active
|
The amount of frames that this move will have a hitbox.
(x) denotes frame gaps where there are no hitboxes is present. Due to varied blockstuns, (x) frames are difficult to use to determine punish windows. Generally the larger the numbers, the more time you have to punish.
X denotes active frames with a duration separate from its origin move's frame data, such as projectile attacks. In this case, the total length of the move is startup+recovery only.
|
| Recovery
|
Frames that this move has after the active frames if not canceled. The character goes into one frame where they can block but not act afterwards, which is not counted here.
|
| Advantage
|
The difference in frames where you can act before your opponent when this move is blocked (assuming the move isn't canceled and the first active frame is blocked).
If the opponent uses a move with startup that is at least 2 frames less than this move's negative advantage, it will result in the opponent hitting that move.
±x~±y denotes a range of possible advantages.
|
| Invul
|
Lists any defensive properties this move has.
X y~z denotes X property happening between the y to z frames of the animations. If no frames are noted, it means the invincibility lasts through the entire move.
Invicibility:
- Strike = Strike invincible.
- Throw = Throw invincible.
Hurtbox-Based Properties:
- Full = No hurtboxes are present.
- High = Upper body lacks a hurtbox.
- Low = Lower body lacks a hurtbox.
Miscellaneous Properties
- Clash = Frames in which clash boxes are active.
- Reflect = Frames in which projectile-reflecting boxes are active.
- Super Armor = Frames in which the character can take hits without going into hit stun.
|
Normal Moves
Standing Normals
|
|
| Damage
|
Red Damage
|
Proration
|
Cancel
|
Guard
|
| 360
|
117
|
70% (O)
|
-SE-, -N-, -SP-, -EX-, (J)
|
LH
|
| First Active
|
Active
|
Recovery
|
Frame Adv
|
Circuit
|
Invuln
|
| 5
|
3
|
11
|
-2
|
4.0%
|
-
|
|
A short range kick to the shins. Despite what it looks like, it hits mid. Outclassed by 2A in most regards, although it has slightly better scaling and base damage and is still valuable as a rebeat option if 2A was already used in a string. Better than 2A for dash-unders or generally pinning landings while the opponent isn't facing you due to having less extended of a hurtbox horizontally.
|
|
|
|
| 5B
|
Damage
|
Red Damage
|
Proration
|
Cancel
|
Guard
|
| 700
|
392
|
90% (O)
|
N, SP, -CH-, EX, (J)
|
LH
|
| First Active
|
Active
|
Recovery
|
Frame Adv
|
Circuit
|
Invuln
|
| 8
|
5
|
12
|
-2
|
7.0%
|
Clash 7-12
|
|
A forward stepping elbow attack. Moves you forward a fair amount and has a solid clash hitbox on the startup and active frames which can be used for heat OSes. Can be used similarly to some other characters' 5As for occasional anti-airing, with more active frames and a clash hitbox in exchange for having more startup and recovery. Good for using after dash 2A to confirm into either a ground string or air combo.
|
| 5B~B
|
Damage
|
Red Damage
|
Proration
|
Cancel
|
Guard
|
| 900
|
686
|
63% (O)
|
(N), SP, EX, (J)
|
LH
|
| First Active
|
Active
|
Recovery
|
Frame Adv
|
Circuit
|
Invuln
|
| 10
|
4
|
30
|
-16
|
9.0%
|
-
|
|
Followup knife haul attack to 5B. Launches the opponent very high on hit. Can be canceled with a special superjump command by using neutral jump(8) to follow up for air combos. Can only cancel into specials on block. Mostly used for combos, but has some merit in pressure as an extra frame-trap from 5B with lenient windows to cancel into and out from it.
|
| 5B~[B]
|
Damage
|
Red Damage
|
Proration
|
Cancel
|
Guard
|
| 1600
|
1176
|
60% (O)
|
(N), SP, EX, (J)
|
H
|
| First Active
|
Active
|
Recovery
|
Frame Adv
|
Circuit
|
Invuln
|
| 28
|
4
|
30
|
-16
|
12.0%
|
-
|
|
Charged up version of 5BB that is an overhead. Launches the opponent on hit into a very long air untechable state. Pretty reactable overhead, but can be mixed up with 5B{B} > 214A. Can still only cancel into specials on block; the window to do so is shorter than the uncharged version. Mostly used for advanced corner BnBs.
|
|
|
|
| 5C
|
Damage
|
Red Damage
|
Proration
|
Cancel
|
Guard
|
| 1100
|
784
|
80% (M)
|
N, SP, EX, (J)
|
LH
|
| First Active
|
Active
|
Recovery
|
Frame Adv
|
Circuit
|
Invuln
|
| 9
|
8
|
30
|
-9
|
13.0%
|
-
|
|
Lunging knife thrust that has good range and moves you forward a lot. Cancel window isn't very long for blockstring offense, but can be cancelled later to get more forwards movement, allowing combo pickups from greater range. Frame data does not change regardless of how meaty this move hits. Generally relegated to combo/blockstring filler. Difficult to use for neutral due to being slower, more committal, and harder to convert off of than just using 2C.
|
| 5[C]
|
Damage
|
Red Damage
|
Proration
|
Cancel
|
Guard
|
| 2200
|
1960
|
50% (O)
|
-
|
U, LHA
|
| First Active
|
Active
|
Recovery
|
Frame Adv
|
Circuit
|
Invuln
|
| 33
|
6
|
36
|
-22
|
18.0%
|
-
|
|
Charged up version of 5C that is unblockable and does a lot of damage. Cannot be canceled, -1 on hit from neutral air tech. Note that it is only unblockable on the first 2 active frames, so if you end up moving forward to hit the opponent, it will be blockable and you will probably get punished. Very reactable, but due to it being slightly more specific to answer (shield, dodge, etc.) it may catch someone off guard if used very rarely. Mostly used to only partially charge to create frametraps and staggers in blockstrings.
|
|
Crouching Normals
|
|
| Damage
|
Red Damage
|
Proration
|
Cancel
|
Guard
|
| 300
|
98
|
68% (O)
|
-SE-, -N-, -SP-, -EX-, (J)
|
LH
|
| First Active
|
Active
|
Recovery
|
Frame Adv
|
Circuit
|
Invuln
|
| 5
|
4
|
9
|
-1
|
3.5%
|
-
|
|
Crouching poke. Hits mid. Average speed for a 2A with a pretty good hitbox for mashing; the height beats many low invulnerable moves, while its range allows Tohno to poke out from further distances. Less recovery than 5A makes it more useful for pressure strings and whiff cancels.
|
|
|
|
| Damage
|
Red Damage
|
Proration
|
Cancel
|
Guard
|
| 600, 500 (1011)
|
(674)
|
85% (O), 100%
|
N, SP, EX, (J)
|
L, LH
|
| First Active
|
Active
|
Recovery
|
Frame Adv
|
Circuit
|
Invuln
|
| 8
|
2 (4) 2
|
16
|
-3
|
6.0%*2 (12.0%)
|
Clash 14-15
|
|
Two part low attack that slashes at the opponents ankles. The first hit has poor range and isn't very fast, making it a bad poke choice. The second hit has larger range and will knock down crouchers. Mostly used as combo/blockstring filler or for a low/high mixup. Has a tiny and barely active clash frame on the second hit; if spaced properly, 2B can automatically beat some characters' wake-up bunker attempts with the clash.
|
|
|
|
| Damage
|
Red Damage
|
Proration
|
Cancel
|
Guard
|
| 900
|
588
|
55% (O)
|
N, SP, EX, (J)
|
L
|
| First Active
|
Active
|
Recovery
|
Frame Adv
|
Circuit
|
Invuln
|
| 7
|
6
|
24
|
-12
|
9.0%
|
-
|
|
Low turn kick. Knocks the opponent down on hit. Amazing speed and range especially when combined with his dash. Very useful as a poke and for catching people not crouching in neutral; however, its hefty recovery means it requires care as if you whiff it you're likely to eat a big punish.
|
|
Aerial Normals
|
|
| Damage
|
Red Damage
|
Proration
|
Cancel
|
Guard
|
| 300
|
98
|
75% (O)
|
SE, N, SP, EX, J
|
LHA
|
| First Active
|
Active
|
Recovery
|
Frame Adv
|
Circuit
|
Invuln
|
| 5
|
4
|
10
|
-
|
3.0%
|
-
|
|
Small and fast air to air jab that angles upwards. Good for up close and personal air encounters, and at swatting people who are floating above you with a rising j.A. You retain air movement options after whiffing this move, making it a low commitment air to air.
|
|
|
|
| Damage
|
Red Damage
|
Proration
|
Cancel
|
Guard
|
| 500*2 (892)
|
(524)
|
81% (O), 79% (O)
|
N, SP, EX, J
|
HA
|
| First Active
|
Active
|
Recovery
|
Frame Adv
|
Circuit
|
Invuln
|
| 6
|
4
|
-
|
-
|
6.0%*2 (12.0%)
|
-
|
|
Downward angled two hit knife slash attack. The first hit has a very poor hitbox whilst the second has an amazing one. These traits combined make it a fairly reliable jumpin at low angles and close range, such as from instant air dashes. On the other hand, it's a weak air to air option unless your opponent is directly below you. Has received increased hitstun from previous versions of Melty Blood, so that it now combos into grounded B and C normals on hit more easily. First hit can not be cancelled into anything.
|
|
|
|
| j.C
|
Damage
|
Red Damage
|
Proration
|
Cancel
|
Guard
|
| 950
|
441
|
90% (O)
|
N, SP, EX, J
|
HA
|
| First Active
|
Active
|
Recovery
|
Frame Adv
|
Circuit
|
Invuln
|
| 9
|
7
|
-
|
-
|
13.0%
|
-
|
|
Long range air to air kick. Comes out pretty fast, has extremely long active frames, and has a slight downward angle, making it a solid multipurpose jump-in at lots of ranges and a strong air to air tool if spaced correctly. Probably his most important normal due to the sheer versatility of the move.
|
| j.[C]
|
Damage
|
Red Damage
|
Proration
|
Cancel
|
Guard
|
| 1200
|
686
|
70%
|
SP, EX
|
HA
|
| First Active
|
Active
|
Recovery
|
Frame Adv
|
Circuit
|
Invuln
|
| 23
|
7
|
-
|
-
|
13.0%
|
-
|
|
Charged up, this move gets a much stronger hitbox that hits more above and around it than before. It causes an untechable knockdown on an air opponent, and will groundbounce a grounded one. Important combo tool in more advanced routes in the corner, can also be used to set up a decent knockdown midscreen.
|
|
Command Normals
|
|
| 6B
|
Damage
|
Red Damage
|
Proration
|
Cancel
|
Guard
|
| 1000
|
490
|
65% (O)
|
(N), SP, EX, (J)
|
LH
|
| First Active
|
Active
|
Recovery
|
Frame Adv
|
Circuit
|
Invuln
|
| 13
|
3
|
14
|
-2
|
10.0%
|
Clash 9-15
|
|
Awkward looking overhead punch attack. Only cancels into specials on block. High damage makes it the ideal move after 2C in many of your combos but otherwise has little utility in pressure or neutral.
|
| 6[B]
|
Damage
|
Red Damage
|
Proration
|
Cancel
|
Guard
|
| 1000
|
490
|
65% (O)
|
(N), SP, EX, (J)
|
H
|
| First Active
|
Active
|
Recovery
|
Frame Adv
|
Circuit
|
Invuln
|
| 28
|
5
|
12
|
-2
|
10.0%
|
-
|
|
When charged, 6[B] loses its clash boxes and becomes an overhead. Still only cancels into specials on block. Can be used very sparingly to see if an opponent is sleeping on defense or half charged into 214A as a risky way to feint into a low.
|
|
Universal Mechanics
|
|
| Damage
|
Red Damage
|
Proration
|
Cancel
|
Guard
|
| 1400
|
474
|
100%
|
-
|
U
|
| First Active
|
Active
|
Recovery
|
Frame Adv
|
Circuit
|
Invuln
|
| 3
|
1
|
20
|
-
|
0.0%
|
-
|
|
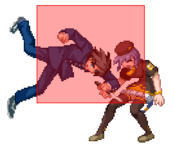
Tohno rolls and slams the opponent. Very standard throw with a hard knockdown. Leaves you right next to the opponent with enough advantage to meaty but little else without conditioning the opponent first. Tohno's throw is shorter range than most other characters- you'll have to walk or dash into throw after the opponent blocks just about anything you do.
|
|
|
|
| Damage
|
Red Damage
|
Proration
|
Cancel
|
Guard
|
| 1600 (1408)
|
517
|
30%
|
(Any if Raw)
|
U
|
| First Active
|
Active
|
Recovery
|
Frame Adv
|
Circuit
|
Invuln
|
| 2
|
1
|
12
|
-
|
0.0%
|
-
|
|
Tohno grabs then slices the opponent. When done raw, this ground bounces the opponent and moves you forward, leading to a combo. As a combo ender, this causes an untechable knockdown and leaves you falling straight down. Despite this knockdown, the frame advantage you get afterwards isn't much.
|
|
|
|
| Bunker
|
Damage
|
Red Damage
|
Proration
|
Cancel
|
Guard
|
| 500
|
196
|
50%
|
-
|
LHA
|
| First Active
|
Active
|
Recovery
|
Frame Adv
|
Circuit
|
Invuln
|
| 26
|
4
|
19
|
-5
|
0.0%
(-50.0% in blockstun)
|
Clash 1-10
|
| (Clash)
|
Damage
|
Red Damage
|
Proration
|
Cancel
|
Guard
|
| 500
|
196
|
50%
|
-
|
LHA
|
| First Active
|
Active
|
Recovery
|
Frame Adv
|
Circuit
|
Invuln
|
| 8
|
4
|
19
|
-5
|
0.0%/-50.0%
|
Strike 1-7
|
|
An upward slash.
|
|
|
|
| Damage
|
Red Damage
|
Proration
|
Cancel
|
Guard
|
| 100
|
0
|
100%
|
-
|
U
|
| First Active
|
Active
|
Recovery
|
Frame Adv
|
Circuit
|
Invuln
|
| 16
|
6
|
25
|
-
|
-100.0% (min)
|
Full 1-21
|
|
Standard Heat activation, a bit on the faster side.
|
|
|
|
| Ground
|
Damage
|
Red Damage
|
Proration
|
Cancel
|
Guard
|
| 100
|
0
|
100%
|
-
|
U
|
| First Active
|
Active
|
Recovery
|
Frame Adv
|
Circuit
|
Invuln
|
| 11
|
10
|
20
|
-
|
removes all
|
Full 1-39
|
| Air
|
Damage
|
Red Damage
|
Proration
|
Cancel
|
Guard
|
| 100
|
0
|
100%
|
-
|
U
|
| First Active
|
Active
|
Recovery
|
Frame Adv
|
Circuit
|
Invuln
|
| 12
|
10
|
15
|
-
|
removes all
|
Strike 1-30
|
|
Universal burst mechanic. Unlike Crescent/Full Heat activation, the hitbox and frame data doesn't vary between characters. However, you can be thrown out of this move if you input it in the air.
|
|
Special Moves
Special Movement
|
|
| Damage
|
Red Damage
|
Proration
|
Cancel
|
Guard
|
| -
|
-
|
-
|
-
|
-
|
| First Active
|
Active
|
Recovery
|
Frame Adv
|
Circuit
|
Invuln
|
| -
|
-
|
36
|
-
|
-
|
Full 1-30
|
|
C-Tohno can extend his backdash by inputting it a second time, giving him full invincibility for 30 frames.
|
|
Grounded Specials
|
|
| A
|
Damage
|
Red Damage
|
Proration
|
Cancel
|
Guard
|
| 1400
|
980
|
100%
|
-EX-
|
LH
|
| First Active
|
Active
|
Recovery
|
Frame Adv
|
Circuit
|
Invuln
|
| 14
|
3
|
20
|
-5
|
13.0%
|
-
|
|
The fastest version, and the most commonly used one. Can be a potent anti-air that can beat effectively anything if spaced correctly, but requires some foresight and precision to account for its forwards movement and few active frames. Is slightly disadvantage on block, but has enough pushback to keep you safe. Typically used as a blockstring ender or a multipurpose high risk/high reward poke. If it hits in a blockstring on a grounded opponent, you can supercancel it into 214C in the corner for a followup combo, or 236C for a midscreen hard knockdown. Can be converted into a 2C on grounded counterhit (low counter only). If it catches a jump, you could cancel it into 623CC for a hard knockdown anywhere. Common tactic to use the move to its fullest is by dashing into the attack, which is done by using 236AB~A.
|
| B
|
Damage
|
Red Damage
|
Proration
|
Cancel
|
Guard
|
| 500, 800 (1275)
|
(863)
|
100%, 70% (O)
|
-EX-
|
LH
|
| First Active
|
Active
|
Recovery
|
Frame Adv
|
Circuit
|
Invuln
|
| 23
|
4
|
24
|
-8
|
6.0%*2 (12.0%)
|
High 1-7
|
| [B]
|
Damage
|
Red Damage
|
Proration
|
Cancel
|
Guard
|
| -
|
-
|
-
|
-
|
-
|
| First Active
|
Active
|
Recovery
|
Frame Adv
|
Circuit
|
Invuln
|
| -
|
-
|
30
|
-
|
-
|
High 1-28
|
|
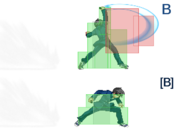
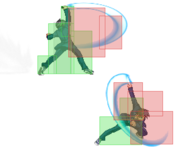
Much slower version with multiple hits and a bigger distance traveled before the attack. The primary usage of this move is in blockstrings, as the extra delay can catch people jumping or mashing. Also, compared to the A version, if it catches a jumper you can actually link a j.A by jumping after them from mostly anywhere on the screen, which you can then convert into a further air combo. Still mostly safe on block but certain fast, long range moves can sometimes punish it unlike 236A. Will beat mash if immediately cancelled from 5C or 2C, but it's minus on grounded hit uncancelled and the multihit spoils counterhits. Can hold down the button to cause Tohno to simply keep dashing forward with upper body invincibility, making the slash never come out. This can be used to bait attempts to shield or otherwise disrespect this move, or to reset on people who are really respecting it. Be wary though, as it is quite slow.
|
| EX
|
Damage
|
Red Damage
|
Proration
|
Cancel
|
Guard
|
| 450*2, 500, 1000 (2150)
|
(1569)
|
100%
|
-
|
LH
|
| First Active
|
Active
|
Recovery
|
Frame Adv
|
Circuit
|
Invuln
|
| 1+5
|
9 (13) 4
|
24
|
0
|
-100.0%
|
Full 1
|
|
Has the speed of the A version and the range and multihit properties of the B. Also has an extra hard knockdown final hit where Tohno charges through the opponent. Incredibly long knockdown that can be used to activate heat safely and still meaty, or to setup a mediocre which way crossup midscreen. Pretty decent corner carry in a blockstring, it's susceptible to being ex-guarded but as it's zero on block it can be used as a risky pressure reset, especially against characters with slower mash than Tohno. Often used to cancel from a 236A/B blockstring or to make an unsafe 214A or 623A safe. OTG relaunch.
|
|
|
|
| A
|
Damage
|
Red Damage
|
Proration
|
Cancel
|
Guard
|
| 1200/800
|
588/392
|
60% (O)
|
-CH-
|
LH/LHA
|
| First Active
|
Active
|
Recovery
|
Frame Adv
|
Circuit
|
Invuln
|
| 5
|
2 (2) 12
|
34
|
-25/-21
|
12.0%/10.0%
|
Full 1-4, Low 5-6
|
| ~X
|
Damage
|
Red Damage
|
Proration
|
Cancel
|
Guard
|
| 1200
|
588
|
90% (O)
|
-
|
HA
|
| First Active
|
Active
|
Recovery
|
Frame Adv
|
Circuit
|
Invuln
|
| 18
|
7
|
24 ~ 23
|
-13 ~ -12
|
0.0%
|
-
|
- Dragon Punch/Shoryuken kick move. All versions have complete startup invulnerability. Air unblockable on the first hitbox, which is very low to the ground, air blockable after that. All versions hit mid. Can be followed up by pressing A, B or C again after during the attack or holding the button down, whereupon he does a j.C kick that causes untechable knockdown. This followup will not hit crouchers, but if an opponent stand or air blocks it, it's harder to punish. Important to note when attempting to anti-air that this move is often punishable if the first hit is blocked in the air and that all versions have a two-frame gap in active frames after their initial hitbox that can often cause it to flat out lose against jump-ins if timed slightly improperly, making it a risky and precise anti-air. Nonetheless, a strong move overall.
After the initial startup invul, has low invul, making it reliable vs most low attacks. On any counterhit, can be combo'd off if you make sure not to do the followup. Can trade with higher angled hitbox attacks or jump-ins, but you can still combo off this because you recover in time. Useful to use from 5D/[D] shields as it launches on hit and will beat jump cancels to avoid the shield or mashing to get past it.
|
| B
|
Damage
|
Red Damage
|
Proration
|
Cancel
|
Guard
|
| 1000
|
764/392
|
60% (O)
|
-CH-
|
LH/LHA
|
| First Active
|
Active
|
Recovery
|
Frame Adv
|
Circuit
|
Invuln
|
| 5
|
2 (2) 12
|
34
|
-32/-28
|
7.0%/10.0%
|
Full 1-4, High 5-6
|
| ~X
|
Damage
|
Red Damage
|
Proration
|
Cancel
|
Guard
|
| 1200
|
686
|
90% (O)
|
-
|
HA
|
| First Active
|
Active
|
Recovery
|
Frame Adv
|
Circuit
|
Invuln
|
| 20
|
7
|
25 ~ 21
|
-14 ~ -7
|
0.0%
|
-
|
|
After the initial startup invul, has high invul, making it reliable vs most jump-ins/high/mid attacks. This version is harder to combo off on a grounded counterhit (have to use 5A/2A), but against aerial opponents/opponents aerial due to specials it's easy. Will trade vs most low attacks, but you can still combo off this because you recover in time. Goes significantly higher than the A version. The A version is usually used on wakeup due to an easier and more damaging combo on non trade, but it still has uses in situations where the slightly higher hitbox and upper body invulnerability may help.
|
| EX
|
Damage
|
Red Damage
|
Proration
|
Cancel
|
Guard
|
| 900, 1000 (1751)
|
(1186)
|
100%
|
-CH-
|
LH/LHA
|
| First Active
|
Active
|
Recovery
|
Frame Adv
|
Circuit
|
Invuln
|
| 4+2
|
2 (2) 12
|
39
|
-37, -33
|
-100.0%
|
Full 1-11
|
| ~X
|
Damage
|
Red Damage
|
Proration
|
Cancel
|
Guard
|
| 1000
|
1379
|
90% (O)
|
-
|
HA
|
| First Active
|
Active
|
Recovery
|
Frame Adv
|
Circuit
|
Invuln
|
| 20
|
7
|
23 ~ 16
|
-12 ~ -3
|
0.0%
|
-
|
|
Adds extra attack portions near the ground, and is completely invulnerable till he starts flying higher off the ground. This move will flat out beat nearly everything, but can only be combo'd off if the airborne section of the attack counterhits. Goes significantly higher than the B version. This EX is good but not used much because his A and B DPs are already very strong. OTG relaunch.
|
|
|
|
| A
|
Damage
|
Red Damage
|
Proration
|
Cancel
|
Guard
|
| 1000
|
784
|
50% (O)
|
-EX-
|
L
|
| First Active
|
Active
|
Recovery
|
Frame Adv
|
Circuit
|
Invuln
|
| 8
|
10
|
16
|
-7
|
8.0%
|
High 1-21
|
- Low sliding attack. Shrinks his hitbox a lot during the slide, meaning it will go under a lot of attacks, and can even hit as an anti air. The frame data does not change regardless of how meaty the move hits. All versions are air unblockable and hit low.
Has the fastest startup, and shrinks his hitbox the most, but has the worst attack hitbox. Can be safe on block due to pushback, but is generally unsafe unless used near max range. On counterhit, can combo off it, making it a fairly low risk poke/anti air that can lead to solid damage. Low profile begins frame one, making it a surprisingly potent tool to occasionally disrespect pressure that relies on attacks it can go under, such as C-Wara 5B and 5C. Can be paired with his special cancellable overheads to make for risky high/low mixups.
|
| B
|
Damage
|
Red Damage
|
Proration
|
Cancel
|
Guard
|
| 1000
|
784
|
100%
|
CH, -EX-
|
L
|
| First Active
|
Active
|
Recovery
|
Frame Adv
|
Circuit
|
Invuln
|
| 18
|
10
|
13
|
-5
|
8.0%
|
-
|
| ~B
|
Damage
|
Red Damage
|
Proration
|
Cancel
|
Guard
|
| 650 (1553)
|
(1201)
|
60% (O)
|
(N), (SP), (EX), (J)
|
LHA
|
| First Active
|
Active
|
Recovery
|
Frame Adv
|
Circuit
|
Invuln
|
| 20
|
4
|
25
|
-11
|
6.0%
|
-
|
|
Has a longer startup and travels a greater distance. Has the least hitbox shrink, but has a solid chunky hitbox at the tip that will beat most attacks. Has an additional followup that can be preformed by pressing B again after the first attack, after which he will preform the same mid hitting knife haul as 5BB. This part cannot be canceled on block but cancels into anything on hit. Can combo off counterhits if spaced correctly, or just be generally combo'd off with the followup. Can be jumped out of on pressure, but will frametrap from most normals and the followup can frametrap from the initial hit. As such, it can be sparingly used in pressure sequences or resets by threatening the followup, and then just throwing the opponent.
|
| EX (Hit)
|
Damage
|
Red Damage
|
Proration
|
Cancel
|
Guard
|
| 500, 1000 (1351)
|
(878)
|
100%, 50% (O)
|
(N), (SP), (EX), (J)
|
L, LHA
|
| First Active
|
Active
|
Recovery
|
Frame Adv
|
Circuit
|
Invuln
|
| 3+6
|
10 (16) 4
|
30
|
-36, -16
|
-100.0%
|
Full 1-8, High 9-12
|
| (Whiff Data)
|
Damage
|
Red Damage
|
Proration
|
Cancel
|
Guard
|
| -
|
-
|
-
|
-
|
-
|
| First Active
|
Active
|
Recovery
|
Frame Adv
|
Circuit
|
Invuln
|
| 3+6
|
10
|
18
|
-
|
-100.0%
|
Full 1-8, High 9-12
|
|
Has startup invulnerability to the first hit. Combines the speed of the A version and the distance of the B version. If the slide connects on hit or block, he will automatically preform the same followup attack that 214B has, except that it wallslams. The first attack has a very good hitbox that is likely to stuff most other attacks despite not being completely invulnerable. This move is unsafe on block but can be annoying to punish properly at specific distances. Because of the wallslam part, it's mostly commonly used in corner combos to get more damage, or supercanceled from a connected 236A to confirm into damage. It is also his most useful OTG relaunch, as it lets him secure the easiest and highest damage compared to the other relaunchers.
|
|
A A B B C C D D
|
| A
|
Damage
|
Red Damage
|
Proration
|
Cancel
|
Guard
|
| 1000
|
490
|
85% (O)
|
-
|
LH
|
| First Active
|
Active
|
Recovery
|
Frame Adv
|
Circuit
|
Invuln
|
| 21
|
8
|
16
|
-6
|
10.0%
|
-
|
| [A]
|
Damage
|
Red Damage
|
Proration
|
Cancel
|
Guard
|
| 1000
|
490
|
60% (O)
|
-
|
H
|
| First Active
|
Active
|
Recovery
|
Frame Adv
|
Circuit
|
Invuln
|
| 30
|
8
|
17
|
-7
|
10.0%
|
-
|
- Tohno goes into a crouching stance before executing one of 4 different attacks. All 4 have the same initial startup animation and are useful for messing with the opponent in blockstrings.
Lunging forward, Tohno donkey kicks the opponent in the groin (ouch). This move wallslams on hit, making it comboable off in the corner, and is relatively safe on block if spaced correctly, making it a very useful tool for ending corner blockstrings with. Air unblockable, hits mid. Can be charged up to become an overhead which can catch people trying to fuzzy jump between uncharged 22A and a 22D/22B~D reset.
|
| B/[B]
|
Damage
|
Red Damage
|
Proration
|
Cancel
|
Guard
|
| -
|
-
|
-
|
-CH-
|
-
|
| First Active
|
Active
|
Recovery
|
Frame Adv
|
Circuit
|
Invuln
|
| -
|
-
|
46
|
-
|
-
|
Full 21-32
|
| ~D
|
Damage
|
Red Damage
|
Proration
|
Cancel
|
Guard
|
| -
|
-
|
-
|
-
|
-
|
| First Active
|
Active
|
Recovery
|
Frame Adv
|
Circuit
|
Invuln
|
| -
|
-
|
12
|
-
|
-
|
-
|
|
Tohno teleports forward. The teleport goes pretty far, but can be canceled at any point by pressing D, where he will quickly reappear again. Is a handy tool for continuing pressure on people respecting your 22A, and lets you punish people trying to shield, dodge, or reversal it if you cancel the teleport quickly. Holding B increases the distance traveled. If done on a knocked down opponent midscreen, you can use it to create a mediocre left/right mixup.
|
| C
|
Damage
|
Red Damage
|
Proration
|
Cancel
|
Guard
|
| 1200 (1162)
|
275
|
50%
|
N/A
|
U
|
| First Active
|
Active
|
Recovery
|
Frame Adv
|
Circuit
|
Invuln
|
| 23
|
8
|
29
|
-
|
0.0%
|
-
|
|
Tohno teleports forward again, but this time he will always attempt to appear behind the opponent, whereupon he will command grab them into a groundbounce situation that can be combo'd off from anywhere (except midscreen on Kouma). Because this move requires you to get behind the opponent its effective range is quite short, and it will not work on a fully cornered enemy. This move sees very little use as it isn't usable in corner pressure and C-Tohno's midscreen pressure rarely commands enough respect to hold people in space long enough for this to work. You're better off forgetting this move exists.
|
| D
|
Damage
|
Red Damage
|
Proration
|
Cancel
|
Guard
|
| -
|
-
|
-
|
-
|
-
|
| First Active
|
Active
|
Recovery
|
Frame Adv
|
Circuit
|
Invuln
|
| -
|
-
|
30
|
-
|
-
|
-
|
|
Tohno poses...then does nothing. This move is a feint attack that allows him to stay safe and recover vs nearly anything an opponent could do on reaction to the intial pose. Whilst this move is not very useful by itself, combined with his other versions it can be used as force respect whiff cancel to lead to more pressure. It's also commonly used in his corner 214C combos; while not strictly necessary, it makes the followup more lenient.
|
|
Aerial Specials
|
|
| A
|
Damage
|
Red Damage
|
Proration
|
Cancel
|
Guard
|
| 1000
|
490
|
75% (O)
|
SP, EX
|
LHA
|
| First Active
|
Active
|
Recovery
|
Frame Adv
|
Circuit
|
Invuln
|
| 13
|
12
|
12
|
1
|
10.0%
|
-
|
- Tohno flies downward in the air at a rougly 45 degree angle while extending his knife. Somewhat resembles Ragna's Berial Edge from Blazblue. These moves have quite a lot of startup, but very strong hitboxes, meaning that if you can recognise the correct situation to use them, they can be pretty scary. The landing recovery for A and B versions is only cancelable into specials. 214A always combos and gives you an OTGable hard knockdown, and if j.22A/B hit low enough to the ground it can combo into 236A which can then be ex cancelled into a more damaging combo than those done from 214A.
The fastest version. Has a pretty good hitbox for hitting people in front of and below you. Sometimes used in situational air spacing to control an area of space that Tohno doesn't usually have access. Could be combo'd off on air counter hits, and if it hits a grounded opponent you can cancel the landing recovery into 214A to knock them down, or cancel into an EX/Super move of your choice for better damage. Hits mid.
|
| B
|
Damage
|
Red Damage
|
Proration
|
Cancel
|
Guard
|
| 1000
|
490
|
75% (O)
|
SP, EX
|
HA
|
| First Active
|
Active
|
Recovery
|
Frame Adv
|
Circuit
|
Invuln
|
| 21
|
12
|
20
|
-7
|
10.0%
|
-
|
|
Slower startup, and causes Tohno to rise slightly before executing the attack. The hitbox is a lot worse and only really extends at the tip of the knife. Hits high, so it's only really used for double overhead mixups from jumpins, that then lead into a 214A knockdown and OTG relaunch.
|
| EX
|
Damage
|
Red Damage
|
Proration
|
Cancel
|
Guard
|
| 1800
|
1470
|
70% (O)
|
-
|
HA
|
| First Active
|
Active
|
Recovery
|
Frame Adv
|
Circuit
|
Invuln
|
| 7+8
|
12
|
15
|
17
|
-100.0%
|
Full 1-20
|
|
Very active and invulnerable aerial callout tool. Can preemptively blow up most attempts at air-to-airing or anti-airing Tohno, but can be beaten on reaction if the opponent hasn't committed to anything before the superflash. This move also has a significant amount of landing recovery so if it whiffs your landing is likely to get punished. Can score some of Tohno's highest damage on counterhits, but careful use of this move is required to stop it from being easy shield bait for opponents.
|
|
|
|
| A
|
Damage
|
Red Damage
|
Proration
|
Cancel
|
Guard
|
| 800
|
392
|
100%
|
EX
|
LHA
|
| First Active
|
Active
|
Recovery
|
Frame Adv
|
Circuit
|
Invuln
|
| 4
|
4
|
11
|
-22 (TK)
|
10.0%
|
-
|
- Aerial version of his shoryuken. Here, they are only used for combo enders if you do not wish to airthrow the opponent. Only the C version has invulnerability, and is air unblockable on the first hit. Cannot do the hard knockdown followup after these versions.
An almost completely useless move. However, it could be canceled into after an air to air held shield (5[D]) to try to get a counter hit, but j.22C would probably be better.
|
| B
|
Damage
|
Red Damage
|
Proration
|
Cancel
|
Guard
|
| 1000
|
392
|
100%
|
EX
|
LHA
|
| First Active
|
Active
|
Recovery
|
Frame Adv
|
Circuit
|
Invuln
|
| 4
|
4
|
11
|
-29 (TK)
|
10.0%
|
-
|
|
Sometimes can be used to then EX cancel into j.623C in an air combo if extra meter is needed before j.623C, or if you can't tell if the extra damage from j.623C will be required to kill and you want to save meter if just j.623B will do it. j.623B > j.623C will do slightly less damage than just j.623C in most combos, though.
|
| EX
|
Damage
|
Red Damage
|
Proration
|
Cancel
|
Guard
|
| 1600, 1000 (2451)
|
(1578)
|
100%
|
-
|
LH, LHA
|
| First Active
|
Active
|
Recovery
|
Frame Adv
|
Circuit
|
Invuln
|
| 1+2
|
2 (2) 4
|
11
|
-38 (TK), -34 (TK)
|
-100.0%
|
Full 1-2
|
|
Complete invulnerability on startup and a pretty decent hitbox could give this move some utility as an aerial reversal, but j.22C typically accomplishes the same thing while being much safer and higher damaging. Unfortunately you won't be able to combo off this move unless you get a single clean counter hit, and the move has 2 possible attack hitboxes so it's not too likely. Also very unsafe on whiff. Can theoretically be used to guard break people with something like a blocked j.A > 623C as the first hit is air unblockable, but an air tick throw into gold airthrow accomplishes effectively the same thing for more damage while also costing no meter. Primarily used to close out rounds by adding a bit more damage at the end of your air combos in place of the hard knockdown an airthrow would give you. OTG relaunch.
|
|
Arc Drive
|
|
| Damage
|
Red Damage
|
Proration
|
Cancel
|
Guard
|
| 3200
|
2795
|
100%
|
-
|
U, LHA
|
| First Active
|
Active
|
Recovery
|
Frame Adv
|
Circuit
|
Invuln
|
| 2+22
|
30
|
16
|
-18 ~ 10
|
removes all
|
Full 1-47
|
|
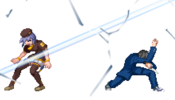
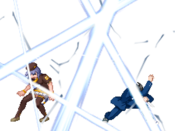
After the superflash, the entire game is slowed down whilst Tohno leaps forward at the opponent. If he connects, he teleports through the opponent and entire screen is cut up whilst they take damage. The initial part of the attack before he leaves the ground is unblockable, whilst the later parts are blockable. This super has complete invulnerability, but has recovery during the slowmo part at the end if it whiffs. Not very good overall as the opponent can always just reaction jump it. The only real use of this move is as a reversal; it's not even worth comboing into because of the bad damage in combos.
|
|
Another Arc Drive
|
|
| Damage
|
Red Damage
|
Proration
|
Cancel
|
Guard
|
| 700*17 (4177)
|
(3490)
|
100%
|
-
|
U, LHA
|
| First Active
|
Active
|
Recovery
|
Frame Adv
|
Circuit
|
Invuln
|
| 2+11
|
12
|
31
|
-14 ~ -5
|
removes all
|
Full 1-79
|
|
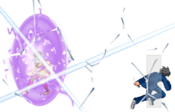
Has pretty much all the same properties as the regular Arc Drive, except that he travels a shorter distance, does more damage, and instead of 1 hit, it does 17 hits. Ironically, this super is named after the infamous situation where Tohno dismembered Arcueid into 17 pieces in Tsukihime, but by cutting 17 times in Melty Blood, Tohno will have cut his opponent into at least 18 pieces. Is slightly more practical for comboing into, but any real combo involving meter would net in more damage. Keep in mind that its animation is slightly misleading since in the very last frames of his leap, the attack won't connect. As a result, it is again, mostly useless except as a possible reversal.
|
|
Last Arc
|
|
| Damage
|
Red Damage
|
Proration
|
Cancel
|
Guard
|
| 4200 ~ 6300
|
5400 ~ 7350
|
50% + 50% * remaining BH time
|
-
|
U
|
| First Active
|
Active
|
Recovery
|
Frame Adv
|
Circuit
|
Invuln
|
| 3+0
|
3
|
48
|
-
|
removes all
|
Full
|
|
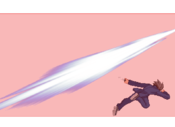
Tohno leaps forward and teleports across the screen, cutting through everything in his wake. Circuit Breaks the opponent on hit (destroys their meter bar for a time). Fullscreen unblockable and instant, does damage depending on how much meter you have left. There is no way to avoid this once he has successfully shielded you, unless you were already invulnerable during your attack. During this attack, Tohno spouts his famous one liner from the end of Arc's route in Tsukihime.
Kore ga, mono wo korosu to iu koto da. - This is, what it means to kill something.
|
|
General Gameplan
C-Tohno specializes in controlling the mid-range (more specifically, at about the round-start range). Emphasizing this most generally are his j.C, 2C grounded dash, and pushback; while his other tools such as 22x, 214x, and 236x, supplement his horizontal dominance in more offensive situations. What Tohno wants to do with this control of the mid-range is what most mid-range "footsies" characters do: Threaten the opponent by using hitboxes in a way that keeps their position teetering uncomfortably. More specifically, where it's hard for them to approach in neutral because of the space your j.C covers. By extension, this should also ideally make them want to keep backing up in order to compensate. Establishing this basic advantage makes it possible for the rest of your options to truly shine. What makes the grounded dash scary isn't just the fact that it travels fast and a good distance, but that it allows for instant approaches in tandem with your other tools. Frankly, by itself, it isn't too scary. But a large reason why this movement option is so versatile for a grounded dash is because it's so complementary. Provided the range at which you'll want to be playing neutral, this makes it possible for your opponent to become so focused on so many other things, they don't see the dash coming. Of course, that's assuming the opponent will stay defensive. Should they choose instead to move forward (be it in the attempt to escape or attack), what's good for C-Tohno is that backwards movements can easily cover that, given how much space he should be controlling. A single backwards jump for instance, would lead the situation back to Tohno's advantage, leaving plenty of space to compensate even if the read happens to be incorrect. From there on, your other movements and tools (airdashes, 236a, single jumps, superjumps, etc.) should be used to round out any predictability. Use and vary Tohno's options well, and you should find yourself winning neutral by merit of good fundamentals.
As far as offense is involved, the first thing to keep in mind is that you're working with pushback. (Most noticeably, on his 5C and 2C.) This pushback makes it extremely difficult for him to maintain any real pressure using his Normals alone. Midscreen, his opponents get pushed back, while in the corner, that pushback is converted to Tohno himself. What this means is that midscreen, your blockstrings should be used as cheap but equally quick pressure that moves the opponent towards the corner, and thus back to your preferred range for neutral. In the corner however, his Specials (236B/[B], 214B, 22X) work in tandem with that pushback, and begin to show their true potential. At point-blank range, his 22X mixup can easily be reacted to by mashing, and what makes them safe (like just about any moving hitbox data) is the range at which the move hits. At the max range at which 5C can touch the opponent, a cancel into 22A will naturally frametrap the opponent, and catch any jumps, leading to a combo. The best part about this is that even if 22A is blocked, Tohno is safe against any mashes or scrambles, and is left in a position where his horizontal dominance is still a risk at large. Most of the same idea applies for 236B, while 214B is there to catch anything more delayed. (Do note that unlike the other two specials, 214B puts you point-blank and unable to keep any momentum against the opponent if blocked, so do be careful about that.) And where this comes back to his Normals is that, while they aren't good for pressure, their delay windows can be used to ambiguate when and how you'll lead into your Specials (should you even choose to). And while it is true that good blocking can be used as a strong measure against all of this, the key thing to remember is that the defender has to move eventually. It's just a matter of playing around that in a way that can constantly both threaten and throw off the defender. To which your 22B~D, as well as the pushback in general, can make your position variable enough to confuse the opponent on when, where, and how you'll be approaching.
Lastly, if you ever find yourself on defense, there isn't much to say. You have Crescent Moon mechanics, but you need to be privy on when and how you're able to escape, meaning you'll need good defense like everyone else. On the other, you have a 623A which is invulnerable for its startup, and has its hitbox active when the hurtbox becomes active too. This is what leads to so many trades and counter hits, making it a prime tool for getting a BnB's worth of damage and your turn back. Furthermore, the 623A can be made safe if the first hit is cancelled into 236C. And less known is that his 214A makes his hurtbox extremely low. Low enough to low profile Warachia 5B. It becomes low within about 3 frames, making it his fantastic go-to low profile option, wherever the use for that may arise.
The following clip of Narusora vs. GO1 can be taken as a model example of all the above concepts in action.
https://www.youtube.com/watch?t=1256&v=O4xGiwVqzlI&feature=youtu.be
Setups and Mixup
Tohno has a few select mixups and setups to use at his disposal. Most of them either require meter or severe damage loss though, so they are not used very much. Consequentially, these are not very important to his overall game, so don't worry too much about them. You can watch a video demonstrating these here.
- 22B~D Which-Way
- 214A (combo ends); 22B~D
- (any combo into 236C hard knockdown) 66 22B~D
- (near corner) 2AA > 5B > 6B > 5C > 2C > 214C > 22D > 2C > 214C > 214A > 2C (combo ends); 214A 22B~D
- (near corner) 2AA > 5B > 6B > 5C > 2C > 214C > 214A > 2C (combo ends); 214A 22B~D
- Any variations into the same basic ender set this up.
This mixup is based around the teleporting in 22B. By pressing D at different times, Tohno can cancel the teleport to change which side he appears on. This creates a sort of acceptable left/right mixup, as it also obscures the vision of the opponent with the dust flying up from the teleport.
Unfortunately, this mixup is actually somewhat risky to use, due to the nerf to Shiki's 214A in Current Code. The additional frames of recovery mean that Tohno cannot always 2A the opponent before they can reversal 2A him. If you do not actually teleport through the opponent you can still get the 2A out before anybody else, but by traveling through them, the only character who will not be able to interrupt you is Nero, because of his slow wakeup speed.
The mixup also has a weakness to reversal shield. If Tohno wanted to use 5B or 2B to catch out incorrect shields, the opponent can just mash out.
Overall the meter setups are not very useful anymore, and the first one that actually does OK damage cost 200%. This relegates it to being a MAX mode only combo typically.
On the plus side, if you get a 214A hit in, via pokes or whatever, the mixup will work just fine on anybody. Midscreen, this is probably one of the better things you can followup a non counterhit 214A with.
- 236C Which-Way/Safe Heat
- 2AA > 5B > 6B > 5C > 2C > 236A > 236C (combo ends); 66 slight delay, j8~[4].C while falling.
- 2AA > 2B > 5C > 2C > 5BB > j.[C], land (66 5A >) 236C
- Note that this combo does less than the above one, but is useful for hitconfirming into from aerial counterhits or 2C pokes at a distance when you want a safe heat and want to keep momentum going.
- The 66 5A is for chars that the 236C whiffs on.
- (midscreen blockstring) 236A(hit) 236C (combo ends); 66 slight delay, j8~[4].C while falling.
- (midscreen otg knockdown) 214A/long-ranged 2C > 66 5A > 5B > 2C > 236C (combo ends); 66 slight delay, j8~[4].C while falling.
Goal of this mixup is to use the directional influence on neutral jump to create a confusing ground crossup when you land on top of the opponent. Tohno has enough time to use 2a, 2b or 5b after this mixup, making it much better vs shields and mashing. The alternative is to cancel into air backdash as late as possible to do an overhead j.C instead.
The 22B~D mixup can be used here too since there is enough time, but this mixup is stronger if you can do it well.
The 236C also allows you to safely Heat and still get a meaty afterwards, though you cannot do the mixup. Problems include the justification of 100% meter for quite mediocre damage, and the fact that 236C is not a very common move to use anyway.
- Midscreen 5BB > j.[C] Which-Way
- 2AA > 2B > 5C > 2C > 5BB > j.[C] (combo ends); sj9, j.66 j.C while falling.
Goal of this mixup is to use specific airdash timing to land on top of the opponent to create an ambiguous ground crossup. By changing the timing of your airdash and j.C you can control where you land. Tohno has enough time to use 2A, 2B or 5B again, keeping them guessing with potential shields. You can also use a similar technique to the previous mixup, where you dash, neutral jump and influence your fall before j.C, or airdash backwards, but this is not really mixup more than a way to play it safe.
Ths mixup unfortunately really really gimps your damage for a midscreen combo, and is difficult to execute correctly.
- IAD j.A > j.22A > Throw
- (anywhere) point-blank IAD j.A j.22A(w) > land, Throw
Not legitimately a setup but this is an incredibly dirty way to tick throw the opponent. Works because j.A has extremely low pushback and the j.22A moves you forward a lot, but won't actually come out as an attack. You will also land with no recovery due to being in the startup of an attack, allowing you to throw immediatly. Works the same way as the IAD j.[C] throw mixup but this is much safer overall (you can get mashed out of that one easily).
Offensive Option Selects
Tohno's upper-body clash frame on his 5B is a useful tool for helping him beat a lot of reversals, as well as his solid DP. The most common situations you can use these in are from a throw (anywhere), or a 623BB hard knockdown in the corner.
To see the original thread for option selects in Actress Again PS2, check here.
Note that Crescent Bunkers can not counter hit anymore, meaning that Tohno can no longer get tech punishes after a bunker OS.
This video showcases the Universal OS.
- Universal OS - meaty 5B > 2B~214D.
Beats wakeup shield counter and bunker. This also beats most wakeup DPs, though for any that have a super flash you need to input bunker again after the super flash. Unless otherwise stated in a specific OS, while it says 5B meaty there needs to be a slight delay on the 5B hitting. If the 5B hits as early as it can it will still be meaty but it won't clash with certain DPs.
- Anti Heat OS - meaty 5A/2A > 5B.
When done right, you will clash the opponents heat if your 5A/2A whiffs, and you can cancel into whatever off the clash for a combo. Works off corner airthrow into 66 5A/2B 5B against most characters as well.
OTG Techpunishes
Check the OTG section in combos to get up to date on the basic setups first.
- (near corner, opponent knocked down) 66 5A > 5B > 2C > 2AAA
- (near corner, opponent knocked down) 66 5A > 2B(2) > 5B > 2AAA
Essentially, after these strings, Tohno can reaction 2C to cover all possible techs into a 2C > 5C combo for back and neutral techs, and into larger combos for when they tech next to him. Although it's possible to add in an extra 2C in the second combo too, the reason we avoid using it, or why it's prefferable to avoid using the higher damage techpunish is because the extra pushback in the string causes you to end up positioning yourself so that forward techs (techs that will come out of the corner) are going to end up being difficult to punish because Tohno won't turn around till later. This means your attempted punishes would whiff. You can remedy this by walking backwards a little but then you cannot properly punish or combo neutral or back techs, meaning this is not really a solution.
It is important to make sure you only throw out the 2C on reaction if you are trying to bait the tech because whiffing his 2C like that will make you very vulnerable.
Note that if they forward tech you can also just techpunish with any other move to start a much more damaging combo (like a 2A or a 5B)
- (following one of the two above OTG combos) 66 > 5A > 2C > 2AAA (> 5C)
- (following one of the two above OTG combos) 66 > 5AA > 2B(2) > 5B
66 5A 2C option select covers all techs (except sometimes first frame neutral techs, which are basically impossible anyway. However, in training mode, the AI always does these, so dont worry if this setup doesnt always work on the dummy), but can be a little tricky to hitconfirm. It can also be hard to actually catch the forward tech into the 5C into air combo with this too. However, it's definitely worth learning to do the OS tech punish just for the fact it will scare opponents into basically never teching your OTGs. If you end with 5C, then you recover in time to 2A all techs again (except first frame neutral techs again).
Here is a video that demonstrates how the double OTG os tech punish works for Crescent and Half Tohno.
If you attempt the second double OTG and they neutral or back teched your 5A will catch it for at least a block, but forward techs will get out.
- (near corner, opponent knocked down) 66 5AAA > 5B > 2B(2) > 2C > 5C > 2A/jumpcancel
For this OTG, using 2A allows you to potentially cover all techs via reaction 2C, but forward techs are hard to catch without some adjustment (outlined above). If you jumpcancel you cannot cover neutral techs. Back techs can be covered by IAD j.C/B and forward techs by IABD j.C/B.
Combos
| Combo Notation Help
|
Disclaimer: Combos are written by various writers, so the actual notation used in pages can differ from the standard one.
For more information, see Glossary and Controls.
|
| X > Y
|
X input is cancelled into Y.
|
| X > delay Y
|
Must wait for a short period before cancelling X input into Y.
|
| X, Y
|
X input is linked into Y, meaning Y is done after X's recovery period.
|
| X+Y
|
Buttons X and Y must be input simultaneously.
|
| X/Y
|
Either the X or Y input can be used.
|
| X~Y
|
This notation has two meanings.
- Use attack X with Y follow-up input.
- Input X then within a few frames, input Y. Usually used for option selects.
|
| X(w)
|
X input must not hit the opponent (Whiff).
|
| j.X
|
X input is done in the air, implies a jump/jump cancel if the previous move was done from the ground.
Applies to all air chain sections:
- Assume a forward jump cancel if no direction is given.
- Air chains such as j.A > j.B > j.C can be shortened to j.ABC.
|
| sj.X
|
X input is done after a super jump. Notated as sj8.X and sj9.X for neutral and forward super jumps respectively.
|
| dj.X
|
X input is done after a double jump.
|
| sdj.X
|
X input is done after a double super jump.
|
| tk.X
|
Stands for Tiger Knee. X motion must be buffered before jumping, inputting the move as close to the ground as possible. (ex. tk.236A)
|
| (X)
|
X is optional. Typically the combo will be easier if omitted.
|
| [X]
|
Input X is held down. Also referred to as Blowback Edge (BE). Depending on the character, this can indicate that this button is held down and not released until indicated by the release notation.
|
| ]X[
|
Input X is released. Will only appear if a button is previously held down. This type of input is referred to as Negative Edge.
|
| {X}
|
Button X should only be held down briefly to get a partially charged version instead of the fully charged one.
|
| X(N)
|
Attack "X" should only hit N times.
|
| (XYZ)xN
|
XYZ string must be performed N times. Combos using this notation are usually referred to as loops.
|
| (XYZ^)
|
A pre-existing combo labelled XYZ is inserted here for shortening purposes.
|
| CH
|
The first attack must be a Counter Hit.
|
| Air CH
|
The first attack must be a Counter Hit on an airborne opponent.
|
| 66
|
Performs a ground forward dash.
|
| j.66
|
Performs an aerial forward dash, used as a cancel for certain characters' air strings.
|
| IAD/IABD
|
Performs an Instant AirDash.
|
| AT
|
Performs an Air Throw. (j.6/4A+D)
|
| IH
|
Performs an Initiative Heat.
|
| AD
|
Performs an Arc Drive.
|
| AAD
|
Performs an Another Arc Drive.
|
Before beginning the rest of the Combo Section, it is important you understand (for the sake of convenience) the common setups and enders Tohno can utilize. The remainder of this section will NOT repeat the following information more than once, if at all (for clarity). This will be to help make the learning curve more practical, while cutting down on the redunancy that was written here prior.
- All AT enders can be replaced instead with j.623C. For 100 Meter, you can add damage that would be significantly greater than an AT ender; at the cost of the enemy being able to airtech long before you land. Note that ending in 623B not only allows this same drawback, but does even less damage than AT enders. Do not end on j.623B for any reason unless somehow, you find yourself in the specific scenario where you desperately require that 10 extra Meter above all else And no, stacking (j.)623C on top of (j.)623B does not do more damage, so don't dream of canceling from one into the other.
- As these combos are specific close/to the corner, 2C > 5BB routes can go three ways. One, the basic hj8.BC > dj.BC > AT ender, which sports an easy source of optimized damage at the cost of a good post-knockdown position. Two, j9.[C] > j.22A > land 623BB, for less damage yet a solid, hard knockdown. Or three, the trickiest, delayed j9.[C] > land > 5A > 5BB > 2A(w), j.CB > dj.BC > AT. This last one is fairly difficult to do, but possible to do consistently. You could think of it as the advanced variant of the first route, except it nets even higher damage, gives more meter, and better post-knockdown position.
It should also be known that the more hits a combo has, the more meter you gain. This rule is much more consistent than the damage calculations based on starters, properties, etc. Because Tohno is so flexible with his combo-ability, this makes it difficult to determine which route is most damaging based on which starter, the preceding normals, and so on. Not even 5BB is always the most optimal route for damage; in fact a vast majority of the time it just isn't.
All of the following transcripts will be in terms of the best damage route possible, unless otherwise stated. As an actual Tohno player, your performance for the most part isn't make-or-break if you don't memorize the specific routes. Often times you'll also have to know when to not go for the optimal damage routes and opt for something more basic in order to alleviate Reverse Beat Penalty. But if you do want to memorize said routes, then the information is definitely here for everyone's sake. These routes have all been tested to assure that no other combination of normals is more optimal in terms of damage.
Combo Theory & Notes Going Forward
Basically, all you need to understand is this:
- Most of what you'll get midscreen is extremely basic confirms
- The only way to confirm into 2C > 6B > j.B/C > j.22C combos is off raw grounded starters. Otherwise the hitcount isn't sufficient to keep the gravity low enough for the sj8.A/C. And if you're not close enough for the grounded starter, your 6B won't reach.
- Airborne starters midscreen (Gold Airthrow, Aerial Counterhits, or 623A/B CH) can be followed up with either the damaging combo (2C > 2B(1) > 5BB > j.CB > dj.BC > AT) or oki combo (2C > 5BB > j.[C] > djc > airdash)
- Airborne starters near the corner get the the corner carry variant (2C > 5BB > dl.j.[c], land > 5AA > 5B > 2A(w), j.B > dj.BC > AT)
- If you think that's too hard, you can substitute it with either the 2C > 2B(1) > 5BB > etc. variant mentioned above in the corner, or do 2C > 5B > 6B > aircombo for what's still good damage and oki
- Combos involving j.[C] don't work on Kouma and Wara. Just do some other variant instead
- 214C corner combos can be done by confirming into 2C, or confirming off 2C OTG
If you see any combo listed as "Tohno 2C conversion variant", that basically means you can do any of the above listed combo conversions that start with 2C. It's suggested for the above listed Airborne starters (Gold Airthrow, Aerial Counterhits, 623A/B CH) you omit 2B(1) and instead use 2B > 5BB if you're going to do j.[C] afterwards.
A video demonstration of the combos listed below can he found here.
Normal Combos
Introductory BnBs
| Condition
|
Notation
|
Damage
vs V.Sion
|
Notes
|
|
| Normal starter, grounded opponent
|
- 5C > 2C > 6B > j.BC > dj.BC > AT
|
4107
|
|
| Meter Gained: 82.0% |
Meter Given (vs C-Moon): 25.7% |
[Link (Video)] |
| Since 2C is safe on block unlike 5C, and is way less to start up and be punishable on whiff, 5C > 2C is ideal for C-Tohno as a reactable frametrap that's 100% safe on block. |
|
|
| Normal starter, crouching opponent only
|
- 2B(2) > 5C > j.BC > dj.BC > AT
|
4159
|
|
| Meter Gained: 75.0% |
Meter Given (vs C-Moon): 23.6% |
[Link (Video)] |
| Basic confirm on brouchers |
|
|
| Counterhit starter, airborne opponent
|
- Any Air CH > 5C > j.BC > dj.BC > AT
|
4231
|
|
| Meter Gained: ??? |
Meter Given (vs C-Moon): ??? |
[Link (Video)] |
| Simple beginner conversion that leaves you with good oki if you happen to do this near the corner. |
|
|
| Counterhit 623A/B starter
|
- 623A/B > 2C > 5C > j.BC > dj.BC > AT
|
3641
|
|
| Meter Gained: ??? |
Meter Given (vs C-Moon): ??? |
[Link (Video)] |
| Only one normal more. Adds about 100 damage. Easy to do, but not much is lost if you don't. |
|
|
| Counterhit starter, can be on airborne opponent
|
- Any Air or 623A/B CH > 2C > 2B(1) > 5BB > sjc8.CB > dj.BC> AT
|
???
|
|
| Meter Gained: ??? |
Meter Given (vs C-Moon): ??? |
[Link (Video)] |
| Higher damage variant that sacrifices oki for damage. |
|
|
2C Confirm Variants
| Condition
|
Notation
|
Damage
vs V.Sion
|
Notes
|
|
| Normal starter, grounded opponent
|
- 2C > 5C > (5B >) j.BC(A) > dj.BC(A) > AT
|
3042 ~ 3318
|
|
| Meter Gained: ??? |
Meter Given (vs C-Moon): ??? |
[Link (Video)] |
Absolute basic yet staple Tohno combo.
You'll find yourself converting into this quite often, as there are seldom other ways in which to consistently do so using 2C from a range.
Opt for this in other combos when you want to spend time cutting down on Reverse Beat Penalty. |
|
|
| Practically any
|
- 2C > 2B(1) > 5BB > sj8.BC > dj.BC > AT
|
3557
|
|
| Meter Gained: 75% |
Meter Given (vs C-Moon): 23.6% |
[Link (Video)] |
Higher damage combo from 2C as opposed to the above route, at the cost of better post-knockdown positioning.
Note that you can hold 8 after 5BB for an automatic superjump. |
|
|
| Practically any
|
|
2159
|
|
| Meter Gained: 38% |
Meter Given (vs C-Moon): 11.4% |
[Link (Video)] |
Hard knockdown variant of the above combo. Sacrifices a significant amount of damage for poor okizeme, but still considered somewhat essential in its own right as a part of Tohno's potential.
Can only be followed up by sj.9 > IAD > land during knockdown, leads into meaty. It can also be followed up by 22B~D, however this isn't very scary and is easily reactable; also leads into meaty. If you want to scare your opponent, you can also do Dash > 22B~D after landing. Unfortunately this isn't universal and is easily masahble, but it can be meaty against opponents with slower wakeup such as Riesbyfe. Also has the benefit of at least looking very real to those that don't know it isn't actually safe to set up.
Also the only HKD combo Tohno has where he can OTG the opponent. This can be used for extra damage depending on position, in order to compensate for the loss of damage through the other route. Can also potentially be used to set up tech punishes, if the opponent gets greedy. |
|
|
| 2C corner confirm variant. Corner carry or in corner, low hitcount starter
|
- 2C > 5BB > j9 delay j.[C], land > 5AA > 5B > 2A(w), j.B > dj.BC > AT
|
???
|
|
| Meter Gained: ??? |
Meter Given (vs C-Moon): ??? |
[Link (Video)] |
| Best for when you're near/in the corner and starting with raw airthrow, air CH, or 623A/B CH. Delaying the j.[C] helps with timing the land 5A. |
|
|
| 2C 214C corner confirm variant. Corner carry or in corner.
|
- 2C > 2B(1) > 5BB > j9 slight delay j.[C], land > 5AA > 5B > 2A(w), j.BC > dj.BC > AT
|
???
|
|
| Meter Gained: ??? |
Meter Given (vs C-Moon): ??? |
[Link (Video)] |
| THE optimal 2C variant used in 214C combos, with the 2B(1) being necessary due to higher hitcount. Higher hitcount means the j.[C] can't be delayed as much, but delaying a bit still helps with making the combo a bit easier. |
|
|
| 2C 214C corner confirm variant. Corner carry or in corner.
|
- 2C > 2B(1) > 5BB > j9.[C] > j.22A > 623BB
|
???
|
| |
| Meter Gained: ??? |
Meter Given (vs C-Moon): ??? |
| Does less damage than the above combo but still does decent damage, gives a considerably better knockdown, and is much easier to execute. Consider using after 214C OTG pickups, as the extra damage of the above route is minimized by the extra scaling from OTG. |
|
|
Basic Meterless Combos
| Condition
|
Notation
|
Damage
vs V.Sion
|
Notes
|
|
| Normal starter, standing opponent only
|
- 2B(2) > 5C > 2C > 5B > 6B > j.BC(A) > dj.BC(A) > AT
|
4710
|
|
| Meter Gained: ??? |
Meter Given (vs C-Moon): ??? |
[Link (Video)] |
Standing opponents only. Must also be about point blank when doing this for it to work.
Optimal, meterless, universal punish anywhere on the screen.
May have to delay the 5B or wait a little after 6B on some characters to get this to work.
If the delay is too annoying, do j.CB(2) > dj.BC(A) > AT instead. |
|
|
| Normal starter, crouching opponent only
|
- 5B > 2B(1) > 5C > 2C > 6B > j.BC(A) > dj.BC(A) > AT
|
4891
|
|
| Meter Gained: ??? |
Meter Given (vs C-Moon): ??? |
[Link (Video)] |
Crouching opponents only. Must also be about point blank when doing this for it to work.
Second most optimal in terms of damage. Meterless, universal punish anywhere on the screen.
May have to wait a little after 6B on some characters to get this to work.
If the delay is too annoying, do j.CB(2) > dj.BC(A) > AT instead.
|
|
|
| Normal starter, crouching opponent only
|
- 5C > 2B(2) > 5B > 6B > j.BC(A) > dj.BC(A) > AT
|
5019
|
|
| Meter Gained: ??? |
Meter Given (vs C-Moon): ??? |
[Link (Video)] |
Highly situational and only desirable if Tohno isn't somehow suffering Rebeat Penalty. Crouching opponents only. Must also be about point blank when doing this for it to work.
Most optimal in terms of meterless midscreen damage. Use this as a punish when you're close enough and if the average startup of a C normal will be fast enough to work.
Unlike the above combo, is easier to execute on everyone and doesn't require obtuse timings. |
|
|
| 6[B] starter, grounded opponent
|
- 6[B] > (5B > 2B(1) >) 2C > 5C > j.BC(A) > dj.BC(A) > AT
|
4415
|
|
| Meter Gained: ??? |
Meter Given (vs C-Moon): ??? |
[Link (Video)] |
| Your one and only overhead combo (that works anywhere on the screen).
Omit the B normals and go to 2C > 5C if you're too far.
Every other possible route gives less damage, unless you do 5C > 2C > 5BB > etc. The damage increase doesn't even amount to 100 to justify the bad position. |
|
|
| 236A counter hit against aerial opponent
|
- 236A(CH, against aerial opponent) > 2C confirm variant
|
4891
|
| |
| Meter Gained: ??? |
Meter Given (vs C-Moon): ??? |
| Corner variants work too. Remember the low hitcount |
|
|
Midscreen Confirms
| Condition
|
Notation
|
Damage
vs V.Sion
|
Notes
|
|
| Raw Airthrow/Counterhit aerial/623A or B starter
|
- Raw AT/Counterhit aerial/623A or B Counterhit > land > 2C confirm variant
|
3051
|
| |
| Meter Gained: ??? |
Meter Given (vs C-Moon): ??? |
| For the counterhit aerial, if you're too far, just dash up before the 2C |
|
|
| Shield > Counterhit 623A starter
|
- Shield > CH 623A > land > 2C confirm variant OR (2B(1) >) 5B > 6B > j.BC(A) > dj.BC(A) > AT
|
3282
|
|
| Meter Gained: ??? |
Meter Given (vs C-Moon): ??? |
[Link (Video)] |
Midscreen, the 2B(1) > 5B route is just slightly higher than the 2C confirm variant. But it doesn't really matter to be honest. Corner confirm variants do most damage and meter gain.
|
|
|
| Counterhit 2C starter
|
- CH 2C > 5A(w), 2C confirm variant
|
???
|
|
| Meter Gained: ??? |
Meter Given (vs C-Moon): ??? |
[Link (Video)] |
Basic conversion off of 2C counter hit starter.
|
|
|
| Counterhit 214A/B starter
|
- CH 214A/B, 5A > 5B > 6B > j.BC(A) > dj.BC(A) > AT
|
3488
|
|
| Meter Gained: ??? |
Meter Given (vs C-Moon): ??? |
[Link (Video)] |
Can work regardless of distance. If this move counter hits, that's always a potential conversion no matter where or what.
Linking/Execution is rather tough, making the attempt at conversion alone a bit of a risk. But it is possible to perform consistently. 214B is more forgiving with timing since the hitstun lasts just a little longer. |
|
|
| Counterhit 236A starter
|
- CH 236A, 2С confirm variant
|
???
|
| |
| Meter Gained: ??? |
Meter Given (vs C-Moon): ??? |
| A pretty hard but important link as damage is insane even with the most basic of 2C confirms. |
|
|
| 236A counter hit in the corner, close to the opponent
|
- CH 236A, 2A > 5C > 2C > 214C > )5A(w) > 5B(w)[B] >) 22D > 2C confirm variant
|
???
|
| |
| Meter Gained: ??? |
Meter Given (vs C-Moon): ??? |
| Corner only, close to the opponent, counter hit, and of course, requires 100 meter. Ridiculous damage if you can manage this though |
|
|
| 22C starter
|
- 22C, 2C > 6B > j.BC(A) > dj.BC(A) > AT
|
3648
|
|
| Meter Gained: 75% |
Meter Given (vs C-Moon): 24.7% |
[Link (Video)] |
Staple 22C combo for when you are too far from facing the corner.
Most optimal confirm in such a scenario. Works on everyone. |
|
|
| 22C starter, near corner
|
- 22C, 2C low hitcount corner variant
|
???
|
| |
| Meter Gained: ??? |
Meter Given (vs C-Moon): ??? |
Obviously can't be done when the opponent is fully in the corner since there's no space to.
|
|
|
| Normal starter, grounded opponent, 100% meter
|
- 5B > 5C > 2B(2)/2C > 6B > j.B(2)/C > j.22C, sj8.CB > dj.BC > AT
|
5354
|
|
| Meter Gained: ??? |
Meter Given (vs C-Moon): ??? |
[Link (Video)] |
The j.22C combo. Your staple metered midscreen route. The highest source of damage you'll get in such a situation.
This route is the most optimal in terms of damage which exists for j.22C. So do 2B(2) if the enemy is crouching and 2C if the enemy is standing. j.C will net more damage than j.B, but not any significant amount, and risks coming out when the enemy is too high compared to j.B. So do j.B(2) if you want.
Similarly, if you find the j.CB part too difficult, it might be easier instead to replace the first j.CB with a j.AC. |
|
|
Situational Combos
| Condition
|
Notation
|
Damage
vs V.Sion
|
Notes
|
|
| Normal starter, grounded opponent
|
- 5B[B] > 22D > 2C confirm variant
|
4700
|
| |
| Meter Gained: ??? |
Meter Given (vs C-Moon): ??? |
[Link (Video)] |
|
|
| j.[C] starter, grounded opponent
|
- j.[C], 2C confirm variant
|
???
|
???
|
|
| j.22C starter, grounded opponent
|
- j.22C, land j.BC > dj.BC > AT
|
4353
|
| |
| Meter Gained: ??? |
Meter Given (vs C-Moon): ??? |
| If the opponent is higher than ground level at the time of j.22C hit, you won't be able to land j.BC, in those cases, you can use sj8.AC as your air combo. On high enough air hits you won't be able to get anything at all. |
|
|
| j.22C CH starter
|
- j.22C CH > land 2C confirm variant
|
???
|
| |
| Meter Gained: ??? |
Meter Given (vs C-Moon): ??? |
| Insane damage. Can also add 5B(w)[B] sometimes, primarily in the corner or after air hit for even more damage, around 700 more. |
|
|
| Midscreen OTG string, 100% meter
|
- 2C > 2A(w)/214A, (dash)214C > 5B j.BC(A) dj.BC > AT
|
2728
|
|
| Meter Gained: ??? |
Meter Given (vs C-Moon): ??? |
(Video) |
| Highest damage midscreen off of OTG, but finnicky. 214C has to be done point blank. 5B has to be cancelled into immediately. The j.A can whiff depending on character and spacing which can be remedied by cancelling the j.C into an airdash j.A, but the timing is strict. Omitting the j.A may cause the j.B to not connect properly if the double jump cancel from j.C isn't slightly delayed. |
|
|
Corner Combos
Note: All of the following combos which involve doing 2C/sweep in the corner with 5B available after will ALWAYS have the 5BB > delay j9.(delay)[C] > land > 5A5BB > Etc.
Basic Corner Specific Routes
| Condition
|
Notation
|
Damage
vs V.Sion
|
Notes
|
|
| Normal starter, grounded opponent
|
- 2C > 5BB > j9.[C] > j.22A > land > 623BB
|
3419
|
|
| Meter Gained: 55% |
Meter Given (vs C-Moon): 17.6% |
[Link (Video)] |
Corner HKD variant. Cannot OTG.
Have to do j.9[C] as quickly as possible while ascending, and j.22A should be input as soon as j.[C] hits. Leave a bit of a gap between j.22A and 623BB, since it won't buffer immediately due to the landing portion. |
|
|
| Raw Airthrow starter
|
- Raw Airthrow > land > 2C > 2B(1) > 5B > 6B > j.BC(A) > dj.BC(A) > AT
|
???
|
| |
| Meter Gained: ??? |
Meter Given (vs C-Moon): ??? |
[Link (Video)] |
|
|
| OTG normal starter
|
- 5AAA > 5B > 2B(2) > 2C > 5C > 2A(w)/236C
|
???
|
|
| Meter Gained: ??? |
Meter Given (vs C-Moon): ??? |
[Link (Video)] |
Max damage 236C OTG route. Use this if you want a bit of extra damage and are willing to spend 100 Meter for that and a better knockdown than the 214C variant. If you find this entire sequence too hard, then you can stop at precisely any point you wish past the first 5A, and the 236C will still connect.
Go for the 2A(w) route if you don't wanna spend the meter but are hoping to catch a tech punish and wanna recover in time to catch it. 2C can and will punish after 2A(w) recovers. |
|
|
Special Confirms
| Condition
|
Notation
|
Damage
vs V.Sion
|
Notes
|
|
| 22A starter, grounded opponent
|
- 22A, 2B(1) > 5B > j.BC(A) > dj.BC(A) > AT
|
4268
|
|
| Meter Gained: ??? |
Meter Given (vs C-Moon): ??? |
[Link (Video)] |
Corner conversion off of a stray 22A.
Strangely, but truthfully, the most optimal yet simplest conversion there is for the starter.
If the opponent is counter hit, they'll stay still in place before flying towards the wall. Your cue on when to do 2B(1) should be as the ripple effect on the wallbounce is just about to fade.
If the opponent is jumping as this hits, 2B may not connect. In which case, omit it and just go right into either 5B or j.B depending on height.
|
|
|
22[A] starter, grounded opponent
Works On: Everyone except Ryougi
|
- 22[A], 5B > 6B > j.BC(A) > dj.BC(A) > AT
|
???
|
|
| Meter Gained: ??? |
Meter Given (vs C-Moon): ??? |
[Link (Video)] |
Exact same as the above EXCEPT DO NOT ATTEMPT THIS ON RYOUGI SHIKI. Due to her strange properties, this will drop on her.
For Ryougi Shiki, just do the 2B(1) > 5B route instead.
Weirdly enough, for some reason, 22[A] is better optimized with 5B > 6B before air combo. Keep that in mind. |
|
|
236B starter, airborne opponent
/214B starter
|
- 236B (air hit), OR 214BB > j.(A)BC > dj.BC(A) > AT
|
???
|
|
| Meter Gained: ??? |
Meter Given (vs C-Moon): ??? |
[Link (Video)] |
Corner confirms off of both Specials.
For 236B, you have to connect with j.A, otherwise the combo will drop. For 214BB, it's optional but if you can do it then go for it.
214BB confirm loses to 5BB > j.CB > dj.BC > AT in terms of damage, but is overall far more practical to land consistently. |
|
|
Advanced Corner Combos
| Condition
|
Notation
|
Damage
vs V.Sion
|
Notes
|
|
| 214C combo
|
- 2B(1) > 5C > 2C > 214C > (5A(w) > 5B(w)[B] >) 22D > 214C confirm variant (see above)
|
???
|
| |
| Meter Gained: ??? |
Meter Given (vs C-Moon): ??? |
| Your staple, metered corner combo as Tohno. Omit the 5A(w) > 5B(w)[B] part if the preceding hitcount is too high (generally around 4 or 5 hits before 2C). |
|
|
| 214C combo OTG
|
- 2C > 22D OR 22B~D OR 5A(w) > 214C > (5A(w) > 5B(w)[B] >) 22D > 214C confirm variant (see above)
|
???
|
| |
| Meter Gained: ??? |
Meter Given (vs C-Moon): ??? |
| Same as above except now it's OTG. |
|
|
| 214C combo OTG
|
- 2C > 22D OR 22B~D OR 5A(w) > 214C > j7 > IAD backwards > j.[C](w) > land > 2C > 5BB > 5A(w), j.BC > dj.BC > AT
|
???
|
| |
| Meter Gained: ??? |
Meter Given (vs C-Moon): ??? |
| Same as above except now it's OTG variant 2. |
|
|
| 214C combo OTG
|
- 236B 214C > (5A(w) > 5B(w)[B] >) 22D > 214C confirm variant (see above)
|
???
|
| |
| Meter Gained: ??? |
Meter Given (vs C-Moon): ??? |
| Same as above except now it's a reaction confirm from raw 236B |
|
|
| 236A Counter hit starter in the corner
|
- 236A(CH), 2A > 5C > 2C > 214C > (5A(w) > 5B(w)[B] >) 22D > 214C confirm variant (see above)
|
???
|
| |
| Meter Gained: ??? |
Meter Given (vs C-Moon): ??? |
| Same as above except now it's a reaction confirm from CH 236A. Better and more easily done against crouchers. |
|
|
| j.22X corner confirm
|
- j.22X > 236A > 214C > (5A(w) > 5B(w)[B] >) 22D > 214C confirm variant (see above)
|
???
|
| |
| Meter Gained: ??? |
Meter Given (vs C-Moon): ??? |
| Same as above except now with j.22X in the corner, j.22X has to hit low to the ground for the combo to work. |
|
|
| (Ender option)
|
- Etc. > 2C > 6B > 22A, j.A(B)C > dj.BC(A) > AT
|
???
|
| |
|
|
2A starter, opponent is Aoko/Powered Ciel
Works On: Aoko, Powered Ciel
|
- 2A > 5BB > 6[B] > 2B(1) > 2C > 22A, 2B(1) > 5BB > j.9 > delay > j.[C] > land > 5A > 2C > 6B > 2B(1) > 5BB > 2A(w) > j.BC > dj.BC > AT
|
5855
|
|
| Meter Gained: 185.0 |
Meter Given (vs C-Moon): 61.5 |
(Video) |
Combo specifically doable on Aoko and Powered Ciel. On Aoko, it's 5855 dmg, and for C-Tohno, 185% meter gain. Right below the 25-hit mark before the enemy's meter gain becomes a problem too.
Omit the 2B(1) after 22A if you're heading towards the corner going this. AKA, when you're not already in the corner when you start this.
This should also be possible on other characters, but hasn't been tested thoroughly at the time of this writing due to its extremely difficult execution. |
|
|
The Corner 22A Combo
- Etc. > 2C > 6B > 22A, j.A(B)C > dj.BC(A) > AT
Due to the amount of minute yet important details which surround this particular combo, it will have its own subsection apart from the rest.
This is the second of C-Tohno's two defining corner combos. It can also be done near the corner. Please remember that if you are going towards the corner doing this, as opposed to already being in there, you must omit j.B as it will not reach and the rest will drop.
You'll want to confirm into this whenever you can since it not only gives about 4K damage each time, but about 115-120% meter too. Quite the absurd departure above average in terms of reward, especially considering its meterless too. However, confirming into this combo is tricky for a number of reasons. Said reasons most primarily revolving around the 2C > 6B portion, and how characters in this game have independent falling speeds.
Certain characters will need to have a certain number on the combo counter satisfied before 2C, otherwise they'll not fall quickly enough for the 22A to connect, allowing them to airtech. Some characters might need about as much as 5 hits minimum before the 2C, and others might not need any at all. Hence the "Etc." portion not being strictly defined. Necessary hit-count varies among characters, and there isn't any particular combination of normals you're forced to stick to. Do note that this combo's execution doesn't differ at all based on whether the opponent is crouching or standing.
The following is a list of how many hits you require before 2C, based on character.
Characters Who Need:
- Neco-Arc, Neco-Arc Chaos, Nero
- Warachia
- 2 Hits Minimum Before 2C:
- Aoko, Kohaku
- 3 Hits Minimum Before 2C:
- Miyako, Len, Powered Ciel, Riesbyfe, Ryougi
- 4 Hits Minimum Before 2C:
- Akiha (Seifuku), Akiha Tohno, Ciel, Kouma, Nanaya, Tohno, White Len
- 5 Hits Minimum Before 2C:
- Akiha Vermilion, Archetype: Earth, Arcueid, Hisui, Mech-Hisui, Red Arcueid, Roa, Satsuki, Sion, Sion Tatari
It should be known that you can get the hit-count to 5 before 2C on any character, and the combo will still work the same. Of course, for those that absolutely require 5, you can't have any less. The following are some (of the most practical) examples that work on everyone. Note that all of these will include 5C. It helps to know that delaying 5C as opposed to cancelling it ASAP allows Tohno sink in, getting him to get closer to hit his next normals.
- Dash forward > 2AAA > 5B > 5C > 2C > 6B > 22A, j.A(B)C > dj.BC(A) > AT
- IAD forward > j.B(2) > land > 2A > 5B > 5C > 2C > 6B > 22A, j.A(B)C > dj.BC(A) > AT
- IAD forward > j.B(2) > land > 5B > 2B(1) > 5C > 2C > 6B > 22A, j.A(B)C > dj.BC(A) > AT (higher damage variant, tougher to confirm)
- IAD forward > j.B(2) > 5B > 5C > 2B(2) > 6B > 22A, j.A(B)C > dj.BC(A) > AT (highest damage variant, toughest to do and confirm)
Now here's where it gets tricky. The above information is relevant ONLY if you perform the combo with similar timing across characters (which is how you should be doing it most of the time regardless in order to confirm right.) The "number of hits you need per character list" in a more objective manner of speaking, is less the actual hit-count you need, but the amount recommended to let the combo go smoothly. For example, Sion Tatari is listed as "5 Hits Minimum Before 2C", when in actuality, it's 1. On her, if you do Normal > 2C, then delay 6B as long as possible before 22A, gravity won't matter at that point as she's low enough for the Special to connect. The above list and combos are there since the delay timing is tough regardless, and the lesser hits make practical confirms even tougher. Nonetheless, this is good to know when labbing/theorizing/experimenting Tohno setups and confirms, just to have that extra bit of leverage. It may be difficult to make practical, but certainly not impossible as this knowledge has been demonstrated and put to practice by past Tohno players.
So with this bit of information in mind, the following is a list of:
Characters Who Need:
- No Hits Before 2C Delayed into 6B:
- Akiha Tohno, Akiha (Seifuku), Aoko, Ciel, Kouma, Kohaku, Len, Miyako, Neco-Arc, Neco-Arc Chaos, Nanaya Shiki, Nero, Powered Ciel, Riesbyfe, Ryougi, Tohno Shiki, Warachia, White Len
- 1 Hit Minimum Before 2C Delayed into 6B:
- Akiha Vermilion, Archetype: Earth, Arcueid, Hisui, Mech, Red Arcueid, Roa, Satsuki, Sion, Sion Tatari
Additional Resources
C-Tohno Match Video Database
Melty Bits: C-Tohno
Notable Players
| Name |
Color
|
Region |
Common Venues |
Status |
Details
|
| Alps |

|
North America |
Lunar Phase, Netplay |
Active |
Nanaya main, but has played C-Tohno a good bit and is very knowledgeable.
|
backward
(バックワード) |

|
Japan |
Play Spot BIG ONE 2nd, Port24 |
Active |
|
DannySsB
|

|
South America |
Netplay |
Active |
C-Kohaku main who also knows C-Tohno very well. Found in MeltySud.
|
narusora
(なるそら) |

|
Japan |
A-cho, KorewaMelty Play Spot BIG ONE 2nd |
Active |
Very technical player, showcases a lot of sick combo routing.
|
| Smug |

|
Brazil |
Netplay |
Active |
|
| T.I |

|
Japan |
A-cho, KorewaMelty |
Inactive |
|
MBAACC Navigation

