Character Page Progress
This page is still a work in progress, consider joining as an editor to help expand it. Please update this character's roadmap page when one of the editing goals have been reached.
| In Progress |
To-do
|
- Overview
- Add a short summary of this character with a list of strengths and weaknesses.
- (Players to watch/ask)
- (If you know any players in particular that can be helpful for learning this character, please add them with, if possible a way to contact them (such as a Discord handle) and a name that can be searched in the match video database.)
- Move Descriptions:
- Add missing LA frame data.
|
- Additional Ressources/Players to watch/ask
- Add any external links to ressources such as video guides or articles.
|
Overview
Strengths / Weaknesses
| Strengths
|
- Very high reward on air counterhits and grounded hits.
- Universal corner mixup into high damage.
- Easy to understand, powerful neutral tools.
|
| Weaknesses
|
- Somewhat linear pressure with no plus frames on B/C normals.
- Weak at catching jumps, especially outside of 5B range.
- Can struggle in neutral against characters that have good options against 236X.
- High execution ceiling.
|
Additional Resources
F-Arcueid Match Video Database
F-Arc Basic Resources
Players to watch/ask
JP:
Move Descriptions
| Frame Data Help
|
| Header
|
Tooltip
|
| Move Box Colors
|
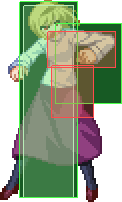
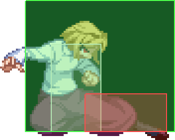
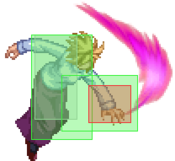
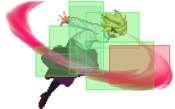
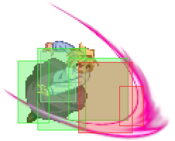
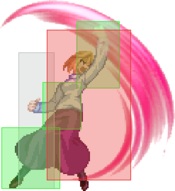
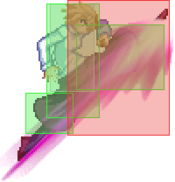
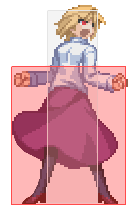
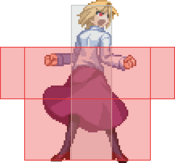
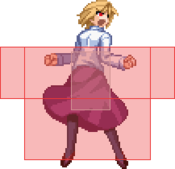
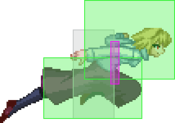
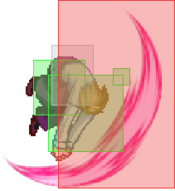
Light gray = Collision Box (A move lacking one means it can go through the opponent's own collision box).
Green: Hurt Boxes.
Red: Hit(/Grab) Boxes.
Yellow: Clash Boxes (When an active hitbox strikes a clash box, the active hitbox stops being active. Multi-hit attacks can beat clash since they will still progress to the next hitbox.)
Magenta: Projectile-reflecting boxes OR Non-hit attack trigger boxes (usually).
Blue: Reflectable Projectile Boxes.
|
| Damage
|
Base damage done by this attack.
(X) denotes combined and scaled damage tested against standing V. Sion.
|
| Red Damage
|
Damage done to the recoverable red health bar by this attack. The values are inherently scaled and tested against standing V. Sion.
(X) denotes combined damage.
|
| Proration
|
The correction value set by this attack and the way it modifies the scaling during a string. See this page for more details.
X% (O) means X% Overrides the previous correction value in a combo if X is of a lower percentage.
X% (M) means the current correction value in a combo will be Multiplied by X%. This can also be referred to as relative proration.
|
| Circuit
|
Meter gained by this attack on hit.
(X%) denotes combined meter gain.
-X% denotes a meter cost.
|
| Cancel
|
Actions this move can be cancelled into.
SE = Self cancelable.
N = Normal cancelable.
SP = Special cancelable.
CH = Cancelable into the next part of the same attack (Chain in case of specials).
EX = EX cancelable.
J = Jump cancelable.
(X) = Cancelable only on hit.
-X- = Cancelable on whiff.
|
| Guard
|
The way this move must be blocked.
L = Can block crouching
H = Can block standing.
A = Can block in the air.
U = Unblockable.
|
| Startup
|
Amount of frames that must pass prior to reaching the active frames. Also referred to as "True Startup".
|
| Active
|
The amount of frames that this move will have a hitbox.
(x) denotes frame gaps where there are no hitboxes is present. Due to varied blockstuns, (x) frames are difficult to use to determine punish windows. Generally the larger the numbers, the more time you have to punish.
X denotes active frames with a duration separate from its origin move's frame data, such as projectile attacks. In this case, the total length of the move is startup+recovery only.
|
| Recovery
|
Frames that this move has after the active frames if not canceled. The character goes into one frame where they can block but not act afterwards, which is not counted here.
|
| Advantage
|
The difference in frames where you can act before your opponent when this move is blocked (assuming the move isn't canceled and the first active frame is blocked).
If the opponent uses a move with startup that is at least 2 frames less than this move's negative advantage, it will result in the opponent hitting that move.
±x~±y denotes a range of possible advantages.
|
| Invul
|
Lists any defensive properties this move has.
X y~z denotes X property happening between the y to z frames of the animations. If no frames are noted, it means the invincibility lasts through the entire move.
Invicibility:
- Strike = Strike invincible.
- Throw = Throw invincible.
Hurtbox-Based Properties:
- Full = No hurtboxes are present.
- High = Upper body lacks a hurtbox.
- Low = Lower body lacks a hurtbox.
Miscellaneous Properties
- Clash = Frames in which clash boxes are active.
- Reflect = Frames in which projectile-reflecting boxes are active.
- Super Armor = Frames in which the character can take hits without going into hit stun.
|
Normal Moves
Standing Normals
|
|
| Damage
|
Red Damage
|
Proration
|
Cancel
|
Guard
|
| 300
|
151
|
75% (O)
|
-SE-, -N-, -SP-, -EX-, (J)
|
LH
|
| First Active
|
Active
|
Recovery
|
Frame Adv
|
Circuit
|
Invuln
|
| 5
|
4
|
5
|
3
|
2.7%
|
-
|
|
Fast elbow jab, shorter range, chainable into itself or 2A. Very plus on block so good move for tick throw/6C mixups. In alternating 5A2A pressure can whiff and then go into 5B to catch mashing. Can be used as an anti-air but not very reliable.
|
|
|
|
| Damage
|
Red Damage
|
Proration
|
Cancel
|
Guard
|
| 700
|
404
|
80% (O)
|
N, SP, EX, (J)
|
LH
|
| First Active
|
Active
|
Recovery
|
Frame Adv
|
Circuit
|
Invuln
|
| 7
|
4
|
12
|
-1
|
6.3%
|
-
|
|
Fast poke that moves Arc slightly forward, great range. Slightly negative on block but staggered 5B 5B frame traps are very strong because of the range it controls. Dash 5B moves Arc across the screen ridiculously fast and can be used to punish careless backdashes from a distance, catch opponents trying to jump a screenlength away, or slow zoning. This can be easily countered but it should still keep opponent wary from a distance. Can be a semi-reliable anti-air against low aerial approaches. This move can also catch people trying to jump out of frame traps pretty easily but since the hitstun is low, can be difficult to confirm unless you anticipate it.
|
|
5C 5C 5C~C 5C~C 5[C] 5[C]
|
| 5C
|
Damage
|
Red Damage
|
Proration
|
Cancel
|
Guard
|
| 1000
|
707
|
90% (O)
|
N, SP, (CH), EX, (J)
|
LH
|
| First Active
|
Active
|
Recovery
|
Frame Adv
|
Circuit
|
Invuln
|
| 8
|
4
|
23
|
-9
|
9.0%
|
-
|
| ~C
|
Damage
|
Red Damage
|
Proration
|
Cancel
|
Guard
|
| -
|
-
|
-
|
-
|
-
|
| First Active
|
Active
|
Recovery
|
Frame Adv
|
Circuit
|
Invuln
|
| 6
|
X
|
0
|
-
|
-
|
-
|
|
Haven’t found much use for this move outside of pressure. Can be half-charged to fake an unblockable attempt -- this will generally only beat mashing attempts and lose to shields. Special note, if it hits an airborne opponent they will be sent flying to the other side of the screen, hit C again on hit to command airdash and follow them. This is useful for corner carry combos.
|
| 5[C]
|
Damage
|
Red Damage
|
Proration
|
Cancel
|
Guard
|
| 2500
|
2020
|
100% (O)
|
-
|
U
|
| First Active
|
Active
|
Recovery
|
Frame Adv
|
Circuit
|
Invuln
|
| 39
|
2
|
27
|
-
|
16.2%
|
-
|
|
Fully-charged 5C is unblockable. On CH opponent will be sent flying backwards and is comboable. Midscreen use dash 5B to confirm, in corner use anything you want. Easily shieldable/mashable/DPable/anything by non-sleeping opponents but can occasionally take opponents off-guard so use sparingly. May be able to bait an opponent into whiffing a shield -- say, a string like 5A5A dash 5[C], in order to get that ridiculously high CH damage but it's a definite risk.
|
|
Crouching Normals
|
|
| Damage
|
Red Damage
|
Proration
|
Cancel
|
Guard
|
| 350
|
202
|
72% (O)
|
-SE-, -N-, -SP-, -EX-, (J)
|
L
(Whiffs vs Air.)
|
| First Active
|
Active
|
Recovery
|
Frame Adv
|
Circuit
|
Invuln
|
| 5
|
4
|
5
|
3
|
2.7%
|
-
|
|
Fast low kick, decent range, chainable into itself or 5A. Best move for mashing out, good in pressure.
|
|
|
|
| Damage
|
Red Damage
|
Proration
|
Cancel
|
Guard
|
| 450
|
303
|
70% (O)
|
N, SP, EX, (J)
|
L
|
| First Active
|
Active
|
Recovery
|
Frame Adv
|
Circuit
|
Invuln
|
| 7
|
4
|
13
|
-2
|
4.5%
|
-
|
|
Solid low poke with a very nice hitbox that extends a good distance past Arc's hittable box. Pretty good move for ground footsies or trying to catch landing opponents.
|
|
|
|
| Damage
|
Red Damage
|
Proration
|
Cancel
|
Guard
|
| 1000
|
505
|
80% (O)
|
N, SP, EX, (J)
|
L
|
| First Active
|
Active
|
Recovery
|
Frame Adv
|
Circuit
|
Invuln
|
| 8
|
4
|
17
|
-3
|
9.0%
|
-
|
|
Great low sweep. Fast and long, relatively safe hitbox, easily confirmable into 236B 623B aircombo on most hits for good damage. Will beat many jump-out attempts in pressure strings. Try not to use as an anti-air, you will probably lose badly.
|
|
Aerial Normals
|
|
| Damage
|
Red Damage
|
Proration
|
Cancel
|
Guard
|
| 300
|
202
|
75% (O) / 40% (O)
|
SE, N, SP, EX, J
|
HA
|
| First Active
|
Active
|
Recovery
|
Frame Adv
|
Circuit
|
Invuln
|
| 5
|
4
|
10
|
-
|
2.7%
|
-
|
|
Quick air poke with bad range. Since it’s full moon it needs to be blocked high. Pretty standard, mostly noteworthy for use in fuzzy setups.
|
|
|
|
| Damage
|
Red Damage
|
Proration
|
Cancel
|
Guard
|
| 700
|
505
|
90% (O)
|
N, SP, EX, J
|
HA
|
| First Active
|
Active
|
Recovery
|
Frame Adv
|
Circuit
|
Invuln
|
| 7
|
3
|
-
|
-
|
5.4%
|
-
|
|
Average air normal. 6 frame startup, not a lot of active frames and a weak vertical hitbox but good horizontal range.
|
|
|
|
| Damage
|
Red Damage
|
Proration
|
Cancel
|
Guard
|
| 900
|
606
|
90% (M)
|
N, SP, EX, J
|
HA
|
| First Active
|
Active
|
Recovery
|
Frame Adv
|
Circuit
|
Invuln
|
| 7
|
5
|
-
|
-
|
6.3%
|
-
|
|
6 frame startup, lots of active frames and a very nice hitbox that extends downwards and out from Arc. Good for fishing for counterhits but try to avoid mashing it mindlessly every time you jump, the startup will allow many moves to CH you first (ugh Miyako). Best done pretty early to give it time to establish spacial dominance.
|
|
Command Normals
|
|
| Damage
|
Red Damage
|
Proration
|
Cancel
|
Guard
|
| 700
|
505
|
60% (O)
|
SP, EX, (J)
|
LH
|
| First Active
|
Active
|
Recovery
|
Frame Adv
|
Circuit
|
Invuln
|
| 11
|
6
|
25
|
-13
|
6.3%
|
-
|
|
Standard launcher, mostly used in easy combos. Also good in pressure strings for adding extra guard damage before a 236A/B. Can only be special cancelled.
|
|
|
|
| Damage
|
Red Damage
|
Proration
|
Cancel
|
Guard
|
| 1200
|
1010
|
70% (O)
|
-SP-, -EX-
|
HA
|
| First Active
|
Active
|
Recovery
|
Frame Adv
|
Circuit
|
Invuln
|
| 27
|
8
|
14
|
-4
|
7.2%
|
-
|
|
Overhead. Can be special cancelled on landing, standard combo followup is 623A. 236A/B if they block to reset pressure. This move is slow and easily reactable. Has its uses, however. It will counterhit most 2A mash attempts and, if mixed in as a fake tick throw attempt it will beat OS throw/low shield. Since overhead startup looks and sounds like superjump forward can fake it with sj9. Use this move to get in on bad opponents who won’t shield it 100%, otherwise you gotta mix this one up. Damage afterwards is decent though.
|
|
|
|
| Damage
|
Red Damage
|
Proration
|
Cancel
|
Guard
|
| 750
|
404
|
100%
|
-SP-, -EX-
|
LHA
|
| First Active
|
Active
|
Recovery
|
Frame Adv
|
Circuit
|
Invuln
|
| 9
|
8
|
14
|
2 (TK)
|
7.2%
|
-
|
|
Claw dive, can be blocked either way. Special-cancelable on landing, on ground CH easily confirmable into basically any bnb. Somewhat slow and easily punishable, but has its utility. Use when above an airborne opponent to CH them out of poorly placed attacks, to punish mashing on the ground, or in pressure. Fun-to-use and can go into good damage even midscreen if willing to burn meter. Will trade with many anti-airs (this generally results in terrible things for the Arc player) and if opponent is on top of things they can punish outright whiffs.
|
|
|
|
| Damage
|
Red Damage
|
Proration
|
Cancel
|
Guard
|
| 600, 800 (1282)
|
(647)
|
100%
|
(J)
|
LHA
|
| First Active
|
Active
|
Recovery
|
Frame Adv
|
Circuit
|
Invuln
|
| 7
|
2 (16) 3
|
3
|
-15, 3 (TK)
|
7.2%*2 (14.4%)
|
-
|
|
Combo ender. Ground techable, punish back and neutral techs with j.2B and forward techs out of the corner with whiffed air-normal into 5A/2A combo but the timing is irritatingly tight. Has a few other non-obvious uses. Moves Arc forward, so you can use its momentum to propel across the screen. This is useful after, say, double super-jumping out of corner pressure, forcing the opponent to reach further for a punish.
|
|
Universal Mechanics
~2 ~2
|
| Ground Throw
|
Damage
|
Red Damage
|
Proration
|
Cancel
|
Guard
|
| 700
|
489
|
40%
|
-
|
U
|
| First Active
|
Active
|
Recovery
|
Frame Adv
|
Circuit
|
Invuln
|
| 3
|
1
|
20
|
-
|
0.0%
|
-
|
|
Wallslams in the corner and is comboable.
|
| ~2
|
Damage
|
Red Damage
|
Proration
|
Cancel
|
Guard
|
| 1500
|
391
|
40%
|
-
|
U
|
| First Active
|
Active
|
Recovery
|
Frame Adv
|
Circuit
|
Invuln
|
| 3
|
1
|
20
|
-
|
0.0%
|
-
|
|
Hold 2 to slam them next to you with a hard knockdown. Can be used to take an opponent out of the corner, allowing for a crossup with Arcueid's crossup dash. Works against all characters except for Sion, VSion, Ciel and Ryougi. Not worth using once your opponent knows you have it since you put yourself in the corner.
|
|
|
|
| Damage
|
Red Damage
|
Proration
|
Cancel
|
Guard
|
1600 (Raw)
1200 (Ender)
|
489
|
30%
|
-
|
U
|
| First Active
|
Active
|
Recovery
|
Frame Adv
|
Circuit
|
Invuln
|
| 2
|
1
|
12
|
-
|
0.0%
|
-
|
|
Arc grabs the opponent by the neck and slams them to the ground just before landing. Switches sides if not touching the corner wall (assuming there is enough space). Ground bounces and can immediately be followed up by any attack if done Raw, untechable knockdown with Arc landing at a further distance from the opponent as a combo ender.
|
|
|
|
| Standing
|
Damage
|
Red Damage
|
Proration
|
Cancel
|
Guard
|
| 500 (345)
|
202
|
45%
|
(SP), (EX), (J)
|
LHA
|
| First Active
|
Active
|
Recovery
|
Frame Adv
|
Circuit
|
Invuln
|
| 9
|
4
|
18
|
-4
|
4.5%
|
-
|
|
Same animation as C/H-Moon 3C.
|
| Aerial
|
Damage
|
Red Damage
|
Proration
|
Cancel
|
Guard
|
| 500 (345)
|
202
|
45%
|
-
|
HA
|
| First Active
|
Active
|
Recovery
|
Frame Adv
|
Circuit
|
Invuln
|
| 9
|
4
|
-
|
-
|
4.5%
|
-
|
|
Same animation as C/H-Moon j.C.
|
|
|
|
| Bunker
|
Damage
|
Red Damage
|
Proration
|
Cancel
|
Guard
|
| 500
|
202
|
100%
|
-
|
LHA
|
| First Active
|
Active
|
Recovery
|
Frame Adv
|
Circuit
|
Invuln
|
| 26
|
4
|
19
|
-5
|
0.0%
(-50.0% in blockstun)
|
Clash 1-10
|
| (Clash)
|
Damage
|
Red Damage
|
Proration
|
Cancel
|
Guard
|
| 500
|
202
|
100%
|
-
|
LHA
|
| First Active
|
Active
|
Recovery
|
Frame Adv
|
Circuit
|
Invuln
|
| 8
|
4
|
19
|
-5
|
0.0%/-50.0%
|
Strike 1-7
|
|
Moves arc slightly forward.
|
|
|
|
| Damage
|
Red Damage
|
Proration
|
Cancel
|
Guard
|
| 100
|
0
|
100%
|
-
|
U
|
| First Active
|
Active
|
Recovery
|
Frame Adv
|
Circuit
|
Invuln
|
| 16
|
6
|
25
|
-
|
uses all
|
Full 1-21
|
|
Standard heat but quite short. Cannot kill.
|
|
|
|
| Ground
|
Damage
|
Red Damage
|
Proration
|
Cancel
|
Guard
|
| 100
|
0
|
100%
|
-
|
U
|
| First Active
|
Active
|
Recovery
|
Frame Adv
|
Circuit
|
Invuln
|
| 11
|
10
|
20
|
-
|
removes all
|
Full 1-39
|
| Air
|
Damage
|
Red Damage
|
Proration
|
Cancel
|
Guard
|
| 100
|
0
|
100%
|
-
|
U
|
| First Active
|
Active
|
Recovery
|
Frame Adv
|
Circuit
|
Invuln
|
| 12
|
10
|
15
|
-
|
removes all
|
Strike 1-30
|
|
Universal burst mechanic. Unlike Crescent/Full Heat activation, the hitbox and frame data doesn't vary between characters. However, you can be thrown out of this move if you input it in the air.
|
|
Special Moves
Special Movement
|
|
| Crossup
|
Damage
|
Red Damage
|
Proration
|
Cancel
|
Guard
|
| -
|
-
|
-
|
-
|
-
|
| First Active
|
Active
|
Recovery
|
Frame Adv
|
Circuit
|
Invuln
|
| 8 (min)
|
15
|
1
|
-
|
-
|
Full 8-22
|
|
Special forward dash that makes Arc jump up behind the opponent on contact. Does not trigger if the opponent is in the corner, with no space inbetween them and the wall. If you input a special move immediately after the crossup, the input will be reversed as if done while still on the pre-crossup side.
|
|
Grounded Specials
|
|
| A
|
Damage
|
Red Damage
|
Proration
|
Cancel
|
Guard
|
| 1800
|
1414
|
80% (M)
|
-EX-
|
LH
|
| First Active
|
Active
|
Recovery
|
Frame Adv
|
Circuit
|
Invuln
|
| 15
|
12
|
9
|
0 ~ 4
|
9.9%
|
High ~12-28
|
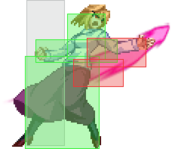
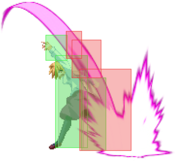
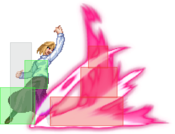
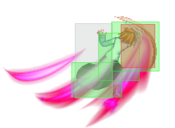
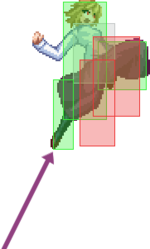
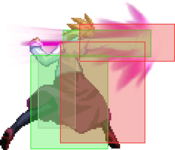
- Arcueid shoots out a power wave on the ground. Powerful, high damage, neutral tool, pressure tool, and combo tool. Very versatile.
Tall wave, even on block at worst. Combos off of 2C with previous hits, so you'll be using this a lot. Reasonably easy to space to be very plus, but you're far away. Situational antiair, head has no hurtbox around the time it's active. Full launches on counterhit for massive damage. Less hitstun on grounded hit, so you always want to 2C into this mid combo.
|
| B
|
Damage
|
Red Damage
|
Proration
|
Cancel
|
Guard
|
| 1700
|
1313
|
80% (M)
|
-EX-
|
L
|
| First Active
|
Active
|
Recovery
|
Frame Adv
|
Circuit
|
Invuln
|
| 16
|
12
|
11
|
1 ~ 9
|
9.9%
|
-
|
|
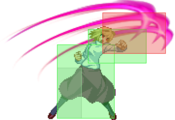
Long wave, at least +1 on block. Only combos off of raw 2C or air hit 2C, so you use this mid combo. Arc crouches, so it can be a decent antiair. Also full launches on counterhit and has less hitstun on ground hit.
|
| EX
|
Damage
|
Red Damage
|
Proration
|
Cancel
|
Guard
|
| 500, 1000*3 (1981)
|
(1349)
|
60% (O), 100%
|
(J)
|
LH, LHA
|
| First Active
|
Active
|
Recovery
|
Frame Adv
|
Circuit
|
Invuln
|
| 5+6
|
19
|
18
|
-11 ~ -3
|
-100.0%
|
-
|
|
Meter burn tool. Very minus on block. That first 3C-like hit is air unblockable, but you're never going to use this to anti-air. OTG relaunches for ok damage. Only use this to burn meter/combo off of 623A midscreen.
|
|
A A ~6X ~6X B B ~6X ~6X EX EX
|
| A
|
Damage
|
Red Damage
|
Proration
|
Cancel
|
Guard
|
| 700
|
505
|
90% (O)
|
-CH-
|
LA
|
| First Active
|
Active
|
Recovery
|
Frame Adv
|
Circuit
|
Invuln
|
| 7
|
4
|
16
|
-8
|
6.3%
|
-
|
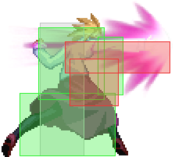
- Arcueid moves foward and claws at the opponent.
Arcueid moves foward and claws downwards. Hits low. Situational poke and frame trap move due to its range and speed.
|
| B
|
Damage
|
Red Damage
|
Proration
|
Cancel
|
Guard
|
| 1000
|
808
|
75% (O)
|
-CH-, -EX-, (J)
|
LH
|
| First Active
|
Active
|
Recovery
|
Frame Adv
|
Circuit
|
Invuln
|
| 8
|
6
|
17
|
-5
|
9.0%
|
-
|
|
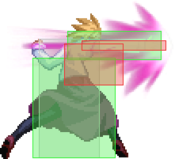
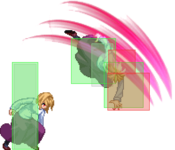
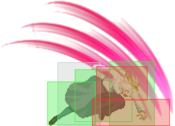
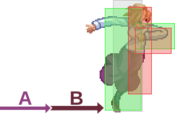
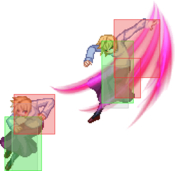
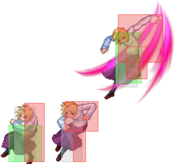
Arcueid moves foward, and claws upwards. Air Unblockable. You do this after your launcher and follow with an air combo. Raw 623B gets you a full combo on air counterhit, but often gets no followup on regular hit.
|
| A~6X
|
Damage
|
Red Damage
|
Proration
|
Cancel
|
Guard
|
| 700
|
505
|
50% (O)
|
(J)
|
LH
|
| First Active
|
Active
|
Recovery
|
Frame Adv
|
Circuit
|
Invuln
|
| 15
|
1
|
27
|
-13
|
3.6%
|
-
|
| B~6X
|
Damage
|
Red Damage
|
Proration
|
Cancel
|
Guard
|
| 700
|
505
|
50% (O)
|
(SP), (EX), (J)
|
LH
|
| First Active
|
Active
|
Recovery
|
Frame Adv
|
Circuit
|
Invuln
|
| 16
|
2
|
23
|
-7
|
3.6%
|
-
|
|
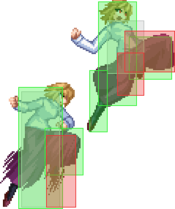
A: Arcueid moves foward and claws upwards. Hits mid and wallslams. Key combo move, -13 on block. Importantly, the followup always leaves a gap, so opponents can reversal out and punish both followup and no followup.
B: Very niche combo tool that you probably will never use.
|
| EX
|
Damage
|
Red Damage
|
Proration
|
Cancel
|
Guard
|
| 500, 300*6, 600 (2316)
|
(1695)
|
70% (O)
|
-
|
LHA
|
| First Active
|
Active
|
Recovery
|
Frame Adv
|
Circuit
|
Invuln
|
| 4+6
|
13 (15) 1
|
25
|
-14
|
-100.0%
|
-
|
|
Super version of Arcueid's 623A~6A. Very bad on block. Guarantees full air untech time near corner and eliminates the need for 1f links in combos. Sets up for corner mixups with 623C into 2C/623A.
|
|
B~A B~A B~B B~B B~[B] B~[B] B~C B~C B~C~C B~C~C
|
| A
|
Damage
|
Red Damage
|
Proration
|
Cancel
|
Guard
|
| 800
|
404
|
100%
|
-EX-
|
LH
|
| First Active
|
Active
|
Recovery
|
Frame Adv
|
Circuit
|
Invuln
|
| 16
|
5
|
15
|
-2
|
9.0%
|
-
|
| B
|
Damage
|
Red Damage
|
Proration
|
Cancel
|
Guard
|
| 700
|
505
|
60% (O)
|
-CH-, -EX-
|
LH
|
| First Active
|
Active
|
Recovery
|
Frame Adv
|
Circuit
|
Invuln
|
| 14
|
8
|
15
|
-5
|
6.3%
|
-
|
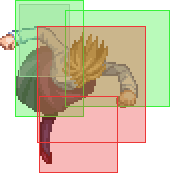
- Arcueid moves foward and strikes with her elbow. Can be useful as a launcher.
A: Arcueid moves fowards and hits the opponent with her elbow. This move has sketchy frame data on this moon and usually isn't plus.
B: Arcueid moves further. Deals 100 damage less than A version. Also not great in pressure due to bad frame data. Kind of a gimmick, but useful as a niche combo tool. Has multiple followups listed below.
|
| B~A
|
Damage
|
Red Damage
|
Proration
|
Cancel
|
Guard
|
| -
|
-
|
-
|
-
|
-
|
| First Active
|
Active
|
Recovery
|
Frame Adv
|
Circuit
|
Invuln
|
| -
|
-
|
29
|
-12
|
-
|
Full 6-20
|
| B~B
|
Damage
|
Red Damage
|
Proration
|
Cancel
|
Guard
|
| 300, 800
|
202, 303
|
80% (M), 65% (O)
|
(N), (SP), (EX), (J)
|
LHA*
|
| First Active
|
Active
|
Recovery
|
Frame Adv
|
Circuit
|
Invuln
|
| 10
|
2 (2) 9
|
33
|
-24
|
2.7%, 7.2% (9.9%)
|
-
|
| B~[B]
|
Damage
|
Red Damage
|
Proration
|
Cancel
|
Guard
|
| 900
|
303
|
50% (O)
|
N, SP, EX, J
|
H
|
| First Active
|
Active
|
Recovery
|
Frame Adv
|
Circuit
|
Invuln
|
| 35
|
9
|
36
|
-27
|
7.2%
|
-
|
| B~C
|
Damage
|
Red Damage
|
Proration
|
Cancel
|
Guard
|
| 700
|
404
|
100%
|
(CH), EX
|
LHA
|
| First Active
|
Active
|
Recovery
|
Frame Adv
|
Circuit
|
Invuln
|
| 9
|
5
|
26
|
-13
|
6.3%
|
-
|
| B~C~C
|
Damage
|
Red Damage
|
Proration
|
Cancel
|
Guard
|
| -
|
-
|
-
|
-
|
-
|
| First Active
|
Active
|
Recovery
|
Frame Adv
|
Circuit
|
Invuln
|
| 5
|
X
|
0
|
-
|
-
|
-
|
|
214B Followups:
~A: Arcueid does a quick teleport foward. Double digit minus, punishable on reaction.
~B/[B]: Arcueid does C-Moon's 4C. Can also be charged. Hits mid, high if charged. Use this in midscreen routes and post 214B OTG universally.
~C: Arcueid does her 5C. Can't be charged, but if it hits, she can follow up with her superjump pursuit. Sometimes useful combo tool.
|
| EX
|
Damage
|
Red Damage
|
Proration
|
Cancel
|
Guard
|
| 800, 600*2, 1000 (2602)
|
(2137)
|
100%
|
-
|
LH
|
| First Active
|
Active
|
Recovery
|
Frame Adv
|
Circuit
|
Invuln
|
| 6+7
|
8
|
18
|
-11
|
-100.0%
|
Clash 2-8
|
|
Niche defensive option and combo tool with clash on frames 2-8. Can be used as part of option selects to beat options such as shield counter and bunker. Automatically follows up on hit with a series of air attacks, but near the corner and on counterhit sometimes your opponent falls out. OTGs with a single hit, but generally inferior to other ex moves for this purpose.
|
|
|
|
| A/B
|
Damage
|
Red Damage
|
Proration
|
Cancel
|
Guard
|
| -
|
-
|
-
|
-
|
-
|
| First Active
|
Active
|
Recovery
|
Frame Adv
|
Circuit
|
Invuln
|
| -
|
-
|
35
|
-
|
-
|
Full 8-27
|
EX
~2
|
Damage
|
Red Damage
|
Proration
|
Cancel
|
Guard
|
1400 (1356)
2700 (2615)
|
(852)
(1620)
|
100%
|
-
|
LH
|
| First Active
|
Active
|
Recovery
|
Frame Adv
|
Circuit
|
Invuln
|
| 3+8
|
8
|
17
|
-9
|
-100.0%
|
Full 5-24
|
|
Frame 5 invuln shieldable air unblockable hitgrab. Recovers quickly, so it can be hard to punish on whiff. Use this for sideswitch routes and as a reversal against specific options as well as a situational antiair. Can press 2 during the throw for a hard knockdown.
|
|
A A B B (Followup on hit) (Followup on hit) EX
(Last 2 hitboxes are repeated) EX
(Last 2 hitboxes are repeated)
|
| A
|
Damage
|
Red Damage
|
Proration
|
Cancel
|
Guard
|
| 700, 500 (1125)
|
(560)
|
100%
|
EX
|
LH
|
| First Active
|
Active
|
Recovery
|
Frame Adv
|
Circuit
|
Invuln
|
| 6
|
2 (1) 7
|
32
|
-24, -21
|
6.3%, 4.5% (10.8%)
|
Full 1-3, High 4-8
|
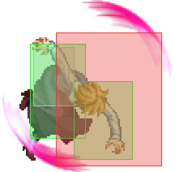
- Arcueid jumps and claws upwards. Useful for catching aerial opponents.
Hits twice, full invuln on frames 1-3 and hits on frame 6. Useful for getting air counterhits.
|
| B
|
Damage
|
Red Damage
|
Proration
|
Cancel
|
Guard
|
| 600*2, 400*2, 800 (1840)
|
(1056)
|
70% (O)
|
EX
|
LH
|
| First Active
|
Active
|
Recovery
|
Frame Adv
|
Circuit
|
Invuln
|
| 5
|
4 (1) 7
|
47
|
-41 ~ -32
17 (IH)
|
5.4%*2, 3.6%*2, 7.2% (25.2%)
|
Full 1-2, 7-8
High 3-6, 9
|
|
Hits four times with an automatic followup on hit. Hits on frame 5, full invuln on frames 1-2 and 7-8. Good tool for hard knockdown and your go to IH move.
|
| EX
|
Damage
|
Red Damage
|
Proration
|
Cancel
|
Guard
|
| 600*2, 500*2, 300, 500*2, 300 (3134)
|
(2184)
|
100%
|
-
|
LH
|
| First Active
|
Active
|
Recovery
|
Frame Adv
|
Circuit
|
Invuln
|
| 2+2
|
35
|
40
|
-45 ~ -54
|
-100.0%
|
Full 1-11
|
|
Frame 4, full invuln 1-11. F-Arc's only fully invulnerable reversal. OTG relaunches, so in the corner, you can cover all options after a soft knockdown with 22C. 22C into OTG 22C will probably kill most characters at 25% life or less.
|
|
Aerial Specials
|
|
A/C
/ B
|
Damage
|
Red Damage
|
Proration
|
Cancel
|
Guard
|
| -
|
-
|
-
|
-N-, -J-
|
-
|
| First Active
|
Active
|
Recovery
|
Frame Adv
|
Circuit
|
Invuln
|
| -
|
-
|
33 / 31
/ 37
|
-
|
-
|
Full 8-27
/ 12-31
|
- Arc's air teleport series. Niche movement and escape tool.
A: Medium forward teleport, frame 8 invuln.
B: Long forward teleport, frame 12 invuln.
C: Short backwards teleport, frame 8 invuln.
|
|
Arc Drive
(Chain textures unavailable) (Chain textures unavailable)
|
| Damage
|
Red Damage
|
Proration
|
Cancel
|
Guard
|
| 0, 350*10, 700 (3310)
|
(2365)
|
100%
|
-
|
LH
|
| First Active
|
Active
|
Recovery
|
Frame Adv
|
Circuit
|
Invuln
|
| 15+1
|
2
|
54
|
-
|
removes all
|
Full 1-19
|
|
Arcueid summons chains towards where she's facing, dealing roughly around 3332 damage raw on Archetype Earth. Air unblockable. Hits the entire screen horizontally with the height of about arc's the whole way.
|
|
Another Arc Drive
(Chain textures unavailable) (Chain textures unavailable)
|
| Damage
|
Red Damage
|
Proration
|
Cancel
|
Guard
|
| 0, 350*10, 700*8 (5352)
|
(4190)
|
100%
|
-
|
LH
|
| First Active
|
Active
|
Recovery
|
Frame Adv
|
Circuit
|
Invuln
|
| 14+1
|
2
|
61
|
-44
|
removes all
|
Full 1-25
|
|
Arcueid summons chains like her Arc Drive, but after the animation of her Arc Drive, she stops and summons forth many red claw waves at the opponent. Deals roughly 5482 damage raw on Archetype Earth. Hits the entire screen horizontally with the height of roughly Arc the whole way. Air unblockable.
|
|
Last Arc
Universal version Universal version Tohno/Nanaya variation Tohno/Nanaya variation
|
| Universal
|
Damage
|
Red Damage
|
Proration
|
Cancel
|
Guard
|
| 1400*7 (3800 ~ 7500)
|
(3330 ~ 6300)
|
50% + 50% * remaining BH time
|
-
|
U
|
| First Active
|
Active
|
Recovery
|
Frame Adv
|
Circuit
|
Invuln
|
| 1+7
|
-
|
-
|
-
|
removes all
|
Full 1-?
|
|
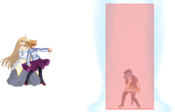
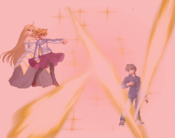
Activated in air. Arcueid flies backwards, with an image of Archetype Earth behind her. The background fades and turns into a full moon with light emerging from cracked earth under it. Deals around 7500 damage with full meter.
|
| Nanaya/Tohno
|
Damage
|
Red Damage
|
Proration
|
Cancel
|
Guard
|
| 600*18 (3450 ~ 6700)
|
(2900 ~ 5600)
|
50% + 50% * remaining BH time
|
-
|
U
|
| First Active
|
Active
|
Recovery
|
Frame Adv
|
Circuit
|
Invuln
|
| -
|
-
|
-
|
-
|
removes all
|
Full 1-?
|
|
Special LA variation for Tohno and Nanaya which tends to do less damage. Nanaya takes more damage than Tohno. damage range for nanaya shown here
|
|
General Gameplan
Neutral
5B, 2B, and 2C are all phenomenal ground normals that cover large amounts of space. 236A and 236B net great reward on counterhit and cover huge amounts of grounded space. 623B and j.C can deter air approaches, and both have 6 active frames.
Pressure
As a Full Moon Character, F-Arc has A normals that are plus on block. However, none of her other ground normals are plus. This somewhat limits your options to effectively apply stagger pressure, as you can always be mashed against for ending on a B or C normal. Your A normals are also incredibly stubby, so you need to be careful to make sure that they don't whiff. To get around this problem, one option is to use your above average range on 5B, 2B, and 2C to play a longer range game instead of trying to rely on frame advantage. It is also important to master the timing to get fast sliding normals with Arc's dash as this brings you right back in. Closer range waves give you plus frames that you can use to press your advantage. 623A can be used to check people especially after a long range wave, but it's air blockable and -8, so use it sparingly. 623B and 5B can both be used to catch jumps. Pressure is not this character's strong suit, as she lacks powerful mixups or rebuy options.
Defense
Anti-air
F-Arc has no single best anti-air. All of her options work in different ways to cover slightly different angles and must be used in conjunction in order to effectively protect yourself from aerial approaches.
"Help there's too many options what do I do and/or Help I'm new what do i do"
Try 22X, 623B, and the universal options. Every new match/character you play, try using one new option to figure out where it's good and bad and eventually you'll be integrating everything into your gameplan.
- Shield: Shield beats any attack provided that they actually chose to do one. You can shield into DP or shield into shield counter. If this gets baited you die.
- Dash Under: Arc's dash is good enough that this can be a valid tactic if you start early enough. Depending on the situation, you can do 5A or 5B to try and catch them.
- Rising airthrow/j.A: These must be done preemptively as you are essentially trying to use them to stuff a late jump-in. You should only go for this if your opponent is consistently doing very low air buttons.
- 22C/421C: Both of these are good if you know your opponent has committed to something as both will beat out any jump-in. However, both lose to shield with 22C always getting punished and 421C usually getting punished.
Use 22C if you're confident that your opponent will press something and unsure if you'll be able to punish with shield or get something out in time and 421C if they're committing to something from further away.
- 22A/B: Both moves have startup invincibility for a few frames and then upper body through the first active frame. 22B is faster by 1 frame and gets you hard knockdown on non counterhit, but 22A will sometimes clip your opponent with the second and get you a counter that way. These moves are mostly interchangeable and are good when your opponent has no double jump or (especially with 22A which is safer) good when they wouldn't be in position to whiff punish if they baited it. These are also great for ambiguous crossup situations and times when your opponent is right above you.
- 623B: this move has 6 active frames, huge disjoint, and comes out on frame 8. However, you extend a huge hurtbox for two frames before the move is active so you need to be careful. This is great preemptively as it lasts for an incredibly long time for an antiair, but if you whiff it or are late you're in danger. It beats most IADs and diagonal approaches if timed correctly however. Additionally, this move hits standing opponents, so it can sometimes stop dashes in.
- 2B: This can beat specific problem normals such as C-Arc j.C. However, whether it works in a specific situation is usually not immediately obvious and requires labbing.
- 2C: This move has a massive disjoint right at the end of Arc's hand and will beat many moves if well spaced.
- 236B: Arc slouches down when she throws it so you will beat or trade with any move not spaced to land directly on top of you if your timing is good. However, it's easy for most characters to airdash over this if they predict it, so be careful with throwing this move out when your opponent is in the air or on the ground at the perfect IAD distance.
- 5A: This is your fastest attack since it takes time to input the 22B motion. This move is small and will lose to anything active but if you whiff it you're probably not dead.
- 5B: This move has a medium sized disjoint in front of you, so depending on spacing it will beat moves. Remember that Arc takes a big step forward so you do need to be far away, but not as far as for 2C.
- 236A: This move is very tall and will stop many iads and some other jumpins. However, it has a blind spot right in front of Arc and she also stands up tall during it, so it will often whiff.
- Low Rising j.2B: This move is very niche but it has a large hitbox with some disjoint and will beat/trade with moves. It is additionally whiff cancellable upon landing so you can go into another antiair or anti ground option if you see that you missed. This move can also counterpoke some moves with low hitboxes.
Combos
| Combo Notation Help
|
Disclaimer: Combos are written by various writers, so the actual notation used in pages can differ from the standard one.
For more information, see Glossary and Controls.
|
| X > Y
|
X input is cancelled into Y.
|
| X > delay Y
|
Must wait for a short period before cancelling X input into Y.
|
| X, Y
|
X input is linked into Y, meaning Y is done after X's recovery period.
|
| X+Y
|
Buttons X and Y must be input simultaneously.
|
| X/Y
|
Either the X or Y input can be used.
|
| X~Y
|
This notation has two meanings.
- Use attack X with Y follow-up input.
- Input X then within a few frames, input Y. Usually used for option selects.
|
| X(w)
|
X input must not hit the opponent (Whiff).
|
| j.X
|
X input is done in the air, implies a jump/jump cancel if the previous move was done from the ground.
Applies to all air chain sections:
- Assume a forward jump cancel if no direction is given.
- Air chains such as j.A > j.B > j.C can be shortened to j.ABC.
|
| sj.X
|
X input is done after a super jump. Notated as sj8.X and sj9.X for neutral and forward super jumps respectively.
|
| dj.X
|
X input is done after a double jump.
|
| sdj.X
|
X input is done after a double super jump.
|
| tk.X
|
Stands for Tiger Knee. X motion must be buffered before jumping, inputting the move as close to the ground as possible. (ex. tk.236A)
|
| (X)
|
X is optional. Typically the combo will be easier if omitted.
|
| [X]
|
Input X is held down. Also referred to as Blowback Edge (BE). Depending on the character, this can indicate that this button is held down and not released until indicated by the release notation.
|
| ]X[
|
Input X is released. Will only appear if a button is previously held down. This type of input is referred to as Negative Edge.
|
| {X}
|
Button X should only be held down briefly to get a partially charged version instead of the fully charged one.
|
| X(N)
|
Attack "X" should only hit N times.
|
| (XYZ)xN
|
XYZ string must be performed N times. Combos using this notation are usually referred to as loops.
|
| (XYZ^)
|
A pre-existing combo labelled XYZ is inserted here for shortening purposes.
|
| CH
|
The first attack must be a Counter Hit.
|
| Air CH
|
The first attack must be a Counter Hit on an airborne opponent.
|
| 66
|
Performs a ground forward dash.
|
| j.66
|
Performs an aerial forward dash, used as a cancel for certain characters' air strings.
|
| IAD/IABD
|
Performs an Instant AirDash.
|
| AT
|
Performs an Air Throw. (j.6/4A+D)
|
| IH
|
Performs an Initiative Heat.
|
| AD
|
Performs an Arc Drive.
|
| AAD
|
Performs an Another Arc Drive.
|
Miscellaneous Notes
You can do the air ch combos off of shield counter, ch 236a/236b, 421c in the corner, and gold air throw as well.
Beginner Midscreen Routes
| Condition
|
Notation
|
Damage
vs V.Sion
|
Notes
|
|
| N/A
|
- 2A > 5B > 2B > 2C > (3C) > 623B > j.ABC > dj.ABC > j.2C
|
4319
|
|
| Meter Gained: 74.7 |
Meter Given (vs C-Moon): ??? |
(Video) |
| Generic ground to air combo. Adding 3C reduces damage but gives very slightly more meter. |
|
|
| N/A
|
- 2A > 5B > 2B > 2C > 3C > 236C > j.ABC > dj.ABC > AT
|
4921
|
|
| Meter Gained: 47.2 (-100) |
Meter Given (vs C-Moon): ??? |
(Video) |
| Basic metered combo. |
|
|
| N/A
|
- 2A > 5B > 2B > 5C > 214B~{B} > j.66 > delay j.B, 5C > 623B > j.BC > dj.BC > j.2C
|
4383
|
| |
| Meter Gained: 99.9 |
Meter Given (vs C-Moon): ??? |
| Full corner to corner route. delay the double jump if not already in the corner. |
|
|
Beginner Corner Combos
| Condition
|
Notation
|
Damage
vs V.Sion
|
Notes
|
|
| In/near corner
|
- 2A > 5B > 2B > 2C > 236A > 623A~6A > 623B > j.ABC > dj.ABC j.2C
|
4790
|
| |
| Meter Gained: 94.5% |
Meter Given (vs C-Moon): 31.5% |
| Basic corner combo. Slightly delay the 623A followup. |
|
|
Beginner Air Counterhit Combos
| Condition
|
Notation
|
Damage
vs V.Sion
|
Notes
|
|
| Air Counterhit
|
- Air CH (j.C)> 5B > 623B > j.BC > j.ABC > j2C
|
4231
|
|
| Meter Gained: 62.1% |
Meter Given (vs C-Moon): 20.7% |
(Video) |
| Basic universal air CH pickup. |
|
|
| Air Counterhit
|
- Air CH (j.C) > 2C > 236B > 623B > j.BC > j.ABC > j2C
|
4956
|
| |
| Meter Gained: 74.7% |
Meter Given (vs C-Moon): 24.9% |
| Higher reward pickup that requires you to be closer to your opponent. |
|
|
Advanced Midscreen Combos
| Condition
|
Notation
|
Damage
vs V.Sion
|
Notes
|
|
| Midscreen
|
- 5B > 2B > 2C > j.2B > 623A > 5A > 2C > 236B > (623A > 5A > 2C > 236B >) 5C~C > (dl. j.BC land rejump) j.BC > dj.ABC > j.2C
|
???
|
|
| Meter Gained: ??? |
Meter Given (vs C-Moon): ??? |
(Video) |
| Works on all characters except Akihas, Ries, Len, Nero, Warc, Hisui, Necos. Needs exactly 2 hits before 2C. You can omit the first extension if you aren't confident and the second extension near the corner. Second extension is not universal. |
|
|
| Midscreen
|
- 2A > 5B > 2B > 5C > 214B~B > j.2B(w) > dl. 623A > 5A > 2C > 236B > (623A > 5A > 2C > 236B >) 5C~C > (dl. j.BC land rejump) j.BC > dj.ABC > j.2C
|
???
|
|
| Meter Gained: ??? |
Meter Given (vs C-Moon): ??? |
(Video) |
| Combo for non-neco characters above. Works on a larger list of characters if you omit earlier hits. |
|
|
Advanced Corner Combos
| Condition
|
Notation
|
Damage
vs V.Sion
|
Notes
|
|
| In/near corner
|
- 2A > 5B > 2B > 2C > 236A > 623A~A > 2C > 236B > 623A > 5A > 2C > 236B > 623A~A > 623A
|
5177
|
|
| Meter Gained: 105.3% |
Meter Given (vs C-Moon): 35.1% |
(Video) |
| Advanced corner combo. 623A ender for HKD |
|
|
| In/near corner
|
- 2A > 5B > 2B > 2C > 236A > 623A~A > 2C > 236B > 623A > 5A > 2C > 236B > 623A~A > 5B > j.ABC > dj.ABC j.2C
|
5611
|
| |
| Meter Gained: 148.5% |
Meter Given (vs C-Moon): 54.8% |
| Advanced corner combo. 1F link on 623A~A > 2C and 623A~A > 5B |
|
|
Advanced Air Counterhit Combos
| Condition
|
Notation
|
Damage
vs V.Sion
|
Notes
|
|
| Air counterhit
|
- Air CH (j.C) > 5B > 2C > dl. 623A > 5A > 2C > 236B > 623B > j.BC > dj.BC > j.2C
|
5718
|
|
| Meter Gained: 96.3% |
Meter Given (vs C-Moon): 32.1% |
(Video) |
| stronger universal combo than the above routes, but much harder. |
|
|
| Air counterhit
|
- air ch > 5B > 2C > dl. 623A > 5B > 2C > dl.623A > 5A > 2C > 236B > 623B > j.BC > dj.BC > j.2C
|
???
|
|
| Meter Gained: ??? |
Meter Given (vs C-Moon): ??? |
(Video) |
| even stronger and harder combo. The hardest combo that is universal. |
|
|
MBAACC Navigation
