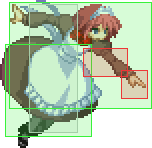
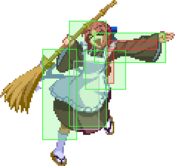
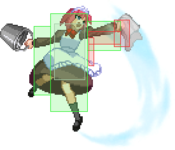
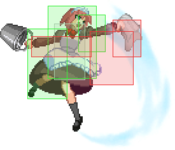
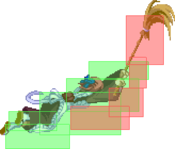
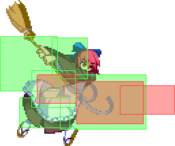
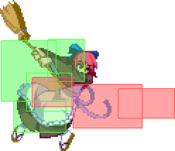
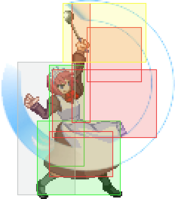
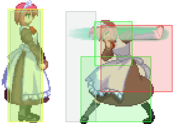
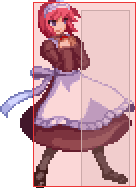
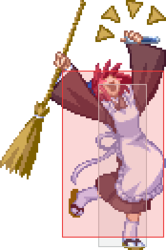
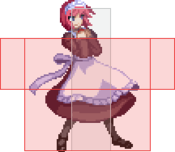
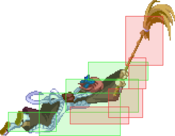
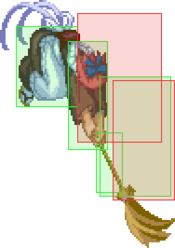
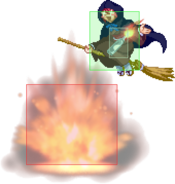
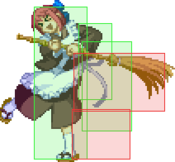
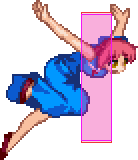
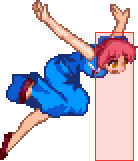
Character Page Progress
This page is still a work in progress, consider joining as an editor to help expand it. Please update this character's roadmap page when one of the editing goals have been reached.
| In Progress |
To-do
|
- General Gameplan:
- "Pressure" section in progress.
- Move Descriptions:
- Expand upon the shorter move descriptions, cite their uses, add captions where helpful, etc.
|
- Overview/General Gameplan:
- Add Strengths/Weaknesses.
- Add "Defense" section.
- Combos:
- Due to the new template, combos have missing meter numbers. Add any video links if needed.
- Additional Ressources/Players to watch/ask
- (Add any external links to ressources such as video guides or articles.)
- If you know any players in particular that can be helpful for learning this character, please add them with, if possible a way to contact them (such as a Discord handle) and a name that can be searched in the match video database.
|
Additional Resources
F-Maids Match Video Database
Konbu (昆布) F-Maids Footage
Notable Players
| Name |
Color
|
Region |
Common Venues |
Status |
Details
|
Pneko
(P猫) |

|
Japan |
BigOne2nd |
Active |
The gold standard for F-Maids. X-Copying their tech will help you greatly. Likes cats a reasonable amount.
|
GoldyDorado01
(GoldyDorado01#2459) |

|
Europe |
Netplay |
Active |
Relatively new to the scene but is the most active F-Maids player nowadays that isn't Pneko. Willing to help anyone wanting to learn the character. Hangs around in the Community Discord
|
Sannos
(Sannos#0536) |

|
Europe |
Netplay |
Active |
The best western F-Maids at the moment, but knowing where they are can be as challenging as beating them in a match.
|
Overview
Playstyle
 F-Maids Is the resident puppet character of AACC, using both Hisui and Kohaku in tandem to overwhelm their opponents limited only by resources. F-Maids Is the resident puppet character of AACC, using both Hisui and Kohaku in tandem to overwhelm their opponents limited only by resources. |
| Pros |
Cons |
- Insane pressure: Some of the strongest pressure in all of MBAACC when hearts are stored, with moves being both frame traps and reset points with absurd frame advantage that are difficult to contest even with reversals. Assists also can be combined with throws to reduce the tech window and add damage, and prevent certain defensive options, allowing for a robust strike/throw game.
- Oppressive set-play: Very good setplay thanks to Kohaku 22X specials and Hisui's chairs and 236CC. You'll often get multiple uncontestable high/low mixups once you get going.
- Strong neutral: Kohaku lead retains F-Kohaku's strong normals and can fight at long range by harassing the opponent with assists and 5[C].
- Good damage potential: With the right setup and sister placement, F-Maids damage can reach very high damage numbers.
|
- Very weak without resources: Without hearts or with a sister down, they both become extremely vulnerable and need to play smart while waiting for an opportunity to recharge hearts.
- Low average damage: F-Maids' 3C launcher is nerfed to multiplicative proration on both Hisui and Kohaku and they lose relevant combo specials compared to their solo counterparts, like F-Hisui 623X and F-Kohaku j.214C. This leaves them with rather low average damage.
- Awful defense: Both Hisui and Kohaku have fast but miniscule 2As, so their abare options are limited, and they don't have any good specials to use out of shield. Additionally, their health is significantly lower than their solo counterparts, and they lack reversals outside of Arc Drives and system mechanics.
- Very poor ways to spend meter: Extremely poor meter usage due to their limited movepool. You'll be mostly spending meter for Kohaku 22C. Hisui 22C is too slow to be useful, and 5[C]>236C with Kohaku can't always be used, making avoiding reaching MAX a hard task.
|
General Gameplan
F-Maids is, in a game with 9 different duo characters, the actual puppeteer of the game. In contrast to those teams, which normally retain most if not all of their special attacks, gain new ones, or keep some of their command normals, F-Maids only has access to 22X and 3C as specials and command normals respectively (with the minor exception of Kohaku's 5[C] 236X followups.) This means each maid is significantly weaker by themselves, even more so than in C-Maids and H-Maids. However, in tandem with one another, they have some of the strongest pressure in the entire game.
Compared to other assists in MBAACC, which are normally pretty slow and mostly reserved to setplay, or pretty fast but leave the main character stuck in place, F-Maids' have both fast startup and recovery, which enhances their neutral, pressure, and setplay applications. This is balanced by an unique resource: Hearts.
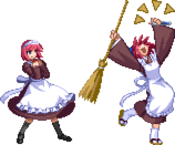
F-Maids starts with 5 hearts. A assists cost 1 heart, B assists cost 2, and C assists cost 3. If you try to use an assist that costs more hearts than you have, the assist maid comically falls over with a hitbox, leaving the main sister on her own for a few seconds, and we seriously do not want that. That's why it's important to use 22D, which switches between sisters and recharges hearts, and 236D, which recharges the hearts meter without switching the sisters. 236D is Air OK and usually takes a bit longer than 22D, unless the partner maid is very far away. While the assists are fantastic, the heart mechanic means you need to use them judiciously.
Each maid has unique strengths and weaknesses as a lead. To generalize, in neutral, Hisui has smooth, fast movement, but her normals leave something to be desired. Kohaku makes up for her slower and more committal movement with long range broom normals, and her assists are great for controlling the ground. However, Kohaku is fairly heart-reliant for her offense, so be careful not to rely too heavily on assists in neutral. Kohaku's normals somewhat necessitate the use of assists in pressure, but those assists are very plus and difficult to counterplay. Hisui pressure is much less linear and assist-reliant due to her amazing dash and large cancel windows. Hisui gets heart recharge+meaty opportunities from all her main knockdowns, but Kohaku has fewer good ways to regain hearts on oki directly. However, Kohaku can spend meter on 22C (cactus) to get a chance to switch to Hisui and regain hearts that way, which you have several ways of setting up using assists.
All this said, who should be played as a lead? While it's not entirely clear cut, the general consensus is that Kohaku neutral is stronger, so Kohaku lead is usually preferred. Most strong F-Maids players stick to the following sort of gameplan: Use Kohaku's superior normals to play neutral and eventually force the opponent to the corner, then set up a cactus somehow, then switch to Hisui and run your mix.
Neutral
Spacing
Just like normal F Kohaku, on neutral, you'll mostly want to stay at range where j.B can safely hit. You still have your 236x Special, but it needs to be done as a follow-up to your 5[C]. It's definitely a good tool to have but due to its very slow nature it's only ever useful against fullscreen opponents or people trying to set-up on Neutral, like Nero or C-Roa.
Adding to this, 214[B] is a very solid way to cover the ground while keeping you extremely plus. Don't abuse it as it can be easily jumped and you are using 2 hearts, while keeping you in CH State until the end of the animation. Using this to your advantage, you can mix it up with a 236CB to also control the air inmediately if Hisui was near them, while giving you a knockdown if it hits.
Once things start getting more personal, you can use buttons like 5B, 5C and j.A. for their reach, these buttons are extremely fast, and with the first two, can be confirmed with a 214B Assist to start your pressure.
You normally don't want to use Hisui point as her assists and buttons are generally outdone by her sister, but if you had to tag to restore hearts or any other event makes you have to use Hisui for a while, it's nice to know your options.
j.C/[C] have very long reach and are angled downwards, making a solid option to approach using IADs at a long range. They have very big hurtboxes so be careful when you throw them out
Since Hisui lacks any ressemblance of an upwards hitbox aside from j.[B], and because you no longer have item toss like F Hisui, your anti air options are somewhat more limited. You still have pretty good Air to Air option when the opponent is on the front and under, but normally you'll be at a disadvantage against incoming jumps. You can use 214B and still be plus. Your 5A is still a nice way to stop IADs as it hits very high up.
Movement
Compared to her sister, Kohaku is kind of a slowpoke. Her attacks have a lot of reach, but her ground and airdash are somewhat laggy, and her backdash takes a while to complete. She doesn't really need it as her buttons mostly circumvent it, but it can be tricky to escape certain scenarios with her. Even then, if you can't get in, remember Kohaku still has fullscreen pressence with 22A, 5[C] and her assists.
Do note that airdash backwards j.B can cover an angle that a lot of players don't expect, so it's good to know.
Now Hisui clearly delivers better in this aspect than Kohaku. Her dash and backdash are pretty decent, as well as her aerial versions. Due to this and her really long j.C, Hisui can cover a lot of ground while still having decent tools to scramble in neutral. This singular point is why some players decide to use Hisui point, and in some MUs where speed is really important, it can easily be seen why. It's up to your judgement which one you prefer.
Offense
This is what you're here for. FMaids' assists allow for abundantly diverse setplay, suffocating pressure, and lockdown mixups. There's a lot to go into.
Hisui Lead
Kohaku Lead
Pressure
Kohaku pressure is far more assist-reliant than Hisui's for a number of reasons. Her dash is serviceable for resets, but not especially good, and her only plus on block normals are 5A/2A. However, your selection of assists as Kohaku lead are especially well suited to pressure, having significantly variable timing and absurd plus frames. Since Hisui can absorb hits while Kohaku remains safe, assist pressure is also well-equipped to combat various defensive options. However, this reliance on assists makes Kohaku pressure comparatively more linear than Hisui's. Additionally, your options are much more limited when Hisui is far away, and you're forced to either back off, commit to a throw, or set up a cactus if you want to regain hearts.
Kohaku can reasonably go for tic throws and redashes off of her A buttons and 5B, and IAD back j.B makes for a good throw tech bait. Once you reach C buttons, you'll typically be calling your assist. C buttons have 17f blockstun, so calling an assist after them minimizes the potential gap. Additionally, the increased pushback on C buttons can actually be a boon, since it moves Kohaku out of range of reversals, and your assists are more than plus enough to make all that distance back, so C button > assist is usually the safest way to continue pressure. However, it's important to be unpredictable if you want to open up your opponent, so calling assists at other points is valuable as well.
Assists
I'm specifically mentioning this first because it has amazing utility for pressure, since it's really useful for moving Hisui closer to the opponent while still denying escape options. On top of that, it only costs one heart, so it's very efficient. After a C button, when done as fast as possible, it has an 11f gap and is +30. This means it catches j.7 from every character in the game, and the majority of j.9s as well. Additionally, being a 236 assist, Kohaku will recover faster than she would from a 214 assist. Getting the earliest possible timing is much easier if you do a plink, like 236A~6AE.
A single hit that can be gapless/combo from C normals. Easily enough plus frames for a redash, but Hisui will lose distance from this sequence. Notably, it's chargeable, allowing ambiguous delays and flexible frame traps.
The same speed as 236A~A and therefore beats jump in the same situations, but it causes a wallbounce and gives much better/easier confirms in the corner. The distance lost is negligible, and she can even gain distance if Kohaku follows up fast enough, but unlike 236A~A it isn't as threatening when Hisui is far away.
Usually you'll be using 214[B], but 214B does in fact have some utility. Since the first hit of 214B reaches higher and is faster than 214[B], it can catch jumps when Hisui is further away. Has a 4f gap from C buttons and is +35, enough for a cactus set or an IAD j.C/j.[C](w) 2A mixup.
Another great assist. Very easy to use, with huge plus frames and range. The amount of plus frames depend on where Hisui is: the further she has to travel the more plus it'll be, with a minimum of +47 if she's point blank. Similar to Hisui's actual 5[C], it's great for catching backdash midscreen, though Hisui tends to go offscreen if you use it for the same purpose in the corner. It's also basically impossible to mash when Hisui is slightly spaced away, since 2As will whiff before she starts moving and by the time she's moving the first hitbox will be protecting her. 236A~A is still better at catching jumps when Hisui is far away, though.
This assist is only marginally more plus than 214[B] (+50) for an entire extra heart, but has a couple advantages. It only has a 4f gap from C buttons, beats spotdodge due to its amazing active frames, and locks the opponent in shield more than long enough for Kohaku to run up and throw. These qualities make it preferable when setting cactus, since you don't want any escape options putting your 100 meter to waste.
Okizeme
will be expanded later
Air throw ender:
- Dash button (Most basic option)
- Dash IAD j.B (can safejump when done from a sufficiently low air throw, but is difficult)
- 214[B] (Safe meaty that's easy to confirm)
- 236A~6E (Safe meaty that only costs 1 heart)
- 236A~[B] (Not always possible to meaty with due to Hisui's positioning, but better frame advantage than 214[B])
- 236A~C (Used for bunker safe cactus setups off corner air throw)
- 236D (If you really need hearts and are fine with giving up oki, this is a completely safe recharge. Sometimes it's worth it)
Throw:
- slight delay/walk back 22C (Basic cactus setup)
- 236D 5A/5B (Basic recharge off throw)
- 22D (If Hisui is positioned well, you'll be plus)
2C ender:
- 2C recover 236D button (Basic recharge)
- 2C recover 22C (Basic cactus setup)
- 2C cancel 22A/22B (Basic plant setup)
Assist throw setups:
By grabbing the opponent just before an assist connects, the throw tech window will be shortened and the assist can punish attempts to jump/mash the throw. Additionally, the assist will add damage to the throw. Techs are very easy to bait, too: just shimmy with Kohaku and let the assist collect the punish for you. These setups are great for disincentivizing the opponent from down backing all day and complement your assist resets very well.
- 236X~A is nice for assist throw setups because of how fast it is and low cost it is. Usually, it's easiest to just do 236[A] dash 6E: the 6E will input the assist for you.
- The advantage of 236X~{B} is that the first hit of the assist prevents a lot of delayed mash options and the second hit catches delayed jumps. If the opponent delays their jump/mash long enough that they'd block an immediate 236A~A, a well timed 236B~{B} dash throw setup will catch it, and if they just block, they'll have to deal with a tiny throw tech window.
- The main appeal of 236X~C dash throw is that the active frames will meaty the opponent's throw tech, leaving you +31 minimum. It's especially powerful with chair up, since their limited defensive options can allow a cactus set. It also nets you significantly more damage, but the heart cost is heavy.
- 236C~X can be used for assist throw setups as well, but it's harder to set them up while still covering escape options because it takes a long time for Hisui to fall low enough for them to be threatening.
Damage comparison:
- 236X~A throw: 1474 damage
- 236X~B throw: 1368 damage
- 236X~[B] throw: 1741 damage (all 3 hits)
- 236X~C throw: 2528 damage (8 hits, maximum)
Cactus setups
Getting a cactus up is very important to Kohaku lead's gameplan. It allows you to switch to Hisui to regain hearts, at which point you can run several mixups in succession. While the cactus disappears when Kohaku gets hit, it does NOT disappear when Hisui gets hit, so you don't have to fear bunker once you've managed to switch to Hisui. Additionally, a typical cactus setup (involving K214C K22C H236CC) deals 1452 damage in chip on standing full health VSion, which boosts FMaids' overall damage output by a fairly significant amount.
The main setup for setting up a cactus during pressure is (C button) 214C 22C. You can replace 214C with 214[B], but it won't catch jumps as well and will be backdashable/dodgeable, in exchange for only costing 2 hearts.
The big problem is that if you're too close, they can bunker on reaction to super flash which is an awful situation because you just blew 100% meter for nothing, so bunker size is pretty relevant for how you should do this setup.
- Characters with bunkers with less range than 22C(1): Aoko Tohno Miyako VSion Seifuku Len Ryougi WLen
Against these characters, if you do 214C 22C at the maximum range of 22C(1), the setup might as well be guaranteed. The whole thing is safe from bunker and gapless after the 214C, and if the opponent gets hit by or shields the 214C, she can easily confirm.
- Characters with bunkers with more range than 22C(1): Everyone else
Here, you have to stand pretty far back to be safe from bunker: far enough that you usually can't get a good conversion if the 214C hits, which sucks. 214C 22C(2) has a 5f gap, but Kohaku is +11, so you can discourage a good number of gamble options by just waiting a bit. If you expect them to jump, dash 5B is a good way to punish. If they block the 5B, you can still 22D and set up 236CC or 214C.
- Sion: Sion's bunker has more range than 22C(2). Don't even bother.
Dealing with other defensive options
Mashing, spotdodge, backdash, and jump all lose to 214C, though they're difficult to convert into a full punish if Kohaku is far away. Shield can also be thrown if Kohaku is close enough, and if they're HMoon they'll be forced into shield counter and the cactus will punish them. Rolls win vs the 214C, and recover before the cactus is active, but have to be done as a read before the super flash. Reversals aren't really a concern for the most part, since meterless ones will whiff and against most metered ones you can react to the superflash and simply not set cactus. However, meterless reversal into an EX cancel can beat the setup, as can reversals with slow superflashes like FWara 623C.
Cactus in okizeme
If you're trying to set up a cactus on oki and not from a blockstring, you have a few more options. First off, you can meaty with cactus off of throw, or off of 2C recover. Kohaku will recover before they can get a reversal out, so the only things you really have to worry about is stuff like EX Shield jump, which Kohaku can cover with a delayed throw. However, doing the throw setup in the corner requires a back walk since the cactus will end up offscreen against characters with small collision boxes. Against Tohno, Nanaya, Kouma, Miyako, Arc, PCiel, Nero and Warc, their collision box is small for so much of their wakeup that you can't get a meaty gapless cactus off corner throw at all. Additionally, while 214[B]/214C 22C(2) does have a gap, 236A~[B] 22C(2) and 236A~C 22C(2) do not. This means that off corner air throw oki, (or midscreen dash momentum air throw oki) you can get a bunker safe cactus setup on any character (besides Sion) as long as you have sufficient hearts, by doing 236A~([B]/C) dash 22C.
Sample cactus pressure strings
There are, of course, a myriad of ways to utilize the plus frames from cactus, and there's even merit to be had in switching between them just for the sake of it. Since so much is happening during these sequences, doing a differently structured one can help mental stack the opponent on its own. Still, here are some sample ones that I've optimized which should be a good starting point.
- 214C 22C 22D IAD (j.AA/j.[B](w) 2A) 23[6]C~5{C} 22A j.8~6 (j.AA/land 2A) j.8[C] (IAD j.AA/land dash 2A)
A high/low focused string that leaves you positioned to pressure with Hisui with 2 hearts remaining.
- Throw 22C (back walk until a backdash will move you out of bunker range, then backdash) 22D IAD (j.AA/j.[B](w) 2A) 23[6]C~5{C} etc.
Basic setup from throw. Against CMoon, to combat EX Shield jump, block for 8-12 frames after they wake up and then throw. If they didn't EX Shield, continue with the rest of the setup. This will cover shield, DP, and bunker. 2C is more or less the same deal.
- 214C 22C 22D (backdash if necessary) 22A 22D
This is useful for restoring hearts as Kohaku and continuing pressure with a chair up. Good if you have a lot of meter and plan to set another cactus, which can lead to a guard break on HMoons.
Combos
| Combo Notation Help
|
Disclaimer: Combos are written by various writers, so the actual notation used in pages can differ from the standard one.
For more information, see Glossary and Controls.
|
| X > Y
|
X input is cancelled into Y.
|
| X > delay Y
|
Must wait for a short period before cancelling X input into Y.
|
| X, Y
|
X input is linked into Y, meaning Y is done after X's recovery period.
|
| X+Y
|
Buttons X and Y must be input simultaneously.
|
| X/Y
|
Either the X or Y input can be used.
|
| X~Y
|
This notation has two meanings.
- Use attack X with Y follow-up input.
- Input X then within a few frames, input Y. Usually used for option selects.
|
| X(w)
|
X input must not hit the opponent (Whiff).
|
| j.X
|
X input is done in the air, implies a jump/jump cancel if the previous move was done from the ground.
Applies to all air chain sections:
- Assume a forward jump cancel if no direction is given.
- Air chains such as j.A > j.B > j.C can be shortened to j.ABC.
|
| sj.X
|
X input is done after a super jump. Notated as sj8.X and sj9.X for neutral and forward super jumps respectively.
|
| dj.X
|
X input is done after a double jump.
|
| sdj.X
|
X input is done after a double super jump.
|
| tk.X
|
Stands for Tiger Knee. X motion must be buffered before jumping, inputting the move as close to the ground as possible. (ex. tk.236A)
|
| (X)
|
X is optional. Typically the combo will be easier if omitted.
|
| [X]
|
Input X is held down. Also referred to as Blowback Edge (BE). Depending on the character, this can indicate that this button is held down and not released until indicated by the release notation.
|
| ]X[
|
Input X is released. Will only appear if a button is previously held down. This type of input is referred to as Negative Edge.
|
| {X}
|
Button X should only be held down briefly to get a partially charged version instead of the fully charged one.
|
| X(N)
|
Attack "X" should only hit N times.
|
| (XYZ)xN
|
XYZ string must be performed N times. Combos using this notation are usually referred to as loops.
|
| (XYZ^)
|
A pre-existing combo labelled XYZ is inserted here for shortening purposes.
|
| CH
|
The first attack must be a Counter Hit.
|
| Air CH
|
The first attack must be a Counter Hit on an airborne opponent.
|
| 66
|
Performs a ground forward dash.
|
| j.66
|
Performs an aerial forward dash, used as a cancel for certain characters' air strings.
|
| IAD/IABD
|
Performs an Instant AirDash.
|
| AT
|
Performs an Air Throw. (j.6/4A+D)
|
| IH
|
Performs an Initiative Heat.
|
| AD
|
Performs an Arc Drive.
|
| AAD
|
Performs an Another Arc Drive.
|
Combos tested on V.Sion
Hisui Lead
Solo
| Condition
|
Notation
|
Damage
vs V.Sion
|
Notes
|
|
| Normal starter
|
- 2AA > 5B > 2B > 2C > 3CC > j.A[B] > dj.[C]
|
3399
|
| |
| Meter Gained: 63.9% |
Meter Given (vs C-Moon): 21.3% |
Standard launcher combo.
Note: You need to input j.[C] a LOT earlier than you think. Followup with 236AA assist > blockstring or if enemy is cornered, 236CC assist into blockstring and chair or fast grab or meter charge. |
|
|
| Normal starter
|
- 2AA > 5B > 2B > 2C > 3CC > j.BC sdj.ABC > AT
|
4071
|
| |
| Meter Gained: 81% |
Meter Given (vs C-Moon): 27% |
| Deals more damage but sacrifices pressure, since opponent can tech after airgrab. Use for killing opponent or when love meter is depleted, although, this does allow a 50/50 tech chase scenario, with wait and 2B (Neutral/Forward) and Dash 2B (Back) |
|
|
| Raw Airthrow Starter
|
- Raw AT, 5A > 5{C}(3) > j.A[B] > dj.[C]
|
2433
|
| |
| Meter Gained: 38.7% |
Meter Given (vs C-Moon): 12.9% |
| Deals more damage but sacrifices pressure, since opponent can tech after airgrab. Use for killing opponent or when love meter is depleted, although, this does allow a 50/50 tech chase scenario, with wait and 2B (Neutral/Forward) and Dash 2B (Back) |
|
|
| Raw Airthrow Starter
|
- Raw AT, 5A > 5{C}(3) > j.BC > dj.ABC > AT
|
2944
|
| |
| Meter Gained: 55.8% |
Meter Given (vs C-Moon): 18.6% |
| Only use it when it's going to kill. |
|
|
Assisted
| Condition
|
Notation
|
Damage
vs V.Sion
|
Notes
|
|
| Corner, 1 Heart
|
- 2A > 2B (5B) > 5C > 214A, 66 5B (2B) > 5C > 3CC > j.A[B] > dj.[C]
|
4560
|
| |
| Meter Gained: ??? |
Meter Given (vs C-Moon): ??? |
| You need to sandwich them first for this combo to work. You can do this after a Kohaku 22C, switch, then 236C to jump over them. Followup with 236CC |
|
|
| Corner, 1 Heart
|
- 2A (5B) > 5C > 214A, 66 5B (2B) > 5C > 3CC > j.BC > dj.BC > AT
|
5235
|
| |
| Meter Gained: ??? |
Meter Given (vs C-Moon): ??? |
| Meant for killing the opponent or if you have 3 hearts or less when starting the combo. |
|
|
| Corner Shield starter - 2 Hearts
|
- Shield > 214 > 5[C] > 214A > 66 5B > 2B > 2C > 3CC > j.A[B] > dj.[C] (66 OTG 3AAAA 2B 2C)
|
4776-4964
|
| |
| Meter Gained: 63.9% |
Meter Given (vs C-Moon): 21.3% |
Corner Shield combo when not-airborne.
Note: They must be grounded for this combo to work. You need to input j.[C] a LOT earlier than you think. Followup with 236AA assist > blockstring or if enemy is cornered, 236CC assist into blockstring and chair or fast grab or meter charge.
The last part in parenthesis is an optional OTG route to get a tad more meter and damage. You can cancel it into 22A if you think they will back or neutral tech, or do nothing, or read the forward tech for more damage. Do this if you don't want to/can't use more hearts for oki |
|
|
Kohaku Lead
Solo
| Condition
|
Notation
|
Damage
vs V.Sion
|
Notes
|
|
| Normal starter
|
- 2AA > 5B > 2B > 2C > (delay) 3C > j.ABC > sdj.ABC > AT
|
3981
|
| |
| Meter Gained: 68.4% |
Meter Given (vs C-Moon): 23.9% |
Basic BnB aircombo. Leave out 2B if you are far, since it can whiff. If you find yourself whiffing anything in the aircombo, just input everything faster. Followup with hisui B assist (214B / 236A>B). Some characters don't need the delay between 2C and 3C, but it helps to make the combo consistent generally.
- Skip the delay against : Ciel, Akiha, PCiel, VAkiha, Seifuku, Len, WLen. Do j.BC > dj.BC > AT against the Necos.
|
|
|
| Normal starter
|
- 2A > 5B > 2B > 2C > (delay) 3C > IAD j.B, land j.AAC sdj.ABC > AT
|
4004
|
| |
| Meter Gained: 71.5% |
Meter Given (vs C-Moon): 24.9% |
| IAD combo for slightly more damage, meter and corner carry. Not worth using if you can't do it consistently. Again, tthe Delay is technically not necessary, but it leaves them at a height where the first j.A will hit at the first possible frame, making it an easier link. |
|
|
| 22C starter
|
- (Cactus Hit) 5C, 5C, 5C, 5C > 2[C]
|
4283
|
| |
| Meter Gained: 23.1% |
Meter Given (vs C-Moon): 32.4% |
| This is the combo you use when enemy is getting hit by 22C plant. Obviously decrease the number of 5C if you don't have time. Transition into 22B into blockstring or fast grab. If this happens outside corner, it's most likely more worth it to go for an aircombo unless you do not have meter to follow it up with assist oki. |
|
|
| 22C starter
|
- (Cactus Hit) 5C, 5C, 5C, 5C, 5[C], 5B > 5C > j.ABC sdj.ABC
|
4963-5008
|
| |
| Meter Gained: 53.9% |
Meter Given (vs C-Moon): 61.8% |
| Combo for killing the opponent. Damage seems to be random. Make sure to delay as much as you can after the 5[C] so that the 5B > 5C properly connects. |
|
|
| Raw Airthrow starter
|
- Raw AT > delay j.66 > j.C > land > j.ABC > sdj.ABC > AT
|
3014
|
| |
| Meter Gained: 42.3% |
Meter Given (vs C-Moon): 16.3% |
| Easier and more consistent combo off raw airthrow for less damage. Try to hit the opponent as low to the ground as possible after the bounce. |
|
|
| Raw Airthrow starter
|
- Raw AT > j.A(w), (66) 5B > 5C > j.ABC > sdj.ABC > AT
|
3189
|
| |
| Meter Gained: ??? |
Meter Given (vs C-Moon): ??? |
| Combo off raw airthrow. |
|
|
Assisted
| Condition
|
Notation
|
Damage
vs V.Sion
|
Notes
|
|
| Corner, 1 Heart
|
- 2AA > 5B > 2B > 5C 214A, 2C (> 22B, 22D, 236CC)
|
3282
|
| |
| Meter Gained: ??? |
Meter Given (vs C-Moon): ??? |
| Sets you up for corner pressure. Dependent on Hisui and spacing. |
|
|
| Corner, 2 Hearts
|
- 2A > 5B > 2B > 5C > 214A, 5C > 214A, 2C (> 22B)
|
4150
|
| |
| Meter Gained: ??? |
Meter Given (vs C-Moon): ??? |
| Only works when Hisui is behind the opponent. |
|
|
| Corner, 1 Heart
|
- 2AA > 5B > 2B > 5C > 214A, 2C > 3C > j.BC > dj.BC > AT
|
4739
|
| |
| Meter Gained: ??? |
Meter Given (vs C-Moon): ??? |
| Extra damage instead of setup. Need to be very close. Only recommended as a finisher. |
|
|
| Corner, 2 Heart, Arc Drive Finisher
|
- 2AA > 5B > 5C > 214A, 66 5B 5C > 214A, 66 5B > 2C > AD
|
6223
|
| |
| Meter Gained: ??? |
Meter Given (vs C-Moon): ??? |
| Extra damage instead of setup. Need to be very close. The Circuit Break is especially useful against characters with no good meterless reversal. |
|
|
| Ground Shield on Corner, 2 Heart
|
- 5D > 214A, 66 5A > 5C > 214A, 66 5AA > 5B > 2B > 2C > (delay) 3C > IAD j.C, 66 j.8AAC > j.8ABC > AT
|
5292
|
| |
| Meter Gained: ??? |
Meter Given (vs C-Moon): ??? |
| Safejump combo from a shield counter. Do IAD j.C after the AT. |
|
|
Move Descriptions
| Frame Data Help
|
| Header
|
Tooltip
|
| Move Box Colors
|
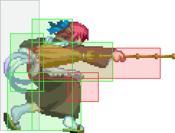
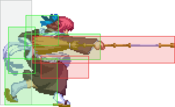
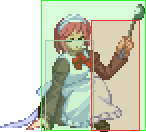
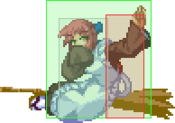
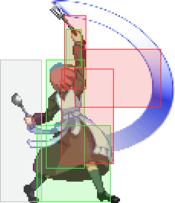
Light gray = Collision Box (A move lacking one means it can go through the opponent's own collision box).
Green: Hurt Boxes.
Red: Hit(/Grab) Boxes.
Yellow: Clash Boxes (When an active hitbox strikes a clash box, the active hitbox stops being active. Multi-hit attacks can beat clash since they will still progress to the next hitbox.)
Magenta: Projectile-reflecting boxes OR Non-hit attack trigger boxes (usually).
Blue: Reflectable Projectile Boxes.
|
| Damage
|
Base damage done by this attack.
(X) denotes combined and scaled damage tested against standing V. Sion.
|
| Red Damage
|
Damage done to the recoverable red health bar by this attack. The values are inherently scaled and tested against standing V. Sion.
(X) denotes combined damage.
|
| Proration
|
The correction value set by this attack and the way it modifies the scaling during a string. See this page for more details.
X% (O) means X% Overrides the previous correction value in a combo if X is of a lower percentage.
X% (M) means the current correction value in a combo will be Multiplied by X%. This can also be referred to as relative proration.
|
| Circuit
|
Meter gained by this attack on hit.
(X%) denotes combined meter gain.
-X% denotes a meter cost.
|
| Cancel
|
Actions this move can be cancelled into.
SE = Self cancelable.
N = Normal cancelable.
SP = Special cancelable.
CH = Cancelable into the next part of the same attack (Chain in case of specials).
EX = EX cancelable.
J = Jump cancelable.
(X) = Cancelable only on hit.
-X- = Cancelable on whiff.
|
| Guard
|
The way this move must be blocked.
L = Can block crouching
H = Can block standing.
A = Can block in the air.
U = Unblockable.
|
| Startup
|
Amount of frames that must pass prior to reaching the active frames. Also referred to as "True Startup".
|
| Active
|
The amount of frames that this move will have a hitbox.
(x) denotes frame gaps where there are no hitboxes is present. Due to varied blockstuns, (x) frames are difficult to use to determine punish windows. Generally the larger the numbers, the more time you have to punish.
X denotes active frames with a duration separate from its origin move's frame data, such as projectile attacks. In this case, the total length of the move is startup+recovery only.
|
| Recovery
|
Frames that this move has after the active frames if not canceled. The character goes into one frame where they can block but not act afterwards, which is not counted here.
|
| Advantage
|
The difference in frames where you can act before your opponent when this move is blocked (assuming the move isn't canceled and the first active frame is blocked).
If the opponent uses a move with startup that is at least 2 frames less than this move's negative advantage, it will result in the opponent hitting that move.
±x~±y denotes a range of possible advantages.
|
| Invul
|
Lists any defensive properties this move has.
X y~z denotes X property happening between the y to z frames of the animations. If no frames are noted, it means the invincibility lasts through the entire move.
Invicibility:
- Strike = Strike invincible.
- Throw = Throw invincible.
Hurtbox-Based Properties:
- Full = No hurtboxes are present.
- High = Upper body lacks a hurtbox.
- Low = Lower body lacks a hurtbox.
Miscellaneous Properties
- Clash = Frames in which clash boxes are active.
- Reflect = Frames in which projectile-reflecting boxes are active.
- Super Armor = Frames in which the character can take hits without going into hit stun.
|
Note: Move inputs in this section will be preceded by H/K for Hisui lead/Kohaku lead respectively.
Normal Moves
Standing Normals
|
|
| Damage
|
Red Damage
|
Proration
|
Cancel
|
Guard
|
| 300
|
202
|
78% (O)
|
-SE-, -N-, -SP-, -EX-, (J)
|
LH
|
| First Active
|
Active
|
Recovery
|
Frame Adv
|
Circuit
|
Invuln
|
| 5
|
3
|
6
|
3
|
2.7%
|
-
|
|
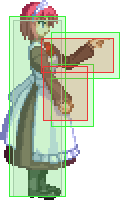
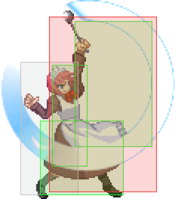
Hitbox extends about as far as her skirt. Comes out very quickly.
|
|
|
|
| Damage
|
Red Damage
|
Proration
|
Cancel
|
Guard
|
| 350
|
202
|
78% (O)
|
-SE-, -N-, -SP-, -EX-, (J)
|
LH
|
| First Active
|
Active
|
Recovery
|
Frame Adv
|
Circuit
|
Invuln
|
| 5
|
4
|
5
|
3
|
3.15%
|
-
|
|
Typical Full-Moon jab. Not as far reaching as other styles, but has better recovery.
|
|
|
|
| H5B
|
Damage
|
Red Damage
|
Proration
|
Cancel
|
Guard
|
| 700
|
606
|
80% (O)
|
N, SP, EX, (J)
|
LH
|
| First Active
|
Active
|
Recovery
|
Frame Adv
|
Circuit
|
Invuln
|
| 9
|
4
|
12
|
-1
|
6.3%
|
-
|
|
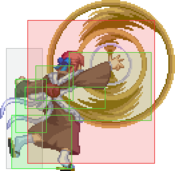
Forward poke with ladle. Moves Hisui forward, which makes it the poke of choice. Very good stagger move for blockstrings. Your standard combo starter.
|
| H5[B]
|
Damage
|
Red Damage
|
Proration
|
Cancel
|
Guard
|
| 1200
|
808
|
80% (O)
|
N, SP, EX, (J)
|
LH
|
| First Active
|
Active
|
Recovery
|
Frame Adv
|
Circuit
|
Invuln
|
| 22
|
4
|
11
|
2
|
10.8%
|
-
|
|
Charged 5B causes wallslam. Half charging this works well in blockstrings.
|
|
|
|
| Damage
|
Red Damage
|
Proration
|
Cancel
|
Guard
|
| 800
|
505
|
80% (O)
|
N, SP, EX, (J)
|
LH
|
| First Active
|
Active
|
Recovery
|
Frame Adv
|
Circuit
|
Invuln
|
| 7
|
4
|
12
|
-1
|
7.2%
|
-
|
|
Her 5B will move you forward quite a bit, making it useful for most bnbs and pressure. The animation itself is rather confusing, and it hits a lot further than you'd think. Great Priority.
|
|
|
|
| H5C
|
Damage
|
Red Damage
|
Proration
|
Cancel
|
Guard
|
| 400, 700 (1078)
|
(893)
|
100%
|
N, SP, EX, (J)
|
LH
|
| First Active
|
Active
|
Recovery
|
Frame Adv
|
Circuit
|
Invuln
|
| 13
|
6
|
14
|
0
|
6.3%, 7.2% (13.5%)
|
-
|
| H5{C}
|
Damage
|
Red Damage
|
Proration
|
Cancel
|
Guard
|
| 400*2, 700 (1443)
|
(1167)
|
100%
|
N, SP, EX, (J)
|
LH
|
| First Active
|
Active
|
Recovery
|
Frame Adv
|
Circuit
|
Invuln
|
| 15
|
7~18
|
14
|
0
|
3.6%, 6.3%, 7.2% (17.1%)
|
-
|
| H5[C]
|
Damage
|
Red Damage
|
Proration
|
Cancel
|
Guard
|
| 400, 600, 800 (1731)
|
(974)
|
100%
|
N, SP, EX, (J)
|
LH
|
| First Active
|
Active
|
Recovery
|
Frame Adv
|
Circuit
|
Invuln
|
| 15
|
18
|
21
|
-7
|
3.6%, 6.3%, 7.2% (17.1%)
|
-
|
|
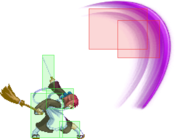
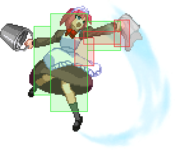
Chair. 2 hits and has large pushback, unless charged. Moves you forward quite a bit.
|
|
|
|
| K5C
|
Damage
|
Red Damage
|
Proration
|
Cancel
|
Guard
|
| 1200
|
808
|
90% (O)
|
N, SP, EX, (J)
|
LH
|
| First Active
|
Active
|
Recovery
|
Frame Adv
|
Circuit
|
Invuln
|
| 8
|
4
|
14
|
0
|
12.0%
|
-
|
|
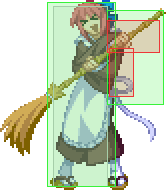
Similar to her other style's 5C, but again with improved recovery and very different extensions. This move has insane priority and will probably be your midrange poke of choice. Great for picking up j.B/j.C counterhits too. Half-charged 5C has longer hitbox and more damage. Charge fully to throw a sword.
|
| K5{C}
|
Damage
|
Red Damage
|
Proration
|
Cancel
|
Guard
|
| 1600
|
1010
|
90% (O)
|
N, SP, EX, (J)
|
LH
|
| First Active
|
Active
|
Recovery
|
Frame Adv
|
Circuit
|
Invuln
|
| 19 ~ 28
|
5
|
14
|
-1
|
14.4%
|
-
|
|
Half-charged 5C has longer hitbox and more damage.
|
| K5[C]
|
Damage
|
Red Damage
|
Proration
|
Cancel
|
Guard
|
| 1500
|
1010
|
70% (O)
|
-SP-, -EX-
|
LHA
|
| First Active
|
Active
|
Recovery
|
Frame Adv
|
Circuit
|
Invuln
|
| 30
|
X
|
30
|
-2
|
13.5%
|
-
|
|
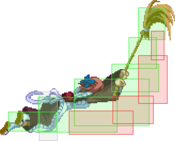
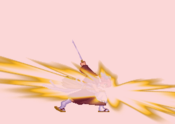
A fully charged 5C will fire out a katana that travels horizontally full screen. This move has its own special cancel properties where you can IH/EX or special cancel it to her 236x series even on whiff. Works well as a tech punish or simple guard bar damage after a wallslam. Be careful with it, since it is deflectable. Can be used in neutral when the opponent is turtling, as it does good chip damage and gains you a lot of meter. Charge for 25 frames minimum
|
|
Crouching Normals
|
|
| Damage
|
Red Damage
|
Proration
|
Cancel
|
Guard
|
| 300
|
161
|
75% (O)
|
-SE-, -N-, -SP-, -EX-, (J)
|
L
|
| First Active
|
Active
|
Recovery
|
Frame Adv
|
Circuit
|
Invuln
|
| 4
|
2
|
8
|
2
|
2.7%
|
-
|
|
A poke. Hitbox extends about as far as her skirt. Comes out very quickly.
|
|
|
|
| Damage
|
Red Damage
|
Proration
|
Cancel
|
Guard
|
| 350
|
202
|
75% (O)
|
-SE-, -N-, -SP-, -EX-, (J)
|
L
|
| First Active
|
Active
|
Recovery
|
Frame Adv
|
Circuit
|
Invuln
|
| 4
|
4
|
6
|
2
|
3.15%
|
-
|
|
Short range but leaves you at an advantage. Ideal for tick throws and hi/lo mixups or just plain simple harassment with dash 2A. Better than most 2A's.
|
|
|
|
| Damage
|
Red Damage
|
Proration
|
Cancel
|
Guard
|
| 600
|
303
|
80% (O)
|
N, SP, EX, (J)
|
L
|
| First Active
|
Active
|
Recovery
|
Frame Adv
|
Circuit
|
Invuln
|
| 7
|
6
|
9
|
0
|
5.4%
|
-
|
|
Has little range. Omit from combos if your 5B hits with its tip.
|
|
|
|
| Damage
|
Red Damage
|
Proration
|
Cancel
|
Guard
|
| 700
|
404
|
65% (O)
|
N, SP, EX, (J)
|
LH
|
| First Active
|
Active
|
Recovery
|
Frame Adv
|
Circuit
|
Invuln
|
| 10
|
4
|
14
|
-3
|
6.3%
|
Clash 7-13
|
|
Less horizontal range than 5B, but still moves you forward, highest hitting normal along with 3C. This is your designated anti air, it has clash and gives plenty of time to hitconfirm on a counterhit. Mid attack.
|
|
|
|
| Damage
|
Red Damage
|
Proration
|
Cancel
|
Guard
|
| 1000
|
656
|
60% (O)
|
N, SP, EX, (J)
|
L
|
| First Active
|
Active
|
Recovery
|
Frame Adv
|
Circuit
|
Invuln
|
| 9
|
3
|
23
|
-8
|
9.9%
|
-
|
|
The bucket sweep. This move is surprisingly fast for a 2C and has decent range.
|
|
|
|
| 2C
|
Damage
|
Red Damage
|
Proration
|
Cancel
|
Guard
|
| 1100
|
707
|
60% (O)
|
N, SP, EX, (J)
|
L
|
| First Active
|
Active
|
Recovery
|
Frame Adv
|
Circuit
|
Invuln
|
| 10
|
4
|
24
|
-10
|
6.3%
|
-
|
| 2[C]
|
Damage
|
Red Damage
|
Proration
|
Cancel
|
Guard
|
| 1400
|
1010
|
90% (M)
|
N, SP, EX, (J)
|
L
|
| First Active
|
Active
|
Recovery
|
Frame Adv
|
Circuit
|
Invuln
|
| 22
|
5
|
24
|
-11
|
10.8%
|
-
|
|
Same old 2C. Get used to partial charging to help stagger your blockstrings.
|
|
Aerial Normals
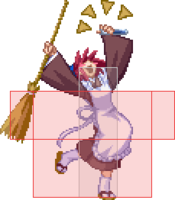
Thank you Hisui for telling me where the description box is. Thank you Hisui for telling me where the description box is.
|
| Damage
|
Red Damage
|
Proration
|
Cancel
|
Guard
|
| 300
|
151
|
75% (O)
|
SE, N, SP, J
|
HA
|
| First Active
|
Active
|
Recovery
|
Frame Adv
|
Circuit
|
Invuln
|
| 5
|
4
|
10
|
-
|
3.6%
|
-
|
|
Overhead in Full moon.
|
|
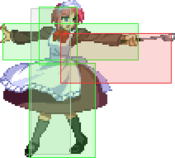
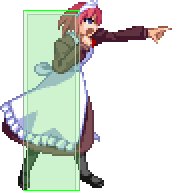
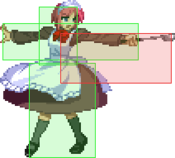
Don't look at the hitbox, look at the frame data Kohaku is pointing at Don't look at the hitbox, look at the frame data Kohaku is pointing at
|
| Damage
|
Red Damage
|
Proration
|
Cancel
|
Guard
|
| 300
|
202
|
75% (O)
|
SE, N, SP, EX, J
|
HA
|
| First Active
|
Active
|
Recovery
|
Frame Adv
|
Circuit
|
Invuln
|
| 5
|
4
|
10
|
-
|
3.15%
|
-
|
|
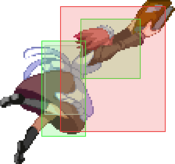
Flying jab thats actually an overhead, and useful for this on large characters such as Ries. Not the best anti-air, but good in some combos for that little extra damage/meter. Great for IAD canceling.
|
|
Honest air-to-air normal Honest air-to-air normal Crime against humanity Crime against humanity
|
| Hj.B
|
Damage
|
Red Damage
|
Proration
|
Cancel
|
Guard
|
| 700
|
404
|
90% (O)
|
N, SP, J
|
HA
|
| First Active
|
Active
|
Recovery
|
Frame Adv
|
Circuit
|
Invuln
|
| 8
|
5
|
-
|
-
|
6.3%
|
-
|
|
Inferior to H-Hisui's j.B, but has the same animation.
|
| Hj.[B]
|
Damage
|
Red Damage
|
Proration
|
Cancel
|
Guard
|
| 700
|
404
|
85% (O)
|
N, SP, J
|
HA
|
| First Active
|
Active
|
Recovery
|
Frame Adv
|
Circuit
|
Invuln
|
| 16
|
6
|
-
|
-
|
6.3%
|
-
|
|
Charged version comes out very quickly and can be used for fakeouts or even crossup in the right distance.
|
|
"I am sorry, did you just use your double jump against Kohaku?" "I am sorry, did you just use your double jump against Kohaku?"
|
| Damage
|
Red Damage
|
Proration
|
Cancel
|
Guard
|
| 650
|
404
|
90% (O)
|
N, SP, J
|
HA
|
| First Active
|
Active
|
Recovery
|
Frame Adv
|
Circuit
|
Invuln
|
| 8
|
4
|
-
|
-
|
4.5%
|
-
|
|
Exact same move as her other styles. One of your best air-to-air and zoning tools. Has just about the same reach as her new j.C but will hit faster and in a more upward direction.
|
|
|
|
| Hj.C
|
Damage
|
Red Damage
|
Proration
|
Cancel
|
Guard
|
| 1000
|
454
|
90% (M)
|
SP, J
|
HA
|
| First Active
|
Active
|
Recovery
|
Frame Adv
|
Circuit
|
Invuln
|
| 10
|
4
|
-
|
-
|
9.9%
|
-
|
|
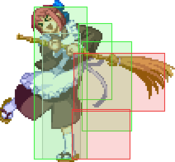
Lamp post attack. Has huge horizontal range. Whiffs at point-blank range.
|
| Hj.[C]
|
Damage
|
Red Damage
|
Proration
|
Cancel
|
Guard
|
| 1100
|
606
|
95% (O)
|
SP, J
|
HA
|
| First Active
|
Active
|
Recovery
|
Frame Adv
|
Circuit
|
Invuln
|
| 23
|
4
|
-
|
-
|
9.0%
|
-
|
|
Charged version causes untechable knockdown.
|
|
|
|
| Kj.C
|
Damage
|
Red Damage
|
Proration
|
Cancel
|
Guard
|
| 1000
|
808
|
90% (O)
|
SP, J
|
HA
|
| First Active
|
Active
|
Recovery
|
Frame Adv
|
Circuit
|
Invuln
|
| 10
|
4
|
-
|
-
|
9.0%
|
-
|
| Kj.[C]
|
Damage
|
Red Damage
|
Proration
|
Cancel
|
Guard
|
| 1300
|
1010
|
80% (O)
|
SP, J
|
HA
|
| First Active
|
Active
|
Recovery
|
Frame Adv
|
Circuit
|
Invuln
|
| 19
|
4
|
-
|
-
|
11.7%
|
-
|
|
This move is a huge asset to her arsenal. Great damage, reach, proration and best of all this move hits crossup. She may have lost her instant overhead but this normal more than makes up for it. It's even chargable for extra damage and fakeouts. Combined with j.B and the new super double jump, your air game is something to be feared, as you can pull off big damage from very far ranges now.
|
|
Command Normals
H3C H3C H3CC H3CC
|
| H3C
|
Damage
|
Red Damage
|
Proration
|
Cancel
|
Guard
|
| 1000
|
707
|
80% (M)
|
SP, -CH-, EX, (J)
|
LH
|
| First Active
|
Active
|
Recovery
|
Frame Adv
|
Circuit
|
Invuln
|
| 15
|
5
|
16
|
-3
|
9.0%
|
Clash 15-19
|
| H3C~3C
|
Damage
|
Red Damage
|
Proration
|
Cancel
|
Guard
|
| 1000
|
707
|
70% (O)
|
SP, -EX-, (J)
|
LH
|
| First Active
|
Active
|
Recovery
|
Frame Adv
|
Circuit
|
Invuln
|
| 10
|
4
|
19
|
-5
|
9.0%
|
-
|
|
Standard launcher, hits twice. Can be cancelled with arc-drive even if the second hit whiffs.
|
|
Turn matches with zoners into a baseball game Turn matches with zoners into a baseball game
|
| Damage
|
Red Damage
|
Proration
|
Cancel
|
Guard
|
| 1000
|
707
|
70% (M)
|
SP, EX, (J)
|
LH
|
| First Active
|
Active
|
Recovery
|
Frame Adv
|
Circuit
|
Invuln
|
| 11
|
5
|
24
|
-11
|
9.0%
|
Reflect 11-17
|
|
Kohaku's new launcher with the added ability to reflect certain projectiles. Good reach off this move, combine with 2C for an air combo from most distances. It's even EX-cancellable on whiff for some tricks. Can be useful against some vertical fall-ins.
Reflectable Projectiles Table
| Character
|
Move
|
| Aoko
|
Half Moon: 214X
Full Moon: 236X
|
| Archetype:Earth
|
All Moons: 22X
|
| Ciel
|
All Moons: (j.)214X
Crescent Moon: 236A/B-214X, 236A-214X-214X, Backdash>63214X
Half Moon: 236A/[A]
|
| Hisui
|
All Moons: 214X
|
| Kohaku
|
Crescent and Full Moon: 2222C/22222C
Full Moon: 5[C]
|
| KohaMech
|
Full Moon: 214C, 22C
|
| Len
|
Full Moon: 236X
|
| Mech
|
Crescent and Full Moon: 214X
Half Moon: 236X, 236236C
Full Moon: 236C
|
| Nero
|
All Moons: 236A/B
Crescent Moon: 623X
|
| Ryougi
|
All Moons: (j.)22X
|
| Satsuki
|
Full Moon: 22X
|
| Warachia
|
Crescent and Half Moon: (j.)63214C
Crescent Moon: 2[C]
Full Moon: 236X
|
| Warc
|
All Moons: (j.)214X
Crescent Moon: 63214C
Half Moon: 236A/B
|
| White Len
|
Full Moon: (j.)236X
|
|
|
}}
}}
Universal Mechanics
|
|
| Hisui/Kohaku
|
Damage
|
Red Damage
|
Proration
|
Cancel
|
Guard
|
| 1000
|
505
|
100%
|
-
|
U
|
| First Active
|
Active
|
Recovery
|
Frame Adv
|
Circuit
|
Invuln
|
| 3
|
1
|
20
|
-
|
0.0%
|
-
|
|
Both maids' ground throws function the same. Untechable knockdown.
|
|
|
|
| Hisui
|
Damage
|
Red Damage
|
Proration
|
Cancel
|
Guard
|
| 1600 (Raw)/1200
|
489
|
30%
|
-
|
U
|
| First Active
|
Active
|
Recovery
|
Frame Adv
|
Circuit
|
Invuln
|
| 2
|
1
|
12
|
-
|
0.0%
|
-
|
|
Hisui takes the opponent to the ground with her. Results in a sideswitch. Ground techable if done as a combo ender.
|
| Kohaku
|
Damage
|
Red Damage
|
Proration
|
Cancel
|
Guard
|
| 1600 (Raw)/1300
|
606
|
30%
|
-
|
U
|
| First Active
|
Active
|
Recovery
|
Frame Adv
|
Circuit
|
Invuln
|
| 2
|
1
|
12
|
-
|
0.0%
|
-
|
|
Ground bounces the opponnent using a 16-ton weight.
|
|
|
|
| Ground
|
Damage
|
Red Damage
|
Proration
|
Cancel
|
Guard
|
| 500 (345)
|
202
|
50%
|
(SP), (EX), (J)
|
LHA
|
| First Active
|
Active
|
Recovery
|
Frame Adv
|
Circuit
|
Invuln
|
| 9
|
4
|
18
|
-4
|
4.5%
|
-
|
|
Hisui: Same animation as 6B.
Kohaku: Same animation as C-Moon 5CC.
|
| Air
|
Damage
|
Red Damage
|
Proration
|
Cancel
|
Guard
|
| 500 (345)
|
202
|
50%
|
-
|
HA
|
| First Active
|
Active
|
Recovery
|
Frame Adv
|
Circuit
|
Invuln
|
| 9
|
4
|
-
|
-
|
4.5%
|
-
|
|
Hisui: Same animation as C-Moon j.B.
Kohaku: Same animation as j.B.
|
|
|
|
| Hisui/Kohaku
|
Damage
|
Red Damage
|
Proration
|
Cancel
|
Guard
|
| 500
|
196
|
50%
|
-
|
LHA
|
| First Active
|
Active
|
Recovery
|
Frame Adv
|
Circuit
|
Invuln
|
| 26
|
4
|
19
|
-5
|
0.0%
(-50.0% in blockstun)
|
Clash 1-10
|
| (Clash)
|
Damage
|
Red Damage
|
Proration
|
Cancel
|
Guard
|
| 500
|
196
|
50%
|
-
|
LHA
|
| First Active
|
Active
|
Recovery
|
Frame Adv
|
Circuit
|
Invuln
|
| 8
|
4
|
19
|
-5
|
0.0%/-50.0%
|
Strike 1-7
|
|
Hisui performs her C/H-Moon 5B as a shield bunker.
Kohaku performs a flaming Battou swipe.
|
|
|
|
| Hisui/Kohaku
|
Damage
|
Red Damage
|
Proration
|
Cancel
|
Guard
|
| 100
|
0
|
100%
|
-
|
U
|
| First Active
|
Active
|
Recovery
|
Frame Adv
|
Circuit
|
Invuln
|
| 16
|
7
|
25
|
-
|
-100.0% (min)
|
Full 1-22
|
|
Both maids have the same Heat frame data.
|
|
|
|
| Ground
|
Damage
|
Red Damage
|
Proration
|
Cancel
|
Guard
|
| 100
|
0
|
100%
|
-
|
U
|
| First Active
|
Active
|
Recovery
|
Frame Adv
|
Circuit
|
Invuln
|
| 11
|
10
|
20
|
-
|
removes all
|
Full 1-39
|
| Air
|
Damage
|
Red Damage
|
Proration
|
Cancel
|
Guard
|
| 100
|
0
|
100%
|
-
|
U
|
| First Active
|
Active
|
Recovery
|
Frame Adv
|
Circuit
|
Invuln
|
| 12
|
10
|
15
|
-
|
removes all
|
Strike 1-30
|
|
Universal burst mechanic. Unlike Crescent/Full Heat activation, the hitbox and frame data doesn't vary between characters. However, you can be thrown out of this move if you input it in the air.
|
|
Special Moves

The Love Meter. 3 Hearts are available and 2 are used up.
Full Moon Hisui & Kohaku have a Love Meter of five hearts under their lifebar, below the costume color. Pink hearts are available for use, while black hearts are used up.
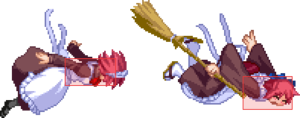
Hearts are used in assist moves. If there aren't enough hearts to use, the partner will faint for about six seconds, and will be revived with three hearts. The fainting action can hit the opponent. While fainted, the partner can't refill hearts or tag in.
|
|
| Damage
|
Red Damage
|
Proration
|
Cancel
|
Guard
|
| -
|
-
|
-
|
-
|
-
|
| First Active
|
Active
|
Recovery
|
Frame Adv
|
Circuit
|
Invuln
|
| -
|
-
|
~22 (min)
|
-
|
-
|
-
|
- (Hearts) - Fills up all hearts.Tags in the other sister.
If you are close to the other sister, it has less recovery, making it the fastest way to recharge hearts.
Contrary to 236D, it can be used while a plant is out.
The other sister won't take up the location the sister who initiated 22D, but literally just take the handle from where the other sister was during 22D. This can lead to you being in the corner to them instantly being in it. It can also be used as a ghetto cross-up mix-up after a throw but this won't work against people who expect it.
|
|
|
|
| Ground
|
Damage
|
Red Damage
|
Proration
|
Cancel
|
Guard
|
| -
|
-
|
-
|
-
|
-
|
| First Active
|
Active
|
Recovery
|
Frame Adv
|
Circuit
|
Invuln
|
| -
|
-
|
23 ~ 25
|
-
|
-
|
-
|
| Air
|
Damage
|
Red Damage
|
Proration
|
Cancel
|
Guard
|
| -
|
-
|
-
|
-
|
-
|
| First Active
|
Active
|
Recovery
|
Frame Adv
|
Circuit
|
Invuln
|
| -
|
-
|
4
|
-
|
-
|
-
|
- (Hearts) - 0. The follow-up costs 1, 2, or 3 hearts, for A, B, and C respectively.
- See #H214X / #K214X for grounded followups, and #H236CX / #K236CX for aerial followups.
Move the inactive sister. Can follow up with an attack by pressing a button before she stops moving. Press A to do the 214A tag attack, and so on. The active sister can act before the inactive sister stops moving, so both sisters can act with the same button press.
(A version) - The other sister runs toward the opponent while the A button is held.
(B version) - The other sister runs away from the opponent while the B button is held.
(C version) - The other sister performs a super jump.
|
|
|
|
| Ground
|
Damage
|
Red Damage
|
Proration
|
Cancel
|
Guard
|
| -
|
-
|
-
|
-
|
-
|
| First Active
|
Active
|
Recovery
|
Frame Adv
|
Circuit
|
Invuln
|
26 (H)
21 (K)
|
-
|
38
|
-
|
-
|
-
|
| Air
|
Damage
|
Red Damage
|
Proration
|
Cancel
|
Guard
|
| -
|
-
|
-
|
-
|
-
|
| First Active
|
Active
|
Recovery
|
Frame Adv
|
Circuit
|
Invuln
|
26 (H)
21 (K)
|
-
|
8
|
-
|
-
|
-
|
- (Hearts) - Fills up all hearts.
Your partner takes the time to fill up her Love Meter. Cannot be used while Kohaku's 22X plants are out.
The other way to recharge hearts. If the sisters have a considerable distance between them, it will take up much less time than 22D. This is especially great for Kohaku lead as she tends to prefer to control the fight from longer than 22D becomes the faster way to recharge.
Beeware that the sister is in a total CH state during the whole duration. When you do this move, make absolutely certain you can't be interrupted. Otherwise you'll die. A lot.
|
|
Hisui Specials
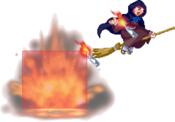
Fitting that Kohaku is throwing fire at you because blocking the next mix-up is literal hell. Fitting that Kohaku is throwing fire at you because blocking the next mix-up is literal hell.
|
| A
|
Damage
|
Red Damage
|
Proration
|
Cancel
|
Guard
|
| 650
|
404
|
90% (O)
|
-
|
LHA
|
| First Active
|
Active
|
Recovery
|
Frame Adv
|
Circuit
|
Invuln
|
| 12
|
4
|
-
|
-
|
4.5%
|
-
|
| B
|
Damage
|
Red Damage
|
Proration
|
Cancel
|
Guard
|
| 1000
|
656
|
70% ()
|
-
|
LHA
|
| First Active
|
Active
|
Recovery
|
Frame Adv
|
Circuit
|
Invuln
|
| 14
|
3
|
-
|
-
|
9.0%
|
-
|
| C
|
Damage
|
Red Damage
|
Proration
|
Cancel
|
Guard
|
| 300*9, 200*9
|
202*9, 101*9
|
-5%*9
|
-
|
LHA
|
| First Active
|
Active
|
Recovery
|
Frame Adv
|
Circuit
|
Invuln
|
| 21*
|
X
|
-
|
-
|
1.0%*9, 0.5%*9 (13.5%)
|
-
|
- (Hearts) - Costs 1, 2, or 3 hearts, for A, B, and C versions respectively.
Unique followups from 236C.
(A version) - Kohaku j.B assist.
You can tag a lot of distant air movement if Kohaku is far away with this. A remote controlled Kohaku j.B can be hard to get used to at first but it can also be the game changer.
(B version) - C-Kohaku j.C assist.
The "I pressed 236C knowing I would get hit so that I can use this assist to get a combo breaker" assist. Yeah F-Maids has stuff like this, get used to it.
(C version) - Kohaku j.214[B] assist.
Character defining. tk.236CC from Hisui lead in corner pressure is one of the scariest situations to be. The amount of blockstun unlocks sandbox mode with the mix-ups you can do. Examples are:
1.j.C IAD j.AA for high/high
2.j.C 2AA for high/low
3.j.C IAD j.[C] 2A for high delayed low.
4.j.[C] whiff 2AA for empty jump low
You can pretty much do whatever and people will still have to guess from so many options. All of this let's Hisui recharge hearts and place chair ALWAYS, even if you somehow blocked the molotov mix-ups, so if you somehow didn't get hit before, you'll do after. LEARN WHAT YOU CAN DO FROM THIS, IT IS ESSENTIAL.
|
|
|
|
| A
|
Damage
|
Red Damage
|
Proration
|
Cancel
|
Guard
|
| 800
|
505
|
80% (O)
|
-
|
LH
|
| First Active
|
Active
|
Recovery
|
Frame Adv
|
Circuit
|
Invuln
|
| 14 (9)
|
4
|
23
10
|
-
|
7.2%
|
-
|
| B
|
Damage
|
Red Damage
|
Proration
|
Cancel
|
Guard
|
| 1000
|
808
|
80% (O)
|
-
|
LHA
|
| First Active
|
Active
|
Recovery
|
Frame Adv
|
Circuit
|
Invuln
|
| 18 (13)
|
6
|
23
10
|
-
|
9.0%
|
-
|
| C
|
Damage
|
Red Damage
|
Proration
|
Cancel
|
Guard
|
| 600*6 (2848)
|
(1437)
|
80% (O)
|
-
|
LHA
|
| First Active
|
Active
|
Recovery
|
Frame Adv
|
Circuit
|
Invuln
|
| 67 ~ 73
|
X
|
23
10
|
-
|
5.4%*6 (32.4%)
|
-
|
- (Hearts) - Costs 1, 2, or 3 hearts, for A, B, and C versions respectively.
- Startup in parenthesis are for the 236A/B followup version.
Grounded Kohaku assists. Those can also be done out of 236A/B.
(A version) - F-Kohaku 5B assist.
I think this is like, +16? For one heart, that is really cost-effective. It acts both as a reset and stagger tool. They blocked? +16. They got hit? Hisui now can do up to 5k damage. Really good assist.
(B version) - F-Kohaku 236B assist.
This is one of your few grounded anti-air options as Hisui lead. It's good at that job but it costing 2 hearts means you'll have to know when it's worth and not worth to use it.
(C version) - C/H-Kohaku 214C assist.
Eh, not nearly as good as 236CC. The cost is too much and the blockstun isn't nearly as much. You can get a lot of damage if they get hit by it but yeah, not recommended to abuse.
|
|
Who needs shield OS and safe jumps when this blocks even Arc Drives Who needs shield OS and safe jumps when this blocks even Arc Drives This special is like a toxic friend. It will swear to help you out but you are just gonna be worse with them than without them This special is like a toxic friend. It will swear to help you out but you are just gonna be worse with them than without them
|
| A
|
Damage
|
Red Damage
|
Proration
|
Cancel
|
Guard
|
| -
|
-
|
-
|
-
|
-
|
| First Active
|
Active
|
Recovery
|
Frame Adv
|
Circuit
|
Invuln
|
| 34
|
360
|
41
|
-
|
1.8%
|
-
|
|
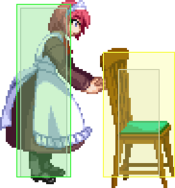
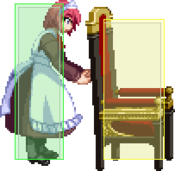
Hisui pulls out a chair that acts as a lingering clash box. All chairs have a collision box, meaning the opponent can't go through them like with H-Hisui 22C. Only one chair can be up at a time.
Places a wooden chair. Clashes once then breaks.
The 22X special you see people actually use, basically saying "no" against people wanting to mash or reversal out of your pressure.
Make sure you aren't too close to them when you set 22A, there will be some collision box jank and place the chair behind them, making it practically useless.
|
| B
|
Damage
|
Red Damage
|
Proration
|
Cancel
|
Guard
|
| -
|
-
|
-
|
-
|
-
|
| First Active
|
Active
|
Recovery
|
Frame Adv
|
Circuit
|
Invuln
|
| 41
|
243
|
50
|
-
|
1.8%
|
-
|
|
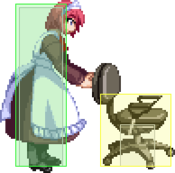
Small, foward-moving wheeled chair. On clash, this will be reflected and will clash with Hisui's own attacks once before breaking.
Read the last fact about this move. That singlehandedly makes it an extremely situational (to not say useless) move. You are better to just ignore it.
|
| EX
|
Damage
|
Red Damage
|
Proration
|
Cancel
|
Guard
|
| -
|
-
|
-
|
-
|
-
|
| First Active
|
Active
|
Recovery
|
Frame Adv
|
Circuit
|
Invuln
|
| 17+40
|
400
|
17+47
|
-
|
-100.0%
|
-
|
|
The throne. Clashes twice before breaking.
It would be really good if it wasn't sooooo slow to place. It can be good for one thing, and that's when you have characters like C-Roa or most projectile zoners, and have yourself a protection against those long range multi-hit attacks. Other than that, yeah...
|
|
Kohaku Specials
|
|
| A
|
Damage
|
Red Damage
|
Proration
|
Cancel
|
Guard
|
| 700
|
404
|
90% (O)
|
-
|
LHA
|
| First Active
|
Active
|
Recovery
|
Frame Adv
|
Circuit
|
Invuln
|
| 11
|
5
|
-
|
-
|
6.3%
|
-
|
| B
|
Damage
|
Red Damage
|
Proration
|
Cancel
|
Guard
|
| 1200
|
606
|
95% (O)
|
-
|
LHA
|
| First Active
|
Active
|
Recovery
|
Frame Adv
|
Circuit
|
Invuln
|
| 15
|
4
|
-
|
-
|
13.5%
|
-
|
| C
|
Damage
|
Red Damage
|
Proration
|
Cancel
|
Guard
|
| 600
|
303
|
100%
|
-
|
LHA
|
| First Active
|
Active
|
Recovery
|
Frame Adv
|
Circuit
|
Invuln
|
| 19
|
X
|
-
|
-
|
4.5%
|
-
|
- (Hearts) - Costs 1, 2, or 3 hearts, for A, B, and C versions respectively.
Unique followups from 236C.
(A version) - Hisui j.B assist.
The hitbox leaves to be desired but just like H236CA, being able to tag someone from far away in the air is valuable, it's just that, well, you already have Kohaku j.B, so the ranges where you can't already tag them with your j.B but Hisui can is in concept, very situational.
(B version) - j.[C] assist.
Instant Hisui j.[C] would be god tier if this was A version and not B. As it is now, while good at its job, it being 2 hearts means you really have to consider when you are going to use this. For this reason, you mostly see it in the corner combos that use it.
(C version) - j.2C assist.
Just like H236CB, this is a prime combo-breaker. At 100% proration and having high hitstun, means you can most of the time go into your own damaging combo afterwards. It costs 3 hearts so only use this when you are certain it will turn the tide in your favour significantly. A whiffed j.2C is horrible.
|
|
You will be traumatized of chairs after fighting this character You will be traumatized of chairs after fighting this character You will also be traumatized of kitchen utensils. You will also be traumatized of kitchen utensils.
|
| A
|
Damage
|
Red Damage
|
Proration
|
Cancel
|
Guard
|
| 700
|
606
|
80% (O)
|
-
|
LH
|
| First Active
|
Active
|
Recovery
|
Frame Adv
|
Circuit
|
Invuln
|
| 16 (11)
|
4
|
26
10
|
-
|
6.3%
|
-
|
| [A]
|
Damage
|
Red Damage
|
Proration
|
Cancel
|
Guard
|
| 1000
|
808
|
80% (O)
|
-
|
LH
|
| First Active
|
Active
|
Recovery
|
Frame Adv
|
Circuit
|
Invuln
|
| 29 (24)
|
4
|
26
10
|
-
|
0.9%
|
-
|
| B
|
Damage
|
Red Damage
|
Proration
|
Cancel
|
Guard
|
| 400, 700 (806)
|
(697)
|
60% (O)
|
-
|
LH
|
| First Active
|
Active
|
Recovery
|
Frame Adv
|
Circuit
|
Invuln
|
| 22 (17)
|
6
|
26
10
|
-
|
6.3%, 7.2% (13.5%)
|
-
|
| [B]
|
Damage
|
Red Damage
|
Proration
|
Cancel
|
Guard
|
| 400, 600, 800 (1198)
|
(704)
|
60% (O)
|
-
|
LH
|
| First Active
|
Active
|
Recovery
|
Frame Adv
|
Circuit
|
Invuln
|
| 24 (19)
|
18
|
26
10
|
-
|
3.6%, 6.3%, 7.2% (17.1%)
|
-
|
| C
|
Damage
|
Red Damage
|
Proration
|
Cancel
|
Guard
|
| 250*12 (2479)
|
(998)
|
100%
|
-
|
LHA
|
| First Active
|
Active
|
Recovery
|
Frame Adv
|
Circuit
|
Invuln
|
| 22 (17)
|
44
|
26
10
|
-
|
1.08%*12 (12.96%)
|
-
|
- (Hearts) - Costs 1, 2, or 3 hearts, for A, B, and C versions respectively.
- Startup in parenthesis are for the 236A/B followup version.
Grounded Hisui assists. Those can also be done out of 236A/B.
(A version) - Hisui 5B assist. Chargeable into a wallslamming version.
Most of what I said for H214A applies here, but now you can also charge it for even more tricky pressure.
At the expense of this, you tend to not be able to get as good as the conversions H214A gives Hisui. At long range, you can only go for 2C into plant, while Hisui can easily 66B into Molotov set-play. Still, this move is still very good.
(B version) - 5C assist. Chargeable too.
When people think about F-Maids, they picture Hisui running towards them and ramming a chair into their back while Kohaku combos from it. This is an ubiquitous part of your arsenal for very good reasons.
For starters, if you have 5 hearts after an air throw, doing K214[B] and then K214C to get a cactus out, you do exactly that. The opponent can try to backdash if they are midscreen, so you should also mix it up with K236[A]-[B] for those situations.
Second, this is over +60 on block when charged. It is a brain-dead easy way to start your offense.
People SHOULD fear this when they are up against you. Remember that, as good as it is, you are using 2 out of your 5 hearts, so if you get predictable with it, you are gonna burn through your resources fast.
(C version) - Solo Hisui 236X assist.
Go to H236CC and K22C sections to learn why this is arguably your most important move and why you should try to always have 3 hearts at all times if possible.
|
|
|
|
A
(~[X])
|
Damage
|
Red Damage
|
Proration
|
Cancel
|
Guard
|
| 333*N
|
101*N
|
100%
|
-
|
LHA
|
| First Active
|
Active
|
Recovery
|
Frame Adv
|
Circuit
|
Invuln
|
58
(~172)
|
X
|
49
|
-
|
2.7%*N
|
-
|
|
Kohaku puts out a spinning pine tree that goes diagonally upwards. The take-off can be delayed by holding any button beforehand, giving you a negative-edge type attack.
Being able to be held by another button that isn't A allows you to do things like Throw then ]X[, giving you increased damage and reducing their tech window. It's not quite as useful for Kohaku's setplay than other plants, though.
|
| B
|
Damage
|
Red Damage
|
Proration
|
Cancel
|
Guard
|
| 280*8 (1724)
|
(802)
|
-4%*8
|
-
|
LHA
|
| First Active
|
Active
|
Recovery
|
Frame Adv
|
Circuit
|
Invuln
|
| 81
|
32
|
53
|
-
|
2.7%*8 (21.6%)
|
-
|
|
This version puts out a grounded multihit spinning tree.
Can be used after 2C. Not as plus as 22C and typically will require Kohaku to close the gap before it hits with a button, even on oki, but it doesn't cost meter.
You tend to see players either use this as an opportunity to switch sisters or to try to mix them up with things like j.C IAD j.BC, super jump into empty jump 2A, and things like that. Not much different from other Kohaku's 22B situations.
|
| EX
|
Damage
|
Red Damage
|
Proration
|
Cancel
|
Guard
|
| 500, 250*12 (1986)
|
(1567)
|
-4%*8
|
-
|
LH (1), LHA
|
| First Active
|
Active
|
Recovery
|
Frame Adv
|
Circuit
|
Invuln
|
| 4+23
|
15 (12), 1 (7) 1 (9) x5,
1 (5) 2
|
4+34
|
-
|
-100.0%
|
Full 1-5
|
|
Pulls out a cactus that performs a series of punches. On hit, this will finish with a superflash into a wallslam hit.
An absolutely essential part of your corner game. Strings ending in 214C and then doing 22C allow Maids to get their plan rolling. Switching to Hisui while cactus is hitting, for you to hit them with a tk.236CC mix-up afterwards is an extremely strong asset for Maids. However, if Kohaku is in bunker range when she sets it, it is always bunkerable. It can be set after throw and 2C as well, though make sure to let the 2C recover to avoid it hitting OTG.
|
|
|
|
| Damage
|
Red Damage
|
Proration
|
Cancel
|
Guard
|
| 800*4
|
606*4
|
80% (O)
|
-
|
LHA
|
| First Active
|
Active
|
Recovery
|
Frame Adv
|
Circuit
|
Invuln
|
| 3+114
|
X
|
3+46
|
-
|
-150.0%
|
-
|
|
Special plant that spits 4 fireballs. Will correct which way it faces if it appears behind the opponent.
This is useful if you have a lot of meter to burn and want to avoid Max. It hitting multiple times fullscreen allows you to get breathing room for you to set-up. Otherwise, it's risky due to the long start-up.
|
|
|
|
| Damage
|
Red Damage
|
Proration
|
Cancel
|
Guard
|
| 100
|
50
|
50%
|
-
|
LH
|
| First Active
|
Active
|
Recovery
|
Frame Adv
|
Circuit
|
Invuln
|
| 3+109
|
72
|
3+36
|
-
|
-150.0%
|
-
|
|
Special plant that spits a slow poison projectile. On hit, it will inflict a damage over time effect on the opponent for approx. 15 seconds, though that effect only deals recoverable damage. The DoT effect automatically ends if Kohaku is hit. Will correct which way it faces if it appears behind the opponent.
Okay this has always been kinda bad and a lot of people see it as a punishment for mashing too many 2s when you wanted Johnny instead. The attack comes out really slowly, covers almost no ground, and does pitiful amounts of damage. If you can avoid it, don't use this.
|
|
Don't do drugs, kids, as they are a waste of meter. Don't do drugs, kids, as they are a waste of meter.
|
| Damage
|
Red Damage
|
Proration
|
Cancel
|
Guard
|
| -
|
-
|
-
|
-
|
-
|
| First Active
|
Active
|
Recovery
|
Frame Adv
|
Circuit
|
Invuln
|
| -
|
-
|
24+100
|
-
|
-100.0%
|
-
|
|
Kohaku injects herself with drugs, granting her Blood Heat and super armor during its duration. After the long super flash, there is a long startup (100f), and it can only be safely used if the opponent is under cactus lockdown. The Blood Heat lasts 300f (5 seconds), shorter than Full Moon's maximum Blood Heat duration (750f, or 12.5 seconds). The super armor completely ignores normal throws, even if you tech throw it she's still invulnerable to that, however command throws can beat it. The only way to cancel it with a throw is by attacking Kohaku during the animation before the super armor comes, with that it becomes a total waste of meter.
24f of startup, then long super flash, then 100f before it becomes active.
While cool-looking, this move has no real practical uses, unless you want to use it for memes.
|
|
Arc Drives
|
|
| Hisui
|
Damage
|
Red Damage
|
Proration
|
Cancel
|
Guard
|
| 8080 (4833)
|
(3120)
|
100%
|
-
|
LHA
|
| First Active
|
Active
|
Recovery
|
Frame Adv
|
Circuit
|
Invuln
|
| 2+4
|
4
|
29
|
-15
|
removes all
|
Full 1-9
|
| Kohaku
|
Damage
|
Red Damage
|
Proration
|
Cancel
|
Guard
|
| 7680 (4594)
|
(3232)
|
100%
|
-
|
LHA
|
| First Active
|
Active
|
Recovery
|
Frame Adv
|
Circuit
|
Invuln
|
| 2+5
|
4
|
22
|
-8
|
removes all
|
Full 1-10
|
|
Hitgrab-type Arc Drive, follows up into fast series of attacks from both maids, finishing in the assisting maid's air throw. Ends in a knockdown that's untechable if done as Hisui lead, and ground techable as Kohaku Lead.
|
|
Uncharged Uncharged Fully Charged Fully Charged
|
| (Min. Charge)
|
Damage
|
Red Damage
|
Proration
|
Cancel
|
Guard
|
| 1000*3 (2629)
|
(2656)
|
90% (M)*3
|
-
|
LH
|
| First Active
|
Active
|
Recovery
|
Frame Adv
|
Circuit
|
Invuln
|
| 3+1+8
|
X
|
25
|
27
|
removes all
|
Full 1-24
|
| (Max. Charge)
|
Damage
|
Red Damage
|
Proration
|
Cancel
|
Guard
|
| 800*8 (4668)
|
(3498)
|
95% (M)*8
|
-
|
LH
|
| First Active
|
Active
|
Recovery
|
Frame Adv
|
Circuit
|
Invuln
|
| 3+378+8
|
X
|
25
|
92
|
removes all
|
Full 1-3, 375-398
|
|
Hisui charges up and delivers a dashing blow through the opponent. If the C button is held, Hisui delays her invulnerable blast of energy, which grants the projectile more hits once it is released.
|
|
|
|
Ground
Air
|
Damage
|
Red Damage
|
Proration
|
Cancel
|
Guard
|
| 1200*2, 1600 (3682)
|
(2706)
|
100%
|
-
|
LH
|
| First Active
|
Active
|
Recovery
|
Frame Adv
|
Circuit
|
Invuln
|
36+49 (min)
30+49 (min)
|
6 (11) 3 (35) 4
|
36+38
3
|
-
|
removes all
|
-
|
|
Hisui commands Kohaku to perform her Arc Drive. Unlike the solo version, this one doesn't function like a dashing command grab and instead Kohaku automatically performs a blockable 3-hit sequence when coming in contact with the opponent. Wallslam into ground-techable knockdown on hit.
|
|
No one will know how to deal with this the first time they see it, just like Tohno/Nanaya AD. No one will know how to deal with this the first time they see it, just like Tohno/Nanaya AD.
|
| Damage
|
Red Damage
|
Proration
|
Cancel
|
Guard
|
| 4700 (2176)
|
(885)
|
50% (O)
|
-
|
U
(Whiffs vs Air.)
|
| First Active
|
Active
|
Recovery
|
Frame Adv
|
Circuit
|
Invuln
|
| 2+15
|
X
|
Knockdown*
|
-
|
removes all
|
Full
|
|
Kohaku dashes forward at high speed and goes into a 3-hit sequence that circuit breaks and knocks the opponent down. This is an unblockable that can only be evaded jumping. If this misses, Kohaku will hit the wall and be in an untechable knockdown state that allows for the opponent to OTG you.
|
|
|
|
Ground
Air
|
Damage
|
Red Damage
|
Proration
|
Cancel
|
Guard
|
| 1000*3 (2629)
|
(2656)
|
90% (M)*3
|
-
|
LH
|
| First Active
|
Active
|
Recovery
|
Frame Adv
|
Circuit
|
Invuln
|
6+8
15+8
|
X
|
6+40
2
|
-
|
removes all
|
-
|
|
Kohaku commands Hisui to perform her Arc Drive. About the same as the solo version, but cannot be charged.
|
|
Another Arc Drives
|
|
| Damage
|
Red Damage
|
Proration
|
Cancel
|
Guard
|
| 800*8 (4668)
|
(3498)
|
95% (M)*8
|
-
|
LH
|
| First Active
|
Active
|
Recovery
|
Frame Adv
|
Circuit
|
Invuln
|
| 2+1+13
|
X
|
22
|
95
|
removes all
|
Full 1-25
|
|
Same as Arc Drive version, but it is automatically fully charged, which means it cannot be delayed.
|
|
|
|
| Damage
|
Red Damage
|
Proration
|
Cancel
|
Guard
|
| 13800 (5238)
|
(3942)
|
50%
|
-
|
U
(Whiffs vs Air.)
|
| First Active
|
Active
|
Recovery
|
Frame Adv
|
Circuit
|
Invuln
|
| 2+18
|
X
|
Knockdown*
|
-
|
removes all
|
Full
|
|
Essentially the same as Arc Drive version in the beginning, but it has much more hits and wallslams the opponent into a ground tech situation. More damage, but does not circuit break.
|
|
Last Arcs
|
|
| Damage
|
Red Damage
|
Proration
|
Cancel
|
Guard
|
| 3000 (1500 ~ 3000)
|
(1262 ~ 2323)
|
50% + 50% * remaining BH time
|
-
|
U
|
| First Active
|
Active
|
Recovery
|
Frame Adv
|
Circuit
|
Invuln
|
| 4+2
|
2
|
54
|
-
|
removes all
|
Full 1-52
|
|
Brainwasher Detective Hisui. It does somewhat low damage, but reverses the controls of the opponent for ten seconds and causes break for a staggering twenty seconds.
|
|
|
|
| Damage
|
Red Damage
|
Proration
|
Cancel
|
Guard
|
| 7000 (3500 ~ 7000)
|
3020 ~ 5538
|
50% + 50% * remaining BH time
|
-
|
U
|
| First Active
|
Active
|
Recovery
|
Frame Adv
|
Circuit
|
Invuln
|
| 4+1
|
1+1
|
16+56
|
-
|
removes all
|
Full
|
|
The final battou. Goes into a cutscene on hit. Untechable knockdown.
|
|
MBAACC Navigation


