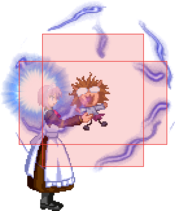
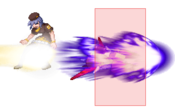
Melty Blood/MBAACC/Neco & Mech/Full Moon
Character Page Progress
This page is still a work in progress, consider joining as an editor to help expand it. Please update this character's roadmap page when one of the editing goals have been reached.
| In Progress | To-do |
|---|---|
|
|
Additional Resources
F-NecoMech Match Video Database
CancerisR's guide, on which this page is based upon (Spanish)
Notable Players
| Name | Color | Region | Common Venues | Status | Details |
|---|---|---|---|---|---|
| naminori (波乗り) |
Japan | A-cho, Big One 2nd, KorewaMelty |
Inactive | The best FNecoMech there was and ever will be. Understands the character on a different level. Watching naminori VODs is one of the best ways to find out what to do as FNecoMech in all types of situations and will allow you to apply that to your own gameplay. | |
| Rau (rau#6829) |
South America | Netplay | Active | Former F-Kouma main, the most active F-Necomech player right now. Found in Melty Sud. | |
| Teadbub (Teadbub) |
North America | Netplay | Inactive | No longer playing F-NecoMech, but you can still ask me questions about the character on discord. |
Overview
|
|
|
| Pros | Cons |
|
|
General Gameplan
F-Necomech is a character that likes to play midrange with pokes such as 2B, rising JA, 6C, and of course, J[C]. Once she gets a hit, she takes you corner to corner into strike/throw setplay. Neco is extremely important to your gameplan, as using her properly will create a wall in front of you.
Due to F-necomech not having the easy Neco repositioning options that C-necomech has, you will need to be very aware of Necos position and where your opponent is. Doing J[C] or 6[C] without looking at whats happening will get you killed.
Neutral
- Spacing the Neco
Due to not having easy access to a Neco reposition option like C and even H-necomech, you need to be a lot more careful and sparing with Neco usage. However, this does not mean it is not strong in certain cases. Due to Neco constantly following you, She is usually an available option in neutral. the only issue is that she stops following you once she's a certain range behind you. You want to play your neutral around being able to easily fade back into Neco in the air or present 6C on the ground. Just the threat of Neco can cause your opponent to hang themselves.
- Using Neco
Due to Neco essentially having a cooldown due to the time it takes for Neco to get up and come back, and the pretty high commitment of all of the moves involving Neco, you have to make it count. 6C is a stop sign in midrange and can anti air due to being air unblockable. 6[C] is a slow projectile that's your only real option fullscreen along with 214B. the issue with these is that you completely lose Neco as a resource for and become much more vulnerable in midrange. An okay strategy is to use these fullscreen options and dash or jump in. This makes it so Neco doesn't have to travel to you, but rather you travel to Neco. This is a little risky, but 214B and 6[C] force them in weird spots if they want to avoid either of them. 214C is another option if you have meter, the issue being that it is quite inconsistent. its usually best when Neco is behind the opponent
- Learning to not be predictable with Neco
All of this Neco stuff sounds great, however, there is one very big issue.
it is very easy to call out.
6C can get airdashed over with the proper spacing , J[C] can get called out with rising air button, 236X and 214B/A are too slow to use at midrange, and 214C can get shielded or hit out of before it starts. All of this means that you have to constantly switch up what you do around neco to keep your opponent on their toes. For some examples, if the opponent is trying to beat your J[C] with a rising button, you can do immediate JC, airdash back JB, or just air block. Changing timings on when you do 6C or just fading back into Neco and doing dash 2B can be strong.
There is a million things you can do but the main point is to not be predictable.
When learning F-Necomech you absolutely need to learn to play without Neco. It is strong, but you will not always have access to it and it can be extremely easy to call out if you are up against a competent player that can punish your bad habits.
Normals
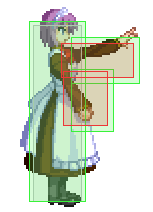
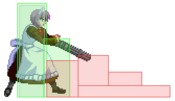
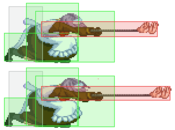
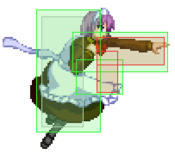
- 5B Strong disjoint, +1 on block, and pretty good startup + recovery on whiff. Best used to control the ground game, but doesn't hit too high up, so stop using it when your opponent goes airborne
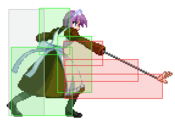
- 2B Slightly faster than 5B and multihit can make hitconfirming it easier. Be careful as it has very high recovery on whiff, hitting even lower than 5B. Prone to getting IADed
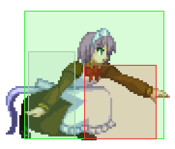
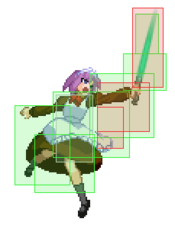
- j.A 3F startup and a very good hitbox makes it your strongest air to air option.
- j.B 8F startup and a hitbox high above mech making it a strong air to air for people above you. has a large hurtbox, so be careful
- j.C: Used mainly when your opponent is out of range from j.A. Solid air to air and air to ground due to its three hitboxes (The attack hits once but hits in different points).
Regarding the buttons you hit Neco Arc with:
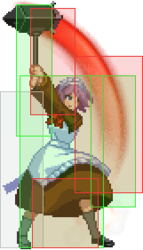
- j.[C]: Arguably F-NecoMech's best tool and the reason she is not bottom of the barrel. It's your best option to control space and force favorable situations. Against a cornered opponent, you can jail them by covering the air with j[C] Neco projectile while Mech holds the ground. Once your opponent begins to respect it, you can begin converting to strike / throw situations. Be careful of doing j.[C] carelessly as the opponent can counterhit you during the startup.
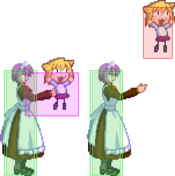
- 6C: Also a very useful projectile, but less active than j[C] projectile. You also have considerably more recovery from "whiffing" 6C. Used mainly to catch airborne opponents after air techs or jump-out attempts in corner, if you happen to have Neco close to you.
- 6[C]: Least useful option due to 6[C]'s higher startup, mainly used to fight fullscreen. The high startup means you'll likely lose any projectile battle. If you manage to get the hit or trade, you can get some time to approach since this Neco projectile wallbounces. Also launches Neco the furthest away from you, which is not a good position to be in.
Pressure
Pressure with F-Necomech isn't the best in the game, but it's still pretty decent and simple strike / throw pressure. She has a suprisingly fast forward walk, which means she can stagger effectively without having to rely on her slow startup dash. A basic example of this would be 2AA or 2A > 5B into forward walk 2A/5A or throw. 5C is +6 on block which gives you plenty of time to go for strike / throw or reset pressure with IAD jump-in as well. Her reward from landing a throw is generally good if you happen to have Neco close to you. After landing a throw, hit Neco with a slightly delayed j.[C] to set up another strike / throw situation. If Neco is slightly further away, you can do meaty 236A and proceed to setup the jC > IAD jA fuzzy guard mixup. Best of all, these setups work anywhere on the screen, so performing them properly and looping them correctly will make your opponent regret not teching that throw.
Take advantage of max range 5B, as many characters struggle trying to challenge it directly. If they do try to challenge it, you can try going above their pokes with IAD jC, which should beat most grounded normals thanks to F-Necomech's airdash trajectory. When your opponent starts jumping out of your pressure, it can be dangerous as your grounded options aren't immediately effective against airborne approaches. If your opponent remains airborne for too long, remember you can use Neco 6C projectile to clip their landing. Just be careful if they land from too high an angle relative to Neco, the projectile may whiff. If the opponent tries to get out of the corner by double jumping away, Neco 6C projectile is also a solid option since it autocorrects to the side your opponent is, in case they happen to have gone behind you.
Be very mindful of Neco's position in the corner so as to not hit her immediately. Pay attention to which normals you use in your pressure string so the pushback leaves you close to Neco. Keeping this proper Neco spacing in mind lets you reset pressure with her either by taking advantage of 5B or 5C plus frames to jump and hit Neco with j[C] or doing a sequence of normals that allows you to hit Neco with a spaced 6C. At the best spacing possible, you should be plus on block enough to get back in with forward walk / dash. 623A/B are -6 on block but can be used as safe pressure enders since they're practically unpunishable at the max range they can hit from. 214x and 236A/B are very plus on block, but your opponent has no reason to respect you due to the very high startup they have, giving them plenty time to mash or get out.
Combos/Okizeme
Off any clean hit or air CH, there's only one combo you should go for in order to get decent okizeme. Omit the 5C from the optimal combo and instead perform a dashjump after j[C]. If done properly and you don't super jump cancel, the dash momentum should carry throughout the air combo and into the air throw ender, leaving you much closer to your opponent compared to a regular air throw ender. Usually, the position you're left at after airthrow ender is abysmal, since it leaves Mech far away from the opponent, meaning they can jump away without much too fear.
It's a bit tight but after an air CH, you can land 5B/5C into 6[C] which lets you follow up with j[C]. You want 5B/5C to hit as low as possible so j[C] won't whiff after 6C.
If you reach the corner, You can omit the later air series portion of the combo and simply end in 2C delay 236A after the last j.[C] in order to set up the fuzzy guard mixup. If Neco happens to be too close to corner from either already being their or being knocked into it from your combo, end the combo in a third j[C] and quickly hit Neco with another j.[C] in order to set up a strike / throw mixup. If you're very lucky and Neco j.[C] hits behind the opponent, it vacuums them away from corner, letting you set up a cheeky left / right mixup
In order to manage meter, you can end the ground portion of the combo early with 5C (623A) 623C, which deals an absurd amount of damage. If you're close to corner and would rather extend the combo a little further, you can do ... j[C] dj9 j[C] 2C > 214C, which lets you set up the fuzzy guard mixup. If your opponent happens to block it but you manage to land a throw after and since Neco is behind your opponent after214C, you can set up a left / right mixup with 236A > neutral jump drift.
623C ender
623C ender gives you a couple options. 236A/B is a consistent oki option, its an autotimed meaty and gives a lot of blockstun due to it being pretty early in the active frames, consistently strong. J[C] is the other(and usually preferred option). While it doesn't hit meaty, it leaves a gap for you to throw while being safe to mashing due to neco J[C] and beating most reversals. Its possible for Neco J[C] to force the opponent to block even after teching a throw, but this is only if they tech it early. if you want to go for a strike, dash 5C and 2A are both viable, although 5C is less prone to getting thrown if you do it at range while still being +6 and continuing your pressure. Regardless, this oki is semi-safe and lets you get extremely oppressive strike/throw. 214B and even 214A is another option, although its a bit weaker than the other 2 listed above. it doesn't hit meaty and isnt air unblockable, but it can still force someone to block it if the opponent attempts to upback on wakeup. however, you cannot sneak in a throw like J[C] and the neco postioning can be a little inconsistent but it can usually setup a J[C] if you land a throw.
623C left/right
If you land a 623C midscreen and they are somewhat far away, you can go for a left/right mixup by doing SJ9 dlJC. Its quite spacing dependent but delaying the JC will get you crossup and delaying it not as much will get you sameside.
Video example:
J[C] ender
Arguably the most important ender, and you can do virtually anything after it. 236B/A oki is quite consistent, although it can be hard to time it to hit meaty and early in the active frames due to the sheer amount of time you have after J[C] ender, but still not a bad option. J[C] is very strong here. A setup you can do in the corner is during the triple J[C] combo, jump back on the 2nd and neutral jump on the 3rd(or neutral jump on the 2nd and 3rd if you're approaching the corner). with this specific spacing, you can consistently get meaty neco J[C] with a decent amount of leniency on the neco spacing. It gives you a lot of room to adjust depending on where Neco is. One strong reversal safe setup that Fnecomech can do is after the 3rd J[C] do 214B and dash up spaced 5C. if you do it right and you're on the right part of the screen, this will be reversal safe while still hitting meaty and 214B being a way to follow up after the 5C. because of Fnecomech's slow backdash/backwalk and the high total duration on 214B, this only really works if you're doing the midscreen bnb from corner to corner or very far from the corner.
Throw ender
After throw, theres a million different things you can do due to the extremely strong knockdown that throw gives. Depending on neco's position, you have to change what you do for oki. But even with that in mind, F-NecoMech can have some variety in her oki options. throw 2A(W) 236A/B or J[C] is a really strong framekill. It will meaty 236A and leave a gap in J[C](refer to the 623C section for the non-meaty J[C])
Fuzzy guard video example:
Doesnt work on: Miyako, Len, White Len, Aoko, Satsuki, PCiel, Tohno, Nanaya Neco Arc, NAC.
Only doable from neutral jump & tight: Hime, Arcueid, Warc, Roa, Hisuis, Ryougi.
Works easily on: Rest of the cast.
Defense
Just block. If you don't block, you'll explode. All the full moon specific universal options are on the mediocre end. It's very important that you manage your meter properly and stay close to Max in order to recover health in case something goes wrong. Your normals are good to challenge grounded pressure but not forward jump or IAD, specially against characters with strong air to ground options. Since her shield counter moves you forward, you're prone to having air approaches go behind you, meaning you'll get whiff punished. 22A / 22B are too slow to be properly used as parries, and the extra hitbox is air blockable, as well as having very high recovery. Meanwhile, 22C has full invul on startup, but it is easy to OS, punishable on block (although -5 is rather tight to punish) and Neco will jump out early and you lose the invulnerability frames if Mech is pushed during the startup of the move.
Combos
| Combo Notation Help | |
|---|---|
| Disclaimer: Combos are written by various writers, so the actual notation used in pages can differ from the standard one. | |
| X > Y | X input is cancelled into Y. |
| X > delay Y | Must wait for a short period before cancelling X input into Y. |
| X, Y | X input is linked into Y, meaning Y is done after X's recovery period. |
| X+Y | Buttons X and Y must be input simultaneously. |
| X/Y | Either the X or Y input can be used. |
| X~Y | This notation has two meanings.
|
| X(w) | X input must not hit the opponent (Whiff). |
| j.X | X input is done in the air, implies a jump/jump cancel if the previous move was done from the ground. Applies to all air chain sections:
|
| sj.X | X input is done after a super jump. Notated as sj8.X and sj9.X for neutral and forward super jumps respectively. |
| dj.X | X input is done after a double jump. |
| sdj.X | X input is done after a double super jump. |
| tk.X | Stands for Tiger Knee. X motion must be buffered before jumping, inputting the move as close to the ground as possible. (ex. tk.236A) |
| (X) | X is optional. Typically the combo will be easier if omitted. |
| [X] | Input X is held down. Also referred to as Blowback Edge (BE). Depending on the character, this can indicate that this button is held down and not released until indicated by the release notation. |
| ]X[ | Input X is released. Will only appear if a button is previously held down. This type of input is referred to as Negative Edge. |
| {X} | Button X should only be held down briefly to get a partially charged version instead of the fully charged one. |
| X(N) | Attack "X" should only hit N times. |
| (XYZ)xN | XYZ string must be performed N times. Combos using this notation are usually referred to as loops. |
| (XYZ^) | A pre-existing combo labelled XYZ is inserted here for shortening purposes. |
| CH | The first attack must be a Counter Hit. |
| Air CH | The first attack must be a Counter Hit on an airborne opponent. |
| 66 | Performs a ground forward dash. |
| j.66 | Performs an aerial forward dash, used as a cancel for certain characters' air strings. |
| IAD/IABD | Performs an Instant AirDash. |
| AT | Performs an Air Throw. (j.6/4A+D) |
| IH | Performs an Initiative Heat. |
| AD | Performs an Arc Drive. |
| AAD | Performs an Another Arc Drive. |
Its worth noting that you can start most of these with 5C > 2A, although this is a 1 frame link.
Normal Combos
OTG Pick ups
Misc. Combos
Shield Counter Confirm
Raw Air Throw Confirms
Aerial CH Confirms
Move Descriptions
| Frame Data Help | |
|---|---|
| Header | Tooltip |
| Move Box Colors |
Light gray = Collision Box (A move lacking one means it can go through the opponent's own collision box). |
| Damage | Base damage done by this attack.
(X) denotes combined and scaled damage tested against standing V. Sion. |
| Red Damage | Damage done to the recoverable red health bar by this attack. The values are inherently scaled and tested against standing V. Sion.
(X) denotes combined damage. |
| Proration | The correction value set by this attack and the way it modifies the scaling during a string. See this page for more details.
X% (O) means X% Overrides the previous correction value in a combo if X is of a lower percentage. |
| Circuit | Meter gained by this attack on hit.
(X%) denotes combined meter gain. |
| Cancel | Actions this move can be cancelled into.
SE = Self cancelable. |
| Guard | The way this move must be blocked.
L = Can block crouching |
| Startup | Amount of frames that must pass prior to reaching the active frames. Also referred to as "True Startup". |
| Active | The amount of frames that this move will have a hitbox. (x) denotes frame gaps where there are no hitboxes is present. Due to varied blockstuns, (x) frames are difficult to use to determine punish windows. Generally the larger the numbers, the more time you have to punish. |
| Recovery | Frames that this move has after the active frames if not canceled. The character goes into one frame where they can block but not act afterwards, which is not counted here. |
| Advantage | The difference in frames where you can act before your opponent when this move is blocked (assuming the move isn't canceled and the first active frame is blocked). If the opponent uses a move with startup that is at least 2 frames less than this move's negative advantage, it will result in the opponent hitting that move. |
| Invul | Lists any defensive properties this move has.
X y~z denotes X property happening between the y to z frames of the animations. If no frames are noted, it means the invincibility lasts through the entire move. Invicibility:
Hurtbox-Based Properties:
Miscellaneous Properties
|
Normal Moves
Standing Normals
5A
5B
5C
Crouching Normals
2A
2B
2C
Jumping Normals
j.A
j.B
j.C
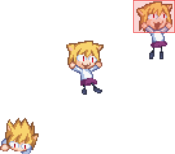
Hit the cat, acquire setplay. Hit the cat, acquire setplay.
|
|---|
Command Normals
6C
Universal Mechanics
Ground Throw
Ground Throw
6/4A+D |
|---|
Air Throw
Air Throw
j.6/4A+D |
|---|
Shield Counter
Shield Counter
236D after a successful Shield (Air OK) |
|---|
Shield Bunker
Shield Bunker
214D in neutral or blockstun |
|---|
Blood Heat
Blood Heat
A+B+C during MAX |
|---|
Circuit Spark
Circuit Spark
A+B+C during hitstun/blockstun at MAX |
|---|
Special Moves
236X
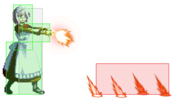
No laser sprites, framedisplay is bugged. No laser sprites, framedisplay is bugged. EX EX
|
|---|
623X
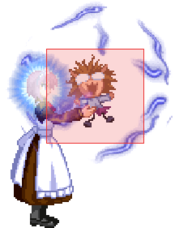
Fingerbritt
623A/B/C |
|---|
214X
22X
A/B A/B (Clash) (Clash) EX EX
|
|---|
Arc Drive
L.S.O (Superhuman Sister Alliance)
41236C during Max/Heat |
|---|
Another Arc Drive
L.S.O (Superhuman Sister Alliance)
41236C during Blood Heat |
|---|
Last Arc
Saturday Night Forever
Aerial EX Shield during Blood Heat |
|---|


