Character Page Progress
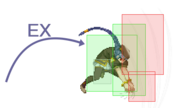
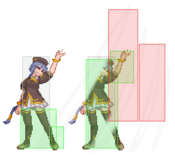
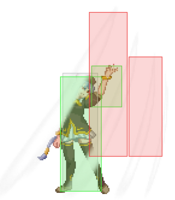
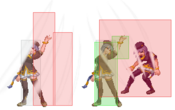
This page is still a work in progress, consider joining as an editor to help expand it. Please update this character's roadmap page when one of the editing goals have been reached.
| In Progress |
To-do
|
- Combos:
- Add damage, meter gain/given numbers and video links to the pre-existing combos.
|
- Additional Ressources/Players to watch/ask
- If you know any players in particular that can be helpful for learning this character, please add them with, if possible a way to contact them (such as a Discord handle) and a name that can be searched in the match video database.
- Overview/General Gameplan:
- Add a short summary of this character with a list of strengths and weaknesses
- Do your best to describe how to play this character, change or add subsections based on what you would write as a guide.
- Combos:
- Add combos for non-(2A) 5[B] starters. (ex: Corner throw, Raw airthrow)
- (If necessary, add Starters/Enders/OTG Pickup combo sections)
|
Additional Resources
F-V.Sion Match Video Database
F-V.Sion Basic Resources
Overview

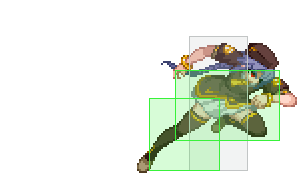
Unlike her other moons, F-V.Sion has a stepdash that travels a set distance and cannot be stopped, and a subsequent command dash (6AB only, not 66) that looks really cool.
Playstyle
 F-V.Sion (FVS) is a unique rushdown/anti-zoner character with great evasion, and excellent metered options. F-V.Sion (FVS) is a unique rushdown/anti-zoner character with great evasion, and excellent metered options. |
| Pros |
Cons |
- Strong abare options: 2A is quick, and 214C can be hard to punish and has high reward on hit.
- Flexible meter use: FVS has simple meter management and can stick (multiple) EX moves into most combos. MAX mode isn't bad either, giving her a healing command grab.
- Unique movement: Command dash (66 6AB), 214[B], and J.2B allow for tricky, yet committal, movement.
- Decent mixups: 623C gives FVS air drift mix midscreen and a left/right in the corner with proper routing. J.B is also a crossup normal.
- Strong air-to-air: FVS air buttons are quick and large, and she gets some of her best damage off of air counter hits.
- Good pressure: While prone to shield, FVS has excellent frame traps and a lot of plus frames.
- 214C: Bionic arm. One of the best reversals in the game.
- TK J.214A: Unreactable overhead. Best used for closing out rounds due to it being minus on hit.
|
- Trades oki for damage (and vice versa), or needs meter: FVS doesn't get a hard knockdown from her air throw, and her HKD routes tend to do less damage or cost meter.
- Meter reliant: See above.
- Fast, but vulnerable: FVS's dash is inactionable for the entirety of the animation, so she cannot dash block, jump, or cancel it into normals.
- Low reward off of stray hits: Low damage and no oki off of most stray hits, most notably 22X, which suffers from high proration.
- Mediocre corner carry without meter: Needs 214C for decent corner carry.
- Execution barrier: FVS combos can be easy, but tend to give far less reward than her more difficult routes.
- Suffers greatly against top tiers: Proceed with caution.
|
General Gameplan
FVS thrives on being unhittable. Abusing the momentum gained by dashjumping is necessary in making your evasive capabilities better. Dash under air approaches to keep opponents on their toes and punish their landing. Despite her laggy dash,
FVS is still very fast; keep this in mind when playing against characters with summons or laggy neutral tools (Aoko orbs, Len cats, Nero summons, C-Roa orbs, etc.) so you can scout the best opportunity to (command) dash in their face and punish. Keep your
air-to-air presence scary by scouting air approaches with 7j.A/C, IAD back j.C, or rising j.C. Air counter hit j.C is some of FVS' best damage, so use j.C liberally. J.A is also strong for boxing out opponents extending hurtboxes in the air.
22X buffer jump is a great option for disrupting setplay, as you can jump over active hitboxes on the ground (Nero snake, etc.). 214C is also great at this, sporting long range and instantly turning the tables on hit.
Neutral
j.A and j.C are your best friends. Neutral/rising jump j.A is good for stuffing air approaches due to its massive horizontal hitbox and fast startup, not to mention you can do two in a single neutral jump. j.C's vertical hitbox is excellent and
will beat most air normals when below the opponent. On the ground, dash 2B and 5B/5[B] are great for checking grounded opponents and are easy to confirm off of. 214[B] whiff cancel into 214C can cover a considerable distance and can whiff punish from nearly
full screen. 6[B] is massive, disjointed, and is whiff cancellable as well, so cancel into 623C if you get jumped in on during the active frames.
Pressure
FVS has good plus frames on her normals. 2A stagger is strong, but a little less effective than other Full Moon characters due to her inactionable dash. 5B is +3 and frametraps into 2A easily point blank. 5[C] is another standoutat +4.
214[B] is jump cancelable on block, allowing for all kinds of mix, like IAD j.BC for a double overhead, j.2B, whiffed j.2B, empty hop throw/low; the possibilities are endless. However, 214[B] is very easy to shield, so buffer 7 after connecting on an opponent's
shield to block the shield counter (EX Shield -> 5A will likely hit you though since it is air unblockable). 6[C] is good for catching jump outs and occasionally for stealing back a turn, but again, is easily shieldable.
214A is plus at max distance, so space with 2B pushback to gain maximum frame advantage. Midscreen, to keep the opponent respectful of your pressure, end strings in 22A/B/C (depending on distance) to catch potential jump outs
or aggressive action. Buffer jump after every 22x to combo afterward on hit.
Okizeme
FVS' oki is pretty lackluster compared to other characters, but still isn't bad.Post airthrow, F-V.Sion gets nothing midscreen, but you
can airdash after to gain some screen presence. FVS air throw becomes far more potent in the corner. She can j.2B in order to meaty neutral or back tech, and can whiff cancel airthrow recovery with a jump normal to chase forward tech. If the opponent doesn't
tech, then F-V.Sion gets real oki. 5B is an excellent meaty with high reward on counterhit (it can also combo into itself on CH point blank) and is +3. Combos ending in 236A set up a safejump with cross up potential midscreen. 623C gives an air drift mixup
midscreen, but can give a left/right mix in the corner with proper routing.
Defense
Please block. But other than that, FVS has a ton of defensive tools. Her 2A abare is strong, and she has two excellent reversal options for different uses. 623C provides a hard knockdown, side switch (if you want to), L/R mix, and vaccuums insanely well.
214C provides instant corner carry and a safejump, and is difficult to punish at max distance. Generally, EX guard often and exploit large gaps in pressure (charge moves, summons, etc.) by using 214C on reaction. If FVS has meter, her defense is very good.
Move Descriptions
| Frame Data Help
|
| Header
|
Tooltip
|
| Move Box Colors
|
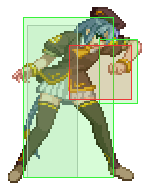
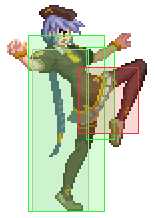
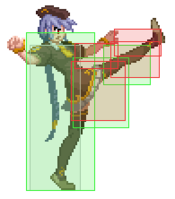
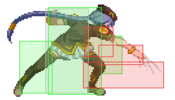
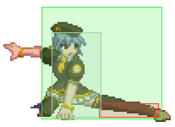
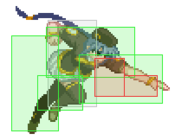
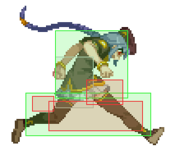
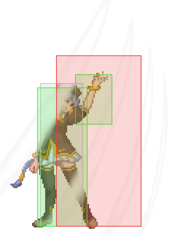
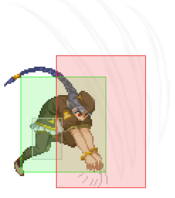
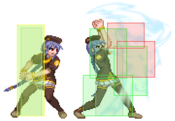
Light gray = Collision Box (A move lacking one means it can go through the opponent's own collision box).
Green: Hurt Boxes.
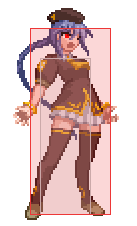
Red: Hit(/Grab) Boxes.
Yellow: Clash Boxes (When an active hitbox strikes a clash box, the active hitbox stops being active. Multi-hit attacks can beat clash since they will still progress to the next hitbox.)
Magenta: Projectile-reflecting boxes OR Non-hit attack trigger boxes (usually).
Blue: Reflectable Projectile Boxes.
|
| Damage
|
Base damage done by this attack.
(X) denotes combined and scaled damage tested against standing V. Sion.
|
| Red Damage
|
Damage done to the recoverable red health bar by this attack. The values are inherently scaled and tested against standing V. Sion.
(X) denotes combined damage.
|
| Proration
|
The correction value set by this attack and the way it modifies the scaling during a string. See this page for more details.
X% (O) means X% Overrides the previous correction value in a combo if X is of a lower percentage.
X% (M) means the current correction value in a combo will be Multiplied by X%. This can also be referred to as relative proration.
|
| Circuit
|
Meter gained by this attack on hit.
(X%) denotes combined meter gain.
-X% denotes a meter cost.
|
| Cancel
|
Actions this move can be cancelled into.
SE = Self cancelable.
N = Normal cancelable.
SP = Special cancelable.
CH = Cancelable into the next part of the same attack (Chain in case of specials).
EX = EX cancelable.
J = Jump cancelable.
(X) = Cancelable only on hit.
-X- = Cancelable on whiff.
|
| Guard
|
The way this move must be blocked.
L = Can block crouching
H = Can block standing.
A = Can block in the air.
U = Unblockable.
|
| Startup
|
Amount of frames that must pass prior to reaching the active frames. Also referred to as "True Startup".
|
| Active
|
The amount of frames that this move will have a hitbox.
(x) denotes frame gaps where there are no hitboxes is present. Due to varied blockstuns, (x) frames are difficult to use to determine punish windows. Generally the larger the numbers, the more time you have to punish.
X denotes active frames with a duration separate from its origin move's frame data, such as projectile attacks. In this case, the total length of the move is startup+recovery only.
|
| Recovery
|
Frames that this move has after the active frames if not canceled. The character goes into one frame where they can block but not act afterwards, which is not counted here.
|
| Advantage
|
The difference in frames where you can act before your opponent when this move is blocked (assuming the move isn't canceled and the first active frame is blocked).
If the opponent uses a move with startup that is at least 2 frames less than this move's negative advantage, it will result in the opponent hitting that move.
±x~±y denotes a range of possible advantages.
|
| Invul
|
Lists any defensive properties this move has.
X y~z denotes X property happening between the y to z frames of the animations. If no frames are noted, it means the invincibility lasts through the entire move.
Invicibility:
- Strike = Strike invincible.
- Throw = Throw invincible.
Hurtbox-Based Properties:
- Full = No hurtboxes are present.
- High = Upper body lacks a hurtbox.
- Low = Lower body lacks a hurtbox.
Miscellaneous Properties
- Clash = Frames in which clash boxes are active.
- Reflect = Frames in which projectile-reflecting boxes are active.
- Super Armor = Frames in which the character can take hits without going into hit stun.
|
Normal Moves
Standing Normals
|
|
| Damage
|
Red Damage
|
Proration
|
Cancel
|
Guard
|
| 350
|
252
|
78% (O)
|
-SE-, -N-, -SP-, -EX-, (J)
|
LH
|
| First Active
|
Active
|
Recovery
|
Frame Adv
|
Circuit
|
Invuln
|
| 5
|
3
|
6
|
3
|
3.15%
|
-
|
|
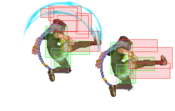
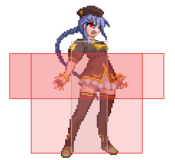
Quick elbow jab, +3 on block. Good for point-blank anti-airing and tick throws.
|
|
|
|
| 5B
|
Damage
|
Red Damage
|
Proration
|
Cancel
|
Guard
|
| 800
|
505
|
100%
|
N, SP, EX, (J)
|
LH
|
| First Active
|
Active
|
Recovery
|
Frame Adv
|
Circuit
|
Invuln
|
| 6
|
3
|
9
|
3
|
7.2%
|
-
|
|
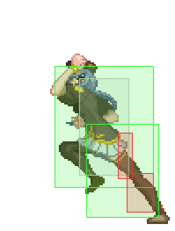
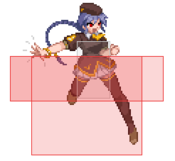
Fast knee strike. Excellent meaty and frame trap tool, especially into 2A and 5B/5[B]. Can combo into itself on counter hit. Use dash momentum to use 5B multiple times in pressure, like a stubby (but plus on block) F-Aoko 5B.
|
| 5[B]
|
Damage
|
Red Damage
|
Proration
|
Cancel
|
Guard
|
| 1000
|
707
|
100%
|
N, SP, EX, (J)
|
LH
|
| First Active
|
Active
|
Recovery
|
Frame Adv
|
Circuit
|
Invuln
|
| 11
|
3
|
15
|
-3
|
9.0%
|
-
|
|
Chargable version, trades plus frames and startup for a chunky hitbox and more damage. Combo fodder, but useful on occasion to catch jumps.
|
|
|
|
| 5C
|
Damage
|
Red Damage
|
Proration
|
Cancel
|
Guard
|
| 1000
|
909
|
100%
|
N, SP, EX, (J)
|
LHA
|
| First Active
|
Active
|
Recovery
|
Frame Adv
|
Circuit
|
Invuln
|
| 12
|
3
|
15
|
0
|
9.0%
|
-
|
|
Far reaching claw smash. Mostly combo/blockstring filler. Unfortunately air blockable...
|
| 5[C]
|
Damage
|
Red Damage
|
Proration
|
Cancel
|
Guard
|
| 1600
|
1111
|
100%
|
N, SP, EX, (J)
|
LHA
|
| First Active
|
Active
|
Recovery
|
Frame Adv
|
Circuit
|
Invuln
|
| 17
|
4
|
10
|
4
|
9.0%
|
-
|
|
Chargeable version becomes +4 on block and does more damage. Great in pressure, but easily shieldable. Can be used multiple times at long range to keep pressure up without committing to redash or 214[B]. Also air blockable...
|
|
Crouching Normals
|
|
| Damage
|
Red Damage
|
Proration
|
Cancel
|
Guard
|
| 350
|
121
|
75% (O)
|
-SE-, -N-, -SP-, -EX-, (J)
|
L
|
| First Active
|
Active
|
Recovery
|
Frame Adv
|
Circuit
|
Invuln
|
| 4
|
4
|
5
|
3
|
1.8%
|
-
|
|
A low kick. +3 on block. Great for stagger pressure and abare.
|
|
"Head Invul" "Head Invul"
|
| Damage
|
Red Damage
|
Proration
|
Cancel
|
Guard
|
| 300, 400 (609)
|
(397)
|
80% (O)
|
N, SP, EX, (J)
|
L
|
| First Active
|
Active
|
Recovery
|
Frame Adv
|
Circuit
|
Invuln
|
| 7
|
4
|
13
|
0
|
2.7%, 3.6% (6.3%)
|
-
|
|
Disjointed, two-hit low claw swipe; easy to hit confirm off of and zero on block. Good in neutral after a dash to start a combo or pressure. You're probably going to start most of your combos with this.
|
|
|
|
| Damage
|
Red Damage
|
Proration
|
Cancel
|
Guard
|
| 1000
|
808
|
60% (O)
|
N, SP, EX, (J)
|
L
|
| First Active
|
Active
|
Recovery
|
Frame Adv
|
Circuit
|
Invuln
|
| 10
|
18
|
9
|
-9 ~ 8
|
9.0%
|
-
|
|
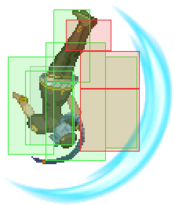
Low slide. Despite its massive hurtbox, it is quite useful for abare, especially against longer range characters. Jump cancel or special cancel into 214C/623C on hit to avoid hazards like Nero snakes. Use sparingly in pressure, as 2C only cancels into 6C and specials, which can end your pressure and make it predictable. Good in neutral as a quick low check against aggressive opponents, and is necessary to snag max range 2B confirms. Safe or even plus depending on distance.
|
|
Aerial Normals
|
|
| Damage
|
Red Damage
|
Proration
|
Cancel
|
Guard
|
| 300
|
181
|
75% (O)
|
SE, N, SP, EX, J
|
HA
|
| First Active
|
Active
|
Recovery
|
Frame Adv
|
Circuit
|
Invuln
|
| 5
|
4
|
10
|
-
|
2.7%
|
-
|
|
Swift shoulder-level hand swipe. Very useful horizontal hitbox. Great when used rising to deter reckless ground-to-air approaches or IADs, or to jumpstart air-to-air offense.
|
|
|
|
| Damage
|
Red Damage
|
Proration
|
Cancel
|
Guard
|
| 750
|
454
|
80%
|
N, SP, EX, J
|
HA
|
| First Active
|
Active
|
Recovery
|
Frame Adv
|
Circuit
|
Invuln
|
| 8
|
6
|
-
|
-
|
6.3%
|
-
|
|
Awkward jumping split kick that crosses up very well. Mostly reserved for IADs and mixup situations due to the hurtbox. You can also do an instant j.214a after it crosses up for a cheeky double overhead 50/50.
|
|
|
|
| Damage
|
Red Damage
|
Proration
|
Cancel
|
Guard
|
| 900
|
454
|
90% (M)
|
SP, EX, J
|
HA
|
| First Active
|
Active
|
Recovery
|
Frame Adv
|
Circuit
|
Invuln
|
| 6
|
3
|
-
|
-
|
8.1%
|
-
|
|
Downright dastardly flip kick. Fast, damaging, and sporting a great hitbox, this is your go-to air-to-air tool. It can be used rising to quickly snipe air approaches for huge reward, or to chase bad air techs. If used properly, opponents will never want to be above you. Ever.
|
|
Command Normals
|
|
| 6B
|
Damage
|
Red Damage
|
Proration
|
Cancel
|
Guard
|
| 300*3 (871)
|
(525)
|
100%
|
-EX-
|
LH
|
| First Active
|
Active
|
Recovery
|
Frame Adv
|
Circuit
|
Invuln
|
| 13
|
10
|
12
|
4
|
2.7%*3 (8.1%)
|
-
|
|
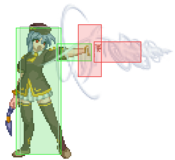
Etherlite drill from V.Sion's hand. Good for close quarter, preemptive anti-airing. Can stuff some abare options close range, but will likely get blown up by crouching buttons due to the hitbox not extending downward. Decent at baiting whiff punish attempts due to its relatively short recovery. Can be crouched and/or dashed under.
|
| 6[B]
|
Damage
|
Red Damage
|
Proration
|
Cancel
|
Guard
|
| 700*3 (2034)
|
(1467)
|
100%
|
-EX-
|
LH
|
| First Active
|
Active
|
Recovery
|
Frame Adv
|
Circuit
|
Invuln
|
| 27
|
12
|
9
|
1
|
6.3%*3 (18.9%)
|
-
|
|
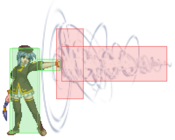
Charged version becomes a huge drill that becomes a great anti-air. Due to its long startup, however, you generally want to use it preemptively at mid range to stuff IADs or ground approaches, or wait until your opponent expends all of their air options to snipe their landing and to keep them stranded in the air. Loses to downward angled jump normals at close range, so be mindful of your opponents position before committing. Can still be crouched and/or dashed under.
|
|
|
|
| 6C
|
Damage
|
Red Damage
|
Proration
|
Cancel
|
Guard
|
| 800
|
505
|
65% (O)
|
-
|
H
|
| First Active
|
Active
|
Recovery
|
Frame Adv
|
Circuit
|
Invuln
|
| 27
|
5
|
12
|
-2
|
7.2%
|
-
|
|
Absolutely unreactable overhead flip kick. Great combo starter, weak to shield and mash (grants air CH).
|
| 6[C]
|
Damage
|
Red Damage
|
Proration
|
Cancel
|
Guard
|
| 1500
|
1010
|
65% (O)
|
-
|
H
|
| First Active
|
Active
|
Recovery
|
Frame Adv
|
Circuit
|
Invuln
|
| 34
|
9
|
8
|
1 ~ 8
|
13.5%
|
-
|
|
Charged version increases damage, range, and hitboxes, along with making it plus on block. Serves a different purpose to its uncharged version, becoming almost useless in pressure due to its high startup making it incredibly easy to shield, but the hitbox increase makes it great for catching jump outs in the corner. Most effective at the end of a blockstring, where you're pushed away from your opponent the furthest.
|
|
|
|
| Damage
|
Red Damage
|
Proration
|
Cancel
|
Guard
|
| 800
|
606
|
60% (O)
|
-
|
LHA
|
| First Active
|
Active
|
Recovery
|
Frame Adv
|
Circuit
|
Invuln
|
| 11
|
X
|
9
|
1 ~ -4
|
7.2%
|
-
|
|
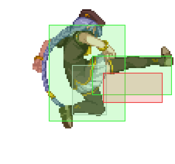
Patented V.Sion divekick. Useful in pressure, as a meaty post air throw in the corner, and for movement in general. Used often in combos. Relaunches OTG.
|
|
Universal Mechanics
|
|
| Damage
|
Red Damage
|
Proration
|
Cancel
|
Guard
|
| 1000
|
404
|
35%
|
-
|
U
|
| First Active
|
Active
|
Recovery
|
Frame Adv
|
Circuit
|
Invuln
|
| 3
|
1
|
20
|
-
|
0.0%
|
-
|
|
V.Sion grabs the opponent and tosses them. Ground techable, but comboable in the corner. 214C after throw midscreen to secure the corner for meter.
|
|
|
|
| Damage
|
Red Damage
|
Proration
|
Cancel
|
Guard
|
| 1600 (Raw)/1200
|
505
|
30%
|
(Any if Raw)
|
U
|
| First Active
|
Active
|
Recovery
|
Frame Adv
|
Circuit
|
Invuln
|
| 2
|
1
|
12
|
-
|
0.0%
|
-
|
|
Works about the same as Sion's airthrow. Ground bounces the opponent if done raw, ground techable if done as a combo ender.
|
|
|
|
| Ground
|
Damage
|
Red Damage
|
Proration
|
Cancel
|
Guard
|
| 500 (345)
|
202
|
50%
|
(SP), (EX), (J)
|
LHA
|
| First Active
|
Active
|
Recovery
|
Frame Adv
|
Circuit
|
Invuln
|
| 9
|
4
|
18
|
-4
|
4.5%
|
-
|
|
Same animation as her 623 series.
|
| Aerial
|
Damage
|
Red Damage
|
Proration
|
Cancel
|
Guard
|
| 500 (345)
|
202
|
50%
|
-
|
HA
|
| First Active
|
Active
|
Recovery
|
Frame Adv
|
Circuit
|
Invuln
|
| 9
|
4
|
-
|
-
|
4.5%
|
-
|
|
Same animation as H-Moon's j.236 series.
|
|
|
|
| Bunker
|
Damage
|
Red Damage
|
Proration
|
Cancel
|
Guard
|
| 500
|
202
|
50%
|
-
|
LHA
|
| First Active
|
Active
|
Recovery
|
Frame Adv
|
Circuit
|
Invuln
|
| 26
|
4
|
19
|
-5
|
0.0%
(-50.0% in blockstun)
|
Clash 1-10
|
| (Clash)
|
Damage
|
Red Damage
|
Proration
|
Cancel
|
Guard
|
| 500
|
202
|
50%
|
-
|
LHA
|
| First Active
|
Active
|
Recovery
|
Frame Adv
|
Circuit
|
Invuln
|
| 8
|
4
|
19
|
-5
|
0.0%/-50.0%
|
Strike 1-7
|
|
A fancier-looking 3C.
|
|
|
|
| Damage
|
Red Damage
|
Proration
|
Cancel
|
Guard
|
| 100
|
0
|
100%
|
-
|
U
|
| First Active
|
Active
|
Recovery
|
Frame Adv
|
Circuit
|
Invuln
|
| 21
|
5
|
23
|
-
|
-100.0% (min)
|
Full 1-25
|
|
Tied for second longest Heat startup in the game with Aoko and Warachia.
|
|
|
|
| Ground
|
Damage
|
Red Damage
|
Proration
|
Cancel
|
Guard
|
| 100
|
0
|
100%
|
-
|
U
|
| First Active
|
Active
|
Recovery
|
Frame Adv
|
Circuit
|
Invuln
|
| 11
|
10
|
20
|
-
|
removes all
|
Full 1-39
|
| Air
|
Damage
|
Red Damage
|
Proration
|
Cancel
|
Guard
|
| 100
|
0
|
100%
|
-
|
U
|
| First Active
|
Active
|
Recovery
|
Frame Adv
|
Circuit
|
Invuln
|
| 12
|
10
|
15
|
-
|
removes all
|
Strike 1-30
|
|
Universal burst mechanic. Unlike Crescent/Full Heat activation, the hitbox and frame data doesn't vary between characters. However, you can be thrown out of this move if you input it in the air.
|
|
Special Moves
Grounded Specials
|
|
| A
|
Damage
|
Red Damage
|
Proration
|
Cancel
|
Guard
|
| 750
|
404
|
70% (M)
|
-
|
LHA
|
| First Active
|
Active
|
Recovery
|
Frame Adv
|
Circuit
|
Invuln
|
| 16
|
4
|
18
|
-4
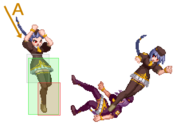
|
6.75%
|
-
|
|
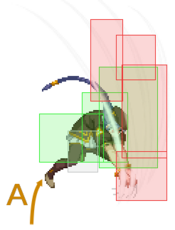
Giant forward claw strike with enormous vertical range. Mostly used for netting HKD in combos.
Can be used as an anti-air on reaction for HKD, but you're probably better off doing rising j.C.
|
| B
|
Damage
|
Red Damage
|
Proration
|
Cancel
|
Guard
|
| 900
|
707
|
50% (O)
|
-
|
HA
|
| First Active
|
Active
|
Recovery
|
Frame Adv
|
Circuit
|
Invuln
|
| 31
|
4
|
14
|
0
|
8.1%
|
-
|
|
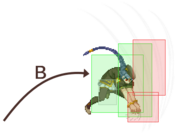
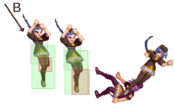
Overhead version with much higher startup and range. You can combo off of this, but 6C is faster and generally
more useful. It's decent enough to just throw out every once in a while to keep your opponent on their toes, though.
|
| EX
|
Damage
|
Red Damage
|
Proration
|
Cancel
|
Guard
|
| 1000*3 (1836)
|
(1298)
|
50% (O)
|
-
|
HA
|
| First Active
|
Active
|
Recovery
|
Frame Adv
|
Circuit
|
Invuln
|
| 7+9
|
9
|
12
|
3
|
-100.0%
|
Full 7
|
|
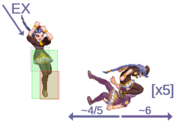
Used in metered combos to add a bit of damage. Can be used in pressure to steal more plus frames and to
manage meter, but is weak to EX guard.
|
|
|
|
| A
|
Damage
|
Red Damage
|
Proration
|
Cancel
|
Guard
|
| 1200
|
909
|
70% (O)
|
-
|
LH
|
| First Active
|
Active
|
Recovery
|
Frame Adv
|
Circuit
|
Invuln
|
| 11
|
2
|
29
|
-7
|
11.7%
|
High 1-10
|
|
A single-hit DP with upper body invincibility. Can be used to fish for counter hits if your opponent
tries to jump out of your pressure in the corner.
|
| B
|
Damage
|
Red Damage
|
Proration
|
Cancel
|
Guard
|
| 800*2 (1379)
|
(870)
|
85%*2 (M)
|
-
|
LHA
|
| First Active
|
Active
|
Recovery
|
Frame Adv
|
Circuit
|
Invuln
|
| 11
|
2
|
32
|
-3
|
7.2%*2 (14.4%)
|
-
|
|
Two-hit upwards claw that is used as a launcher in combos.
|
| EX
|
Damage
|
Red Damage
|
Proration
|
Cancel
|
Guard
|
| 300, 500*6 (2969)
|
(2329)
|
100%
|
-
|
LH
|
| First Active
|
Active
|
Recovery
|
Frame Adv
|
Circuit
|
Invuln
|
| 6+4
|
2
|
41
|
-25
|
-100.0%
|
Full 1-13
|
|
Hitgrab DP with sizable vertical range. Great reversal that HKDs.
|
|
|
|
| A
|
Damage
|
Red Damage
|
Proration
|
Cancel
|
Guard
|
| 800
|
606
|
70% (O)
|
(SP), -EX-, (J)
|
LH
|
| First Active
|
Active
|
Recovery
|
Frame Adv
|
Circuit
|
Invuln
|
| 12
|
8
|
13
|
-3 ~ 4
|
7.2%
|
-
|
|
Dashing eitherlite punch, A.K.A. drill/rush punch. (Non-self) Special cancelable in its recovery frames. Used in combos
into 623B for airborne opponents, or into 214B on the ground. The double drill punch link is distance dependant, requiring
you to hit 214A at the tail end of its active frames in order to combo into 214B.
|
| B
|
Damage
|
Red Damage
|
Proration
|
Cancel
|
Guard
|
| 1200
|
808
|
80% (M)
|
-EX-, (J)
|
LH
|
| First Active
|
Active
|
Recovery
|
Frame Adv
|
Circuit
|
Invuln
|
| 12
|
8
|
17
|
-7 ~ 0
|
10.8%
|
-
|
|
Combo fodder drill punch. Less safe than 214A, and launches.
|
| [B]
|
Damage
|
Red Damage
|
Proration
|
Cancel
|
Guard
|
| 1600
|
1010
|
80% (M)
|
-EX-, J
|
LH
|
| First Active
|
Active
|
Recovery
|
Frame Adv
|
Circuit
|
Invuln
|
| 26
|
8
|
17
|
-7 ~ 0
|
14.4%
|
-
|
|
Chargable version. Becomes jump cancellable on block, and is very useful for extending pressure. Weak to shield, but blocking on reaction
right after the jump cancel will make it safe.
|
| EX
|
Damage
|
Red Damage
|
Proration
|
Cancel
|
Guard
|
| 700*2, 1200 (2141)
|
(1472)
|
80% (O)
|
-
|
LH
|
| First Active
|
Active
|
Recovery
|
Frame Adv
|
Circuit
|
Invuln
|
| 2+8
|
12
|
23
|
-12
|
-100.0%
|
Full 1-2, Strike 3-21
|
|
Multi-hit reversal drill punch. One of F-V.Sion's best moves, if not the best. Sends the opponent
tumbling into the corner from anywhere on the screen. Use it in combos to setup a safejump and to gain corner
positioning literally instantly. Interrupt slow options in your opponent's pressure (charged moves, Nero summons, etc.)
to immediately turn the tables against them. Abuse this move against characters you cannot afford to return to neutral against.
Extremely unsafe, but can be difficult to punish at max distance. Strangely, it's grabbable past the first 3 frames.
|
|
|
|
A/B
C
|
Damage
|
Red Damage
|
Proration
|
Cancel
|
Guard
|
650
700
|
404
|
60% (M)
|
-EX-, (J)
|
L
|
| First Active
|
Active
|
Recovery
|
Frame Adv
|
Circuit
|
Invuln
|
| 16
|
10
|
21
|
-13
|
5.85%
|
-
|
|
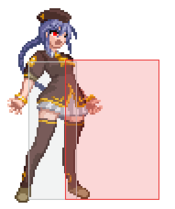
Etherlite ground spike. Distance depends on the button pressed (no EX). Hits low, jump cancelable on hit, air unblockable, and launches
the opponent at the cost of high scaling. Not great in neutral due to the hitbox being extremely small and specific, not to mention the absurd amount of recovery, but is decently useful in ending blockstrings to catch backdash or jump attempts when combined with a buffered jump forward. Mix between 22x enders to reset to neutral and 214[B] to extend pressure to keep your opponents on their toes.
|
|
Aerial Specials
|
|
| A
|
Damage
|
Red Damage
|
Proration
|
Cancel
|
Guard
|
| 100, 1200 (1262)
|
101
|
100%
|
-
|
H
(Whiffs vs Air.)
|
| First Active
|
Active
|
Recovery
|
Frame Adv
|
Circuit
|
Invuln
|
| 12
|
X
|
22
|
-19 ~ -12
|
0.9%
|
High (while active)
|
|
Hitgrab divekick. Can be tiger knee'ed to become the fastest overhead in the game. Save this for the finishing blow, for it's -3 on hit, so you won't be able to apply pressure afterwards. It's also an abysmal -19 (at worst) on block, so
be precise and unpredictable.
|
| B
|
Damage
|
Red Damage
|
Proration
|
Cancel
|
Guard
|
| 100, 800 (875)
|
(385)
|
100%
|
-
|
U
(Whiffs vs Air.)
|
| First Active
|
Active
|
Recovery
|
Frame Adv
|
Circuit
|
Invuln
|
| 30
|
X
|
22
|
-
|
0.9%
|
High (while active)
|
|
Unblockable version. Slow with an audio cue, but is good for finishing out rounds, especially after 214C.
|
| EX
|
Damage
|
Red Damage
|
Proration
|
Cancel
|
Guard
|
| 100, 700*5 (3270)
|
(1403)
|
100%
|
-
|
HA
|
| First Active
|
Active
|
Recovery
|
Frame Adv
|
Circuit
|
Invuln
|
| 3+2
|
X
|
22
|
-17 ~ -12
|
-100.0%
|
Full 1-4, High (while active)
|
|
EX version becomes a decent combo ender to tack on some additional damage. Untechable knockdown, but you're even on hit and far away from your opponent. 5C and 236A can be used to punish mashing, but the knockdown is generally easy to escape.
|
|
Arc Drive
|
|
| Damage
|
Red Damage
|
Proration
|
Cancel
|
Guard
|
| 3000
|
2248
|
100%
|
-
|
U
(Whiffs vs Air.)
|
| First Active
|
Active
|
Recovery
|
Frame Adv
|
Circuit
|
Invuln
|
| 13+0
|
2
|
39
|
-
|
removes all
|
Full 1-15
|
|
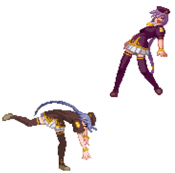
This is a command grab with not too much range that gives her a bit of life back. Cannot grab airborne opponents. You generally have better use for meter than this, but can still be used to finish off an opponent that is respecting your pressure
a little too much in MAX, or as an expensive reversal.
|
|
Another Arc Drive
TATARI Jumpscare TATARI Jumpscare
|
| Damage
|
Red Damage
|
Proration
|
Cancel
|
Guard
|
| 4200
|
3598
|
100%
|
-
|
U
(Whiffs vs Air.)
|
| First Active
|
Active
|
Recovery
|
Frame Adv
|
Circuit
|
Invuln
|
| 14+0
|
1
|
39
|
-
|
removes all
|
Full 1-15
|
|
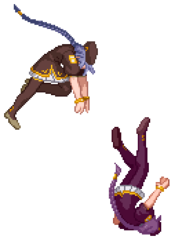
The above with more range, damage, and healing.
|
|
Last Arc
No ArkGrounded EX Shield during Blood Heat
|
| Damage
|
Red Damage
|
Proration
|
Cancel
|
Guard
|
| 3500 ~ 7000
|
2900 ~ 5200
|
50% + 50% * remaining BH time
|
-
|
U
|
| First Active
|
Active
|
Recovery
|
Frame Adv
|
Circuit
|
Invuln
|
| 5
|
1
|
22
|
-
|
removes all
|
Full
|
|
One of the Last Arcs with a fullscreen hitbox on activation. Summons a giant claw that crashes on the opponent if the LA connects.
|
|
Combos
| Combo Notation Help
|
Disclaimer: Combos are written by various writers, so the actual notation used in pages can differ from the standard one.
For more information, see Glossary and Controls.
|
| X > Y
|
X input is cancelled into Y.
|
| X > delay Y
|
Must wait for a short period before cancelling X input into Y.
|
| X, Y
|
X input is linked into Y, meaning Y is done after X's recovery period.
|
| X+Y
|
Buttons X and Y must be input simultaneously.
|
| X/Y
|
Either the X or Y input can be used.
|
| X~Y
|
This notation has two meanings.
- Use attack X with Y follow-up input.
- Input X then within a few frames, input Y. Usually used for option selects.
|
| X(w)
|
X input must not hit the opponent (Whiff).
|
| j.X
|
X input is done in the air, implies a jump/jump cancel if the previous move was done from the ground.
Applies to all air chain sections:
- Assume a forward jump cancel if no direction is given.
- Air chains such as j.A > j.B > j.C can be shortened to j.ABC.
|
| sj.X
|
X input is done after a super jump. Notated as sj8.X and sj9.X for neutral and forward super jumps respectively.
|
| dj.X
|
X input is done after a double jump.
|
| sdj.X
|
X input is done after a double super jump.
|
| tk.X
|
Stands for Tiger Knee. X motion must be buffered before jumping, inputting the move as close to the ground as possible. (ex. tk.236A)
|
| (X)
|
X is optional. Typically the combo will be easier if omitted.
|
| [X]
|
Input X is held down. Also referred to as Blowback Edge (BE). Depending on the character, this can indicate that this button is held down and not released until indicated by the release notation.
|
| ]X[
|
Input X is released. Will only appear if a button is previously held down. This type of input is referred to as Negative Edge.
|
| {X}
|
Button X should only be held down briefly to get a partially charged version instead of the fully charged one.
|
| X(N)
|
Attack "X" should only hit N times.
|
| (XYZ)xN
|
XYZ string must be performed N times. Combos using this notation are usually referred to as loops.
|
| (XYZ^)
|
A pre-existing combo labelled XYZ is inserted here for shortening purposes.
|
| CH
|
The first attack must be a Counter Hit.
|
| Air CH
|
The first attack must be a Counter Hit on an airborne opponent.
|
| 66
|
Performs a ground forward dash.
|
| j.66
|
Performs an aerial forward dash, used as a cancel for certain characters' air strings.
|
| IAD/IABD
|
Performs an Instant AirDash.
|
| AT
|
Performs an Air Throw. (j.6/4A+D)
|
| IH
|
Performs an Initiative Heat.
|
| AD
|
Performs an Arc Drive.
|
| AAD
|
Performs an Another Arc Drive.
|
Some of the combos are taken and translated from the French wiki BasGrosPoing. See here for the original.
214A 214B Link: You can link 214A into 214B for extra damage. You want to aim to hit 214A in its final active frames and cancel the recovery frames into 214B. Generally, the link is easier and more stable when done after 3 hits of 2A.
Once you get used to doing it, you can gauge the distance pretty easily. It is also easier to do after j.BC double overhead, so keep that in mind.
Normal Combos
| Condition
|
Notation
|
Damage
vs V.Sion
|
Notes
|
|
| Normal starter, grounded opponent
|
- 2AAA > 5[B] > 2B > 5C/2C > 214B > j.ABC > dj.ABC > AT
|
4747
|
| |
| Meter Gained: 74.7% |
Meter Given (vs C-Moon): ??? |
| Basic combo for beginners. Doing the combo with 2C instead of 5C will do a lot less damage, but it's required if 2B hits near its maximum range. |
|
|
| Normal starter, grounded opponent
|
- 2AAA > 5[B] > 2B > 2C > 214A > 9j.B > j.2B > j.ABC > dj.ABC > AT
|
4771
|
| |
| Meter Gained: 84.6% |
Meter Given (vs C-Moon): ??? |
| Good combo to use as it is easy and gives decent meter. Easier with more 2A's and more damage. |
|
|
| Normal starter, grounded opponent
|
- 2AAA > 5[B] > 2B > 5C > 214B > 9j.2B > 214A > 623B > j.C > dj.BC > AT
|
4992
|
| |
| Meter Gained: 91.8% |
Meter Given (vs C-Moon): ??? |
| Hard combo, but doesn't require stupid ass 214A > 214B link. 214A cancel into 623B timing is late, but not difficult. Hardest part is probably doing 214A quickly. |
|
|
| Normal starter, grounded opponent
|
- 2AAA > 5[B] > 2B > 5C > 214B > j.C > IAD > j.B > delay > j.C > land > j.C > dj.BC > AT
|
4902
|
| |
| Meter Gained: 85.5% |
Meter Given (vs C-Moon): ??? |
| Easier combo, but doesn't generate as much meter and a bit less damage. |
|
|
| Normal starter, grounded opponent, 100% Meter
|
- 2AAA > 5[B] > 2B > 5C > 236C > 5A > 5[B] > j.ABC > j.ABC > AT
|
5078
|
| |
| Meter Gained: ??? |
Meter Given (vs C-Moon): ??? |
| Metered BnB for damage. It's also a good way to dump meter for meter management. |
|
|
| Normal starter, grounded opponent, 100% Meter
|
- 2AAA > 5[B] > 2B > 5C > 214B > TK j.2B, 5C > 623C
|
4949
|
| |
| Meter Gained: ??? |
Meter Given (vs C-Moon): ??? |
| Metered BnB for getting a hard knockdown into okizeme. |
|
|
Corner Combos
| Condition
|
Notation
|
Damage
vs V.Sion
|
Notes
|
|
| Normal starter, grounded opponent
|
- 2AAAA > 5[B] > 2B > 5C > 214A > 214B > j.2B > 5C > 623B > j.C > dj.BC > AT
|
5232
|
| |
| Meter Gained: 102.6% |
Meter Given (vs C-Moon): ??? |
| 214A into 214B is hard. Required 4 2A's for spacing to be consistent. CMV combo. |
|
|
| Normal starter, grounded opponent, 100% Meter
|
- 2AAAA > 5[B] > 2B > 5C > 214A > 214B > j.A > delay > j.B > delay > j.C > land > 236A > TK j.2B > 5A > 6B > 623C
|
???
|
| |
| Meter Gained: ??? |
Meter Given (vs C-Moon): ??? |
| Sets up a gap in the corner for left/right mixups. CMV combo. |
|
|
Corner Throw Combos
| Condition
|
Notation
|
Damage
vs V.Sion
|
Notes
|
|
| Throw starter
|
- Throw > 5A > 5[B] > j.ABC > dj.ABC > AT
|
2606
|
| |
| Meter Gained: 46.3% |
Meter Given (vs C-Moon): ??? |
| Basic combo. Decent damage, poor meter gain. |
|
|
| Throw starter
|
- Throw > 5A > 5[C] > j.ABC > dj.ABC > AT
|
2785
|
| |
| Meter Gained: 46.3% |
Meter Given (vs C-Moon): ??? |
| Basic combo 2. Good damage, poor meter gain. |
|
|
| Throw starter
|
- Throw > 2C > 214A > j.ABC > dj.ABC > AT
|
2748
|
| |
| Meter Gained: 50.4% |
Meter Given (vs C-Moon): ??? |
| Better combo. Good damage, decent meter gain. |
|
|
| Throw starter
|
- Throw > 2C > j.2B > 5C > 623B > j.C > dj.BC > AT
|
2795
|
| |
| Meter Gained: 62.1% |
Meter Given (vs C-Moon): ??? |
| Intermediate combo. Good damage, good meter gain. |
|
|
| Throw starter
|
- Throw > 214A > j.B > j.2B > j.ABC > dj.ABC > AT
|
2855
|
| |
| Meter Gained: 54.9% |
Meter Given (vs C-Moon): ??? |
| Intermediate combo 2. Good damage, decent meter gain. |
|
|
| Throw starter
|
- Throw > 2C > j.2B > 2C > 214A > 623B > j.C > dj.BC > AT
|
2981
|
| |
| Meter Gained: 69.3% |
Meter Given (vs C-Moon): ??? |
| Optimal combo. |
|
|
| Throw starter, 100% Meter
|
- Throw > 2C > j.2B > 5A > 6B > 623C
|
2748
|
| |
| Meter Gained: 50.4% |
Meter Given (vs C-Moon): ??? |
| Oki with 50/50 using your command dash. |
|
|
Players to ask/watch
| Name |
Color
|
Region |
Common Venues |
Status |
Details
|
| Branch |

|
North America |
Netplay and Locals |
Active |
Air warrior. Very aggressive and nimble player.
|
| Ouytsu |

|
Europe |
Netplay |
Active |
Characterized by their non-committal play style and unique pressure.
|
| softdrinks |

|
North America |
Netplay |
Active |
Strong NA player with solid fundamentals and consistent calculated play. Notable oomfie, always willing to offer advice.
|
| YuZuRu |

|
South America |
Netplay |
Active |
AKA Lks. Plays many characters at a high level.
|
MBAACC Navigation
