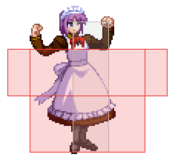
Character Page Progress
This page is still a work in progress, consider joining as an editor to help expand it. Please update this character's roadmap page when one of the editing goals have been reached.
| In Progress |
To-do
|
|
|
- Players to watch/ask
- If you know any players in particular that can be helpful for learning this character, please add them with, if possible a way to contact them (such as a Discord handle) and a name that can be searched in the match video database.
- Overview/General Gameplan:
- Add a short summary of this character with a list of strengths and weaknesses
- Do your best to describe how to play this character, change or add subsections based on what you would write as a guide.
- Combos:
- If needed, add starter/ender options and OTG pickup combo sections.
|
Additional Resources
H-Mech-Hisui Match Video Database
Melty Bits: H-Mech-Hisui
Japanese combo movie video for all Mech-Hisui moons
Players to watch/ask
JP:
NA:
- Mech#7386
- Dabsr
- Text goes here after asterisk
Overview

H-Mech has different airdashes from other moons. Those are similar to C-Mech j.236A/B, in which you can manually stop anytime by releasing your directional input.
Strengths / Weaknesses
| Strengths
|
- Text goes here after asterisk
- Text goes here after asterisk
|
| Weaknesses
|
- Place text here be sure to use "*" for each point*
|
General Gameplan
Place text here*
Neutral
Place text here*
Pressure
Place text here
Okizeme
Place text here
Defense
you cry.
Combos
| Combo Notation Help
|
Disclaimer: Combos are written by various writers, so the actual notation used in pages can differ from the standard one.
For more information, see Glossary and Controls.
|
| X > Y
|
X input is cancelled into Y.
|
| X > delay Y
|
Must wait for a short period before cancelling X input into Y.
|
| X, Y
|
X input is linked into Y, meaning Y is done after X's recovery period.
|
| X+Y
|
Buttons X and Y must be input simultaneously.
|
| X/Y
|
Either the X or Y input can be used.
|
| X~Y
|
This notation has two meanings.
- Use attack X with Y follow-up input.
- Input X then within a few frames, input Y. Usually used for option selects.
|
| X(w)
|
X input must not hit the opponent (Whiff).
|
| j.X
|
X input is done in the air, implies a jump/jump cancel if the previous move was done from the ground.
Applies to all air chain sections:
- Assume a forward jump cancel if no direction is given.
- Air chains such as j.A > j.B > j.C can be shortened to j.ABC.
|
| sj.X
|
X input is done after a super jump. Notated as sj8.X and sj9.X for neutral and forward super jumps respectively.
|
| dj.X
|
X input is done after a double jump.
|
| sdj.X
|
X input is done after a double super jump.
|
| tk.X
|
Stands for Tiger Knee. X motion must be buffered before jumping, inputting the move as close to the ground as possible. (ex. tk.236A)
|
| (X)
|
X is optional. Typically the combo will be easier if omitted.
|
| [X]
|
Input X is held down. Also referred to as Blowback Edge (BE). Depending on the character, this can indicate that this button is held down and not released until indicated by the release notation.
|
| ]X[
|
Input X is released. Will only appear if a button is previously held down. This type of input is referred to as Negative Edge.
|
| {X}
|
Button X should only be held down briefly to get a partially charged version instead of the fully charged one.
|
| X(N)
|
Attack "X" should only hit N times.
|
| (XYZ)xN
|
XYZ string must be performed N times. Combos using this notation are usually referred to as loops.
|
| (XYZ^)
|
A pre-existing combo labelled XYZ is inserted here for shortening purposes.
|
| CH
|
The first attack must be a Counter Hit.
|
| Air CH
|
The first attack must be a Counter Hit on an airborne opponent.
|
| 66
|
Performs a ground forward dash.
|
| j.66
|
Performs an aerial forward dash, used as a cancel for certain characters' air strings.
|
| IAD/IABD
|
Performs an Instant AirDash.
|
| AT
|
Performs an Air Throw. (j.6/4A+D)
|
| IH
|
Performs an Initiative Heat.
|
| AD
|
Performs an Arc Drive.
|
| AAD
|
Performs an Another Arc Drive.
|
Normal Combos
| Condition
|
Notation
|
Damage
vs V.Sion
|
Notes
|
|
| Normal starter, grounded opponent
|
- 2A > 2B(1) > 2C > 6C > j8.BC > dj.BC > AT
|
4023
|
|
| Meter Gained: 42.4 |
Meter Given (vs C-Moon): 18.1 |
(Video) |
| Most basic Mech-Hisui BnB. |
|
|
| Normal starter, grounded opponent
|
- 2A > 2B > 5C > 2C > 214A > j.BC > dj.BC > AT
|
4531
|
|
| Meter Gained: 61.3 |
Meter Given (vs C-Moon): 26.2 |
(Video) |
| 214A launcher combo. For ranges too far for 5A(w)6AA combos, or if 5A has already been used. |
|
|
| Normal starter, grounded opponent
|
- 2C > 214A > tk.623B > land > j.AC > dj.BC > AT
|
???
|
| |
| Meter Gained: ??? |
Meter Given (vs C-Moon): ??? |
| Alternate 214A launcher combo, works from the tip of max range 2C. Difficult. |
|
|
| Normal starter, grounded opponent
|
- 2A > 2B(1) > 5C(1) > 5A(w)6AA > 2[C] > 6C > j.BC > dj.BC > AT
|
4866
|
|
| Meter Gained: 62.0 |
Meter Given (vs C-Moon): 26.5 |
(Video) |
| Close range combo. More hits from 5C can be added depending on distance, but 1 hit is the safest option. |
|
|
| Raw Airthrow starter
|
- Raw AT, land 5C > 6C > j8.BC > sdj9.BC > AT
|
3087
|
| |
| Meter Gained: 35.0 |
Meter Given (vs C-Moon): 15.0 |
(Video) |
|
|
| Standing Shield Counter starter
|
- 5D > 63214B > 2[C] > 5C > 5B > 6C > j8.C > dj.BC > AT
|
3621
|
| |
| Meter Gained: 49.7 |
Meter Given (vs C-Moon): 22.4 |
(Video) |
|
|
| Crouching Shield Counter starter
|
- 2D > 214A > j.BC > sdj9.BC > AT
|
3100
|
| |
| Meter Gained: 45.5 |
Meter Given (vs C-Moon): 19.5 |
(Video) |
|
|
| 5B/2B starter, grounded opponent, 100% meter
|
|
???
|
| |
| Meter Gained: ??? |
Meter Given (vs C-Moon): ??? |
| Followup off a long range hit from your Dhalsim normals. 623B is optional as it can whiff if you hit from the tip of 5B/2B. |
|
|
| Normal starter, grounded opponent, 100% meter
|
- 2A > 5B > 2B(1) > 5C > 2C > TK j.623B, land 623A > 623C
|
4583
|
|
| Meter Gained: -45.4 |
Meter Given (vs C-Moon): 35.6 |
(Video) |
| Metered combo ending in an untechable knockdown. This routing is also the best damage you can get from max range 2c. |
|
|
| Normal starter, grounded opponent, 100% meter
|
- 2A > 2B > 5C > 2C > 214A > j.C > j.236C > dj.AC > AT
|
4735
|
|
| Meter Gained: -55.0 |
Meter Given (vs C-Moon): 24.5 |
(Video) |
| Metered BnB. |
|
|
| Raw Airthrow starter, 100% meter
|
- Raw AT, land 5A6AA > j.[C]A, land 5B > 236236C
|
2809
|
| |
| Meter Gained: -67.8 |
Meter Given (vs C-Moon): 14.9 |
(Video) |
|
|
Corner Combos
| Condition
|
Notation
|
Damage
vs V.Sion
|
Notes
|
|
| Normal starter, grounded opponent
|
- 2A > 2B(1) > 5C(3) > 2C > 5A(w)6AA > 236C, 2[C] > 5C > 5B > 6C > sj8.BC > dj.BC > AT
|
5326
|
| |
| Meter Gained: -45.9 |
Meter Given (vs C-Moon): 36.6 |
(Video) |
|
|
Move Descriptions
| Frame Data Help
|
| Header
|
Tooltip
|
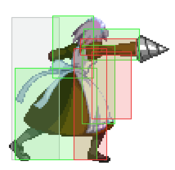
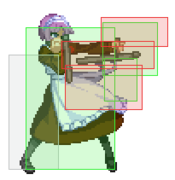
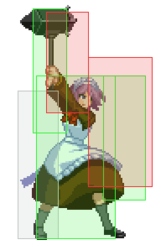
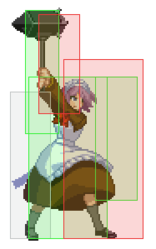
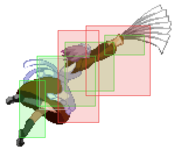
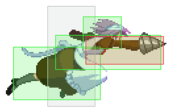
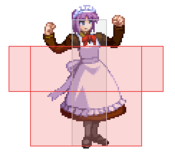
| Move Box Colors
|
Light gray = Collision Box (A move lacking one means it can go through the opponent's own collision box).
Green: Hurt Boxes.
Red: Hit(/Grab) Boxes.
Yellow: Clash Boxes (When an active hitbox strikes a clash box, the active hitbox stops being active. Multi-hit attacks can beat clash since they will still progress to the next hitbox.)
Magenta: Projectile-reflecting boxes OR Non-hit attack trigger boxes (usually).
Blue: Reflectable Projectile Boxes.
|
| Damage
|
Base damage done by this attack.
(X) denotes combined and scaled damage tested against standing V. Sion.
|
| Red Damage
|
Damage done to the recoverable red health bar by this attack. The values are inherently scaled and tested against standing V. Sion.
(X) denotes combined damage.
|
| Proration
|
The correction value set by this attack and the way it modifies the scaling during a string. See this page for more details.
X% (O) means X% Overrides the previous correction value in a combo if X is of a lower percentage.
X% (M) means the current correction value in a combo will be Multiplied by X%. This can also be referred to as relative proration.
|
| Circuit
|
Meter gained by this attack on hit.
(X%) denotes combined meter gain.
-X% denotes a meter cost.
|
| Cancel
|
Actions this move can be cancelled into.
SE = Self cancelable.
N = Normal cancelable.
SP = Special cancelable.
CH = Cancelable into the next part of the same attack (Chain in case of specials).
EX = EX cancelable.
J = Jump cancelable.
(X) = Cancelable only on hit.
-X- = Cancelable on whiff.
|
| Guard
|
The way this move must be blocked.
L = Can block crouching
H = Can block standing.
A = Can block in the air.
U = Unblockable.
|
| Startup
|
Amount of frames that must pass prior to reaching the active frames. Also referred to as "True Startup".
|
| Active
|
The amount of frames that this move will have a hitbox.
(x) denotes frame gaps where there are no hitboxes is present. Due to varied blockstuns, (x) frames are difficult to use to determine punish windows. Generally the larger the numbers, the more time you have to punish.
X denotes active frames with a duration separate from its origin move's frame data, such as projectile attacks. In this case, the total length of the move is startup+recovery only.
|
| Recovery
|
Frames that this move has after the active frames if not canceled. The character goes into one frame where they can block but not act afterwards, which is not counted here.
|
| Advantage
|
The difference in frames where you can act before your opponent when this move is blocked (assuming the move isn't canceled and the first active frame is blocked).
If the opponent uses a move with startup that is at least 2 frames less than this move's negative advantage, it will result in the opponent hitting that move.
±x~±y denotes a range of possible advantages.
|
| Invul
|
Lists any defensive properties this move has.
X y~z denotes X property happening between the y to z frames of the animations. If no frames are noted, it means the invincibility lasts through the entire move.
Invicibility:
- Strike = Strike invincible.
- Throw = Throw invincible.
Hurtbox-Based Properties:
- Full = No hurtboxes are present.
- High = Upper body lacks a hurtbox.
- Low = Lower body lacks a hurtbox.
Miscellaneous Properties
- Clash = Frames in which clash boxes are active.
- Reflect = Frames in which projectile-reflecting boxes are active.
- Super Armor = Frames in which the character can take hits without going into hit stun.
|
Normal Moves
Standing Normals
|
|
| 5A
|
Damage
|
Red Damage
|
Proration
|
Cancel
|
Guard
|
| 300
|
192
|
78% (O)
|
-SE-, -N-, -SP-, -CH-, -EX-, (J)
|
LH
|
| First Active
|
Active
|
Recovery
|
Frame Adv
|
Circuit
|
Invuln
|
| 5
|
3
|
8
|
1
|
2.1%
|
-
|
|
Finger snap poke. Your fastest normal, plus on block and hits crouchers.
|
| 5A~6A
|
Damage
|
Red Damage
|
Proration
|
Cancel
|
Guard
|
| 600
|
384
|
80% (M)
|
N, SP, -CH-, EX, (J)
|
LH
|
| First Active
|
Active
|
Recovery
|
Frame Adv
|
Circuit
|
Invuln
|
| 7
|
4
|
17
|
-6
|
4.2%
|
-
|
|
Drill attack. Moves Mech-Hisui quite a bit forward.
|
| 5A~6A~6A
|
Damage
|
Red Damage
|
Proration
|
Cancel
|
Guard
|
| 1000
|
672
|
60% (O)
|
(N), SP, EX, (J)
|
LH
|
| First Active
|
Active
|
Recovery
|
Frame Adv
|
Circuit
|
Invuln
|
| 10
|
7
|
12
|
-1
|
7.0%
|
-
|
|
5A6AA finisher and one of your launcher options.
|
|
|
|
| Damage
|
Red Damage
|
Proration
|
Cancel
|
Guard
|
| 1000
|
672
|
100%
|
N, SP, EX, (J)
|
LH
|
| First Active
|
Active
|
Recovery
|
Frame Adv
|
Circuit
|
Invuln
|
| 11
|
5
|
19
|
-6
|
7.0%
|
-
|
|
Disjointed Dhalsim-style poke number one. Whiffs on most crouchers.
|
|
|
|
| 5C
|
Damage
|
Red Damage
|
Proration
|
Cancel
|
Guard
|
| 400*2, 300, 600 (1367)
|
(801)
|
80% (O)
|
N, SP, EX, (J)
|
LH
|
| First Active
|
Active
|
Recovery
|
Frame Adv
|
Circuit
|
Invuln
|
| 9
|
8
|
23
|
-7
|
2.8%*2, 2.1%*2 (9.8%)
|
-
|
|
Chainsaw attack, hits up to 4 times and moves Mech-Hisui forward. Combo tool, has a bit of a damage upgrade from C-Moon, but essentially works the same.
|
| 5[C]
|
Damage
|
Red Damage
|
Proration
|
Cancel
|
Guard
|
| 500, 600, 400, 500 (1909)
|
(1105)
|
100%
|
N, SP, EX, (J)
|
LH
|
| First Active
|
Active
|
Recovery
|
Frame Adv
|
Circuit
|
Invuln
|
| 24
|
8
|
11
|
5
|
4.9%*2, 2.1%*2 (14.0%)
|
-
|
|
The charged version has some use in blockstrings, it will leave a gap that will leave you plus if respected, allowing you to refresh your normals without reverse beat penalty
|
|
Crouching Normals
|
|
| Damage
|
Red Damage
|
Proration
|
Cancel
|
Guard
|
| 300
|
192
|
78% (O)
|
-SE-, -N-, -SP-, -EX-, (J)
|
L
|
| First Active
|
Active
|
Recovery
|
Frame Adv
|
Circuit
|
Invuln
|
| 6
|
4
|
6
|
2
|
1.96%
|
-
|
|
Slowest 2A out of all moons, but the fastest low you have and plus on block.
|
|
|
|
| Damage
|
Red Damage
|
Proration
|
Cancel
|
Guard
|
| 700*2 (1242)
|
(852)
|
80% (O)
|
N, SP, EX, (J)
|
L
|
| First Active
|
Active
|
Recovery
|
Frame Adv
|
Circuit
|
Invuln
|
| 11
|
9
|
18
|
-8
|
4.9%*2 (9.8%)
|
-
|
|
Disjointed Dhalsim-style poke number two. More commonly used than 5B due to being more reliable against crouch, a huge low that can control the ground very effectively.
|
|
|
|
| 2C
|
Damage
|
Red Damage
|
Proration
|
Cancel
|
Guard
|
| 950
|
576
|
60% (O)
|
N, SP, EX, (J)
|
L
|
| First Active
|
Active
|
Recovery
|
Frame Adv
|
Circuit
|
Invuln
|
| 13
|
3
|
29
|
-14
|
5.6%
|
-
|
|
Standard low sweep. Has decent range by itself, but relative to this moon it isn't the best option to use in neutral as the recovery and the startup are both longer then 2B.
|
| 2[C]
|
Damage
|
Red Damage
|
Proration
|
Cancel
|
Guard
|
| 1600
|
1152
|
80% (O)
|
N, SP, EX, (J)
|
L
|
| First Active
|
Active
|
Recovery
|
Frame Adv
|
Circuit
|
Invuln
|
| 25
|
3
|
13
|
2
|
11.2%
|
-
|
|
The charged version is mainly used as a way to add more damage to combos. Has a niche use in blockstrings as it allows you to remain plus without using a reverse beat, but using it too much may open you up to low shield.
|
|
Aerial Normals
|
|
| Damage
|
Red Damage
|
Proration
|
Cancel
|
Guard
|
| 300
|
192
|
75% (O)
|
SE, N, SP, EX, J
|
LHA
|
| First Active
|
Active
|
Recovery
|
Frame Adv
|
Circuit
|
Invuln
|
| 6
|
4
|
11
|
-
|
2.1%
|
-
|
|
Standard air jab. Respectable range for a j.A, and is your last line of defence should they close the gap from the air.
|
|
|
|
| Damage
|
Red Damage
|
Proration
|
Cancel
|
Guard
|
| 1000
|
624
|
80% (O) / 50% (O)
|
N, SP, EX, J
|
HA
|
| First Active
|
Active
|
Recovery
|
Frame Adv
|
Circuit
|
Invuln
|
| 13
|
4
|
-
|
-
|
7.0%
|
-
|
|
Disjointed Dhalsim-style poke number three. Character-defining aerial, your best long-range air to ground (and air-to-air should you end up above them) against opponents who will block, and smart usage of this button alongside IADs and airdash cancels are one of the best ways of putting pressure on opponents who are happy to block your offence. Not in counter hit state during the active frames, so you win trades.
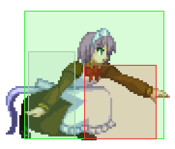
|
|
|
|
| j.C
|
Damage
|
Red Damage
|
Proration
|
Cancel
|
Guard
|
| 1100
|
672
|
90% (M) / 50% (O)
|
N, SP, EX, J
|
HA
|
| First Active
|
Active
|
Recovery
|
Frame Adv
|
Circuit
|
Invuln
|
| 11
|
7
|
-
|
-
|
5.6%
|
-
|
|
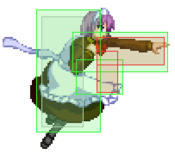
Overhead hammerstrike. Primarly a jump-in tool. Notably faster than j.B. Can be used in place of j.A in air-to-airs if you are willing to trade some speed for bit more range.
|
| j.[C]
|
Damage
|
Red Damage
|
Proration
|
Cancel
|
Guard
|
| 1600
|
1056
|
100%
|
N, SP, EX, J
|
HA
|
| First Active
|
Active
|
Recovery
|
Frame Adv
|
Circuit
|
Invuln
|
| 27
|
8
|
-
|
-
|
14.0%
|
-
|
|
The charged version is much more disjointed and causes an untechable knockdown if you manage to land it on an airborne opponent. It now does some of the most damage of any air normal in the game, with 100% proration, so even simple combos after a j.[C] starter vs a grounded opponent will do big damage.
|
|
Command Normals
|
|
| Damage
|
Red Damage
|
Proration
|
Cancel
|
Guard
|
| 270*6 (1000)
|
(355)
|
60% (O)
|
-
|
LHA
|
| First Active
|
Active
|
Recovery
|
Frame Adv
|
Circuit
|
Invuln
|
| 14
|
1 (3) 1 (3) 1 (3) 1 (1) 2 (2) 2
|
19
|
-6
|
1.89%*6 (11.34%)
|
-
|
|
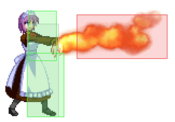
Flamethrower hands. Slow attack for barely any reward due to zero cancel options, this move doesn't have much use; Her 623X series is usually better in nearly every situation. Make sure you don't input this by accident.
|
|
|
|
| Damage
|
Red Damage
|
Proration
|
Cancel
|
Guard
|
| 650
|
384
|
65% (O)
|
SP, EX, (J)
|
LH
|
| First Active
|
Active
|
Recovery
|
Frame Adv
|
Circuit
|
Invuln
|
| 11
|
4
|
22
|
-8
|
2.8%
|
-
|
|
Upward hammer strike. A standard launching command normal, but short-ranged. Superjump-cancellable. Unlike in other moons, this is air unblockable.
|
|
|
|
| Damage
|
Red Damage
|
Proration
|
Cancel
|
Guard
|
| 250*8 (1776)
|
(1368)
|
100%
|
-EX-
|
LHA
|
| First Active
|
Active
|
Recovery
|
Frame Adv
|
Circuit
|
Invuln
|
| 14
|
24
|
-
|
-
|
1.4%*8 (11.2%)
|
-
|
|
Flamethrower attack that carries Mech-Hisui's air momentum. Very unsafe on whiff. Mostly only used for movement alongside airdashes, but a hard read can lead to you getting punished heavily.
|
|
Universal Mechanics
|
|
| Damage
|
Red Damage
|
Proration
|
Cancel
|
Guard
|
| 600*5, 300 (1680)
|
(766)
|
50%
|
-
|
U
|
| First Active
|
Active
|
Recovery
|
Frame Adv
|
Circuit
|
Invuln
|
| 3
|
1
|
20
|
-
|
0.0%
|
-
|
|
Mech-Hisui electrocutes the opponent. Untechable knockdown.
|
|
|
|
| Damage
|
Red Damage
|
Proration
|
Cancel
|
Guard
|
| 1600 (Gold)/1200
|
465
|
30%
|
-
|
U
|
| First Active
|
Active
|
Recovery
|
Frame Adv
|
Circuit
|
Invuln
|
| 2
|
1
|
12
|
-
|
0.0%
|
-
|
|
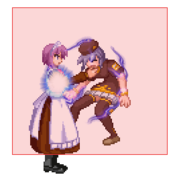
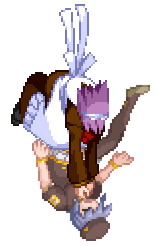
Mech-Hisui takes the opponent for a ride. This launches the opponent to the opposite side and you throw the opponent in the same direction no matter which side you input. You can chase ground techs with moves like 2B to ok effect, but this is not as reliable as other characters, so you may opt for a j.623B ender for more damage and meter gain and an air tech situation instead.
|
|
|
|
| Standing
|
Damage
|
Red Damage
|
Proration
|
Cancel
|
Guard
|
| 500 (345)
|
198
|
50%
|
(SP), (EX), (J)
|
LHA
|
| First Active
|
Active
|
Recovery
|
Frame Adv
|
Circuit
|
Invuln
|
| 9
|
4
|
18
|
-4
|
3.5%
|
-
|
|
Same animation as 6C.
|
| Crouching
|
Damage
|
Red Damage
|
Proration
|
Cancel
|
Guard
|
| 1500 (1117)
|
714
|
50%
|
(SP), (EX)
|
LA
|
| First Active
|
Active
|
Recovery
|
Frame Adv
|
Circuit
|
Invuln
|
| 9
|
4
|
18
|
-4
|
10.5%
|
-
|
|
Same hitboxes as 2[C].
|
| Aerial
|
Damage
|
Red Damage
|
Proration
|
Cancel
|
Guard
|
| 500 (345)
|
198
|
50%
|
-
|
HA
|
| First Active
|
Active
|
Recovery
|
Frame Adv
|
Circuit
|
Invuln
|
| 9
|
4
|
-
|
-
|
3.5%
|
-
|
|
Same animation as C-Moon j.B.
|
|
|
|
| Neutral
|
Damage
|
Red Damage
|
Proration
|
Cancel
|
Guard
|
| 500
|
192
|
50%
|
-
|
LHA
|
| First Active
|
Active
|
Recovery
|
Frame Adv
|
Circuit
|
Invuln
|
| 26
|
4
|
19
|
-5
|
0.0%
|
Clash 1-10
|
| (Clash)
|
Damage
|
Red Damage
|
Proration
|
Cancel
|
Guard
|
| 500
|
192
|
50%
|
-
|
LHA
|
| First Active
|
Active
|
Recovery
|
Frame Adv
|
Circuit
|
Invuln
|
| 8
|
4
|
19
|
-5
|
0.0%
|
Strike 1-7
|
|
A Shield Bunker similar to her 214 series, but without as much forward movement.
|
| Blockstun
|
Damage
|
Red Damage
|
Proration
|
Cancel
|
Guard
|
| 0
|
0
|
100%
|
-
|
LHA
|
| First Active
|
Active
|
Recovery
|
Frame Adv
|
Circuit
|
Invuln
|
| 19
|
3
|
22
|
-7
|
-100.0%
|
-
|
|
H-Moon specific reversal bunker.
|
|
|
|
| Ground
|
Damage
|
Red Damage
|
Proration
|
Cancel
|
Guard
|
| 100
|
0
|
100%
|
-
|
U
|
| First Active
|
Active
|
Recovery
|
Frame Adv
|
Circuit
|
Invuln
|
| 11
|
10
|
20
|
-
|
removes all
|
Full 1-39
|
| Air
|
Damage
|
Red Damage
|
Proration
|
Cancel
|
Guard
|
| 100
|
0
|
100%
|
-
|
U
|
| First Active
|
Active
|
Recovery
|
Frame Adv
|
Circuit
|
Invuln
|
| 12
|
10
|
15
|
-
|
removes all
|
Strike 1-30
|
|
Universal burst mechanic. Unlike Crescent/Full Heat activation, the hitbox and frame data doesn't vary between characters. However, you can be thrown out of this move if you input it in the air.
|
|
Special Moves
Grounded Specials
|
|
| A
|
Damage
|
Red Damage
|
Proration
|
Cancel
|
Guard
|
| 400*4 (1189)
|
(857)
|
80% (O)
|
-
|
LHA
|
| First Active
|
Active
|
Recovery
|
Frame Adv
|
Circuit
|
Invuln
|
| 16
|
X
|
35
|
-6
|
2.8%*4 (11.2%)
|
-
|
|
Fireball series. Fires a rocket drill that automatically changes its trajectory downward or upward depending on whether the opponent is grounded or airborne.
|
| B
|
Damage
|
Red Damage
|
Proration
|
Cancel
|
Guard
|
| 1100
|
768
|
70% (O)
|
-
|
LH
|
| First Active
|
Active
|
Recovery
|
Frame Adv
|
Circuit
|
Invuln
|
| 13
|
X
|
32
|
-4
|
7.7%
|
-
|
|
Fires an air unblockable rocket punch. Whiffs all crouchers except for Hime, Wara, and Nero, but can catch moves and jumps effectively.
|
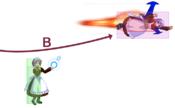
| EX
|
Damage
|
Red Damage
|
Proration
|
Cancel
|
Guard
|
| 1200
|
960
|
80% (O)
|
-
|
LH
|
| First Active
|
Active
|
Recovery
|
Frame Adv
|
Circuit
|
Invuln
|
| 7+13
|
X
|
35
|
-7
|
-100.0%
|
-
|
|
Air unblockable spikeball. Gives an untechable knockdown and corner carry on hit.
|
|
|
|
| A
|
Damage
|
Red Damage
|
Proration
|
Cancel
|
Guard
|
| 400*2, 800 (1537)
|
(1197)
|
100%
|
-EX-
|
LH
|
| First Active
|
Active
|
Recovery
|
Frame Adv
|
Circuit
|
Invuln
|
| 8
|
3 (3) 3 (3) 3
|
18
|
-9
|
2.8%*2, 5.6% (11.2%)
|
-
|
|
Longer-ranged variation of C-Moon's 623 series. 3 hits. Deceptively low blockstun and generous cancel window mean you can do some light reset/stagger pressure between 623A > approach or 623A delay 623C. Very fast and disjointed for its range, and air unblockable means it can work as a safe callout on jumps from long range. Quite minus on block, but due its impressive range its usually safe.
|
| B
|
Damage
|
Red Damage
|
Proration
|
Cancel
|
Guard
|
| 350*5, 800 (2315)
|
(1917)
|
100%
|
-EX-
|
LH
|
| First Active
|
Active
|
Recovery
|
Frame Adv
|
Circuit
|
Invuln
|
| 14
|
3 (3) x5, 3
|
18
|
-9
|
2.45%*5, 5.6% (17.85%)
|
-
|
|
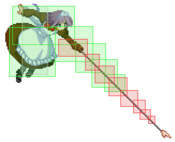
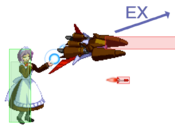
More useful, longer-reaching version. 6 hits. A signature of H-Mech, this move is very fast and disjointed, with huge range horizontally, and decent range vertically. Better at catching jumpouts then 623A if you can get past the longer startup due to being larger. Slower startup means it can frametrap more easily from normals such as 2C. Use at the ends of strings often to make sure your opponent keeps blocking and respecting, then use the constant threat of it to dash in or sj9 j.B airdash cancel into more pressure. Use in neutral instead of 2B at near max range when you think they may IAD or sj9.
|
| EX
|
Damage
|
Red Damage
|
Proration
|
Cancel
|
Guard
|
| 300*10, 800 (3124)
|
(2478)
|
100%
|
-
|
LH
|
| First Active
|
Active
|
Recovery
|
Frame Adv
|
Circuit
|
Invuln
|
| 1+13
|
3 (3) x10, 3
|
18
|
-3
|
-100.0%
|
-
|
|
Longest reach, last hit causes an untechable knockdown and least disadvantageous on block version. Converts from long-range 5B/2B hits, sets up oki as a combo ender and makes any EX cancellable special safe. 11 hits.
|
|
|
|
| A
|
Damage
|
Red Damage
|
Proration
|
Cancel
|
Guard
|
| 200*7 (1266)
|
(912)
|
100%
|
(J)
|
LHA
|
| First Active
|
Active
|
Recovery
|
Frame Adv
|
Circuit
|
Invuln
|
| 11
|
14
|
21
|
-11
|
1.4%*7 (11.9%)
|
-
|
|
Obligatory Gurren Lagann reference. This version is one of H-Mech's launcher options after 2C, as it reaches forward more than 5A6AA and 6C and is jump cancelable on hit. 7 hits.
|
| B
|
Damage
|
Red Damage
|
Proration
|
Cancel
|
Guard
|
| 200*7 (1266)
|
(912)
|
100%
|
EX, (J)
|
LHA
|
| First Active
|
Active
|
Recovery
|
Frame Adv
|
Circuit
|
Invuln
|
| 25
|
14
|
15
|
1
|
1.4%*7 (11.9%)
|
-
|
|
Slower, safer on block, EX cancelable and reaches a bit farther. Safe frametrap option that leaves you close range, but due to H-Mech's slow 2A and short range 5A it can be tricky to use as a pressure reset.
|
| EX
|
Damage
|
Red Damage
|
Proration
|
Cancel
|
Guard
|
| 300*10 (2574)
|
(1650)
|
100%*9, 70% (M)
|
-
|
LH
|
| First Active
|
Active
|
Recovery
|
Frame Adv
|
Circuit
|
Invuln
|
| 1+13
|
26
|
28
|
-11
|
-100.0%
|
Full 1-13
|
|
Gigadrill. One of H-Mech's only invulnerable moves, but the hitbox and hurtbox come out at the same time so relying on this too much may cause trades. 10 hits.
|
|
|
|
| A
|
Damage
|
Red Damage
|
Proration
|
Cancel
|
Guard
|
| -
|
-
|
-
|
-
|
-
|
| First Active
|
Active
|
Recovery
|
Frame Adv
|
Circuit
|
Invuln
|
| -
|
-
|
42
|
-
|
-
|
-
|
| (Assist)
|
Damage
|
Red Damage
|
Proration
|
Cancel
|
Guard
|
| 1000
|
768
|
100%
|
-
|
LH
|
| First Active
|
Active
|
Recovery
|
Frame Adv
|
Circuit
|
Invuln
|
| 31
|
X
|
-
|
-
|
7.0%
|
-
|
| (Takeuchi)
|
Damage
|
Red Damage
|
Proration
|
Cancel
|
Guard
|
| 1800
|
1440
|
100%
|
-
|
LH
|
| First Active
|
Active
|
Recovery
|
Frame Adv
|
Circuit
|
Invuln
|
| 31
|
X
|
-
|
-
|
7.0%
|
-
|
|
Calls out another Mech-Hisui that rushes forward and can be stopped with an attack. Tricky to convert from without a counterhit. Your go-to move after hard knockdowns such as 2C, 623C, j.[C], and throw. A solid option for controlling the ground if you can get past the long startup. If you time this in a specific way after a hard knockdown (for example, after throw you can do 5A 63214A) you can grab them as soon as wakeup throw invul ends just before the assist hits them, for bonus throw damage and the ability to reset the situation, or keep blocking and watch how they respond to the assist to potentially punish. If you're lucky, you can get a Takashi Takeushi cameo which is stronger, unstoppable and wallslams on hit.
|
| B
|
Damage
|
Red Damage
|
Proration
|
Cancel
|
Guard
|
| -
|
-
|
-
|
-
|
-
|
| First Active
|
Active
|
Recovery
|
Frame Adv
|
Circuit
|
Invuln
|
| -
|
-
|
38
|
-
|
-
|
-
|
| (Assist)
|
Damage
|
Red Damage
|
Proration
|
Cancel
|
Guard
|
| 800
|
480
|
100%
|
-
|
LHA
|
| First Active
|
Active
|
Recovery
|
Frame Adv
|
Circuit
|
Invuln
|
| 27
|
X
|
-
|
-
|
0.0%
|
-
|
|
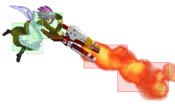
Calls out a Mech-Hisui on a jetpack, covering the air. The more commonly used variant in neutral due to H-Mech already being effective at controlling the ground, but struggling far more against opponents above her. Generally your best option against opponents who spend double jump early to prevent you from meeting them air-to-air with j.A or j.623X.
|
| EX
|
Damage
|
Red Damage
|
Proration
|
Cancel
|
Guard
|
| -
|
-
|
-
|
-
|
-
|
| First Active
|
Active
|
Recovery
|
Frame Adv
|
Circuit
|
Invuln
|
| -
|
-
|
15+86
|
-
|
-100.0%
|
-
|
| (Assist Lasers)
|
Damage
|
Red Damage
|
Proration
|
Cancel
|
Guard
|
| 600*5
|
384*5
|
65% (O)
|
-
|
HA
(Whiffs vs Crouch.)
|
| First Active
|
Active
|
Recovery
|
Frame Adv
|
Circuit
|
Invuln
|
| 15+113
|
2 (22) 2 (21) 2 (23) 2 (22) 2
|
-
|
-
|
0.0%
|
-
|
| (Assist Missiles)
|
Damage
|
Red Damage
|
Proration
|
Cancel
|
Guard
|
| 500*3
|
336*3
|
65% (O)
|
-
|
LHA
|
| First Active
|
Active
|
Recovery
|
Frame Adv
|
Circuit
|
Invuln
|
| 15+118
|
X (36) X (37) X
|
-
|
-
|
0.0%
|
-
|
|
Calls out a Last Arc style plane Mech-Hisui that starts from behind her then goes diagonally upwards as it fires lasers and missiles. This move may have potential as oki from a hard knockdown, but most of H-Mech's damaging hard knockdowns come from meter usage, and if you have enough meter for 2 EX moves, then you are most likely in heat and Arc Drive will be better in nearly every way. Still, if you really want an oki option from a max range 2C, it may give access to some setups. Outside of oki its far to slow to use reliably.
|
|
|
|
| Damage
|
Red Damage
|
Proration
|
Cancel
|
Guard
|
| 1700
|
1248
|
100%
|
-
|
LHA
|
| First Active
|
Active
|
Recovery
|
Frame Adv
|
Circuit
|
Invuln
|
| 4+7
|
X
|
36
|
-8
|
-100.0%
|
-
|
|
For her next trick, Mech-Hisui will shoot Kinoko Nasu himself. Untechable knockdown and corner carry on hit. Has limited use as a close range metered hard knockdown, and your best hard knockdown option for corner carry. Otherwise generally outclassed by 623C as a hard knockdown ender due to doing less damage, 236C as a combo extender in the corner as it prevents any followup, and 236B in neutral doing the same thing but meterless.
|
|
Aerial Specials
No laser sprites, framedisplay is bugged. No laser sprites, framedisplay is bugged.
|
| A
|
Damage
|
Red Damage
|
Proration
|
Cancel
|
Guard
|
| 1000
|
576
|
60% (O)
|
-EX-, -J-
|
LHA
|
| First Active
|
Active
|
Recovery
|
Frame Adv
|
Circuit
|
Invuln
|
| 14
|
3
|
21
|
-6 (TK)
|
6.3%
|
-
|
|
Shoots a diagonally downward laser from Mech-Hisui's hairband. After a recovery period, you can double jump instead of going through the full vulnerable landing period, which makes using this move far safer when you have access to your double jump. Incredibly fast way of preventing grounded approaches from the air, and has niche use offensively out of sj9 as you can do double jump IAD on block. You will generally use this when you are in the air and react to a grounded approach, instead of reacting to a grounded opponent then doing jump > j.236A.
|
| B
|
Damage
|
Red Damage
|
Proration
|
Cancel
|
Guard
|
| 1000*2 (1580)
|
(910)
|
60% (O)
|
-EX-, -J-
|
LHA
|
| First Active
|
Active
|
Recovery
|
Frame Adv
|
Circuit
|
Invuln
|
| 22
|
3 (11) 3
|
13
|
0 (TK)
|
6.3%*2 (12.6%)
|
-
|
|
Shoots two beams and can be jump canceled earlier. The second beam effectively makes the laser more active, so you can use it a bit more preemptively, but otherwise is a bit riskier then j.236A while also being less rewarding on counterhit.
|
| EX
|
Damage
|
Red Damage
|
Proration
|
Cancel
|
Guard
|
| 1100*3 (2389)
|
(1668)
|
70% (O)
|
-N-, -J-
|
LHA
|
| First Active
|
Active
|
Recovery
|
Frame Adv
|
Circuit
|
Invuln
|
| 1+13
|
8
|
17
|
1 (TK)
|
-100.0%
|
-
|
|
EX laser. Launches on hit. Unlike other versions, the recovery can also be cancelled into an aerial normal or an airdash. Mostly a combo/meter dump tool.
|
|
|
|
| A
|
Damage
|
Red Damage
|
Proration
|
Cancel
|
Guard
|
| 400*2, 800 (1537)
|
(1197)
|
100%
|
-
|
LHA
|
| First Active
|
Active
|
Recovery
|
Frame Adv
|
Circuit
|
Invuln
|
| 8
|
3 (3) 3 (3) 3
|
-
|
1 (TK), 5 (lowest)
|
2.8%*2, 5.6% (11.2%)
|
-
|
|
Functionally the same as the ground version. Not as useful as j.623B as an anti-air due to big recovery. May as well be an entirely different move when TK'd however, as when done close to the ground it is +6 and air blockable. This gives it an interesting function in pressure as it can be used in combination with the grounded version to catch jumpouts and mash (if jump blocked however the opponent can jump out). 3 hits.
|
| B
|
Damage
|
Red Damage
|
Proration
|
Cancel
|
Guard
|
| 350*5, 800 (2315)
|
(1917)
|
100%
|
-
|
LHA
|
| First Active
|
Active
|
Recovery
|
Frame Adv
|
Circuit
|
Invuln
|
| 10
|
3 (3) x5, 3
|
11
|
1 (TK), 5 (lowest)
|
2.45%*5, 5.6% (17.85%)
|
-
|
|
Similarly to j.As, this move only goes through a set recovery period before regaining all your options in the air back. Can be used as an air-to-air due to its incredible range, but cautious opponents can block it relatively risk free, and whiffing is incredibly dangerous. You can end air combos with this for more damage and meter gain then air throw. TK j.623B serves the same purpose as the A version, but is slower, bigger, and more active. 6 hits.
|
| EX
|
Damage
|
Red Damage
|
Proration
|
Cancel
|
Guard
|
| 250*10, 800 (2694)
|
(1697)
|
100%
|
-
|
LH
|
| First Active
|
Active
|
Recovery
|
Frame Adv
|
Circuit
|
Invuln
|
| 1+9
|
3 (3) x10, 3
|
11
|
7 (TK)
|
-100.0%
|
-
|
|
Same type of recovery as j.623B, and becomes air unblockable. Can be used to tack on some damage at the end of an air combo, or catch techs. 11 hits.
|
|
Arc Drive
|
|
| Damage
|
Red Damage
|
Proration
|
Cancel
|
Guard
|
| 500*13 (4143)
|
(2363)
|
90% (O)
|
-
|
LHA
|
| First Active
|
Active
|
Recovery
|
Frame Adv
|
Circuit
|
Invuln
|
| 17+8
|
X
|
21
|
45 ~ 72
|
removes all
|
Full 1-29
|
|
A train of Mech-Hisuis comes out and covers the bottom of the screen. Has the most invulnerability out of all H-Mech moves, and greatly advantageous on block. If they air block this, you can hit them with an air unblockable move such as 6C for a combo. Probably H-Mech's biggest strength, having incredible meter gain from stray hits with 623X alongside arguably the best Arc Drive in the game, this move will most likely be very important to your gameplay. It can be used as a safe reversal, an anti-air, a way of catching people air teching after j.623B ender, an oki tool, an OTG relaunch into j.[C] for a hard knockdown or an air combo for damage, even as something you can just throw out when you want to apply some pressure or bring back a life deficit (as even if they jump they will usually need to spend at least one and often both air options to avoid it, and you can catch them landing), and do all of these things from fullscreen, giving access to a jump in > empty low/delayed airdash mixup if blocked. This Arc Drive is a swiss army knife only gated by its meter cost, that can solve most problems you throw it at. Very powerful and versatile tool, there is no one best way to use this move, very rewarding to use often. The one big downside is that you can be thrown out of it with very good timing, more easily from characters with invulnerable command grabs such as Kouma, so be careful if your opponent shows they can react propery.
|
|
MBAACC Navigation
