Character Page Progress
This page is mostly complete, consider joining as an editor to help finish it up. Please update this character's roadmap page when one of the editing goals have been reached. When no main goals are left, please remove this section from this page.
| In Progress |
To-do
|
|
|
- Additional Ressources/Players to watch/ask
- (Add any external links to ressources such as video guides or articles.)
- (If you know any players in particular that can be helpful for learning this character, please add them with, if possible a way to contact them (such as a Discord handle) and a name that can be searched in the match video database.)
- Overview/General Gameplan:
- Add a short summary of this character with a list of strengths and weaknesses.
- Add Neutral and Defense subsections, adapt what's already written as you see fit.
|
Additional Resources
H-Nanaya Match Video Database
Notable Players
| Name |
Color
|
Region |
Common Venues |
Status |
Details
|
| Jorge |

|
Brazil |
Netplay |
Active |
|
kamishiro
(かみしろ) |

|
Japan |
A-cho, Play Spot BIG ONE 2nd |
Inactive |
|
| Nanyako |

|
South America |
Dream Match, Netplay |
Active |
|
| ranpo (らんぽ) |

|
Japan |
A-cho, Kirisugu, KorewaMelty |
Inactive(?) |
|
Overview
Playstyle
 H-Nanaya is a movement focused character with potent neutral and decent damage. H-Nanaya is a movement focused character with potent neutral and decent damage. |
| Pros |
Cons |
- Simple: Straightforward and easily executable gameplan with streamlined meter management.
- Mobile: Despite not having the double command backdash from C-Nanaya, H-Nanaya still retains the above average ground movement Nanaya is known for.
- Neutral: Strong counter-poke game with his disjointed 2B and works well with his ability to quickly adjust his spacing.
- Anti-Zoning: Has a few niche full-screen punishes that most characters don't have access to.
|
- Being Half Moon Style: H-Moon mechanics are unfortunately a bad thing.
- Below Average HP: Having lower HP means you cannot afford to make many mistakes.
- Subpar Defense: Slow Abare Normals and the lack of EX Guard make his close range defensive options very limited, forcing reliance on Shield and 623B to escape pressure when cornered.
- Awkward Range: Limited ability to confirm his pokes from a distance will impede effective threat range.
|
General Gameplan
Although H-Nanaya's game plan and meter usage is simple, the mere fact that he's H-Moon makes it challenging and requires the player to make difficult decisions.
You have to remember how/when to dump meter, and how dangerous it is to start a round with 190%
NEUTRAL
H-Nanaya mainly controls ANTI AIR AND GROUND SPACE well, using the various normals below, otherwise he has a lot of issues getting in.
- 5B
- 5C
- 2C
- Rising j.A
- Double jump height falling j.C
Characters like C-Seifuku have a really strong zoning game plan which can shut down his effectiveness, as well as problematic projectiles that prevent you from playing midrange.
Mentally summarized as "Discount F-Hime Neutral"
However, when you can abuse his tools to his full potential it can prove to be quite potent.
BACKDASH:
Core to his gameplan; in combination with his far reaching pokes can help him wall out slow characters, and most in-fighters who need to play close as their main win condition. Your goal is to not let them in at all in this scenario via spacing and counterpoking
2B is disjointed with no green on startup and is very proficient at abusing this game plan.
Confirming whether or not 2B > 2C will connect is a MUST. Dive into training mode and make sure you are accustomed to the spacings this confirm can hit, practicing against commonly used pokes from various characters
OTHERWISE, the combo becomes 2B > 236x
However, people who understand the matchup will know that if H-Nanaya keeps backdashing he won't have the space to compensate for the slower startup of his attacks. This ties into H-Nanaya having trouble contesting at close ranges due to the slow speeds of his normals, and despite having a DP, it generally doesn't end up very well for him so he has to rely on gambling with bunker, blocking, and fuzzy jumping out.
APPROACHING:
214X (commonly referred to as Donkey Kick) while it has a threat phishing for counter hits, it's a risk that forces the situation and is NOT solid methodology to playing neutral. Donkey kick will not solve his problems getting in, it's a hard read/gamble that has a huge reward.
H-Nanaya instead should go in after conditioning the opponent to be more aware of, or respectful of his back dash poke game. This creates more opportunities to go for options like:
- Instant Air Dash
- Dashing 2B/2C/5B
METER MANAGEMENT
Being h-moon means you want to avoid going into heat to avoid unnecessary auto sparks, because it may conflict when you want to be able to heal yourself. (Or getting pit loop infinite'd by F-VAKI) So you'll want to be spending your meter on 214C or j.214C enders.
Despite the plus frames, 236C is actually a crap knowledge check because the defending player just needs to bunker during the super cancel, effectively only forcing them to bunker and make you ground tech, which is not a favorable outcome for you, it's not a tool you can use like F-Aoko's bluefire.
There will be times where you cut your combo short and it works out because j214C has amazing damage.
Esoteric things
- 236x for poking is mediocre at best, but can be a secondary option to mix it up, but is prone to being blown up by low profile moves like Tohno slide
- Air donkey kick can act as a secondary air dash or counter hit phishing
- "TK Air donkey kick is "decent" -- Grounded donkey kick is reminiscent of tohno 214a, except without the low profile; instead of "spacing it" in some scenarios where you have extra frames opting to tk the special makes it plus. Where as ground 214a is mostly an interrupt/callout against jump kind of move in comparison
- Basic Combo Theory: Utilize 214 ender for corner carry when not in the corner, paying attention to your meter, Air throw ender for damage in the corner. Single jump air throw ender for okizeme route.
Pressure
It's not a good idea to have canned blockstrings, so its easier to explain certain moves on block and the options they provide.
A multi-purpose imitation where the 5a could catch potential jump outs or pokes.
If they crouch to make 5A whiff you can still whiff cancel into the 5C to continue the string or it may catch their jumpout to begin with.
Mainly used as a filler to keep you in as the slide moves him forward, definitely requires exguard to push him out more.
On unexpected confirms, you can still late confirm with OTG 5B > 5AAAAC to tack on damage
Using too many normals will easily push you out making you overextend and prone to getting whiff punished when you could just backdash to reassess the situation or counter poke.
Good starter / great rebeat option (much more than 5A) post 2C and etc.
2A on block is is neutral (+-0) which means you want to make the level 2 normals like 2b/2c whiff into 2a rather than 5a if possible
2A whiffing recovers faster than 5A whiff
Don't expect to be able to redash in for free without presenting frame traps.
+1 on block, but has very limited cancellable recovery frames, and kind of sucks if they ex guard it.
However if not; you can do strings like
2B>5B
5B> 2C > 5C
Generally forfeits the turn or hits naturally based on stagger timings to chip away at their health.
Can opt to backdash or hard RPS
Can close the gap and simultaneously avoid things like Nero snake summons and a character length away type spacing
j.B to catch counter poke attempts or j9 button/empty low when they fear you, or during on some oki situations.
Occasionally presentable to condition fuzzy jumping or fuzzy mashing.
Nets you a strike throw on success
Basic examples
2B > 5C > 2C > 2A
5a(w) > 5C > 2A
2B > 2C
2B > 236B
Okizeme
TBA
Combos
| Combo Notation Help
|
Disclaimer: Combos are written by various writers, so the actual notation used in pages can differ from the standard one.
For more information, see Glossary and Controls.
|
| X > Y
|
X input is cancelled into Y.
|
| X > delay Y
|
Must wait for a short period before cancelling X input into Y.
|
| X, Y
|
X input is linked into Y, meaning Y is done after X's recovery period.
|
| X+Y
|
Buttons X and Y must be input simultaneously.
|
| X/Y
|
Either the X or Y input can be used.
|
| X~Y
|
This notation has two meanings.
- Use attack X with Y follow-up input.
- Input X then within a few frames, input Y. Usually used for option selects.
|
| X(w)
|
X input must not hit the opponent (Whiff).
|
| j.X
|
X input is done in the air, implies a jump/jump cancel if the previous move was done from the ground.
Applies to all air chain sections:
- Assume a forward jump cancel if no direction is given.
- Air chains such as j.A > j.B > j.C can be shortened to j.ABC.
|
| sj.X
|
X input is done after a super jump. Notated as sj8.X and sj9.X for neutral and forward super jumps respectively.
|
| dj.X
|
X input is done after a double jump.
|
| sdj.X
|
X input is done after a double super jump.
|
| tk.X
|
Stands for Tiger Knee. X motion must be buffered before jumping, inputting the move as close to the ground as possible. (ex. tk.236A)
|
| (X)
|
X is optional. Typically the combo will be easier if omitted.
|
| [X]
|
Input X is held down. Also referred to as Blowback Edge (BE). Depending on the character, this can indicate that this button is held down and not released until indicated by the release notation.
|
| ]X[
|
Input X is released. Will only appear if a button is previously held down. This type of input is referred to as Negative Edge.
|
| {X}
|
Button X should only be held down briefly to get a partially charged version instead of the fully charged one.
|
| X(N)
|
Attack "X" should only hit N times.
|
| (XYZ)xN
|
XYZ string must be performed N times. Combos using this notation are usually referred to as loops.
|
| (XYZ^)
|
A pre-existing combo labelled XYZ is inserted here for shortening purposes.
|
| CH
|
The first attack must be a Counter Hit.
|
| Air CH
|
The first attack must be a Counter Hit on an airborne opponent.
|
| 66
|
Performs a ground forward dash.
|
| j.66
|
Performs an aerial forward dash, used as a cancel for certain characters' air strings.
|
| IAD/IABD
|
Performs an Instant AirDash.
|
| AT
|
Performs an Air Throw. (j.6/4A+D)
|
| IH
|
Performs an Initiative Heat.
|
| AD
|
Performs an Arc Drive.
|
| AAD
|
Performs an Another Arc Drive.
|
Of all three Nanayas, Half Moon is the absolute simplest in terms of both combo theory and execution. You shouldn't be concerned with scoring the most optimal numbers you can. The best damage you can earn as this character comes through very specific routes on his normals and specials. Because of this, constantly optimized damage an impractical pipe dream, as you'll be using Reverse Beats often. Yet unlike Crescent Nanaya, his moves also don't prorate in a way which lets you squeeze out more in some alternative way. Furthermore, H-Nanaya is the anti-jump Nanaya. His most damaging combos will not usually align with his main method for damage dealing.
To compensate for all these negatives, Half-Moon Nanaya tends to score higher damage at a more consistent rate than the other two; even with Reverse Beat Penalty accounted for. His most practical combos in this sense, ARE his most damaging combos (go ahead and lab if you wish, see if you'll find anything new. You won't. And no, double-stacking 214A in a combo never deals more than just one.) This makes it easier to keep the focus on conversions, which are also very simple. They are always the typical Melty Blood air combo BnB (j.BC > dj.BC > AT) with very little variety or trickery to them, making him an easy character to understand, pick up, and use for players on all levels.
Because H-Nanaya combos are so generic and streamlined, there will not be much to this section. Everything you can do midscreen (save for one AT combo and one corner carry) you can do in the corner as well, regardless of where anyone is.
All combos were tested on Sion Tatari (standing). All damage and meter gain calculations are thus based on such, unless otherwise specifically stated. If there are any calculations in parentheses, that means they're calculations showing how much more you gain for tighter confirms (optional normals in the combo that do more damage.) If they're not listed, despite such parenthesized normals being in the transcript, it was omitted because it follows the basic pattern of either:
- A starters resulting in less damage but more meter if you stack them on before B/C starters due to scaling
- j.A always adding more damage and meter in air combo finishers
- j.B/C always adding more damage if used as starters, on top of more meter
Normal Combos
IMPORTANT NOTICE REGARDING THE BELOW SECTION:
The entire combo list will only list AT enders. AT enders are interchangeable with j.214B or j.214C. Use j.214B as an ender if you want a tech-chase situation (which H-Nanaya is rather good at thanks to his good anti-airing ability), an extra 10 meter, and/or if airdashing to your AT ender won't reach in time; it does the same damage anyway. Use j.214C for (about 1K) extra damage IF you haven't exceeded the bounce-count per combo. Otherwise the last part of the super will pass through, and you'll likely have wasted 100 meter for less damage than usual.
If you find the 214A/236A links too difficult, then replace them with/skip straight into the typical sweep-into-launch routes instead (2C > 5C (> 5B)). 214A/236A links are optimal, but don't add any truly significant amount of meter or damage (in fact only about 100-300 more.) So mastering them is by all means optional in the grand scheme of things.
| Condition
|
Notation
|
Damage
vs V.Sion
|
Notes
|
|
| Normal starter, grounded opponent
|
- 2AA > 5B > 5C > 2C > delay > 2B > 214A, 5A > 5C > j.BC > j.ABC > AT
|
4836
|
| |
| Meter Gained: 74.2 |
Meter Given (vs C-Moon): 32.9 |
Good 2A starter BnB. Reliable and relatively simple.
Video Example |
|
|
| Normal starter, grounded opponent
|
- 2C > 5A/B/C > j.BC > dj.BC > AT
|
3578
|
| |
| Meter Gained: 39.2 |
Meter Given (vs C-Moon): 17.9 |
5C was used for the calculations.
Your bread and butter sweep into air finisher.
Extremely basic, but undeniably his most important combo. This is what you will be converting from and into for the vast majority of situations. The rest is by no means mandatory to learn if you can do this.
Video Example |
|
|
| Normal starter, grounded opponent
|
- 2C > 236A, 5A > j.BC > dj.BC > AT
|
3458
|
| |
| Meter Gained: 41.3 |
Meter Given (vs C-Moon): 18.8 |
The absolute basis of your 236A links, should you choose to opt for these.
Note that these links aren't that important as few routes truly benefit in any way from them. Not to mention they require said routes to work in the first place.
Video Example |
|
|
| Normal starter, grounded opponent
|
- 2C > 214A, 5A > 5C > j.BC > dj.BC > AT
|
3856
|
| |
| Meter Gained: 49.7 |
Meter Given (vs C-Moon): 22.4 |
The absolute basis of your 214A links, should you choose to do these.
Do note that this link will not work on every character in actual combos where the hit count will rise, one of its biggest flaws.
Video Example |
|
|
| Normal starter, grounded opponent
|
- (j.C >) 5B > 2B > 2C > 5C > j.BC > dj.BC > AT
|
4402 (5199)
|
| |
| Meter Gained: 49.7 (57.4) |
Meter Given (vs C-Moon): 22.4 (25.7) |
Universal punish against everyone in the cast.
If it's impossible to squeeze in, or if it makes things too difficult because of hit count affecting airtech and gravity, omit the j.C.
Video Example |
|
|
| Normal starter, grounded opponent
|
- 5B > 2B > 5C > 5A6AA > 22C, 2A > 5C > j.BC > j.BC > AT
|
5034
|
| |
| Meter Gained: 67.5 |
Meter Given (vs C-Moon): 30.0 |
Alternative combo that is a bit easier to do, can replace the 2A link for 2B but it's significantly harder.
Video Example |
|
|
| Normal starter, grounded opponent
|
- (j.C >) 5B > 2B > 5C > 2C > 236A, 5A > j.BC > dj.BC > AT
|
4762 (5525)
|
| |
| Meter Gained: 58.8 (66.5) |
Meter Given (vs C-Moon): 26.3 (29.6) |
Optimized slightly further from the first version, but more difficult to do.
Universal punish against everyone in the cast.
If it's impossible to squeeze in, or if it makes things too difficult because of hit count affecting airtech and gravity, omit the j.C.
Video Example |
|
|
| Normal starter, grounded opponent
|
- (j.C >) 5B > 2B > 5C > 2C > dl 2A > 214A, 5A > 5C > j.BC > j.BC > AT
|
5215 (5970)
|
| |
| Meter Gained: 69.6 (77.3) |
Meter Given (vs C-Moon): 30.9 (34.2) |
Optimized slightly further from the above version, but more difficult to do.
Universal punish against everyone in the cast.
Video Example |
|
|
| Max range normal starter, grounded opponent, 100% meter
|
|
2923
|
| |
| Meter Gained: -79.0 |
Meter Given (vs C-Moon): 15.5 |
*Max range 2B > 236B confirm.
This is good for particular scenarios. At max range, 2B won't combo into anything else. You'll rarely run into such a situation, but if you do, it's good to know you can combo this way. Especially since 236B is safe and has such a large super cancel window, and since this ends in hard knockdown.
Video Example |
|
|
| Counterhit aerial normal starter, airborne opponent
|
- CH j.A/B/C > 5B > 5C > j.BC > dj.BC > AT
|
4895
|
| |
| Meter Gained: 46.9 |
Meter Given (vs C-Moon): 21.2 |
Staple conversion off of an air-to-air counter hit situation.
Values given for j.C.
Deals the most damage by a significant margin, without losing any noticeable amount of meter by not instead opting for other routes.
Always do 5B > 5C. If you misjudge the height and if the opponent ends up too high for j.BC, omit the first j.B and go right into j.C before doing the rest of the aerial finisher. Like the other two Moons, 5B > 5C > j.B > etc. nets greater damage than if you were to do 5C > aircombo.
Video Example |
|
|
| Counterhit 623B starter, 100% meter
|
- CH 623B(1) > 236C, 5A > j.BC > dj.BC > AT
|
3590
|
| |
| Meter Gained: -79.1 |
Meter Given (vs C-Moon): 37.2 |
For when your wakeup DP counter hits before you make it safe with 236C.
Video Example |
|
|
Corner Combos
| Condition
|
Notation
|
Damage
vs V.Sion
|
Notes
|
|
| Normal starter, grounded opponent
|
- 2C > 5B/5C > tk.214B > land, j.AC > dj.BC > AT/j.214B
|
3820
|
| |
| Meter Gained: 44.1 |
Meter Given (vs C-Moon): 20.0 |
The enemy MUST wallslam in the corner for this to be possible. This is a (near) corner combo.
Does more damage than the typical sweep into air combo variant, but difficult to execute. Enemy must be as low to the ground as possible and the tk.j.214B must be done as quickly as possible as well.
If done heading towards the corner, the j.C in j.AC might have to be omitted dependent on spacing.
If done in the corner, the AT might not be possible due to distance issues, so j.214B instead. You will lose corner position and go back to netural if you use this combo in such a spot, however.
Video Example |
|
|
Raw Airthrow Combos
| Condition
|
Notation
|
Damage
vs V.Sion
|
Notes
|
|
| Raw airthrow starter
|
- Raw AT, Dash ~ 2C > 214A, 5A > 5C > j.BC > dj.BC > AT
|
3062
|
| |
| Meter Gained: 49.7 |
Meter Given (vs C-Moon): 23.5 |
The best combo you can possibly do off a raw airthrow, anywhere.
Keep the height of the opponent just low enough so that by the time you do 5A > 5C, they don't go too high for the air combo finisher.
Video Example |
|
|
| Raw airthrow starter, corner-only
|
- Raw AT, 214[B], 2C > 214A, 5A > 5C > j.BC > dj.BC > AT
|
3382
|
| |
| Meter Gained: 60.9 |
Meter Given (vs C-Moon): ??? |
Strictly corner-only air throw starting combo.
Same as the above, except you add a 214[B] to it.
Based on the character, they might have odd collision boxes, which may cause them to bounce out from the corner. In which case, walk away from the corner a little after 214[B] before landing 2C, so they end up where they're supposed to.
Video Example |
|
|
Move Descriptions
| Frame Data Help
|
| Header
|
Tooltip
|
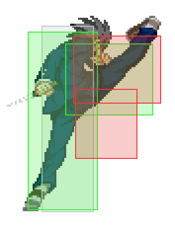
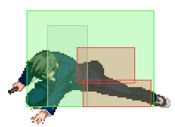
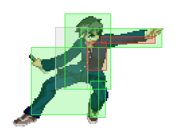
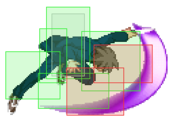
| Move Box Colors
|
Light gray = Collision Box (A move lacking one means it can go through the opponent's own collision box).
Green: Hurt Boxes.
Red: Hit(/Grab) Boxes.
Yellow: Clash Boxes (When an active hitbox strikes a clash box, the active hitbox stops being active. Multi-hit attacks can beat clash since they will still progress to the next hitbox.)
Magenta: Projectile-reflecting boxes OR Non-hit attack trigger boxes (usually).
Blue: Reflectable Projectile Boxes.
|
| Damage
|
Base damage done by this attack.
(X) denotes combined and scaled damage tested against standing V. Sion.
|
| Red Damage
|
Damage done to the recoverable red health bar by this attack. The values are inherently scaled and tested against standing V. Sion.
(X) denotes combined damage.
|
| Proration
|
The correction value set by this attack and the way it modifies the scaling during a string. See this page for more details.
X% (O) means X% Overrides the previous correction value in a combo if X is of a lower percentage.
X% (M) means the current correction value in a combo will be Multiplied by X%. This can also be referred to as relative proration.
|
| Circuit
|
Meter gained by this attack on hit.
(X%) denotes combined meter gain.
-X% denotes a meter cost.
|
| Cancel
|
Actions this move can be cancelled into.
SE = Self cancelable.
N = Normal cancelable.
SP = Special cancelable.
CH = Cancelable into the next part of the same attack (Chain in case of specials).
EX = EX cancelable.
J = Jump cancelable.
(X) = Cancelable only on hit.
-X- = Cancelable on whiff.
|
| Guard
|
The way this move must be blocked.
L = Can block crouching
H = Can block standing.
A = Can block in the air.
U = Unblockable.
|
| Startup
|
Amount of frames that must pass prior to reaching the active frames. Also referred to as "True Startup".
|
| Active
|
The amount of frames that this move will have a hitbox.
(x) denotes frame gaps where there are no hitboxes is present. Due to varied blockstuns, (x) frames are difficult to use to determine punish windows. Generally the larger the numbers, the more time you have to punish.
X denotes active frames with a duration separate from its origin move's frame data, such as projectile attacks. In this case, the total length of the move is startup+recovery only.
|
| Recovery
|
Frames that this move has after the active frames if not canceled. The character goes into one frame where they can block but not act afterwards, which is not counted here.
|
| Advantage
|
The difference in frames where you can act before your opponent when this move is blocked (assuming the move isn't canceled and the first active frame is blocked).
If the opponent uses a move with startup that is at least 2 frames less than this move's negative advantage, it will result in the opponent hitting that move.
±x~±y denotes a range of possible advantages.
|
| Invul
|
Lists any defensive properties this move has.
X y~z denotes X property happening between the y to z frames of the animations. If no frames are noted, it means the invincibility lasts through the entire move.
Invicibility:
- Strike = Strike invincible.
- Throw = Throw invincible.
Hurtbox-Based Properties:
- Full = No hurtboxes are present.
- High = Upper body lacks a hurtbox.
- Low = Lower body lacks a hurtbox.
Miscellaneous Properties
- Clash = Frames in which clash boxes are active.
- Reflect = Frames in which projectile-reflecting boxes are active.
- Super Armor = Frames in which the character can take hits without going into hit stun.
|
Normal Moves
Standing Normals
|
|
| 5A
|
Damage
|
Red Damage
|
Proration
|
Cancel
|
Guard
|
| 340
|
192
|
70%
|
-SE-, -N-, -SP-, -CH-, -EX-, (J)
|
LH
|
| First Active
|
Active
|
Recovery
|
Frame Adv
|
Circuit
|
Invuln
|
| 4
|
4
|
9
|
-1
|
2.8%
|
-
|
|
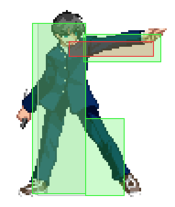
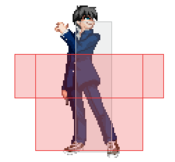
Standing knife-hand. Doesn't hit crouchers, so it's great for setting up tick throws. Strong fuzzy anti-air option that leads to full combo on CH.
|
| 5A~6A
|
Damage
|
Red Damage
|
Proration
|
Cancel
|
Guard
|
| 600
|
384
|
80% (M)
|
N, SP, -CH-, EX, (J)
|
LH
|
| First Active
|
Active
|
Recovery
|
Frame Adv
|
Circuit
|
Invuln
|
| 8
|
4
|
16
|
-5
|
4.2%
|
-
|
|
Second part of the 5A6AA chain - a palm thrust to the opponent. Moves him forward; this move is a good to use sometimes to stay in during blockstrings. Can also catch jump-outs similar to 2A.
|
| 5A~6A~6A
|
Damage
|
Red Damage
|
Proration
|
Cancel
|
Guard
|
| 1000
|
768
|
60% (O)
|
(N), SP, EX , (J)
|
LH
|
| First Active
|
Active
|
Recovery
|
Frame Adv
|
Circuit
|
Invuln
|
| 10
|
4
|
17
|
-3
|
7.0%
|
-
|
|
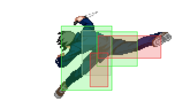
Third part of the 5A6AA chain - a slice that moves far forward. Launches into an air untechable state on hit. It's unsafe on block, but since the window to cancel it into a special is unusually long, you could do some gimmicky frametraps every once in a while. This move makes Nanaya's collision box disappear for frames 10-23 so if done close to the opponent mid-screen, it will cross-up.
|
|
|
|
| Damage
|
Red Damage
|
Proration
|
Cancel
|
Guard
|
| 800
|
576
|
90% (O)
|
N, SP, EX, (J)
|
LH
|
| First Active
|
Active
|
Recovery
|
Frame Adv
|
Circuit
|
Invuln
|
| 8
|
2
|
15
|
1
|
5.6%
|
-
|
|
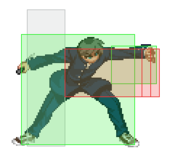
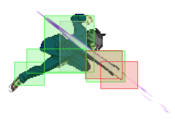
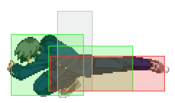
A very good-ranged poke that also moves forward a bit. This and 2B are your usual mid-range pokes, but note that the active frames aren't great. It's +1 on block though, so you'll be safe even if you don't chain or Reverse Beat into something else. The window to cancel into another move is very small though, so it's not very good for staggered blockstrings. Use it to end blockstrings every now and then to gauge reactions from your opponent - best used to set Nanaya back into optimal mid-range after a blockstring.
|
|
|
|
| Damage
|
Red Damage
|
Proration
|
Cancel
|
Guard
|
| 1000
|
672
|
80% (O)
|
N, SP, EX, (J)
|
LH
|
| First Active
|
Active
|
Recovery
|
Frame Adv
|
Circuit
|
Invuln
|
| 12
|
8
|
13
|
-3
|
7.0%
|
-
|
|
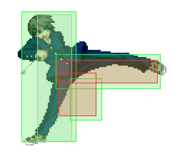
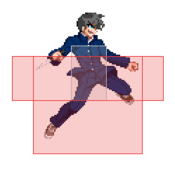
A roundhouse kick that has a huge hit box and extends to parts above him. Moves him forward a good amount to keep on the offensive during blockstrings - it also beats mashing out of blockstrings and jump-outs; the latter situation being something H-Nanaya players must learn to hit confirm from on command. Prorates very nicely and has an absurd amount of stun on counter hits - usually leading to very damaging combos. 5C moves forward a crazy amount from a dash, but it's a bit on the slow side so be wary of using it too liberally as an anti-air or approach.
|
|
Crouching Normals
|
|
| Damage
|
Red Damage
|
Proration
|
Cancel
|
Guard
|
| 300
|
96
|
70% (O)
|
-SE-, -N-, -SP-, -EX-, (J)
|
L
|
| First Active
|
Active
|
Recovery
|
Frame Adv
|
Circuit
|
Invuln
|
| 6
|
4
|
8
|
0
|
2.45%
|
-
|
|
Nanaya drops down and does his morning leg stretch. It's slightly slower than other 2A's but the extra vertical hitbox can allow you to stabilize some combos or catch jump-outs from the corner.
|
|
|
|
| Damage
|
Red Damage
|
Proration
|
Cancel
|
Guard
|
| 700
|
432
|
75% (O)
|
N, SP, EX, (J)
|
L
|
| First Active
|
Active
|
Recovery
|
Frame Adv
|
Circuit
|
Invuln
|
| 8
|
6
|
16
|
-7
|
4.9%
|
-
|
|
Long reaching leg shank that also gains a bit of momentum from a dash. It is a staple low to use for its range, speed, and that it moves him forward. At max range, you can really only hit confirm to 236B > 214C though.
|
|
|
|
| Damage
|
Red Damage
|
Proration
|
Cancel
|
Guard
|
| 1000
|
576
|
60% (O)
|
N, SP, EX, (J)
|
L
|
| First Active
|
Active
|
Recovery
|
Frame Adv
|
Circuit
|
Invuln
|
| 11
|
9
|
15
|
-9
|
5.6%
|
-
|
|
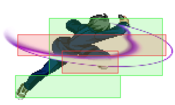
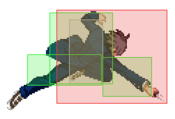
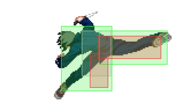
Overall one of his best moves - a slide sweep kick. It moves very far and goes under a good number of projectiles. Be sure to hit confirm this to make the best of it. Use this in blockstrings to keep in and beat out jump-outs. This and 5C make H-Nanaya's staggered blockstrings truly deadly.
|
|
Aerial Normals
Note: All aerial normals are cancellable into Fastfall on block/hit.
|
|
| Damage
|
Red Damage
|
Proration
|
Cancel
|
Guard
|
| 300
|
144
|
75% (O)
|
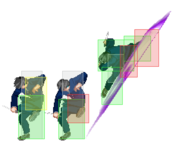
SE, N, J
|
LHA
|
| First Active
|
Active
|
Recovery
|
Frame Adv
|
Circuit
|
Invuln
|
| 6
|
4
|
10
|
-
|
2.1%
|
-
|
|
Your prime air-air move considering how fast it is coupled with how Nanaya pales in comparison to most of the cast while airborne. Be sure to confirm counter hits off this.
|
|
|
|
| Damage
|
Red Damage
|
Proration
|
Cancel
|
Guard
|
| 800
|
576
|
90% (O)
|
N, J
|
HA
|
| First Active
|
Active
|
Recovery
|
Frame Adv
|
Circuit
|
Invuln
|
| 8
|
2
|
-
|
-
|
5.6%
|
-
|
|
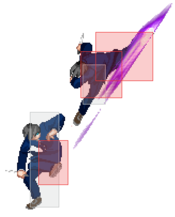
A downward horizontal slash. Unlike Crescent, this move only hits once. The horizontal range makes it okay to use for opponents on-level with you in the air, but the active frames are unimpressive. It's better used sparingly as an air-ground move.
|
|
|
|
| Damage
|
Red Damage
|
Proration
|
Cancel
|
Guard
|
| 1100
|
768
|
90% (M)
|
N, J
|
HA
|
| First Active
|
Active
|
Recovery
|
Frame Adv
|
Circuit
|
Invuln
|
| 10
|
6
|
-
|
-
|
7.7%
|
-
|
|
An angled downward stab. The hitbox on this move is massive, making it great as an air-ground, as well as a sparingly used air-air if the opponent is under you. It's a little slow so be careful about aimlessly throwing it out. The start-up can be used to do whiff mix-ups to bait out Shields sometimes.
|
|
Universal Mechanics
|
|
| Damage
|
Red Damage
|
Proration
|
Cancel
|
Guard
|
| 1400
|
465
|
100%
|
-
|
U
|
| First Active
|
Active
|
Recovery
|
Frame Adv
|
Circuit
|
Invuln
|
| 3
|
1
|
20
|
-
|
0.0%
|
-
|
|
Standard ground throw, but pretty fast. Recovers quickly enough for any oki you want. Does about 1400 damage, but will do less in practice because of Reverse Beat penalty.
|
|
|
|
| Damage
|
Red Damage
|
Proration
|
Cancel
|
Guard
|
| 1600 (1408)
|
506
|
30%
|
-
|
U
|
| First Active
|
Active
|
Recovery
|
Frame Adv
|
Circuit
|
Invuln
|
| 2
|
1
|
12
|
-
|
0.0%
|
-
|
|
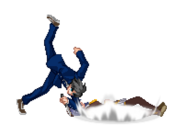
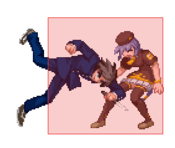
Standard air throw. Ground bounces the opponent and makes Nanaya automatically enter Fastfall if done raw, cause an untechable knockdown and leaves you in a pretty lengthy landing recovery as a combo ender.
|
|
|
|
| Standing
|
Damage
|
Red Damage
|
Proration
|
Cancel
|
Guard
|
| 500 (345)
|
198
|
40%
|
SP, EX, (J)
|
LHA
|
| First Active
|
Active
|
Recovery
|
Frame Adv
|
Circuit
|
Invuln
|
| 9
|
2
|
20
|
-4
|
3.5%
|
-
|
|
Same animation as C-Moon's 5BB.
|
| Crouching
|
Damage
|
Red Damage
|
Proration
|
Cancel
|
Guard
|
| 1500 (1117)
|
714
|
50%
|
SP, EX, (J)
|
LA
|
| First Active
|
Active
|
Recovery
|
Frame Adv
|
Circuit
|
Invuln
|
| 9
|
4
|
18
|
-4
|
10.5%
|
-
|
|
Same hitboxes as F-Moon's 2C.
|
| Air
|
Damage
|
Red Damage
|
Proration
|
Cancel
|
Guard
|
| 500 (303)
|
174
|
50%
|
-
|
HA
|
| First Active
|
Active
|
Recovery
|
Frame Adv
|
Circuit
|
Invuln
|
| 7
|
4
|
-
|
-
|
3.5%
|
-
|
|
Same animation as j.C
|
|
|
|
| Neutral
|
Damage
|
Red Damage
|
Proration
|
Cancel
|
Guard
|
| 500
|
192
|
50%
|
-
|
LHA
|
| First Active
|
Active
|
Recovery
|
Frame Adv
|
Circuit
|
Invuln
|
| 26
|
4
|
19
|
-5
|
0.0%
|
Clash 1-10
|
| (Clash)
|
Damage
|
Red Damage
|
Proration
|
Cancel
|
Guard
|
| 500
|
192
|
50%
|
-
|
LHA
|
| First Active
|
Active
|
Recovery
|
Frame Adv
|
Circuit
|
Invuln
|
| 8
|
4
|
19
|
-5
|
0.0%/-50.0%
|
Strike 1-7
|
|
Similar to his 5BB.
|
| Blockstun
|
Damage
|
Red Damage
|
Proration
|
Cancel
|
Guard
|
| 0
|
0
|
100%
|
-
|
LHA
|
| First Active
|
Active
|
Recovery
|
Frame Adv
|
Circuit
|
Invuln
|
| 19
|
3
|
22
|
-7
|
-100.0%
|
-
|
|
H-Moon specific reversal bunker.
|
|
元気だねアンタ。
"You're pretty lively, huh?" 元気だねアンタ。
"You're pretty lively, huh?" 寄せってろ!
"Bring it on!" 寄せってろ!
"Bring it on!"
|
| Ground
|
Damage
|
Red Damage
|
Proration
|
Cancel
|
Guard
|
| 100
|
0
|
100%
|
-
|
U
|
| First Active
|
Active
|
Recovery
|
Frame Adv
|
Circuit
|
Invuln
|
| 11
|
10
|
20
|
-
|
removes all
|
Full 1-39
|
| Air
|
Damage
|
Red Damage
|
Proration
|
Cancel
|
Guard
|
| 100
|
0
|
100%
|
-
|
U
|
| First Active
|
Active
|
Recovery
|
Frame Adv
|
Circuit
|
Invuln
|
| 12
|
10
|
15
|
-
|
removes all
|
Strike 1-30
|
|
Universal burst mechanic. Unlike Crescent/Full Heat activation, the hitbox and frame data doesn't vary between characters. However, you can be thrown out of this move if you input it in the air.
|
|
Special Moves
Special Movement
"Fastfall if your opp doesn't know it's fake" "Fastfall if your opp doesn't know it's fake"
|
| Damage
|
Red Damage
|
Proration
|
Cancel
|
Guard
|
| -
|
-
|
-
|
-
|
-
|
| First Active
|
Active
|
Recovery
|
Frame Adv
|
Circuit
|
Invuln
|
| -
|
-
|
5
|
-
|
-
|
-
|
|
Nanaya's unique fastfall, no button input. It is used in a lot of mix-ups - high/low/throw and cross-ups. Get creative and condition your opponent to get the best mileage out of this.
|
|
Grounded Specials
A A B B EX EX
|
| A
|
Damage
|
Red Damage
|
Proration
|
Cancel
|
Guard
|
| 250*6 (1380)
|
(1062)
|
100%
|
EX
|
LHA
(Whiffs vs Crouch.)
|
| First Active
|
Active
|
Recovery
|
Frame Adv
|
Circuit
|
Invuln
|
| 12
|
13
|
20
|
-1
|
1.05%*6 (6.3%)
|
-
|
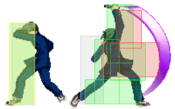
- Nanaya does a series of flurry slashes in front of him.
The quickest version and the safest on block. Unfortunately, it completely whiffs on crouching opponents. Good for covering space in front of you sometimes, and it can also be used to hit confirm from 2C into a combo.
|
| B
|
Damage
|
Red Damage
|
Proration
|
Cancel
|
Guard
|
| 200*12 (1983)
|
(1614)
|
100%
|
EX
|
LHA
|
| First Active
|
Active
|
Recovery
|
Frame Adv
|
Circuit
|
Invuln
|
| 12
|
26
|
22
|
-3 (vs Ground.)
-6 (vs Air.)
|
1.05%*12 (12.6%)
|
-
|
|
Moves forward a bit more than A, slightly minus on block and can be used to zone in front of you, hitting crouchers too unlike A. On hit, if not EX cancelled, 236B is actually at frame disadvantage, so be careful.
|
| EX
|
Damage
|
Red Damage
|
Proration
|
Cancel
|
Guard
|
| 200*18 (2337)
|
(1679)
|
100%
|
-
|
LHA
|
| First Active
|
Active
|
Recovery
|
Frame Adv
|
Circuit
|
Invuln
|
| 4+8
|
42
|
20
|
5
|
-100.0%
|
Full 1-5, High 6-11; 24-26; 39-41
|
|
Advantageous on block, so it's good for continuing pressure. Overall not that great of a move compared to the rest of H-Nanaya's arsenal, but it has situational uses. If you must blow meter to prevent going into HEAT too early, this is the move to use on block. On hit, it launches opponents, so you can do a quick combo into 5A -> air combo string. The damage is quite poor however.
|
|
A A B B EX EX
|
| A
|
Damage
|
Red Damage
|
Proration
|
Cancel
|
Guard
|
| 1500/600
|
1056/384
|
100%
|
EX
|
LH/LHA
|
| First Active
|
Active
|
Recovery
|
Frame Adv
|
Circuit
|
Invuln
|
| 7
|
2 (2) 5
|
33
|
-24/-20
|
8.4%/5.6%
|
Full 1-4, Clash 5-6, High 5-8
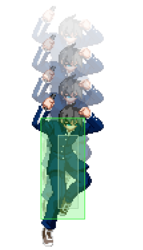
|
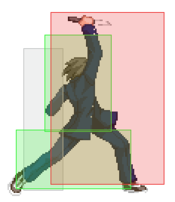
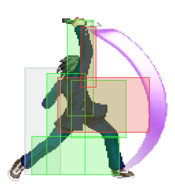
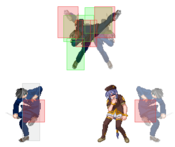
- H-Nanaya's reversal series. Not as good compared to the other Nanaya moons but when used appropriately are still excellent tools.
Has some invincibility start-up and a clash on the ground, so you can clash with a low-hitting move and EX cancel into something else. Overall a gimmicky move since it's air blockable and the clash isn't very reliable.
|
| B
|
Damage
|
Red Damage
|
Proration
|
Cancel
|
Guard
|
| 1400, 600*2 (2405)
|
(1699)
|
100%
|
EX
|
LH
|
| First Active
|
Active
|
Recovery
|
Frame Adv
|
Circuit
|
Invuln
|
| 6
|
2 (2) 6
|
40
|
-32 ~ -25
|
3.6%, 1.75%*2 (7.1%)
|
Full 1-15
|
|
The go-to reversal on H-Nanaya. Has more invincibility frames than A and is actually air unblockable (no clash trait though).
|
| EX (Both Nanayas)
|
Damage
|
Red Damage
|
Proration
|
Cancel
|
Guard
|
(3578)
400*5 (1696)
|
(2339)
(813)
|
100%
|
-
|
LH*, LHA
|
| First Active
|
Active
|
Recovery
|
Frame Adv
|
Circuit
|
Invuln
|
| 11+3
|
5 (2) 12
|
45
|
-41 (vs Stand.)
-43 (vs Crouch.)
|
-100.0%
|
Full 1-27
|
| (Clone)
|
Damage
|
Red Damage
|
Proration
|
Cancel
|
Guard
|
| 400*5 (1696)
|
(813)
|
100%
|
-
|
LHA
|
| First Active
|
Active
|
Recovery
|
Frame Adv
|
Circuit
|
Invuln
|
| 11+4
|
5 (2) 12
|
-
|
-39 (vs Stand.)
-43 (vs Crouch.)
|
-
|
-
|
|
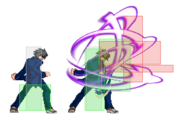
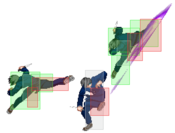
The reversal becomes air blockable again except for the very first active frames. However, the main attraction to this move is that it makes a clone appear behind your opponent no matter where they are - can be used as a fullscreen punish and will setup a tech punish setup if it hits. It does around 3k damage if both you and the clone cleanly hit, so you can get great damage if you time it correctly; careful, it's very slow on start-up so only use it if you're confident it will hit.
|
|
A A B/[B] B/[B] EX EX
|
| A
|
Damage
|
Red Damage
|
Proration
|
Cancel
|
Guard
|
| 700
|
480
|
60% (O)
|
-EX-
|
LH
|
| First Active
|
Active
|
Recovery
|
Frame Adv
|
Circuit
|
Invuln
|
| 11
|
9
|
26
|
-7 to +1
|
7.7%
|
-
|
- A series of kicks that strike horizontally. Not really used outside of combos.
A fast moving kick that travels a nice distance. Causes techable ground knockdown so be prepared to tech punish after this hits.
On block, advantage is based on the distance. It's pretty much safe unless you hit close up. You can hit confirm the tipped hit with 5A into an air combo string, meaning this is a decent anti-jump move to use.
|
| B
|
Damage
|
Red Damage
|
Proration
|
Cancel
|
Guard
|
| 1200
|
768
|
70% (O)
|
-EX-
|
LH
|
| First Active
|
Active
|
Recovery
|
Frame Adv
|
Circuit
|
Invuln
|
| 21
|
9
|
26
|
-6 to +2
|
8.4%
|
-
|
|
Slower kick than 214A. Not exactly useful outside of maybe half-charging it to beat mashing away the charged 214B. It's safe on block.
|
| [B]
|
Damage
|
Red Damage
|
Proration
|
Cancel
|
Guard
|
| 1600
|
1152
|
70% (O)
|
-EX-
|
HA
|
| First Active
|
Active
|
Recovery
|
Frame Adv
|
Circuit
|
Invuln
|
| 30
|
9
|
21
|
-1 to +7
|
11.2%
|
-
|
|
One of H-Nanaya's two ground overheads. Usually plus on block. It wall bounces on hit and nets good damage if you do land it.
|
| EX
|
Damage
|
Red Damage
|
Proration
|
Cancel
|
Guard
|
| 600*4, 1400, 600*2 (2269)
|
400*4, 1100, 400*2 (1450)
|
70% (O)
|
-
|
HA (3), LH (3)
|
| First Active
|
Active
|
Recovery
|
Frame Adv
|
Circuit
|
Invuln
|
| 4+8
|
9 (12) 1 (2) 6
|
41
|
-28
|
-100.0%, 3.5%
|
Full 1-9, 27-31
|
|
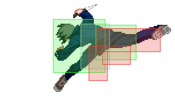
A two part EX move. First is a 4 hit forward kick similar to 214A/B. Second is a 3 hit upwards kick like his DP (even including the invulnerability). The final 2 hits cause an untechable knockdown. Note that the first hit of the second portion almost always whiffs. Being the most damaging hit of the move, this hurts its damage a lot compared to j.214C. Mostly used to confirm long range pokes like with 2B > 236B > 214C. Can also be used to OTG relaunch stray 2Cs, although it is probably not worth the meter outside of Heat. This is his second ground overhead, but it's a huge gimmick that's easily blocked and punished afterward. The second part of the move actually builds a small amount of meter back.
|
|
A A B B C C
|
| A
|
Damage
|
Red Damage
|
Proration
|
Cancel
|
Guard
|
| -
|
-
|
-
|
Any*
|
-
|
| First Active
|
Active
|
Recovery
|
Frame Adv
|
Circuit
|
Invuln
|
| -
|
-
|
36
|
-
|
-
|
Full 12-23
|
- H-Nanaya's teleport moves. Situational, but overall decent for mix-ups and frame traps.
Does a crouching stance then teleports about half a screen distance. The distance is shortened if you hit the wall. Since your hitbox disappears during this, you can use as a cross-up in some situations including blockstrings. Easily mashed if anticipated though. You're also invincible during the teleport, so get creative.
|
| B
|
Damage
|
Red Damage
|
Proration
|
Cancel
|
Guard
|
| -
|
-
|
-
|
-
|
-
|
| First Active
|
Active
|
Recovery
|
Frame Adv
|
Circuit
|
Invuln
|
| -
|
-
|
32
|
-
|
-
|
Full 10-23
|
|
Does a crouching stance then teleports a jump height above the same spot. After the teleport, you can use any air option normally available to you after an initial jump.
|
| C
|
Damage
|
Red Damage
|
Proration
|
Cancel
|
Guard
|
| -
|
-
|
-
|
-
|
-
|
| First Active
|
Active
|
Recovery
|
Frame Adv
|
Circuit
|
Invuln
|
| -
|
-
|
20
|
-
|
-
|
-
|
|
Goes into the same crouching stance as 22A/B but after a brief moment will return to normal. Used as a feint for 22A/B or a move to cancel into for less recovery.
|
|
Aerial Specials
A A B B EX EX
|
| A
|
Damage
|
Red Damage
|
Proration
|
Cancel
|
Guard
|
| 800
|
576
|
70% (O)
|
-EX-
|
LHA
|
| First Active
|
Active
|
Recovery
|
Frame Adv
|
Circuit
|
Invuln
|
| 10
|
9
|
4
|
-2 to +6 (TK)
|
5.6%
|
-
|
- Air versions of the strike kicks. All of them hit mid/air blockable and are generally unsafe to use on block.
On hit, it causes an air tech state, which is mostly a gimmick. Its main use is to run away from pressure and/or the corner.
|
| B
|
Damage
|
Red Damage
|
Proration
|
Cancel
|
Guard
|
| 1200
|
768
|
70% (O)
|
-EX-
|
LHA
|
| First Active
|
Active
|
Recovery
|
Frame Adv
|
Circuit
|
Invuln
|
| 13
|
9
|
8
|
-6 to +2 (TK)
|
8.4%
|
-
|
|
Wall bounces on hit and next to air throw is the to-go ender for most air combos. Allows you to possibly harass opponents after the air tech and nets you around 10% meter each hit.
|
| EX
|
Damage
|
Red Damage
|
Proration
|
Cancel
|
Guard
|
| 600*4, 1400, 600*2 (3000)
|
400*4, 1100, 400*2 (1986)
|
70% (O)
|
-
|
LHA
|
| First Active
|
Active
|
Recovery
|
Frame Adv
|
Circuit
|
Invuln
|
| 4+6
|
9 (12) 1 (2) 6
|
-
|
-25 (vs Stand.)
-31 (vs Crouch.)
|
-100.0%, 7.1%
|
Full 1-6, 27-31
|
|
A two part EX move. Mostly identical to the grounded version, except the 5th hit is much easier to land, and the first 4 hits will use 2 bounces in the corner. This means the second portion will whiff if you have already used up a bounce. This is the move you'll defer meter to as it adds a ridiculous amount of damage to any combo. It's essentially the round ender, and also causes opponents to enter an air tech state. If done close to the ground, it will grant a techable knockdown. If done even closer to the ground, it will land between the two parts and perform the second half of the grounded version instead, granting a hard knockdown. Like the grounded version, the second part of the move builds a small amount of meter back.
|
|
Arc Drive
|
|
| Damage
|
Red Damage
|
Proration
|
Cancel
|
Guard
|
| 4000
|
2650
|
50%
|
-
|
U
|
| First Active
|
Active
|
Recovery
|
Frame Adv
|
Circuit
|
Invuln
|
| 2+12
|
46
|
16
|
-
|
removes all
|
Full 1-61
|
|
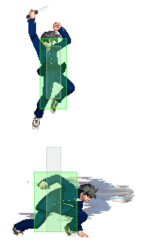
An unblockable Arc Drive that includes a clone Nanaya for added vertical range. It is dodgeable - for Full Moon characters, they can just dash through you instead and it will make them backdash the Arc Drive. If used as a punish for a suspected jump out, you can connect into a combo afterward. The recovery is actually pretty decent even on whiff, but there are usually better uses for meter in HEAT.
|
|
MBAACC Navigation


