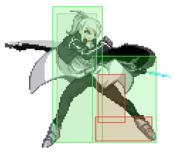
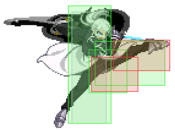
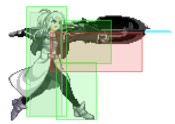
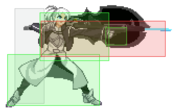
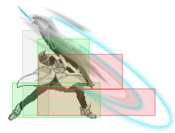
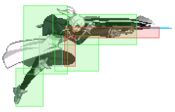
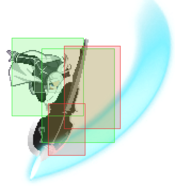
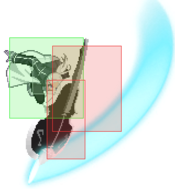
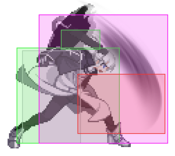
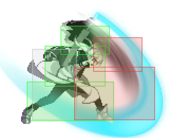
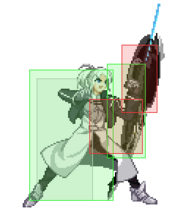
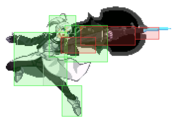
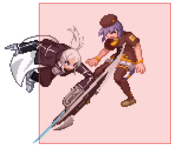
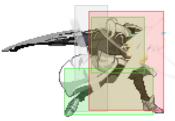
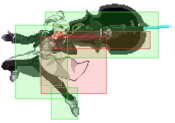
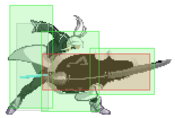
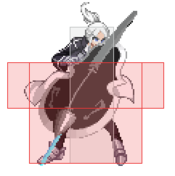
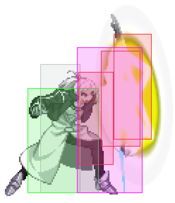
Melty Blood/MBAACC/Riesbyfe Stridberg/Half Moon

From Mizuumi Wiki
Jump to navigation Jump to search

Character Page Progress

This page is still a work in progress, consider joining as an editor to help expand it. Please update this character's roadmap page when one of the editing goals have been reached.

In Progress To-do
  • Combos:
    • Add meter gain/given numbers to combos.
  • Additional Ressources/Players to watch/ask
    • If you know any players in particular that can be helpful for learning this character, please add them with, if possible a way to contact them (such as a Discord handle) and a name that can be searched in the match video database.


Additional Resources

H-Riesbyfe Match Video Database
H-Riesbyfe Combo Showcase

Notable Players

Name Color Region Common Venues Status Details
Mordon

Color

Brazil Netplay Active
obutsu
(汚物)

Color

Japan Play Spot BIG ONE 2nd Active Has been sporadically active for the entirety of this game's history. Loops for days.

Overview

Strengths / Weaknesses
Strengths
  • High meter gain, especially in the corner
  • Good damage off clean hits
  • Good poking normals, both grounded and airborne
  • Oppressive pressure with good frame traps, frame advantage, and multiple forward moving normals
  • Good corner carry on close range starters. Can carry corner to corner into hard knockdown, as well as transition into corner loops from midscreen.
  • Can counteract many zoning tools with guard point, armor, and projectile reflection
  • Overall a very cute character, just look at her
Weaknesses
  • Poor mobility
  • Slow midrange normals
  • Struggles to convert max range hits
  • Very weak oki from airthrow ender
  • Limited options for mixup
  • Metered specials have limited utility, making meter management difficult if trying to avoid Heat

General Gameplan

Half-Moon Riesbyfe is more or less the same as Crescent-Moon with a pinch of Full-Moon added to the mix - A rushdown-oriented character with lots of pokes that relies more on ground play than fighting in the air against their opponent, with some significant changes to the playstyle that promotes going up-close and personal, constant poking & pressure and trapping your opponent to the corner to release that sweet damage burst.
Because of a certain change in Ries's specials however, she is much more offensive than both her moon counterparts as tradition to any other Half-Moon character and has an easier way to gain meter & okizeme as a result through her corner combos and infamous Seal Loop combo. That being said, she is still Riesbyfe, which means her framedata is going to be pretty weak in comparison to other characters - and there will be times where said framedata will betray you during matches. Many will consider H-Riesbyfe a great variation of Riesbyfe whenever speed is more necessary than power.

Neutral

As H-Ries, you have a few neutral tools at your disposal during footsies that will help you get in that hit to unleash some basic combo starters, to list a few examples:
5B: A decent enough poke to throw out every once in a while if your opponent isn't low-profiling you due to its high hitbox, don't throw it out too often because it has a 10f startup. Proper spacing should be considered when throwing 5B in the ring.
2B: Same thing as 5B. A decent enough poke to throw out every once in a while, marginally worse range than 5B but hits low as well and is also good to toss out when people are expecting to shield 5B, also has a 10f startup like 2B so spacing should also be considered when tossing this normal out.
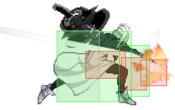
2C: Very great poking tool because it moves you forward by default and it also hard knockdowns upon hit allowing for 2C/214A into Air Combo conversion if landed.
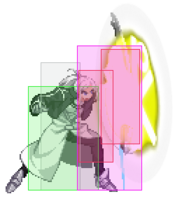
236X: Shield rush which is either air unblockable or has a hard knockdown on hit depending on which button you press. Has a few guard-points and can be held for a longer period which allows for great advances if you can read the enemy's attacks, allowing for an automatic punish/okizeme opportunity.
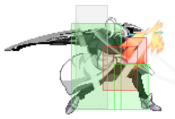
63214B: Not a bad option to use whenever you expect the enemy to rush you down or advance with an attack due to its superarmor frames. You will immediately win neutral if you read the opponent and enter Okizeme if in midscreen or a potential corner combo.

Pressure

H.ries’ pressure is easily separated into two categories, midscreen, and corner. While all characters enjoy strengthened pressure in the corner h ries experiences this to a degree far beyond others as her midscreen and corner pressure are worlds apart in structure, effectiveness, and depth.

Midscreen: your pressure at midscreen is limited, linear, and unthreatening, as the only reliable ways of resetting pressure and closing the distance as you push yourself out are rebeating out of 6AA, 5C and 2C all of which severely limit your confirming routes once expended to continue pressure. Other tools for resetting pressure like 6[B], 214C and 624[B] allow the opponent to easily disengage via a backdash or backjump and the only chase for a backdash at extended range for h.ries is likely to be a 5B which has no confirm without arcdrive.

Corner: your pressure in the corner is extensive, varied, and profoundly dangerous with touches leading to anywhere from 4k to 8k with a near limitless metergain ceiling. This is where much of the joy of this character comes from with broad options and opportunities for expression in the structure of your pressure. The cornerstone of your corner pressure is building an ever growing wall of options for your opponent to consider, taxing at their mental stack until even slow options become difficult to react to. The reduced pushback at the wall allows h.ries to stay very close to the opponent throughout her entire pressure and with nowhere to go her wide range of pressure extenders all require precise and specific responses as without specific callouts all of your options are incredibly safe. The high guard damage of many of h.ries’s specials also put a clock on the opponent forcing half moon characters to quickly find an out or be guard broken and crescent and full moon characters are forced to split their metal focus even further to EX guard.

5A6A: 5A6A moves a surprising amount forward and in many strings will leave you as close as possible, rebeating into 2A leaves you at near point blanc and if you hold forward until the first frame you move forward this puts you nearly imperceptibly into tick throw range at the proper timing with an easy option of delayed 2A to instead catch a tech or mash. Even when a rebeat into 2A is unavailable 6AA remains a threat and even played fully out as an overcommit you are merely -2 with cancel options available.
6[B]: 6[B] is a +5 on block low with quite a long range, this is one of the most generic and layer 1 ways for you to extend your pressure as it can allow you to approach after pushing yourself somewhat out while also incidentally catching movement and jump outs due to being a low. When rebeating into this from 5C or 2C the gap is surprisingly small making it very difficult to interrupt with a mash.
5C/2C: 5C and 2C have a significant amount of forward movement and are excellent for rebeating out of into 5A or 2A to extend pressure, however stray hits from either of these are quite difficult to get a full confirm from on reaction if the other has already been used in the string.
63214[B]/63214B: As you build up your pressure and get your opponent used to frametraps and the more typical ways of resetting pressure they will become more focused on looking for the more typical pressure resets and will not be able to react quickly enough to b seal to hit early enough to reliably string in a way to beat both uncharged and charged seal. This will often result in them erring on the side of caution and blocking the charged seal giving you a way to reset both your rebeat strings and your distance letting you get back to point blanc and start your pressure all over again. Mixing in uncharged seal on occasion has fairly low risk and reinforces the opponent’s preference for conservative, defensive options, as getting hit by uncharged seal for trying to mash or escape will lead immediately to the loop.
214C: All of these options together give the opponent an enormous amount of things to consider, opening them up to your very slow but very safe overhead. 214C is one of the slowest commonly used overheads in melty at 28f but despite this it has a number of things going for it that make it much better than the data suggests. The startup of this overhead is surprisingly ambiguous, the startup doesn’t have a clear animation until halfway through and even once it does many players have reported confusing the animation for b seal, 214B, or even h ries simply walking backwards forcing the opponent to spend a lot of focus confirming that the overhead is coming. On top of this the overhead is -0 on block meaning that even when successfully blocked the opponent isn’t in the clear and still needs to respect your options. Shielding is not even a reliable punish as the EX cancel options ries have can have varied timings, interrupt many shield responses and can even reliably punish half moon counter. Blocking this overhead can even be dangerous due to the enormous amount of guard damage this does on block making this an even more appealing option when the opponent is low on guard gage and forced to time EX guards to avoid a guard break as the speed of this will alter the timing and can often be what breaks guards as the opponent reacts early enough to block but not early enough to properly time the EX guard.

Okizeme

H-Ries is filled to the brim with lots of tools to get her a chance of okizeme, because this character is all about getting that sweet knockdown/ender into the okizeme to further destroy their opponent's hopes and dreams of ever even considering mashing buttons on wakeup into even more damage output and a SECONDARY Seal Loop if you've managed to carry your opponent to the corner.
Your general okizeme paradise will either begin in a 2C > Air Combo > AT, 63214A Combo Ender, 236B, 6[B] or through a Shield Counter. Once your opponent is down, you can either set up for a Corner BnB, a crossup j.C (will not work on short characters), an IAD j.6C or another 50/50 mixup with 214C since it is her only standing overhead.
This version of Riesbyfe is the one that just screams 'Wake up for more pain' at their opponent and actually mean it whenever she gets in the position to do what her tools allow her to do.

Defense

That being said - let's talk about whenever you are not the one in the position to do what their tools allow them to do. Her Seal Bash, originally usable as her unique Alpha Counter whenever in blockstun has been completely removed from the scene - rendering her automatically with worse defensive options. So what CAN she do when she's in the defensive?

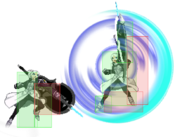
Universal Half-Moon Mechanics: Albeit not your #1 priority when wanting to escape a blockstring - Half-Moon gives Riesbyfe better room to breathe in a way as long as she has 100% meter and above, or when attempting to hard read an opponent's incoming pressure attempt. Her Shield Bunker, albeit doing no damage if done while blocking, grants invulnerability for the whole frame period from start to finish, and it comes out faster than other moons. Her Regular Shield also automatically stops any incoming attack from the opponent with a combo opener by itself.
623B: D.P with invulnerability frames at the start and upper-body invulnerability at the second half of the move. Catches Shield Bunker, Shield and button mashing but is beat by (obviously) blocking. Also air unblockable throughout the whole move so it's also good to catch jump-ins.
623C: Basically the same as above, but it's a super, has full invulnerability for the whole 15 frames, deals more damage, but is air blockable after the 8th active frame so you will need to time this DP right if you want to catch jump-ins.
63214B: Situational, but if the opponent is setting up some sort of a projectile trap, this may come in useful due to superamor frames and projectile reflect properties. 6B can also reflect projectiles but does not have the former armor frames.
63214C: Another decent reversal super to route meter to whenever cornered, as it knocks the enemy back far and resetting into neutral... if you catch a counter-hit with this, you can convert it into a combo.

Meter Management

H.Ries’s incredible access to meter and the way it interacts with the meter mechanics of half moon results in two major competing styles when it comes to meter management on this character:

Access to EX: The first major playstyle revolves around the standard theory of meter management on half moon characters, maintaining around 100% meter at all times in order to maximize the access to EX moves and to have the most consistent presence in the match. This has a number of difficulties with this character due to the difficulty of dumping meter, few of h.ries’s EX’s have consistent neutral application and none function as pressure extensions that can be easily used in order to prevent entering heat in an inopportune time during pressure. However maintaining this access to EX has a number of significant benefits as 624C is essential to converting off h.ries’s overhead presence, half moon bunker is by far your most reliable and versatile pressure escape and 236C can interrupt many ranged pressure sequences. When converting it can often be worth it to recognize when you can efficiently dump meter using 624C as an alternate to other wall bounces for additional damage and control of your meter total.

Insurance and Control: The second major playstyle revolves around using H.ries’s incredible metergain in the corner to its fullest potential in order to have precise control of both your own, and your opponent’s meter. This playstyle is fundamentally based on the seal loop combo and taking care in recognizing the metergain potential of your starters, and when to end the loop in order to optimize the amount of time you spend in heat during pressure while minimizing your opponent’s access to their own metered tools. H.ries wants to play in heat far more than most other characters, and has a great access to it due to her massive metergain and autoheat letting her enter it unimpeded. In pressure remaining in heat allows you to push the opponent into less offensive escapes, as successful abare will simply run into the autospark and force them to make a second correct call in a row without getting hit or allow you back into heat. These less offensive escapes are also more easily punished in heat as even when you are pushing yourself out 5B presents a much greater threat for checking movement and jumps as arc drive is a reliable reaction confirm on hits from any range of 5B, the only one she has. Additionally, many of the risks in entering heat for half moon characters are minimized for h.ries as autospark is only punishable while airborne and you will typically remain grounded for much of the match. Losing the meter upon autospark is also much less painful as the post knockdown situation will lead to one of the quite long corner pressure sequences h.ries has available, building much of the meter back unless the opponent makes two consecutive risky correct calls. This playstyle is especially effective against full moon characters as they will often be forced into max and have to make the choice between a risky burst at the cost of all their meter or being reduced to 100 meter and suffering oki.

Combos

Combo Notation Help
Disclaimer: Combos are written by various writers, so the actual notation used in pages can differ from the standard one.

For more information, see Glossary and Controls.

X > Y X input is cancelled into Y.
X > delay Y Must wait for a short period before cancelling X input into Y.
X, Y X input is linked into Y, meaning Y is done after X's recovery period.
X+Y Buttons X and Y must be input simultaneously.
X/Y Either the X or Y input can be used.
X~Y This notation has two meanings.
  1. Use attack X with Y follow-up input.
  2. Input X then within a few frames, input Y. Usually used for option selects.
X(w) X input must not hit the opponent (Whiff).
j.X X input is done in the air, implies a jump/jump cancel if the previous move was done from the ground.

Applies to all air chain sections:

  • Assume a forward jump cancel if no direction is given.
  • Air chains such as j.A > j.B > j.C can be shortened to j.ABC.
sj.X X input is done after a super jump. Notated as sj8.X and sj9.X for neutral and forward super jumps respectively.
dj.X X input is done after a double jump.
sdj.X X input is done after a double super jump.
tk.X Stands for Tiger Knee. X motion must be buffered before jumping, inputting the move as close to the ground as possible. (ex. tk.236A)
(X) X is optional. Typically the combo will be easier if omitted.
[X] Input X is held down. Also referred to as Blowback Edge (BE). Depending on the character, this can indicate that this button is held down and not released until indicated by the release notation.
]X[ Input X is released. Will only appear if a button is previously held down. This type of input is referred to as Negative Edge.
{X} Button X should only be held down briefly to get a partially charged version instead of the fully charged one.
X(N) Attack "X" should only hit N times.
(XYZ)xN XYZ string must be performed N times. Combos using this notation are usually referred to as loops.
(XYZ^) A pre-existing combo labelled XYZ is inserted here for shortening purposes.
CH The first attack must be a Counter Hit.
Air CH The first attack must be a Counter Hit on an airborne opponent.
66 Performs a ground forward dash.
j.66 Performs an aerial forward dash, used as a cancel for certain characters' air strings.
IAD/IABD Performs an Instant AirDash.
AT Performs an Air Throw. (j.6/4A+D)
IH Performs an Initiative Heat.
AD Performs an Arc Drive.
AAD Performs an Another Arc Drive.

Normal Combos

Condition Notation Damage
vs V.Sion
Notes
Normal starter, grounded opponent
  • 2AA > 5B > 6B > 5C > 5A(w)6AA > 2C > 214A > j.BC > j.BC > AT
5296


Meter Gained: 71.4 Meter Given (vs C-Moon): 30.6
Basic ground BnB. Works anywhere.
Normal starter, grounded opponent
  • 2AAA > 5B > 2B > 6B > 5C > 236A > j.CB > j.BC > AT
5080


Meter Gained: 59.5 Meter Given (vs C-Moon): 25.5
Long range BnB.
Counterhit 63214C starter, 100% meter
  • CH 63214C, 5C > 3C > 8sj.BC > j.AC > AT
5006


Meter Gained: -100 + 14.3 Meter Given (vs C-Moon): 15.5
Midscreen combo off CH EX Seal.

Corner Combos

Seal loop info:

  • Seal loop starts with 63214B, which then allows you to loop (5A > 5C > 63214B) or (2C > 5C > 63214B) or (2C > 3C > 63214B).
  • (XX > 5C > 63214B) loop stops working after 20 hits, because there isn't enough untech time after 5C. After 20 hits you should either stop with 63214A, or start doing (2C > 3C > 63214B) loop until you get heat.
  • Even though you get all the meter in the world, AD ender is not recommended due to high proration. End with 63214A, keep the heat and go for riskier pressure instead, as half moon's safe(ish) auto burst will protect you.
  • Don't forget that you will also give a lot of meter to the opponent.
Condition Notation Damage
vs V.Sion
Notes
Normal starter, grounded opponent
  • 2AA > 5B > 2B > 6B > 5C > 214B > j.C > dj.C > j.6C > (land) > sj8j.BC > j.BC > AT
5940


Meter Gained: 82.6 Meter Given (vs C-Moon): 35.4
No loops. Damage though...
Normal starter, grounded opponent
  • 2AA > 5B > 6B > 5C > 5A(w)6AA > 63214B > 6[B] > 5C > 63214B > 6[B] > 5C > 63214A
4515
(1 "fake" Loop)


Meter Gained: 90.3 Meter Given (vs C-Moon): 38.7
Baby's first seal loop. Gives ok amount of meter and gives hard down. Note that with 5A6AA you can't do more than one loop anyway, so doing a "fake" version with 6[B] otg gives more dmg.
Normal starter, grounded opponent
  • 2AA > 5B > 2B > 6B > 5C > 214B > j.C > j.6C > (delay) > 63214B > [5A > 5C > 63214B]x3 > 5A > 5C > 63214A
5041
(3 Loops)


Meter Gained: 127.4 Meter Given (vs C-Moon): 54.6
First real seal loop. Easy version of the corner BnB.
Normal starter, grounded opponent
  • 2AA > 5B > 2B > 6B > 5C > 214B > (delay) > j8.[C] > j.6C > 6[B] > 63214B > [5A > 5C > 63214B]x3 > 5A > 5C > 63214A
5585
(3 Loops)


Meter Gained: 140.7 Meter Given (vs C-Moon): 60.3
Real seal loop. Delay jump after 214B to make opponent fall lower for 6[B] eventually to hit.
Normal starter, grounded opponent
  • 2AA > 5B > 2B > 6B > 5C > 214B > (delay) > j8.[C] > j.6C > 6[B] > 63214B > [5A > 5C > 63214B]x3 > [2C > 3C > 63214B]x3 > 63214A
5618
(6 Loops)


Meter Gained: 187.9 Meter Given (vs C-Moon): 86.8
Real full seal loop. Once you get heat, end with 63214A immediately. You don't want to give more meter to the opponent for free.
Normal starter, grounded opponent
  • 214C > 63214C > 5B > 63214B > [5A > 5C > 63214B > 2C > 5C > 63214B]x2 > 5A > 5C > 63214B > [2C > 3C > 63214B]x3 > 63214A
3042
(many Loops)


Meter Gained: 241.2 - 100 Meter Given (vs C-Moon): 78.9
Not a lot of dmg, but you get oki after this. You are allowed to let opponent drop to the ground once, this will drop the dmg (only slightly anyway), but combo is still ok to finish.
Normal starter, grounded opponent
  • 2AA > 5B > 2B > 6B > [2C > 3C > 63214B]x15 > 2C > 3C > 63214A
4000+
(too many Loops)


Meter Gained: Heat Meter Given (vs C-Moon): MAX/Heat
They will shake your hand after you land this. Guaranteed heat at some point even before the 15(!) loops.
Doesn't work on all characters. For characters that this exact combo doesn't work, you can start with couple of 5A 5C 63214B loops, then go into 2C 3C 63214B loops.

Move Descriptions

Frame Data Help
Header Tooltip
Move Box Colors

Light gray = Collision Box (A move lacking one means it can go through the opponent's own collision box).
Green: Hurt Boxes.
Red: Hit(/Grab) Boxes.
Yellow: Clash Boxes (When an active hitbox strikes a clash box, the active hitbox stops being active. Multi-hit attacks can beat clash since they will still progress to the next hitbox.)
Magenta: Projectile-reflecting boxes OR Non-hit attack trigger boxes (usually).
Blue: Reflectable Projectile Boxes.

Damage Base damage done by this attack.

(X) denotes combined and scaled damage tested against standing V. Sion.

Red Damage Damage done to the recoverable red health bar by this attack. The values are inherently scaled and tested against standing V. Sion.

(X) denotes combined damage.

Proration The correction value set by this attack and the way it modifies the scaling during a string. See this page for more details.

X% (O) means X% Overrides the previous correction value in a combo if X is of a lower percentage.
X% (M) means the current correction value in a combo will be Multiplied by X%. This can also be referred to as relative proration.

Circuit Meter gained by this attack on hit.

(X%) denotes combined meter gain.
-X% denotes a meter cost.

Cancel Actions this move can be cancelled into.

SE = Self cancelable.
N = Normal cancelable.
SP = Special cancelable.
CH = Cancelable into the next part of the same attack (Chain in case of specials).
EX = EX cancelable.
J = Jump cancelable.
(X) = Cancelable only on hit.
-X- = Cancelable on whiff.

Guard The way this move must be blocked.

L = Can block crouching
H = Can block standing.
A = Can block in the air.
U = Unblockable.

Startup Amount of frames that must pass prior to reaching the active frames. Also referred to as "True Startup".
Active The amount of frames that this move will have a hitbox.

(x) denotes frame gaps where there are no hitboxes is present. Due to varied blockstuns, (x) frames are difficult to use to determine punish windows. Generally the larger the numbers, the more time you have to punish.
X denotes active frames with a duration separate from its origin move's frame data, such as projectile attacks. In this case, the total length of the move is startup+recovery only.

Recovery Frames that this move has after the active frames if not canceled. The character goes into one frame where they can block but not act afterwards, which is not counted here.
Advantage The difference in frames where you can act before your opponent when this move is blocked (assuming the move isn't canceled and the first active frame is blocked).

If the opponent uses a move with startup that is at least 2 frames less than this move's negative advantage, it will result in the opponent hitting that move.
±x~±y denotes a range of possible advantages.

Invul Lists any defensive properties this move has.

X y~z denotes X property happening between the y to z frames of the animations. If no frames are noted, it means the invincibility lasts through the entire move.

Invicibility:

Strike = Strike invincible.
Throw = Throw invincible.

Hurtbox-Based Properties:

Full = No hurtboxes are present.
High = Upper body lacks a hurtbox.
Low = Lower body lacks a hurtbox.

Miscellaneous Properties

Clash = Frames in which clash boxes are active.
Reflect = Frames in which projectile-reflecting boxes are active.
Super Armor = Frames in which the character can take hits without going into hit stun.

Normal Moves

Standing Normals

5A
5A
5A~6A~6A
Hries 5a.png
Hries 6a.png
Hries 6aa.png
5A Damage Red Damage Proration Cancel Guard
350 240 75% (O) -SE-, -N-, -SP-, -CH-, -EX-, (J) L
First Active Active Recovery Frame Adv Circuit Invuln
5 2 9 1 2.45% -

Fast, low hitting 5A. Good frame advantage at +1 on block, and also your best rebeat option at 15f total. Not useful as an antiair due to the low hitbox.

5A~6A Damage Red Damage Proration Cancel Guard
600 384 80% (M) N, SP, -CH-, EX, (J) LH
First Active Active Recovery Frame Adv Circuit Invuln
8 4 16 -5 4.2% -
5A~6A~6A Damage Red Damage Proration Cancel Guard
1000 768 60% (O) (N), SP, EX, (J) LH
First Active Active Recovery Frame Adv Circuit Invuln
11 4 16 -2 7.0% -

Standard H-Moon 6A chain. Ries kicks forward, then stabs with her weapon. Launches the opponent on hit.

5B
Hries 5b.png
Damage Red Damage Proration Cancel Guard
800 576 100% N, SP, EX, (J) LH
First Active Active Recovery Frame Adv Circuit Invuln
10 2 19 -6 5.6% -

Ries steps forward and stabs straight out with Gamaliel. Has better range than 2B, but worse frame advantage and cannot confirm into a full combo from max range. Can be low profiled by some attacks. Very good for controlling space and shutting down approaches.

5C
Hries 5c.png
Damage Red Damage Proration Cancel Guard
1000 480 90% (O) N, SP, EX, (J) LH
First Active Active Recovery Frame Adv Circuit Invuln
13 2 18 -2 7.0% -

Ries slides forward and does a big swing with her weapon. One of her slowest normals at 13f first active, but the range is huge thanks to the sliding movement. Good button to catch opponents just outside B normal range and also to confirm pokes.


Crouching Normals

2A
Hries 2a.png
Damage Red Damage Proration Cancel Guard
350 240 75% (O) -SE-, -N-, -SP-, -EX-, (J) L
First Active Active Recovery Frame Adv Circuit Invuln
5 4 8 0 2.45% -

Basic 2A, reaches slightly further than 5A. Hits low. Cannot hit airborne opponents.

2B
Hries 2b.png
Damage Red Damage Proration Cancel Guard
650 384 80% (O) N, SP, EX, (J) LH
First Active Active Recovery Frame Adv Circuit Invuln
10 3 14 0 4.55% -

Ries leans forward and does a poke with her weapon. Excellent poking and pressure tool with low recovery and a long cancel window. Also your main normal to counter stand shield.

2C
Hries 2c.png
Damage Red Damage Proration Cancel Guard
700 384 65% (O) N, SP, EX, (J) L
First Active Active Recovery Frame Adv Circuit Invuln
11 3 22 -7 5.6% -

Low slide. Moves forward quite a bit and knocks down. Staple in combos, sometimes used in pressure as another low and for the forward movement. Does not reach as far as it appears due to the low active frames.


Aerial Normals

j.A
Hries ja.png
Damage Red Damage Proration Cancel Guard
300 144 75% (O) SE, N, J LHA
First Active Active Recovery Frame Adv Circuit Invuln
6 4 10 - 2.1% -

Quick forward kick that looks like Crescent's j.B. Useful as a quick air to air or when you need a fast downwards hitbox. Can act afterwards before landing.

j.B
Hries jb.png
Damage Red Damage Proration Cancel Guard
700 480 90% (O) N, J HA
First Active Active Recovery Frame Adv Circuit Invuln
10 8 -- - 4.9% -

Long-ranged horizontal stab. Like all her other B moves this extends her hurtbox quite a bit, so space this properly. Hits higher and farther out than her other air normals besides j6C, filling an important niche in her air game. Also your button of choice from an instant air dash.

j.C
j.C
j.[C]
Hries jc.png
Hries bejc.png
j.C Damage Red Damage Proration Cancel Guard
900 576 90% (O) / 50% (O) N, J HA
First Active Active Recovery Frame Adv Circuit Invuln
11 3 -- - 5.6% -

Huge downward swing. Slow and has very little disjoint, but covers a lot of space in front of and below her. A good jump in attack and controls a lot of air space if not preempted, but does not hit from lowest airdash height.

j.[C] Damage Red Damage Proration Cancel Guard
1500 1152 90% (O) N, J HA
First Active Active Recovery Frame Adv Circuit Invuln
21 3 -- - 11.5% -

Charged version deals more damage and has much better disjoint.

Command Normals

6B
6B
6[B]
Hries 6b.png
Hries be6b.png
6B Damage Red Damage Proration Cancel Guard
800 480 100% N, SP, EX, (J) LH
First Active Active Recovery Frame Adv Circuit Invuln
13 4 16 -2 5.6% Reflect 9-16

Ries takes a swipe with Gamaliel. Moves forward slightly. Uncharged version has long startup for its range, but it can reflect most projectiles. Good combo filler if close enough.

6[B] Damage Red Damage Proration Cancel Guard
1200 672 100% N, SP, EX, (J) L
First Active Active Recovery Frame Adv Circuit Invuln
22 3 10 5 8.4% -

Charged version is a +5 on block sweep and gains a larger hitbox. Does not reflect projectiles.

3C
Hries 3c.png
Damage Red Damage Proration Cancel Guard
700 384 70% (O) (N), SP, EX, (J) LH
First Active Active Recovery Frame Adv Circuit Invuln
10 4 23 -9 4.9% -

Ries steps forward into an upward strike, similar to C's 5B. Launches the opponent upwards, and has a command superjump followup on 8. Has limited use as an antiair due to the extended hurtboxes, and not very useful in pressure since it doesn't allow rebeating on block and has poor frame advantage. Used in high gravity seal loops.

j.6C
Hries 6jc.png
Damage Red Damage Proration Cancel Guard
850 576 68% (M) - HA
First Active Active Recovery Frame Adv Circuit Invuln
10 3 -- - 7.2% -

Big stab that looks kind of like j.B. Wallslams on hit. Slower than j.B, but the hitbox is significantly better. As an additional tradeoff, hits kind of high so you won't be using it for jump-in.

Universal Mechanics

Ground Throw
MBCRiesThrow.png
Damage Red Damage Proration Cancel Guard
1500 744 100% - U
First Active Active Recovery Frame Adv Circuit Invuln
3 1 20 - 0.0% -

Riesbyfe carries her opponent to the ground using the tip of Gamaliel. Untechable knockdown.

Air Throw
Air Throw
j.6/4A+D
MBCRiesThrowAir.png
Damage Red Damage Proration Cancel Guard
1600 (1408, Raw)/1500 844 30% (Any if Raw) U
First Active Active Recovery Frame Adv Circuit Invuln
2 1 12 - 0.0% -

Riesbyfe grabs the opponent then slashes them with Gamaliel. Ground bounces the opponent if done raw, causes an untechable knockdown but leaves you at a distance as a combo ender.

Shield Counter
Shield Counter
Auto after a successful Shield (Air OK)
MBHRiesSC.png
MBHRiesSCLow.png
MBHRiesSCAir.png
Standing Damage Red Damage Proration Cancel Guard
500 (345) 198 50% (SP), (EX), (J) LHA
First Active Active Recovery Frame Adv Circuit Invuln
10 4 18 -4 3.5% -

Same animation as 214A.

Crouching Damage Red Damage Proration Cancel Guard
1500 (1117) 714 50% (SP), (EX) LA
First Active Active Recovery Frame Adv Circuit Invuln
9 4 18 -4 10.5% -

Same animation as 2B.

Aerial Damage Red Damage Proration Cancel Guard
500 (345) 198 50% - HA
First Active Active Recovery Frame Adv Circuit Invuln
9 4 - - 3.5% -

Same animation as j.6C.

Shield Bunker
Shield Bunker
214D in neutral or blockstun
MBCRies214D.png
MBHRies214D.png
Neutral Damage Red Damage Proration Cancel Guard
500 192 50% - LHA
First Active Active Recovery Frame Adv Circuit Invuln
26 4 19 -5 0.0% Clash 1-10
(Clash) Damage Red Damage Proration Cancel Guard
500 192 50% - LHA
First Active Active Recovery Frame Adv Circuit Invuln
8 4 19 -5 0.0% Strike 1-7

A charging shield bunker.

Blockstun Damage Red Damage Proration Cancel Guard
0 0 100% - LHA
First Active Active Recovery Frame Adv Circuit Invuln
19 3 22 -7 -100.0% -

H-Moon specific reversal bunker.

Circuit Spark
Circuit Spark
In Heat:
Auto during hitstun
A+B+C during blockstun
MBCRiesCSpark.png
MBCRiesCSparkAir.png
Ground Damage Red Damage Proration Cancel Guard
100 0 100% - U
First Active Active Recovery Frame Adv Circuit Invuln
12 10 20 N/A removes all Full 1-39
Air Damage Red Damage Proration Cancel Guard
100 0 100% - U
First Active Active Recovery Frame Adv Circuit Invuln
13 10 15 N/A removes all Strike 1-30

Universal burst mechanic. Unlike Crescent/Full Heat activation, the hitbox and frame data doesn't vary between characters. However, you can be thrown out of this move if you input it in the air.


Special Moves

236X
Wrist Pizzicato
236A/[A]/B/[B]/C
MBCRies236A.png
MBCRies236B.png
MBCRies236C.png
A Damage Red Damage Proration Cancel Guard
700 384 70% (O) -EX-, (J) LH
First Active Active Recovery Frame Adv Circuit Invuln
13 8 27 -17 ~ -10 4.9% Guard point 8-11
[A] (Max) Damage Red Damage Proration Cancel Guard
700 384 70% (O) -EX-, (J) LHA, LH
First Active Active Recovery Frame Adv Circuit Invuln
23 8 12 -2 ~ 5 4.9% Guard point 8-22
  • Shield rush. A dashing shield attack that has a guard point(acts as if Ries blocks without putting her in blockstun or stopping the animation) that varies by version. Charging extends startup and guard point duration while reducing recovery.

High shield rush, has guard point against mid and highs. Launches on hit. Air unblockable, but punishable on ground block unless EX canceled. Guard point on uncharged lasts only four frames, and does not extend until active frames. When charged Ries moves further, the guardpoint lasts longer, and recovery is greatly reduced.

B Damage Red Damage Proration Cancel Guard
700 384 70% (O) -EX-, (J) L
First Active Active Recovery Frame Adv Circuit Invuln
14 8 22 -12 ~ -5 4.9% Guard point 9-11
[B] (Max) Damage Red Damage Proration Cancel Guard
700 384 70% (O) -EX-, (J) L
First Active Active Recovery Frame Adv Circuit Invuln
24 8 12 -2 ~ 5 4.9% Guard point 9-23

Charges forward with Gamaliel poised below Riesbyfe, tripping the enemy. Jump and EX cancelable. Has guard point only against air blockable attacks. Charged is the safer but slower version, and is notably air unblockable for the full duration unlike 236[A]. If either version hits the enemy high up enough you can go into an air combo.

EX Damage Red Damage Proration Cancel Guard
600*13 (3297) (2622) 90%*13 (M) N/A LH
First Active Active Recovery Frame Adv Circuit Invuln
5+9 30 12 -8 ~ 5 -100.0% Clash 14-43

Similar to A version except multi-hitting. Not invulnerable, but has guard point during later startup frames and upper body clash during active frames. Pushback on block is greater than her forward movement during later active frames, which can cause later hits to whiff and worsen frame advantage. Final hit wallslams, so following with a (heavily prorated) combo is possible in the corner.

623X
MBCRies623A.png
MBCRies623B.png
MBCRies623C.png
A Damage Red Damage Proration Cancel Guard
1000 480 70% (O) - LH, LHA
First Active Active Recovery Frame Adv Circuit Invuln
4 2 (2) 4 36 -26 (1st Hit),
-22 (2nd Hit)
7.0% -
  • DP-like rising slash. All versions are air unblockable so they make decent AAs in certain situations.

Fastest version. No invulnerability and extends hurtboxes quite a bit, but recovers quickly enough to enable a followup combo on air CH. Still very punishable on block.

B Damage Red Damage Proration Cancel Guard
700*2, 300 (1543) (869) 100% - LH
First Active Active Recovery Frame Adv Circuit Invuln
4 4 (2) 6 46 -34 7.0% Full 1-5 8-9, High 6-7

Her meterless reversal. Starts out completely invulnerable for the first hit, then is upper-body invulnerable until the second. Functions pretty much like a conventional DP. Can pick up air CHs into combo in certain situations (late active frames, opponent high in the air).

EX Damage Red Damage Proration Cancel Guard
600, 300*7 (2210) (1320) 100% - LH, LHA
First Active Active Recovery Frame Adv Circuit Invuln
1+5 25 41 -32 -100.0% Full 1-15

Has longer invulnerability frames than B version and does more damage, but otherwise works about the same.

214X
Wrist Staccato
214A/B/C (No EX)
MBCRies214A.png
MBHRies214B.png
MBHRies214C.png
A Damage Red Damage Proration Cancel Guard
1000 480 80% (O) -EX-, (J) LH
First Active Active Recovery Frame Adv Circuit Invuln
12 6 15 -3 7.0% -
  • Ries slides forward and punches.

Short-ranged uppercut. Fastest version, commonly used after 2C in combos.

B Damage Red Damage Proration Cancel Guard
1200 672 70% (O) -EX-, (J) LH
First Active Active Recovery Frame Adv Circuit Invuln
13 2 23 -7 8.4% -

Straight body blow. Wallslams on hit. Combo staple for big damage in corner. Not as safe as A version, but pushes you out a fair bit on block so you probably won't get punished per se.

C Damage Red Damage Proration Cancel Guard
1000 768 60% (O) -EX-, (J) H
First Active Active Recovery Frame Adv Circuit Invuln
28 2 16 0 7.0% -

Overhead Ryu punch. Her only standing overhead. Comes out extremely slowly and doesn't do much by itself. Can cancel into 236C or 63214C to scoop a small combo, but reward on hit is relatively low. Links into 5B/2B on counterhit for a much better combo. Safe on block, but pushes her out of 2A range. Inflicts heavy guard bar damage.

63214X
Wrist Mordent
63214A/B/[B]/C
MBHRies63214AB.png
A/B
A/B
MBHRies63214XB.png
MBHRies63214C.png
A Damage Red Damage Proration Cancel Guard
1200 768 100% -EX- LH
First Active Active Recovery Frame Adv Circuit Invuln
5 6 31 -19 8.4% Reflect 5-20
  • H's defining move. Ries performs a shield bash motion, creating a seal that blows the opponent back. Like 6B, it will reflect certain projectiles if they hit the seal.

Fastest version (5f first active). Long recovery and unsafe on block. The opponent is sent flying on hit. Cannot continue the combo afterwards, even in the corner. Works as automatic corner carry from anywhere since it knocks back so far and has generous frame advantage on knockdown, which means you can easily run in after them from fullscreen. Also her favored corner ender.

B Damage Red Damage Proration Cancel Guard
1200 768 50% -EX- LH
First Active Active Recovery Frame Adv Circuit Invuln
20 6 17 -5 8.4% Reflect 20-32
Super Armor 6-40
[B] Damage Red Damage Proration Cancel Guard
700*3 (1566) (1074) 65% (O) -EX- LHA
First Active Active Recovery Frame Adv Circuit Invuln
38 X 22 3 ~ 23 2.1%*3 (6.3%) Reflect 33-60
Super Armor 6-26

Longer startup, less recovery, safer on block, and gains armor. Unlike the A version, you can combo off this in the corner. The cornerstone of her seal loops.

Can also be charged. Instead of knocking down, this makes three advancing seals that give decent advantage on hit or block. Move has strange property of being invul against command grabs but not regular throws, and armor frames do not last as long when charged.

EX Damage Red Damage Proration Cancel Guard
2000 1632 70% (O) - LH
First Active Active Recovery Frame Adv Circuit Invuln
4+0 5 18 -5 -100.0% Reflect 5-18

Basically A version with more damage. On counterhit, the opponent will be locked in stun all day, making it possible to follow up even from midscreen. Mostly safe on block and scoops big damage, so it's a good super to use as a frametrap or reversal when you have meter to burn.

Arc Drive

Official Apocrypha
41236C in Heat
MBCRiesAD.png
Damage Red Damage Proration Cancel Guard
800*6, 2500 (3626) (2905) 50% (O) - LH
First Active Active Recovery Frame Adv Circuit Invuln
2+10 21 35 -20 removes all Full 1-32

Ries charges forward with a BUSTA WOLF. Completely invulnerable during startup and active frames. Hitbox is not as big as it looks and has some travel time to reach max range. Very unsafe on block and whiff. A decent midrange whiff punish that benefits from invulnerability, but ends Heat prematurely and does not allow for followups. Keeping Heat for autoburst is often better unless Heat is about to end anyway or no other option will work. Not very useful as a combo ender due to proration on seal loops, ending Heat, and already good knockdown from 63214A.


MBAACC Navigation

General
FAQ
Advanced
AokoCrescentHalfFull
TohnoCrescentHalfFull
HimeCrescentHalfFull
NanayaCrescentHalfFull
KoumaCrescentHalfFull
MiyakoCrescentHalfFull
CielCrescentHalfFull
SionCrescentHalfFull
RiesbyfeCrescentHalfFull
V.SionCrescentHalfFull
WarachiaCrescentHalfFull
RoaCrescentHalfFull
MaidsCrescentHalfFull
AkihaCrescentHalfFull
ArcueidCrescentHalfFull
Powered CielCrescentHalfFull
Red ArcueidCrescentHalfFull
V.AkihaCrescentHalfFull
Mech-HisuiCrescentHalfFull
SeifukuCrescentHalfFull
SatsukiCrescentHalfFull
LenCrescentHalfFull
RyougiCrescentHalfFull
White LenCrescentHalfFull
NeroCrescentHalfFull
NACCrescentHalfFull
Koha-MechCrescentHalfFull
HisuiCrescentHalfFull
Neco-ArcCrescentHalfFull
KohakuCrescentHalfFull
Neco-MechCrescentHalfFull