Character Page Progress
This page is mostly complete, consider joining as an editor to help finish it up. Please update this character's roadmap page when one of the editing goals have been reached. When no main goals are left, please remove this section from this page.
| In Progress
|
- Gameplan
- Add any additional information untouched on in gameplan.
- Additional Resources/Players to watch
- Add any external links to useful resources such as video guides or articles. Expand on each noted player and their playstyles.
|
Overview
Playstyle
 H-Tohno is an all rounder with a focus on mobility. H-Tohno is an all rounder with a focus on mobility. |
| Pros |
Cons |
- Amazing ground and air mobility: Has the signature Tohno ground dash/backdashes, while also wielding an incredibly fast airdash and walk speed.
- Reversals with good reward and hard knockdown - H-Tohno has a meterless DP that can provide a full combo on trade, or a hard knockdown on hit, as well as several metered reversal options.
- Potentially high damage: Although H-Tohno has difficulty setting up the correct situation for it, given the right spacing, starter, or meter, H-Tohno can rack up to 6k damage meterless.
- Strong pressure and frametraps: A wide variety of forward moving normals combined with rebeats, a good throw, and strong movement makes H-Tohno a threat on the offensive.
- Unblockable setups with Arc Drive: Gimmicky, but Arc Drive is unblockable on startup, and half moon meter gain lets you utilize it relatively quickly.
|
- Poor reward off most hits: H-Tohno suffers from limited meterless conversions and low damage when out of range for 5A6AA/5BB to connect, forcing him to work hard to get some damage.
- Weak okizeme off airthrow ender: H-Tohno is left at a relatively far distance after the airthrow, limiting his oki options.
- Difficult meter management: Situational EX moves means that H-Tohno has difficulty meter dumping in neutral to avoid preemptive heat.
- Limited conversion tools without meter: Without 214C or 236C, it can be difficult to convert many of his buttons into decent damage or a hard knockdown
|
Although he was once among the strongest characters in the game, in MBAACC H-Tohno is usually considered on the weaker end of the character roster and by far the weakest of the three Shiki Tohnos. Players looking to explore H-Tohno will find a character with awkward, low-damage confirms unless he gets a clean jump-in or a point-blank hit in the corner with meter. H-Tohno loses many of C-Tohno's most powerful tools, including his grounded overhead 6[B], divekick specials, his ability to easily confirm off counterhit DPs, a powerful all-purpose j.[C], cancellable 236[B] dash, less comboable 214B, and many others. In exchange, he gains an unwieldy 6C that is difficult to integrate into combos and a decent but somewhat unimpressive 5A6AA series. His normals are overall less suited for neutral and space control than the other two Tohnos, and his special move suite is by far the most limited - even the moves he shares with C-Tohno are almost universally less-powerful versions. To compound this, his okizeme is extremely poor even if he sacrifices damage for knockdown.
So why play H-Tohno at all? There is one very important trait of H-Tohno that sets him apart from the other two Tohnos - his extreme speed. Crescent and especially Full Moon Tohno suffer tremendously from their heavy reliance on Tohno's dash to get in, since their airdashes are extremely poor for covering space quickly and their walkspeed is mediocre. Although Tohno excels in midrange footsie battles, when faced against characters that are strong at restricting grounded movement like Aoko or Nero, C-Tohno and F-Tohno can struggle immensely to get in and stay in. H-Tohno, on the other hand, is a speed demon, with one of the fastest horizontal airdashes in Melty Blood and a fantastic grounded walkspeed, while still retaining the infamously strong Tohno dash (actionable on frame 4!) having the fastest of all 3 Moons. His 214a has been unnerfed from previous versions of the game unlike C or F, allowing him to abuse the powerful low profile much more safely on both whiff and block, making for powerful abare. His grounded normals move him forward to keep up the attack, and although he needs a clean hit to do decent damage, his corner damage is actually quite high if you have a keen eye for hit confirms.
In general, it is difficult to recommend H-Tohno to most players - if what you just read sounds appealing, any Nanaya moon is almost certainly going to be a better fit for your playstyle, especially H-Nanaya. However, if you're looking to master all three moons of Tohno for counterpick purposes or character loyalty, or just like the idea of playing an extremely fast character with good footsies and don't mind working hard for damage, H-Tohno can be a rewarding challenge. Almost any character in Melty Blood can win despite their shortcomings, and H-Tohno does have the fundamental tools to overcome any foe, so if playing a "bad" character doesn't deter you, let's get started!
Move Descriptions
| Frame Data Help
|
| Header
|
Tooltip
|
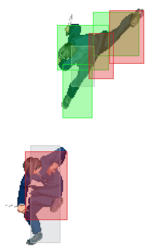
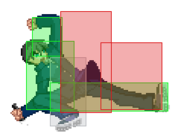
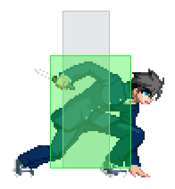
| Move Box Colors
|
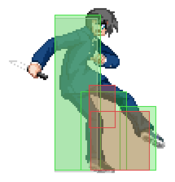
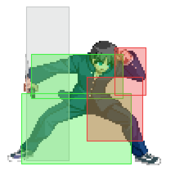
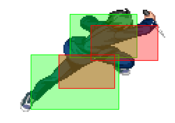
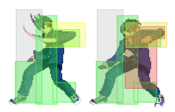
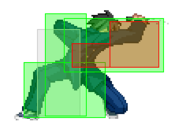
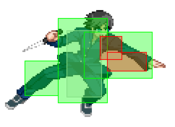
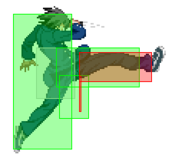
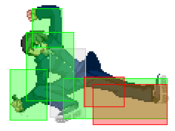
Light gray = Collision Box (A move lacking one means it can go through the opponent's own collision box).
Green: Hurt Boxes.
Red: Hit(/Grab) Boxes.
Yellow: Clash Boxes (When an active hitbox strikes a clash box, the active hitbox stops being active. Multi-hit attacks can beat clash since they will still progress to the next hitbox.)
Magenta: Projectile-reflecting boxes OR Non-hit attack trigger boxes (usually).
Blue: Reflectable Projectile Boxes.
|
| Damage
|
Base damage done by this attack.
(X) denotes combined and scaled damage tested against standing V. Sion.
|
| Red Damage
|
Damage done to the recoverable red health bar by this attack. The values are inherently scaled and tested against standing V. Sion.
(X) denotes combined damage.
|
| Proration
|
The correction value set by this attack and the way it modifies the scaling during a string. See this page for more details.
X% (O) means X% Overrides the previous correction value in a combo if X is of a lower percentage.
X% (M) means the current correction value in a combo will be Multiplied by X%. This can also be referred to as relative proration.
|
| Circuit
|
Meter gained by this attack on hit.
(X%) denotes combined meter gain.
-X% denotes a meter cost.
|
| Cancel
|
Actions this move can be cancelled into.
SE = Self cancelable.
N = Normal cancelable.
SP = Special cancelable.
CH = Cancelable into the next part of the same attack (Chain in case of specials).
EX = EX cancelable.
J = Jump cancelable.
(X) = Cancelable only on hit.
-X- = Cancelable on whiff.
|
| Guard
|
The way this move must be blocked.
L = Can block crouching
H = Can block standing.
A = Can block in the air.
U = Unblockable.
|
| Startup
|
Amount of frames that must pass prior to reaching the active frames. Also referred to as "True Startup".
|
| Active
|
The amount of frames that this move will have a hitbox.
(x) denotes frame gaps where there are no hitboxes is present. Due to varied blockstuns, (x) frames are difficult to use to determine punish windows. Generally the larger the numbers, the more time you have to punish.
X denotes active frames with a duration separate from its origin move's frame data, such as projectile attacks. In this case, the total length of the move is startup+recovery only.
|
| Recovery
|
Frames that this move has after the active frames if not canceled. The character goes into one frame where they can block but not act afterwards, which is not counted here.
|
| Advantage
|
The difference in frames where you can act before your opponent when this move is blocked (assuming the move isn't canceled and the first active frame is blocked).
If the opponent uses a move with startup that is at least 2 frames less than this move's negative advantage, it will result in the opponent hitting that move.
±x~±y denotes a range of possible advantages.
|
| Invul
|
Lists any defensive properties this move has.
X y~z denotes X property happening between the y to z frames of the animations. If no frames are noted, it means the invincibility lasts through the entire move.
Invicibility:
- Strike = Strike invincible.
- Throw = Throw invincible.
Hurtbox-Based Properties:
- Full = No hurtboxes are present.
- High = Upper body lacks a hurtbox.
- Low = Lower body lacks a hurtbox.
Miscellaneous Properties
- Clash = Frames in which clash boxes are active.
- Reflect = Frames in which projectile-reflecting boxes are active.
- Super Armor = Frames in which the character can take hits without going into hit stun.
|
Normal Moves
Standing Normals
|
|
| 5A
|
Damage
|
Red Damage
|
Proration
|
Cancel
|
Guard
|
| 360
|
115
|
70% (O)
|
-SE-, -N-, -SP-, -CH-, -EX-, (J)
|
LH
|
| First Active
|
Active
|
Recovery
|
Frame Adv
|
Circuit
|
Invuln
|
| 5
|
3
|
11
|
-2
|
2.8%
|
-
|
|
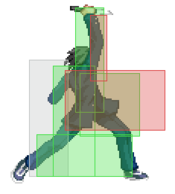
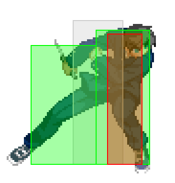
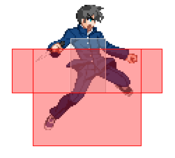
A short range kick to the shins. Despite what it looks like, it hits mid. By itself, it's outclassed by 2A in terms of reach and rebeat frame advantage, but its ability to cancel into 5A6AA provides more incentive to its usage.
|
| 5A~6A
|
Damage
|
Red Damage
|
Proration
|
Cancel
|
Guard
|
| 600
|
384
|
80% (M)
|
N, SP, -CH-, EX, (J)
|
LH
|
| First Active
|
Active
|
Recovery
|
Frame Adv
|
Circuit
|
Invuln
|
| 8
|
4
|
16
|
-5
|
4.2%
|
-
|
|
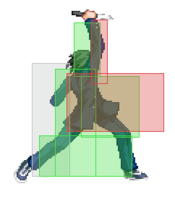
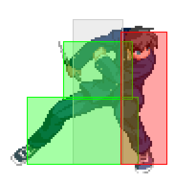
Tohno lunges forward afterwards. Decent forward movement and chain options make it quite useful in rebeat pressure.
|
| 5A~6A~6A
|
Damage
|
Red Damage
|
Proration
|
Cancel
|
Guard
|
| 1000
|
768
|
60% (O)
|
(N), SP, EX, (J)
|
LHA
|
| First Active
|
Active
|
Recovery
|
Frame Adv
|
Circuit
|
Invuln
|
| 10
|
4
|
17
|
-3
|
7.0%
|
-
|
|
He finishes with a foward-moving slash. Launches on hit, and untechable time is long enough to even link normals afterward, resetting your possible ground chains. Uniquely crosses up when close on both hit and block, so it can be used to change sides mid-combo or for a gimmicky pressure string. Cancelling into specials after crossup will not readjust to face the opponent, and will normally hilariously fly the other direction. (In the corner, 214A can actually hit and bypass crossup protection.)
|
|
|
|
| 5B
|
Damage
|
Red Damage
|
Proration
|
Cancel
|
Guard
|
| 700
|
384
|
90% (O)
|
N, SP, -CH-, EX, (J)
|
LH
|
| First Active
|
Active
|
Recovery
|
Frame Adv
|
Circuit
|
Invuln
|
| 8
|
5
|
12
|
-2
|
4.9%
|
Clash 7-12
|
|
A forward stepping elbow attack. Moves you forward a fair amount and has a solid clashframe box on the startup and active frames. Can anti air with this attack, but it requires precision to use effectively. Good for using after dash 2A to confirm into either a ground string or air combo.
|
| 5B~B
|
Damage
|
Red Damage
|
Proration
|
Cancel
|
Guard
|
| 900
|
672
|
63% (O)
|
(N), SP, EX, (J)
|
LH
|
| First Active
|
Active
|
Recovery
|
Frame Adv
|
Circuit
|
Invuln
|
| 10
|
4
|
30
|
-16
|
6.3%
|
-
|
|
Followup knife haul attack to 5B. Launches the opponent very high on hit. Can be canceled with a special superjump command by using neutral jump(8) to follow up for air combos. Can only cancel into specials on block, but the window is quite large.
|
| 5B~[B]
|
Damage
|
Red Damage
|
Proration
|
Cancel
|
Guard
|
| 1600
|
1152
|
60% (O)
|
(N), SP, EX, (J)
|
H
|
| First Active
|
Active
|
Recovery
|
Frame Adv
|
Circuit
|
Invuln
|
| 28
|
4
|
30
|
-16
|
8.4%
|
-
|
|
Charged up version of 5BB that is an overhead. Launches the opponent on hit into a very long air untechable state. Is pretty slow for an overhead, so not used too often. Can only cancel into specials on block, again with the large window. Primarily used in 214C combos.
|
|
|
|
| Damage
|
Red Damage
|
Proration
|
Cancel
|
Guard
|
| 1100
|
768
|
80% (M)
|
N, SP, EX, (J)
|
LH
|
| First Active
|
Active
|
Recovery
|
Frame Adv
|
Circuit
|
Invuln
|
| 8
|
8
|
23
|
-5
|
9.1%
|
-
|
|
Slow knife thrust that has good range and moves you forward a lot. Cancel window isn't very long for blockstring offense, but can be cancelled later to get more forwards movement, allowing combo pickups from greater range. Frame data does not change regardless of how meaty this move hits. Due to the lengthy recovery, it's generally relegated to combo/blockstring filler. Slightly less startup and recovery than C-Tohno's 5C, though using it in neutral is still dubious.
|
|
Crouching Normals
|
|
| Damage
|
Red Damage
|
Proration
|
Cancel
|
Guard
|
| 300
|
96
|
68% (O)
|
-SE-, -N-, -SP-, -EX-, (J)
|
LH
|
| First Active
|
Active
|
Recovery
|
Frame Adv
|
Circuit
|
Invuln
|
| 5
|
4
|
9
|
-1
|
2.45%
|
-
|
|
Crouching poke. Hits mid. Has solid range and height, making it beat a lot of low invulnerable moves. Less recovery than 5A makes it more useful for rebeat pressure.
|
|
|
|
| Damage
|
Red Damage
|
Proration
|
Cancel
|
Guard
|
| 600
|
384
|
85% (O)
|
N, SP, EX, (J)
|
L
|
| First Active
|
Active
|
Recovery
|
Frame Adv
|
Circuit
|
Invuln
|
| 8
|
4
|
12
|
-1
|
4.2%
|
-
|
|
The first part of C-Moon's 2B, which is safer on block. A nice way to reset blockstrings due to its framedata and large cancel window. Due to it's very stubby nature and large hurtbox however, it can be difficult to utilize in longer blockstrings
|
|
|
|
| Damage
|
Red Damage
|
Proration
|
Cancel
|
Guard
|
| 900
|
576
|
55% (O)
|
N, SP, EX, (J)
|
L
|
| First Active
|
Active
|
Recovery
|
Frame Adv
|
Circuit
|
Invuln
|
| 7
|
6
|
24
|
-12
|
6.3%
|
-
|
|
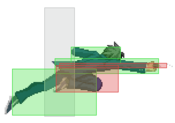
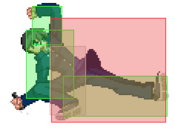
Extremely long range and fast low turn kick. Knocks the opponent down on hit. One of the best sweeps in the game due to its speed and range, but has very bad recovery on whiff, so you have to be careful about poking with it. Not disjointed like Crescent or Full.
|
|
Aerial Normals
|
|
| Damage
|
Red Damage
|
Proration
|
Cancel
|
Guard
|
| 300
|
144
|
75% (O)
|
SE, N, J
|
LHA
|
| First Active
|
Active
|
Recovery
|
Frame Adv
|
Circuit
|
Invuln
|
| 5
|
4
|
10
|
-
|
2.1%
|
-
|
|
Quickest air normal, but short-ranged. However, as is with most Melty j.A's, its true strength lies in its ability to be cancelled into movement options on whiff. Combine this with H-Tohno's movement speed, and you have yourself a useful low commitment tool in the air.
|
|
The Stanky Leg The Stanky Leg
|
| Damage
|
Red Damage
|
Proration
|
Cancel
|
Guard
|
| 700
|
384
|
90% (O)
|
N, J
|
HA
|
| First Active
|
Active
|
Recovery
|
Frame Adv
|
Circuit
|
Invuln
|
| 8
|
4
|
-
|
-
|
4.9%
|
-
|
|
Stanky Leg - The higher vertical placement and slight disjointedness makes it a little more useful as an air to air, but has a dead zone directly below and in front of him which can sometimes lead to awkward whiffs mid-combo.
|
|
|
|
| Damage
|
Red Damage
|
Proration
|
Cancel
|
Guard
|
| 1000
|
576
|
90% (O)
|
N, J
|
HA
|
| First Active
|
Active
|
Recovery
|
Frame Adv
|
Circuit
|
Invuln
|
| 9
|
6
|
-
|
-
|
9.1%
|
-
|
|
A strong downwards kick suitable for jump-ins and keepaway. One of his most important normals. Commands space below you very well, as it's quite large, damaging, and active. Doesn't cross up unless your opponent extends a hurtbox into it unfortunately, but you can't have it all.
|
|
Command Normals
|
|
| 6C
|
Damage
|
Red Damage
|
Proration
|
Cancel
|
Guard
|
| 800
|
384
|
85% (M)
|
(N), SP, EX, (J)
|
LH
|
| First Active
|
Active
|
Recovery
|
Frame Adv
|
Circuit
|
Invuln
|
| 7
|
8
|
23
|
-13
|
5.6%
|
-
|
|
Tohno charges forward. Long recovery limits its usage in neutral. Relatively useful in rebeat pressure, as it moves you forward a fair bit, but really needs to be cancelled into something else, since it's -13 on block. If you whiff this, you will be very sad, and likely eat a punish.
|
| 6[C]
|
Damage
|
Red Damage
|
Proration
|
Cancel
|
Guard
|
| 1300
|
784
|
60%
|
(N), SP, EX (J)
|
H
|
| First Active
|
Active
|
Recovery
|
Frame Adv
|
Circuit
|
Invuln
|
| 26
|
5
|
20
|
-7
|
9.1%
|
-
|
|
The slower charged version becomes an overhead, is more disjointed, causes a knockdown and is a bit less minus on block. Useful for advanced combo routes.
|
|
Universal Mechanics
|
|
| Damage
|
Red Damage
|
Proration
|
Cancel
|
Guard
|
| 1400
|
465
|
100%
|
-
|
U
|
| First Active
|
Active
|
Recovery
|
Frame Adv
|
Circuit
|
Invuln
|
| 3
|
1
|
20
|
-
|
0.0%
|
-
|
|
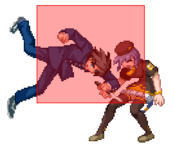
Tohno rolls and slams the opponent. Untechable knockdown.
|
|
|
|
| Damage
|
Red Damage
|
Proration
|
Cancel
|
Guard
|
| 1600 (1408)
|
506
|
30%
|
(Any if Raw)
|
U
|
| First Active
|
Active
|
Recovery
|
Frame Adv
|
Circuit
|
Invuln
|
| 2
|
1
|
12
|
-
|
0.0%
|
-
|
|
Tohno grabs then slices the opponent. When done raw, this ground bounces the opponent and moves you forward, leading to a combo. As a combo ender, this causes an untechable knockdown and leaves you falling straight down. Despite this knockdown, the frame advantage you get afterwards isn't much.
|
|
|
|
| Standing
|
Damage
|
Red Damage
|
Proration
|
Cancel
|
Guard
|
| 500 (345)
|
198
|
40%
|
SP, EX, (J)
|
LHA
|
| First Active
|
Active
|
Recovery
|
Frame Adv
|
Circuit
|
Invuln
|
| 9
|
2
|
20
|
-4
|
3.5%
|
-
|
|
Same animation as 5BB.
|
| Crouching
|
Damage
|
Red Damage
|
Proration
|
Cancel
|
Guard
|
| 1500 (1117)
|
714
|
50%
|
SP, EX, (J)
|
LA
|
| First Active
|
Active
|
Recovery
|
Frame Adv
|
Circuit
|
Invuln
|
| 9
|
4
|
18
|
-4
|
10.5%
|
-
|
|
Same animation as 2C.
|
| Air
|
Damage
|
Red Damage
|
Proration
|
Cancel
|
Guard
|
| 500 (303)
|
174
|
50%
|
-
|
HA
|
| First Active
|
Active
|
Recovery
|
Frame Adv
|
Circuit
|
Invuln
|
| 7
|
4
|
-
|
-
|
3.5%
|
-
|
|
Same animation as j.C
|
|
|
|
| Neutral
|
Damage
|
Red Damage
|
Proration
|
Cancel
|
Guard
|
| 500
|
192
|
50%
|
-
|
LHA
|
| First Active
|
Active
|
Recovery
|
Frame Adv
|
Circuit
|
Invuln
|
| 26
|
4
|
19
|
-5
|
0.0%
|
Clash 1-10
|
| (Clash)
|
Damage
|
Red Damage
|
Proration
|
Cancel
|
Guard
|
| 500
|
192
|
50%
|
-
|
LHA
|
| First Active
|
Active
|
Recovery
|
Frame Adv
|
Circuit
|
Invuln
|
| 8
|
4
|
19
|
-5
|
0.0%
|
Strike 1-7
|
|
An upwards slash.
|
| Blockstun
|
Damage
|
Red Damage
|
Proration
|
Cancel
|
Guard
|
| 0
|
0
|
100%
|
-
|
LHA
|
| First Active
|
Active
|
Recovery
|
Frame Adv
|
Circuit
|
Invuln
|
| 19
|
3
|
22
|
-7
|
-100.0%
|
-
|
|
H-Moon specific reversal bunker.
|
|
|
|
| Ground
|
Damage
|
Red Damage
|
Proration
|
Cancel
|
Guard
|
| 100
|
0
|
100%
|
-
|
U
|
| First Active
|
Active
|
Recovery
|
Frame Adv
|
Circuit
|
Invuln
|
| 11
|
10
|
20
|
-
|
removes all
|
Full 1-39
|
| Air
|
Damage
|
Red Damage
|
Proration
|
Cancel
|
Guard
|
| 100
|
0
|
100%
|
-
|
U
|
| First Active
|
Active
|
Recovery
|
Frame Adv
|
Circuit
|
Invuln
|
| 12
|
10
|
15
|
-
|
removes all
|
Strike 1-30
|
|
Universal burst mechanic. Unlike Crescent/Full Heat activation, the hitbox and frame data doesn't vary between characters. However, you can be thrown out of this move if you input it in the air.
|
|
Special Moves
|
|
| A
|
Damage
|
Red Damage
|
Proration
|
Cancel
|
Guard
|
| 1400
|
960
|
100%
|
-EX-
|
LH
|
| First Active
|
Active
|
Recovery
|
Frame Adv
|
Circuit
|
Invuln
|
| 14
|
3
|
20
|
-5
|
9.1%
|
-
|
|
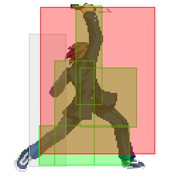
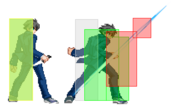
The fastest version, and the most commonly used one. Can anti-air effectively anything if spaced correctly, but requires a bit of precision. Is slightly disadvantage on block, but has enough pushback to keep you safe. Typically used as a blockstring ender or a multipurpose high risk/high reward poke. If it hits in a blockstring on a grounded opponent, you can supercancel it into 214C in the corner for a followup combo, or 236C for a midscreen hard knockdown.
|
| B
|
Damage
|
Red Damage
|
Proration
|
Cancel
|
Guard
|
| 500*2, 800 (1734)
|
(1107)
|
100%*2, 70% (O)
|
-EX-
|
LH
|
| First Active
|
Active
|
Recovery
|
Frame Adv
|
Circuit
|
Invuln
|
| 20
|
6
|
24
|
-8
|
4.2%*3 (12.6%)
|
Clash 5-10
|
|
A version that trades C-Moon's upper body invicibility and ability to fake-out for a clash window and more damage. Can confirm off hit jumpouts with j.a into an air combo with airthrow ender
|
| EX
|
Damage
|
Red Damage
|
Proration
|
Cancel
|
Guard
|
| 450*2, 500, 1000 (2150)
|
(1539)
|
100%
|
-
|
LH
|
| First Active
|
Active
|
Recovery
|
Frame Adv
|
Circuit
|
Invuln
|
| 1+5
|
9 (13) 4
|
24
|
0
|
-100.0%
|
Full 1
|
|
Has the speed of the A version and the range and multihit properties of the B. Also has an extra hard knockdown final hit where Tohno charges through the opponent, that could be used to setup a mediocre which way crossup midscreen. This move is very safe on block, but does not really leave you in a desirable position afterwards. Only really ever used to cancel from a 236A midscreen blockstring or to possibly make an unsafe 214A safe. OTG relaunches.
|
|
|
|
| A
|
Damage
|
Red Damage
|
Proration
|
Cancel
|
Guard
|
| 1200/800
|
576/384
|
60% (O)
|
(CH), EX
|
LH/LHA
|
| First Active
|
Active
|
Recovery
|
Frame Adv
|
Circuit
|
Invuln
|
| 5
|
2 (2) 4
|
35
|
-25/-21
|
8.4%/7.0%
|
Full 1-4, Low 5-6
|
| (Auto-Chain)
|
Damage
|
Red Damage
|
Proration
|
Cancel
|
Guard
|
| 800 (1609/1209)
|
(772/580)
|
90% (O)
|
-
|
HA
|
| First Active
|
Active
|
Recovery
|
Frame Adv
|
Circuit
|
Invuln
|
| 14
|
7
|
17
|
-
|
0.0%
|
-
|
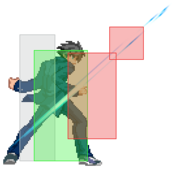
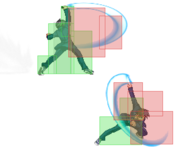
- Dragon Punch/Shoryuken kick move. All versions have complete startup invulnerability. Air unblockable on the first hitbox, which is very low to the ground, air blockable after that. Unlike C-Moon, the follow-up kick is automatic on hit and does less damage, and the special cannot be done in the air. A strong move overall and causes an untechable knockdown.
After the initial startup invul, has low invul, making it reliable vs most low attacks. Will trade with higher angled hitbox attacks or jump-ins, but you can still combo off this because you recover in time.
|
| B
|
Damage
|
Red Damage
|
Proration
|
Cancel
|
Guard
|
| 1500/1000
|
768/384
|
60% (O)
|
(CH)
|
LH/LHA
|
| First Active
|
Active
|
Recovery
|
Frame Adv
|
Circuit
|
Invuln
|
| 8
|
2 (2) 4
|
42
|
-32/-28
|
8.4%/7.0%
|
Full 1-7, High 8-9
|
| (Auto-Chain)
|
Damage
|
Red Damage
|
Proration
|
Cancel
|
Guard
|
| 1000 (2010/1510)
|
(1013/629)
|
90% (O)
|
-
|
HA
|
| First Active
|
Active
|
Recovery
|
Frame Adv
|
Circuit
|
Invuln
|
| 19
|
7
|
19
|
-
|
0.0%
|
-
|
|
After the initial startup invul, has high invul, making it reliable vs most jumpins/high/mid attacks. Goes significantly higher than the A version. Generally, on wakeup, A is preferable because you can combo off it even on non trade counterhits and has faster startup. However, B is useful for some option selects later on.
|
| EX
|
Damage
|
Red Damage
|
Proration
|
Cancel
|
Guard
|
| 1600, 1000 (2451)
|
(1547)
|
100%
|
(CH)
|
LH/LHA
|
| First Active
|
Active
|
Recovery
|
Frame Adv
|
Circuit
|
Invuln
|
| 5+3
|
2 (2) 4
|
47
|
-37, -33
|
-100.0%
|
Full 1-13
|
| (Auto-Chain)
|
Damage
|
Red Damage
|
Proration
|
Cancel
|
Guard
|
| 1000 (3275)
|
(2710)
|
100%
|
-
|
HA
|
| First Active
|
Active
|
Recovery
|
Frame Adv
|
Circuit
|
Invuln
|
| 19
|
7
|
24
|
-
|
0.0%
|
-
|
|
Both the grounded and airborne parts of this move hits, and is completely invulnerable till he starts flying higher off the ground. This move will flat out beat nearly everything. Goes significantly higher than the B version. This EX is good but not used much beacuse his A and B DPs are already very strong. Significantly higher damage than the C-Moon variation makes it a strong combo ender if you desire stronger okizeme or want to set up the unblockable arc drive. OTG relaunches.
|
|
|
|
| A
|
Damage
|
Red Damage
|
Proration
|
Cancel
|
Guard
|
| 1000
|
768
|
50% (O)
|
-EX-
|
L
|
| First Active
|
Active
|
Recovery
|
Frame Adv
|
Circuit
|
Invuln
|
| 8
|
10
|
13
|
-8 ~ +1
|
5.6%
|
High 1-21
|
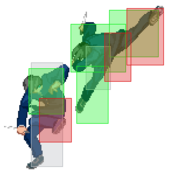
- Low sliding attack. Shrinks his hurtbox a lot during the slide, meaning it will go under a lot of attacks, and can even be anti aired with. All versions are air unblockable and hit low. H-Tohno's slides uniquely have variable frame data depending on how meaty they hit and can be up to +1 on block.
Has the fastest startup, and shrinks his hurtbox the most, but has the worst hitbox. Is usually safe on block, but will be punishable if blocked point blank. Has very little recovery on whiff making it a fairly low risk poke/anti air that can lead to solid damage with meter. Most commonly paired with his special cancelable overheads to create pseudo 50/50s.
|
| B
|
Damage
|
Red Damage
|
Proration
|
Cancel
|
Guard
|
| 1000
|
768
|
100%
|
-EX-
|
L
|
| First Active
|
Active
|
Recovery
|
Frame Adv
|
Circuit
|
Invuln
|
| 18
|
10
|
13
|
-8 ~ +1
|
5.6%
|
Clash 18-27
|
|
Has a longer startup and travels a greater distance. Has the least hurtbox shrink, but has a solid chunky hitbox along with a small clash box at the tip so this will beat most attacks. If spaced properly in blockstrings, this move can be neutral or plus on block. Can link into 2a on counterhit for a full combo. Due to the long startup and vulnerability to people just plain jumping out of your blockstring, this move does not see a lot of use.
|
| EX (Hit)
|
Damage
|
Red Damage
|
Proration
|
Cancel
|
Guard
|
| 500, 1000 (1351)
|
(860)
|
100%, 50% (O)
|
(N), (SP), (EX), (J)
|
L, LHA
|
| First Active
|
Active
|
Recovery
|
Frame Adv
|
Circuit
|
Invuln
|
| 3+6
|
10 (16) 4
|
30
|
-36, -16
|
-100.0%
|
Full 1-8, High 9-12
|
| (Whiff Data)
|
Damage
|
Red Damage
|
Proration
|
Cancel
|
Guard
|
| -
|
-
|
-
|
-
|
-
|
| First Active
|
Active
|
Recovery
|
Frame Adv
|
Circuit
|
Invuln
|
| 3+6
|
10
|
18
|
-
|
-100.0%
|
Full 1-8, High 9-12
|
|
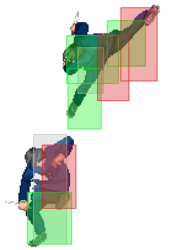
Has startup invulnerability to the first hit. Combines the speed of the A version and the distance of the B version. If the slide connects on hit or block, he will automatically preform the same followup attack that 214B has, except that it wallslams. The first attack has a very good hitbox that is likely to stuff most other attacks despite not being completely invulnerable. This move is unsafe on block but can be annoying to punish properly at specific distances. Because of the wallslam part, it's mostly commonly used in corner combos to get more damage, or supercanceled from a connected 236A on a blocked opponent to confirm into damage. It is also his most useful OTG relaunch, as it lets him secure the easiest and highest damage compared to the other relaunchers.
|
|
A A B B C C D D
|
| A
|
Damage
|
Red Damage
|
Proration
|
Cancel
|
Guard
|
| 1000
|
480
|
85% (O)
|
-
|
LH
|
| First Active
|
Active
|
Recovery
|
Frame Adv
|
Circuit
|
Invuln
|
| 21
|
8
|
16
|
-6
|
7.0%
|
-
|
| [A]
|
Damage
|
Red Damage
|
Proration
|
Cancel
|
Guard
|
| 1000
|
490
|
60% (O)
|
-
|
H
|
| First Active
|
Active
|
Recovery
|
Frame Adv
|
Circuit
|
Invuln
|
| 30
|
8
|
17
|
-7
|
7.0%
|
-
|
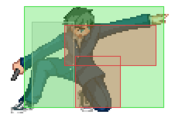
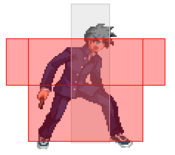
- Tohno goes into a crouching stance before executing one of 4 different attacks. All 4 have the same initial startup animation and are useful for messing with the opponent in blockstrings.
Lunging forward, Tohno donkey kicks the opponent in the groin (ouch). This move wallslams on hit, making it comboable off in the corner, and is relatively safe on block if spaced correctly, making it a very useful tool for ending corner blockstrings with. Air unblockable, hits mid. Can be charged up to become an overhead.
|
| B/[B]
|
Damage
|
Red Damage
|
Proration
|
Cancel
|
Guard
|
| -
|
-
|
-
|
-CH-
|
-
|
| First Active
|
Active
|
Recovery
|
Frame Adv
|
Circuit
|
Invuln
|
| -
|
-
|
46
|
-
|
-
|
Full 21-32
|
| ~D
|
Damage
|
Red Damage
|
Proration
|
Cancel
|
Guard
|
| -
|
-
|
-
|
-
|
-
|
| First Active
|
Active
|
Recovery
|
Frame Adv
|
Circuit
|
Invuln
|
| -
|
-
|
12
|
-
|
-
|
-
|
|
Tohno teleports forward. The teleport goes pretty far, but can be canceled at any point by pressing D, where he will instantly reappear again. Is a handy tool for continuing pressure on people respecting your 22A, and lets you punish people trying to shield, dodge, or reversal it if you cancel the teleport quickly. If done on a knocked down opponent midscreen, you can use it to create a mediocre which way mixup.
|
| C
|
Damage
|
Red Damage
|
Proration
|
Cancel
|
Guard
|
| 1200 (1162)
|
270
|
50%
|
-
|
U
|
| First Active
|
Active
|
Recovery
|
Frame Adv
|
Circuit
|
Invuln
|
| 23
|
8
|
29
|
-
|
0.0%
|
-
|
|
Tohno teleports forward again, but this time he will always attempt to appear behind the opponent, whereupon he will command throw them into a groundbounce situation that can be combo'd off from anywhere (except midscreen on Kouma). Because this move requires you to get behind the opponent, it has a pretty annoying range requirement, and it will not work on a fully cornered enemy. This move is so difficult to use properly that it is very rarely used, but since it is now comboable midscreen on everybody now, it could be a useful trick to cinch out a close match with.
|
| D
|
Damage
|
Red Damage
|
Proration
|
Cancel
|
Guard
|
| -
|
-
|
-
|
-
|
-
|
| First Active
|
Active
|
Recovery
|
Frame Adv
|
Circuit
|
Invuln
|
| -
|
-
|
30
|
-
|
-
|
-
|
|
Tohno poses...then does nothing. This move is a feint attack that allows him to stay safe and recover vs nearly anything an opponent could do on reaction to the intial pose. Whilst this move is not very useful by itself, combined with his other versions it can be used as force respect whiff cancel to lead to more pressure.
|
|
Arc Drive
|
|
| Damage
|
Red Damage
|
Proration
|
Cancel
|
Guard
|
| 3200
|
2738
|
100%
|
-
|
U, LHA
|
| First Active
|
Active
|
Recovery
|
Frame Adv
|
Circuit
|
Invuln
|
| 2+22
|
30
|
16
|
-18 ~ 10
|
removes all
|
Full 1-47
|
|
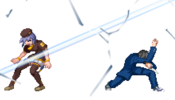
After the superflash, the entire game is slowed down whilst Tohno leaps forward at the opponent. If he connects, he teleports through the opponent and entire screen is cut up whilst they take a lot of damage. The initial part of the attack before he leaves the ground is unblockable, whilst the later parts are blockable. This super has complete invulnerability, but has recovery during the slowmo part at the end if it whiffs. This AD has an unblockable setup in the corner. The setup is: 236C walk back AD. Have to make sure you are before the air part of your AD during their wakeup frame to prevent jump outs. Due to slow motion, air unblockable part is not 1 frame, but 3.
|
|
General Gameplan
Use your great mobility to play footsies or rush down on the flip of a dime. Once you get a workable knockdown, you can start your pressure game.
Since H-Tohno shares alot of moves with C-Tohno, you can check out his wonderfully written page for some more ideas that might have been missed here.
Neutral
Use your movement! One of the defining features of H-Tohno is his great speed. Although his fast airdash and ground dash potentially let him get in very quickly, it's also importantly to play patiently and find an opening in some matchups, as your backdash is still very powerful, and your buttons are good for commanding space.
Dashing buttons, like 2A, 5B, or 2C work well to control the ground. 5B, 623X, and Shield are good anti airs in a pinch. j.A already has a nicely generous hitbox, but combined with a dashjump, you can turn yourself into a low commitment cannonball, and use your movement options afterwards to adapt if it fails to connect. j.C and j.B cover below you and in front of you respectively. Get moving!
Pressure
H-Tohnos pressure can be rather freeflow, given your wide variety of forward-moving attacks, strong buttons, and rebeats.
Similar to C-Tohno, the keeping the threat of 2C for as long as possible is an incredibly strong tool. It catches abare and jumps at ranges where your opponent can't easily challenge, so instill that fear in them. Using your forward moving normals, namely 5A6AA and 6C, you can slightly adjust your distance between you and the opponent depending on the situation.
Example blockstrings include
- 2A > 2A > 5B > 2B > 6C > 5A6A > 2C > 5C > 22A
- 2A > 5B > 6C > 5A6A > 2B > 5C > 2C > 22A
Your main special ender options are 236A, 22A, and 214B. 236A is a reliably safe ender. 22A can be unsafe, but at the ranges that H-Tohno typically ends his blockstrings, it tends to be safe. It also builds respect for his other 22X move. 214B can sometimes even be plus, but its slow startup means that it can be easily jumped over.
H-Tohno has several good ways to reset pressure. His forward moving normals, 5A6AA and 6C, let get closer to the opponent from a bit far away, as well as utilize his shorter ranged pressure resets. 2B, at only -1, is a potent pressure reset tool given how wide its cancel window is. Staggering your 2A is also a good way to force respect, which can then be exploited for more resets. His super fast IAD lets him reset pressure effectively as well, though it's recommended that you do so outside of your opponent's 2A range. Using basic rebeat 5A(w) pressure concepts still apply.
Tohno's dash throw game is very strong, given his quick dash speed. Your grounded overheads are 5B[B], 6[C] and 22[A]. They're nothing special, but you always have them as an option once your opponent is getting a little too respectful. 2A/5A are not lows, and if you want to do a low mixup, you have to use 2B, 2C, or 214X.
Using double overheads with j.C [blocked] j.66 j.C/2B/Throw can be a good mixup against an overly respectful opponent.
After 236C, you are even on block, but functionally disadvantaged against most 3f 2A's. You can go for a very risky tossup between DPing and hoping that they mash, or resetting pressure with an A normal.
Given how strong H-Tohno's neutral is, it's important to recognize the strength of just stopping. Overextending pressure can lead to you getting blown up, and Tohno has plenty of ways to make the opponent scared of escaping, especially in the corner, like with drift j.C.
Okizeme
Similar to most Tohnos, H-Tohno has a difficult time getting workable oki off of his air throw ender, as it launches him so far away. You're rarely going to be able to meaty off it, and midscreen, you're sent out of dash 2A range. In the corner, dash up 2A can be a pseudo meaty (beats abare) on some characters with slow wakeup, such as Aoko. In the corner, you can try to do a "meaty" 2C, which, spaced properly, will avoid DPs/heats and catch jumpers, but your pressure options afterwards are severely limited. At farther distances you can bet on dash 236A catching jumps or certain abare due to its nice disjoint, speed, and active frames but it can be difficult to convert without a counterhit or meter to burn
This being said - His half moon exclusive 5A6AA and 6C lets him combo into his 623X midscreen with good damage and corner carry! When it comes to oki, 623X is your best friend, as it gives you plenty of time to meaty. Here's when options like meaty 5B come into play, which has a clashbox that lets you OS against some reversals, meaty 22[A]/C/D mixups (22B can't swap sides at this distance, so you'd better know what you're doing with it) or legitimate safejumps in the corner, with IAD j.C or neutral jump drift back j.C
Additionally, when H-Tohno has Heat, he can set up a difficult-to-avoid Arc Drive using OTG strings. Some examples (performed on a grounded opponent):
- 2AA > 5B > 2B > 5C > 2C > 236C <walk back> AD
- The unblockable setup in the corner/midscreen. Have to time AD to start being in the air during opponent wakeup. This setup loses to heat/blood heat activation, or EX DP. EX DP's are difficult to pull off because of weird slow motion going on during the AD, and H-Tohno recovers quickly from AD, might even be able to punish with 2C. Gives 19.2 meter.
- 2AA > 5B > 5A6AA > 6[C] > IAD j.C > 5B > 623C <tiny walk back> AD
- Another unblockable setup in the corner. Have to time AD to start being in the air during opponent wakeup. This setup loses to heat/blood heat activation, or EX DP. EX DP's are difficult to pull off because of weird slow motion going on during the AD, and H-Tohno recovers quickly from AD, might even be able to punish with 2C. Gives 25.6 meter.
Defense
Please block.
Responsibility aside, H-Tohno has a great meterless DP! It grants hard knockdown on standard hit, but oddly enough, gives its biggest reward on trade. Although they aren't fully invuln through active frames, the active frames are invuln to low/high depending on the strength you use. A is likely going to be your most common one due to its speed and ease of conversion, although B has its own uses. EX DP is incredibly funny, but unless you really need that extra damage or the full invincibility, you're probably better off saving that meter for heat, combo utlity, or bunker
Speaking of bunker, H-Moon shield bunker is an incredibly powerful tool. Completely invuln even through recovery, grants a hard knockdown on hit, and super fast, it's a fantastic low commitment option for defense. Also gives a nice drift mixup if it lands. Given how H-Tohno has difficulty meter dumping effectively through EX moves to avoid heat anyways, having this on board for when you're under pressure never hurts.
His 214A is incredibly low profile, making it an oddly strong way to disrespect many high hitting moves, and safe on block outside of point blank (with the option to EX cancel into 236C for complete safety). Use with responsibility.
Combos
| Combo Notation Help
|
Disclaimer: Combos are written by various writers, so the actual notation used in pages can differ from the standard one.
For more information, see Glossary and Controls.
|
| X > Y
|
X input is cancelled into Y.
|
| X > delay Y
|
Must wait for a short period before cancelling X input into Y.
|
| X, Y
|
X input is linked into Y, meaning Y is done after X's recovery period.
|
| X+Y
|
Buttons X and Y must be input simultaneously.
|
| X/Y
|
Either the X or Y input can be used.
|
| X~Y
|
This notation has two meanings.
- Use attack X with Y follow-up input.
- Input X then within a few frames, input Y. Usually used for option selects.
|
| X(w)
|
X input must not hit the opponent (Whiff).
|
| j.X
|
X input is done in the air, implies a jump/jump cancel if the previous move was done from the ground.
Applies to all air chain sections:
- Assume a forward jump cancel if no direction is given.
- Air chains such as j.A > j.B > j.C can be shortened to j.ABC.
|
| sj.X
|
X input is done after a super jump. Notated as sj8.X and sj9.X for neutral and forward super jumps respectively.
|
| dj.X
|
X input is done after a double jump.
|
| sdj.X
|
X input is done after a double super jump.
|
| tk.X
|
Stands for Tiger Knee. X motion must be buffered before jumping, inputting the move as close to the ground as possible. (ex. tk.236A)
|
| (X)
|
X is optional. Typically the combo will be easier if omitted.
|
| [X]
|
Input X is held down. Also referred to as Blowback Edge (BE). Depending on the character, this can indicate that this button is held down and not released until indicated by the release notation.
|
| ]X[
|
Input X is released. Will only appear if a button is previously held down. This type of input is referred to as Negative Edge.
|
| {X}
|
Button X should only be held down briefly to get a partially charged version instead of the fully charged one.
|
| X(N)
|
Attack "X" should only hit N times.
|
| (XYZ)xN
|
XYZ string must be performed N times. Combos using this notation are usually referred to as loops.
|
| (XYZ^)
|
A pre-existing combo labelled XYZ is inserted here for shortening purposes.
|
| CH
|
The first attack must be a Counter Hit.
|
| Air CH
|
The first attack must be a Counter Hit on an airborne opponent.
|
| 66
|
Performs a ground forward dash.
|
| j.66
|
Performs an aerial forward dash, used as a cancel for certain characters' air strings.
|
| IAD/IABD
|
Performs an Instant AirDash.
|
| AT
|
Performs an Air Throw. (j.6/4A+D)
|
| IH
|
Performs an Initiative Heat.
|
| AD
|
Performs an Arc Drive.
|
| AAD
|
Performs an Another Arc Drive.
|
Please always keep in mind that Melty Blood's combo system is very freeflow, especially in the Crescent Moon and Half Moon styles. Especially with a footsies-oriented character like Tohno, you will not always get the same kind of starters/strings for all of these combos, so remembering what normals you've already used in a given blockstring is important for figuring out how to confirm a stray hit.
Big note for his 5a6a6a routes is that they often need dash momentum otherwise the 5a6a6a will not connect, not a massive issue since a lot of HTohno's gameplan will revolve around dashing in with his normals but its something to keep in mind in certain situations
In the corner, using 5B instead 5BB might be better if you want to have better oki options. In general, keeping the opponent lower in the air is a good idea for Tohno.
You can follow up 5B or 236B with 623B for hard knockdown into several setups and OS's
To follow the 5BB into air combo, use neutral jump to superjump after the opponent. 2B does not have very good range so a lot of the time you may be omitting it to go from 2A to 5C instead. Another thing good to mention - You want to delay 5BB superjump cancel combo as much as possible after you jump. This is so that you can lower your reverse penalty is much as possible (Also makes air throw easier to combo, since enemy will be lower).
Use super double jump with either 29 or pressing and releasing 9 during an air attack.
The aerial portion of all H-Tohno's combos often depends on your positioning and timing a lot, as well as the character you are against. j.BC(A) dj.BC will work on anyone off anything but often requires some delay or tweaked timing, wheras j.CB sdj.BC is usually easier from 5BB launches. j.BC sdj.CAB is the highest damage option and is generally used when the opponent is higher than you and you wish to bring them down for a lower airthrow.
Normal Combos
Staple Conversions and Combos
Simple routes for when you're starting out or can't get a bigger combo.
| Condition
|
Notation
|
Damage
vs V.Sion
|
Notes
|
|
| Normal starter, grounded opponent
|
- 2AA > 5B > 2C > 5C > j.BC(A) > j.BC > AT
|
3454
|
| |
| Meter Gained: 55.3 |
Meter Given (vs C-Moon): 24.8 |
[Link (Video)] |
|
|
| Normal starter, grounded opponent
|
- 2AA > 5C > 2C > 5B > 6C > j.BC(A) > j.BC > AT
|
3697
|
| |
| Meter Gained: 60.9 |
Meter Given (vs C-Moon): 27.2 |
[Link (Video)] |
|
|
| Normal starter, grounded opponent
|
- 2AA > 5C > 2C > 5BB > j.BC > j.BC > AT
|
3945
|
| |
| Meter Gained: 59.5 |
Meter Given (vs C-Moon): 26.2 |
[Link (Video)] |
|
|
Advanced Combos
| Condition
|
Notation
|
Damage
vs V.Sion
|
Notes
|
|
| Normal starter, grounded opponent
|
- 2AA > 5B > (5c) > 5A6AA > 6[C] > IAD j.C > 5BB > 2A(w) > j.CB > j.BC > AT
|
4591
|
|
| Meter Gained: 81.2 |
Meter Given (vs C-Moon): 42.0 |
[Link (Video)] |
| After a 2aa starter, avoid implementing 5c, otherwise feel free to use it after 5b always. After the 5c, the 5a can whiff but 6a6a will still connect. The damage is good and it works everywhere. A small delay after a jump in starter like j.c is advised to avoid rebeat penalty |
|
|
| Normal starter, grounded opponent
|
- 2AA > 5B > (5c) > 5A6AA > 6[C] > IAD j.C > 5B > 623B
|
3855
|
|
| Meter Gained: 55.3 |
Meter Given (vs C-Moon): 24.8 |
[Link (Video)] |
| Variation with stronger hard knockdown and okizeme. Fantastic corner carry. Can set up left/rights midscreen. Can burn 100 meter to do 623C ender instead for higher damage and even longer hard knockdown. The damage is good and it works everywhere. A small delay after a jump in starter like j.c is advised to avoid rebeat penalty |
|
|
| Normal starter, grounded opponent
|
- 2AA > 5B > (5c) > 5A6AA > 6[C] > 2A > 2B > 5BB > j8.BC > j.ABC > AT
|
4487
|
|
| Meter Gained: 78.7 |
Meter Given (vs C-Moon): 42.9 |
[Link (Video)] |
| Easier 2A starter (without IAD). After a 2aa starter, avoid implementing 5c, otherwise feel free to use it after 5b always. After the 5c, the 5a can whiff but 6a6a will still connect. |
|
|
| Normal starter, grounded opponent
|
- 2AA > 2B > 5C > 5BB > 6[C] > 5BB > j8.CB > j.BC > AT
|
4628
|
|
| Meter Gained: 77.7 |
Meter Given (vs C-Moon): 36.7 |
[Link (Video)] |
| 5BB Loop, highest meterless damage off 2AA and 2B starters. Needs dash momentum to land all the hits, otherwise omit the 2b. Does not work on Kouma, Warachia, Red Arcueid, Arcueid. Cannot omit 2AA for Satsuki, Ciel, Seifuku, Kohaku, Nero |
|
|
| Normal starter, grounded opponent
|
- 2C > 5C > 236B > j.AC > j.BC > AT
|
3254
|
|
| Meter Gained: 53.2 |
Meter Given (vs C-Moon): 23.9 |
[Link (Video)] |
| Max Range 2C confirm. Need to delay the 5c a bit so 236b leaves the opponent close enough to link j.a. If 2C counterhits, can rebeat into 2A(w)/5A(w) and still link into 5C > 236B |
|
|
OTGs
| Condition
|
Notation
|
Damage
vs V.Sion
|
Notes
|
|
| OTG String
|
- 2C > 5A6A > 5B > 5C > 2C > 2A(w)
|
1513
|
|
| Meter Gained: 33.6 |
Meter Given (vs C-Moon): 14.4 |
[Link (Video)] |
| Midscreen OTG String. First 2C assumed as knockdown. Can cancel 2C into 236C for hard knockdown. Can catch all techs near the corner with dash 2C |
|
|
| OTG String
|
- 2C > 5A6A > 5B > 5C > 2C > 236C
|
1785
|
|
| Meter Gained: -75.5 |
Meter Given (vs C-Moon): 14.9 |
[Link (Video)] |
| Hard knockdown OTG string. Works anywhere. |
|
|
| OTG String, cornered opponent
|
- 2C > 2AA > 2C > 214C > 5A(w) > 6[C] > IAD j.C > 5BB > 2A(w) > j.CB > dj.BC > AT
|
????
|
| |
| Meter Gained: ???? |
Meter Given (vs C-Moon): ???? |
| Max damage OTG route in the corner. |
|
|
Situational Confirms
| Condition
|
Notation
|
Damage
vs V.Sion
|
Notes
|
|
| 623A Trade
|
- 623A (Trade) > 2C > 2B > 5BB > j8.CB > j.BC > AT
|
4221
|
|
| Meter Gained: 58.1 |
Meter Given (vs C-Moon): 29.0 |
[Link (Video)] |
| Confirm for 623A trading with the opponent and putting them in a launch state. A big reason why people are afraid of Tohno's 623 series |
|
|
| 623A Trade
|
- 623A (Trade) > 2C > 236B > 5BB > j8.CB > j.BC > AT
|
4518
|
|
| Meter Gained: 66.5 |
Meter Given (vs C-Moon): 32.6 |
[Link (Video)] |
| Optimized Confirm for 623A trading with the opponent and putting them in a launch state. Does not work on Kouma, Warachia, Red Arcueid |
|
|
| Raw airthrow starter
|
- Raw AT, land 2C > 5BB > j8.BC > j.BC > AT
|
2996
|
|
| Meter Gained: 45.5 |
Meter Given (vs C-Moon): 21.7 |
[Link (Video)] |
| Standard Airthrow Route |
|
|
| Shield Counter starter, grounded opponent
|
- Shield Counter, 2C > 2B > 5BB > j8.BC > dj.BC > AT
|
3012
|
|
| Meter Gained: 56.7 |
Meter Given (vs C-Moon): 23.9 |
[Link (Video)] |
| Standard SC Route. Universal |
|
|
| Shield Counter starter, grounded opponent
|
- Shield Counter, 2C > 236B > 5BB > j8.CB > dj.BC > AT
|
3425
|
|
| Meter Gained: 65.1 |
Meter Given (vs C-Moon): 27.5 |
[Link (Video)] |
| Optimized SC Route. Does not work on Kouma, Warachia, Red Arcueid |
|
|
| Jump in starter, grounded opponent
|
- j.C > 5B > 5C > 5A(w)6AA > 6[C] > IAD j.C > 5BB > 2A(w) > j.CB > j.BC > AT
|
6080
|
|
| Meter Gained: 91.7 |
Meter Given (vs C-Moon): 44.6 |
[Link (Video)] |
| This combo takes some practice to pull off consistently, but its not super hard. The damage is good and it works everywhere. If you do 5B too quickly after j.C, you will get reverse beat, which will lose damage. To avoid that, add some small delay after j.C. This is not hard, since hitstun from j.C is long. |
|
|
| Max Range J.C, grounded opponent
|
- j.C > 5C > 2C > 6C > 5BB > j.CB > j.BC > AT
|
4680
|
| |
| Meter Gained: 69.3 |
Meter Given (vs C-Moon): 30.8 |
| His best meterless conversion off max range j.c, important for converting off far range safejumps and j.c's in neutral. Delay the 2c so the 6c can connect more consistently |
|
|
| 236a Counterhit/Trade, grounded opponent
|
- 236A > 2C > 5C > j.CB > j.BC > AT
|
4159
|
| |
| Meter Gained: 52.5 |
Meter Given (vs C-Moon): 23.6 |
| A difficult link but a highly rewarding one, important for making 236a a much more threatening neutral tool and frametrap even without meter |
|
|
| 236a Counterhit/Trade, grounded opponent
|
- 236A > 5C > 2C > 6C > 5BB > j.CB > j.BC > AT
|
5226
|
| |
| Meter Gained: 69.3 |
Meter Given (vs C-Moon): 30.8 |
| This requires some dash momentum off raw counterhit. A difficult link but a highly rewarding one, important for making 236a a much more threatening neutral tool and frametrap even without meter |
|
|
| 236a Counterhit/Trade, aerial opponent
|
- 236A > 5C > j.BC > j.BC > AT
|
4829
|
| |
| Meter Gained: 46.2 |
Meter Given (vs C-Moon): 20.9 |
| An easy conversion off counterhit 236a on aerial opponents |
|
|
Corner Combos
| Condition
|
Notation
|
Damage
vs V.Sion
|
Notes
|
|
| Raw airthrow starter
|
- Raw AT, land 2C > 2B > 5BB > j8.CB > j.BC > AT
|
3074
|
| |
| Meter Gained: 49.7 |
Meter Given (vs C-Moon): 23.5 |
| Standard Airthrow Route |
|
|
| Jump in starter, grounded opponent
|
- j.C > 5B > 5C > 5A(w)6AA > 6[C] > 22[a] > 2B > 5BB > j8.CB > j.BC > AT
|
6225
|
|
| Meter Gained: 93.8 |
Meter Given (vs C-Moon): 47.4 |
[Link (Video)] |
| This combo takes some practice to pull off consistently, but its not super hard. If you do 5B too quickly after j.C, you will get reverse beat, which will lose damage. To avoid that, add some small delay after j.C. This is not hard, since hitstun from j.C is long. |
|
|
| Jump in starter, grounded opponent, 100 meter
|
- j.C > 5B > 5C > 5A(w)6AA > 6[C] > 2A(w) > 2C > 214C > 2C > 2B > 5BB > j.BC > j.ABC > AT
|
6419
|
|
| Meter Gained: -28.2 |
Meter Given (vs C-Moon): 59.5 |
[Link (Video)] |
| Hard part is to whiff 2A after 6[C], because its pretty big. Because of that, it might not work on all chars. If you do 5B too quickly after j.C, you will get reverse beat, which will lose damage. To avoid that, add some small delay after j.C. This is not hard, since hitstun from j.C is long. Takes them out of the corner during air combo |
|
|
| Jump in starter, grounded opponent, 100 meter
|
- j.C > 5B > 6C > 2B > 5C > 2C > 214C > 2A(w) > 6[C] > 22[A] > 2B > 5BB > j8.CB > j.BC > AT
|
6475
|
|
| Meter Gained: -35.4 |
Meter Given (vs C-Moon): 53.6 |
[Link (Video)] |
| H-Tohno's best universal corner combo, can mix and match the ground normals done before 2C 214C. 2B after 22[A] may whiff on certain characters. Make sure that the 2A(w) completely recovers before inputting 6[C] otherwise it won't come out |
|
|
Additional Resources
H-Tohno Match Video Database
Video of combos listed on this page
Notable Players
MBAACC Navigation

