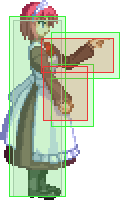
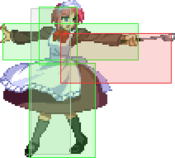
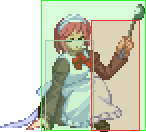
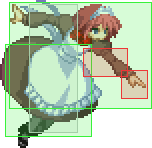
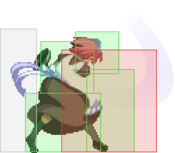
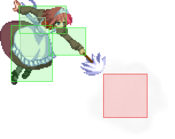
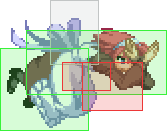
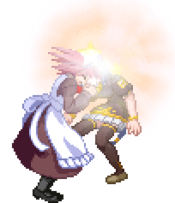
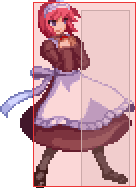
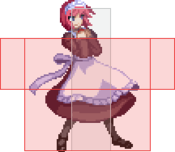
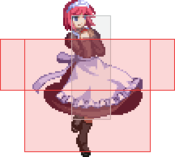
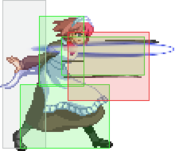
Character Page Progress
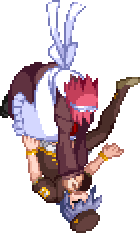
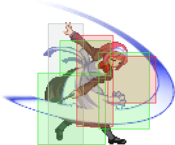
This page is still a work in progress, consider joining as an editor to help expand it. Please update this character's roadmap page when one of the editing goals have been reached.
| In Progress |
To-do
|
- Combos:
- Add damage, meter gain/given numbers and video links to the pre-existing combos.
|
- Move Descriptions:
- Expand upon the move descriptions, cite their uses, add captions where helpful, etc.
|
Additional Resources
F-Hisui Match Video Database
F hisui video guide
Bunker/ shield counter os (The inputs for the os is 2A 6E 5[B]/5[C])
Notable Players
| Name |
Color
|
Region |
Common Venues |
Status |
Details
|
aware
(あわれ) |

|
Japan |
A-cho, KorewaMelty, Play Spot BIG ONE 2nd |
Active |
|
| Enkido |

|
North America |
Netplay |
Active |
Tonberry's Prodigal son but doesn't like to be asked for tips, still has several matches to watch from him.
|
Overview
Strengths Weaknesses
| Strengths
|
- Low 2A
- Chair prevents a lot of mashing
- consistent hard knockdown
- j.A overhead allows for more offensive iad pressure
- Better neutral tools such as 5B, j.C and j.[C] etc.
- 623B and 623A being good anti airs for different purposes
- Better frame advantage on her normals thanks to being f moon
- good air and ground control thanks to chair and 214B,[1]
|
| Weaknesses
|
- Not as versatile as C, partly due to mechanic differences
- her pressure while oppressive isn't flexible as some of the other moons
- Chair and how it works can be a bit difficult to understand at first.
- outside of shield, bunker, heat(must be in max) and arc drive, her defensive capabilities are limited
- can be really awkward to do her knockdown routes especially if you caught a jump out attempt
|
General Gameplan
F-hisui is a character that focuses on neutral control via pot toss and chair. She is really mobile and offers quite a lot of things to cover her retreat or approach. the main selling point to this character is that she has 623A, 623B for anti airing purposes and 22A, chair which is a big clash box set down. This chair soaks up exactly one hit and can mess up combos for many characters and possibly allow hisui to punish the opponent for clashing with the chair. Another thing that this character is known for is actually having access to Knockdown consistently thanks to j.[C] and many of her combo routes will end in it to ensure she's at her best position in the game. In the corner once she sets down chair there's not much to be done against defending her except for jumping out at the right moment to minimize her reward in the worst scenario case. Since chair absorbs heat, shield counter, bunker, Abare. It allows Hisui to run her strike/throw game really well. she also has 6[c] which also is an overhead that can go to a kd route. F hisui is a character that rewards players for controlling the pace and she can do all of that with j.6b, 214B,[1] 623A and 623B for the air. and 2B, 214B,[1] j.c, j.[c] for the ground approaches.
Neutral
In neutral its important to focus on controlling the pace as F-Hisui since any hit from you will most likely allow you to go a kd situation with her. While you're in neutral you would want to try tossing 214B[1] in many match ups where they are fullscreen and are trying to approach you. In some other match ups you may want to forget about using this special as much and attempt to play the air game with characters that like to zone in that spot like say c-seifuku or characters that generally don't care about pot toss like say hime, nero. If you find a spot to do so while the opponent is being hesitant you can set down 22A and continue throwing pots. Throwing pots allows you to monitor how people respond to them and in a lot of cases if they are trying to jump back to avoid it you can run behind the honey pot that is falling towards them. you can do this if they are mid range and trap them with 2A as honeypot is falling on them. When in the air you use j.[c] when you neutral jump or jump back to deny people trying to approach you from either the ground or the air. if you think someone will commit to something on the ground you can also do air dash j.c but make sure you time it decently, otherwise it can either whiff the active frames or opponents can low profile it. In cases where someone might try to cross under you, you want to use j.[B] since it does hit behind her and also allows you a combo if you land it. j.A is simply a quick tool that you use in the air whether its because you're close air to air or you did it rising. One thing you can do is use 623B to anti air people in neutral. a common thing you can do is either input 623B the moment they airdash forward since its AUB and you can even do something like 22A, 623A or 623B depending on the situation.
Whenever you need to gain space you can airdash j.6B and that will act as wall for people that are dashing at you. If you don't want to give up ground you can neutral jump late j.6B so that the dust is at ground level and discourages rushing people down from the ground. if you think they will try to dash at you with buttons you can also intercept them with dash preemptive 5B/ 2B as its very active. if it lands you also get a combo on a grounded opponent. by using pot toss, and using your air movement with j.6B you can control the space and eventually force the opponent to move into places you want them to and take advantage from there.
Pressure
Her pressure is going to be a lot of strike/throw game generally. Its usually strongest when in the corner, but midscreen its fairly similar with some changes. Typically you will do a lot of 2A staggers and dash 2A since its +2. so typically its going to look like this for your pressure.
- 2A stagger 2A dash 2A stagger 2A
- 2A stagger 2A dash throw
- 2A 2A stagger 5B, 2A dash 2A
- 2A 2A stagger 5B stagger 2B
- 2A 2A 5B 2B, 2B
- 2A dash throw
- 2A 5[B] dash throw/2A
- 2A 2A 5B stagger 5[C]
- 2A 2A stagger 2B stagger 5[C] 214A(6)
since 2B is 0, 5B is -1 and 5[b] is +2. you want to cycle through some of the strings depending on the character and the player you are facing. if the opponent is good at teching hisui's throws, what you want to do is baiting it by either doing instant j2C, iad, or delaying your attack a bit after your dash or even doing dash instant j2C to see if they are stand teching or using 1A+D OS. in midscreen, players may want to backdash her pressure, you can counter this by doing 2A 5[C] and that chases backdashes really well and also leads into a combo! If you watch aware videos or in the Hisui video guide you can see the applications more clearly, this is just to start you off.
Okizeme
Your oki comes from either airthrow ender(will be explained more in detail and from j.[C] enders. The easiest to understand is the j.[C] ender so lets start with that.
With j.[C] ender you typically want to follow up with 6C 22A if you carried them to the corner which sets down chair and from there you can run your oki game whether is 2A pressure into throw or another strike mix up. or you want to do more than just that, you can do iad j.6B 2A or iad j.6B throw. Again, because of chair trying to 2A mash usually means that your own 2A mash will beat them out. if they try to heat, if you set the chair next to them it will only hit the chair and that's a fully unscaled punish for you, this also includes shield counters excluding fwara's, bunkers as well so you are free to do a lot of things and have no regard for the opponent's options other than their jump out attempts. since players may look to try to tech hisui's throw you can counter that with instant j2C. if you want to keep the pressure tighter you can do things like
- 2A 2A tk236A
- 2A 2A tk236A tk 236A
- 2A 2A tk tk236A tk236A j.236C
- 2A 2A iad j.A j.A
- 2A 2A 6[C]
- 6[C] (usually after a chair set)
you can also include things from the pressure section above and it works much better in the corner. After you land a throw you can neutral jump drift back (8, [4]) j.6B and that's a safe meaty dust. after that you can then either iad j.6B, or do 6[C] or run up throw. There's plenty more showcased in the video in "additional resources" so be sure to check out that part
As for air throw ender, its techable, but fortunately Hisui can punish those techs!
'For neutral and forward tech
you just do wait 2B and that will punish those techs
'for back tech'
You do dash 2B for that specific tech. if they happen to neutral tech, they will end up having to correct their block as you cross under them as they neutral teched.
These lead to the same combos listed below. if they don't tech you are still at advantage, now if you think they won't tech you have a good bit of options to go from. Here are some below
- throw, 22A
- throw, jump, late j.6B(safe jump)
- throw, dash w2A instant j.2C(left/right midscreen)
- throw, neutral jump j.236B(also a left/right midscreen can be more ambiguous with instant head)
If you land a ground throw you also have these options to choose from
- throw, neutral jump, late j.6B, iad j.6B throw
- throw, neutral jump drift back (8 [4]) j.6B, 6[C]
- throw, neutral jump drift back (8 [4]) j.6B iad j.6B, 2AAAA
- throw, neutral jump drift back (8 [4]) j.6B iad j.AA
While 6[C] is an overhead it is encourage not to crutch on it but instead establish a strong strike/ throw game and then from there you can incorporate 6[C] from time to time.
Defense
In neutral you have plenty of defensive measures such as jump back j.[C] or neutral jump j.[C]. 623A and 623B and even j.6B. Now when you're blocking you really don't have much other than realistically jumping out. 623C is invuln but it loses to hitboxes that go below the ladder so be careful about using it on wake up. There is of course f moon's shield but use it sparingly. If you can ex guard enough to make space for the opponent to redash you can do 2B in retaliation and fight back. If you happen to have max and are in a bind you may want to use arc drive which is a fully invuln and plus on block option. Leads to knockdown if it lands. Other than that she doesn't really possess anything in her kit that would aid her on defense.
Combos
| Combo Notation Help
|
Disclaimer: Combos are written by various writers, so the actual notation used in pages can differ from the standard one.
For more information, see Glossary and Controls.
|
| X > Y
|
X input is cancelled into Y.
|
| X > delay Y
|
Must wait for a short period before cancelling X input into Y.
|
| X, Y
|
X input is linked into Y, meaning Y is done after X's recovery period.
|
| X+Y
|
Buttons X and Y must be input simultaneously.
|
| X/Y
|
Either the X or Y input can be used.
|
| X~Y
|
This notation has two meanings.
- Use attack X with Y follow-up input.
- Input X then within a few frames, input Y. Usually used for option selects.
|
| X(w)
|
X input must not hit the opponent (Whiff).
|
| j.X
|
X input is done in the air, implies a jump/jump cancel if the previous move was done from the ground.
Applies to all air chain sections:
- Assume a forward jump cancel if no direction is given.
- Air chains such as j.A > j.B > j.C can be shortened to j.ABC.
|
| sj.X
|
X input is done after a super jump. Notated as sj8.X and sj9.X for neutral and forward super jumps respectively.
|
| dj.X
|
X input is done after a double jump.
|
| sdj.X
|
X input is done after a double super jump.
|
| tk.X
|
Stands for Tiger Knee. X motion must be buffered before jumping, inputting the move as close to the ground as possible. (ex. tk.236A)
|
| (X)
|
X is optional. Typically the combo will be easier if omitted.
|
| [X]
|
Input X is held down. Also referred to as Blowback Edge (BE). Depending on the character, this can indicate that this button is held down and not released until indicated by the release notation.
|
| ]X[
|
Input X is released. Will only appear if a button is previously held down. This type of input is referred to as Negative Edge.
|
| {X}
|
Button X should only be held down briefly to get a partially charged version instead of the fully charged one.
|
| X(N)
|
Attack "X" should only hit N times.
|
| (XYZ)xN
|
XYZ string must be performed N times. Combos using this notation are usually referred to as loops.
|
| (XYZ^)
|
A pre-existing combo labelled XYZ is inserted here for shortening purposes.
|
| CH
|
The first attack must be a Counter Hit.
|
| Air CH
|
The first attack must be a Counter Hit on an airborne opponent.
|
| 66
|
Performs a ground forward dash.
|
| j.66
|
Performs an aerial forward dash, used as a cancel for certain characters' air strings.
|
| IAD/IABD
|
Performs an Instant AirDash.
|
| AT
|
Performs an Air Throw. (j.6/4A+D)
|
| IH
|
Performs an Initiative Heat.
|
| AD
|
Performs an Arc Drive.
|
| AAD
|
Performs an Another Arc Drive.
|
Starters
| Condition
|
Notation
|
Damage
vs V.Sion
|
Notes
|
|
| Normal starter, grounded opponent
|
- 2AA > (5B >) 2B > 2C/5C > 3CC (> 623B)
|
2523
|
| |
| Meter Gained: 38.7 |
Meter Given (vs C-Moon): 12.9 |
| This is one of the typical routes to use on a grounded opponent, on a air counter hit, you just do 2C 3CC (623B) or 5B into air sequence. the parts in parenthesis are optional the 5B specifically because it may make the other parts of the starter whiff. the 623B is more optimal for damage, but there may be other reasons to not do 623B and that will be covered in the ender section. Damage listed does not include optional moves. |
|
|
| Normal starter, grounded opponent
|
|
2396
|
| |
| Meter Gained: 13.3 |
Meter Given (vs C-Moon): 4.4 |
| Not a likely starter but it can catch people off guard during pressure and it does lead to her KD route. Damage listed is for all hits of 236B. |
|
|
| Normal starter, grounded opponent
|
|
???
|
| |
| Meter Gained: 9 |
Meter Given (vs C-Moon): 3 |
| Since 623B is jump cancellable and is active for very long and tall it has plenty of use in neutral and in the corner as well. |
|
|
Enders
| Condition
|
Notation
|
Damage
vs V.Sion
|
Notes
|
|
| Air Ender
|
- dj9/8/7.[C] (land 6C > 22A / dash 6C > 22A)
|
???
|
| |
| Meter Gained: ??? |
Meter Given (vs C-Moon): ??? |
| Normally your combos want to end in this combo as much as possible. it grants knockdown. depending on your distance is whether is good to either do 6C 22A or dash 6C 22A. The reason you do dash 6C is to place the chair closer to them. you usually include the 6C 22A if they are right in the corner. If they are midscreen you can either use the otg pick up tool, 236C or if you are starved for meter you can dash the knockdown body to move them closer to the corner. Also for this ender depending on where you're at. to set up the chair for the right spacing generally you want to do dj forward. but if you're close to the corner you may want to do neutral double jump. if you're in the corner you want to do double jump back before doing j.[C] |
|
|
| Air Ender
|
|
???
|
| |
| Meter Gained: ??? |
Meter Given (vs C-Moon): ??? |
| if you can end your combos with j.C, you do have the option to end in airthrow. its techable so please look up in the okizeme section to understand how to punish techs! |
|
|
OTG Pick ups
| Condition
|
Notation
|
Damage
vs V.Sion
|
Notes
|
|
| OTG starter, 100% meter
|
|
???
|
| |
| Meter Gained: ??? |
Meter Given (vs C-Moon): ??? |
| Use this if you want to keep meter management but also place them in the corner to set up chair. |
|
|
| OTG starter, MAX mode
|
|
???
|
| |
| Meter Gained: ??? |
Meter Given (vs C-Moon): ??? |
| Character specific but if you have max and do IH you can net more damage with it |
|
|
| OTG starter, Corner
|
- 2AAA > 5B (> 2A > 2B/22A/236C)
|
???
|
| |
| Meter Gained: ??? |
Meter Given (vs C-Moon): ??? |
| This is a corner otg pick up. 2AAA 5B, 2A 2B punishes all tech in the corner. if they don't tech it allows you to set up 22A chair. If you just wanted the meter gain but need to keep from going to max you can do 236C |
|
|
Normal Combos
| Condition
|
Notation
|
Damage
vs V.Sion
|
Notes
|
|
| Normal starter, grounded opponent
|
- 2AA > (5B) > 2B > 2C/5C > 3CC > j.BC > dj.BC > AT
|
4127
|
| |
| Meter Gained: 71.1 |
Meter Given (vs C-Moon): 23.7 |
| Simple combo to start with. 5B is optional and may whiff depending on spacing. 4417 damage with 5B included. |
|
|
| Normal starter, grounded opponent
|
- 2AA > (5B) > 2B > 2C/5C > 3CC > 623B > j.C > sdj.ABC > AT
|
4274
|
| |
| Meter Gained: 77.4 |
Meter Given (vs C-Moon): 25.8 |
| More optimized version of the basic combo with 623B. 5B is optional and may whiff depending on spacing. 4581 damage with 5B included. |
|
|
| Normal starter, grounded opponent
|
- 2AA > (5B) > 2B > 2C/5C > 3CC > j.A[B] > dj.[C] (land 6C > 22A/dash 6C > 22A)
|
???
|
| |
| Meter Gained: ??? |
Meter Given (vs C-Moon): ??? |
| This is the more favored combo route that F-Hisui player should learn as it maximizes potency as a character overall. the parts in parenthesis are for setting the chair next to the opponent sometimes you may need to do dash 6C 22A and other times you just need to do 6C 22A. look at the distance from you to the opponent and judge which one to use. Also, as with most routes using j.A[B] dj.[C] or j.[B] dj.[C] the presence / absence of j.A and required doublejump angle may change under various conditions. |
|
|
| Normal starter, grounded opponent
|
- 2AA > (5B) > 2B > 2C/5C > 3CC > 623B > j.[B] > dj/sdj.[C] (land 6C >22A)
|
???
|
| |
| Meter Gained: ??? |
Meter Given (vs C-Moon): ??? |
| This is the more optimal route than the one previously written above. |
|
|
| Normal starter, grounded opponent, 100% meter
|
- 2AA > (5B) > 2B > 2C/5C > 3CC > 623B > j.[B] > dj/sdj.[C] > 236C > j.A[B] > dj.[C], land 6C > 22A
|
???
|
| |
| Meter Gained: ??? |
Meter Given (vs C-Moon): ??? |
| This combo is used for when you need to corner carry and also to keep your meter management from going into max. If the extension after 236C is a bit difficult link wise, you can walk back 2C 22A as well. you can also instant heat after the first j.[C] and otg with 236C to regain health while corner carrying. Also, note that 623A and 623B are generally interchangeable in combos since 3CC already guarantees a lower proration value than 623A. Using 623A instead may be easier for you. |
|
|
| Normal starter, grounded opponent, MAX mode
|
- 2AA > (5B) > 2B > 2C/5C > 3CC > 623B > j.[B] > dj/sdj j.[C] > IH AD > j.A[B] > dj.[C], land 6C > 22A
|
???
|
| |
| Meter Gained: ??? |
Meter Given (vs C-Moon): ??? |
| This combo is an IH route that is character specific. does more damage than IH into 236C. |
|
|
| 6[C] starter, grounded opponent
|
- 6[C] > 236A~B > j.A[B] > dj.[C] (land 6C > 22A/dash 6C > 22A)
|
???
|
| |
| Meter Gained: ??? |
Meter Given (vs C-Moon): ??? |
| a combo from 6[C] that leads to knockdown. |
|
|
| 236A/B starter, grounded opponent
|
- 236A/B~B > j.A[B] > dj.[C] (land 6C > 22A/dash 6C > 22A)
|
???
|
| |
| Meter Gained: ??? |
Meter Given (vs C-Moon): ??? |
| a combo from 236A/B that leads to knockdown |
|
|
| Raw Airthrow starter
|
- Raw AT, land 2A > 5B > j.BC > dj.BC > AT
|
???
|
| |
| Meter Gained: ??? |
Meter Given (vs C-Moon): ??? |
| basic airthrow combo |
|
|
| Raw Airthrow starter
|
- Raw AT, land 2A > 5B > j.A[B] > dj/sdj.[C] (land 6C > 22A/ dash 6C > 22A)
|
???
|
| |
| Meter Gained: ??? |
Meter Given (vs C-Moon): ??? |
| Knockdown route from air throw starter |
|
|
| Raw Airthrow starter
|
- Raw AT > dj.6B, land 5B > 623B > j.[B] > sdj.[C]
|
???
|
| |
| Meter Gained: ??? |
Meter Given (vs C-Moon): ??? |
| Optimal version of the combo previously written above. |
|
|
Corner Combos
| Condition
|
Notation
|
Damage
vs V.Sion
|
Notes
|
|
| Normal starter, grounded opponent, 100% meter
|
- 2AA > (5B) > 2B > 2C/5C > 3CC > 623C > j.[B] > dj7.[C] (land 6C >22A)
|
???
|
| |
| Meter Gained: ??? |
Meter Given (vs C-Moon): ??? |
| the famed ladder combo that leads to hard knockdown |
|
|
| Normal starter, grounded opponent, 200% meter
|
- 2AA > (5B) > 2B > 2C/5C > 3CC > 623C, 623C > jump > dj.B > AT
|
???
|
| |
| Meter Gained: ??? |
Meter Given (vs C-Moon): ??? |
| the double ladder combo, can also be IH'D when in max. |
|
|
| Normal starter, grounded opponent, Max mode
|
- 2AA > (5B) > 2B > 2C/5C > 3CC > 623C > j.[C] > IH j.B > land 5B > 623C > j.A[B] > dj.[C]
|
???
|
| |
| Meter Gained: ??? |
Meter Given (vs C-Moon): ??? |
| an ih route that leads to KD route with good damage on top of that |
|
|
| 6[C] starter, grounded opponent
|
- 6[C], 2A > 5B > j.A[B] > dj.[C] (land 6C > 22A/dash 6C > 22A)
|
???
|
| |
| Meter Gained: ??? |
Meter Given (vs C-Moon): ??? |
| a combo from 6[C] that leads to knockdown. |
|
|
Move Descriptions
| Frame Data Help
|
| Header
|
Tooltip
|
| Move Box Colors
|
Light gray = Collision Box (A move lacking one means it can go through the opponent's own collision box).
Green: Hurt Boxes.
Red: Hit(/Grab) Boxes.
Yellow: Clash Boxes (When an active hitbox strikes a clash box, the active hitbox stops being active. Multi-hit attacks can beat clash since they will still progress to the next hitbox.)
Magenta: Projectile-reflecting boxes OR Non-hit attack trigger boxes (usually).
Blue: Reflectable Projectile Boxes.
|
| Damage
|
Base damage done by this attack.
(X) denotes combined and scaled damage tested against standing V. Sion.
|
| Red Damage
|
Damage done to the recoverable red health bar by this attack. The values are inherently scaled and tested against standing V. Sion.
(X) denotes combined damage.
|
| Proration
|
The correction value set by this attack and the way it modifies the scaling during a string. See this page for more details.
X% (O) means X% Overrides the previous correction value in a combo if X is of a lower percentage.
X% (M) means the current correction value in a combo will be Multiplied by X%. This can also be referred to as relative proration.
|
| Circuit
|
Meter gained by this attack on hit.
(X%) denotes combined meter gain.
-X% denotes a meter cost.
|
| Cancel
|
Actions this move can be cancelled into.
SE = Self cancelable.
N = Normal cancelable.
SP = Special cancelable.
CH = Cancelable into the next part of the same attack (Chain in case of specials).
EX = EX cancelable.
J = Jump cancelable.
(X) = Cancelable only on hit.
-X- = Cancelable on whiff.
|
| Guard
|
The way this move must be blocked.
L = Can block crouching
H = Can block standing.
A = Can block in the air.
U = Unblockable.
|
| Startup
|
Amount of frames that must pass prior to reaching the active frames. Also referred to as "True Startup".
|
| Active
|
The amount of frames that this move will have a hitbox.
(x) denotes frame gaps where there are no hitboxes is present. Due to varied blockstuns, (x) frames are difficult to use to determine punish windows. Generally the larger the numbers, the more time you have to punish.
X denotes active frames with a duration separate from its origin move's frame data, such as projectile attacks. In this case, the total length of the move is startup+recovery only.
|
| Recovery
|
Frames that this move has after the active frames if not canceled. The character goes into one frame where they can block but not act afterwards, which is not counted here.
|
| Advantage
|
The difference in frames where you can act before your opponent when this move is blocked (assuming the move isn't canceled and the first active frame is blocked).
If the opponent uses a move with startup that is at least 2 frames less than this move's negative advantage, it will result in the opponent hitting that move.
±x~±y denotes a range of possible advantages.
|
| Invul
|
Lists any defensive properties this move has.
X y~z denotes X property happening between the y to z frames of the animations. If no frames are noted, it means the invincibility lasts through the entire move.
Invicibility:
- Strike = Strike invincible.
- Throw = Throw invincible.
Hurtbox-Based Properties:
- Full = No hurtboxes are present.
- High = Upper body lacks a hurtbox.
- Low = Lower body lacks a hurtbox.
Miscellaneous Properties
- Clash = Frames in which clash boxes are active.
- Reflect = Frames in which projectile-reflecting boxes are active.
- Super Armor = Frames in which the character can take hits without going into hit stun.
|
Normal Moves
Standing Normals
|
|
| Damage
|
Red Damage
|
Proration
|
Cancel
|
Guard
|
| 300
|
202
|
78% (O)
|
-SE-, -N-, -SP-, -EX-, (J)
|
LH
|
| First Active
|
Active
|
Recovery
|
Frame Adv
|
Circuit
|
Invuln
|
| 5
|
3
|
6
|
3
|
2.7%
|
-
|
|
A short poke. +3 on block.
|
|
|
|
| 5B
|
Damage
|
Red Damage
|
Proration
|
Cancel
|
Guard
|
| 700
|
606
|
80% (O)
|
N, SP, EX, (J)
|
LH
|
| First Active
|
Active
|
Recovery
|
Frame Adv
|
Circuit
|
Invuln
|
| 9
|
4
|
12
|
-1
|
6.3%
|
-
|
|
A far ladle strike.
|
| 5[B]
|
Damage
|
Red Damage
|
Proration
|
Cancel
|
Guard
|
| 1200
|
808
|
80% (O)
|
N, SP, EX, (J)
|
LH
|
| First Active
|
Active
|
Recovery
|
Frame Adv
|
Circuit
|
Invuln
|
| 22
|
4
|
11
|
2
|
10.8%
|
-
|
|
Charged version wallslams on hit.
|
|
|
|
| 5C
|
Damage
|
Red Damage
|
Proration
|
Cancel
|
Guard
|
| 400, 700 (1078)
|
(893)
|
100%
|
N, SP, EX, (J)
|
LH
|
| First Active
|
Active
|
Recovery
|
Frame Adv
|
Circuit
|
Invuln
|
| 13
|
6
|
14
|
0
|
6.3%, 7.2% (13.5%)
|
-
|
| 5{C}
|
Damage
|
Red Damage
|
Proration
|
Cancel
|
Guard
|
| 400*2, 700 (1443)
|
(1167)
|
100%
|
N, SP, EX, (J)
|
LH
|
| First Active
|
Active
|
Recovery
|
Frame Adv
|
Circuit
|
Invuln
|
| 15
|
7~18
|
14
|
0
|
3.6%, 6.3%, 7.2% (17.1%)
|
-
|
| 5[C]
|
Damage
|
Red Damage
|
Proration
|
Cancel
|
Guard
|
| 400, 600, 800 (1731)
|
(974)
|
100%
|
N, SP, EX, (J)
|
LH
|
| First Active
|
Active
|
Recovery
|
Frame Adv
|
Circuit
|
Invuln
|
| 15
|
18
|
21
|
-7
|
3.6%, 6.3%, 7.2% (17.1%)
|
-
|
|
Hisui rushes in with a chair. Can be charged/half-charged to go further. Neutral on block unless fully charged.
|
|
Crouching Normals
|
|
| Damage
|
Red Damage
|
Proration
|
Cancel
|
Guard
|
| 300
|
161
|
75% (O)
|
-SE-, -N-, -SP-, -EX-, (J)
|
L
|
| First Active
|
Active
|
Recovery
|
Frame Adv
|
Circuit
|
Invuln
|
| 4
|
2
|
8
|
2
|
2.7%
|
-
|
|
Ladle poke. Hits low unlike other moons' 2A.
|
|
|
|
| Damage
|
Red Damage
|
Proration
|
Cancel
|
Guard
|
| 600
|
303
|
80% (O)
|
N, SP, EX, (J)
|
L
|
| First Active
|
Active
|
Recovery
|
Frame Adv
|
Circuit
|
Invuln
|
| 7
|
6
|
9
|
0
|
5.4%
|
-
|
|
Double palm strike.
|
|
|
|
| Damage
|
Red Damage
|
Proration
|
Cancel
|
Guard
|
| 1000
|
656
|
60% (O)
|
N, SP, EX, (J)
|
L
|
| First Active
|
Active
|
Recovery
|
Frame Adv
|
Circuit
|
Invuln
|
| 9
|
3
|
23
|
-8
|
9.9%
|
-
|
|
A sweep.
|
|
Aerial Normals
|
|
| Damage
|
Red Damage
|
Proration
|
Cancel
|
Guard
|
| 300
|
151
|
75% (O)
|
SE, N, SP, EX, J
|
HA
|
| First Active
|
Active
|
Recovery
|
Frame Adv
|
Circuit
|
Invuln
|
| 5
|
4
|
10
|
-
|
3.6%
|
-
|
|
Standard F-Moon j.A overhead.
|
|
|
|
| j.B
|
Damage
|
Red Damage
|
Proration
|
Cancel
|
Guard
|
| 700
|
404
|
90% (O)
|
N, SP, EX, J
|
HA
|
| First Active
|
Active
|
Recovery
|
Frame Adv
|
Circuit
|
Invuln
|
| 8
|
5
|
-
|
-
|
6.3%
|
-
|
|
Small water splash j.B
|
| j.[B]
|
Damage
|
Red Damage
|
Proration
|
Cancel
|
Guard
|
| 700
|
404
|
85% (O)
|
N, SP, EX, J
|
HA
|
| First Active
|
Active
|
Recovery
|
Frame Adv
|
Circuit
|
Invuln
|
| 16
|
6
|
-
|
-
|
6.3%
|
-
|
|
Charged version has much bigger hitboxes.
|
|
|
|
| j.C
|
Damage
|
Red Damage
|
Proration
|
Cancel
|
Guard
|
| 1000
|
454
|
90% (M)
|
N, SP, EX, J
|
HA
|
| First Active
|
Active
|
Recovery
|
Frame Adv
|
Circuit
|
Invuln
|
| 10
|
4
|
-
|
-
|
9.9%
|
-
|
|
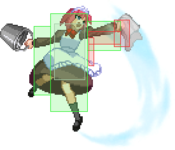
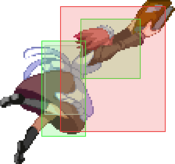
Hisui pulls out a lamp from nowhere.
|
| j.[C]
|
Damage
|
Red Damage
|
Proration
|
Cancel
|
Guard
|
| 1100
|
606
|
95% (O)
|
N, SP, EX, J
|
HA
|
| First Active
|
Active
|
Recovery
|
Frame Adv
|
Circuit
|
Invuln
|
| 23
|
4
|
-
|
-
|
9.0%
|
-
|
|
Charged version knocks down airborne opponents.
|
|
Command Normals
|
|
| 4B
|
Damage
|
Red Damage
|
Proration
|
Cancel
|
Guard
|
| 100
|
101
|
100%
|
-
|
U
(Whiffs vs Crouch.)
|
| First Active
|
Active
|
Recovery
|
Frame Adv
|
Circuit
|
Invuln
|
| 16
|
4
|
17
|
-
|
5.4%, 4.5% (9.9%)
|
-
|
| 4[B] (Max)
|
Damage
|
Red Damage
|
Proration
|
Cancel
|
Guard
|
| 100
|
101
|
100%
|
-
|
U
(Whiffs vs Crouch.)
|
| First Active
|
Active
|
Recovery
|
Frame Adv
|
Circuit
|
Invuln
|
| 16
|
4 (13) 3 (13) 3 (13) 3 (13) 3
|
17
|
-
|
5.4%, 4.5%*5 (27.9%)
|
-
|
|
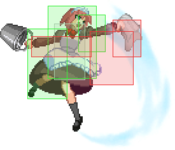
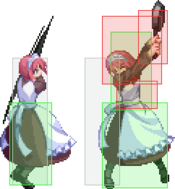
The watering can. Has a massive deadzone in front of Hisui. It only hits where the water hits the ground. On contact, the opponent will lose around 12% meter. Holding this attack will make the meter drain effect happen up to 5 times. Inflicts untechable knockdown unless the opponent is crouching.
|
|
3C 3C 3CC 3CC
|
| 3C
|
Damage
|
Red Damage
|
Proration
|
Cancel
|
Guard
|
| 1000
|
707
|
65% (O)
|
SP, -CH-, EX, (J)
|
LH
|
| First Active
|
Active
|
Recovery
|
Frame Adv
|
Circuit
|
Invuln
|
| 15
|
5
|
16
|
-3
|
9.0%
|
Clash 15-19
|
|
An upward ladle strike with a clash box on top.
|
| 3C~3C
|
Damage
|
Red Damage
|
Proration
|
Cancel
|
Guard
|
| 1000
|
707
|
70% (O)
|
SP, -EX-, (J)
|
LH
|
| First Active
|
Active
|
Recovery
|
Frame Adv
|
Circuit
|
Invuln
|
| 10
|
4
|
19
|
-5
|
9.0%
|
-
|
|
Followup strike.
|
|
|
|
| 6C
|
Damage
|
Red Damage
|
Proration
|
Cancel
|
Guard
|
| 1200
|
808
|
80% (O)
|
SP, EX
|
LH
|
| First Active
|
Active
|
Recovery
|
Frame Adv
|
Circuit
|
Invuln
|
| 19
|
4
|
19
|
-5
|
9.0%
|
-
|
|
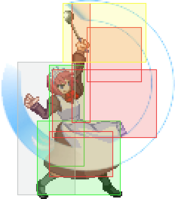
Downward pan strike. Untechable knockdown on hit.
|
| 6[C]
|
Damage
|
Red Damage
|
Proration
|
Cancel
|
Guard
|
| 1000
|
505
|
45% (O)
|
-
|
H
|
| First Active
|
Active
|
Recovery
|
Frame Adv
|
Circuit
|
Invuln
|
| 28
|
4
|
20
|
-9
|
9.0%
|
-
|
|
Charged version is an overhead and ground bounces on hit.
|
|
|
|
| Damage
|
Red Damage
|
Proration
|
Cancel
|
Guard
|
| 750
|
404
|
70% (O)
|
-
|
LHA
|
| First Active
|
Active
|
Recovery
|
Frame Adv
|
Circuit
|
Invuln
|
| 25
|
6
|
-
|
-
|
6.75%
|
-
|
|
Hisui creates a small cloud of dust that takes some time before becoming active.
|
|
|
|
| Damage
|
Red Damage
|
Proration
|
Cancel
|
Guard
|
| 600
|
303
|
100%
|
-
|
LHA
|
| First Active
|
Active
|
Recovery
|
Frame Adv
|
Circuit
|
Invuln
|
| 15
|
X
|
4
|
8 (TK)
|
4.5%
|
-
|
|
Hisui dives in. Hits mid.
|
|
Universal Mechanics
|
|
| Damage
|
Red Damage
|
Proration
|
Cancel
|
Guard
|
| 1000
|
505
|
100%
|
-
|
U
|
| First Active
|
Active
|
Recovery
|
Frame Adv
|
Circuit
|
Invuln
|
| 3
|
1
|
20
|
-
|
0.0%
|
-
|
|
Hisui grabs and headbutts the opponent. Untechable knockdown.
|
|
|
|
| Damage
|
Red Damage
|
Proration
|
Cancel
|
Guard
|
| 1600 (Raw)/1200
|
489
|
30%
|
-
|
U
|
| First Active
|
Active
|
Recovery
|
Frame Adv
|
Circuit
|
Invuln
|
| 2
|
1
|
12
|
-
|
0.0%
|
-
|
|
Hisui takes the opponent to the ground with her. Results in a sideswitch. Ground techable if done as a combo ender.
|
|
|
|
| Ground
|
Damage
|
Red Damage
|
Proration
|
Cancel
|
Guard
|
| 500 (345)
|
202
|
50%
|
(SP), (EX), (J)
|
LHA
|
| First Active
|
Active
|
Recovery
|
Frame Adv
|
Circuit
|
Invuln
|
| 9
|
4
|
18
|
-4
|
4.5%
|
-
|
|
Same animation as 3C.
|
| Air
|
Damage
|
Red Damage
|
Proration
|
Cancel
|
Guard
|
| 500 (345)
|
202
|
50%
|
-
|
HA
|
| First Active
|
Active
|
Recovery
|
Frame Adv
|
Circuit
|
Invuln
|
| 9
|
4
|
-
|
-
|
4.5%
|
-
|
|
Same animation as C-Moon j.B.
|
|
|
|
| Bunker
|
Damage
|
Red Damage
|
Proration
|
Cancel
|
Guard
|
| 500
|
202
|
50%
|
-
|
LHA
|
| First Active
|
Active
|
Recovery
|
Frame Adv
|
Circuit
|
Invuln
|
| 26
|
4
|
19
|
-5
|
0.0%
(-50.0% in blockstun)
|
Clash 1-10
|
| (Clash)
|
Damage
|
Red Damage
|
Proration
|
Cancel
|
Guard
|
| 500
|
202
|
50%
|
-
|
LHA
|
| First Active
|
Active
|
Recovery
|
Frame Adv
|
Circuit
|
Invuln
|
| 8
|
4
|
19
|
-5
|
0.0%/-50.0%
|
Strike 1-7
|
|
Performs her C/H-Moon 5B as a shield bunker.
|
|
|
|
| Damage
|
Red Damage
|
Proration
|
Cancel
|
Guard
|
| 100
|
0
|
100%
|
-
|
U
|
| First Active
|
Active
|
Recovery
|
Frame Adv
|
Circuit
|
Invuln
|
| 16
|
7
|
25
|
-
|
uses all
|
Full 1-22
|
|
Hisui leans back and activates Blood Heat.
|
|
|
|
| Ground
|
Damage
|
Red Damage
|
Proration
|
Cancel
|
Guard
|
| 100
|
0
|
100%
|
-
|
U
|
| First Active
|
Active
|
Recovery
|
Frame Adv
|
Circuit
|
Invuln
|
| 11
|
10
|
20
|
-
|
removes all
|
Full 1-39
|
| Air
|
Damage
|
Red Damage
|
Proration
|
Cancel
|
Guard
|
| 100
|
0
|
100%
|
-
|
U
|
| First Active
|
Active
|
Recovery
|
Frame Adv
|
Circuit
|
Invuln
|
| 12
|
10
|
15
|
-
|
removes all
|
Strike 1-30
|
|
Universal burst mechanic. Unlike Crescent/Full Heat activation, the hitbox and frame data doesn't vary between characters. However, you can be thrown out of this move if you input it in the air.
|
|
Special Moves
Grounded Specials
A/B A/B ~236A ~236A ~236B/C ~236B/C EX EX
|
| A
|
Damage
|
Red Damage
|
Proration
|
Cancel
|
Guard
|
| 320*6 (1770)
|
(556)
|
100%
|
-CH-
|
LHA
|
| First Active
|
Active
|
Recovery
|
Frame Adv
|
Circuit
|
Invuln
|
| 9
|
22
|
10
|
-2
|
1.8%*6 (10.8%)
|
-
|
| B
|
Damage
|
Red Damage
|
Proration
|
Cancel
|
Guard
|
| 250*9 (1965)
|
(791)
|
100%
|
-CH-
|
LHA
|
| First Active
|
Active
|
Recovery
|
Frame Adv
|
Circuit
|
Invuln
|
| 13
|
33
|
4
|
4
|
1.08%*9 (9.72%)
|
-
|
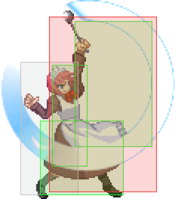
- Ora ora with ladles. Stuff Fu!
A: Hits 6 times.
B: Hits 9 times.
|
| ~236A
|
Damage
|
Red Damage
|
Proration
|
Cancel
|
Guard
|
| 600
|
40
|
100%
|
-EX-
|
LH
|
| First Active
|
Active
|
Recovery
|
Frame Adv
|
Circuit
|
Invuln
|
| 9
|
3
|
19
|
-4
|
3.6%
|
-
|
| ~236B/C
|
Damage
|
Red Damage
|
Proration
|
Cancel
|
Guard
|
| 600
|
404
|
50% (O)
|
-EX-, (J)
|
LH
|
| First Active
|
Active
|
Recovery
|
Frame Adv
|
Circuit
|
Invuln
|
| 7
|
4
|
19
|
-8
|
3.6%
|
-
|
- Follow-ups to her 236X series. Only works from the grounded version.
A: Knocks down.
B/C: Launches with a spatula. Jump cancelable. If input with C, this is what you get.
|
| EX
|
Damage
|
Red Damage
|
Proration
|
Cancel
|
Guard
|
| 200*12, 600 (2358)
|
(1747)
|
100%, 75% (O)
|
-
|
LHA
|
| First Active
|
Active
|
Recovery
|
Frame Adv
|
Circuit
|
Invuln
|
| 2+6
|
44 (7) 4
|
24
|
-16
|
-100.0%
|
Full 1-5
|
|
Hits 12 times, and then ends with an uppercut that is fully untechable.
|
|
|
|
| A
|
Damage
|
Red Damage
|
Proration
|
Cancel
|
Guard
|
| 1000
|
808
|
70% (O)
|
-EX-, (J)
|
LH
|
| First Active
|
Active
|
Recovery
|
Frame Adv
|
Circuit
|
Invuln
|
| 8
|
7
|
17
|
-6
|
9.0%
|
High 1-7
|
|
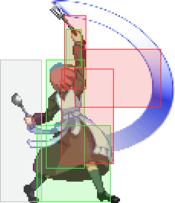
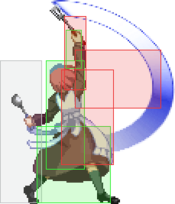
An anti-air pan strike with upper body invincibility during startup. Jump cancelable.
|
| B
|
Damage
|
Red Damage
|
Proration
|
Cancel
|
Guard
|
| 1000
|
808
|
75% (O)
|
-EX-, (J)
|
LH
|
| First Active
|
Active
|
Recovery
|
Frame Adv
|
Circuit
|
Invuln
|
| 11
|
16
|
9
|
-7
|
9.0%
|
-
|
|
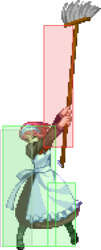
Hisui uses a broom instead. No upper body invuln.
|
| EX
|
Damage
|
Red Damage
|
Proration
|
Cancel
|
Guard
|
| 2500
|
2020
|
75% (O)
|
(J)
|
LH
|
| First Active
|
Active
|
Recovery
|
Frame Adv
|
Circuit
|
Invuln
|
| 4+4
|
8
|
15
|
-5
|
-100.0%
|
Strike 1-7
|
|
The ladder. Wallslams on hit.
|
|
|
|
| A
|
Damage
|
Red Damage
|
Proration
|
Cancel
|
Guard
|
| 500 ~ 1000*
|
202 ~ 606*
|
80% ~ 100%* (O)
|
-
|
LHA
|
| First Active
|
Active
|
Recovery
|
Frame Adv
|
Circuit
|
Invuln
|
| 14
|
X
|
33
|
-8 ~ -12*
|
2.52%
|
-
|
- Hisui randomly throws stuff at her opponent. The player can control which projectile is thrown by immediately holding the corresponding direction after the initial input. If this counter-hits in the air, run in and follow up with your favorite combo.
- 0 - Random
- 1 - A very slow lamp that flies straight.
- 2 - A pot that that arcs upwards at a high angle. Good for counter-hits against air.
- 3 - A vase that flies upwards slightly, but hits the floor about midscreen.
- 6 - A book that goes about five feet before hitting the floor.
- You can also get a coat hanger or a tray on random.
- Tray is her fastest horizontal projectile. Half-moon Hisui gets tray only from her 214A.
- Coat hanger moves slower than the tray but faster then the lamp.
|
| B
|
Damage
|
Red Damage
|
Proration
|
Cancel
|
Guard
|
| Random*
|
Random*
|
Random* (O)
|
-
|
LHA
|
| First Active
|
Active
|
Recovery
|
Frame Adv
|
Circuit
|
Invuln
|
| 23
|
X
|
32
|
Random
|
2.52%*N
|
-
|
- Hisui throws 1-2 of the same projectiles as the A version at the cost of a longer start-up time. Can be used at the end of blockstrings if you're lazy. Causes a ton of stun if two of the projectiles hit at the same time.
- 0 - Random
- 1 - Pot & Book
- 2 - Vase & Lamp
- 3 - Vase & Hanger
- 6 - Tray & Book
- Sometimes on random you'll just get book.
|
| EX
|
Damage
|
Red Damage
|
Proration
|
Cancel
|
Guard
|
| Random*
|
Random*
|
Random* (O)
|
-
|
LHA
|
| First Active
|
Active
|
Recovery
|
Frame Adv
|
Circuit
|
Invuln
|
| 8+8
|
X
|
33
|
Random
|
-100.0%
|
Full 1-3, Low 4-15
|
|
Hisui will throw random projectiles. it is low invuln.
|
|
|
|
| A
|
Damage
|
Red Damage
|
Proration
|
Cancel
|
Guard
|
| -
|
-
|
-
|
-
|
-
|
| First Active
|
Active
|
Recovery
|
Frame Adv
|
Circuit
|
Invuln
|
| 35
|
360
|
41
|
-
|
1.8%
|
-
|
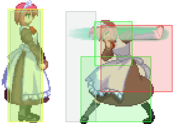
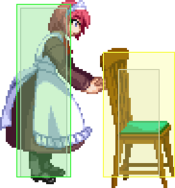
- Hisui pulls out a chair that acts as a lingering clash box. All chairs have a collision box, meaning the opponent can't go through them like with H-Hisui 22C. Only one chair can be up at a time.
Places a wooden chair. Clashes once then breaks.
|
| B
|
Damage
|
Red Damage
|
Proration
|
Cancel
|
Guard
|
| -
|
-
|
-
|
-
|
-
|
| First Active
|
Active
|
Recovery
|
Frame Adv
|
Circuit
|
Invuln
|
| 42
|
243
|
50
|
-
|
1.8%
|
-
|
|
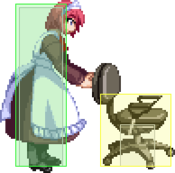
Small, foward-moving wheeled chair. On clash, this will be reflected and will clash with Hisui's own attacks once before breaking.
|
| EX
|
Damage
|
Red Damage
|
Proration
|
Cancel
|
Guard
|
| -
|
-
|
-
|
-
|
-
|
| First Active
|
Active
|
Recovery
|
Frame Adv
|
Circuit
|
Invuln
|
| 17+41
|
400
|
17+47
|
-
|
-100.0%
|
-
|
|
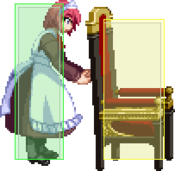
The throne. Clashes twice before breaking.
|
|
Aerial Specials
|
|
| A
|
Damage
|
Red Damage
|
Proration
|
Cancel
|
Guard
|
| 250*8 (1778)
|
(859)
|
100%
|
EX
|
LHA
|
| First Active
|
Active
|
Recovery
|
Frame Adv
|
Circuit
|
Invuln
|
| 9
|
16
|
0
|
10 (TK)
|
1.35%*8 (10.8%)
|
-
|
- Air ladle jabs. These don't have follow-ups like the ground version.
Hits 8 times.
|
| B
|
Damage
|
Red Damage
|
Proration
|
Cancel
|
Guard
|
| 250*12 (2479)
|
(1197)
|
100%
|
EX
|
LHA
|
| First Active
|
Active
|
Recovery
|
Frame Adv
|
Circuit
|
Invuln
|
| 13
|
24
|
0
|
10 (TK)
|
1.35%*12 (16.2%)
|
-
|
|
Hits 12 times.
|
| EX
|
Damage
|
Red Damage
|
Proration
|
Cancel
|
Guard
|
| 250*N
|
181*N
|
100%
|
-
|
LHA
|
| First Active
|
Active
|
Recovery
|
Frame Adv
|
Circuit
|
Invuln
|
| 3+4
|
X
|
0
|
10 (TK)
|
-100.0%
|
Full 1-6
|
|
Keeps hitting until it reaches the ground.
|
|
Arc Drive
Uncharged Uncharged Fully Charged Fully Charged
|
| (Min. Charge)
|
Damage
|
Red Damage
|
Proration
|
Cancel
|
Guard
|
| 1000*3 (2629)
|
(2656)
|
90% (M)*3
|
-
|
LH
|
| First Active
|
Active
|
Recovery
|
Frame Adv
|
Circuit
|
Invuln
|
| 3+1+2
|
X
|
25
|
27
|
removes all
|
Full 1-24
|
| (Max. Charge)
|
Damage
|
Red Damage
|
Proration
|
Cancel
|
Guard
|
| 800*8 (4668)
|
(3498)
|
95% (M)*8
|
-
|
LH
|
| First Active
|
Active
|
Recovery
|
Frame Adv
|
Circuit
|
Invuln
|
| 3+378+379
|
X
|
25
|
92
|
removes all
|
Full 1-3, 375-398
|
|
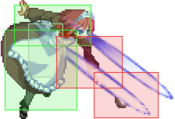
Hisui charges up and delivers a dashing blow through the opponent. Leaves standing if done close, but launches if it hits at round start distance.
|
|
Another Arc Drive
|
|
| Damage
|
Red Damage
|
Proration
|
Cancel
|
Guard
|
| 800*8 (4668)
|
(3496)
|
95% (M)*8
|
-
|
LH
|
| First Active
|
Active
|
Recovery
|
Frame Adv
|
Circuit
|
Invuln
|
| 2+1+2
|
X
|
22
|
95
|
removes all
|
Full 1-25
|
|
Same as above, except it's automatically fully charged, has an extended hitbox, and cannot be delayed or turned around.
|
|
Last Arc
|
|
| Damage
|
Red Damage
|
Proration
|
Cancel
|
Guard
|
| 3000 (1500 ~ 3000)
|
(1262 ~ 2323)
|
50% + 50% * remaining BH time
|
-
|
U
|
| First Active
|
Active
|
Recovery
|
Frame Adv
|
Circuit
|
Invuln
|
| 4+2
|
2
|
54
|
-
|
removes all
|
Full 1-52
|
|
Brainwasher Detective Hisui. It does somewhat low damage, but reverses the controls of the opponent for ten seconds and causes break for a staggering twenty seconds. The lower Hisui's meter, the worse the proration is.
|
|
MBAACC Navigation
