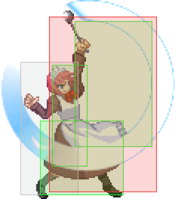
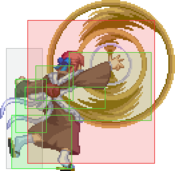
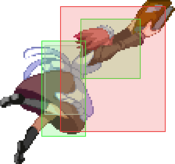
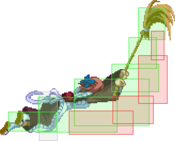
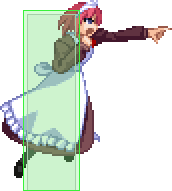
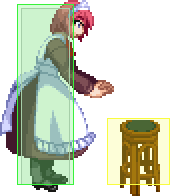
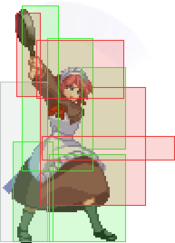
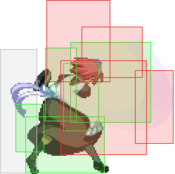
Character Page Progress
This page is still a work in progress, consider joining as an editor to help expand it. Please update this character's roadmap page when one of the editing goals have been reached.
| In Progress |
To-do
|
- Move Descriptions:
- Expand upon the move descriptions, cite their uses, add captions where helpful, etc.
|
- Additional Ressources/Players to watch/ask
- Add any external links to ressources such as video guides or articles.
- If you know any players in particular that can be helpful for learning this character, please add them with, if possible a way to contact them (such as a Discord handle) and a name that can be searched in the match video database.
- Overview/General Gameplan:
- Add a short summary of this character with a list of strengths and weaknesses
- Do your best to describe how to play this character, change or add subsections based on what you would write as a guide.
- Combos:
- Add tech in the starters, enders, OTG pickup and normal/corner combo sections.
- Add damage, meter gain/given numbers and video links to combos as you add them.
|
Additional Resources
H-Maids Match Video Database
Players to watch/ask
JP:
- Text goes here after asterisk
- Text goes here after asterisk
NA:
- Text goes here after asterisk
- Text goes here after asterisk
Overview
Strengths / Weaknesses
| Strengths
|
- Text goes here after asterisk
- Text goes here after asterisk
|
| Weaknesses
|
- Place text here be sure to use "*" for each point*
|
General Gameplan
Place text here*
Neutral
Place text here*
Pressure
Place text here
Okizeme
Place text here
Defense
place text here*
Combos
| Combo Notation Help
|
Disclaimer: Combos are written by various writers, so the actual notation used in pages can differ from the standard one.
For more information, see Glossary and Controls.
|
| X > Y
|
X input is cancelled into Y.
|
| X > delay Y
|
Must wait for a short period before cancelling X input into Y.
|
| X, Y
|
X input is linked into Y, meaning Y is done after X's recovery period.
|
| X+Y
|
Buttons X and Y must be input simultaneously.
|
| X/Y
|
Either the X or Y input can be used.
|
| X~Y
|
This notation has two meanings.
- Use attack X with Y follow-up input.
- Input X then within a few frames, input Y. Usually used for option selects.
|
| X(w)
|
X input must not hit the opponent (Whiff).
|
| j.X
|
X input is done in the air, implies a jump/jump cancel if the previous move was done from the ground.
Applies to all air chain sections:
- Assume a forward jump cancel if no direction is given.
- Air chains such as j.A > j.B > j.C can be shortened to j.ABC.
|
| sj.X
|
X input is done after a super jump. Notated as sj8.X and sj9.X for neutral and forward super jumps respectively.
|
| dj.X
|
X input is done after a double jump.
|
| sdj.X
|
X input is done after a double super jump.
|
| tk.X
|
Stands for Tiger Knee. X motion must be buffered before jumping, inputting the move as close to the ground as possible. (ex. tk.236A)
|
| (X)
|
X is optional. Typically the combo will be easier if omitted.
|
| [X]
|
Input X is held down. Also referred to as Blowback Edge (BE). Depending on the character, this can indicate that this button is held down and not released until indicated by the release notation.
|
| ]X[
|
Input X is released. Will only appear if a button is previously held down. This type of input is referred to as Negative Edge.
|
| {X}
|
Button X should only be held down briefly to get a partially charged version instead of the fully charged one.
|
| X(N)
|
Attack "X" should only hit N times.
|
| (XYZ)xN
|
XYZ string must be performed N times. Combos using this notation are usually referred to as loops.
|
| (XYZ^)
|
A pre-existing combo labelled XYZ is inserted here for shortening purposes.
|
| CH
|
The first attack must be a Counter Hit.
|
| Air CH
|
The first attack must be a Counter Hit on an airborne opponent.
|
| 66
|
Performs a ground forward dash.
|
| j.66
|
Performs an aerial forward dash, used as a cancel for certain characters' air strings.
|
| IAD/IABD
|
Performs an Instant AirDash.
|
| AT
|
Performs an Air Throw. (j.6/4A+D)
|
| IH
|
Performs an Initiative Heat.
|
| AD
|
Performs an Arc Drive.
|
| AAD
|
Performs an Another Arc Drive.
|
Hisui Lead
Starters
These all work anywhere. For all starters involving 5A6AA > 2C, delay the 2C as long as possible or the followup combo may drop. All starters ending in 6B or 5A6AA can lead into j.[C], allowing for a rejump or hard knockdown for okizeme.
| Condition
|
Notation
|
Damage
vs V.Sion
|
Notes
|
|
| Starter
|
- (5B / j.B / j.C / j.[C] >) 2B > 5C(1) > 5A(w)6AA > 2C > 6B > (Air Combo)
|
???
|
| |
| Meter Gained: ??? |
Meter Given (vs C-Moon): ??? |
| Basic starter. |
|
|
| Starter
|
- (5B / j.B / j.C / j.[C] >) 2B > 5C(1) > 2C > 5A(w)6AA > (Air Combo)
|
???
|
| |
| Meter Gained: ??? |
Meter Given (vs C-Moon): ??? |
| Alternative starter. Leads to slightly less damage than 2B > 5C(1) > 5A(w)6AA > 2C > 6B, but involves one less reverse beat so you'll get better damage from your oki if you just go into j.[C] afterwards. |
|
|
| 2B Starter
|
- 2B > 5C(2) > 5A(w)6AA > 2C > 6B > (Air Combo)
|
???
|
| |
| Meter Gained: ??? |
Meter Given (vs C-Moon): ??? |
| If you are at a range where 5C(1) > 5A connects (rather than whiffing the 5A), you can go for both hits of 5C and a 5A whiff instead for more damage. Requires close spacing. 2B > 5C(1) 5A6AA > 2C > 6B works from farther, but does much less damage. |
|
|
| 2B Starter
|
- 2B > 5C(2) > 2C > 5A(w)6AA > (Air Combo)
|
???
|
| |
| Meter Gained: ??? |
Meter Given (vs C-Moon): ??? |
| Alternative 2B > 5C(2) starter; has the same spacing restrictions. Shares the benefits and drawbacks of the alternative 2B > 5C(1) starter above. |
|
|
| 5[C] Starter
|
- 5[C] > 5A6AA > 2C > 6B > (Air Combo)
|
???
|
| |
| Meter Gained: ??? |
Meter Given (vs C-Moon): ??? |
| Max damage starter. 5A actually connects here, unlike in all other optimal starters. |
|
|
| Air Counterhit Starter
|
- Air CH, 2C > 5A(w)6AA > (Air Combo)
|
???
|
| |
| Meter Gained: ??? |
Meter Given (vs C-Moon): ??? |
| Maximizes damage from an air counterhit. |
|
|
Air Combos
| Condition
|
Notation
|
Damage
vs V.Sion
|
Notes
|
|
| Air Combo
|
- ...j.[C] > j.A > j.236B[9] \/ j.]9[ > (Air Ender)
|
???
|
| |
| Meter Gained: ??? |
Meter Given (vs C-Moon): ??? |
| Rejump, made easy by holding 9 during j.236B. Use a slightly delayed j.B instead of j.A in the corner to get the height right. |
|
|
Air Enders
| Condition
|
Notation
|
Damage
vs V.Sion
|
Notes
|
|
| Air Ender
|
|
???
|
| |
| Meter Gained: ??? |
Meter Given (vs C-Moon): ??? |
| Simple j.B combo into airthrow, use when you can't confirm the other j.B combo from your current spacing or height or want to let your reverse penalty count down. Use assists for okizeme. |
|
|
| Air Ender
|
- j.A > j.66 j.AC > dj.BC > AT
|
???
|
| |
| Meter Gained: ??? |
Meter Given (vs C-Moon): ??? |
| Basic airdash cancel aircombo ender. Versus most if not all characters you can mash j.A more; experiment away. |
|
|
Kohaku Lead
| Condition
|
Notation
|
Damage
vs V.Sion
|
Notes
|
|
| Normal starter, grounded opponent
|
|
text
|
| |
| Meter Gained: text |
Meter Given (vs C-Moon): text |
| text |
|
|
Move Descriptions
| Frame Data Help
|
| Header
|
Tooltip
|
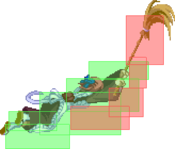
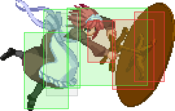
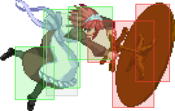
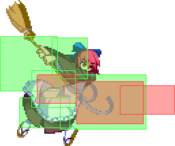
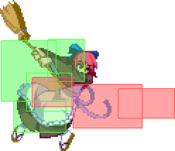
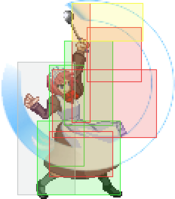
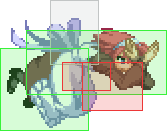
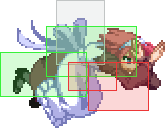
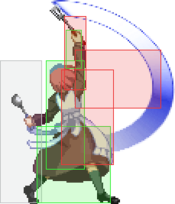
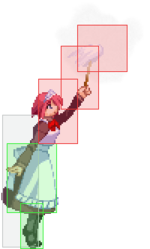
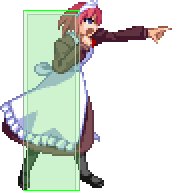
| Move Box Colors
|
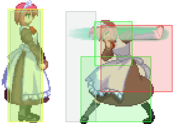
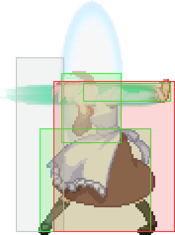
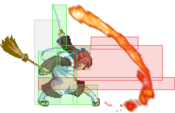
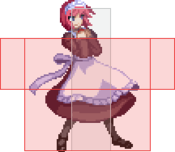
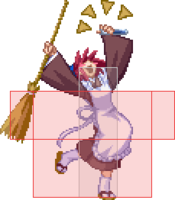
Light gray = Collision Box (A move lacking one means it can go through the opponent's own collision box).
Green: Hurt Boxes.
Red: Hit(/Grab) Boxes.
Yellow: Clash Boxes (When an active hitbox strikes a clash box, the active hitbox stops being active. Multi-hit attacks can beat clash since they will still progress to the next hitbox.)
Magenta: Projectile-reflecting boxes OR Non-hit attack trigger boxes (usually).
Blue: Reflectable Projectile Boxes.
|
| Damage
|
Base damage done by this attack.
(X) denotes combined and scaled damage tested against standing V. Sion.
|
| Red Damage
|
Damage done to the recoverable red health bar by this attack. The values are inherently scaled and tested against standing V. Sion.
(X) denotes combined damage.
|
| Proration
|
The correction value set by this attack and the way it modifies the scaling during a string. See this page for more details.
X% (O) means X% Overrides the previous correction value in a combo if X is of a lower percentage.
X% (M) means the current correction value in a combo will be Multiplied by X%. This can also be referred to as relative proration.
|
| Circuit
|
Meter gained by this attack on hit.
(X%) denotes combined meter gain.
-X% denotes a meter cost.
|
| Cancel
|
Actions this move can be cancelled into.
SE = Self cancelable.
N = Normal cancelable.
SP = Special cancelable.
CH = Cancelable into the next part of the same attack (Chain in case of specials).
EX = EX cancelable.
J = Jump cancelable.
(X) = Cancelable only on hit.
-X- = Cancelable on whiff.
|
| Guard
|
The way this move must be blocked.
L = Can block crouching
H = Can block standing.
A = Can block in the air.
U = Unblockable.
|
| Startup
|
Amount of frames that must pass prior to reaching the active frames. Also referred to as "True Startup".
|
| Active
|
The amount of frames that this move will have a hitbox.
(x) denotes frame gaps where there are no hitboxes is present. Due to varied blockstuns, (x) frames are difficult to use to determine punish windows. Generally the larger the numbers, the more time you have to punish.
X denotes active frames with a duration separate from its origin move's frame data, such as projectile attacks. In this case, the total length of the move is startup+recovery only.
|
| Recovery
|
Frames that this move has after the active frames if not canceled. The character goes into one frame where they can block but not act afterwards, which is not counted here.
|
| Advantage
|
The difference in frames where you can act before your opponent when this move is blocked (assuming the move isn't canceled and the first active frame is blocked).
If the opponent uses a move with startup that is at least 2 frames less than this move's negative advantage, it will result in the opponent hitting that move.
±x~±y denotes a range of possible advantages.
|
| Invul
|
Lists any defensive properties this move has.
X y~z denotes X property happening between the y to z frames of the animations. If no frames are noted, it means the invincibility lasts through the entire move.
Invicibility:
- Strike = Strike invincible.
- Throw = Throw invincible.
Hurtbox-Based Properties:
- Full = No hurtboxes are present.
- High = Upper body lacks a hurtbox.
- Low = Lower body lacks a hurtbox.
Miscellaneous Properties
- Clash = Frames in which clash boxes are active.
- Reflect = Frames in which projectile-reflecting boxes are active.
- Super Armor = Frames in which the character can take hits without going into hit stun.
|
Note: Move inputs in this section will be preceded by H/K for Hisui lead/Kohaku lead respectively.
Normal Moves
Standing Normals
|
|
| H5A
|
Damage
|
Red Damage
|
Proration
|
Cancel
|
Guard
|
| 300
|
192
|
78% (O)
|
-SE-, -N-, -SP-, -CH-, -EX-, (J)
|
LH
|
| First Active
|
Active
|
Recovery
|
Frame Adv
|
Circuit
|
Invuln
|
| 5
|
3
|
8
|
1
|
2.1%
|
-
|
|
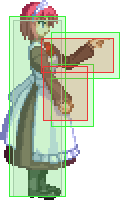
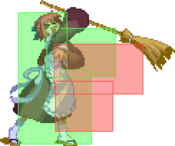
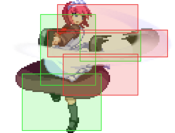
A short poke.
|
| H5A~6A
|
Damage
|
Red Damage
|
Proration
|
Cancel
|
Guard
|
| 600
|
384
|
80% (M)
|
N, SP, -CH-, EX, (J)
|
LH
|
| First Active
|
Active
|
Recovery
|
Frame Adv
|
Circuit
|
Invuln
|
| 7
|
4
|
17
|
-6
|
4.2%
|
-
|
|
Does C-Hisui's 5A slap.
|
| H5A~6A~6A
|
Damage
|
Red Damage
|
Proration
|
Cancel
|
Guard
|
| 1000
|
768
|
60% (O)
|
(N), SP, EX, (J)
|
LH
|
| First Active
|
Active
|
Recovery
|
Frame Adv
|
Circuit
|
Invuln
|
| 10
|
7
|
11
|
0
|
7.0%
|
-
|
|
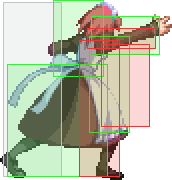
The bucket. Launches the opponent.
|
|
|
|
| K5A
|
Damage
|
Red Damage
|
Proration
|
Cancel
|
Guard
|
| 350
|
163
|
78% (O)
|
-SE-, -N-, -SP-, -CH-, -EX-, (J)
|
LH
|
| First Active
|
Active
|
Recovery
|
Frame Adv
|
Circuit
|
Invuln
|
| 4
|
4
|
8
|
0
|
2.45%
|
-
|
|
Quick jab, active on frame 4.
|
| K5A~6A
|
Damage
|
Red Damage
|
Proration
|
Cancel
|
Guard
|
| 600
|
384
|
80% (M)
|
N, SP, -CH-, EX, (J)
|
LH
|
| First Active
|
Active
|
Recovery
|
Frame Adv
|
Circuit
|
Invuln
|
| 8
|
4
|
16
|
-5
|
4.2%
|
-
|
|
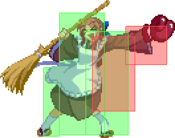
Broom swipe followup.
|
| K5A~6A~6A
|
Damage
|
Red Damage
|
Proration
|
Cancel
|
Guard
|
| 1000
|
768
|
60% (O)
|
(N), SP, EX, (J)
|
LH
|
| First Active
|
Active
|
Recovery
|
Frame Adv
|
Circuit
|
Invuln
|
| 10
|
4
|
17
|
-3
|
7.0%
|
-
|
|
The boxing glove. Launches on hit.
|
|
|
|
| Damage
|
Red Damage
|
Proration
|
Cancel
|
Guard
|
| 600
|
528
|
80% (O)
|
N, SP, EX, (J)
|
LH
|
| First Active
|
Active
|
Recovery
|
Frame Adv
|
Circuit
|
Invuln
|
| 8
|
6
|
13
|
-4
|
4.9%
|
-
|
|
Hisui pushes the opponent back with her palm.
|
|
|
|
| 5B
|
Damage
|
Red Damage
|
Proration
|
Cancel
|
Guard
|
| 600
|
384
|
70% (O)
|
N, SP, EX, (J)
|
H (Whiffs vs Crouch.),
LH
|
| First Active
|
Active
|
Recovery
|
Frame Adv
|
Circuit
|
Invuln
|
| 9
|
5
|
14
|
-4 (vs Stand.)
-2 (vs Crouch.)
|
4.2%
|
-
|
|
Kohaku swipes with the broom over her head.
|
| 5[B]
|
Damage
|
Red Damage
|
Proration
|
Cancel
|
Guard
|
| 1000
|
672
|
70% (O)
|
N, SP, EX, (J)
|
LH
|
| First Active
|
Active
|
Recovery
|
Frame Adv
|
Circuit
|
Invuln
|
| 18
|
8
|
12
|
-5
|
7.0%
|
-
|
|
Charged version inflicts a ground techable knockdown on air hit.
|
|
|
|
| 5C
|
Damage
|
Red Damage
|
Proration
|
Cancel
|
Guard
|
| 400, 700 (1078)
|
(849)
|
100%
|
N, SP, EX, (J)
|
LH
|
| First Active
|
Active
|
Recovery
|
Frame Adv
|
Circuit
|
Invuln
|
| 13
|
6
|
14
|
0
|
4.9%, 5.6% (10.5%)
|
-
|
|
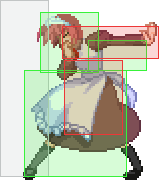
Hisui pulls a chair out of nowhere and hits the opponent over the head with it. Neutral on block.
|
| 5{C}
|
Damage
|
Red Damage
|
Proration
|
Cancel
|
Guard
|
| 400*2, 700 (1443)
|
(1110)
|
100%
|
N, SP, EX, (J)
|
LH
|
| First Active
|
Active
|
Recovery
|
Frame Adv
|
Circuit
|
Invuln
|
| 15
|
7~18
|
14
|
0
|
2.8%, 4.9%, 5.6% (13.3%)
|
-
|
|
Partial charging this will make Hisui rush forward a bit before hitting with the chair.
|
| 5[C]
|
Damage
|
Red Damage
|
Proration
|
Cancel
|
Guard
|
| 400, 600, 800 (1731)
|
(927)
|
100%
|
N, SP, EX, (J)
|
LH
|
| First Active
|
Active
|
Recovery
|
Frame Adv
|
Circuit
|
Invuln
|
| 15
|
18
|
21
|
-7
|
2.8%, 4.9%, 5.6% (13.3%)
|
-
|
|
Fully charged version goes the furthest and is more damaging.
|
|
|
|
| Damage
|
Red Damage
|
Proration
|
Cancel
|
Guard
|
| 900, 150*3, 800 (2020)
|
(908)
|
100% (1-5), 60% (M)
|
N, SP, EX, (J)
|
LH (1), LHA
|
| First Active
|
Active
|
Recovery
|
Frame Adv
|
Circuit
|
Invuln
|
| 7
|
4 (8) 8
|
24
|
-26 ~ -8
|
3.5%*5 (17.5%)
|
-
|
|
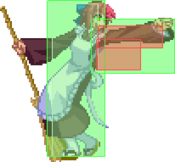
Stabs with the broom handle, then automatically does the launching followup.
|
|
Crouching Normals
|
|
| Damage
|
Red Damage
|
Proration
|
Cancel
|
Guard
|
| 300
|
134
|
75% (O)
|
-SE-, -N-, -SP-, -EX-, (J)
|
LH
|
| First Active
|
Active
|
Recovery
|
Frame Adv
|
Circuit
|
Invuln
|
| 4
|
4
|
8
|
0
|
2.1%
|
-
|
|
Crouching chop. Hits mid.
|
|
|
|
| Damage
|
Red Damage
|
Proration
|
Cancel
|
Guard
|
| 300
|
96
|
75% (O)
|
-SE-, -N-, -SP-, -EX-, (J)
|
L
|
| First Active
|
Active
|
Recovery
|
Frame Adv
|
Circuit
|
Invuln
|
| 4
|
4
|
8
|
0
|
2.1%
|
-
|
|
Crouching jab that hits low.
|
|
|
|
| Damage
|
Red Damage
|
Proration
|
Cancel
|
Guard
|
| 550
|
288
|
80% (O)
|
N, SP, EX, (J)
|
L
|
| First Active
|
Active
|
Recovery
|
Frame Adv
|
Circuit
|
Invuln
|
| 7
|
6
|
12
|
-3
|
4.2%
|
-
|
|
Crouching palm strike. Hits low.
|
|
|
|
| Damage
|
Red Damage
|
Proration
|
Cancel
|
Guard
|
| 500*2 (911)
|
(540)
|
85% (O)
|
N, SP, EX, (J)
|
LH, L
|
| First Active
|
Active
|
Recovery
|
Frame Adv
|
Circuit
|
Invuln
|
| 8
|
5 (3) 4
|
22
|
-19, -11
|
3.5%*2 (7.0%)
|
Clash 8-12
|
|
Crescent's 2B and 2B~B in one move. Second hit is a low.
|
|
|
|
| Damage
|
Red Damage
|
Proration
|
Cancel
|
Guard
|
| 1000
|
624
|
60% (O)
|
N, SP, EX, (J)
|
L
|
| First Active
|
Active
|
Recovery
|
Frame Adv
|
Circuit
|
Invuln
|
| 9
|
3
|
23
|
-8
|
7.7%
|
-
|
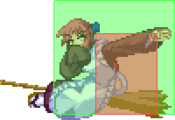
|
Water splash sweep. Hits low.
|
|
|
|
| K2C
|
Damage
|
Red Damage
|
Proration
|
Cancel
|
Guard
|
| 1100
|
672
|
60% (O)
|
N, SP, EX, (J)
|
L
|
| First Active
|
Active
|
Recovery
|
Frame Adv
|
Circuit
|
Invuln
|
| 10
|
4
|
24
|
-10
|
4.9%
|
-
|
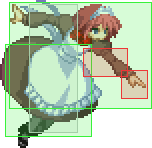
|
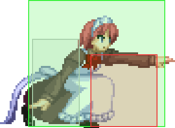
Kohaku literally sweeps the opponent. Hits low.
|
| K2[C]
|
Damage
|
Red Damage
|
Proration
|
Cancel
|
Guard
|
| 1400
|
960
|
90% (M)
|
N, SP, EX, (J)
|
L
|
| First Active
|
Active
|
Recovery
|
Frame Adv
|
Circuit
|
Invuln
|
| 22
|
5
|
24
|
-11
|
8.4%
|
-
|
|
Charged version has a smaller hurtbox.
|
|
Aerial Normals
|
|
| Damage
|
Red Damage
|
Proration
|
Cancel
|
Guard
|
| 300
|
144
|
75% (O)
|
SE, N, SP, EX, J
|
LHA
|
| First Active
|
Active
|
Recovery
|
Frame Adv
|
Circuit
|
Invuln
|
| 5
|
4
|
10
|
-
|
2.8%
|
-
|
|
Downward poke.
|
|
|
|
| Damage
|
Red Damage
|
Proration
|
Cancel
|
Guard
|
| 300
|
96
|
73% (O)
|
SE, N, SP, EX, J
|
LHA
|
| First Active
|
Active
|
Recovery
|
Frame Adv
|
Circuit
|
Invuln
|
| 5
|
4
|
10
|
-
|
2.1%
|
-
|
|
A broom handle poke in the air.
|
|
|
|
| Damage
|
Red Damage
|
Proration
|
Cancel
|
Guard
|
| 700
|
384
|
90% (O)
|
N, SP, EX, J
|
HA
|
| First Active
|
Active
|
Recovery
|
Frame Adv
|
Circuit
|
Invuln
|
| 8
|
5
|
-
|
-
|
4.9%
|
-
|
|
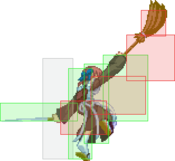
H-Hisui's trademark j.B.
|
|
|
|
| Damage
|
Red Damage
|
Proration
|
Cancel
|
Guard
|
| 680
|
384
|
90% (O)
|
N, SP, EX, J
|
HA
|
| First Active
|
Active
|
Recovery
|
Frame Adv
|
Circuit
|
Invuln
|
| 8
|
4
|
-
|
-
|
3.5%
|
-
|
|
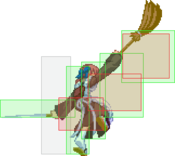
A blazingly fast upward broom swipe that has a truly staggering range.
|
|
|
|
| Hj.C
|
Damage
|
Red Damage
|
Proration
|
Cancel
|
Guard
|
| 1000
|
432
|
90% (M)
|
N, SP, EX, J
|
HA
|
| First Active
|
Active
|
Recovery
|
Frame Adv
|
Circuit
|
Invuln
|
| 10
|
4
|
-
|
-
|
7.7%
|
-
|
|
A downward slam with a table pulled out of nowhere.
|
| Hj.[C]
|
Damage
|
Red Damage
|
Proration
|
Cancel
|
Guard
|
| 1200
|
576
|
95% (O)
|
N, SP, EX, J
|
HA
|
| First Active
|
Active
|
Recovery
|
Frame Adv
|
Circuit
|
Invuln
|
| 21
|
4
|
-
|
-
|
10.5%
|
-
|
|
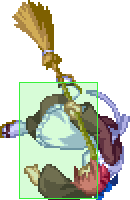
Charged version of j.C. Hard knockdown.
|
|
|
|
| Kj.C
|
Damage
|
Red Damage
|
Proration
|
Cancel
|
Guard
|
| 900
|
576
|
90% (O)
|
N, SP, J
|
HA
|
| First Active
|
Active
|
Recovery
|
Frame Adv
|
Circuit
|
Invuln
|
| 10
|
4
|
-
|
-
|
6.3%
|
-
|
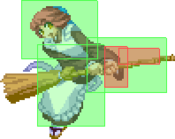
|
Horizontal broom swipe.
|
| Kj.[C]
|
Damage
|
Red Damage
|
Proration
|
Cancel
|
Guard
|
| 1200
|
864
|
80% (O)
|
N, SP, EX, J
|
HA
|
| First Active
|
Active
|
Recovery
|
Frame Adv
|
Circuit
|
Invuln
|
| 19
|
4
|
-
|
-
|
8.4%
|
-
|
|
Disjointed charged version.
|
|
Command Normals
|
|
| 4B
|
Damage
|
Red Damage
|
Proration
|
Cancel
|
Guard
|
| 100
|
96
|
100%
|
-
|
U
(Whiffs vs Crouch.)
|
| First Active
|
Active
|
Recovery
|
Frame Adv
|
Circuit
|
Invuln
|
| 16
|
4
|
17
|
-
|
4.2%, 3.5% (7.7%)
|
-
|
| 4[B] (Max)
|
Damage
|
Red Damage
|
Proration
|
Cancel
|
Guard
|
| 100
|
96
|
100%
|
-
|
U
(Whiffs vs Crouch.)
|
| First Active
|
Active
|
Recovery
|
Frame Adv
|
Circuit
|
Invuln
|
| 16
|
4 (13) 3 (13) 3 (13) 3 (13) 3
|
17
|
-
|
4.2%, 3.5%*5 (21.7%)
|
-
|
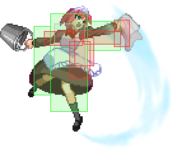
|
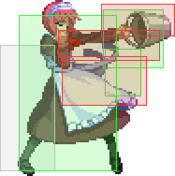
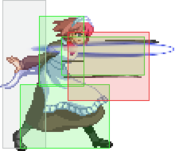
The watering can. Has a massive deadzone in front of Hisui. It only hits where the water hits the ground. On contact, the opponent will lose around 12% meter. Holding this attack will make the meter drain effect happen up to 5 times. Inflicts untechable knockdown unless the opponent is crouching.
|
|
|
|
| Damage
|
Red Damage
|
Proration
|
Cancel
|
Guard
|
| 800
|
432
|
65% (O)
|
N, SP, EX, (J)
|
LH
|
| First Active
|
Active
|
Recovery
|
Frame Adv
|
Circuit
|
Invuln
|
| 15
|
5
|
16
|
-6
|
4.2%
|
Clash 15-19
|
|
Ladle launcher.
|
|
|
|
| Hj.2C
|
Damage
|
Red Damage
|
Proration
|
Cancel
|
Guard
|
| 600
|
288
|
100%
|
-
|
LHA
|
| First Active
|
Active
|
Recovery
|
Frame Adv
|
Circuit
|
Invuln
|
| 15
|
X
|
4
|
8 (TK)
|
3.5%
|
-
|
|
Hisui dives in. Hits mid.
|
| Hj.2[C]
|
Damage
|
Red Damage
|
Proration
|
Cancel
|
Guard
|
| 1000
|
672
|
80% (O)
|
-
|
HA
|
| First Active
|
Active
|
Recovery
|
Frame Adv
|
Circuit
|
Invuln
|
| 24
|
X
|
4
|
12 (TK)
|
7.0%
|
-
|
|
Charged version becomes an overhead.
|
|
Universal Mechanics
|
|
| Hisui/Kohaku
|
Damage
|
Red Damage
|
Proration
|
Cancel
|
Guard
|
| 1000
|
480
|
100%
|
-
|
U
|
| First Active
|
Active
|
Recovery
|
Frame Adv
|
Circuit
|
Invuln
|
| 3
|
1
|
20
|
-
|
0.0%
|
-
|
|
Both maids' ground throws function the same. Untechable knockdown.
|
|
|
|
| Hisui
|
Damage
|
Red Damage
|
Proration
|
Cancel
|
Guard
|
| 1600 (Raw)/1200
|
465
|
30%
|
-
|
U
|
| First Active
|
Active
|
Recovery
|
Frame Adv
|
Circuit
|
Invuln
|
| 2
|
1
|
12
|
-
|
0.0%
|
-
|
|
Hisui takes the opponent to the ground with her. Results in a sideswitch. Ground techable if done as a combo ender.
|
| Kohaku
|
Damage
|
Red Damage
|
Proration
|
Cancel
|
Guard
|
| 1600 (Raw)/1300
|
576
|
30%
|
-
|
U
|
| First Active
|
Active
|
Recovery
|
Frame Adv
|
Circuit
|
Invuln
|
| 2
|
1
|
12
|
-
|
0.0%
|
-
|
|
Ground bounces the opponnent using a 16-ton weight.
|
|
|
|
| Standing
|
Damage
|
Red Damage
|
Proration
|
Cancel
|
Guard
|
| 500 (345)
|
198
|
50%
|
(SP), (EX), (J)
|
LHA
|
| First Active
|
Active
|
Recovery
|
Frame Adv
|
Circuit
|
Invuln
|
| 9
|
4
|
18
|
-4
|
3.5%
|
-
|
|
Hisui: Same animation as 6B.
Kohaku: Same animation as 5C.
|
| Crouching
|
Damage
|
Red Damage
|
Proration
|
Cancel
|
Guard
|
| 1500 (1117)
|
714
|
50%
|
(SP), (EX)
|
LA
|
| First Active
|
Active
|
Recovery
|
Frame Adv
|
Circuit
|
Invuln
|
| 9
|
4
|
18
|
-4
|
10.5%
|
-
|
|
Hisui: Same animation as 2C.
Kohaku: Same animation as 2C.
|
| Aerial
|
Damage
|
Red Damage
|
Proration
|
Cancel
|
Guard
|
| 500 (345)
|
198
|
50%
|
-
|
HA
|
| First Active
|
Active
|
Recovery
|
Frame Adv
|
Circuit
|
Invuln
|
| 9
|
4
|
-
|
-
|
3.5%
|
-
|
|
Hisui: Same animation as C-Moon j.B.
Kohaku: Same animation as j.B.
|
|
|
|
| Neutral
|
Damage
|
Red Damage
|
Proration
|
Cancel
|
Guard
|
| 500
|
192
|
50%
|
-
|
LHA
|
| First Active
|
Active
|
Recovery
|
Frame Adv
|
Circuit
|
Invuln
|
| 26
|
4
|
19
|
-5
|
0.0%
|
Clash 1-10
|
| (Clash)
|
Damage
|
Red Damage
|
Proration
|
Cancel
|
Guard
|
| 500
|
192
|
50%
|
-
|
LHA
|
| First Active
|
Active
|
Recovery
|
Frame Adv
|
Circuit
|
Invuln
|
| 8
|
4
|
19
|
-5
|
0.0%
|
Strike 1-7
|
|
Hisui: Performs her 5B as a shield bunker.
Kohaku: Flaming battou swipe.
|
| Blockstun
|
Damage
|
Red Damage
|
Proration
|
Cancel
|
Guard
|
| 0
|
0
|
100%
|
-
|
LHA
|
| First Active
|
Active
|
Recovery
|
Frame Adv
|
Circuit
|
Invuln
|
| 19
|
3
|
22
|
-7
|
-100.0%
|
-
|
|
H-Moon specific reversal bunker.
|
|
|
|
| Ground
|
Damage
|
Red Damage
|
Proration
|
Cancel
|
Guard
|
| 100
|
0
|
100%
|
-
|
U
|
| First Active
|
Active
|
Recovery
|
Frame Adv
|
Circuit
|
Invuln
|
| 11
|
10
|
20
|
-
|
removes all
|
Full 1-39
|
| Air
|
Damage
|
Red Damage
|
Proration
|
Cancel
|
Guard
|
| 100
|
0
|
100%
|
-
|
U
|
| First Active
|
Active
|
Recovery
|
Frame Adv
|
Circuit
|
Invuln
|
| 12
|
10
|
15
|
-
|
removes all
|
Strike 1-30
|
|
Universal burst mechanic. Unlike Crescent/Full Heat activation, the hitbox and frame data doesn't vary between characters. However, you can be thrown out of this move if you input it in the air.
|
|
Special Moves
|
|
| Damage
|
Red Damage
|
Proration
|
Cancel
|
Guard
|
| -
|
-
|
-
|
-
|
-
|
| First Active
|
Active
|
Recovery
|
Frame Adv
|
Circuit
|
Invuln
|
| -
|
-
|
~20 (min)
|
-
|
-
|
-
|
|
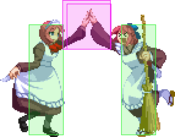
Tags in the other sister.
|
|
Hisui Specials
A/B A/B A followup A followup B followup B followup EX EX
|
| A
|
Damage
|
Red Damage
|
Proration
|
Cancel
|
Guard
|
| 320*6, 600 (2257)
|
(843)
|
100%
|
-CH-, -EX-
|
LHA (1-6), LH (7)
|
| First Active
|
Active
|
Recovery
|
Frame Adv
|
Circuit
|
Invuln
|
| 9
|
18 (9) 3
|
19
|
-4
|
1.4%*6, 2.8% (11.2%)
|
-
|
- Ladlepokes, aka yayaya. Hisui pokes forwards with her ladle several times and then does a followup attack. For both the A and B versions, the followup can be accessed immediately by repeating the input.
The followup strike gives a hard knockdown. Can be relatively safe because of pushback, though this depends on spacing.
|
| B
|
Damage
|
Red Damage
|
Proration
|
Cancel
|
Guard
|
| 250*9, 600 (2396)
|
(1032)
|
100%*6, 70% (O)
|
-CH-, -EX-, (J)
|
LHA (1-9), LH (10)
|
| First Active
|
Active
|
Recovery
|
Frame Adv
|
Circuit
|
Invuln
|
| 13
|
27 (7) 4
|
19
|
-8
|
0.84%*9, 2.8% (10.36%)
|
-
|
|
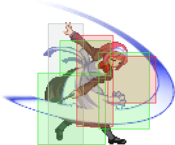
The followup strike launches and can be followed up with j.[C]. Usually used on far 2C confirms. Can catch backdashes.
|
| EX
|
Damage
|
Red Damage
|
Proration
|
Cancel
|
Guard
|
| 200*12, 600 (2358)
|
(1668)
|
100%, 75% (O)
|
-
|
LHA
|
| First Active
|
Active
|
Recovery
|
Frame Adv
|
Circuit
|
Invuln
|
| 2+6
|
44 (7) 4
|
24
|
-16
|
-100.0%
|
Full 1-5
|
|
OTGs and also stops time for a moment when activated, allowing it to connect very quickly. Gives an untechable launch which can be followed up with <code2C into a hard knockdown via 623A or 6C~6C. Uses 100% meter.
|
|
|
|
| A
|
Damage
|
Red Damage
|
Proration
|
Cancel
|
Guard
|
| 650*2 (1279)
|
(567)
|
100%
|
EX
|
LH
|
| First Active
|
Active
|
Recovery
|
Frame Adv
|
Circuit
|
Invuln
|
| 12
|
2 (9) 4
|
10
|
-4
|
3.5%*2 (7.0%)
|
-
|
|
Air unblockable dust cloud in front of Hisui. Has very solid range and knocks down on hit. You have time to set up a bento or a stool after this hits.
|
| B
|
Damage
|
Red Damage
|
Proration
|
Cancel
|
Guard
|
| 1000
|
576
|
70% (O)
|
EX
|
LH
|
| First Active
|
Active
|
Recovery
|
Frame Adv
|
Circuit
|
Invuln
|
| 11
|
2 (8) 4
|
17
|
-19, -9
|
7.0%
|
High 1-32
|
|
Upwards dust, also air unblockable but does not give a hard knockdown like the A version does. This move is a very strong anti-air if you can get it out. Don't whiff it though. Head hurtbox is removed during the move.
|
| EX
|
Damage
|
Red Damage
|
Proration
|
Cancel
|
Guard
|
| 500*N
|
480*N
|
80% (M)
|
-
|
LHA
|
| First Active
|
Active
|
Recovery
|
Frame Adv
|
Circuit
|
Invuln
|
| 1+2
|
152
|
1+31
|
-2 (min)
|
-100.0%
|
Full 1
|
|
Creates a dust cloud which slowly glides forwards, hitting up to four times. Useful in pressure and getting out of pressure. Uses 100% meter. Opponents might get block stuck in the cloud, and can be hit out of it by ground moves.
|
|
A A B B C C
|
| A
|
Damage
|
Red Damage
|
Proration
|
Cancel
|
Guard
|
| 280*8 (1724)
|
(761)
|
-4%*8
|
-
|
LHA
|
| First Active
|
Active
|
Recovery
|
Frame Adv
|
Circuit
|
Invuln
|
| 112
|
32
|
59
|
-
|
2.1%*8 (16.8%)
|
-
|
|
Hisui commands Kohaku to perform one of her moves.
B Plant assist.
|
| B
|
Damage
|
Red Damage
|
Proration
|
Cancel
|
Guard
|
| 600*3 (1743)
|
(837)
|
100%*2, 80% (O)
|
-
|
LHA
|
| First Active
|
Active
|
Recovery
|
Frame Adv
|
Circuit
|
Invuln
|
| 73 ~ 74
|
2 (2) 2 (2) 8
|
47
|
-
|
4.2%*3 (12.6%)
|
-
|
|
214 assist.
|
| C
|
Damage
|
Red Damage
|
Proration
|
Cancel
|
Guard
|
| 350, 600, 1000 (1458)
|
(957)
|
78% (O), 90% (M), 60% (O)
|
-
|
LH
|
| First Active
|
Active
|
Recovery
|
Frame Adv
|
Circuit
|
Invuln
|
| 30
|
4 (6) 4 (8) 4
|
47
|
-
|
2.45%, 4.2%, 7.0% (13.65%)
|
-
|
|
5A6AA assist.
|
|
Same assist hitboxes as grounded version. Same assist hitboxes as grounded version.
|
| A
|
Damage
|
Red Damage
|
Proration
|
Cancel
|
Guard
|
| 280*8 (1724)
|
(782)
|
-4%*8
|
-
|
LHA
|
| First Active
|
Active
|
Recovery
|
Frame Adv
|
Circuit
|
Invuln
|
| 112
|
32
|
14
|
-
|
3.0%*8 (24.0%)
|
-
|
| B
|
Damage
|
Red Damage
|
Proration
|
Cancel
|
Guard
|
| 600*3 (1743)
|
(853)
|
100%*2, 80% (O)
|
-
|
LHA
|
| First Active
|
Active
|
Recovery
|
Frame Adv
|
Circuit
|
Invuln
|
| 73 ~ 74
|
2 (2) 2 (2) 8
|
14
|
-
|
6.0%*3 (18.0%)
|
-
|
| C
|
Damage
|
Red Damage
|
Proration
|
Cancel
|
Guard
|
| 350, 600, 1000 (1458)
|
(957)
|
78% (O), 90% (M), 60% (O)
|
-
|
LH
|
| First Active
|
Active
|
Recovery
|
Frame Adv
|
Circuit
|
Invuln
|
| 30
|
4 (6) 4 (8) 4
|
14
|
-
|
2.45%, 4.2%, 7.0% (13.65%)
|
-
|
|
Aerial Kohaku assist series. Identical to the grounded version.
|
|
|
|
A/B
(Explosion)
|
Damage
|
Red Damage
|
Proration
|
Cancel
|
Guard
|
| 600
|
384
|
50% (O)
|
-
|
LH
|
| First Active
|
Active
|
Recovery
|
Frame Adv
|
Circuit
|
Invuln
|
92
9/93
|
180
2
|
50
|
-
|
5.6%
|
-
|
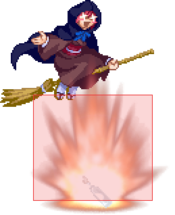
- Item set. Most typically used for okizeme.
A:Close bento. Hisui pulls out a tablecloth and sets a plum sandwhich bento on it, which will explode when stood upon. Launches on hit.
B: Far bento. Like the A version, but the cloth travels further along the ground.
|
| C
|
Damage
|
Red Damage
|
Proration
|
Cancel
|
Guard
|
| -
|
-
|
-
|
-
|
-
|
| First Active
|
Active
|
Recovery
|
Frame Adv
|
Circuit
|
Invuln
|
| 35
|
300
|
41
|
-
|
1.4%
|
Clash
(While Active)
|
|
Hisui pulls out a stool which will clash any one attack that touches it, keeping you safe and allowing you to punish with a combo of your choice. You can have two stools set up at once. Does not cost meter.
|
|
|
|
| 6C
|
Damage
|
Red Damage
|
Proration
|
Cancel
|
Guard
|
| 750
|
480
|
75% (O)
|
N, SP, -CH-, EX, (J)
|
LH
|
| First Active
|
Active
|
Recovery
|
Frame Adv
|
Circuit
|
Invuln
|
| 15
|
3
|
21
|
-6
|
4.9%
|
-
|
|
Upward pan strike.
|
| 6C~6C
|
Damage
|
Red Damage
|
Proration
|
Cancel
|
Guard
|
| 600
|
384
|
100%
|
-CH-
|
LH
|
| First Active
|
Active
|
Recovery
|
Frame Adv
|
Circuit
|
Invuln
|
| 13
|
4
|
20
|
-6
|
4.2%
|
-
|
| 6C~6[C]
|
Damage
|
Red Damage
|
Proration
|
Cancel
|
Guard
|
| 1200
|
768
|
100%
|
-CH-
|
H
|
| First Active
|
Active
|
Recovery
|
Frame Adv
|
Circuit
|
Invuln
|
| 24
|
4
|
20
|
-6
|
7.0%
|
-
|
|
Second 6C can be held for overhead.
|
| 6C~6C/6[C]~236C
|
Damage
|
Red Damage
|
Proration
|
Cancel
|
Guard
|
| 800
|
672
|
50% (O)
|
-
|
LH
|
| First Active
|
Active
|
Recovery
|
Frame Adv
|
Circuit
|
Invuln
|
| 14
|
6
|
21
|
-9
|
4.2%
|
-
|
|
Follow up after 6CC or 6C[C].
|
|
Kohaku Specials
A A [A] [A] B B [B] [B] A/[A]~A A/[A]~A B/[B]~A B/[B]~A ~B ~B ~C ~C EX EX
|
| A
|
Damage
|
Red Damage
|
Proration
|
Cancel
|
Guard
|
| 1000
|
643
|
96% (M)
|
(SP)*, -CH-, -EX-
|
LHA
|
| First Active
|
Active
|
Recovery
|
Frame Adv
|
Circuit
|
Invuln
|
| 8
|
2
|
29
|
-13
|
7.0%
|
Clash 4-5
|
| [A]
|
Damage
|
Red Damage
|
Proration
|
Cancel
|
Guard
|
| 1500
|
931
|
60% (O)
|
-CH-, -EX-
|
HA
|
| First Active
|
Active
|
Recovery
|
Frame Adv
|
Circuit
|
Invuln
|
| 29
|
2
|
44
|
-28
|
7.0%
|
-
|
|
Low slash. Charged version knocks down and is an overhead. Uncharged version can cancel into 236B on hit.
|
| B
|
Damage
|
Red Damage
|
Proration
|
Cancel
|
Guard
|
| 1000
|
643
|
70% (O)
|
-CH-, -EX-, (J)
|
LHA*
|
| First Active
|
Active
|
Recovery
|
Frame Adv
|
Circuit
|
Invuln
|
| 9
|
4
|
44
|
-24
|
2.1%
|
Clash 4-5
|
| [B]
|
Damage
|
Red Damage
|
Proration
|
Cancel
|
Guard
|
| 1200
|
960
|
70% (O)
|
-CH-, -EX-
|
LH
|
| First Active
|
Active
|
Recovery
|
Frame Adv
|
Circuit
|
Invuln
|
| 26
|
4
|
44
|
-24
|
7.0%
|
-
|
|
High slash. Charged version wallslams and is air-unblockable. Unlike Crescent, can't jump-cancel on hit.
|
| A/[A]~A
|
Damage
|
Red Damage
|
Proration
|
Cancel
|
Guard
|
| 800
|
288
|
70% (O)
|
-
|
LH*
|
| First Active
|
Active
|
Recovery
|
Frame Adv
|
Circuit
|
Invuln
|
| 13
|
4
|
28
|
-18 ~ -17
|
5.6%
|
-
|
| B/[B]~A
|
Damage
|
Red Damage
|
Proration
|
Cancel
|
Guard
|
| 800
|
288
|
85% (M)
|
-
|
LH
|
| First Active
|
Active
|
Recovery
|
Frame Adv
|
Circuit
|
Invuln
|
| 13
|
10
|
40
|
-38
|
2.1%
|
-
|
| ~B
|
Damage
|
Red Damage
|
Proration
|
Cancel
|
Guard
|
| -
|
-
|
-
|
-
|
-
|
| First Active
|
Active
|
Recovery
|
Frame Adv
|
Circuit
|
Invuln
|
| -
|
-
|
35
|
-
|
-
|
-
|
| ~C
|
Damage
|
Red Damage
|
Proration
|
Cancel
|
Guard
|
| -
|
-
|
-
|
-
|
-
|
| First Active
|
Active
|
Recovery
|
Frame Adv
|
Circuit
|
Invuln
|
| -
|
-
|
18
|
-
|
-
|
-
|
|
For non-EX versions, any of these can be used on hit, whiff, or block:
- Pressing A will do a follow-up attack, launching the opponent. Will launch behind Kohaku if done from A slash, and upwards if done from B slash.
- Pressing B will do a follow-up roll.
- Pressing C during startup will cancel the attack.
|
| EX
|
Damage
|
Red Damage
|
Proration
|
Cancel
|
Guard
|
| 2000
|
1536
|
100%
|
-
|
LH
|
| First Active
|
Active
|
Recovery
|
Frame Adv
|
Circuit
|
Invuln
|
| 4+6
|
1
|
55
|
-38
|
-100.0%
|
Full 1-7
|
|
Low slash. Untechable launch.
|
|
|
|
| A
|
Damage
|
Red Damage
|
Proration
|
Cancel
|
Guard
|
| -
|
-
|
-
|
-
|
-
|
| First Active
|
Active
|
Recovery
|
Frame Adv
|
Circuit
|
Invuln
|
| -
|
-
|
38
|
-
|
-
|
Strike 8-13
|
|
A command airdash. Has frames where Kohaku is hit invincible but can be airthrown.
|
| B
|
Damage
|
Red Damage
|
Proration
|
Cancel
|
Guard
|
| -
|
-
|
-
|
-
|
-
|
| First Active
|
Active
|
Recovery
|
Frame Adv
|
Circuit
|
Invuln
|
| -
|
-
|
52
|
-
|
-
|
Strike 11-28
|
|
B version goes about double the distance.
|
| EX
|
Damage
|
Red Damage
|
Proration
|
Cancel
|
Guard
|
| 400*6 (1992)
|
(1433)
|
100%
|
(J)
|
LHA
|
| First Active
|
Active
|
Recovery
|
Frame Adv
|
Circuit
|
Invuln
|
| 1+4
|
12
|
11
|
-
|
-100.0%
|
Strike 1-4
|
|
A damaging A version. Jump-cancelable on hit and cancels into air throw.
|
|
A A B B C C
|
| A
|
Damage
|
Red Damage
|
Proration
|
Cancel
|
Guard
|
| 600
|
384
|
70% (O)
|
-
|
LH
|
| First Active
|
Active
|
Recovery
|
Frame Adv
|
Circuit
|
Invuln
|
14
(min)
|
4
|
54
|
-14
|
3.5%
|
Clash 11-12, 15-18*
|
|
Kohaku commands Hisui to perform one of her moves. A/B versions make Hisui dash toward the opponent before attacking.
5B assist. Air unblockable and wallslams on hit.
|
| B
|
Damage
|
Red Damage
|
Proration
|
Cancel
|
Guard
|
| 800*2 (1342)
|
(805)
|
70% (O)
|
-
|
LHA
|
| First Active
|
Active
|
Recovery
|
Frame Adv
|
Circuit
|
Invuln
|
13
(min)
|
8
|
55
|
-2
|
5.6%*2 (11.2%)
|
-
|
|
5C assist.
|
| C
|
Damage
|
Red Damage
|
Proration
|
Cancel
|
Guard
|
| 300, 600, 1000 (1724)
|
(1212)
|
100%, 90% (M), 60% (O)
|
-
|
LH
|
| First Active
|
Active
|
Recovery
|
Frame Adv
|
Circuit
|
Invuln
|
| 7
|
3 (4) 4 (5) 7
|
56
|
-
|
2.1%, 4.2%, 7.0% (13.3%)
|
-
|
|
5A6AA assist.
|
|
A A All other versions are the same. All other versions are the same.
|
| A
|
Damage
|
Red Damage
|
Proration
|
Cancel
|
Guard
|
| 600
|
392
|
70% (O)
|
-
|
LH
|
| First Active
|
Active
|
Recovery
|
Frame Adv
|
Circuit
|
Invuln
|
22
(min)
|
4
|
14
|
-
|
5.0%
|
-
|
| B
|
Damage
|
Red Damage
|
Proration
|
Cancel
|
Guard
|
| 800*2 (1342)
|
(821)
|
70% (O)
|
-
|
LHA
|
| First Active
|
Active
|
Recovery
|
Frame Adv
|
Circuit
|
Invuln
|
25
(min)
|
8
|
14
|
-
|
8.0%*2 (16.0%)
|
-
|
| C
|
Damage
|
Red Damage
|
Proration
|
Cancel
|
Guard
|
| 300, 600, 1000 (1724)
|
(1212)
|
100%, 90% (M), 60% (O)
|
-
|
LH
|
| First Active
|
Active
|
Recovery
|
Frame Adv
|
Circuit
|
Invuln
|
| 16
|
3 (4) 4 (5) 7
|
14
|
-
|
2.1%, 4.2%, 7.0% (13.3%)
|
-
|
|
Aerial Hisui assist series. Takes a bit more time for the assist to come out, and A version doesn't have clash frames anymore.
|
|
|
|
| A
|
Damage
|
Red Damage
|
Proration
|
Cancel
|
Guard
|
| 600
|
576
|
100%
|
-
|
LHA
|
| First Active
|
Active
|
Recovery
|
Frame Adv
|
Circuit
|
Invuln
|
| 65
|
2
|
47
|
-
|
4.2%
|
-
|
|
Kohaku screams kyaah and drops a bomb that goes off as soon as it hits the ground.
|
| B
|
Damage
|
Red Damage
|
Proration
|
Cancel
|
Guard
|
| 600
|
384/576
|
70% (O)/100%
|
-
|
LHA
|
| First Active
|
Active
|
Recovery
|
Frame Adv
|
Circuit
|
Invuln
|
| 46
|
618*
|
49
|
-
|
4.2%
|
-
|
|
Kohaku drops a bomb that doesn't go off unless it's hit into the air and then comes into contact with the ground. If it hasn't exploded within 10-11 seconds, it disappears. The bomb can only be hit by the player's attacks, and can be hit multiple times while it's in the air. If the bomb in motion hits the opponent, it does 600 base damage (70% proration) and launches. Hitting the opponent does not change its trajectory.
|
| EX
|
Damage
|
Red Damage
|
Proration
|
Cancel
|
Guard
|
| 2500
|
1920
|
100%
|
-
|
U
|
| First Active
|
Active
|
Recovery
|
Frame Adv
|
Circuit
|
Invuln
|
| 7+494
|
2
|
35
|
-
|
-100.0%
|
-
|
|
Kohaku drops a huge bomb with a 3-count timer (about two seconds per count, or six seconds total). Once the timer reaches 0 the bomb goes off with an unblockable blast that can hit Kohaku as well. Notably unlike the B version:
- Both players can hit it.
- Can only be hit when it's on the ground.
- Damages both players.
- Does not do damage if it's knocked into the opponent.
|
|
Arc Drives
|
|
| Hisui
|
Damage
|
Red Damage
|
Proration
|
Cancel
|
Guard
|
| 8080 (4837)
|
(2971)
|
100%
|
-
|
LHA
|
| First Active
|
Active
|
Recovery
|
Frame Adv
|
Circuit
|
Invuln
|
| 2+4
|
4
|
29
|
-15
|
removes all
|
Full 1-9
|
| Kohaku
|
Damage
|
Red Damage
|
Proration
|
Cancel
|
Guard
|
| 7680 (4589)
|
(3079)
|
100%
|
-
|
LHA
|
| First Active
|
Active
|
Recovery
|
Frame Adv
|
Circuit
|
Invuln
|
| 2+5
|
4
|
22
|
-8
|
removes all
|
Full 1-10
|
|
Hitgrab-type Arc Drive, follows up into fast series of attacks from both maids, finishing in the assisting maid's air throw. Ends in a knockdown that's untechable if done as Hisui lead, and ground techable as Kohaku Lead.
|
|
Uncharged Uncharged Fully Charged Fully Charged
|
| (Min. Charge)
|
Damage
|
Red Damage
|
Proration
|
Cancel
|
Guard
|
| 1000*3 (2629)
|
(2526)
|
90% (M)*3
|
-
|
LH
|
| First Active
|
Active
|
Recovery
|
Frame Adv
|
Circuit
|
Invuln
|
| 3+1+2
|
X
|
25
|
27
|
removes all
|
Full 1-24
|
| (Max. Charge)
|
Damage
|
Red Damage
|
Proration
|
Cancel
|
Guard
|
| 800*8 (4668)
|
(3325)
|
95% (M)*8
|
-
|
LH
|
| First Active
|
Active
|
Recovery
|
Frame Adv
|
Circuit
|
Invuln
|
| 3+378+379
|
X
|
25
|
92
|
removes all
|
Full 1-3, 375-398
|
|
Hisui charges up and delivers a dashing blow through the opponent. If the C button is held, Hisui delays her invulnerable blast of energy, which grants the projectile more hits once it is released.
|
|
|
|
Ground
Air
|
Damage
|
Red Damage
|
Proration
|
Cancel
|
Guard
|
| 1200*2, 1600 (3682)
|
(2573)
|
100%
|
-
|
LH
|
| First Active
|
Active
|
Recovery
|
Frame Adv
|
Circuit
|
Invuln
|
36+48 (min)
30+48 (min)
|
6 (11) 3 (35) 4
|
36+38
3
|
-
|
removes all
|
-
|
|
Hisui commands Kohaku to perform her Arc Drive. Unlike the solo version, this one doesn't function like a dashing command grab and instead Kohaku automatically performs a blockable 3-hit sequence when coming in contact with the opponent. Wallslam into ground-techable knockdown on hit.
|
|
|
|
| Damage
|
Red Damage
|
Proration
|
Cancel
|
Guard
|
| 4700 (2176)
|
(842)
|
50% (O)
|
-
|
U
(Whiffs vs Air.)
|
| First Active
|
Active
|
Recovery
|
Frame Adv
|
Circuit
|
Invuln
|
| 2+15
|
X
|
Knockdown*
|
-
|
removes all
|
Full
|
|
Kohaku dashes forward at high speed and goes into a 3-hit sequence that circuit breaks and knocks the opponent down. This is an unblockable that can only be evaded jumping. If this misses, Kohaku will hit the wall and be in an untechable knockdown state that allows for the opponent to OTG you.
|
|
|
|
Ground
Air
|
Damage
|
Red Damage
|
Proration
|
Cancel
|
Guard
|
| 1000*3 (2629)
|
(2526)
|
90% (M)*3
|
-
|
LH
|
| First Active
|
Active
|
Recovery
|
Frame Adv
|
Circuit
|
Invuln
|
6+7
15+8
|
X
|
6+40
2
|
-
|
removes all
|
-
|
|
Kohaku commands Hisui to perform her Arc Drive. About the same as the solo version, but cannot be charged.
|
|
MBAACC Navigation
