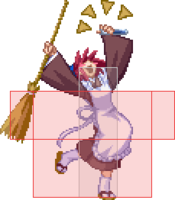
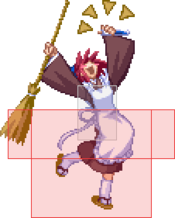
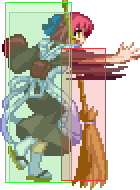
Character Page Progress
This page is still a work in progress, consider joining as an editor to help expand it. Please update this character's roadmap page when one of the editing goals have been reached.
| In Progress |
To-do
|
- Combos:
- Add damage, meter gain/given numbers and video links to pre-existing combos.
- Move Descriptions:
- Expand upon to the shorter descriptions, cite their uses, add captions where helpful, etc.
- Overview/General Gameplan:
- Improve the descriptions of how to play the character with more advanced concepts and any missing fundamental tools.
|
- Additional Ressources/Players to watch/ask
- Add any external links to ressources such as video guides or articles.
- If you know any players in particular that can be helpful for learning this character, please add them with, if possible a way to contact them (such as a Discord handle) and a name that can be searched in the match video database.
|
Additional Resources
H-Kohaku Match Video Database
H-Kohaku Melty Bread Forum Thread
Notable Players
| Name |
Color
|
Region |
Common Venues |
Status |
Details
|
| LordKnight |

|
North America |
Korewamelty |
Inactive |
|
Omla
(Omla#4930) |

|
North America |
Netplay |
Active |
Found in Melty Blood Main Server and Melty Blood Community Server. Up for all questions and techs about H-Kohaku when pinged at any time.
|
Overview
Playstyle
 H-Kohaku is a grappler. Best one in the game, arguably. H-Kohaku is a grappler. Best one in the game, arguably. |
| Pros |
Cons |
- Amazing space control: Has the infamous Kohaku buttons allowing for great space coverage and denial on defense, and amazing reach and rushdown potential on offense.
- Extremely consistent damage : Every raw hit she lands leads into 2k at minimum, often averaging around 4.3k
- Strong pressure and amazing setplay: Large buttons and strong rebeat pressure give her some of the most threatening strike/throw in the game
- Loopable unblockables from command grab: 63214C leads into a chunky combo into 22A/C setplay that loops into itself multiple times with many variations, allowing her to snowball very hard.
|
- Half-Moon('s lack of) defensive mechanics: No EX-Guard and poor shield mechanics makes defense an uphill battle, and makes H-Kohaku prone to getting snowballed herself despite her above average guts.
|
General Gameplan
(The following statements are meant as starting points for newer players. This section still needs to be cleaned up and improved upon)
Half Moon Kohaku is a character with many gimmicky tools, high damage, and a devastating command grab to get it. Bombs cover difficult angles in neutral, and the classic Kohaku normals provide you excellent range in both neutral and pressure. Unlike C-Kohaku, who focuses on more complex setplay, H-Kohaku makes use of her stronger command grab and simpler okizeme that still lends well to landing it.
Neutral
Kohaku has extremely strong air buttons in jB (air to air) and jC (air to ground), as well ground normals that cover a lot of space (2C, 5B/5[B]) and serviceable anti airs (5B/5[B] again, 5A).
22B bombs control a lot of space once launched, but are difficult to set against aggressive opponents.
You generally have the tools in neutral to be wherever your opponent doesn't want you, be it in the air controlling space, dashing under jump ins to counter hit with 5A, or using large grounded normals to poke in conjunction with 22B bombs locking down the air.
Pressure
Kohaku's huge normals allow her to pressure from outside of the opponent's usual attack range, as well as catch jump outs up close.
Both jabs leave you 0 on block allowing you to go for a reset or throw.
Kohaku's 236A~C feint can be used in pressure in lieu of reverse beat whiffing, though it is not as advantageous. 2B has a clash hitbox that allows it to bait and beat out Heat activations.
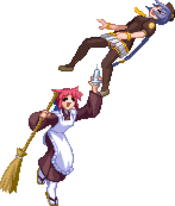
Your command grab is the best in the game. It is your goal as H-Kohaku to either make your opponent scared of it and get themselves hit, or to throw them into oblivion with looping throw okizeme. Always be ready to represent the command grab if an opponent isn't scrambling.
Okizeme
Bombs are the bread and butter of your basic knockdown situations. Drop a 22A early to make it whiff so you can throw them. Drop it late and throw them at the same time for slightly more damage. Use it as an unshieldable meaty. Very strong and simple tool when you can get it on them. Air throw enders leave you very far away, preventing you from setting this up.
Defense
Good news: You have a metered reversal. Bad news: You're Half Moon.
With meter you have 623C (which is very fast) and Shield Bunker to escape bad situations. Without it, you'll just have to tough it out and block or take a risk using tricky options like j236X, Half Moon's dodge (which for Kohaku is a roll that moves forward with somewhat lengthy recovery), or some good ol' fashion mashing. 5A and 2A are very good jabs, but your defensive options are nothing impressive.
Combos
| Combo Notation Help
|
Disclaimer: Combos are written by various writers, so the actual notation used in pages can differ from the standard one.
For more information, see Glossary and Controls.
|
| X > Y
|
X input is cancelled into Y.
|
| X > delay Y
|
Must wait for a short period before cancelling X input into Y.
|
| X, Y
|
X input is linked into Y, meaning Y is done after X's recovery period.
|
| X+Y
|
Buttons X and Y must be input simultaneously.
|
| X/Y
|
Either the X or Y input can be used.
|
| X~Y
|
This notation has two meanings.
- Use attack X with Y follow-up input.
- Input X then within a few frames, input Y. Usually used for option selects.
|
| X(w)
|
X input must not hit the opponent (Whiff).
|
| j.X
|
X input is done in the air, implies a jump/jump cancel if the previous move was done from the ground.
Applies to all air chain sections:
- Assume a forward jump cancel if no direction is given.
- Air chains such as j.A > j.B > j.C can be shortened to j.ABC.
|
| sj.X
|
X input is done after a super jump. Notated as sj8.X and sj9.X for neutral and forward super jumps respectively.
|
| dj.X
|
X input is done after a double jump.
|
| sdj.X
|
X input is done after a double super jump.
|
| tk.X
|
Stands for Tiger Knee. X motion must be buffered before jumping, inputting the move as close to the ground as possible. (ex. tk.236A)
|
| (X)
|
X is optional. Typically the combo will be easier if omitted.
|
| [X]
|
Input X is held down. Also referred to as Blowback Edge (BE). Depending on the character, this can indicate that this button is held down and not released until indicated by the release notation.
|
| ]X[
|
Input X is released. Will only appear if a button is previously held down. This type of input is referred to as Negative Edge.
|
| {X}
|
Button X should only be held down briefly to get a partially charged version instead of the fully charged one.
|
| X(N)
|
Attack "X" should only hit N times.
|
| (XYZ)xN
|
XYZ string must be performed N times. Combos using this notation are usually referred to as loops.
|
| (XYZ^)
|
A pre-existing combo labelled XYZ is inserted here for shortening purposes.
|
| CH
|
The first attack must be a Counter Hit.
|
| Air CH
|
The first attack must be a Counter Hit on an airborne opponent.
|
| 66
|
Performs a ground forward dash.
|
| j.66
|
Performs an aerial forward dash, used as a cancel for certain characters' air strings.
|
| IAD/IABD
|
Performs an Instant AirDash.
|
| AT
|
Performs an Air Throw. (j.6/4A+D)
|
| IH
|
Performs an Initiative Heat.
|
| AD
|
Performs an Arc Drive.
|
| AAD
|
Performs an Another Arc Drive.
|
This page is a translation from the French wiki BasGrosPoing. Original can be seen here.
Normal Combos
| Condition
|
Notation
|
Damage
vs V.Sion
|
Notes
|
|
| Normal starter, grounded opponent
|
- 2A > 2B(1) > 5C(1) > 2C > 623A > j.[C]B > sdj.BC > AT
|
4367
|
|
| Meter Gained: 42.7 |
Meter Given (vs C-Moon): 19.4 |
(Video) |
| Basic BnB. |
|
|
| Normal starter, grounded opponent
|
- 2A > 2B(1) > 5C(1) > 5A6AA > 2C/2[C] > 623A > j.[C]B > sdj.BC > AT
|
4862
|
|
| Meter Gained: 56.3 |
Meter Given (vs C-Moon): 25.2 |
(Video) |
| 2C needs good timing, while 2[C] is easier but deals less damage. 5A will whiff at max range but the combo still works. |
|
|
| Normal starter, grounded opponent
|
- 2A > 2B(1) > 5C(1) > 5A6AA > delay 2C > 236A > 236B~C, 2A > 2C > 5A(w)6AA > 623[A] > j.[C]B > sdj.BC > AT
|
5188
|
| |
| Meter Gained: 82.9 |
Meter Given (vs C-Moon): 38.5 |
| Optimized midscreen combo. |
|
|
| 63214C starter
|
- 63214C > 2A(w) > 5[B] > 5C(1) > 236A~B, 623A > j.[C]B > sdj.BC > AT
|
2837
|
|
| Meter Gained: 36 |
Meter Given (vs C-Moon): 24.4 |
(Video) |
| More consistent 63214C combo from anywhere but deals less damage. |
|
|
| 63214C starter
|
- 63214C > 2A(w) > 5[B] > 5C(1) > 2C > 5A(w)6AA > 623[A] > j.[C]B > sdj.BC > AT
|
???
|
| |
| Meter Gained: ??? |
Meter Given (vs C-Moon): ??? |
| Midscreen 63214C combo. |
|
|
| Aerial counterhit starter
|
- Air CH, 5C(1) > j.BC > j.BC > AT
|
Varies
|
| |
| Meter Gained: ??? |
Meter Given (vs C-Moon): ??? |
(Video) |
|
|
Corner Combos
| Condition
|
Notation
|
Damage
vs V.Sion
|
Notes
|
|
| Normal starter, grounded opponent
|
- 2A > 2B(1) > 5C(1) > 5A6AA > delay (Battou Loop #1/#2^)
|
???
|
???
|
|
| Normal starter, grounded opponent
|
- 5C > 2C > 2B(1) > (Battou Loop #1/#2^)
|
???
|
???
|
|
| 63214C starter
|
- 63214C > 2A(w) > 5[B] > 5C(1) > (Battou Loop #1/#2/#3^)
|
???
|
| |
| Meter Gained: ??? |
Meter Given (vs C-Moon): ??? |
| Corner only command grab combo. Against Warachia and Nero, add 5A after the first 5C(1) for easier combo, but not 236A. |
|
|
| Aerial counterhit starter
|
- Air CH, (2C >) 5C(1) > (Battou Loop #1/#2^)
|
???
|
???
|
|
Battou Loop Enders
| Condition
|
Notation
|
Damage
vs V.Sion
|
Notes
|
|
| #1
|
- ...(236A >) 236B~A, 2A/5A > 5C > 236B~A > 5A6A > 5[B] > 2B(1) > 5C > 623B
|
???
|
| |
| Meter Gained: ??? |
Meter Given (vs C-Moon): ??? |
| Gives an okizeme using 22A bomb. |
|
|
| #2
|
- ...(236A >) 236B~A, 2A/5A > 5C > 236B~A > 5A6A > 5[B] > 2B(1) > 5C(1) > 623A > j.[C]B > sdj.BC > AT
|
???
|
???
|
|
#3
100% meter
|
- ...(236A >) 236B~A, 2A/5A > 5C > 236B~A > 5AA > 5C > 236[B] > 22C, 5A > 5C > 2A(w), 5C > 236[B]~B > 5AAAAA > j.ABC > AT
|
???
|
| |
| Meter Gained: ??? |
Meter Given (vs C-Moon): ??? |
| Gives an unblockable setup thanks to the 22C explosion... but beware of not getting caught yourself. |
|
|
Move Descriptions
| Frame Data Help
|
| Header
|
Tooltip
|
| Move Box Colors
|
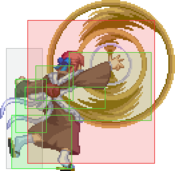
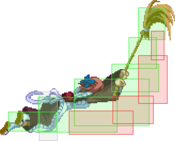
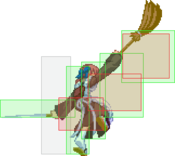
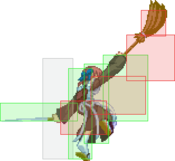
Light gray = Collision Box (A move lacking one means it can go through the opponent's own collision box).
Green: Hurt Boxes.
Red: Hit(/Grab) Boxes.
Yellow: Clash Boxes (When an active hitbox strikes a clash box, the active hitbox stops being active. Multi-hit attacks can beat clash since they will still progress to the next hitbox.)
Magenta: Projectile-reflecting boxes OR Non-hit attack trigger boxes (usually).
Blue: Reflectable Projectile Boxes.
|
| Damage
|
Base damage done by this attack.
(X) denotes combined and scaled damage tested against standing V. Sion.
|
| Red Damage
|
Damage done to the recoverable red health bar by this attack. The values are inherently scaled and tested against standing V. Sion.
(X) denotes combined damage.
|
| Proration
|
The correction value set by this attack and the way it modifies the scaling during a string. See this page for more details.
X% (O) means X% Overrides the previous correction value in a combo if X is of a lower percentage.
X% (M) means the current correction value in a combo will be Multiplied by X%. This can also be referred to as relative proration.
|
| Circuit
|
Meter gained by this attack on hit.
(X%) denotes combined meter gain.
-X% denotes a meter cost.
|
| Cancel
|
Actions this move can be cancelled into.
SE = Self cancelable.
N = Normal cancelable.
SP = Special cancelable.
CH = Cancelable into the next part of the same attack (Chain in case of specials).
EX = EX cancelable.
J = Jump cancelable.
(X) = Cancelable only on hit.
-X- = Cancelable on whiff.
|
| Guard
|
The way this move must be blocked.
L = Can block crouching
H = Can block standing.
A = Can block in the air.
U = Unblockable.
|
| Startup
|
Amount of frames that must pass prior to reaching the active frames. Also referred to as "True Startup".
|
| Active
|
The amount of frames that this move will have a hitbox.
(x) denotes frame gaps where there are no hitboxes is present. Due to varied blockstuns, (x) frames are difficult to use to determine punish windows. Generally the larger the numbers, the more time you have to punish.
X denotes active frames with a duration separate from its origin move's frame data, such as projectile attacks. In this case, the total length of the move is startup+recovery only.
|
| Recovery
|
Frames that this move has after the active frames if not canceled. The character goes into one frame where they can block but not act afterwards, which is not counted here.
|
| Advantage
|
The difference in frames where you can act before your opponent when this move is blocked (assuming the move isn't canceled and the first active frame is blocked).
If the opponent uses a move with startup that is at least 2 frames less than this move's negative advantage, it will result in the opponent hitting that move.
±x~±y denotes a range of possible advantages.
|
| Invul
|
Lists any defensive properties this move has.
X y~z denotes X property happening between the y to z frames of the animations. If no frames are noted, it means the invincibility lasts through the entire move.
Invicibility:
- Strike = Strike invincible.
- Throw = Throw invincible.
Hurtbox-Based Properties:
- Full = No hurtboxes are present.
- High = Upper body lacks a hurtbox.
- Low = Lower body lacks a hurtbox.
Miscellaneous Properties
- Clash = Frames in which clash boxes are active.
- Reflect = Frames in which projectile-reflecting boxes are active.
- Super Armor = Frames in which the character can take hits without going into hit stun.
|
Normal Moves
Standing Normals
|
|
| 5A
|
Damage
|
Red Damage
|
Proration
|
Cancel
|
Guard
|
| 350
|
163
|
78% (O)
|
-SE-, -N-, -SP-, -CH-, -EX-, (J)
|
LH
|
| First Active
|
Active
|
Recovery
|
Frame Adv
|
Circuit
|
Invuln
|
| 4
|
4
|
8
|
0
|
2.45%
|
-
|
|
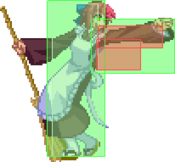
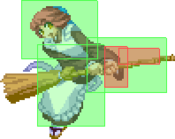
Extremely quick jab at 3 frames and has a tall enough hitbox to use for anti-airs. Unlike Crescent 5A, the close hitbox will hit all characters crouching, while the far hitbox will only hit characters with taller crouches like Tohno and Archetype. It should be noted that the close hitbox can still be low profiled relatively easily, so try to default to 2A for those purposes.
|
| 5A~6A
|
Damage
|
Red Damage
|
Proration
|
Cancel
|
Guard
|
| 600
|
384
|
80% (M)
|
N, SP, -CH-, EX, (J)
|
LH
|
| First Active
|
Active
|
Recovery
|
Frame Adv
|
Circuit
|
Invuln
|
| 8
|
4
|
16
|
-5
|
4.2%
|
-
|
|
Universal Half-Moon follow up to 5A. Used as combo/blockstring filler, or as a way to combo off of 2C/2[C] at specific spacings, allowing for midscreen to corner combos. Can also be used to space yourself for a command grab through the 5A~6A 624c setup.
|
| 5A~6A~6A
|
Damage
|
Red Damage
|
Proration
|
Cancel
|
Guard
|
| 1000
|
768
|
60% (O)
|
(N), SP, EX, (J)
|
LH
|
| First Active
|
Active
|
Recovery
|
Frame Adv
|
Circuit
|
Invuln
|
| 10
|
4
|
17
|
-3
|
7.0%
|
-
|
|
Third hit of the H-Moon 5A string. Launches on hit for easy air combos or into normals like 2[C]. Also combos into 236[B], allowing for midscreen to corner combos for stronger okizeme. Pushes decently far back on block.
|
|
Fly swatter - the move Fly swatter - the move Continue blocking, or else Continue blocking, or else
|
| 5B
|
Damage
|
Red Damage
|
Proration
|
Cancel
|
Guard
|
| 600
|
384
|
70% (O)
|
N, SP, EX, (J)
|
H (Whiffs vs Crouch.),
LH
|
| First Active
|
Active
|
Recovery
|
Frame Adv
|
Circuit
|
Invuln
|
| 9
|
5
|
14
|
-4 (vs Stand.)
-2 (vs Crouch.)
|
4.2%
|
-
|
|
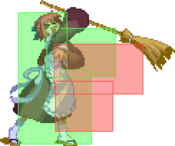
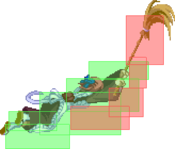
Kohaku swipes with the broom over her head. This antiair attack will trade or beat most jump in attacks provided you space it correctly, but the broom extends Kohaku's hurtbox making her particularly vulnerable to disjointed air to air attacks. It can also be used to halt jump out attempts when your opponent is in the corner. First hitbox whiffs on crouchers.
|
| 5[B]
|
Damage
|
Red Damage
|
Proration
|
Cancel
|
Guard
|
| 1000
|
672
|
70% (O)
|
N, SP, EX, (J)
|
LH
|
| First Active
|
Active
|
Recovery
|
Frame Adv
|
Circuit
|
Invuln
|
| 18
|
8
|
12
|
-5
|
7.0%
|
-
|
|
This looks the same as 5B but has a very different purpose. This is a very fast charge move that has a disjointed horizontal hitbox that's perfect for stuffing pokeout attempts in your blockstrings, and can even be spaced to safely meaty versus certain dps. Despite not being a hard knockdown, this move is very good at swatting your opponent trying to jump out of the corner, as even if they tech it Kohaku can punish very easily on reaction. Also used to knock people back to the ground for combo extensions after 5A6A and 624C.
|
|
It'd be a great poking tool, if , you know, it didn't do THAT. It'd be a great poking tool, if , you know, it didn't do THAT.
|
| Damage
|
Red Damage
|
Proration
|
Cancel
|
Guard
|
| 900, 150*3, 800 (2020)
|
(908)
|
100% (1-5), 60% (M)
|
N, SP, EX, (J)
|
LH (1), LHA
|
| First Active
|
Active
|
Recovery
|
Frame Adv
|
Circuit
|
Invuln
|
| 7
|
4 (8) 8
|
24
|
-26 ~ -8
|
3.5%*5 (17.5%)
|
Low 2-6
|
|
Oh God please don't whiff this. A fast long range poke that's even faster than Crescent's, but does Crescent's 5C follow up automatically on hit, block, and most infuriatingly, whiff. Due to this the first hit of the move needs to almost always be cancelled into something else, as the automatic follow up makes a nice habit of whiffing some of its hits on far away grounded opponents even if 5C's initial hit connected, leaving you unsafe on hit if you don't cancel it. Like Crescent, the first hit is very useful as a poke, combo filler (100% override proration makes this one of your best starters and combo filler moves), and to catch jump outs. If the full move plays out, it launches on hit for an easy air combo or 236[B] for corner carry and is unsafe on block unless feint canceled or reverse beat into 2A in which it then becomes +1.
|
|
Crouching Normals
Ol' Reliable Ol' Reliable
|
| Damage
|
Red Damage
|
Proration
|
Cancel
|
Guard
|
| 300
|
96
|
75% (O)
|
-SE-, -N-, -SP-, -EX-, (J)
|
L
|
| First Active
|
Active
|
Recovery
|
Frame Adv
|
Circuit
|
Invuln
|
| 4
|
4
|
8
|
0
|
2.1%
|
-
|
|
H-Kohaku has a very strong 2A. It can be done up to 2 times and still be in range for a command grab, amazing for reverse beat pressure, and is your best tool in close quarter scramble situations, due to its blazingly fast startup.
|
|
Nice heat you got there... It'd be a shame if I clashed it Nice heat you got there... It'd be a shame if I clashed it
|
| Damage
|
Red Damage
|
Proration
|
Cancel
|
Guard
|
| 500*2 (911)
|
(540)
|
85% (O)
|
N, SP, EX, (J)
|
LH, L
|
| First Active
|
Active
|
Recovery
|
Frame Adv
|
Circuit
|
Invuln
|
| 8
|
5 (3) 4
|
22
|
-19, -11
|
3.5%*2 (7.0%)
|
Clash 8-12
|
|
Crescent's 2B and 2B~B in one move. Serves as decent combo/blockstring filler, and like most Kohaku normals can catch jump outs pretty well. Less useful as an anti air and poke due to the automatic follow up, so whiffing is dangerous. The first hit is a mid with less range than you'd expect, while the second hit is a low. The first hit has a clash box, allowing you to option select heats with 2A 2B with relative ease, along with some shield counters as well.
|
|
"Nero-Be-Gone" "Nero-Be-Gone"
|
| 2C
|
Damage
|
Red Damage
|
Proration
|
Cancel
|
Guard
|
| 1100
|
672
|
60% (O)
|
N, SP, EX, (J)
|
L
|
| First Active
|
Active
|
Recovery
|
Frame Adv
|
Circuit
|
Invuln
|
| 10
|
4
|
24
|
-10
|
4.9%
|
-
|
|
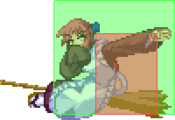
A long range literal sweep attack that hits low. Like Kohaku's other pokes, quite fast. This move can used as a low poke or to go under certain attacks and counter, as well as seeing quite a bit of use in juggle combos. On a stray hit you can cancel this into 236A~B for an OTG combo using 623A. One of your primary neutral tools, and understanding how it interacts with your oppoenents grounded moves is key to start abusing Kohaku's amazing neutral
|
| 2[C]
|
Damage
|
Red Damage
|
Proration
|
Cancel
|
Guard
|
| 1400
|
960
|
90% (M)
|
N, SP, EX, (J)
|
L
|
| First Active
|
Active
|
Recovery
|
Frame Adv
|
Circuit
|
Invuln
|
| 22
|
5
|
24
|
-11
|
8.4%
|
-
|
|
Charged version has a smaller hurtbox, and deals noticeably more damage in combos when not used after 5A6AA due to its 90% forced proration. Best starter for pure damage, and used primarily in pressure and block strings. Can also be used rarely in neutral to take better advantage of the low profile, but it has the same recovery as normal 2C with double the startup, making it even easier to whiff punish in neutral.
|
|
Aerial Normals
|
|
| Damage
|
Red Damage
|
Proration
|
Cancel
|
Guard
|
| 300
|
96
|
73% (O)
|
SE, N, SP, EX, J
|
LHA
|
| First Active
|
Active
|
Recovery
|
Frame Adv
|
Circuit
|
Invuln
|
| 5
|
4
|
10
|
-
|
2.1%
|
-
|
|
A broom handle poke in the air. This j.A is angled in such a way it's good for jumping in as well as air to air, although the crossup potential has been nerfed since PS2.
|
|
Ol' Faithful Ol' Faithful
|
| Damage
|
Red Damage
|
Proration
|
Cancel
|
Guard
|
| 680
|
384
|
90% (O)
|
N, SP, EX, J
|
HA
|
| First Active
|
Active
|
Recovery
|
Frame Adv
|
Circuit
|
Invuln
|
| 8
|
4
|
-
|
-
|
3.5%
|
-
|
|
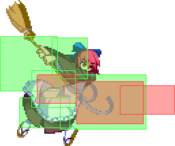
A blazingly fast upward broom swipe that has a truly staggering range. This is your mainstay air to air attack and one of the best at what it does. The broom tip does not have a hurtbox, so use this move to swat your opponent out of the sky when they are at that upward angle, but it's speed also allows it to be used as a instant air backdash overhead or just a move you can throw out on the way down when you don't have time to use j.C. Most of Kohaku's neutral game comes from calculated abuse of this move.
|
|
Your best landing button Your best landing button Swangin' on 'em Swangin' on 'em
|
| j.C
|
Damage
|
Red Damage
|
Proration
|
Cancel
|
Guard
|
| 900
|
576
|
90% (O)
|
N, SP, J
|
HA
|
| First Active
|
Active
|
Recovery
|
Frame Adv
|
Circuit
|
Invuln
|
| 10
|
4
|
-
|
-
|
6.3%
|
-
|
|
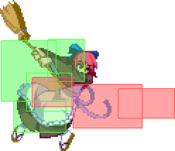
Kohaku sweeps her broom at a down-forward angle, hitting everything in front and below her. Can be used after a knockdown for an ambiguous crossup that will start some of your most damaging combos. Great aerial poke, and her best air-to-ground. Between this and jB, aerial opponents will struggle to get close to you no matter where they approach from.
|
| j.[C]
|
Damage
|
Red Damage
|
Proration
|
Cancel
|
Guard
|
| 1200
|
864
|
80% (O)
|
N, SP, EX, J
|
HA
|
| First Active
|
Active
|
Recovery
|
Frame Adv
|
Circuit
|
Invuln
|
| 19
|
4
|
-
|
-
|
8.4%
|
-
|
|
Disjointed charged version. Great for harassing from the air, as well as dealing more damage, and especially useful for fake outs into your command grab.
|
|
Universal Mechanics
|
|
| Damage
|
Red Damage
|
Proration
|
Cancel
|
Guard
|
| 1000
|
480
|
100%
|
-
|
U
|
| First Active
|
Active
|
Recovery
|
Frame Adv
|
Circuit
|
Invuln
|
| 3
|
1
|
20
|
-
|
0.0%
|
-
|
|
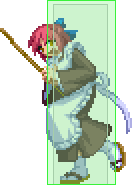
Syringe hit. Untechable knockdown. Leads to a three way on hit or 22A oki if the opponent is in the corner. Rarely used over 63214C, but it being 1 frame faster and needing no motion input makes it the go to at times.
|
|
|
|
| Damage
|
Red Damage
|
Proration
|
Cancel
|
Guard
|
| 1600 (Raw)/1300
|
576
|
30%
|
-
|
U
|
| First Active
|
Active
|
Recovery
|
Frame Adv
|
Circuit
|
Invuln
|
| 2
|
1
|
12
|
-
|
0.0%
|
-
|
|
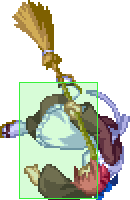
Ground bounces the opponnent using a 16-ton weight. Unfortunately leaves Kohaku very far away from the opponent when she lands, but she is still plus enough to dash up and still meaty a button. On gold airthrow, it must be whiff canceled with j.A in order to combo off of it so as to not suffer landing lag.
|
|
|
|
| Standing
|
Damage
|
Red Damage
|
Proration
|
Cancel
|
Guard
|
| 500 (345)
|
198
|
50%
|
(SP), (EX), (J)
|
LHA
|
| First Active
|
Active
|
Recovery
|
Frame Adv
|
Circuit
|
Invuln
|
| 9
|
4
|
18
|
-4
|
3.5%
|
-
|
|
Same animation as 5C. Sets up for a battou loop in a corner.
|
| Crouching
|
Damage
|
Red Damage
|
Proration
|
Cancel
|
Guard
|
| 1500 (1117)
|
714
|
50%
|
(SP), (EX)
|
LA
|
| First Active
|
Active
|
Recovery
|
Frame Adv
|
Circuit
|
Invuln
|
| 9
|
4
|
18
|
-4
|
10.5%
|
-
|
|
Same animation as 2C. Can be special cancelled into 623A to be comboed off of, making it one of the better low shield counters.
|
| Aerial
|
Damage
|
Red Damage
|
Proration
|
Cancel
|
Guard
|
| 500 (345)
|
198
|
50%
|
-
|
HA
|
| First Active
|
Active
|
Recovery
|
Frame Adv
|
Circuit
|
Invuln
|
| 9
|
4
|
-
|
-
|
3.5%
|
-
|
|
Same animation as j.B.
|
|
|
|
| Neutral
|
Damage
|
Red Damage
|
Proration
|
Cancel
|
Guard
|
| 500
|
192
|
50%
|
-
|
LHA
|
| First Active
|
Active
|
Recovery
|
Frame Adv
|
Circuit
|
Invuln
|
| 26
|
4
|
19
|
-5
|
0.0%
|
Clash 1-10
|
| (Clash)
|
Damage
|
Red Damage
|
Proration
|
Cancel
|
Guard
|
| 500
|
192
|
50%
|
-
|
LHA
|
| First Active
|
Active
|
Recovery
|
Frame Adv
|
Circuit
|
Invuln
|
| 8
|
4
|
19
|
-5
|
0.0%
|
Strike 1-7
|
|
Flaming battou swipe.
|
| Blockstun
|
Damage
|
Red Damage
|
Proration
|
Cancel
|
Guard
|
| 0
|
0
|
100%
|
-
|
LHA
|
| First Active
|
Active
|
Recovery
|
Frame Adv
|
Circuit
|
Invuln
|
| 19
|
3
|
22
|
-7
|
-100.0%
|
-
|
|
H-Moon specific reversal bunker. Outstanding range, making it one of the best ways to dump meter.
|
|
|
|
| Ground
|
Damage
|
Red Damage
|
Proration
|
Cancel
|
Guard
|
| 100
|
0
|
100%
|
-
|
U
|
| First Active
|
Active
|
Recovery
|
Frame Adv
|
Circuit
|
Invuln
|
| 11
|
10
|
20
|
-
|
removes all
|
Full 1-39
|
| Air
|
Damage
|
Red Damage
|
Proration
|
Cancel
|
Guard
|
| 100
|
0
|
100%
|
-
|
U
|
| First Active
|
Active
|
Recovery
|
Frame Adv
|
Circuit
|
Invuln
|
| 12
|
10
|
15
|
-
|
removes all
|
Strike 1-30
|
|
Universal burst mechanic. Unlike Crescent/Full Heat activation, the hitbox and frame data doesn't vary between characters. However, you can be thrown out of this move if you input it in the air.
|
|
Special Moves
Grounded Specials
A : Great combo tool/Ender A : Great combo tool/Ender [A] : Overhead [A] : Overhead B : Your purpose is to lead into 236B~A B : Your purpose is to lead into 236B~A [B] : Hard Callout Anti-Air [B] : Hard Callout Anti-Air A/[A]~A : Damage in a can A/[A]~A : Damage in a can B/[B]~A : What goes up, must come down B/[B]~A : What goes up, must come down ~B : Do a Barrel roll! ~B : Do a Barrel roll! ~C : Sometimes, doing nothing really is plus ~C : Sometimes, doing nothing really is plus EX : Meter dump with a side of oki EX : Meter dump with a side of oki
|
| A
|
Damage
|
Red Damage
|
Proration
|
Cancel
|
Guard
|
| 1000
|
643
|
96% (M)
|
(SP)*, -CH-, -EX-
|
LHA
|
| First Active
|
Active
|
Recovery
|
Frame Adv
|
Circuit
|
Invuln
|
| 8
|
2
|
29
|
-13
|
7.0%
|
Clash 4-5
|
| [A]
|
Damage
|
Red Damage
|
Proration
|
Cancel
|
Guard
|
| 1500
|
931
|
60% (O)
|
-CH-, -EX-
|
HA
|
| First Active
|
Active
|
Recovery
|
Frame Adv
|
Circuit
|
Invuln
|
| 29
|
2
|
44
|
-28
|
7.0%
|
-
|
|
Low slash that is hard knockdown on aerial oppoenents. Charged version knocks down standing oppoenents as well but is also an overhead, and can be comboed into 236C or 41236C for extra damage and a usable knockdown. Uncharged version can cancel into 236B on hit.
|
| B
|
Damage
|
Red Damage
|
Proration
|
Cancel
|
Guard
|
| 1000
|
643
|
70% (O)
|
-CH-, -EX-, (J)
|
LHA*
|
| First Active
|
Active
|
Recovery
|
Frame Adv
|
Circuit
|
Invuln
|
| 9
|
4
|
44
|
-24
|
2.1%
|
Clash 4-5
|
| [B]
|
Damage
|
Red Damage
|
Proration
|
Cancel
|
Guard
|
| 1200
|
960
|
70% (O)
|
-CH-, -EX-
|
LH
|
| First Active
|
Active
|
Recovery
|
Frame Adv
|
Circuit
|
Invuln
|
| 26
|
4
|
44
|
-24
|
7.0%
|
-
|
|
High slash. Uncharged is primarily used as a launcher that leads into 236B~A. Charged version wallslams, leads into a combo, and is air-unblockable. With these properties and it's amazing range, it's perfect for opponents who are attempting to jump out of the corner expecting 236[A]. Unlike Crescent, can't jump-cancel on hit.
|
| A/[A]~A
|
Damage
|
Red Damage
|
Proration
|
Cancel
|
Guard
|
| 800
|
288
|
70% (O)
|
-
|
LH*
|
| First Active
|
Active
|
Recovery
|
Frame Adv
|
Circuit
|
Invuln
|
| 13
|
4
|
28
|
-18 ~ -17
|
5.6%
|
-
|
|
Leads to a devastating combo on grounded foes, assuming you can perform the ~2f 2A link afterwards.
|
| B/[B]~A
|
Damage
|
Red Damage
|
Proration
|
Cancel
|
Guard
|
| 800
|
288
|
85% (M)
|
-
|
LH
|
| First Active
|
Active
|
Recovery
|
Frame Adv
|
Circuit
|
Invuln
|
| 13
|
10
|
40
|
-38
|
2.1%
|
-
|
|
Your primary launcher, and the main source of damage for Half-Moon Kohaku. Combos into 5A > 5C >236B~A , allowing you to loop this move in the corner, hence her infamous "battou loops".
|
| ~B
|
Damage
|
Red Damage
|
Proration
|
Cancel
|
Guard
|
| -
|
-
|
-
|
-
|
-
|
| First Active
|
Active
|
Recovery
|
Frame Adv
|
Circuit
|
Invuln
|
| -
|
-
|
35
|
-
|
-
|
-
|
|
Main way to follow up after 236A on aerial opponents (Doesnt increase proration, unlike using 236B~C). Can also be used on 236[A] or 236[B} whiff, allowing you to low profile attempts to punish.
|
| ~C
|
Damage
|
Red Damage
|
Proration
|
Cancel
|
Guard
|
| -
|
-
|
-
|
-
|
-
|
| First Active
|
Active
|
Recovery
|
Frame Adv
|
Circuit
|
Invuln
|
| -
|
-
|
18
|
-
|
-
|
-
|
|
One of H-Kohaku's best moves, this feint is one of the major aspects of your pressure and combo routing. Can be used to make the framedata of certain moves much better on block (listed below), and can also be done after 236A from 236B in order to link into 2A/5A, allowing for more damage from your basic midscreen starters, or even better corner carry. Important Feint frame data is listed below.
Important Frame Data Notes regarding Feint:
- 5A, 2A, and 5C(2-4) are -6 after feint.
- 5A6A, 5B, 5[B], and both hits of 2B are -3 after feint.
- 5C(1), 5C(5), 2C, 2[C], and 5A6AA are 0 after feint.
|
| EX
|
Damage
|
Red Damage
|
Proration
|
Cancel
|
Guard
|
| 2000
|
1536
|
100%
|
-
|
LH
|
| First Active
|
Active
|
Recovery
|
Frame Adv
|
Circuit
|
Invuln
|
| 4+6
|
1
|
55
|
-38
|
-100.0%
|
Full 1-7
|
|
Low slash. Untechable launch. Meter dump combo ender, that gives either a safejump, Sandoori mixup, or a free 22B and meaty afterwards. Can also be used versus certain pressure sequences due to the invul, but it should be noted that said invul wears out about 2 frames before the active frames.
|
|
Primary launcher Primary launcher Hard knockdown ender. Hard knockdown ender. Fore! Fore!
|
| A
|
Damage
|
Red Damage
|
Proration
|
Cancel
|
Guard
|
| 1000
|
672
|
70% (O)
|
-EX-, (J)
|
LH
|
| First Active
|
Active
|
Recovery
|
Frame Adv
|
Circuit
|
Invuln
|
| 11
|
5
|
24
|
-11
|
7.0%
|
Reflect 11-17
|
| [A]
|
Damage
|
Red Damage
|
Proration
|
Cancel
|
Guard
|
| 1200
|
960
|
70% (O)
|
-EX-, (J)
|
LH
|
| First Active
|
Active
|
Recovery
|
Frame Adv
|
Circuit
|
Invuln
|
| 23
|
5
|
21
|
-8
|
10.4%
|
Reflect 23-29
|
- Similar in animation to the the followup broomswing of the other two moons' 63214C. Reflects projectiles and air unblockable.
Kohaku swings her broom like a bat, launches opponent. Chargeable for more damage. Used as her primary launcher in combos.
|
| B
|
Damage
|
Red Damage
|
Proration
|
Cancel
|
Guard
|
| 1500
|
960
|
100%
|
-
|
LH
|
| First Active
|
Active
|
Recovery
|
Frame Adv
|
Circuit
|
Invuln
|
| 15
|
6
|
31
|
-19
|
10.5%
|
High 1-17, Reflect 15-22
|
|
Same as A but with upper body invincibility, slower startup (four frames) and recovery, more damage (1500 instead of 1000 or 1200), not chargeable, not cancellable. Serves as a combo ender that gives hard knockdown, allowing for safejumps midscreen or 22A okizeme in the corner. Can also be used as a hard callout anti-air, but not reccomended unless you also plan on reflecting a projectile whilst doing so.
|
| EX
|
Damage
|
Red Damage
|
Proration
|
Cancel
|
Guard
|
| 2500 (2200)
|
(1689)
|
100%
|
(J)
|
LH
|
| First Active
|
Active
|
Recovery
|
Frame Adv
|
Circuit
|
Invuln
|
| 1+4
|
6
|
27 (11)
|
-21
|
-100.0%
|
Full 1-10, Reflect 5-12
|
|
Great reversal, very fast start up, invincible startup, air unblockable with fast recovery on hit. Launches opponent to opposite top corner, like the Crescent/Full's Amber Upper home run, but can't combo off it. Doesn't hit quite as high as it looks, so be careful trying to swat away opponents in the air. Can also be shielded on reaction the ssuper flash, so be careful against players who appear to be doing nothing/delayed meaties on your wakeup. If landed midscreen, the decreased recover on hit allows you to cover any early techs with a run up 2C.
|
|
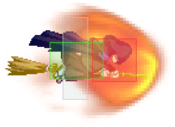
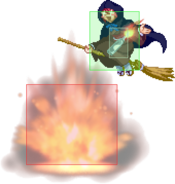
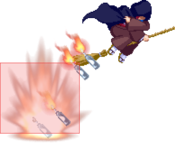
Take flight! Take flight! ~X (Molotov Oki) ~X (Molotov Oki) EX (You misinputted 63214C with meter, didn't you?) EX (You misinputted 63214C with meter, didn't you?)
|
| A
|
Damage
|
Red Damage
|
Proration
|
Cancel
|
Guard
|
| -
|
-
|
-
|
-CH-
|
-
|
| First Active
|
Active
|
Recovery
|
Frame Adv
|
Circuit
|
Invuln
|
| 22
|
18
|
18
|
-
|
-
|
Strike 18-46
|
| B
|
Damage
|
Red Damage
|
Proration
|
Cancel
|
Guard
|
| -
|
-
|
-
|
-CH-
|
-
|
| First Active
|
Active
|
Recovery
|
Frame Adv
|
Circuit
|
Invuln
|
| 21
|
18
|
36
|
-
|
-
|
Strike 17-45
|
| ~X
|
Damage
|
Red Damage
|
Proration
|
Cancel
|
Guard
|
| 600*3 (1743)
|
(837)
|
100%*2, 80% (O)
|
-
|
LHA
|
| First Active
|
Active
|
Recovery
|
Frame Adv
|
Circuit
|
Invuln
|
| 32 ~ 33
|
2 (2) 2 (2) 8
|
-
|
-
|
4.2%*3 (12.6%)
|
-
|
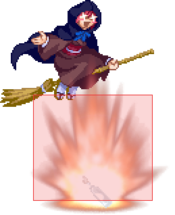
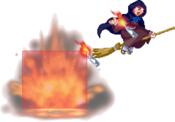
- Kohaku jumps off the ground and flies on her broom. While airborne, she can drop one explosive projectile on the ground by inputting any button. She lacks hurtboxes and a collision box while flying, but can still be air thrown.
A version fully recovers in the air, so it can be followed by a jump/airdash or a j.A. best used after 236A hard knock down midscreen, as it will side switch and provide molotov okizeme.
B version goes farther but has to go through landing recovery.
|
| EX
|
Damage
|
Red Damage
|
Proration
|
Cancel
|
Guard
|
| (500*3) x4
|
(307*3) x4
|
(100%*2, 75% (M)) x4
|
-
|
LHA
|
| First Active
|
Active
|
Recovery
|
Frame Adv
|
Circuit
|
Invuln
|
| 17+(37 ~ 18)
|
X
|
71
|
-
|
-100.0%
|
Strike 1-115
|
|
Same as above, but Kohaku will automatically drop 4 projectiles in succession, and is completely invulnerable for almost the entire duration. The only problem is that it is easily thrown on reaction to the superflash, making this move only really usable after a 2C or 236C hard knockdown, and only really for stalling for time and chip damage due to the fact it doesnt really lead to any mixup afterwards. Can be used as a gimmick reversal, but due to the reasons already listed, it isn't advised to do so.
|
|
Your main oki tool in the corner Your main oki tool in the corner "Go out my child, and hold down the corner" "Go out my child, and hold down the corner" Your win condition, or a funny meme. Your execution decides which. Your win condition, or a funny meme. Your execution decides which.
|
| A
|
Damage
|
Red Damage
|
Proration
|
Cancel
|
Guard
|
| 600
|
576
|
100%
|
-
|
LHA
|
| First Active
|
Active
|
Recovery
|
Frame Adv
|
Circuit
|
Invuln
|
| 65
|
2
|
47
|
-
|
4.2%
|
-
|
|
Kohaku screams kyaah and drops an unshieldable bomb that goes off as soon as it hits the ground. Once the bomb is dropped it will always go off which can sometimes interrupt combos if you get hit while dropping it. The explosion always pushes the opponent away, regardless of if it hits in front or behind the opponent. Because of this, dropping the bomb behind the opponent in the corner pushes them out, allowing for a left/right mixup in the corner. You can also time it on 2C hard knock down so that it doesn't meaty, allowing you to psyche out opponents for a command grab or an actual meaty into a 624C.
|
| B
|
Damage
|
Red Damage
|
Proration
|
Cancel
|
Guard
|
| 600
|
384/576
|
70% (O)/100%
|
-
|
LHA
|
| First Active
|
Active
|
Recovery
|
Frame Adv
|
Circuit
|
Invuln
|
| 46
|
618*
|
49
|
-
|
4.2%
|
-
|
|
Kohaku drops a bomb that doesn't go off unless it's hit into the air and then comes into contact with the ground. If it hasn't exploded within 10-11 seconds, it disappears. The bomb can only be hit by Kohaku's attacks, and can be hit multiple times while it's in the air. If the bomb in motion hits the opponent, it does 600 base damage (70% proration) and launches. Hitting the opponent does not change its trajectory. The bomb in motion can be shielded, but the explosion can't be shielded. The initial position of the bomb is random, with its horizontal position varying slightly. Best used against opponents attempting to zone, or those not willing to engage with neutral. Also serves as an amazing corner lockdown tool, as it covers jump outs and DPs extraordinarily well. Can also be used to bring opponents out of the corner or to vacuum them towards you using certain setups.
|
| EX
|
Damage
|
Red Damage
|
Proration
|
Cancel
|
Guard
|
| 2500
|
1920
|
100%
|
-
|
U
|
| First Active
|
Active
|
Recovery
|
Frame Adv
|
Circuit
|
Invuln
|
| 7+494
|
2
|
35
|
-
|
-100.0%
|
-
|
|
HEY HEY HEY HEY! Kohaku drops a huge bomb with a 3-count timer (about two seconds per count, or six seconds total). Once the timer reaches 0 the bomb goes off with an unblockable/unshieldable blast that can hit Kohaku as well. Very tricky move to use, but there are some legitimate setups into this, and a great way to manage meter, especially since combos that lead to it tend to be meter neutral or positive. Examples shown here and here. Notably unlike the B version:
- Both players can hit it.
- Can only be hit when it's on the ground.
- Damages both players.
- Does not do damage if it's knocked into the opponent.
|
|
Your opponent's worst nightmare Your opponent's worst nightmare
|
| Damage
|
Red Damage
|
Proration
|
Cancel
|
Guard
|
| 500 (440)
|
422
|
50%
|
-
|
U
(Whiffs vs Air.)
|
| First Active
|
Active
|
Recovery
|
Frame Adv
|
Circuit
|
Invuln
|
| 4
|
1
|
22
|
-
|
5.6%
|
-
|
|
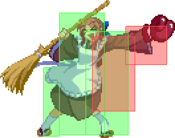
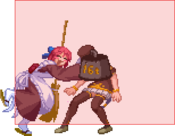
A Command throw, and almost definitely one of the best in the game. Unlike the Crescent/Full command throws, Half has no automatic followup. Instead, the opponent is launched by the punch, allowing for a full combo into setplay afterwards. The reward off of landing a command grab is so great that this move should be the cornerstone of your pressure, and its existance is what should be used to get opponents to fall for more conventional staggers. It grabs hurtboxes, not collision boxes, allowing you to scoop opponents who throw out a move too late at extraordinary distances.
|
|
Aerial Specials
"Zoom" "Zoom" "Vroom" "Vroom"
|
| A
|
Damage
|
Red Damage
|
Proration
|
Cancel
|
Guard
|
| -
|
-
|
-
|
-
|
-
|
| First Active
|
Active
|
Recovery
|
Frame Adv
|
Circuit
|
Invuln
|
| -
|
-
|
38
|
-
|
-
|
Strike 8-13
|
|
A command airdash. Has frames where Kohaku is hit invincible but can be airthrown. Can cancel into a button or an air movement option as soon as it is over, allowing it to work as a niche/last ditch tool for mixing up your landings.
|
| B
|
Damage
|
Red Damage
|
Proration
|
Cancel
|
Guard
|
| -
|
-
|
-
|
-
|
-
|
| First Active
|
Active
|
Recovery
|
Frame Adv
|
Circuit
|
Invuln
|
| -
|
-
|
52
|
-
|
-
|
Strike 11-28
|
|
B version goes about double the distance, with about double the strike invulnerability, but later in the animation. Sometimes used as a gimmick way to get away from corner pressure or stall for time while still keeping an airdash and or double jump.
|
| EX
|
Damage
|
Red Damage
|
Proration
|
Cancel
|
Guard
|
| 400*6 (1992)
|
(1433)
|
100%
|
(J)
|
LHA
|
| First Active
|
Active
|
Recovery
|
Frame Adv
|
Circuit
|
Invuln
|
| 1+4
|
12
|
11
|
-
|
-100.0%
|
Strike 1-4
|
|
A damaging A version. Jump-cancelable on hit and cancels into air throw (The cancel is on the fifth hit, NOT the sixth hit. If all 6 hits connect you cant combo off of it). Used as a meter burn or corner carry option, mainly in Heat or to prevent entering Heat.
|
|
Stall 'n Fall Stall 'n Fall "Time to guess!" "Time to guess!" Gimmicky Reversal Gimmicky Reversal
|
| A
|
Damage
|
Red Damage
|
Proration
|
Cancel
|
Guard
|
| 600*3 (1743)
|
(837)
|
100%*2, 80% (O)
|
-
|
LHA
|
| First Active
|
Active
|
Recovery
|
Frame Adv
|
Circuit
|
Invuln
|
| 19*
|
X
|
-
|
-
|
4.2%*3 (12.6%)
|
Strike 8-40
|
|
Aerial version of 214X that automatically drops an explosive. Has strike invul like the ground version, and can be easily air thrown if used poorly.
|
| B
|
Damage
|
Red Damage
|
Proration
|
Cancel
|
Guard
|
| 300*3, 200*3 (1170)
|
(669)
|
-5%*3
|
-
|
LHA
|
| First Active
|
Active
|
Recovery
|
Frame Adv
|
Circuit
|
Invuln
|
| 20*
|
X
|
-
|
-
|
0.7%*3, 0.35%*3 (3.15%)
|
-
|
|
Kohaku hovers around and drops up to 3 explosives depending on how long this move is held. No strike invincibility, but much better for left/right mixups in return. Good to use after a bunker or 2C hard knockdown, and leads into a left right or tick throw setup.
|
| EX
|
Damage
|
Red Damage
|
Proration
|
Cancel
|
Guard
|
| (500*3) x4
|
(307*3) x4
|
(100%*2, 75% (M)) x4
|
-
|
LHA
|
| First Active
|
Active
|
Recovery
|
Frame Adv
|
Circuit
|
Invuln
|
| 17+(35 ~ 18)
|
X
|
-
|
-
|
-100.0%
|
Strike 1-59
|
|
Aerial EX version drops 4 explosives in a much faster succession than its grounded counterpart, and can be used as a last ditch get out of jail attempt, or a way to enforce even stronger corner lockdown. Not all too great at the former despite its generous invincibility frames, and meter is often better saved for other defensive or offensive options.
|
|
Arc Drive
Flashy combo finisher Flashy combo finisher
|
| Damage
|
Red Damage
|
Proration
|
Cancel
|
Guard
|
| 4700 (2176)
|
(1082)
|
50% (O)
|
-
|
U
(Whiffs vs Air.)
|
| First Active
|
Active
|
Recovery
|
Frame Adv
|
Circuit
|
Invuln
|
| 2+15
|
X
|
Knockdown*
|
-
|
removes all
|
Full
|
|
Kohaku dashes forward at high speed and goes into a 3-hit sequence that circuit breaks and knocks the opponent down. This is an unblockable that can only be evaded jumping. If this misses, Kohaku will hit the wall and be in an untechable knockdown state that allows for the opponent to OTG you. The attack will combo off of bomb explosions and OTG hits (usually 2C, 236[A], or air hit 236A).
|
|
MBAACC Navigation


