Character Page Progress
This page is still a work in progress, consider joining as an editor to help expand it. Please update this character's roadmap page when one of the editing goals have been reached.
| In Progress |
To-do
|
- Combos:
- Add damage, meter gain/given numbers and video links to the pre-existing combos.
- Move Descriptions:
- Complete Last Arc frame data.
- Expand upon to the shorter descriptions, cite their uses, add captions where helpful, etc.
|
- Overview/General Gameplan:
- Write the Defense section.
- Combos:
- If necessary: add separate starter/ender options and corner-specific combos in their respective sections.
|
Overview
Playstyle
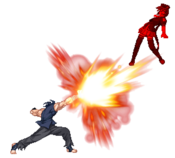
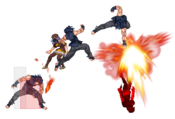
 C-Kouma is a hard-hitting stagger pressure king. C-Kouma is a hard-hitting stagger pressure king. |
| Pros |
Cons |
- Large Health Pool: Has the 5th highest health in the game, allowing him to take trades and make risky plays much more liberally.
- High Damage Off Clean Confirms: When fully optimized, C-Kouma's combos typically do upwards of 5K or even 6K damage before reducing.
- Diverse Metered Reversals: Heat, 22C, 623C, 214C and j.236C are all useful reversals, each with their own benefits and counterplay.
- Good Stagger Pressure: Reverse beat, a plethora of lows, good stagger windows, vacuuming 5B~[B] and a command grab make C-Kouma's pressure extremely threatening.
- Good Mixups After Command Grab: C-Kouma gets good setups off of 214A/B.
|
- Slow Pokes: Most of C-Kouma's normals are rather small or slow, restricting his options in neutral.
- Mediocre Anti-airs: 623A, 22A, and EX-Shield 5A are effective against opponents approaching from the air in front C-Kouma, but he lacks a response to opponents directly overhead or crossing up.
|
C-Kouma is the version of Kouma that trades away many of Full Moon's more straightforwardly useful tools in exchange for higher damage and a more flexible air game. The biggest difference between C-Kouma and his other two moons is C's ability to cancel air normals like any other character in the game, allowing him to make full use of his high damage air moves in combos. In addition, after C-Kouma recovers from performing an air normal, he retains all of his options! This makes options like rising j.B much more viable. Kouma has quite a few reversal options, in Heat, 22C, 623C, and 214C. Despite these strengths, C-Kouma suffers from a lack of solid ground normals, often forcing him to approach at awkward angles predictably, making neutral quite difficult.
Move Descriptions
| Frame Data Help
|
| Header
|
Tooltip
|
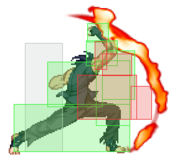
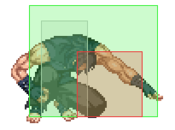
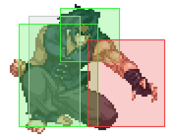
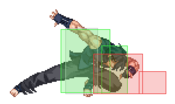
| Move Box Colors
|
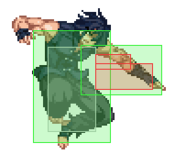
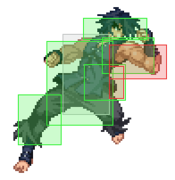
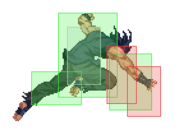
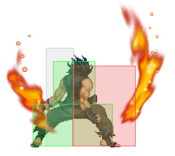
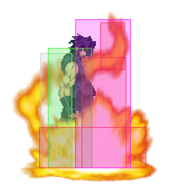
Light gray = Collision Box (A move lacking one means it can go through the opponent's own collision box).
Green: Hurt Boxes.
Red: Hit(/Grab) Boxes.
Yellow: Clash Boxes (When an active hitbox strikes a clash box, the active hitbox stops being active. Multi-hit attacks can beat clash since they will still progress to the next hitbox.)
Magenta: Projectile-reflecting boxes OR Non-hit attack trigger boxes (usually).
Blue: Reflectable Projectile Boxes.
|
| Damage
|
Base damage done by this attack.
(X) denotes combined and scaled damage tested against standing V. Sion.
|
| Red Damage
|
Damage done to the recoverable red health bar by this attack. The values are inherently scaled and tested against standing V. Sion.
(X) denotes combined damage.
|
| Proration
|
The correction value set by this attack and the way it modifies the scaling during a string. See this page for more details.
X% (O) means X% Overrides the previous correction value in a combo if X is of a lower percentage.
X% (M) means the current correction value in a combo will be Multiplied by X%. This can also be referred to as relative proration.
|
| Circuit
|
Meter gained by this attack on hit.
(X%) denotes combined meter gain.
-X% denotes a meter cost.
|
| Cancel
|
Actions this move can be cancelled into.
SE = Self cancelable.
N = Normal cancelable.
SP = Special cancelable.
CH = Cancelable into the next part of the same attack (Chain in case of specials).
EX = EX cancelable.
J = Jump cancelable.
(X) = Cancelable only on hit.
-X- = Cancelable on whiff.
|
| Guard
|
The way this move must be blocked.
L = Can block crouching
H = Can block standing.
A = Can block in the air.
U = Unblockable.
|
| Startup
|
Amount of frames that must pass prior to reaching the active frames. Also referred to as "True Startup".
|
| Active
|
The amount of frames that this move will have a hitbox.
(x) denotes frame gaps where there are no hitboxes is present. Due to varied blockstuns, (x) frames are difficult to use to determine punish windows. Generally the larger the numbers, the more time you have to punish.
X denotes active frames with a duration separate from its origin move's frame data, such as projectile attacks. In this case, the total length of the move is startup+recovery only.
|
| Recovery
|
Frames that this move has after the active frames if not canceled. The character goes into one frame where they can block but not act afterwards, which is not counted here.
|
| Advantage
|
The difference in frames where you can act before your opponent when this move is blocked (assuming the move isn't canceled and the first active frame is blocked).
If the opponent uses a move with startup that is at least 2 frames less than this move's negative advantage, it will result in the opponent hitting that move.
±x~±y denotes a range of possible advantages.
|
| Invul
|
Lists any defensive properties this move has.
X y~z denotes X property happening between the y to z frames of the animations. If no frames are noted, it means the invincibility lasts through the entire move.
Invicibility:
- Strike = Strike invincible.
- Throw = Throw invincible.
Hurtbox-Based Properties:
- Full = No hurtboxes are present.
- High = Upper body lacks a hurtbox.
- Low = Lower body lacks a hurtbox.
Miscellaneous Properties
- Clash = Frames in which clash boxes are active.
- Reflect = Frames in which projectile-reflecting boxes are active.
- Super Armor = Frames in which the character can take hits without going into hit stun.
|
Normal Moves
Standing Normals
|
|
| Damage
|
Red Damage
|
Proration
|
Cancel
|
Guard
|
| 400
|
196
|
70% (O)
|
-SE-, -N-, -SP-, -EX-, (J)
|
LH
|
| First Active
|
Active
|
Recovery
|
Frame Adv
|
Circuit
|
Invuln
|
| 5
|
4
|
8
|
0
|
3.0%
|
-
|
|
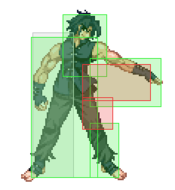
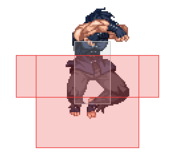
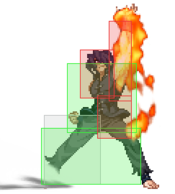
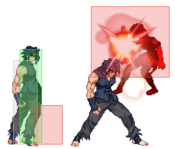
Pretty good poke, all things considered. Hits crouchers, works well in stagger pressure, and is a good followup after EX shield.
|
|
5B 5B 5B~B 5B~B 5B~[B] 5B~[B]
|
| 5B
|
Damage
|
Red Damage
|
Proration
|
Cancel
|
Guard
|
| 600
|
441
|
85% (O)
|
N, SP, -CH-, EX, (J)
|
LH
|
| First Active
|
Active
|
Recovery
|
Frame Adv
|
Circuit
|
Invuln
|
| 11
|
4
|
17
|
-6
|
6.0%
|
-
|
|
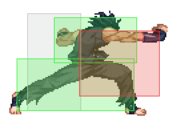
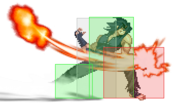
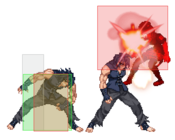
A slow but far reaching normal with decent horizontal disjoint. Mostly used in combos or pressure but can be used to good effect as a meaty, as it will beat most heats at the range at which air throw ender puts you as well as blow up low shield. Because it has a follow-up, you can punish dodges and backdashes as well.
|
| ~B
|
Damage
|
Red Damage
|
Proration
|
Cancel
|
Guard
|
| 700
|
441
|
100%
|
N, SP, EX, (J)
|
LH
|
| First Active
|
Active
|
Recovery
|
Frame Adv
|
Circuit
|
Invuln
|
| 10
|
6
|
14
|
-5
|
7.0%
|
-
|
|
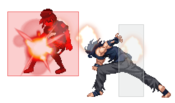
Used in pressure to catch people expecting 5B~[B] as well as punishing dodges and backdashes if close enough (the latter is usually only worthwhile if said backdash isn't airborne, due to Kouma's lackluster confirms off an airborne 5B hit). Can be half charged.
|
| ~[B]
|
Damage
|
Red Damage
|
Proration
|
Cancel
|
Guard
|
| 700
|
441
|
100%
|
N, SP, EX, (J)
|
LH
|
| First Active
|
Active
|
Recovery
|
Frame Adv
|
Circuit
|
Invuln
|
| 23
|
6
|
14
|
-5
|
7.0%
|
-
|
|
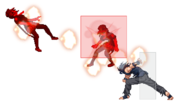
Pulls the opponent toward you on block or hit, allowing pressure to continue if uncontested. If done as quickly as possible, leaves a 9 frame gap for the opponent to mash.
|
|
|
|
| Damage
|
Red Damage
|
Proration
|
Cancel
|
Guard
|
| 900
|
784
|
90% (O)
|
N, SP, EX, (J)
|
LH
|
| First Active
|
Active
|
Recovery
|
Frame Adv
|
Circuit
|
Invuln
|
| 11
|
4
|
21
|
-7
|
9.0%
|
-
|
|
As fast as 5B, but a bit higher reaching. Mostly used as combo/blockstring filler. Generally not used in neutral in favor of 2C and 623A due to its long recovery.
|
|
Crouching Normals
|
|
| Damage
|
Red Damage
|
Proration
|
Cancel
|
Guard
|
| 300
|
196
|
70% (O)
|
-SE-, -N-, -SP-, -EX-, (J)
|
L
|
| First Active
|
Active
|
Recovery
|
Frame Adv
|
Circuit
|
Invuln
|
| 5
|
4
|
8
|
0
|
3.5%
|
-
|
|
Fairly standard 2A. Hits low. Use in pressure to condition against escape attempts that require not holding down, such as any special move, backdash, or jump.
|
|
|
|
| Damage
|
Red Damage
|
Proration
|
Cancel
|
Guard
|
| 600
|
392
|
85% (O)
|
N, SP, EX, (J)
|
L
|
| First Active
|
Active
|
Recovery
|
Frame Adv
|
Circuit
|
Invuln
|
| 9
|
6
|
9
|
0
|
7.0%
|
-
|
|
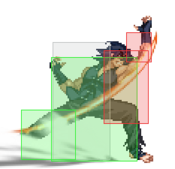
Reach isn't the greatest but a useful pressure tool thanks to being 0 on block, moving you forward, and even keeping you just barely in range for a command grab when blocked at point blank. Hits low, and is generally your best starter. Used to beat standing shield and set up a 50/50 in the corner on some characters when followed with 214A on block. Keeps a low profile and moves you forward, so it can be good for last-second repositioning to beat a jump-in.
|
|
|
|
| Damage
|
Red Damage
|
Proration
|
Cancel
|
Guard
|
| 950
|
568
|
65% (O)
|
N, SP, EX, (J)
|
L
|
| First Active
|
Active
|
Recovery
|
Frame Adv
|
Circuit
|
Invuln
|
| 10
|
3
|
14
|
1
|
9.5%
|
-
|
|
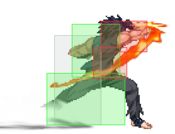
A strong sweep. Has average startup but a deceptive threat range compared to the animation, especially when backed by Kouma's dash. Has fairly low recovery for a sweep, this in tandem with its low profile and forward movement can make it effective for last-second repositioning to beat a jump-in.
|
|
Aerial Normals
|
|
| Damage
|
Red Damage
|
Proration
|
Cancel
|
Guard
|
| 300
|
147
|
75% (O)
|
SE, N, SP, EX, J
|
LHA
|
| First Active
|
Active
|
Recovery
|
Frame Adv
|
Circuit
|
Invuln
|
| 5
|
4
|
10
|
-
|
3.0%
|
-
|
|
Standard j.A, used to snipe slower moves out of startup for a counter hit.
|
|
|
|
| Damage
|
Red Damage
|
Proration
|
Cancel
|
Guard
|
| 650
|
441
|
90% (O)
|
N, SP, EX, J
|
HA
|
| First Active
|
Active
|
Recovery
|
Frame Adv
|
Circuit
|
Invuln
|
| 7
|
6
|
-
|
-
|
6.5%
|
-
|
|
A deceptively strong tool in the neutral game. Works well at beating out other air options due to its 6 active frames, and functions well in an IAD.
|
|
|
|
| Damage
|
Red Damage
|
Proration
|
Cancel
|
Guard
|
| 900
|
588
|
90% (O)
|
N, SP, EX, J
|
HA
|
| First Active
|
Active
|
Recovery
|
Frame Adv
|
Circuit
|
Invuln
|
| 11
|
5
|
-
|
-
|
9.0%
|
-
|
|
Your biggest, slowest, hardest hitting air normal. Has good downward reach.
|
|
Command Normals
|
|
| Damage
|
Red Damage
|
Proration
|
Cancel
|
Guard
|
| 1000
|
784
|
65% (M)
|
N, SP, EX, (J)
|
HA
|
| First Active
|
Active
|
Recovery
|
Frame Adv
|
Circuit
|
Invuln
|
| 28
|
5
|
16
|
-4
|
10.0%
|
-
|
|
A very telegraphed overhead, but still strong nonetheless. Can be cancelled into normals on hit or block, allowing for a full combo or more pressure respectively. Your best pickup for OTG and air counter hits.
|
|
Universal Mechanics
|
|
| Damage
|
Red Damage
|
Proration
|
Cancel
|
Guard
|
| 1300
|
784
|
70%
|
-
|
U
|
| First Active
|
Active
|
Recovery
|
Frame Adv
|
Circuit
|
Invuln
|
| 3
|
1
|
20
|
-
|
0.0%
|
-
|
|
Despite the fact that Kouma has access to a command grab, this is still really strong. Ground techable, but you can punish any tech from anywhere onscreen with dash 2C into your combo, and you can sometimes punish no tech with 6C OTG (Some characters are too short to be hit where they land, but of these, many can be hit by microwalking before 6C).
|
|
|
|
| Damage
|
Red Damage
|
Proration
|
Cancel
|
Guard
|
| 1600
|
588
|
30%
|
-
|
U
|
| First Active
|
Active
|
Recovery
|
Frame Adv
|
Circuit
|
Invuln
|
| 2
|
1
|
12
|
-
|
0.0%
|
-
|
|
Useful meterless air combo ender that allows for 5B or 2C meaty without moving or 5A/2A meaty after a dash forward. Ground bounces the opponent when done raw.
|
|
|
|
| Bunker
|
Damage
|
Red Damage
|
Proration
|
Cancel
|
Guard
|
| 500
|
196
|
50%
|
-
|
LHA
|
| First Active
|
Active
|
Recovery
|
Frame Adv
|
Circuit
|
Invuln
|
| 26
|
4
|
19
|
-5
|
0.0%
(-50.0% in blockstun)
|
Clash 1-10
|
| (Clash)
|
Damage
|
Red Damage
|
Proration
|
Cancel
|
Guard
|
| 500
|
196
|
50%
|
-
|
LHA
|
| First Active
|
Active
|
Recovery
|
Frame Adv
|
Circuit
|
Invuln
|
| 8
|
4
|
19
|
-5
|
0.0%/-50.0%
|
Strike 1-7
|
|
A fairly standard shield bunker.
|
|
|
|
| Damage
|
Red Damage
|
Proration
|
Cancel
|
Guard
|
| 100
|
0
|
100%
|
-
|
U
|
| First Active
|
Active
|
Recovery
|
Frame Adv
|
Circuit
|
Invuln
|
| 16
|
2
|
25
|
-
|
-100.0% (min)
|
Full 1-17
|
|
Despite having many metered reversal options, Heat remains a staple as its lack of super flash makes reacting to it much more difficult.
|
|
|
|
| Ground
|
Damage
|
Red Damage
|
Proration
|
Cancel
|
Guard
|
| 100
|
0
|
100%
|
-
|
U
|
| First Active
|
Active
|
Recovery
|
Frame Adv
|
Circuit
|
Invuln
|
| 11
|
10
|
20
|
-
|
removes all
|
Full 1-39
|
| Air
|
Damage
|
Red Damage
|
Proration
|
Cancel
|
Guard
|
| 100
|
0
|
100%
|
-
|
U
|
| First Active
|
Active
|
Recovery
|
Frame Adv
|
Circuit
|
Invuln
|
| 12
|
10
|
15
|
-
|
removes all
|
Strike 1-30
|
|
Universal burst mechanic. Unlike Crescent/Full Heat activation, the hitbox and frame data doesn't vary between characters. However, you can be thrown out of this move if you input it in the air.
|
|
Special Moves
Grounded Specials
Buza Palm236A/B/C (No EX)
(236A~236B~236C~236C~236C) A A B B C C ~236C 1 ~236C 1 ~236C 2 ~236C 2
|
| A
|
Damage
|
Red Damage
|
Proration
|
Cancel
|
Guard
|
| 500
|
392
|
70% (O)
|
-CH-, -EX-
|
L
|
| First Active
|
Active
|
Recovery
|
Frame Adv
|
Circuit
|
Invuln
|
| 15
|
4
|
15
|
-1
|
3.5%
|
Super Armor 4-11
|
|
This is probably Kouma's most useful rekka. It is used in his standard combo and can be used as a stagger in strings. There is super armor on the startup of this version so if timed correctly, it can be used to poke out of moves or setups that have short active frames, like F-Akiha's flame pillars. When used in a string, this rekka is best used at the end of your string since it can go from -1 to +3 on block depending of the distance, leaving Kouma open to do more mixup options.
|
| B
|
Damage
|
Red Damage
|
Proration
|
Cancel
|
Guard
|
| 800
|
392
|
70% (O)
|
-CH-, -EX-
|
LH
|
| First Active
|
Active
|
Recovery
|
Frame Adv
|
Circuit
|
Invuln
|
| 11
|
3
|
21
|
-9
|
3.5%
|
-
|
|
Mostly used as combo filler, but can be staggered after a blocked 236A.
|
| C
|
Damage
|
Red Damage
|
Proration
|
Cancel
|
Guard
|
| 800
|
490
|
70% (O)
|
-CH-
|
LH
|
| First Active
|
Active
|
Recovery
|
Frame Adv
|
Circuit
|
Invuln
|
| 11
|
4
|
20
|
-6
|
8.0%
|
-
|
| ~236C (1)
|
Damage
|
Red Damage
|
Proration
|
Cancel
|
Guard
|
| 500
|
294
|
65% (O)
|
(CH)
|
LHA
|
| First Active
|
Active
|
Recovery
|
Frame Adv
|
Circuit
|
Invuln
|
| 12
|
4
|
22
|
-8
|
5.0%
|
-
|
| ~236C (2)
|
Damage
|
Red Damage
|
Proration
|
Cancel
|
Guard
|
| 2100
|
-
|
-
|
-
|
U
|
| First Active
|
Active
|
Recovery
|
Frame Adv
|
Circuit
|
Invuln
|
| -
|
-
|
-
|
-
|
0.0%
|
-
|
|
This isn't an EX, just a third rekka. It can be input two additional times for (respectively) an upward reaching air-blockable hit and an air grab. Notably, even if the second 236C is blocked, the air grab can (and typically will) still work. The grab throws the opponent full screen with a techable knockdown that can be punished at all ranges, so is best not teched at all. As such you can sometimes get a Heat off. If your opponent knows this, however, they might tech in scenarios where they expect your Heat, so opting not to Heat and instead waiting to punish their tech can lead to big damage.
|
|
A A B B EX EX
|
| A
|
Damage
|
Red Damage
|
Proration
|
Cancel
|
Guard
|
| 800
|
490
|
70% (O)
|
-EX-
|
LH
|
| First Active
|
Active
|
Recovery
|
Frame Adv
|
Circuit
|
Invuln
|
| 9
|
8
|
13
|
-3
|
10.0%
|
-
|
|
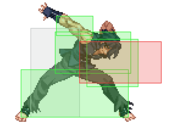
A subpar launcher, but one of your better anti-airs and anti-approach tools. Will trade or cleanly beat many approach options due to its 8 active frames and good hitbox, though will lose to any move with a low profile. Useful as a launcher in specific matchups where getting off the ground quickly is necessary (e.g. Nero).
|
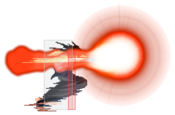
| B
|
Damage
|
Red Damage
|
Proration
|
Cancel
|
Guard
|
| 400*2, 800 (1400)
|
(1027)
|
100%
|
-CH-
|
L, LH
|
| First Active
|
Active
|
Recovery
|
Frame Adv
|
Circuit
|
Invuln
|
| 6
|
6 (6) 3
|
35
|
-29
|
3.0%*2, 8.0% (14.0%)
|
High 1-5
|
| ~236X
|
Damage
|
Red Damage
|
Proration
|
Cancel
|
Guard
|
| 600 (1877)
|
(1417)
|
80% (M)
|
-
|
LHA
|
| First Active
|
Active
|
Recovery
|
Frame Adv
|
Circuit
|
Invuln
|
| 14
|
2
|
-
|
-
|
6.0% (20.0%)
|
-
|
|
Very unsafe multi-hit DP. The move starts with a bit of upper-body invulnerability, but is not a good or reliable anti-air. Inputting 236X afterwards does a followup kick that causes a techable ground bounce. Can be used sparingly to catch fleeing opponents, as it remains air unblockable until the followup. Interestingly, the first hit is low.
|
| EX
|
Damage
|
Red Damage
|
Proration
|
Cancel
|
Guard
|
| 800*2, 400*6 (3270)
|
(2824)
|
100%
|
-
|
LH (2), LHA (4)
|
| First Active
|
Active
|
Recovery
|
Frame Adv
|
Circuit
|
Invuln
|
| 4+3
|
6 (2) 13
|
36
|
-24
|
-100.0%
|
Full 1-11
|
|
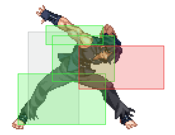
Situational DP reversal. Air unblockable for the first few hits, so can be used in matchups where the opponent hangs in the air on your wakeup (e.g. C-Roa). Also notable for having the longest horizontal range of C-Kouma's reversals, but this ultimately doesn't come up too often.
|
|
A A B B ~2 ~2 ~4 ~4 ~236C ~236C EX EX
|
A
~2/4
|
Damage
|
Red Damage
|
Proration
|
Cancel
|
Guard
|
2000
2200/2700
|
1470
980/1470
|
100%
100%/25%
|
(CH)
|
U
|
| First Active
|
Active
|
Recovery
|
Frame Adv
|
Circuit
|
Invuln
|
| 4
|
1
|
27
|
-
|
0.0%
|
-
|
|
The most important tool in your kit. A very fast command grab with a very easy input means this move can be done very quickly. Applications include in close stagger pressure, after a reset, and after a held shield. After a successful grab, you can hold 2, 4, or input 236/623C for different followups. Doing none causes the enemy to be dropped at Kouma's feet with plenty of time to set up. Holding 2 causes Kouma to throw the enemy to the ground on his opposite side, dealing more damage but switching side and reducing the amount of time the enemy takes to recover. Holding 4 will cause Kouma to throw the enemy backwards, hitting the wall if close enough, and is comboable.
|
B
~2/4
|
Damage
|
Red Damage
|
Proration
|
Cancel
|
Guard
|
2000
2200/2700
|
1470
980/1470
|
100%
100%/25%
|
(CH)
|
U
|
| First Active
|
Active
|
Recovery
|
Frame Adv
|
Circuit
|
Invuln
|
| 29
|
1
|
14
|
-
|
0.0%
|
-
|
|
A more telegraphed command grab with slightly more range. Generally better to avoid using, though can be easier to use than 214A in some setups due to the startup time, meaning there is no need to stagger instead of cancelling any normal immediately. Like the A version, after a successful grab, you can input a followup.
|
A/B~623C
A/B~236C
|
Damage
|
Red Damage
|
Proration
|
Cancel
|
Guard
|
| 3000
|
2164
|
100%
|
-
|
-
|
| First Active
|
Active
|
Recovery
|
Frame Adv
|
Circuit
|
Invuln
|
| -
|
-
|
-
|
-
|
-100.0%
|
-
|
|
The highest damage followup after 214A/B if you're not close enough to the corner to combo after 214A/B~4, generally used to ensure a kill. Either 623C or 236C can be used to the same effect.
|
| EX
|
Damage
|
Red Damage
|
Proration
|
Cancel
|
Guard
|
| 3200
|
(2254)
|
100%
|
-
|
U
|
| First Active
|
Active
|
Recovery
|
Frame Adv
|
Circuit
|
Invuln
|
| 6+7
|
1
|
36
|
-
|
-100.0%
|
Full 1-12
|
|
Reversal EX command grab. Can be jumped on reaction, but has full body invulnerability until after the grab, so it is used best while being pressured by a grounded opponent or on wakeup.
|
|
A A B B EX EX
|
| A
|
Damage
|
Red Damage
|
Proration
|
Cancel
|
Guard
|
| 1000
|
735
|
75% (O)
|
-
|
LH
|
| First Active
|
Active
|
Recovery
|
Frame Adv
|
Circuit
|
Invuln
|
| 9
|
4
|
32
|
-8
|
8.0%
|
Reflect 9-13
Super Armor 6-22
|
|
A decent armored anti-air that launches on hit. Can be confirmed into a combo on CH only. Its strangely shaped hitbox makes it good for beating out moves with low hurtboxes or generally catching any airborne opponent not already directly over you. Can reflect projectiles if timed properly.
|
| B
|
Damage
|
Red Damage
|
Proration
|
Cancel
|
Guard
|
| -
|
-
|
-
|
-
|
-
|
| First Active
|
Active
|
Recovery
|
Frame Adv
|
Circuit
|
Invuln
|
| -
|
-
|
58
|
-
|
-
|
Full 6-25
Super Armor 26-37
|
|
Startup looks similar to 22A, but has no hitbox. Instead, Kouma does a command dash forward after a delay with a decent amount of invulnerability and armor. Used in specific matchups to safely close distance (e.g. C-Roa).
|
| EX
|
Damage
|
Red Damage
|
Proration
|
Cancel
|
Guard
|
| 1000
|
588
|
100%
|
-
|
LHA
|
| First Active
|
Active
|
Recovery
|
Frame Adv
|
Circuit
|
Invuln
|
| 8+12
|
2
|
26
|
-10
|
-100.0%
|
Full 1-8
Reflect 9-32
Super Armor 9-157
|
|
Similar to 22A, but with key differences. Notably, it has some startup invulnerability immediately followed by super armor that lasts until a couple seconds after the move ends, persisting through Kouma's other actions. The hitbox of the move itself is larger, but it's air blockable. Similarly, it can only be confirmed on a counter hit. Can be thrown before active frames on reaction to super flash. Key points of how armor functions are very helpful in understanding the applications of this move: Any time Kouma is hit, he will continue to do whatever he was doing after a short delay. This can cause Kouma to become stun-locked, but unlike in a combo, there is no push-back for the attacker. Additionally, these hits can be cancelled as normal, so an opponent that hits the armor at the start of this move can avoid being counter-hit by it simply by jump cancelling, as it is air blockable. Despite this, when used appropriately, it can be an extremely powerful tool that discourages opponents from contesting you, allowing more opportunities for command grabs during the period of armor after its use.
|
|
Aerial Specials
A/B A/B EX EX
|
| A
|
Damage
|
Red Damage
|
Proration
|
Cancel
|
Guard
|
| 800
|
588
|
100%
|
-CH-
|
LHA
|
| First Active
|
Active
|
Recovery
|
Frame Adv
|
Circuit
|
Invuln
|
| 10
|
3
|
-
|
-9 (TK)
|
8.0%
|
-
|
|
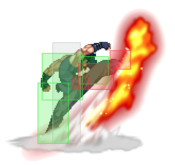
A single hit air kick that can be followed up. Generally not used in favor of j.236B.
|
| B
|
Damage
|
Red Damage
|
Proration
|
Cancel
|
Guard
|
| 500, 700 (1096)
|
(809)
|
100%
|
-CH-
|
LHA
|
| First Active
|
Active
|
Recovery
|
Frame Adv
|
Circuit
|
Invuln
|
| 8
|
5
|
-
|
-9 (TK)
|
5.0%, 6.0% (11.0%)
|
-
|
|
Similar to j.236A, but starts up faster and has 2 hits instead of 1. Used as a meterless high-damage ender and for particular traps in the corner.
|
| ~236X
|
Damage
|
Red Damage
|
Proration
|
Cancel
|
Guard
|
| 600
|
-
|
80% (M)
|
-
|
LHA
|
| First Active
|
Active
|
Recovery
|
Frame Adv
|
Circuit
|
Invuln
|
| 14
|
2
|
-
|
-
|
6.0%
|
-
|
|
This followup to j.236A/B causes Kouma to kick the opponent down, causing a techable ground bounce. Should the opponent not ground tech, this can lead to a high damage grounded followup. Should the opponent tech, depending on spacing and the direction of the tech, they can be punished. An opponent that techs forward out of the corner can be punished if this move is spaced such that Kouma lands close enough to the location of the opponent that he is within range of his A normals. An opponent that techs backward into the corner can be punished similarly if Kouma is near enough to use A normals. An opponent that neutral techs can always block anything you can throw at them, but can be command grabbed if they choose to block instead of jumping.
|
| EX
|
Damage
|
Red Damage
|
Proration
|
Cancel
|
Guard
|
| 300, 600, 350*5 (1749)
|
(1413)
|
70% (O)
|
-
|
LHA
|
| First Active
|
Active
|
Recovery
|
Frame Adv
|
Circuit
|
Invuln
|
| 3+2
|
2 (2) 13
|
-
|
18 (min. height, all hits blocked)
(TK)
|
-100.0%
|
Strike 1-10
|
|
One of Melty Blood's better air reversals, having a nice amount of invuln frames and being safe to plus at most heights. Can be used to disrespect guard break setups that have a small gap as well as having use in pressure sometimes to punish jumps and several reversal options. Serves as Kouma's highest damage ender in combos and yields enough frame advantage on hit for a safe use of either 22C or Heat when used at the end of a combo.
The main downsides to this move's use on offense are it being bunkerable by Crescent and Full moon characters at most spacings for a 50 meter-positive trade as well as being vulnerable to shield counter, spot dodge, and some reversals being used post-flash.
|
|
A/B A/B EX EX
|
| A
|
Damage
|
Red Damage
|
Proration
|
Cancel
|
Guard
|
| 1000
|
784
|
70% (O)
|
-
|
LHA
|
| First Active
|
Active
|
Recovery
|
Frame Adv
|
Circuit
|
Invuln
|
| 13
|
X
|
14
|
3 (TK)
|
10.0%
|
-
|
|
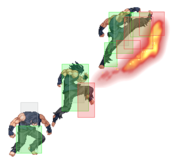
A very strong divekick. The landing recovery can be EX cancelled, allowing Kouma to punish his opponent for attempting to punish if whiffed or blocked far from the ground. Ranges from unsafe if chicken blocked or Ex-Guarded high up on tall characters to plus when connecting on block just before Kouma reaches the ground.
|
| B
|
Damage
|
Red Damage
|
Proration
|
Cancel
|
Guard
|
| 1000
|
784
|
100%
|
EX, J
|
LHA
|
| First Active
|
Active
|
Recovery
|
Frame Adv
|
Circuit
|
Invuln
|
| 15
|
X
|
21
|
-7 (TK)
|
10.0%
|
-
|
|
Slower to start up and recover on landing, but Kouma bounces off and retains his air options after this is blocked, allowing you to start pressure after an air dash or similar gap closer as well as not having the A version's vulnerability to chicken blocks. Recovery on landing is NOT EX cancellable.
|
| EX (Whiff)
|
Damage
|
Red Damage
|
Proration
|
Cancel
|
Guard
|
| 600, 1900 (1895)
|
(1625)
|
80% (M)
|
-
|
LHA
|
| First Active
|
Active
|
Recovery
|
Frame Adv
|
Circuit
|
Invuln
|
| 2+9
|
2
|
-
|
-3 (TK)
|
-100.0%
|
-
|
|
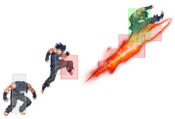
Not a divekick. A 2-hit combo ender that gives a decent knockdown with better damage and oki than air throw, but requires good spacing to ensure the second hit doesn't whiff.
|
|
A A B B C C
|
| A
|
Damage
|
Red Damage
|
Proration
|
Cancel
|
Guard
|
| -
|
-
|
-
|
-
|
-
|
| First Active
|
Active
|
Recovery
|
Frame Adv
|
Circuit
|
Invuln
|
| -
|
-
|
38
|
-
|
-
|
-
|
|
A command airdash that leaves you open for a bit on landing. Not often used outside of particular matchups that require you to stagger your landing (e.g. C-Roa).
|
| B
|
Damage
|
Red Damage
|
Proration
|
Cancel
|
Guard
|
| -
|
-
|
-
|
-
|
-
|
| First Active
|
Active
|
Recovery
|
Frame Adv
|
Circuit
|
Invuln
|
| -
|
-
|
38
|
-
|
-
|
-
|
|
A longer command airdash that leaves you open for a bit on landing. Not often used outside of particular matchups that require you to stagger your landing (e.g. C-Roa).
|
| C
|
Damage
|
Red Damage
|
Proration
|
Cancel
|
Guard
|
| -
|
-
|
-
|
-
|
-
|
| First Active
|
Active
|
Recovery
|
Frame Adv
|
Circuit
|
Invuln
|
| -
|
-
|
10
|
-
|
-
|
-
|
|
A move that feints the command airdash, but cancels Kouma's momentum and allows him to fall straight down. Leaves you open for a bit on landing.
|
|
Arc Drive
|
|
(Grab)
(Hit)
|
Damage
|
Red Damage
|
Proration
|
Cancel
|
Guard
|
900*10, 1200 (4017)
2500
|
(2458)
(2058)
|
50%
80%
|
-
|
U
LHA
|
| First Active
|
Active
|
Recovery
|
Frame Adv
|
Circuit
|
Invuln
|
| 5+1
|
1 (3) 8
|
43
|
-21
|
removes all
|
Full 1-10
|
|
Command grab super. Not jumpable on reaction to super flash. If the grab whiffs, has an air blockable strike hitbox. Both will whiff an opponent already in hitstun, so it cannot be used in combos.
|
|
Another Arc Drive
|
|
(Grab)
(Hit)
|
Damage
|
Red Damage
|
Proration
|
Cancel
|
Guard
|
16600 (5518)
3200
|
(4136)
(2524)
|
50%
80%
|
-
|
U
LHA
|
| First Active
|
Active
|
Recovery
|
Frame Adv
|
Circuit
|
Invuln
|
| 5+1
|
2 (2) 12
|
26
|
-21
|
removes all
|
Full 1-10
|
|
Longer reach, better damage, and can be comboed into, even grabbing airborne enemies so long as they are in hitstun.
|
|
Last Arc
|
|
| Damage
|
Red Damage
|
Proration
|
Cancel
|
Guard
|
| 1200*7, 1300 (base)
|
-
|
50% + 50% * remaining BH time
|
-
|
U
|
| First Active
|
Active
|
Recovery
|
Frame Adv
|
Circuit
|
Invuln
|
| -
|
-
|
-
|
-
|
removes all
|
Full
|
|
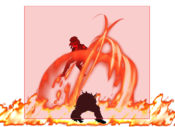
A Last Arc that activates only in the air. Generally one of the more difficult to avoid.
|
|
General Gameplan
Kouma is a decent grappler with a fairly strong air game. When played properly, he can threaten multiple avenues of attack with his strong forward mobility in conjunction with options like his divekicks, air normals that allow action after recovering from a whiff, and of course, his command grab.
Neutral
C-Kouma's neutral can be a bit difficult to navigate due to his smaller overall buttons and somewhat slower frame data. C-Kouma possesses a unique trait to retain air options off of any air button. What C-Kouma lacks in solid options, he makes up for with his versatility in playing neutral. His 5A and 2A are relatively fast at 5 frames, having averagely sized hitboxes and a decent amount of active frames, but have no disjointed hitbox. His 5B and 5C normals are among the slowest of their kind in the game (active on frame 11), and have relatively poor hurtbox placement to boot, making them rather difficult to use in neutral. Kouma's walk speed is pretty slow. His dash and air dash are solid, covering good distance quickly and letting him make the most of his relatively small normals. The grounded dash can sometimes slip under certain moves, like F-Aoko's projetile. C-Kouma's usage of 668 is very strong, allowing him to enter the air and potentially threaten using his dash momentum very well. This allows him to potentially cover large amounts of space quickly using his air dash or covering small space using forward drift out of 668. All of these options come from a rather non-committal action that allows him to conserve multiple options and is key to playing neutral with C-Kouma. His backdash leaves something to be desired, having a fair bit of recovery, making it extremely unsafe to use when not actually dodging a hit. C-Kouma tends to try anti airing with 623A and 22A but his strongest anti air option lies within using his dash to get under jumping opponents and catching landings using 2C. C-Kouma can also beat many air moves such as all of F-Ryougi's buttons, C-Arc 63214A/B, or most crossup hitbox moves using his 2B to low profile these moves and score an air counter hit. With meter, you can use j.236C to anti air and get a combo. Even if it is blocked, it still retains your advantage in nearly any situation it's used in. C-Kouma's j.B is quite active, allowing him to potentially poke out against many moves that extend their hurtbox outwards such as Nero j.C or Kohaku j.B with rather low commitment due to retaining air options on whiff. Using this tool to its full potential helps form a strong core of his air game when combined with the rest of his tool kit. His j.C being a very strong jump in and in the first 3 active frames, actually has a sizable hitbox extending inwards that allows j.C to hit crossup. His divekicks can be used in a variety of ways to score counter hits, whiff punish from the air, or safely alter landing timing. j.214A in particular has the strength of being EX cancelable on whiff, allowing you to make it safe with 22C in many situations. j.214B performs a bounce back after connecting and allows you to retain any air options you had before you divekicked, while also being EX cancelable on hit/block.
Pressure
If you can make it past neutral, Kouma begins to excel - keeping your opponent in a constant state of pressure is the easiest way to victory. Kouma has a lot of different tricks up his sleeve to open people up in just about every way, depending on the opponent. All 3 of his crouching normals, as well as 236A (and 623B, if you're a crackhead) hit low, allowing him to effectively catch premature jumpouts, backdashes, and special inputs. 6C is a standing overhead that, while slow, can be cancelled into any of his normals, allowing a blocked 6C to continue pressure and a hit 6C to start a combo. 214A is your primary mix-up tool, allowing you to punish an enemy complacent in just blocking you. In pressure, staggers are your friend, C-Kouma possesses very long stagger windows on his moves giving him a large variety of timings to perform staggers. Delaying your hits with the right time can mask a dash-in that can let you potentially 214A or continue the pressure. 5B~[B] pulls your opponent back towards you, allowing pressure to continue indefinitely without needing to dash back in, should your opponent not contest it. 5B~B has many different cancel windows that allow you to frame trap, charge, or potentially refresh your normals letting 5B recover. If your opponent begins to shield as F/H moon 5B~[B], you can try using 236A or 214A to beat the shield attempt from an F/H moon. The key to success is remaining ambiguous by not establishing a recognizable pattern - do different resets in different places with different timings while doing pressure to punish escape attempts that would work if you remained stagnant. Of his moves with advantage on block, 2C is +1 and 236A can be plus depending on spacing. After 236A on block, you can potentially frame trap again with 5A to continue your turn. When utilizing 2A whiff in pressure you begin to acquire some nice frame data.
- 5B becomes -2
- 5B~B becomes -2
- 5C becomes +1
- 2C stays +1
- 6C becomes 0
You retain the option to whiff cancel into something to score counter hits or hit people jumping out while also remaining ambiguous with possible reset attempts.
Staggering your rekka series can be rather effective at catching jump or mash attempts, though they are all shieldable standing. This gives you the option to potentially dash-in after performing your rekka series due to the fear of a follow up. Concerning pressure resets, staggered use of your normals can mask a dash-in, 5B~[B] forgoes the need for one, and a well placed TK 236C will put you closer at considerable advantage if in the corner. Strategic use of divekicks can also be a powerful reset tool, as they will beat out many common low abare tools. It's important to be prepared to respond to EX Guards as C-Kouma, just a couple of EX Guards and C-Kouma's turn is over. Utilizing 214A and dash-in resets is important in catching out EX Guards.
Okizeme
Air Throw ender, after BnB, assuming normal wakeup time
5B and 2C will hit meaty, as well as beating low and high shield respectively. For non-meaty options, dash 5B and dash 2B come out decently quickly, and must be shielded in the proper direction, with 5B coming out slowly enough that a bunker inputted immediately will be punished; a dash into 2B can be delayed to a similar effect. Both of these options are effective at beating fuzzy jump with 2B being particularly effective due to being a low. 2C at max range avoids several reversals, allowing a punish. Dash 5A will also hit meaty on many characters, allowing a quick start to pressure. Against opponents who backdash on wakeup, dash 5A/2A > 2C will cover a backdash, as well as dash 5B~B; if the opponent's backdash is airborne, the former is preferable, as the resulting confirm is better and easier. Dash 22A will trade favorably with some reversals. As with pressure, dashing into a delayed 214A can be a good way to punish a complacent opponent. Divekicks and IADs should also be considered when conditioning. Dash tk j.236C when you have the meter to afford it has the use of being very + if blocked, beating most reversals and low shield in addition to most cancel options if shielded standing, trading with wake up bunker, and creating guard break opportunities against jumping opponents.
j.214C ender, after BnB, assuming normal wakeup time
Similar to above, but Kouma lands closer to his opponent, allowing for slightly more time to act before the opponent wakes up. This makes dash 5B and 2B hit meaty. 6C is also an option that while not hitting meaty, makes many heat hitboxes whiff. Unlike air throw ender, this leaves you at enough advantage to bait many DPs (except particularly massive ones) by super jumping forward.
214A or Air Throw > 6C, midscreen
Kouma has access to sandoori and drift mixups after these knockdowns. The former consists of a super jump forward and an airdash back coupled with a falling j.C. The j.C can hit (same side, high) or whiff, allowing Kouma to instead use 2A for a fast low or 214A for a command grab. The drift mixup simply involves dashing forward, neutral jumping, and holding back, allowing Kouma to come down on either side of his opponent for a meaty 2A. For both mixups, 5B, 2B, and 214A are useful against opponents who like to shield. You're able to use 22C following a 214A knockdown as well to gain armor and have time to meaty. This armor will allow you to armor through wakeup options such as heat and various other reversals (e.g. Nanaya 623x) and be able to punish.
Defense
Being a C-Moon character, Kouma has access to Ex-Guard, a long held shield, and Ex-Shield. Ex-Guard is helpful in every situation, and using it to cause an opponent to whiff can turn the tide in your favor, as a quick low sweep can catch a recovering opponent, or dash 214A can catch one who understands the necessity to block after a whiff. Held shield is especially powerful for Kouma, moreso than other characters, as he can cancel into 214A, which cannot be jumped if cancelled into immediately on the ground, and can catch an airborne opponent landing if delayed slightly. Do however mindful of your opponent's remaining air options when using this option as if they have a double jump or airdash left to cancel into on shield you may end up getting whiff punished. Shield into 22A is another decent option for opponents with multi-hit jump-ins. Ex-Shield into 5A is another powerful anti-jump-in tool that allows Kouma to convert into a corner carrying combo. 2C and 623A are your primary tools for stopping a grounded approach, as they come out pretty quickly, have decent active frames, far reach (comparatively), and enough disjoint to get the job done. 623A and 22A are Kouma's best anti airs, but neither are particularly reliable against some of the stronger jump-ins in the game, so take care to understand their frame data as well as your opponent's. 623A and 5C are good tools for stuffing IADs. Against characters with telegraphed moves with long recovery, especially ones that move them forward (e.g. Satsuki 3[C], Hisui 5[C]), dodge can work wonders in conjunction with a followup 5A or 214A. Notably, Kouma's dash can low profile certain attacks and projectiles, allowing him to escape under opponents or punish through a projectile. Another tool of note when holding pressure in the corner is that 2B and 2C move Kouma forward slightly, allowing you to pull yourself out of the corner and potentially make some IAD buttons whiff, letting you to take the corner and start your own pressure.
C-Kouma also has a variety of metered reversals, with each one covering different options that the opponent might do. 214C has decently long reach and can latch onto enemy hurtboxes allowing it to disrespect many staggers and make a lot of characters tread carefully and second guess running their pressure. 623C is a DP with a fair bit of invuln that, while not great in terms of catching people above you vertically, does have a lot of horizontal reach allowing it to beat certain strong moves such as C-Nero 5[C] at many ranges, but is also only air unblockable for the first handful of active frames. 22C can function as an opt out against left/right mixups if you don't think that the opponent will meaty with something that they can whiff cancel into shield/throw in reaction to the superflash. j.236C can disrespect improperly timed meaties and function as a costly antiair that confirms into 3k on hit in most cases and if blocked will usually result in either a return to neutral or a scramble situation in your favor. C-Kouma is a character that can easily make a lot of characters think twice about running parts of their offense as long you retain 100 meter to spare. Even without using them, the threat of C-Kouma's reversals can often give you openings to get out if you keep a good eye for them. On the other hand, a savvy opponent expecting a reversal can simply wait for superflash, as all 3 can be punished by an opponent who simply waits and reacts appropriately. Presenting your reversals allows you to gain more options on wakeup if they fear your reversals and elect to wait for the superflash, helping you possibly get your turn back with a more risky option such as wakeup jump, mash, or even dash 2A.
Combos
| Combo Notation Help
|
Disclaimer: Combos are written by various writers, so the actual notation used in pages can differ from the standard one.
For more information, see Glossary and Controls.
|
| X > Y
|
X input is cancelled into Y.
|
| X > delay Y
|
Must wait for a short period before cancelling X input into Y.
|
| X, Y
|
X input is linked into Y, meaning Y is done after X's recovery period.
|
| X+Y
|
Buttons X and Y must be input simultaneously.
|
| X/Y
|
Either the X or Y input can be used.
|
| X~Y
|
This notation has two meanings.
- Use attack X with Y follow-up input.
- Input X then within a few frames, input Y. Usually used for option selects.
|
| X(w)
|
X input must not hit the opponent (Whiff).
|
| j.X
|
X input is done in the air, implies a jump/jump cancel if the previous move was done from the ground.
Applies to all air chain sections:
- Assume a forward jump cancel if no direction is given.
- Air chains such as j.A > j.B > j.C can be shortened to j.ABC.
|
| sj.X
|
X input is done after a super jump. Notated as sj8.X and sj9.X for neutral and forward super jumps respectively.
|
| dj.X
|
X input is done after a double jump.
|
| sdj.X
|
X input is done after a double super jump.
|
| tk.X
|
Stands for Tiger Knee. X motion must be buffered before jumping, inputting the move as close to the ground as possible. (ex. tk.236A)
|
| (X)
|
X is optional. Typically the combo will be easier if omitted.
|
| [X]
|
Input X is held down. Also referred to as Blowback Edge (BE). Depending on the character, this can indicate that this button is held down and not released until indicated by the release notation.
|
| ]X[
|
Input X is released. Will only appear if a button is previously held down. This type of input is referred to as Negative Edge.
|
| {X}
|
Button X should only be held down briefly to get a partially charged version instead of the fully charged one.
|
| X(N)
|
Attack "X" should only hit N times.
|
| (XYZ)xN
|
XYZ string must be performed N times. Combos using this notation are usually referred to as loops.
|
| (XYZ^)
|
A pre-existing combo labelled XYZ is inserted here for shortening purposes.
|
| CH
|
The first attack must be a Counter Hit.
|
| Air CH
|
The first attack must be a Counter Hit on an airborne opponent.
|
| 66
|
Performs a ground forward dash.
|
| j.66
|
Performs an aerial forward dash, used as a cancel for certain characters' air strings.
|
| IAD/IABD
|
Performs an Instant AirDash.
|
| AT
|
Performs an Air Throw. (j.6/4A+D)
|
| IH
|
Performs an Initiative Heat.
|
| AD
|
Performs an Arc Drive.
|
| AAD
|
Performs an Another Arc Drive.
|
Starters
| Condition
|
Notation
|
Damage
vs V.Sion
|
Notes
|
|
| Normal starter, grounded opponent,
|
- (2A)/(5A) > 2B > 5B~B > 5C > 2C
|
???
|
| |
| Meter Gained: ??? |
Meter Given (vs C-Moon): ??? |
| Your main starter on a grounded opponent. On an airborne opponent, immediately jump-cancel into an air string instead. |
|
|
Enders
| Condition
|
Notation
|
Damage
vs V.Sion
|
Notes
|
|
| Normal starter, grounded opponent,
|
|
???
|
| |
| Meter Gained: ??? |
Meter Given (vs C-Moon): ??? |
| Standard air throw ender OR j.214C for a better knockdown situation and a little more damage. |
|
|
OTG Pick ups
| Condition
|
Notation
|
Damage
vs V.Sion
|
Notes
|
|
| OTG Starter
|
|
1251 (2C Knockdown)
826 (236A Knockdown)
|
| |
Meter Gained: 23.5% (2C Knockdown)
17.5% (236A Knockdown) |
Meter Given (vs C-Moon): 7% (2C Knockdown)
5.2% (236A Knockdown) |
| Midscreen OTG combo. You can chase any tech with a well timed dash 2C. |
|
|
| OTG Starter
|
- 6C > 2C > 236A~delay 236B~236C > j.CB > dj.BC > AT/j.214C
|
3381
|
| |
| Meter Gained: 38.9% |
Meter Given (vs C-Moon): 22.5% |
| Can only be performed from 2C or no tech from normal throw. |
|
|
| OTG Starter, 100% meter
|
- tk.236C > sj9.CB > dj.BC > AT/j.214C
|
2893 (2C Knockdown)
2580 (236A Knockdown)
|
| |
Meter Gained: -84.6% (2C Knockdown)
-90.6% (236A Knockdown) |
Meter Given (vs C-Moon): 19.9% (2C Knockdown)
18.1% (236A Knockdown) |
| Midscreen OTG relaunch combo. j.236C must be done right after the knockdown to be able to OTG from midscreen. |
|
|
| OTG Starter, Corner-only
|
|
1836 (2C Knockdown)
1427 (236A Knockdown)
|
| |
Meter Gained: 49% (2C Knockdown)
43% (236A Knockdown) |
Meter Given (vs C-Moon): 14.7% (2C Knockdown)
12.9% (236A Knockdown) |
| Basic corner OTG combo. Most common from stray 236A but can happen from stray 2C as well. You can punish any tech with 2B. You can cut out 1 2A to make punishing techs easier. |
|
|
| OTG Starter, Corner-only
|
- 2AAAA > 2C > 5AAA > 5C > 8
|
1894 (2C Knockdown)
1485 (236A Knockdown)
|
| |
Meter Gained: 51% (2C Knockdown)
45% (236A Knockdown) |
Meter Given (vs C-Moon): 15.3% (2C Knockdown)
13.5% (236A Knockdown) |
| Corner OTG combo that can be unsafe if you don't jump cancel. You can do iad forwards or backwards to punish a tech with a j.C. |
|
|
| OTG Starter, Corner-only, 100% meter
|
- 2AAAA > 2C > tk.236C > sj9.CB > dj.BC > AT
|
3002 (2C Knockdown)
2593 (236A Knockdown)
|
| |
Meter Gained: -61.1% (2C Knockdown)
-67.1% (236A Knockdown) |
Meter Given (vs C-Moon): 26.9% (2C Knockdown)
25.1% (236A Knockdown) |
| OTG relaunch combo using j.236C. |
|
|
| OTG Starter, Blood Heat
|
|
6200 (2C Knockdown)
5826 (236A Knockdown)
|
| |
Meter Gained: -All (2C Knockdown)
-All (236A Knockdown) |
Meter Given (vs C-Moon): 24.5% (2C Knockdown)
22.7% (236A Knockdown) |
| OTG Pickup with AAD. |
|
|
Normal Combos
| Condition
|
Notation
|
Damage
vs V.Sion
|
Notes
|
|
| Normal starter, grounded opponent
|
- (5A/2A) > 2B > 5B~B > 5C > 2C > 236A~236C > j.CB > dj.BC > AT/j.214C
|
5248 (2B Starter)
4875 (5A Starter)
4775 (2A Starter)
|
| |
Meter Gained: 81% (2B Starter)
84% (5A Starter)
84.5% (2A Starter) |
Meter Given (vs C-Moon): 24.3% (2B Starter)
25.2% (5A Starter)
25.3% (2A Starter) |
| This is his most basic bread and butter combo. It does the most damage when started with 2B and has to be used at close range. May have to omit 5B~B depending on your distance on the starter. |
|
|
| Normal starter, grounded opponent
|
- (5A/2A) > 2B > 5B~B > 5C > 2C > 236A~delay 236B~236C > j.CB > dj.BC > AT/j.214C
|
5498 (2B starter)
5109 (5A Starter)
5009 (2A Starter)
|
| |
Meter Gained: 84.5% (2B starter)
87.5% (5A Starter)
88% (2A Starter) |
Meter Given (vs C-Moon): 25.3% (2B starter)
26.2% (5A Starter)
26.4% (2A Starter) |
| The standard BnB you should be trying to go for. Due to distance you may have to cut 5B~B out of the combo for 2C to connect. The delay on 236B is done to make sure 236C connects on certain characters such as Ryougi and Ciel. |
|
|
| Normal starter, grounded opponent
|
- (5A/2A) > 2B > 5B~B > 5C > 2C > 236A~delay 236B~236C~delay 236C > delay j.CB > sdj.BC > AT/j.214C
|
5615 (2B starter)
5219 (5A Starter)
5119 (2A Starter)
|
| |
Meter Gained: 89.5% (2B starter)
92.5% (5A Starter)
93% (2A Starter) |
Meter Given (vs C-Moon): 26.8% (2B starter)
27.7% (5A Starter)
27.9% (2A Starter) |
| The most optimized universal BnB. It takes a bit of work to properly land. The final rekka extension can be added onto any rekka sequence. The final rekka extension is much easier at higher gravities, making it useful after long combos such as loops. |
|
|
| Normal starter, grounded opponent
|
- (5A/2A) > 2B > 5B~B > 5C > 2C > 236A~delay 236B~delay 236C~delay 236C~236C
|
4975 (2B Starter)
4613 (5A Starter)
4513 (2A Starter)
|
| |
Meter Gained: 58.5% (2B Starter)
61.5% (5A Starter)
62% (2A Starter) |
Meter Given (vs C-Moon): 18.6% (2B Starter)
19.5% (5A Starter)
19.7% (2A Starter) |
| This is a full rekka combo that will throw the opponent into the corner. This can be used to create a heat opportunity or tech trap. You can cut out any rekka before 236C as well for faster routing into rekka ender to avoid things like burst. You can catch any tech using 2B. If they don't tech, you get a safejump using j.C. |
|
|
| Normal starter, grounded opponent, 100%/200% meter
|
- (5A/2A) > 2B > 5B~B > 5C > 2C > 236A~delay 236B~delay 236C >delay tk.236C > sj8.C > dj.CB > AT/j.214C
|
5864 (2B Starter)
5435 (5A Starter)
5335 (2A Starter)
|
| |
Meter Gained: -33.2% (2B Starter)
-30.2% (5A Starter)
-29.7% (2A Starter) |
Meter Given (vs C-Moon): 32% (2B Starter)
32.9% (5A Starter)
33% (2A Starter) |
| Meter dump combo, can also be ended in j.214C for better oki from MAX. If performed in the corner the air combo should be performed as sj8.CB > dj.BC > AT. Good way to get the most out of your damage. |
|
|
| 5B CH starter, grounded opponent
|
- CH 5B~[B] > 2B > 5C > 2C > 236A~delay 236B~236C > j.CB > dj.BC > AT/j.214C
|
5864
|
| |
| Meter Gained: 84.5% |
Meter Given (vs C-Moon): 25.3% |
| High damaging combo from a counterhit 5B. This allows you to combo into 5B[B], pulling them back in to get more normals in even from a range. More common to have happen because of 5B's slow speed letting it stagger easy. Also effective at crushing low shield. |
|
|
| 6C starter, crouching opponent, far range
|
- 6C > 2C > 236A~delay 236B~236C> j.CB > dj.BC > AT/j.214C
|
4636
|
| |
| Meter Gained: 65.5% |
Meter Given (vs C-Moon): 19.6% |
| More common 6C hit 1-2 character lengths away. If you've already used 2C, you can go right into 236A. |
|
|
| 6C starter, crouching opponent, close range
|
- 6C > 2A > 2B > 5B~B > 5C > 2C > 236A~delay 236B~236C > j.CB > dj.BC > AT/j.214C
|
5737
|
| |
| Meter Gained: 98% |
Meter Given (vs C-Moon): 29.4% |
| Point blank 6C confirm with all normals available. You can cut out any normal you don't have available after 6C, since 6C combos into 236A. |
|
|
| 214A [4] Midscreen starter
|
- 214A [4], 66 5C > j.CB > dj.BC > AT
|
3702
|
| |
| Meter Gained: 40% |
Meter Given (vs C-Moon): 14.2% |
| This works from about the middle of the screen. It's possible to fit a 5A in before 5C for slightly higher damage and meter gain for increased effort. |
|
|
| 214A [4] Near corner starter
|
- 214A [4], 2C > 236A~delay 236B~236C > j.CB > dj.BC > AT/j.214C
|
4019
|
| |
| Meter Gained: 55.5% |
Meter Given (vs C-Moon): 18.8% |
| The highest damage pickup not counting loops from your wall slam follow-up. To get a feel for the spacing, jump behind your opponent in training mode from their starting space and 214A [4] from there, this position is nearly the max range. |
|
|
Normal starter, grounded opponent
Works On: Everyone except Kouma
|
- (2A) > 2B > 5B(~B) > 5C > 2C > (delay) 5A > 236A, 5A > 236A~delay 236B~236C~delay 236C > j.CB > dj.BC > AT/j.214C
|
5805 (2B Starter)
5302 (2A Starter)
|
| |
Meter Gained: 99% (2B Starter)
102.5% (2A Starter) |
Meter Given (vs C-Moon): 29.7% (2B Starter)
30.7% (2A Starter) |
| The nearly universal single rep 236A loop. Most characters require a delay for the first 5A, or else the first 236A will whiff. A couple of characters will make 5A whiff if you do 5B~B in the corner, use 5B in those situations instead. Replace all 5A's with 2A's and omit 5B~B on Necos, because 5A will whiff due to their small hurtbox, and 5B~B will push them out of range of your 2A. |
|
|
| Airborne CH starter
|
- CH j.A/B/C, 5A > 5C > j.CB > dj.BC > AT
|
3329 (j.A Starter)
3631 (j.B Starter)
3851 (j.C Starter)
|
| |
Meter Gained: 46% (j.A Starter)
49.5% (j.B Starter)
52% (j.C Starter) |
Meter Given (vs C-Moon): 13.8% (j.A Starter)
14.8% (j.B Starter)
15.6% (j.C Starter) |
| Most basic air CH pickup. If you catch with 5A too high you may have to do (j.C > dj.CB > AT) for your air combo. |
|
|
| Airborne CH starter
|
- CH j.A/B/C, 2C > 236A~delay 236B~236C > j.CB >dj.BC > AT/j.214C
|
3833 (j.A Starter)
4237 (j.B Starter)
4431 (j.C Starter)
|
| |
Meter Gained: 58.5% (j.A Starter)
62% (j.B Starter)
64.5% (j.C Starter) |
Meter Given (vs C-Moon): 17.5% (j.A Starter)
18.6% (j.B Starter)
19.3% (j.C Starter) |
| The common pickup you should try to aim for from any CH that launches the opponent. High damage for how basic it is. |
|
|
| Airborne CH starter
|
- CH j.A/B/C, 6C, 2C > 236A~delay 236B~236C > j.CB > dj.BC > AT/j.214C
|
4207 (j.A Starter)
4606 (j.B Starter)
4826 (j.C Starter)
|
| |
Meter Gained: 68.5% (j.A Starter)
72% (j.B Starter)
74.5% (j.C Starter) |
Meter Given (vs C-Moon): 20.5% (j.A Starter)
21.6% (j.B Starter)
22.3% (j.C Starter) |
| Optimal universal air CH pickup. In most cases your air CH needs to happen while your falling to have enough time to land into 6C. Very high damage and sets up the chance to perform loops. |
|
|
| gAT starter
|
- gAT, delay 5AA > 5C > j.CB > dj.BC > AT
|
3008
|
| |
| Meter Gained: 46% |
Meter Given (vs C-Moon): 13.8% |
| Basic gAT combo. Deals decent damage for how easy it is. |
|
|
| gAT starter
|
- gAT, delay 5A > 236A~delay 236B~236C > j.CB > dj.BC > AT
|
3139
|
| |
| Meter Gained: 49% |
Meter Given (vs C-Moon): 14.7% |
| Optimal universal gAT combo. Grants more meter, damage, and corner carry. |
|
|
Corner Combos
| Condition
|
Notation
|
Damage
vs V.Sion
|
Notes
|
|
| Normal starter, grounded opponent, 100%/200% meter
|
- (5A/2A) > 2B > 5B~B > 5C > 2C > 236A~delay 236C > delay j.C > j.236C > sj8.BC > dj.CB > AT/j.214C
|
5905 (2B Starter)
5471 (5A Starter)
5371 (2A Starter)
|
| |
Meter Gained: -27.7% (2B Starter)
-24.7% (5A Starter)
-24.2% (2A Starter) |
Meter Given (vs C-Moon): 34.7% (2B Starter)
35.6% (5A Starter)
35.8% (2A Starter) |
| Corner exclusive rejump j.236C combo. It adds a small amount of damage over the normal j.236C launch combo but generates more meter. |
|
|
| 214A [4] starter, cornered
|
- 214A [4], delay 5AA > 5C > j.CB > dj.BC > AT
|
3788
|
| |
| Meter Gained: 46% |
Meter Given (vs C-Moon): 16% |
| This combo is performed while in the corner most often from 5D > 214A. Basic follow-up that allows you to take the corner for your own pressure and okizeme. Against Roa, you have to microwalk out of the corner to keep Roa in the corner. |
|
|
| 214A [4] starter, cornered
|
- 214A [4], delay 5A > 236A~delay 236B~236C > j.CB > dj.BC > AT/j.214C
|
3908
|
| |
| Meter Gained: 49% |
Meter Given (vs C-Moon): 16.9% |
| More optimal version of the above combo. Highest damage universal 214A [4] route from the corner. Against Roa, you have to microwalk out of the corner to keep Roa in the corner. |
|
|
Additional Resources
C-Kouma Match Video Database
Notable Players
| Name |
Color
|
Region |
Common Venues |
Status |
Details
|
akatsuki
(朱月) |

|
Japan |
A-cho,
KorewaMelty,
Play Spot BIG ONE 2nd |
Active |
Very technical, the JP Kouma to watch for loops and optimal conversions.
|
ari
(あり) |

|
Japan |
Kirisugu, KorewaMelty |
Inactive |
Shows off strong tick throws and post throw mixups. Displays very strong movement using his ground dash and momentum drift to maneuver even the most difficult matchups.
|
| Inami |

|
North America |
Netplay |
Inactive |
Positions herself aggressively, using preemptive buttons to score rewarding counter-hits. Shows off good pressure and has a lot of footage to watch showing technical aspects of C-Kouma.
|
JIN
(jin_kouma29) |

|
Japan |
A-cho,
Nihonbashi Athena,
Netplay |
Active |
The golden standard for C-Kouma. Shows off many of C-Kouma's unique answers to situations. Strong combos, pressure, defense, and neutral allow him to use C-Kouma at a very high level. Occasionally posts tech to his Twitter. Very ready to answer questions on Discord if you ask!
|
Lily
(Lilianna#1381) |

|
North America |
Netplay |
Inactive |
Found in the Melty Blood Community Server and Meltycord. Shows off a more grounded game with C-Kouma, utilizing many dash unders and grounded anti airs. Frequently will play for time out.
|
mudaniku
(むだにく) |

|
Japan |
A-cho |
Inactive |
The original great C-Kouma. Footage is a bit outdated, but still shows off strong situational awareness and C-Kouma fundamental concepts.
|
| Skeleton |

|
North America |
Next Level, Netplay |
Active |
This is my color, don't take it.
|
| TRG |

|
Japan |
A-cho,
Play Spot BIG ONE 2nd |
Active |
Primarily plays F but shows strong proficiency with C at times too.
|
zashinu
(Zash犬) |

|
Japan |
A-cho,
KorewaMelty,
Play Spot BIG ONE 2nd |
Inactive |
Shows off a proactive style of play that demonstrates how to overwhelm the opponent. Good at making opponents uncomfortable even in advantageous situations. His style sometimes borders on recklessness, leading to volatile results.
|
MBAACC Navigation
