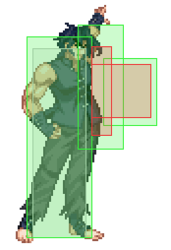
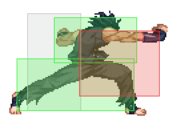
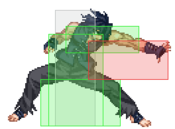
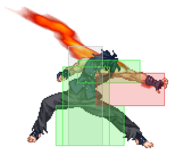
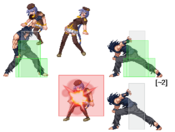
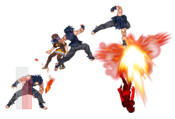
Character Page Progress
This page is still a work in progress, consider joining as an editor to help expand it. Please update this character's roadmap page when one of the editing goals have been reached.
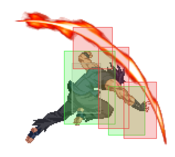
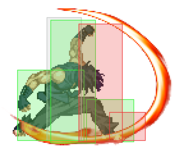
| In Progress |
To-do
|
- Combos:
- Add meter gain/given numbers and video links to the pre-existing combos.
- Move Descriptions:
- Complete Last Arc frame data.
- Expand upon to the shorter descriptions, cite their uses, add captions where helpful, etc.
|
- Additional Ressources/Players to watch/ask
- (Add any external links to ressources such as video guides or articles.)
- If you know any players in particular that can be helpful for learning this character, please add them with, if possible a way to contact them (such as a Discord handle) and a name that can be searched in the match video database.
- Overview/General Gameplan:
- Add a short summary of this character with a list of strengths and weaknesses
- Do your best to describe how to play this character, change or add subsections based on what you would write as a guide.
|
Additional Resources
F-Kouma Match Video Database
F-Kouma Essentials
F-Kouma Corner Set ups
Notable Players
| Name |
Color
|
Region |
Common Venues |
Status |
Details
|
| JIN |

|
Japan |
A-cho, Play Spot BIG ONE 2nd, Nihonbashi Athena, Netplay |
Active |
|
Jog
(Jog#5053) |

|
North America |
Netplay, Midwest locals, Majors |
Active |
|
Rau
(rau#6829) |

|
South America |
Netplay |
Active |
|
Tatu
(Tatu#8254) |

|
Brazil |
Netplay |
Active |
|
TRG
(とらじ) |

|
Japan |
A-cho, Play Spot BIG ONE 2nd |
Active |
|
Overview
Playstyle
 F-Kouma is centered around using powerful mixups to keep the opponent constantly guessing. F-Kouma is centered around using powerful mixups to keep the opponent constantly guessing. |
| Pros |
Cons |
- Large Health Pool: Has the 5th highest health in the game, which allows him take some more hits than most other characters.
- Mixups and Okizeme: F-Kouma has access to powerful mixups anywhere on the screen, and he can always force one on hit thanks to his 623A combo ender giving ample time for oki.
- Anti-Airs: Sporting one of Melty's very few grounded anti-airs in the form of 2B, F-Kouma can deter the opponent from air approaches.
|
- Poor Air Confirms: Due to F-Kouma's air combo rules, he cannot confirm off of air hits unless he gets a counter hit, hurting his air game a bit.
- Technical Combos: Most of F-Kouma's optimal combos are somewhat difficult to perform, usually having weird timings, tight links, or a mix of both.
- Linear Pressure: Due to his low range and only having a single low with 2C, F-Kouma has to do risky pressure resets to keep momentum if an opponent blocks one of his mixups.
|
General Gameplan
F-Kouma is different from his C and H moons. Where as C-Kouma your pressure is done through the use of rebeats and rekkas that yield good damage and H has a bit of a focus on rekka along with good neutral tools such as 5A6AA, F-Kouma is more focused on securing a knockdown and looping his powerful 50/50 set up. That's not all he has though as his OTG set ups rack up his damage output and can also catch all techs if done right, essentially giving him good damage whether they tech or not.
While these are all great things, you still have to get the hit. So in short, your gameplan is to bide your time and use your anti-air 2B and move into a spot where you can land a command grab or start your pressure.
Neutral
In neutral, while you may not have the obvious neutral tools to aid you like some of the cast, F-Kouma has a good anti-air 2B that allows him to score air CH's if someone is approaching him. It's also important that you learn when to use air backdash j.B and airdash j.C as air backdash j.B is pretty good to make sure you get the disjointed part of the button out to protect space but also to look for air counterhits if it hits. j.A is generally used for counter hit fishing if you're up close to someone. Other tools such as 22A are decent if you are using it preemptively to anti-air or even as a dash up option occasionally if you know they are going to mash.
Since you don't have the greatest of speeds in the air, you need to make good use of your dash jump, super jump and double jumps accordingly to make the most out of j.C. Again, as F-Kouma, your neutral isn't your main shining point so at many points in time you have to pick your spots wisely and dash in when needed or just wait until the opponent overextends to anti-air with 2B. To make people come to you, you have the option to charge meter in neutral.
Pressure
His pressure, since he's a Full Moon character, is fairly linear because he doesn't have a particular special move that makes him plus. Generally his pressure revolves around the fear of command grabs and while his 2A is a mid it's important to use it to stagger in order to catch mashing or jump out attempts. His 5B has a long cancel window too. Here's a few sample ideas.
- 2A delay 2A 5B delay 2C
- 2A, 214A
- 2A, 2A 5B, delay 2C, 236A
- 2A, 2A 5B delay 2B 2C, 236A
- 2A, 2A 5B 214B
Also look around for TRG's (jp's current F-Kouma) footage because you may see similar variations for his pressure and such and how it works for him. Kouma's pressure is generally short but can be useful if you learn to incorporate whiff punishing for him. Moving on to okizeme
Okizeme
Now this is where F-Kouma shines. Some of the corner set ups can be found here: F-Kouma Corner Set ups but before that, let's talk about the midscreen options from the main combo you'll be using
- 5B > 2B > 2C > delay 236B~236B~delay 236[C], 5A > 6C > j.[C] > dj.[C] > delay 623A
From this combo you have a 50/50 of either landing left/right depending on how you did dash neutral jump drift and whether you choose to airdash back j.C or land 2A/214A. Any of the options allows you to loop it back into the same set up as well. So it's important to learn how to use 214A vs 2A vs j.C. Generally 214A for your oki is for people that like to shield or can block l/r's. Lastly, delay airdash j.C is your left/right of course.
Here's a full list of characters the drift mix works and doesn't work on:
Works on:
- Aoko, Ciel, Hisui, Nanaya, Neco, Neco Chaos, Nero, Roa, Satsuki, Tohno, V.Sion and W.Len
Doesn't Work on
- Akiha, Hime, Arcueid, Kohaku, Kouma, Len, Mech, Miyako, P.Ciel, Red Arcueid, Ries, Ryougi, Seifuku, V.Akiha and Warachia
In the corner to set up an OTG sequence for now use this combo.
- 2A 5B 2B 2C 6C j[C] j[C] dl 623B
On non tech you can choose one of these options for different reasons
- (no tech) 2AAA 5c 623A
- (no tech) 2AAA 5c 623C
The latter option is usually used when you're in Max and want to extend your damage while also looking to catch tech and can loop it for 2-3 times then after that you would end it with 2AAA 5C 623A. Of course you can catch the tech if you wait a bit before dashing and react to tech with your 2A as well.
Here's a route for OTG corner steal (2AAAAA 2B 5C 623A); this one works if they don't tech something like throw or 236[C] in the corner and you want to set up the gap in the corner
Works on:
- Aoko, Nanaya, Kouma, Ciel, Riesbyfe, Warachia, Roa, Arcueid, P.Ciel, Satsuki and Nero
Doesn't Work on:
- Tohno, Hime, Miyako, Sion, V.Sion, Akiha, Warc, V.Akiha, Seifuku, Len, Ryougi, W.Len, Neco Chaos, Hisui, Neco and Kohaku
A 214A ender can also allow you to 22C to discourage mashing of all sorts since it will absorb Heat, abare 2A etc. Also gives a safe jump via iad j.C
Defense
Defense wise, beyond system mechanics F-Kouma has 214C and 22C.
214C is a really fast command grab that is not jumpable postflash, its range is small but grabs hurtboxes as well making it a good reversal in the right spots. You also have 22C which is invulnerable (only during frames 1 through 8 of the startup) and gives armor but can be thrown to break the armor and can be thrown postflash since it's slow enough, you can even do 2A(whiff) and then grab Kouma out of it. It's important to know when to use these reversals as 214C is self explanatory while 22C is best used if someone is being greedy with their run up oki sequences or if they are looking to meaty you with a 5B normal. These are your defensive options and they can be good just be sure to find the right spots in order to use them to their full usage.
Combos
| Combo Notation Help
|
Disclaimer: Combos are written by various writers, so the actual notation used in pages can differ from the standard one.
For more information, see Glossary and Controls.
|
| X > Y
|
X input is cancelled into Y.
|
| X > delay Y
|
Must wait for a short period before cancelling X input into Y.
|
| X, Y
|
X input is linked into Y, meaning Y is done after X's recovery period.
|
| X+Y
|
Buttons X and Y must be input simultaneously.
|
| X/Y
|
Either the X or Y input can be used.
|
| X~Y
|
This notation has two meanings.
- Use attack X with Y follow-up input.
- Input X then within a few frames, input Y. Usually used for option selects.
|
| X(w)
|
X input must not hit the opponent (Whiff).
|
| j.X
|
X input is done in the air, implies a jump/jump cancel if the previous move was done from the ground.
Applies to all air chain sections:
- Assume a forward jump cancel if no direction is given.
- Air chains such as j.A > j.B > j.C can be shortened to j.ABC.
|
| sj.X
|
X input is done after a super jump. Notated as sj8.X and sj9.X for neutral and forward super jumps respectively.
|
| dj.X
|
X input is done after a double jump.
|
| sdj.X
|
X input is done after a double super jump.
|
| tk.X
|
Stands for Tiger Knee. X motion must be buffered before jumping, inputting the move as close to the ground as possible. (ex. tk.236A)
|
| (X)
|
X is optional. Typically the combo will be easier if omitted.
|
| [X]
|
Input X is held down. Also referred to as Blowback Edge (BE). Depending on the character, this can indicate that this button is held down and not released until indicated by the release notation.
|
| ]X[
|
Input X is released. Will only appear if a button is previously held down. This type of input is referred to as Negative Edge.
|
| {X}
|
Button X should only be held down briefly to get a partially charged version instead of the fully charged one.
|
| X(N)
|
Attack "X" should only hit N times.
|
| (XYZ)xN
|
XYZ string must be performed N times. Combos using this notation are usually referred to as loops.
|
| (XYZ^)
|
A pre-existing combo labelled XYZ is inserted here for shortening purposes.
|
| CH
|
The first attack must be a Counter Hit.
|
| Air CH
|
The first attack must be a Counter Hit on an airborne opponent.
|
| 66
|
Performs a ground forward dash.
|
| j.66
|
Performs an aerial forward dash, used as a cancel for certain characters' air strings.
|
| IAD/IABD
|
Performs an Instant AirDash.
|
| AT
|
Performs an Air Throw. (j.6/4A+D)
|
| IH
|
Performs an Initiative Heat.
|
| AD
|
Performs an Arc Drive.
|
| AAD
|
Performs an Another Arc Drive.
|
Normal Combos
| Condition
|
Notation
|
Damage
vs V.Sion
|
Notes
|
|
| Normal starter, grounded opponent.
|
- 5B > 2B > 2C > 6C > delay 623A
|
3496
|
| |
| Meter Gained: 31.5% |
Meter Given (vs C-Moon): 11.6% |
| Simplified BnB. |
|
|
| Normal starter, grounded opponent.
|
- 5B > 2B > 2C > 6C > j.[C] > dj.[C] > land, delay 623A
|
4257
|
| |
| Meter Gained: 53.2% |
Meter Given (vs C-Moon): 18.8% |
| Basic BnB. |
|
|
| Normal starter, grounded opponent
|
- (2A >) 5B > 2B > 2C > delay 236B~236B~delay 236[C], 2A > 5A > 5C > 623A
|
4355
|
| |
| Meter Gained: 57.1% |
Meter Given (vs C-Moon): 20.1% |
| Rekka BnB. Adding more hits at the beginning will make you require to delay less before 236[C]. |
|
|
| Normal starter, grounded opponent
|
- 5B > 2B > 2C > delay 236B~236B~delay 236[C], 5A > 6C > j.[C] > dj.[C] > delay 623A
|
4855
|
|
| Meter Gained: 73.9% |
Meter Given (vs C-Moon): 25.7% |
(Video) |
| Advanced BNB. Best damage, meter gain and corner carry. Not worth going for from higher scaled starters as the gravity will make the later part of the combo more difficult. |
|
|
| Counterhit 2B starter, airborne opponent
|
|
3104
|
| |
| Meter Gained: ??? |
Meter Given (vs C-Moon): ??? |
| Simple anti-air counterhit combo. Do run up 5AA or 2B before 5C for higher damage. |
|
|
| Counterhit jB starter, airborne opponent, 100% meter
|
- CH j.B > land (66), 2C > delay 236B~236B~delay 236[C] > 5A > 6C > j.[C] > delay dj.[C] > land j.C > j.214C
|
4139
|
| |
| Meter Gained: ??? |
Meter Given (vs C-Moon): ??? |
| AirCounter combo midscreen with meter. |
|
|
| Raw Airthrow starter
|
- Raw AT > land, 2A > 5A > 5C > 623A
|
2566
|
| |
| Meter Gained: 14.8% |
Meter Given (vs C-Moon): 6.0% |
| Golden Airthrow combo. |
|
|
Corner Combos
| Condition
|
Notation
|
Damage
vs V.Sion
|
Notes
|
|
| Normal starter, grounded opponent, 100% meter
|
- 5B > 2B > 5C > 236C > 2B > 5C > 623A
|
5281
|
| |
| Meter Gained: ??? |
Meter Given (vs C-Moon): text |
| Corner combo with meter, on some characters replace 2B > 5C by 5A > 2B. |
|
|
| Normal starter, grounded opponent
|
- 5B > 2B > 2C > delay 236B~236B~delay 236[C], 2A > 5AA > 2B > 623A
|
4373
|
| |
| Meter Gained: ??? |
Meter Given (vs C-Moon): ??? |
Corner combo that trades damage to take off the corner.
Use more "2A" at the beginning to increase gravity depending on the enemy. |
|
|
OTG Combos
| Condition
|
Notation
|
Damage
vs V.Sion
|
Notes
|
|
| OTG, normal starter.
|
- 2AAA(A) > (5B >) 5C > 623A
|
???
|
| |
| Meter Gained: ??? |
Meter Given (vs C-Moon): ??? |
| Basic OTG combo. Mostly used if the opponent doesn't tech 623B/C or ground throw in the corner. |
|
|
| OTG, normal starter.
|
|
???
|
| |
| Meter Gained: ??? |
Meter Given (vs C-Moon): ??? |
| OTG combo used to set up a tech chase with jump/IAD > j.C |
|
|
| OTG, normal starter.
|
- 5B > 2B > 5C > 22B > 623A
|
???
|
| |
| Meter Gained: ??? |
Meter Given (vs C-Moon): ??? |
| Double OTG corner combo used when the opponent respects the previous tech chase route. The opponent can neutral tech between 5C and 22B and punish with a fast button. You can also end in 623B to put the opponent in a techable knockdown again. |
|
|
| OTG, Blood Heat.
|
|
???
|
| |
| Meter Gained: ??? |
Meter Given (vs C-Moon): ??? |
| OTG Pickup with AAD. |
|
|
Move Descriptions
| Frame Data Help
|
| Header
|
Tooltip
|
| Move Box Colors
|
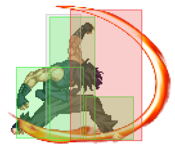
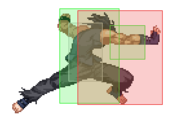
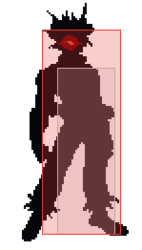
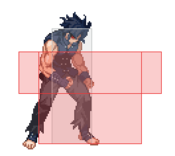
Light gray = Collision Box (A move lacking one means it can go through the opponent's own collision box).
Green: Hurt Boxes.
Red: Hit(/Grab) Boxes.
Yellow: Clash Boxes (When an active hitbox strikes a clash box, the active hitbox stops being active. Multi-hit attacks can beat clash since they will still progress to the next hitbox.)
Magenta: Projectile-reflecting boxes OR Non-hit attack trigger boxes (usually).
Blue: Reflectable Projectile Boxes.
|
| Damage
|
Base damage done by this attack.
(X) denotes combined and scaled damage tested against standing V. Sion.
|
| Red Damage
|
Damage done to the recoverable red health bar by this attack. The values are inherently scaled and tested against standing V. Sion.
(X) denotes combined damage.
|
| Proration
|
The correction value set by this attack and the way it modifies the scaling during a string. See this page for more details.
X% (O) means X% Overrides the previous correction value in a combo if X is of a lower percentage.
X% (M) means the current correction value in a combo will be Multiplied by X%. This can also be referred to as relative proration.
|
| Circuit
|
Meter gained by this attack on hit.
(X%) denotes combined meter gain.
-X% denotes a meter cost.
|
| Cancel
|
Actions this move can be cancelled into.
SE = Self cancelable.
N = Normal cancelable.
SP = Special cancelable.
CH = Cancelable into the next part of the same attack (Chain in case of specials).
EX = EX cancelable.
J = Jump cancelable.
(X) = Cancelable only on hit.
-X- = Cancelable on whiff.
|
| Guard
|
The way this move must be blocked.
L = Can block crouching
H = Can block standing.
A = Can block in the air.
U = Unblockable.
|
| Startup
|
Amount of frames that must pass prior to reaching the active frames. Also referred to as "True Startup".
|
| Active
|
The amount of frames that this move will have a hitbox.
(x) denotes frame gaps where there are no hitboxes is present. Due to varied blockstuns, (x) frames are difficult to use to determine punish windows. Generally the larger the numbers, the more time you have to punish.
X denotes active frames with a duration separate from its origin move's frame data, such as projectile attacks. In this case, the total length of the move is startup+recovery only.
|
| Recovery
|
Frames that this move has after the active frames if not canceled. The character goes into one frame where they can block but not act afterwards, which is not counted here.
|
| Advantage
|
The difference in frames where you can act before your opponent when this move is blocked (assuming the move isn't canceled and the first active frame is blocked).
If the opponent uses a move with startup that is at least 2 frames less than this move's negative advantage, it will result in the opponent hitting that move.
±x~±y denotes a range of possible advantages.
|
| Invul
|
Lists any defensive properties this move has.
X y~z denotes X property happening between the y to z frames of the animations. If no frames are noted, it means the invincibility lasts through the entire move.
Invicibility:
- Strike = Strike invincible.
- Throw = Throw invincible.
Hurtbox-Based Properties:
- Full = No hurtboxes are present.
- High = Upper body lacks a hurtbox.
- Low = Lower body lacks a hurtbox.
Miscellaneous Properties
- Clash = Frames in which clash boxes are active.
- Reflect = Frames in which projectile-reflecting boxes are active.
- Super Armor = Frames in which the character can take hits without going into hit stun.
|
Normal Moves
Standing Normals
|
|
| Damage
|
Red Damage
|
Proration
|
Cancel
|
Guard
|
| 400
|
202
|
80% (O)
|
-SE-, -N-, -SP-, -EX-, (J)
|
LH
|
| First Active
|
Active
|
Recovery
|
Frame Adv
|
Circuit
|
Invuln
|
| 5
|
4
|
6
|
2
|
2.7%
|
-
|
|
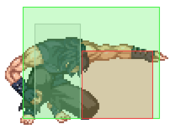
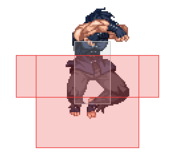
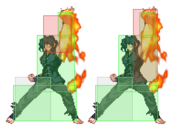
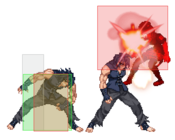
Close range slap that can help you out with people who try to jump out from your approach. Got +2 frame advantage on block. High hitbox. This is your go to normal if you get non air counter hits when your opponent is jumping while you are grounded, best converted into an air throw or 623X
|
|
|
|
| Damage
|
Red Damage
|
Proration
|
Cancel
|
Guard
|
| 700
|
454
|
100%
|
N, SP, EX, (J)
|
LH
|
| First Active
|
Active
|
Recovery
|
Frame Adv
|
Circuit
|
Invuln
|
| 11
|
4
|
17
|
-6
|
6.3%
|
-
|
|
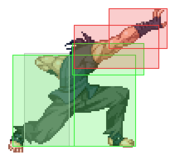
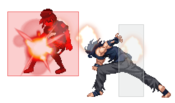
Can be used in combos for the most part, and maybe reach over a bit longer distances than the A normals. It moves Kouma foward a bit and is minus on block. 5B can also catch some techs and you can punish accordingly.
|
|
5C 5C 5[C] 5[C]
|
| 5C
|
Damage
|
Red Damage
|
Proration
|
Cancel
|
Guard
|
| 1000
|
707
|
90% (O)
|
N*, SP, EX, (J)
|
LH
|
| First Active
|
Active
|
Recovery
|
Frame Adv
|
Circuit
|
Invuln
|
| 7
|
4
|
20
|
-6
|
9.0%
|
-
|
|
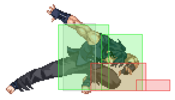
Normal-cancellable into 6C only. Somehow faster than 5B and same frame advantage. Also moves Kouma forward a bit. Holding 5c for 3 or more frames result in it coming out slower than 6 frames startup.
|
5[C]
~2
|
Damage
|
Red Damage
|
Proration
|
Cancel
|
Guard
|
300, 1000 (1268)
300, 1500 (1753)
|
(596)
(1281)
|
75%
100%
|
-
|
U
|
| First Active
|
Active
|
Recovery
|
Frame Adv
|
Circuit
|
Invuln
|
| 42
|
2
|
23
|
-
|
7.2%
|
-
|
|
This becomes an unblockable. The follow-up on hit is similar to his 214 series, which launches to the other side by default or by inputting 2 ends in an untechable knockdown and more damage.
|
|
Crouching Normals
|
|
| Damage
|
Red Damage
|
Proration
|
Cancel
|
Guard
|
| 350
|
202
|
75% (O)
|
-SE-, -N-, -SP-, -EX-, (J)
|
LH
|
| First Active
|
Active
|
Recovery
|
Frame Adv
|
Circuit
|
Invuln
|
| 5
|
4
|
7
|
1
|
3.15%
|
-
|
|
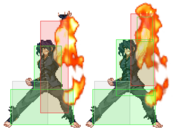
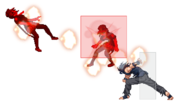
Your combo starter, generally the normal you start with in your pressure. Got a larger range than 5A and gives +1 frame advantage on block. Hits mid.
|
|
|
|
| Damage
|
Red Damage
|
Proration
|
Cancel
|
Guard
|
| 800
|
454
|
80% (O)
|
N, SP, EX, (J)
|
LH
|
| First Active
|
Active
|
Recovery
|
Frame Adv
|
Circuit
|
Invuln
|
| 7
|
3
|
16
|
-4
|
7.2%
|
-
|
|
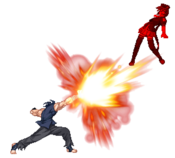
Great anti-air move. Also a part of Kouma's combo string.
|
|
2C 2C 2[C] 2[C]
|
| 2C
|
Damage
|
Red Damage
|
Proration
|
Cancel
|
Guard
|
| 1200
|
585
|
50% (O)
|
N*, SP, EX, (J)
|
L
|
| First Active
|
Active
|
Recovery
|
Frame Adv
|
Circuit
|
Invuln
|
| 11
|
3
|
19
|
-4
|
10.8%
|
-
|
|
F-Kouma's only low-hitting normal. Moves him forward a bit. Both versions are normal-cancellable into 6C only.
|
| 2[C]
|
Damage
|
Red Damage
|
Proration
|
Cancel
|
Guard
|
| 1500
|
1090
|
70% (O)
|
N*, SP, EX, (J)
|
L
|
| First Active
|
Active
|
Recovery
|
Frame Adv
|
Circuit
|
Invuln
|
| 31
|
3
|
10
|
5
|
11.7%
|
-
|
|
Slow, but advantageous on block.
|
|
Aerial Normals
|
|
| Damage
|
Red Damage
|
Proration
|
Cancel
|
Guard
|
| 300
|
151
|
75% (O)
|
-SP-, -EX-
|
HA
|
| First Active
|
Active
|
Recovery
|
Frame Adv
|
Circuit
|
Invuln
|
| 5
|
3
|
-
|
-
|
2.7%
|
-
|
|
A slightly smaller H-Kouma j.A.
|
|
|
|
| Damage
|
Red Damage
|
Proration
|
Cancel
|
Guard
|
| 800
|
606
|
90% (O)
|
SP, EX
|
HA
|
| First Active
|
Active
|
Recovery
|
Frame Adv
|
Circuit
|
Invuln
|
| 6
|
3
|
-
|
-
|
7.2%
|
-
|
|
Great air-to-air. Kouma specifically can also rejump after whiffed air normals, j.b being included makes this a powerful poking tool.
|
|
|
|
| j.C
|
Damage
|
Red Damage
|
Proration
|
Cancel
|
Guard
|
| 1000
|
606
|
85% (O)
|
SP, EX
|
HA
|
| First Active
|
Active
|
Recovery
|
Frame Adv
|
Circuit
|
Invuln
|
| 9
|
5
|
-
|
-
|
8.1%
|
-
|
|
Your prime jump-in normal.
|
| j.[C]
|
Damage
|
Red Damage
|
Proration
|
Cancel
|
Guard
|
| 1500
|
1212
|
90% (M)
|
SP, EX, J
|
HA
|
| First Active
|
Active
|
Recovery
|
Frame Adv
|
Circuit
|
Invuln
|
| 25
|
3
|
-
|
-
|
12.1%
|
-
|
|
His only jump-cancellable aerial normal, used as a combo tool.
|
|
Command Normals
|
|
| Damage
|
Red Damage
|
Proration
|
Cancel
|
Guard
|
| 700
|
505
|
50% (O)
|
SP, EX, (J)
|
LH
|
| First Active
|
Active
|
Recovery
|
Frame Adv
|
Circuit
|
Invuln
|
| 15
|
4
|
19
|
-5
|
7.2%
|
-
|
|
Kouma's standard launcher.
|
|
Universal Mechanics
|
|
| Damage
|
Red Damage
|
Proration
|
Cancel
|
Guard
|
| 1300
|
808
|
70%
|
-
|
U
|
| First Active
|
Active
|
Recovery
|
Frame Adv
|
Circuit
|
Invuln
|
| 3
|
1
|
20
|
-
|
0.0%
|
-
|
|
Ground techable grab. Stacks up great deals of damage when you OTG combo when your opponent does not tech, even more so when you spend meter on 623C for another tech situation.
|
|
|
|
| Damage
|
Red Damage
|
Proration
|
Cancel
|
Guard
|
| 1600
|
606
|
30%
|
-
|
U
|
| First Active
|
Active
|
Recovery
|
Frame Adv
|
Circuit
|
Invuln
|
| 2
|
1
|
12
|
-
|
0.0%
|
-
|
|
Standard ground slam air throw. Ground bounces the opponent when done raw, causes an untechable knockdown as a combo ender.
|
|
|
|
| Ground
|
Damage
|
Red Damage
|
Proration
|
Cancel
|
Guard
|
| 500 (345)
|
300 (198)
|
40%
|
SP, EX, (J)
|
LHA
|
| First Active
|
Active
|
Recovery
|
Frame Adv
|
Circuit
|
Invuln
|
| 9
|
4
|
18
|
-4
|
3.5%
|
Strike 1-12
|
|
Same animation as 6C.
|
| Air
|
Damage
|
Red Damage
|
Proration
|
Cancel
|
Guard
|
| 500 (303)
|
300 (174)
|
50%
|
-
|
HA
|
| First Active
|
Active
|
Recovery
|
Frame Adv
|
Circuit
|
Invuln
|
| 9
|
4
|
-
|
-
|
3.5%
|
Strike 1-12
|
|
Same animation as j.B.
|
|
|
|
| Bunker
|
Damage
|
Red Damage
|
Proration
|
Cancel
|
Guard
|
| 500
|
202
|
50%
|
-
|
LHA
|
| First Active
|
Active
|
Recovery
|
Frame Adv
|
Circuit
|
Invuln
|
| 26
|
4
|
19
|
-5
|
0.0%
(-50.0% in blockstun)
|
Clash 1-10
|
| (Clash)
|
Damage
|
Red Damage
|
Proration
|
Cancel
|
Guard
|
| 500
|
202
|
50%
|
-
|
LHA
|
| First Active
|
Active
|
Recovery
|
Frame Adv
|
Circuit
|
Invuln
|
| 8
|
4
|
19
|
-5
|
0.0%/-50.0%
|
Strike 1-7
|
|
A fairly standard shield bunker.
|
|
|
|
| Damage
|
Red Damage
|
Proration
|
Cancel
|
Guard
|
| 100
|
0
|
100%
|
-
|
U
|
| First Active
|
Active
|
Recovery
|
Frame Adv
|
Circuit
|
Invuln
|
| 16
|
2
|
25
|
-
|
uses all
|
Full 1-17
|
|
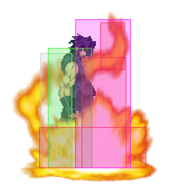
Kouma is a big guy but his hitbox on heat activation is not terribly large.
|
|
|
|
| Ground
|
Damage
|
Red Damage
|
Proration
|
Cancel
|
Guard
|
| 100
|
0
|
100%
|
-
|
U
|
| First Active
|
Active
|
Recovery
|
Frame Adv
|
Circuit
|
Invuln
|
| 11
|
10
|
20
|
-
|
removes all
|
Full 1-39
|
| Air
|
Damage
|
Red Damage
|
Proration
|
Cancel
|
Guard
|
| 100
|
0
|
100%
|
-
|
U
|
| First Active
|
Active
|
Recovery
|
Frame Adv
|
Circuit
|
Invuln
|
| 12
|
10
|
15
|
-
|
removes all
|
Strike 1-30
|
|
Universal burst mechanic. Unlike Crescent/Full Heat activation, the hitbox and frame data doesn't vary between characters. However, you can be thrown out of this move if you input it in the air.
|
|
Special Moves
Grounded Specials
A/B A/B ~236A/B ~236A/B ~236A/B Ender ~236A/B Ender ~236C Ender ~236C Ender EX EX
|
| A/B
|
Damage
|
Red Damage
|
Proration
|
Cancel
|
Guard
|
| 600
|
505
|
100%
|
-CH-, -EX-
|
LH
|
| First Active
|
Active
|
Recovery
|
Frame Adv
|
Circuit
|
Invuln
|
| 11
|
3
|
23
|
-11
|
2.7%
|
-
|
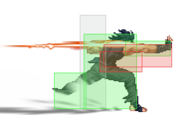
- F-Kouma's own rekka series. The B versions of all attacks moves Kouma forward a lot more, 236B~236B~236B can even reach an opponent from fullscreen. Has three different enders depending on which button you press. Also has armor on the first 236A/B rekka.
Rekka starter.
|
| ~236A/B
|
Damage
|
Red Damage
|
Proration
|
Cancel
|
Guard
|
| 600 (1181)
|
404 (896)
|
100%
|
-CH-
|
LH
|
| First Active
|
Active
|
Recovery
|
Frame Adv
|
Circuit
|
Invuln
|
| 9
|
3
|
29
|
-17
|
6.3% (9.0%)
|
-
|
|
Middle followup. This launches the opponent
|
| ~236A
|
Damage
|
Red Damage
|
Proration
|
Cancel
|
Guard
|
| 700 (1758)
|
404 (1228)
|
100%
|
N
|
H
|
| First Active
|
Active
|
Recovery
|
Frame Adv
|
Circuit
|
Invuln
|
| 19
|
2
|
21
|
-8
|
9.0% (18.0%)
|
-
|
|
Kouma jumps back and ends with an overhead attack.
|
| ~236B
|
Damage
|
Red Damage
|
Proration
|
Cancel
|
Guard
|
| 700 (1758)
|
404 (1228)
|
100%
|
-
|
H
|
| First Active
|
Active
|
Recovery
|
Frame Adv
|
Circuit
|
Invuln
|
| 19
|
2
|
17
|
-3
|
7.2%
|
-
|
|
Forward-moving version of the above. Has better frame advantage from Kouma landing a little sooner.
|
| ~236C
|
Damage
|
Red Damage
|
Proration
|
Cancel
|
Guard
|
| 550 (1634)
|
404 (1228)
|
70% (O)
|
-EX-
|
LH
|
| First Active
|
Active
|
Recovery
|
Frame Adv
|
Circuit
|
Invuln
|
| 16
|
4
|
21
|
-7
|
3.15% (12.15%)
|
-
|
| ~236[C]
|
Damage
|
Red Damage
|
Proration
|
Cancel
|
Guard
|
| 950 (1964)
|
707 (1514)
|
70% (O)
|
-EX-
|
L
|
| First Active
|
Active
|
Recovery
|
Frame Adv
|
Circuit
|
Invuln
|
| 27
|
4
|
15
|
-1
|
5.4% (14.4%)
|
-
|
|
C-Kouma 236A Ender, becomes a low and way safer on block while held. Causes a techable knockdown. Due to the second attack launching, 236C has to be delayed a little for it to connect, though the held version doesn't have that problem.
|
| EX
|
Damage
|
Red Damage
|
Proration
|
Cancel
|
Guard
|
| 700*2, 800 (2128)
|
(1855)
|
100% (x2), 80% (M)
|
-
|
LH
|
| First Active
|
Active
|
Recovery
|
Frame Adv
|
Circuit
|
Invuln
|
| 3+9
|
8
|
23
|
-12
|
-100.0%
|
Full 1-10
|
| [EX]
|
Damage
|
Red Damage
|
Proration
|
Cancel
|
Guard
|
| 1200*2, 1500 (3768)
|
(3031)
|
100%*2, 70% (O)
|
-
|
LH
|
| First Active
|
Active
|
Recovery
|
Frame Adv
|
Circuit
|
Invuln
|
| 3+24
|
8
|
23
|
-12
|
-100.0%
|
Full 1-25
|
|
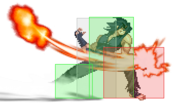
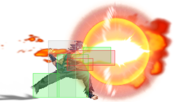
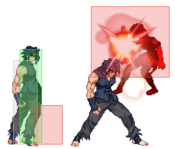
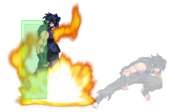
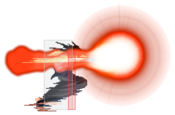
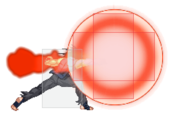
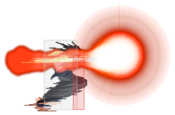
Advancing palm strike, with a decieving hitbox that's actually quite smaller than the explosion effect. Causes a wallbounce on hit, allowing you to follow up in the corner for respectable damage. Notably less untech frames than H-Moon's 236C, disallowing midscreen combos.
Not a true reversal, as invul frames end before the actives begin.
Can be charged for more damage and invul frames (still not making it a true reversal), which has some application against certain moves, as the charged invulnerability time is quite high - 25 frames.
|
|
A/B A/B EX EX A (Anti-Air Grab) A (Anti-Air Grab) B/EX (Anti-Air Grab) B/EX (Anti-Air Grab)
|
| A (Hit)
|
Damage
|
Red Damage
|
Proration
|
Cancel
|
Guard
|
| 1000
|
707
|
70% (O)
|
(J)
|
LH
|
| First Active
|
Active
|
Recovery
|
Frame Adv
|
Circuit
|
Invuln
|
| 10
|
3
|
22
|
-7
|
9.0%
|
-
|
| (Anti-Air Grab)
|
Damage
|
Red Damage
|
Proration
|
Cancel
|
Guard
|
| 0, 2000 (1937)
|
(1467)
|
100%
|
-
|
U
(Whiffs vs Ground.)
|
| First Active
|
Active
|
Recovery
|
Frame Adv
|
Circuit
|
Invuln
|
| 9
|
1
|
25
|
-
|
0.0%
|
-
|
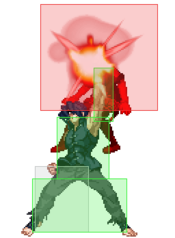
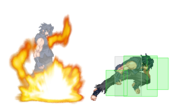
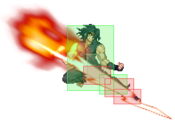
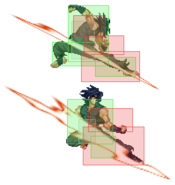
- Anti-air grab series. These just act as launchers against grounded opponents. The anti-air grab hitbox being smaller than the strike one means that against airborne opponents the former can whiff while the latter connects, making it a bit inconsistent at times. All versions of this move are able to be shielded.
Moves Kouma forward a little, the grab causes an untechable knockdown at a small distance from you.
|
| B (Hit)
|
Damage
|
Red Damage
|
Proration
|
Cancel
|
Guard
|
| 1000
|
707
|
70% (O)
|
(J)
|
LH
|
| First Active
|
Active
|
Recovery
|
Frame Adv
|
Circuit
|
Invuln
|
| 13
|
3
|
22
|
-7
|
9.0%
|
-
|
| (Anti-Air Grab)
|
Damage
|
Red Damage
|
Proration
|
Cancel
|
Guard
|
| 0, 2200 (1491)
|
(1643)
|
70% (M)
|
-
|
U
|
| First Active
|
Active
|
Recovery
|
Frame Adv
|
Circuit
|
Invuln
|
| 12
|
1
|
25
|
-
|
0.0%
|
-
|
|
Kouma advances a little more, the grab launches the opponent farther but it can be ground teched and your damage suffers a bit from the scaling.
|
| EX (Hit)
|
Damage
|
Red Damage
|
Proration
|
Cancel
|
Guard
|
| 1500
|
1010
|
70% (O)
|
(J)
|
LH
|
| First Active
|
Active
|
Recovery
|
Frame Adv
|
Circuit
|
Invuln
|
| 5+6
|
3
|
22
|
-7
|
-100.0%
|
Full 1-5
|
| (Anti-Air Grab)
|
Damage
|
Red Damage
|
Proration
|
Cancel
|
Guard
|
| 0, 3000 (2906)
|
(2158)
|
70% (O)
|
-
|
U
|
| First Active
|
Active
|
Recovery
|
Frame Adv
|
Circuit
|
Invuln
|
| 5+5
|
1
|
25
|
-
|
-100.0%
|
Full 1-5
|
|
EX DP Grab.
|
|
A A B B ~2 ~2 ~4 ~4 ~236C ~236C EX EX
|
A
~2/4
|
Damage
|
Red Damage
|
Proration
|
Cancel
|
Guard
|
2000
2200/2700
|
1515
1010/1515
|
100%
100%/25%
|
(CH)
|
U
|
| First Active
|
Active
|
Recovery
|
Frame Adv
|
Circuit
|
Invuln
|
| 4
|
1
|
27
|
-
|
0.0%
|
-
|
- The classic kouma Grab series
The fast up-close version. Frame 4.
~[2]: Knocks the opponent down on the other side at an awkwardly long distance.
~[4]: Kouma just lanches the opponent behind him, wall-splatting them. Ground techable.
|
B
~2/4
|
Damage
|
Red Damage
|
Proration
|
Cancel
|
Guard
|
2000
2200/2700
|
1515
1010/1515
|
100%
100%/25%
|
(CH)
|
U
|
| First Active
|
Active
|
Recovery
|
Frame Adv
|
Circuit
|
Invuln
|
| 28
|
1
|
14
|
-
|
0.0%
|
-
|
|
Slow, delayed and further ranged version.
|
| A/B~236C
|
Damage
|
Red Damage
|
Proration
|
Cancel
|
Guard
|
| 3000
|
2230
|
100%
|
-
|
-
|
| First Active
|
Active
|
Recovery
|
Frame Adv
|
Circuit
|
Invuln
|
| -
|
-
|
-
|
-
|
-100.0%
|
-
|
|
Most damaging 214A/B follow-up option, this sends the opponent fullscreen and with an untechable knockdown without switching sides.
|
| EX
|
Damage
|
Red Damage
|
Proration
|
Cancel
|
Guard
|
| 3200
|
(2323)
|
100%
|
-
|
U
|
| First Active
|
Active
|
Recovery
|
Frame Adv
|
Circuit
|
Invuln
|
| 6+1
|
1
|
36
|
-
|
-100.0%
|
Full 1-6
|
|
EX Slamdunk. Untechable knockdown. NOT jumpable post flash. Can be used to beat safejumps.
|
|
A A B B C C
|
| A
|
Damage
|
Red Damage
|
Proration
|
Cancel
|
Guard
|
| -
|
-
|
-
|
-
|
-
|
| First Active
|
Active
|
Recovery
|
Frame Adv
|
Circuit
|
Invuln
|
| -
|
-
|
39
|
-
|
-
|
Full 6-25
Super Armor 26-37
|
- F-Kouma gets to have a whole series out of his grounded 22 command dash. Has better recovery than the other Kouma's grounded command dashes and is a helpful tool in matchups to close distance.
|
| B
|
Damage
|
Red Damage
|
Proration
|
Cancel
|
Guard
|
| -
|
-
|
-
|
-
|
-
|
| First Active
|
Active
|
Recovery
|
Frame Adv
|
Circuit
|
Invuln
|
| -
|
-
|
41
|
-
|
-
|
Full 6-25
Super Armor 26-37
|
|
Reaches a bit farther, slightly more recovery than 421A.
|
| C
|
Damage
|
Red Damage
|
Proration
|
Cancel
|
Guard
|
| -
|
-
|
-
|
-
|
-
|
| First Active
|
Active
|
Recovery
|
Frame Adv
|
Circuit
|
Invuln
|
| -
|
-
|
35
|
-
|
-
|
-
|
|
The true feint. Can also be used for fake-out mixups after a hard knock down, where dash into 421a/b will go through your opponent and 421c will not.
|
|
A/B A/B EX EX
|
| A
|
Damage
|
Red Damage
|
Proration
|
Cancel
|
Guard
|
| 1000
|
757
|
75% (O)
|
-
|
LH
|
| First Active
|
Active
|
Recovery
|
Frame Adv
|
Circuit
|
Invuln
|
| 9
|
4
|
32
|
-8
|
7.2%
|
Reflect 9-13
Super Armor 6-22
|
|
Super-armored stomp, has a small reflect window. Armor comes out on frame 6 and lasts until 10 frames into the recovery.
|
| B
|
Damage
|
Red Damage
|
Proration
|
Cancel
|
Guard
|
| 1000
|
757
|
75% (O)
|
-
|
LH
|
| First Active
|
Active
|
Recovery
|
Frame Adv
|
Circuit
|
Invuln
|
| 15
|
4
|
22
|
1
|
7.2%
|
Reflect 14-17
Super Armor 13-28
|
|
A F-Kouma exclusive, now slower and plus on block. Good to use against characters meaty, can power through a good amount of reversals as 22a can but is also +1. Armor comes out on frame 13 and lasts until 10 frames into the recovery of this move.
|
| EX
|
Damage
|
Red Damage
|
Proration
|
Cancel
|
Guard
|
| 1000
|
606
|
100%
|
-
|
LHA
|
| First Active
|
Active
|
Recovery
|
Frame Adv
|
Circuit
|
Invuln
|
| 8+12
|
2
|
26
|
-10
|
-100.0%
|
Full 1-8
Reflect 9-32
Super Armor 9-157
|
|
EX Stomp. Huge amount of armor frames, 111 frames to be exact, you can use this to setup powerful armored oki after doing 214a/b or after ending a combo with 623a.
|
|
Aerial Specials
A/B A/B EX EX
|
| A
|
Damage
|
Red Damage
|
Proration
|
Cancel
|
Guard
|
| 1000
|
808
|
70% (O)
|
-
|
LHA
|
| First Active
|
Active
|
Recovery
|
Frame Adv
|
Circuit
|
Invuln
|
| 13
|
X
|
14
|
3 (TK)
|
10.0%
|
-
|
- Divekick series. Can be used to mix up jump out escapes as well.
|
| B
|
Damage
|
Red Damage
|
Proration
|
Cancel
|
Guard
|
| 1000
|
808
|
100%
|
EX, J
|
LHA
|
| First Active
|
Active
|
Recovery
|
Frame Adv
|
Circuit
|
Invuln
|
| 15
|
X
|
21
|
-7 (TK)
|
10.0%
|
-
|
|
Becomes jump and EX cancellable on block.
|
| EX (Whiff)
|
Damage
|
Red Damage
|
Proration
|
Cancel
|
Guard
|
| 600, 1900 (1895)
|
(1675)
|
80% (M)
|
-
|
LHA
|
| First Active
|
Active
|
Recovery
|
Frame Adv
|
Circuit
|
Invuln
|
| 2+9
|
2
|
-
|
-3 (TK)
|
-100.0%
|
-
|
|
Has an automatic followup on hit/block, doesn't hit crouchers by TK-ing. (Frame data on whiff)
|
|
A A B B C C
|
| A
|
Damage
|
Red Damage
|
Proration
|
Cancel
|
Guard
|
| -
|
-
|
-
|
-
|
-
|
| First Active
|
Active
|
Recovery
|
Frame Adv
|
Circuit
|
Invuln
|
| -
|
-
|
38
|
-
|
-
|
-
|
- Aerial command airdash series. A and B version have armor, you also keep your double jump if not previously used.
|
| B
|
Damage
|
Red Damage
|
Proration
|
Cancel
|
Guard
|
| -
|
-
|
-
|
-
|
-
|
| First Active
|
Active
|
Recovery
|
Frame Adv
|
Circuit
|
Invuln
|
| -
|
-
|
38
|
-
|
-
|
-
|
|
Farther-reaching version.
|
| C
|
Damage
|
Red Damage
|
Proration
|
Cancel
|
Guard
|
| -
|
-
|
-
|
-
|
-
|
| First Active
|
Active
|
Recovery
|
Frame Adv
|
Circuit
|
Invuln
|
| -
|
-
|
10
|
-
|
-
|
-
|
|
Feint version.
|
|
Arc Drive
|
|
(Grab)
(Hit)
|
Damage
|
Red Damage
|
Proration
|
Cancel
|
Guard
|
900*10, 1200 (4017)
2500
|
(2533)
(2121)
|
50%
80%
|
-
|
U
LHA
|
| First Active
|
Active
|
Recovery
|
Frame Adv
|
Circuit
|
Invuln
|
| 5+1
|
1 (3) 8
|
43
|
-21
|
removes all
|
Full 1-10
|
|
An invincible grab. Becomes a hit if the opponent is in blockstun, hitstun or airborne.
|
|
Another Arc Drive
|
|
(Grab)
(Hit)
|
Damage
|
Red Damage
|
Proration
|
Cancel
|
Guard
|
16600 (5518)
3200
|
(4266)
(2602)
|
50%
80%
|
-
|
U
LHA
|
| First Active
|
Active
|
Recovery
|
Frame Adv
|
Circuit
|
Invuln
|
| 5+1
|
2 (2) 12
|
26
|
-21
|
removes all
|
Full 1-10
|
|
Stronger version of AD that can now be used during combos.
|
|
Last Arc
|
|
| Damage
|
Red Damage
|
Proration
|
Cancel
|
Guard
|
| 1200*7, 1300 (base)
|
-
|
50% + 50% * remaining BH time
|
-
|
U
|
| First Active
|
Active
|
Recovery
|
Frame Adv
|
Circuit
|
Invuln
|
| -
|
-
|
-
|
-
|
removes all
|
Full
|
|
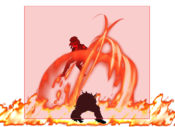
Air Shield LA. Not really practical, but it does okay damage and looks pretty cool I guess.
|
|
MBAACC Navigation


