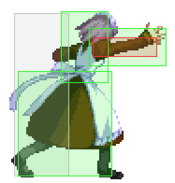
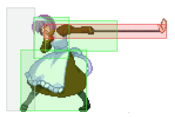
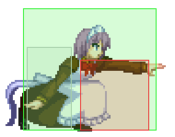
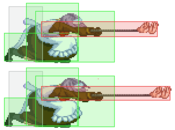
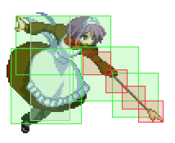
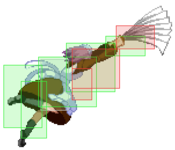
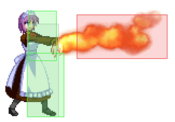
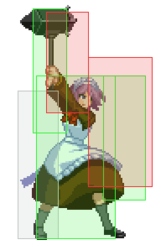
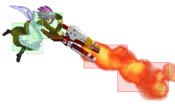
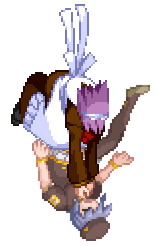
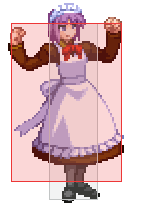
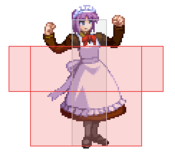
Melty Blood/MBAACC/Mech-Hisui/Crescent Moon

From Mizuumi Wiki
Jump to navigation Jump to search

Character Page Progress

This page is still a work in progress, consider joining as an editor to help expand it. Please update this character's roadmap page when one of the editing goals have been reached.

In Progress To-do
  • Combos:
    • Complete/double check info on the combos that are missing some.
  • Move Descriptions:
    • Double check j.236C data and air specials landing recovery.
  • Players to watch/ask
    • If you know any players in particular that can be helpful for learning this character, please add them with, if possible a way to contact them (such as a Discord handle) and a name that can be searched in the match video database.
  • Overview/General Gameplan:
    • Add a short summary of this character with a list of strengths and weaknesses
    • Do your best to describe how to play this character, change or add subsections based on what you would write as a guide.


Additional Resources

C-Mech-Hisui Match Video Database
Japanese combo movie video for all Mech-Hisui moons

Notable Players

Name Color Region Common Venues Status Details
Akimi
(Akimi#8257)

Mech Color34.png

North America Climax Of Night, Netplay Active Found in Melty Blood Community Server.
alicecolor
(アリスカラー)

Mech Color08.png

Japan KoreWaMelty, Play Spot BIG ONE 2nd Inactive
Darko
(Darko#9614)

Mech Color31.png

North America Netplay Active
flea925
(flea925)

Random

North America Netplay Active No.1 player
O

Mech Color01.png

Japan A-cho, KorewaMelty Inactive

Overview

Strengths / Weaknesses
Strengths
  • Great zoning tools.
  • Huge multi-hitting buttons.
Weaknesses
  • Okizeme is weak without meter.
  • Limited defensive options outside system mechanics.
  • Combos leave a lot of red life, causing heat from the opponent to undo much more damage than from other characters.

General Gameplan

Place text here*

Neutral

Place text here*

Pressure

Place text here

Okizeme

Place text here

Defense

place text here*


Combos

Combo Notation Help
Disclaimer: Combos are written by various writers, so the actual notation used in pages can differ from the standard one.

For more information, see Glossary and Controls.

X > Y X input is cancelled into Y.
X > delay Y Must wait for a short period before cancelling X input into Y.
X, Y X input is linked into Y, meaning Y is done after X's recovery period.
X+Y Buttons X and Y must be input simultaneously.
X/Y Either the X or Y input can be used.
X~Y This notation has two meanings.
  1. Use attack X with Y follow-up input.
  2. Input X then within a few frames, input Y. Usually used for option selects.
X(w) X input must not hit the opponent (Whiff).
j.X X input is done in the air, implies a jump/jump cancel if the previous move was done from the ground.

Applies to all air chain sections:

  • Assume a forward jump cancel if no direction is given.
  • Air chains such as j.A > j.B > j.C can be shortened to j.ABC.
sj.X X input is done after a super jump. Notated as sj8.X and sj9.X for neutral and forward super jumps respectively.
dj.X X input is done after a double jump.
sdj.X X input is done after a double super jump.
tk.X Stands for Tiger Knee. X motion must be buffered before jumping, inputting the move as close to the ground as possible. (ex. tk.236A)
(X) X is optional. Typically the combo will be easier if omitted.
[X] Input X is held down. Also referred to as Blowback Edge (BE). Depending on the character, this can indicate that this button is held down and not released until indicated by the release notation.
]X[ Input X is released. Will only appear if a button is previously held down. This type of input is referred to as Negative Edge.
{X} Button X should only be held down briefly to get a partially charged version instead of the fully charged one.
X(N) Attack "X" should only hit N times.
(XYZ)xN XYZ string must be performed N times. Combos using this notation are usually referred to as loops.
(XYZ^) A pre-existing combo labelled XYZ is inserted here for shortening purposes.
CH The first attack must be a Counter Hit.
Air CH The first attack must be a Counter Hit on an airborne opponent.
66 Performs a ground forward dash.
j.66 Performs an aerial forward dash, used as a cancel for certain characters' air strings.
IAD/IABD Performs an Instant AirDash.
AT Performs an Air Throw. (j.6/4A+D)
IH Performs an Initiative Heat.
AD Performs an Arc Drive.
AAD Performs an Another Arc Drive.

Starters

Condition Notation Damage
vs V.Sion
Notes
Grounded opponent
  • 2B
887


Meter Gained: 10.0 Meter Given (vs C-Moon): 3.0
Your main low starter that will be used as a basis for her BnB combos.
Grounded opponent
  • j.C
900


Meter Gained: 6.0 Meter Given (vs C-Moon): 1.8
A jump-in starter that will add around 500dmg to your BnBs.
Grounded opponent
  • 421[A]
1200


Meter Gained: 0.0 Meter Given (vs C-Moon): 0.0
Grounded overhead starter that wallslams the opponent to the other side. From there you dash into a pickup while the opponent is still in the air.
Airborne opponent
  • 5A/5B
500/700


Meter Gained: 4.0/7.0 Meter Given (vs C-Moon): 1.2/2.1
Your options for a quick anti-air starter. Gets you a standard air chain into ender on hit, and a pickup into BnB on counterhit.
Airborne opponent
  • j.B
900


Meter Gained: 6.0 Meter Given (vs C-Moon): 1.8
Your fastest air button and a pretty good air-to-air. Gets you a standard air chain into ender on hit, and a pickup into BnB on counterhit.

Enders

Condition Notation Damage
vs V.Sion
Notes
Grounded opponent
  • 2C
950


Meter Gained: 8.0 Meter Given (vs C-Moon): 2.4
Stopping a BnB at 2C gives C-Mech lots of options for okizeme because not only does it give an untechable knockdown, it is also jump cancelable (for j.214c) and special cancelable into her slow special attacks (214c or 41236c in particular).
Airborne opponent
  • AT
1200


Meter Gained: 0.0 Meter Given (vs C-Moon): 0.0
Mech-Hisui's airthrow is ground techable, meaning the opponent has an opportunity to escape from her pressure afterwards. However, C-Mech can tech punish all tech options in midscreen and corner with 2B. One exception is when an opponent back techs midscreen, which is where you must use 236A/2C to punish it. One word of caution about this specific punish is that a CPU can block it (due to it teching on the first possible frame), but it is very unlikely that a human will be able to tech on the first frame. However in the event that your 2C is blocked, you can still special cancel or reverse beat it to continue your pressure.
Airborne opponent
  • 421B
678


Meter Gained: 0.0 Meter Given (vs C-Moon): 0.0
Scores an untechable knockdown during a part of your combo where the opponent is airborne while you're still grounded, for example after the last 421A of C-Mech's main BnB.
Airborne opponent
  • j.236A/B
1012


Meter Gained: 8.0 Meter Given (vs C-Moon): 2.4
Ending an air combo with j.236A/B will send your opponent flying up in an air techable state. This means that your opponent will be able to air tech and may have access to an airdash or another air jump. However, if done correctly, you will land on the ground very quickly after this ender, so you can actually send jetpacks flying at your opponent to force him to air block. If you succeed in forcing your opponent to air block, you can attempt to restart a chain with 5A/5B since those are air unblockable.
Grounded/Airborne opponent, 100% meter
  • 623C
3351


Meter Gained: -100.0 Meter Given (vs C-Moon): 21.0
At any time when your opponent is airborne during the combo around body height, you can use this to get an untechable knockdown. While not too much to speak of, if your opponent is far enough away, you can do a superjump mixup (to land on either side of your fallen opponent ambiguously or hit him with a j.C). If close, a meaty attack or safejump (a jump-in attack that is safe from reversals to due the reversal's startup) can be used.
Airborne opponent, 100% meter
  • j.236C
1911


Meter Gained: -100.0 Meter Given (vs C-Moon): 3.3
Gives you an untechable knockdown but you don't get much advantage out of it, especially if done closer to the ground. The recovery itself can be used as a slight mixup when midscreen, so it does have some practical application.
Grounded/Airborne opponent, 150% meter
  • 63214C
2406


Meter Gained: -150.0 Meter Given (vs C-Moon): 8.8
Same use as 623C, except the knockdown is usually a little worse since they fall from a lower height by comparison. However, you can use this move on OTG opponents (from a late 2C for example) to add damage and guarantee a knockdown.
Airborne opponent, 150% meter
  • j.63214C
2406


Meter Gained: -150.0 Meter Given (vs C-Moon): 8.8
Gives you an untechable knockdown with much more time for okizeme than j.236C.

Normal Combos

(Damage calculated using AT ender.) For more consistency in your air chain, input 29 as your double jump cancel.

Condition Notation Damage
vs V.Sion
Notes
Normal starter, grounded opponent
Works On: Everyone
  • (2A >) 2B(1) > 5C > 2C > 6C > j9.BC > dj.BC > Ender
3691
Meter Gained: 49.0 Meter Given (vs C-Moon): 14.7 (Video)
Basic BnB. 6C will whiff if the combo isn't done at a close enough range. Not that practical in the long run, but it is there for the Neco matchup at least.
Normal starter, grounded opponent
Works On: Everyone
  • (2A >) 2B > 5C > 2C > 421A, sj9.BC > dj.BC > Ender
3563
Meter Gained: 47.0 Meter Given (vs C-Moon): 15.2 (Video)
Basic 421A BnB, which can be done at longer ranges than the above. Omit the 5C if you aren't close enough. Doable on Necos, but the air chain timing is a bit tight and you'd need to perform a super double jump to get a proper ender.
Normal starter, grounded opponent
Works On: Everyone but Necos
(See Notes)
  • (2A >) 2B > 5C > 2C > 421A, 236[A], 2C > 421A, sj9.BC > dj.BC > Ender
4123
Meter Gained: 65.0 Meter Given (vs C-Moon): 21.7 (Video)
Your main BnB. Some characters require going forward for a very short period after the first 421A to be able to land the second one. Omit the 5C if you aren't close enough, and to get more consistency and an untechable knockdown you can either end with the second 2C or chain any 421A into 421B.


Difficulty:
  • Very Easy: Nero, Warachia (Possible to do two reps of 2C 421A 236[A] instead of one)
  • Easy: Akiha, V.Akiha, Seifuku, Arc, Red Arcueid, Ciel, Hime, Kouma, Tohno, Nanaya (Second 2C 421A lands while standing still)
  • Normal: Hisui, Mech-Hisui, Len, W.Len, Miyako, Powered Ciel, Riesbyfe, Ryougi, Sion, V.Sion (Must dash or walk forward before doing 2C or 421A will not land)
  • Hard: Aoko, Kohaku, Roa, Satsuki (Similar to normal, but requires more forward movement.)
  • Impossible Neco-Arc, NAC (Second 421A whiffs)
Normal starter, grounded opponent
  • (2A >) 2B > 2C > 5C(3/4) > (5B >) j9.A > (delay) j.C > (delay) j.236A, (land) sj8.BC > sdj9.BC > Ender
~3646
Meter Gained:  ??? Meter Given (vs C-Moon): ??? (Video)
Fancy jetpack combo. This combo is actually more difficult in the corner on some characters in terms of landing the 5B. Builds the most meter for a meterless combo and gains the most vertical height in the end for j.236A/B tricks.
421[A] starter, grounded opponent
Works On: Everyone but Necos
  • 421[A] > (dash) 2C > 421A, 236[A], 2C > 421A, sj9.BC > dj.BC > Ender
3888
Meter Gained: 46.0 Meter Given (vs C-Moon): 17.1 (Video)
Conversion off 421[A] overhead into the 421A BnB. Any variation of it applies.
Raw Airthrow starter
Works On: Everyone but Necos
  • Raw AT, land, delay 2B(1) > 421A, 236[A], 2C > 421A, sj9.BC > dj.BC > Ender
3446
Meter Gained: 43.0 Meter Given (vs C-Moon): 15.1 (Video)
Conversion off raw airthrow into the 421A BnB, with a bit of timing needed for 2B(1) so that 421A doesn't whiff. The first 421A cannot be replaced by 421C, but otherwise it follows the same rules as the standard BnB.
Aerial counterhit 5A/5B starter, airborne opponent
Works On: Everyone
  • Air CH 5A/5B > 6C > j.9(B)C > dj.BC > Ender
2333
Meter Gained: 23.0 Meter Given (vs C-Moon): 6.9 (Video)
(Damage & meter off 5A starter) Basic aerial counterhit combos for opponents that are too low to the ground to go into the combo below
Counterhit normal starter, airborne opponent
Works On: Everyone but Necos
  • Air CH, 2C(/2[C]) > 421A, 236[A], 2C > 421A, sj9.BC > dj.BC > Ender
3544
Meter Gained: 50.0 Meter Given (vs C-Moon): 17.2 (Video)
(Damage & meter off j.B starter) Standard pickup off an air CH into the 421A BnB. Any variation of it applies. Using 2[C] adds up to 500 more damage.
Normal starter, grounded opponent, 100% meter
Works On: Everyone
  • (2A) > 2B > 5C > 2C > 421C, 2C > 5C > 623A
3665
Meter Gained: -62.4 Meter Given (vs C-Moon): 17.8 (Video)
Basic metered BnB ending in an untechable knockdown.
Normal starter, grounded opponent, 100% meter
Works On: Everyone
  • (2A >) 2B > 5C > 2C > 421C, 2B > 5C > 2C > 421A, sj9.BC > dj.BC > Ender
4456
Meter Gained: -54.2 Meter Given (vs C-Moon): 24.6 (Video)
Metered variation of the 421A BnB.
~10+ hit starter, grounded opponent, 100% meter
Works On: (See Notes)
  • (~10+ hits) > 421C, (5A >) 5C > (2C > 6C > 236[A])xN, 2C > 5C > 623A
???


Meter Gained:  ??? Meter Given (vs C-Moon): ???
Very difficult combo and highly character/gravity situation specific but is very rewarding as it is very damaging and builds a lot of meter.

The way to begin this combo is to begin with a combo that has around 11 hits on its counter and then attach on a 421C 5C to begin the loop. This combo works by having so much gravity that the 6c launches just right for 236[A] to connect afterward. 236[A] is of course, untechable, so they fall back into your 2C (or straight into 6C, omitting 2C) to restart the loop. There are multiple ways to build up the hit count (2AxN, j.A, 421C etc) and of course, the more hits you have before your definitive 421C, the easier and more possible the combo becomes.

To successfully land the first rep, make sure to delay the 236[A] until the end of the special-cancelable window of the 6C. As your land more and more reps, the delay on the 236[A] after the 6C shortens and speeds up the overall timing, so make sure you know your visual/audio cues to perform this combo. This loop eventually ends when the hit counter is too high (fall too fast to catch with 2C) or too many 236[A]s have been added to the combo (including ones done before the loop began, because 236[A] decreases untech time of the rest of the combo, similar to how the 421A 236[A] combo stops at one/two reps).

Tentative list for ~10+ hit starter: (This is more or less just a general difficulty guideline, characters in italic need proper confirmation)
  • ~4 times: Ciel, Hime, Powered Ciel, Neco-Arc, NAC, Ryougi, Satsuki, W.Len
  • ~3 times: Aoko, Len, Nanaya, Nero, Ries, Roa, Sion
  • ~2 times: Kohaku, Miyako, Tohno, V.Sion
  • ~1 times: Hisui, Mech-Hisui, V.Akiha, Warachia
  • Impossible (?): Akiha, Seifuku, Arcueid, Red Arcueid, Kouma

Corner Combos

Condition Notation Damage
vs V.Sion
Notes
Normal starter, grounded opponent,
  • (2A >) 2B > 5C > 2C > 6C > TK j.236A, land sj8.[C] > delay j.B > j.236A, land sj8.BC > j.AB > Ender
??? ???

Move Descriptions

Frame Data Help
Header Tooltip
Move Box Colors

Light gray = Collision Box (A move lacking one means it can go through the opponent's own collision box).
Green: Hurt Boxes.
Red: Hit(/Grab) Boxes.
Yellow: Clash Boxes (When an active hitbox strikes a clash box, the active hitbox stops being active. Multi-hit attacks can beat clash since they will still progress to the next hitbox.)
Magenta: Projectile-reflecting boxes OR Non-hit attack trigger boxes (usually).
Blue: Reflectable Projectile Boxes.

Damage Base damage done by this attack.

(X) denotes combined and scaled damage tested against standing V. Sion.

Red Damage Damage done to the recoverable red health bar by this attack. The values are inherently scaled and tested against standing V. Sion.

(X) denotes combined damage.

Proration The correction value set by this attack and the way it modifies the scaling during a string. See this page for more details.

X% (O) means X% Overrides the previous correction value in a combo if X is of a lower percentage.
X% (M) means the current correction value in a combo will be Multiplied by X%. This can also be referred to as relative proration.

Circuit Meter gained by this attack on hit.

(X%) denotes combined meter gain.
-X% denotes a meter cost.

Cancel Actions this move can be cancelled into.

SE = Self cancelable.
N = Normal cancelable.
SP = Special cancelable.
CH = Cancelable into the next part of the same attack (Chain in case of specials).
EX = EX cancelable.
J = Jump cancelable.
(X) = Cancelable only on hit.
-X- = Cancelable on whiff.

Guard The way this move must be blocked.

L = Can block crouching
H = Can block standing.
A = Can block in the air.
U = Unblockable.

Startup Amount of frames that must pass prior to reaching the active frames. Also referred to as "True Startup".
Active The amount of frames that this move will have a hitbox.

(x) denotes frame gaps where there are no hitboxes is present. Due to varied blockstuns, (x) frames are difficult to use to determine punish windows. Generally the larger the numbers, the more time you have to punish.
X denotes active frames with a duration separate from its origin move's frame data, such as projectile attacks. In this case, the total length of the move is startup+recovery only.

Recovery Frames that this move has after the active frames if not canceled. The character goes into one frame where they can block but not act afterwards, which is not counted here.
Advantage The difference in frames where you can act before your opponent when this move is blocked (assuming the move isn't canceled and the first active frame is blocked).

If the opponent uses a move with startup that is at least 2 frames less than this move's negative advantage, it will result in the opponent hitting that move.
±x~±y denotes a range of possible advantages.

Invul Lists any defensive properties this move has.

X y~z denotes X property happening between the y to z frames of the animations. If no frames are noted, it means the invincibility lasts through the entire move.

Invicibility:

Strike = Strike invincible.
Throw = Throw invincible.

Hurtbox-Based Properties:

Full = No hurtboxes are present.
High = Upper body lacks a hurtbox.
Low = Lower body lacks a hurtbox.

Miscellaneous Properties

Clash = Frames in which clash boxes are active.
Reflect = Frames in which projectile-reflecting boxes are active.
Super Armor = Frames in which the character can take hits without going into hit stun.

Normal Moves

Standing Normals

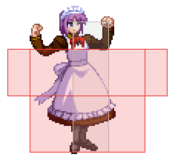
5A
MBCMech5A.png
Damage Red Damage Proration Cancel Guard
300 176 78% (O) -SE-, -N-, -SP-, -EX-, (J) LH
First Active Active Recovery Frame Adv Circuit Invuln
5 4 9 -1 3.0% -

Fast slap attack that makes for a decent up-close air unblockable option, but it will whiff on crouchers with the exception of Hime, Warachia and Nero.

5B
MBCMech5B.png
Damage Red Damage Proration Cancel Guard
700 490 100% N, SP, EX, (J) LH
First Active Active Recovery Frame Adv Circuit Invuln
6 3 18 -3 7.0% -

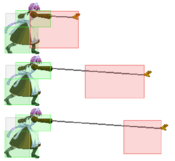
Arm-extending attack. Works the same as 5A, with some benefits from the added range.

5C
5C
5[C]
MBCMech5C.png
MBCMech5XC.png
5C Damage Red Damage Proration Cancel Guard
300*3, 400 (1045) (634) 80% (O) N, SP, EX, (J) LH
First Active Active Recovery Frame Adv Circuit Invuln
9 8 23 -7 3.0%*4 (12.0%) -

Chainsaw attack, hits up to 4 times. This move has a good hitbox, deals decent guard damage, and deals chip damage making it very good for blockstrings. Also used as combo fodder as it does add damage and move her closer.

5[C] Damage Red Damage Proration Cancel Guard
500, 600, 400, 500 (1909) (1127) 100% N, SP, EX, (J) LH
First Active Active Recovery Frame Adv Circuit Invuln
24 8 11 5 7.0%*2, 3.0%*2 (20.0%) -

The charged version is basically an upgrade in all aspects except it comes out a lot slower. If your opponent respects (or disrespects but makes bad choices) it, it can be good to throw this out at times to get a little more out of your blockstring.

Crouching Normals

2A
MBCMech2A.png
Damage Red Damage Proration Cancel Guard
320 156 78% (O) -SE-, -N-, -SP-, -EX-, (J) LH
First Active Active Recovery Frame Adv Circuit Invuln
5 4 9 -1 2.8% -

Mech-Hisui sticks her hand out while crouching. While it is her fastest normal to poke with, it is not particularly amazing in any way, though the active hitbox is quite large. Not a low attack.

2B
MBFMech2B.png
Damage Red Damage Proration Cancel Guard
500*2 (887) (521) 80% (O) N, SP, EX, (J) L
First Active Active Recovery Frame Adv Circuit Invuln
8 6 21 -8 5.0%*2 (10.0%) -

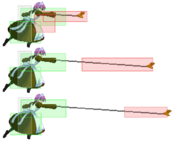
Mech-Hisui sticks out both hands for a double palm strike. Relatively fast poke that hits twice. Also has a disjointed hitbox making it very difficult for other pokes to beat it when it is active. Thus, this is the main poke used for pretty much everything and can also be used to punish many ground tech situations.

2C
2C
2[C]
MBFMech2C.png
MBFMech2XC.png
2C Damage Red Damage Proration Cancel Guard
950 588 60% (O) N, SP, EX, (J) L
First Active Active Recovery Frame Adv Circuit Invuln
13 3 29 -14 8.0% -

Far range low beam sword swipe, quite slow to be used on its own, but in blockstrings it is fairly good at catching jump outs. Untechable AND jump cancelable on hit, making it a good source of knockdown if desired, or can be easily comboed into 421A. Can catch back techs if the opponent did not ground tech early enough. 2C is indispensable as combo fodder as it is C-Mech's only way to trip and a very long ranged attack.

2[C] Damage Red Damage Proration Cancel Guard
1600 1176 80% (O) N, SP, EX, (J) L
First Active Active Recovery Frame Adv Circuit Invuln
25 3 13 2 16.0% -

While this is a better move than the uncharged version in all aspects, it comes out incredibly slow, making it relatively useless in actual play.


Aerial Normals

j.A
MBCMechjA.png
Damage Red Damage Proration Cancel Guard
230*5 (905) (383) 80% (O) SE, N, SP, EX, J LHA
First Active Active Recovery Frame Adv Circuit Invuln
8 9 6 - 1.0%*5 (5.0%) -

Downward extended hand poke. Hits up to 5 times. Good active frames and low recovery, but multihit spoils counterhits.

j.B
MBCMechjB.png
Damage Red Damage Proration Cancel Guard
500 294 100% N, SP, EX, J HA
First Active Active Recovery Frame Adv Circuit Invuln
6 4 - - 4.0% -

Horizontal fan strike. Overall a great air-to-air tool. Otherwise it can be used as an overhead jump-in tool, either late into a jump or as a reverse beat after early j.C on a standing opponent for a double overhead.

j.C
j.C
j.[C]
MBFMechjC.png
MBFMechjXC.png
j.C Damage Red Damage Proration Cancel Guard
900 539 90% (M) / 50% (O) N, SP, EX, J HA
First Active Active Recovery Frame Adv Circuit Invuln
11 7 - - 8.0% -

Overhead hammerstrike. Primarly a jump-in tool, but this move can also be used as a slow air to air when spaced properly. However, it is relatively slow and should be used with care against shields or invincible attacks.

j.[C] Damage Red Damage Proration Cancel Guard
1600 1078 100% N, SP, EX, J HA
First Active Active Recovery Frame Adv Circuit Invuln
27 8 - - 14.0% -

The held version is much more disjointed and causes an untechable knockdown if you manage to land it on an airborne opponent.

Command Normals

4B
MBCMech4B.png
Damage Red Damage Proration Cancel Guard
270*6 (1000) (360) 60% (O) - LHA
First Active Active Recovery Frame Adv Circuit Invuln
14 1 (3) 1 (3) 1 (3) 1 (1) 2 (2) 2 19 -6 2.7%*6 (16.2%) -

Flamethrower hands. Slow attack for barely any reward, this move doesn't have much use. Make sure you don't input this by accident.

6C
MBFMech6C.png
Damage Red Damage Proration Cancel Guard
650 392 65% (O) SP, EX, (J) LHA
First Active Active Recovery Frame Adv Circuit Invuln
11 4 22 -8 4.0% -

Upward hammer strike. While the hitbox and animation look good as a makeshift anti-air, it is relatively slow to come out and is air blockable. It also does not have much range, so it really isn't particularly useful in blockstrings and even outperformed by 421A as a launcher. However, this move is commonly overlooked as it is special cancelable on block, so isn't too bad to have your opponent block this: on ground block you can cancel into 214A/B and on air block you can cancel into 421B for an air unblockable.

j.2C
MBFMechj2C.png
Damage Red Damage Proration Cancel Guard
250*8 (1776) (1393) 100% -EX- LHA
First Active Active Recovery Frame Adv Circuit Invuln
14 24 8 - 2.0%*8 (16.0%) -

Flamethrower attack, mostly used as a jumping back zoning tool, as it carries Mech-Hisui's air momentum. Very unsafe on whiff, but canceling into j.214C can be done anytime during it to make the opponent think twice before punishing it.


Universal Mechanics

Ground Throw
MBFMechThrow.png
Damage Red Damage Proration Cancel Guard
600*5, 300 (1650) (783) 50% - U
First Active Active Recovery Frame Adv Circuit Invuln
3 1 20 - 0.0% -

Mech-Hisui electrocutes the opponent. Untechable knockdown.

Air Throw
Air Throw
j.6/4A+D
MBFMechThrowAir.png
Damage Red Damage Proration Cancel Guard
1600 (Raw)/1200 474 30% - U
First Active Active Recovery Frame Adv Circuit Invuln
2 1 12 - 0.0% -

Mech-Hisui takes the opponent for a ride. This launches the opponent to the opposite side and you throw the opponent in the same direction no matter which side you input. However, you get to chase ground techs with moves like 2B pretty nicely afterwards.

Shield Bunker
Shield Bunker
214D in neutral or blockstun
MBFMech214D.png
Bunker Damage Red Damage Proration Cancel Guard
500 196 50% - LHA
First Active Active Recovery Frame Adv Circuit Invuln
26 4 19 -5 0.0%
(-50.0% in blockstun)
Clash 1-10
(Clash) Damage Red Damage Proration Cancel Guard
500 196 50% - LHA
First Active Active Recovery Frame Adv Circuit Invuln
8 4 19 -5 0.0%/-50.0% Strike 1-7

Performs an attack similar to H Moon's 214A/B. Moves Mech-Hisui forward

Heat
Heat
A+B+C
MBFMechHeat.png
Damage Red Damage Proration Cancel Guard
100 0 100% - U
First Active Active Recovery Frame Adv Circuit Invuln
18 4 24 - -100.0% (min) Full 1-21

Reversal option that gives you access to your Arc Drive, which is one of the more useful ones out there.

Circuit Spark
Circuit Spark
A+B+C during hitstun/blockstun at MAX
MBFMechCSpark.png
MBFMechCSparkAir.png
Ground Damage Red Damage Proration Cancel Guard
100 0 100% - U
First Active Active Recovery Frame Adv Circuit Invuln
11 10 20 - removes all Full 1-39
Air Damage Red Damage Proration Cancel Guard
100 0 100% - U
First Active Active Recovery Frame Adv Circuit Invuln
12 10 15 - removes all Strike 1-30

Universal burst mechanic. Unlike Crescent/Full Heat activation, the hitbox and frame data doesn't vary between characters. However, you can be thrown out of this move if you input it in the air.


Special Moves

Grounded Specials

236X
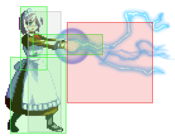
MBCMech236A.png
MBCMech236XA.png
MBCMech236B.png
MBCMech236C.png
No laser sprites, framedisplay is bugged.
A Damage Red Damage Proration Cancel Guard
1000 588 100% -EX- LHA
First Active Active Recovery Frame Adv Circuit Invuln
13 2 29 -6 9.0% -
[A] Damage Red Damage Proration Cancel Guard
1000 784 92% (M) -EX- LHA
First Active Active Recovery Frame Adv Circuit Invuln
20 2 26 -3 10.0% -

Standing eye laser, can't really hit crouchers, but can hit people trying to jump. Charged version has a taller hitbox and is air untechable, making it a staple combo tool.

B Damage Red Damage Proration Cancel Guard
1000 588 100% -EX- LA
First Active Active Recovery Frame Adv Circuit Invuln
21 2 33 -10 9.0% -
[B] Damage Red Damage Proration Cancel Guard
1000 588 100% -EX- LA
First Active Active Recovery Frame Adv Circuit Invuln
28 2 22 1 9.0% -

Crouching eye laser, relatively slow, but it is good against people who stay still. Hits low, so it can be used in mixup attempts where the opponent does not expect it. Charged version causes an untechable knockdown on air hit.

EX Damage Red Damage Proration Cancel Guard
1000*4 (3224) (2480) 90% (O) N/A LH(1), H (3, Whiffs vs Crouch.)
First Active Active Recovery Frame Adv Circuit Invuln
3+14 8 26 -14 (vs Stand.), -19 (vs Crouch.) -100.0% Full 1-14

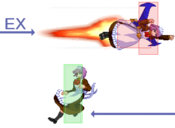
Air unblockable EX standing eye laser. For the first hit to interact with crouchers, you have to be at a range of about until half the length of the vertical hitbox, otherwise everything will whiff. Invincible from frame 1 through 14, so it can have some use as a reversal.

623X
MBCMech623A.png
MBCMech623B.png
MBCMech623C.png
A Damage Red Damage Proration Cancel Guard
250*5 (1056) (411) 100% -EX- LHA
First Active Active Recovery Frame Adv Circuit Invuln
7 13 17 0 1.0%*5 (5.0%) -

Electric shocks. Long lasting, neutral on block and cause an untechable knockdown on hit, making it useful as a way to set up okizeme and works as a meaty attack. A/B versions are only EX cancellable during recovery frames.

B Damage Red Damage Proration Cancel Guard
150*15 (1751) (1141) 100% -EX- LHA
First Active Active Recovery Frame Adv Circuit Invuln
25 27 12 -6 1.0%*15 (15.0%) -

Standard slower/stronger B version. The only real use it has over 623A is being able to land an EX cancel 623C on hit.

EX Damage Red Damage Proration Cancel Guard
250*19 (3351) (2641) 100% - LHA
First Active Active Recovery Frame Adv Circuit Invuln
1+7 28 14 -12 -100.0% Full 1-2

EX electric shocks, similar to 623B but with more hits and is even worse on block. It pushes back fairly far though, making it safe in most situations. This attack can grant fairly good knockdown, so it does have some use for setting up okizeme in situations where nothing else will do.

214X
MBCMech214A.png
MBCMech214B.png
MBCMech214C.png
Sequence 152 in framedisplay. You're welcome.
A Damage Red Damage Proration Cancel Guard
750 343 100% - LH
First Active Active Recovery Frame Adv Circuit Invuln
18 X 25 3 7.5% -

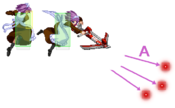
Shoots a single rocket that veers upward, good anti jump at the end of blockstrings and in zoning as it is air unblockable.

B Damage Red Damage Proration Cancel Guard
750*2 (1476) (675) 100% - LHA
First Active Active Recovery Frame Adv Circuit Invuln
20 X 28 0 7.5%*2 (15.0%) -

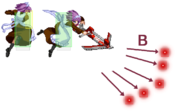
Shoots two rockets, one in a straight line and the other a bit more downward. Decent blockstring ender and has uses as a ground zoning tool.

EX Damage Red Damage Proration Cancel Guard
- - - - -
First Active Active Recovery Frame Adv Circuit Invuln
- - 21+31 - -100.0% Full 11-36
(Missile) Damage Red Damage Proration Cancel Guard
2400 (1764) 100% - LHA
First Active Active Recovery Frame Adv Circuit Invuln
21+40 X - - -100.0% -

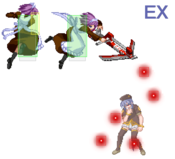
Skirt missile. Scary okizeme tool, but doesn't have as much use in other situations.

421X
EM Net Wire Type C
421A/[A]/B/C
(421A~2)
MBCMech421A.png
MBCMech421XA.png
MBCMech421B.png
MBCMech421C.png
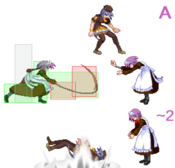
A Damage Red Damage Proration Cancel Guard
1400 (542) 0 40% (O) - LH
First Active Active Recovery Frame Adv Circuit Invuln
14 1 23 -6 0.0% -

Hitgrab whip. Mainly a staple combo tool as a launcher with much more range than 6C. Inputting 2 when landing it will give you an untechable knockdown similar to 421B.

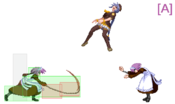
[A] Damage Red Damage Proration Cancel Guard
1200 343 50% - H
First Active Active Recovery Frame Adv Circuit Invuln
26 1 29 -12 0.0% -

Your grounded overhead option. Wallslams on hit. Unsafe on block and can be direspected if your opponent knows about this move.

B Damage Red Damage Proration Cancel Guard
1400 (678) 0 50% (O) - U
(Whiffs vs Ground)
First Active Active Recovery Frame Adv Circuit Invuln
9 5 20 - 0.0% -

Anti-Air whip, one of your air-unblockable options but you only get an OK untechable knockdown from it.

EX Damage Red Damage Proration Cancel Guard
1000 (822) 0 85% (M) - LHA
First Active Active Recovery Frame Adv Circuit Invuln
4+8 1 42 -31 -100.0% Full 11-36

EX whip, puts the opponent in hitstun next to you. Mostly used as combo fodder, but can lead to a high/low/throw reset when the opponent least expects it as the hitstun duration can be shorter than you think.

22X
MBCMech22A.png
MBCMech22B.png
MBCMech22C.png
A Damage Red Damage Proration Cancel Guard
1000 784 50% (O) - LHA
First Active Active Recovery Frame Adv Circuit Invuln
9 9 27 -8 10.0% High 1-8, Clash 5-8

Barrier shield, has some upper body invincibility and clash frames. This move can be used as an anti air by itself or after a Normal Shield. Fairly unsafe on ground block or whiff, but fairly safe on air block. Launches vertically on hit.

B Damage Red Damage Proration Cancel Guard
320*7 (1822) (884) 50% (O) - LHA
First Active Active Recovery Frame Adv Circuit Invuln
19 20 32 -25 2.6%*7 (18.2%) Full 9-19, Clash 5-16

Big barrier shield, has clash frames near startup followed by total body invincibility. It is pretty risky to use this move unless you time it to clash your opponent's attack, but if it does clash the invincibility following it will win out in most situations. Opponent can react to the clash to potentially beat it though. It is possible to follow up on the wallslam in some situations on hit. Very unsafe on ground block/whiff, but is fairly safe on air block. Wallslams on hit.

EX Damage Red Damage Proration Cancel Guard
360*11 (2292) (1301) -5%*11 - LHA
First Active Active Recovery Frame Adv Circuit Invuln
5+10 20 27 -18 -100.0% Full 1-15

EX reversal, basically a 22B with full invincibility starting from frame 1, making it safe from meaties.

63214C
MBCMech63214C.png
Damage Red Damage Proration Cancel Guard
100, 500*2, 100, 500*3 (2406) (1830) 100% - LH
First Active Active Recovery Frame Adv Circuit Invuln
1+9 6 (4) 2 26 -26 ~ -22 -150.0% -

EX arm extend, on hit it grabs the opponent and shocks them for an untechable knockdown. Costs 150% meter instead of 100%. Only real use is for grabbing OTG opponents for extra damage and guaranteed knockdown. It does however, have some particular applications as a counterattack against certain moves, such as Mech Hisui's own arc drive.


Aerial Specials

j.236X
MBCMechj236A.png
MBCMechj236B.png
MBCMechj236C.png
A/[A] Damage Red Damage Proration Cancel Guard
1150 784 50% (O) N/A LHA
First Active Active Recovery Frame Adv Circuit Invuln
14 ~ 15 X 0 - 8.0% -

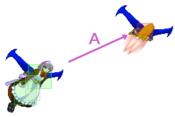
JETPACKS! Covers a lot of space and moves relatively slowly but with relatively fast startup. Highly spammable due to barely having any landing recovery, but you are left vulnerable the higher you go. The main use of this is as anti-jump zoning when tiger kneed (2369A).

B/[B] Damage Red Damage Proration Cancel Guard
1150 784 50% (O) - LHA
First Active Active Recovery Frame Adv Circuit Invuln
12 ~ 13 X 0 - 8.0% -

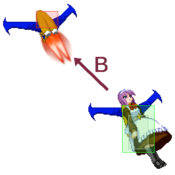
More situational backwards version. Used to catch air techs after a j.236A combo ender and sideswitch attempts.

EX Damage Red Damage Proration Cancel Guard
800*3 (2007) (1227) 90% (O) - LHA
First Active Active Recovery Frame Adv Circuit Invuln
4+0~8 - - - -100.0% Full 4-72

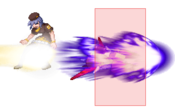
EX jetpack travels fullscreen horizontally. Mech returns from the screen she flew toward and becomes vulnerable during the dash animation of this return. As an aircombo ender it is fully untechable, but it doesn't always guarantee advantage since Mech's distance from the opponent varies. Fully invincible so it can be used to punish fullscreen attacks when tked (2369C)

j.214X
MBCMechj214A.png
MBCMechj214B.png
MBCMechj214C.png
A Damage Red Damage Proration Cancel Guard
600*3 (1743) (853) 100% -EX- LHA
First Active Active Recovery Frame Adv Circuit Invuln
15 X 9 - 5.0%*3 (15.0%) Clash 2-7

Crossbow shots, useful as a zoning tool as it travels fullscreen quite quickly and will give you an advantage over characters who rely on horizontal fireballs to counter jetpacks/missles/lazer, EX cancellable to j.214C or j.236C to make it safe.

B Damage Red Damage Proration Cancel Guard
600*5 (2811) (1376) 100% - LHA
First Active Active Recovery Frame Adv Circuit Invuln
15 X 12 - 5.0%*5 (25.0%) Clash 2-7

Pretty much the same as j.214A, has more shots, but you cannot EX cancel it so any mistakes with it can be a guaranteed punish.

EX Damage Red Damage Proration Cancel Guard
400*6 (2211) (1081) 100% - LHA
First Active Active Recovery Frame Adv Circuit Invuln
2+13 X 12 - -100.0% Clash 2-7

EX crossbow shots that lock on to the opponent, can be used to make j.214A safe and can also be used as a meaty attack or as a pressure starter.

j.63214C
MBCMechj63214C.png
Damage Red Damage Proration Cancel Guard
100, 500*2, 100, 500*3 (2406) (1830) 100% - LH
First Active Active Recovery Frame Adv Circuit Invuln
1+8 9 9 - -150.0% -

Works the same as the ground version. Gives the best knockdown out of all aerial enders.

Arc Drive

MBFMechAD.png
Damage Red Damage Proration Cancel Guard
500*13 (4143) (2416) 90% (O) - LHA
First Active Active Recovery Frame Adv Circuit Invuln
17+8 X 21 45 ~ 72 removes all Full 1-29

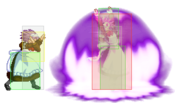
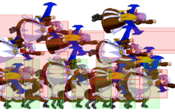
A train of Mech-Hisuis comes out, covers the bottom of the screen, fully invincible from 1~29. Great damage if it connects or free guard break on air block or free throw/airthrow on shield. Also gives you mixup attempts as the move is VERY plus after all.

Another Arc Drive

L.S.O (Superhuman Sister Alliance)
41236C during Blood Heat
MBFMechAAD.png
Damage Red Damage Proration Cancel Guard
500*29 (5969) (3470) 90% (O) - LHA
First Active Active Recovery Frame Adv Circuit Invuln
1+23 X 22 42 ~ 68 removes all Full 1

Similar to the above, except the move is no longer invincible (if hit out of the startup, the brigade will not appear). However, this version covers much more space as there are also flying Mech-Hisuis added as well.


Last Arc

Saturday Night Forever
Aerial EX Shield during Blood Heat
MBFMechLA.png
Damage Red Damage Proration Cancel Guard
2100*4 (3250~6500) (2500~5000) 50% + 50% * remaining BH time N/A U
First Active Active Recovery Frame Adv Circuit Invuln
1+3 13 (23) 13 (21) 13 (23) 13 111 N/A removes all Full

Mech-Hisui transforms into a plane and impacts the opponent 4 times.


MBAACC Navigation

General
FAQ
Advanced
AokoCrescentHalfFull
TohnoCrescentHalfFull
HimeCrescentHalfFull
NanayaCrescentHalfFull
KoumaCrescentHalfFull
MiyakoCrescentHalfFull
CielCrescentHalfFull
SionCrescentHalfFull
RiesbyfeCrescentHalfFull
V.SionCrescentHalfFull
WarachiaCrescentHalfFull
RoaCrescentHalfFull
MaidsCrescentHalfFull
AkihaCrescentHalfFull
ArcueidCrescentHalfFull
Powered CielCrescentHalfFull
Red ArcueidCrescentHalfFull
V.AkihaCrescentHalfFull
Mech-HisuiCrescentHalfFull
SeifukuCrescentHalfFull
SatsukiCrescentHalfFull
LenCrescentHalfFull
RyougiCrescentHalfFull
White LenCrescentHalfFull
NeroCrescentHalfFull
NACCrescentHalfFull
Koha-MechCrescentHalfFull
HisuiCrescentHalfFull
Neco-ArcCrescentHalfFull
KohakuCrescentHalfFull
Neco-MechCrescentHalfFull