Character Page Progress
This page is still a work in progress, consider joining as an editor to help expand it. Please update this character's roadmap page when one of the editing goals have been reached.
| In Progress |
To-do
|
- Move Descriptions:
- Add frame data to the remaining moves.
- Add descriptions to those moves, specify how they function, cite their uses, add captions where helpful, etc.
|
- Additional Ressources/Players to watch/ask
- Add any external links to ressources such as video guides or articles.
- Overview/General Gameplan:
- Add a short summary of this character (Expand the Strengths/Weaknesses list if necessary.)
- Do your best to describe how to play this character, change or add subsections based on what you would write as a guide.
- (Combos:)
- (Add tech in the OTG pickup and corner combo sections.)
- Move Descriptions:
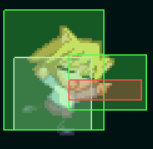
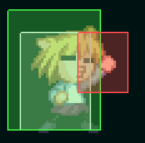
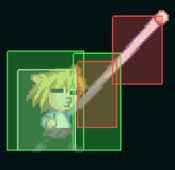
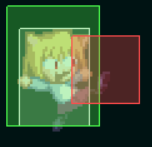
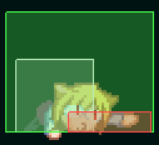
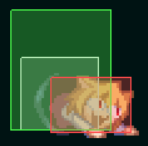
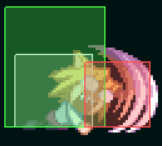
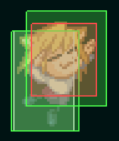
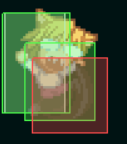
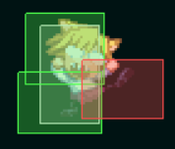
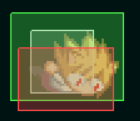
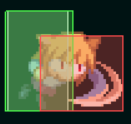
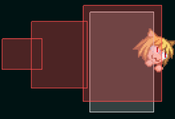
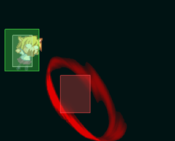
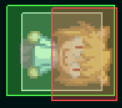
- Add images with hitboxes to the moves.
|
Additional Resources
C-Neco Match Video Database
Notable Players
| Name |
Color
|
Region |
Common Venues |
Status |
Details
|
| KFL |

|
North America |
Netplay |
Active? |
No footage, but has sharked the waters of LFG-NA plenty with this character. Can be found in Meltycord.
|
nishiogineko
(西荻猫) |

|
Japan |
KorewaMelty, Play Spot BIG ONE 2nd |
Active |
|
ouba-
(オーバー) |

|
Japan |
Play Spot BIG ONE 2nd |
Inactive |
|
sakura乃nyan
(桜乃にゃん) |

|
Japan |
A-cho |
Inactive |
|
yoshiyumenyan
(由夢にゃん) |

|
Japan |
|
Inactive |
|
Overview
Playstyle
|
C-Neco-Arc needs to work as hard as a grappler to get in, and needs to press as many buttons as a rushdown once she does get in, but her post-combo positioning and ability to punish techs can threaten to take rounds from even one successful approach. |
| Pros |
Cons |
- Frame data: Neco-Arc boasts the fastest 2A in the game at 3 frames, and her three slowest normals are frames 11, 8, and 6.
- Backdash: It has 16 frames of invincibility with only 5 frames of recovery, its teleporting nature makes it hard to punish on reaction, and her already-fast grounded normals can be all canceled into it, making them very safe.
- Tiny: Neco-Arc's hitbox is so small that her opponents require unique blockstrings and combos just to prevent her from falling out, which are both always less optimal than their universal options, and require extra effort to learn. Combined with the difficulty of switching between the two in a bracket setting, it's common for her to slip through the cracks and reverse into her own combo.
|
- Range of a rat: Neco-Arc "boasts" some of the worst range in the entire genre, making it difficult to punish certain moves or even to approach close enough to start pressing buttons. What longer range attacks she does have are generally slow and not threatening to patient opponents.
- Limited mobility: Her airdash is designed for air-stalling rather than covering distance, and her dash startup is relatively slow at 6 frames. Her great backdash also doesn't help in this regard. Expect to use 214X liberally against foes who refuse to approach.
|
General Gameplan
Please keep in mind that this section is mostly a WIP.
Neutral
Stick to zoning with 236A/B in conjunction with 421C, use 214x and incredible backdash to evade your opponent and keep up zoning.
Pressure
Place text here
Okizeme
Place text here
Defense
place text here*
Combos
| Combo Notation Help
|
Disclaimer: Combos are written by various writers, so the actual notation used in pages can differ from the standard one.
For more information, see Glossary and Controls.
|
| X > Y
|
X input is cancelled into Y.
|
| X > delay Y
|
Must wait for a short period before cancelling X input into Y.
|
| X, Y
|
X input is linked into Y, meaning Y is done after X's recovery period.
|
| X+Y
|
Buttons X and Y must be input simultaneously.
|
| X/Y
|
Either the X or Y input can be used.
|
| X~Y
|
This notation has two meanings.
- Use attack X with Y follow-up input.
- Input X then within a few frames, input Y. Usually used for option selects.
|
| X(w)
|
X input must not hit the opponent (Whiff).
|
| j.X
|
X input is done in the air, implies a jump/jump cancel if the previous move was done from the ground.
Applies to all air chain sections:
- Assume a forward jump cancel if no direction is given.
- Air chains such as j.A > j.B > j.C can be shortened to j.ABC.
|
| sj.X
|
X input is done after a super jump. Notated as sj8.X and sj9.X for neutral and forward super jumps respectively.
|
| dj.X
|
X input is done after a double jump.
|
| sdj.X
|
X input is done after a double super jump.
|
| tk.X
|
Stands for Tiger Knee. X motion must be buffered before jumping, inputting the move as close to the ground as possible. (ex. tk.236A)
|
| (X)
|
X is optional. Typically the combo will be easier if omitted.
|
| [X]
|
Input X is held down. Also referred to as Blowback Edge (BE). Depending on the character, this can indicate that this button is held down and not released until indicated by the release notation.
|
| ]X[
|
Input X is released. Will only appear if a button is previously held down. This type of input is referred to as Negative Edge.
|
| {X}
|
Button X should only be held down briefly to get a partially charged version instead of the fully charged one.
|
| X(N)
|
Attack "X" should only hit N times.
|
| (XYZ)xN
|
XYZ string must be performed N times. Combos using this notation are usually referred to as loops.
|
| (XYZ^)
|
A pre-existing combo labelled XYZ is inserted here for shortening purposes.
|
| CH
|
The first attack must be a Counter Hit.
|
| Air CH
|
The first attack must be a Counter Hit on an airborne opponent.
|
| 66
|
Performs a ground forward dash.
|
| j.66
|
Performs an aerial forward dash, used as a cancel for certain characters' air strings.
|
| IAD/IABD
|
Performs an Instant AirDash.
|
| AT
|
Performs an Air Throw. (j.6/4A+D)
|
| IH
|
Performs an Initiative Heat.
|
| AD
|
Performs an Arc Drive.
|
| AAD
|
Performs an Another Arc Drive.
|
Starters
| Condition
|
Notation
|
Damage
vs V.Sion
|
Notes
|
|
| Normal starter, grounded opponent
|
|
2169
|
| |
| Meter Gained: 29.5% |
Meter Given (vs C-Moon): 8.8% |
| The combo starter that one would use the most since 2A and 5A are fast and + on block. |
|
|
| Normal starter, grounded opponent
|
|
850
|
| |
| Meter Gained: 7.0% |
Meter Given (vs C-Moon): 2.1% |
| A quite simple starter. It's quite quick and this can be used with 5[B] to apply some pressure. |
|
|
| Normal starter, grounded opponent
|
|
1350
|
| |
| Meter Gained: 12.0% |
Meter Given (vs C-Moon): 3.6% |
| This is the charged starter. The combos off this starter do less damage outside the corner compared to 5B. |
|
|
| Normal starter, grounded opponent
|
|
2538
|
| |
| Meter Gained: 25.0% |
Meter Given (vs C-Moon): 7.8% |
| A very damaging combo starter. Outside of the j.C > j.2C > 2C > 5C starter, it's Neco-Arc's most damaging launcher. |
|
|
| Normal starter, grounded opponent
|
|
3174
|
| |
| Meter Gained: 42.0% |
Meter Given (vs C-Moon): 12.6% |
| This is the most damaging launcher. While this notation is a double overhead into a low, it can be adjusted on block so that there is only one overhead, or straight into empty low. If done in the corner, j.C > j.2C > 2A > 2B > 2C > 5C can be used instead, but it is tighter. |
|
|
| Normal starter, grounded opponent
|
|
1349
|
| |
| Meter Gained: 20.0% |
Meter Given (vs C-Moon): 6.0% |
| While 6A is not that great and the charged version is reactable, it is here for completion. |
|
|
| Normal starter, grounded opponent
|
|
2367
|
| |
| Meter Gained: 36.0% |
Meter Given (vs C-Moon): 10.8% |
| This is an overhead starter but it is reactable and won't be used at a higher level and is also here for completion. |
|
|
| Corner starter, grounded opponent
|
|
2269
|
| |
| Meter Gained: 30.0% |
Meter Given (vs C-Moon): 9.0% |
| 5[B] has enough hitstun to catch the opponent on the way down with 2C > 5C to relaunch. 2C > 5C needs to hit right before the opponent hits the ground. |
|
|
| Corner starter, grounded opponent
|
|
800
|
| |
| Meter Gained: 10.0% |
Meter Given (vs C-Moon): 3.0% |
| 5[C] wallbounces and a combo can be started there. |
|
|
| Metered starter, grounded opponent
|
|
1705
|
| |
| Meter Gained: -86.0% |
Meter Given (vs C-Moon): 4.2% |
| 421C is used here as a poor man's Roman Cancel for 236B's recovery. Must be done right next to the opponent. |
|
|
| Metered starter, grounded opponent
|
|
1589
|
| |
| Meter Gained: -84.0% |
Meter Given (vs C-Moon): 4.8% |
| Like the previous starter, but with 236A. |
|
|
| Metered starter, grounded opponent
|
|
1080
|
| |
| Meter Gained: -97.0% |
Meter Given (vs C-Moon): 2.0% |
| While it's a combo starter, you can only really do OTG in midscreen. |
|
|
| Metered corner starter, grounded opponent
|
- (j.236A >) j.236C > 2C > 5C
|
1968
|
| |
| Meter Gained: -89.3% |
Meter Given (vs C-Moon): 7.4% |
| This is the non-OTG combo starter off j.236C. |
|
|
| Neco Packet 2008, grounded opponent
|
|
3046
|
| |
| Meter Gained: 10.0% |
Meter Given (vs C-Moon): 10.7% |
| 421A and 241C have a chance to summon a Neco Himme who summons an air-unblockable version of Hime's pillar. |
|
|
| Abaddon Force/Neco Packet 2008, grounded opponent
|
|
1250
|
| |
| Meter Gained: 0.0% |
Meter Given (vs C-Moon): 1.1% |
| When using Abaddon Force, a Neco-Arc may spawn which uses 5B. The same 5[B] combo can be used, but this has slightly different properties. The other attacks from Abaddon force can be simply linked into 2A/5A. Neco Packet 2008 may spawn a Neco-Arc using Abaddon Force. |
|
|
Enders
| Condition
|
Notation
|
Damage
vs V.Sion
|
Notes
|
|
| Normal starter, airborne opponent
|
|
1100
|
| |
| Meter Gained: 13.0% |
Meter Given (vs C-Moon): 3.9% |
| Usually the preferred non-metered ender as it gives good oki. |
|
|
| Normal starter, airborne opponent
|
|
1408
|
| |
| Meter Gained: 10.0% |
Meter Given (vs C-Moon): 3.0% |
| Also can be written as 6/4A+D. Has worse oki than the j.2C in exchange for a little bit of damage. |
|
|
| Normal starter, airborne opponent, 100% meter
|
|
3163
|
| |
| Meter Gained: -100.0% |
Meter Given (vs C-Moon): 18.8% |
| Max damage metered ender. While it seems to do a ridiculous amount of damage, it is a multihit and scales quite heavily at the end of a combo. |
|
|
| Normal starter, airborne opponent, 100% meter
|
|
2272
|
| |
| Meter Gained: -75.0% |
Meter Given (vs C-Moon): 8.6% |
| Does less damage than raw j.214C ender, but gives much better oki. It can be hard to gain enough height for make j.214B connect into j.236C, so if one has enough meter without j.214B, they can drop it and go straight into j.236C. |
|
|
| Normal starter, airborne opponent, 100% meter
|
|
3030
|
| |
| Meter Gained: -75.0% |
Meter Given (vs C-Moon): 26.3% |
| This can be used if one wants to use j.214C but is 25.0% short on meter. Does less damage than raw j.214C due to scaling. |
|
|
OTG Pick ups
| Condition
|
Notation
|
Damage
vs V.Sion
|
Notes
|
|
| Normal starter, grounded opponent
|
|
text
|
| |
| Meter Gained: text |
Meter Given (vs C-Moon): text |
| text |
|
|
Normal Combos
| Condition
|
Notation
|
Damage
vs V.Sion
|
Notes
|
|
| Normal starter, grounded opponent
|
- (2A/5A >) (2B >) 2C > 5C > j.ABC > dj.ABC > j.2C
|
3836
|
| |
| Meter Gained: 86.5% |
Meter Given (vs C-Moon): 25.9% |
| This is the standard combo starter for Neco-Arc. 2A/5A > 2B > 2C can be used as a hit confirm. |
|
|
| Normal starter, grounded opponent
|
- 5B > delay j.BC > dj.BC > j.2C
|
3311
|
| |
| Meter Gained: 58.0% |
Meter Given (vs C-Moon): 17.4% |
| A late jump cancel is needed for j.B to connect. j.214CB cannot be linked into j.236C with this route. |
|
|
| Normal starter, grounded opponent, 100% meter
|
- 5B > j.A > dj.B > j.214B > j.236C
|
2803
|
| |
| Meter Gained: -59.5% |
Meter Given (vs C-Moon): 13.2% |
| This is the j.214B > j.236C route. |
|
|
| Normal starter, grounded opponent
|
|
2976
|
| |
| Meter Gained: 50.0% |
Meter Given (vs C-Moon): 15.0% |
| This is a crossunder 5B combo. |
|
|
| Normal starter, grounded opponent
|
- 5[B] > j.BC > dj.BC > j.2C
|
2889
|
| |
| Meter Gained: 63.0% |
Meter Given (vs C-Moon): 18.9% |
| The midscreen 5[B] combo. Can get more from being done in the corner. |
|
|
| Normal starter, grounded opponent
|
- 5C > 2C > 2B > j.ABC > dj.ABC > j.2C
|
4245
|
| |
| Meter Gained: 83.0% |
Meter Given (vs C-Moon): 24.9% |
| Drop the j.As to gain enough height to end with j.214B > j.236C. |
|
|
| Normal starter, grounded opponent
|
- (j.C >) (j.2C >) 2C > 5C > j.ABC > dj.ABC > j.2C
|
4777
|
| |
| Meter Gained: 99.0% |
Meter Given (vs C-Moon): 29.7% |
| Drop the j.As to gain enough height to end with j.214B > j.236C. |
|
|
| Normal starter, grounded opponent
|
- 6A~6B~6C > j.BC > dj.ABC > j.2C
|
3388
|
| |
| Meter Gained: 74.0% |
Meter Given (vs C-Moon): 22.2% |
| Drop the j.As to gain enough height to end in j.214B > j.236C. Cannot connect j.214B into j.236C |
|
|
| Normal starter, grounded opponent, 100% meter
|
- 6A~6B~6C > j.A > dj.B > j.214B > j.236C
|
3016
|
| |
| Meter Gained: -46.5% |
Meter Given (vs C-Moon): 17.1% |
| This is the j.214B j.236C route. |
|
|
| Normal starter, grounded opponent,
|
- 6[A]~6B > 2C > 5C > j.ABC > j.ABC > j.2C
|
4034
|
| |
| Meter Gained: 93.0% |
Meter Given (vs C-Moon): 27.9% |
| Once 6[A] is charged, the 6B followup can be cancelled into 2C > 5C, leading to higher damage. |
|
|
| Raw AT Starter
|
- AT > delay j.236A > land > j.BC > j.ABC > j.214B
|
2645
|
| |
| Meter Gained: 79.0% |
Meter Given (vs C-Moon): ??? |
| Can carry to the corner. To help with the j.236A delay, input 236A when Neco and the opponent are at the same height after the AT. Might be character specific. |
|
|
Corner Combos
| Condition
|
Notation
|
Damage
vs V.Sion
|
Notes
|
|
| Normal starter, grounded opponent, 100% meter
|
- 5[B] > 2[B] > 2C > 5[C] > j.ABC > dj.ABC > j.214C
|
4416
|
| |
| Meter Gained: -12% |
Meter Given (vs C-Moon): text |
| Good damage by Neco standards. Good luck getting a 5[B] starter though. |
|
|
Move Descriptions
| Frame Data Help
|
| Header
|
Tooltip
|
| Move Box Colors
|
Light gray = Collision Box (A move lacking one means it can go through the opponent's own collision box).
Green: Hurt Boxes.
Red: Hit(/Grab) Boxes.
Yellow: Clash Boxes (When an active hitbox strikes a clash box, the active hitbox stops being active. Multi-hit attacks can beat clash since they will still progress to the next hitbox.)
Magenta: Projectile-reflecting boxes OR Non-hit attack trigger boxes (usually).
Blue: Reflectable Projectile Boxes.
|
| Damage
|
Base damage done by this attack.
(X) denotes combined and scaled damage tested against standing V. Sion.
|
| Red Damage
|
Damage done to the recoverable red health bar by this attack. The values are inherently scaled and tested against standing V. Sion.
(X) denotes combined damage.
|
| Proration
|
The correction value set by this attack and the way it modifies the scaling during a string. See this page for more details.
X% (O) means X% Overrides the previous correction value in a combo if X is of a lower percentage.
X% (M) means the current correction value in a combo will be Multiplied by X%. This can also be referred to as relative proration.
|
| Circuit
|
Meter gained by this attack on hit.
(X%) denotes combined meter gain.
-X% denotes a meter cost.
|
| Cancel
|
Actions this move can be cancelled into.
SE = Self cancelable.
N = Normal cancelable.
SP = Special cancelable.
CH = Cancelable into the next part of the same attack (Chain in case of specials).
EX = EX cancelable.
J = Jump cancelable.
(X) = Cancelable only on hit.
-X- = Cancelable on whiff.
|
| Guard
|
The way this move must be blocked.
L = Can block crouching
H = Can block standing.
A = Can block in the air.
U = Unblockable.
|
| Startup
|
Amount of frames that must pass prior to reaching the active frames. Also referred to as "True Startup".
|
| Active
|
The amount of frames that this move will have a hitbox.
(x) denotes frame gaps where there are no hitboxes is present. Due to varied blockstuns, (x) frames are difficult to use to determine punish windows. Generally the larger the numbers, the more time you have to punish.
X denotes active frames with a duration separate from its origin move's frame data, such as projectile attacks. In this case, the total length of the move is startup+recovery only.
|
| Recovery
|
Frames that this move has after the active frames if not canceled. The character goes into one frame where they can block but not act afterwards, which is not counted here.
|
| Advantage
|
The difference in frames where you can act before your opponent when this move is blocked (assuming the move isn't canceled and the first active frame is blocked).
If the opponent uses a move with startup that is at least 2 frames less than this move's negative advantage, it will result in the opponent hitting that move.
±x~±y denotes a range of possible advantages.
|
| Invul
|
Lists any defensive properties this move has.
X y~z denotes X property happening between the y to z frames of the animations. If no frames are noted, it means the invincibility lasts through the entire move.
Invicibility:
- Strike = Strike invincible.
- Throw = Throw invincible.
Hurtbox-Based Properties:
- Full = No hurtboxes are present.
- High = Upper body lacks a hurtbox.
- Low = Lower body lacks a hurtbox.
Miscellaneous Properties
- Clash = Frames in which clash boxes are active.
- Reflect = Frames in which projectile-reflecting boxes are active.
- Super Armor = Frames in which the character can take hits without going into hit stun.
|
Normal Moves
Standing Normals
5A
|
| Damage
|
Red Damage
|
Proration
|
Cancel
|
Guard
|
| 350
|
196
|
75%
|
-SE-, N, -SP-, -EX-, (J)
|
LH
|
| First Active
|
Active
|
Recovery
|
Frame Adv
|
Circuit
|
Invuln
|
| 4
|
2
|
9
|
1
|
3.5%
|
-
|
|
A literal poke. Very fast button, but incredibly small. You can only get one or two 5As in a row before you're pushed out of range for any other buttons.
|
|
5B
|
| 5B
|
Damage
|
Red Damage
|
Proration
|
Cancel
|
Guard
|
| 850
|
539
|
80%
|
N, SP, EX, (J)
|
LH
|
| First Active
|
Active
|
Recovery
|
Frame Adv
|
Circuit
|
Invuln
|
| 8
|
2
|
16
|
-6
|
7.0%
|
-
|
|
A small uppercut. Moves Neco Arc slightly forward. Launches opponent.
|
| 5[B]
|
Damage
|
Red Damage
|
Proration
|
Cancel
|
Guard
|
| 1350
|
980
|
50%
|
N, SP, EX, (J)
|
LH
|
| First Active
|
Active
|
Recovery
|
Frame Adv
|
Circuit
|
Invuln
|
| 28
|
4
|
15
|
-4
|
12.0%
|
-
|
|
A bigger uppercut. Moves Neco Arc forward for as long as you hold B. Also launches opponent.
|
|
5C
|
| 5C
|
Damage
|
Red Damage
|
Proration
|
Cancel
|
Guard
|
| 1200
|
735
|
100%
|
N, SP, EX, (J)
|
LH
|
| First Active
|
Active
|
Recovery
|
Frame Adv
|
Circuit
|
Invuln
|
| 6
|
2
|
14
|
-4
|
8.0%
|
-
|
|
A small front kick. Moves Neco Arc forward slightly.
|
| 5[C]
|
Damage
|
Red Damage
|
Proration
|
Cancel
|
Guard
|
| 800
|
1176
|
50%
|
-
|
LH
|
| First Active
|
Active
|
Recovery
|
Frame Adv
|
Circuit
|
Invuln
|
| 18
|
3
|
22
|
-10
|
10.0%
|
-
|
|
Neco Arc extends her foot for a bigger kick. Moves Neco Arc forward for as long as you hold C. Sends your opponent to the wall.
|
|
Crouching Normals
2A
|
| Damage
|
Red Damage
|
Proration
|
Cancel
|
Guard
|
| 350
|
196
|
75%
|
-SE-, N, -SP-, -EX-, (J)
|
LH
|
| First Active
|
Active
|
Recovery
|
Frame Adv
|
Circuit
|
Invuln
|
| 3
|
2
|
9
|
1
|
3.5%
|
-
|
|
A small poke in the feet. Fastest move in the game, but extends her hurtbox forward into the perfect "getting punched" range, so be careful when using this. Good for tick throws.
|
|
2B
|
| 2B
|
Damage
|
Red Damage
|
Proration
|
Cancel
|
Guard
|
| 750
|
539
|
80% (O) / 100% (O)
|
N, SP, EX, (J)
|
LHA
|
| First Active
|
Active
|
Recovery
|
Frame Adv
|
Circuit
|
Invuln
|
| 7
|
12
|
8
|
-8 ~ 3
|
8.0%
|
-
|
|
Neco Arc lunges forward. Active for surprisingly long.
|
| 2{B}
|
Damage
|
Red Damage
|
Proration
|
Cancel
|
Guard
|
| 900 / 750
|
735 / 539
|
70% (O) ~ 100% (O)
|
N, SP, EX, (J)
|
LH / LHA
|
| First Active
|
Active
|
Recovery
|
Frame Adv
|
Circuit
|
Invuln
|
| 15 ~ 28
|
24
|
8
|
-16 ~ 3
|
10.0% / 8.0%
|
-
|
|
Neco Arc lunges even farther forward and now hits low during the early active frames.
|
| 2[B]
|
Damage
|
Red Damage
|
Proration
|
Cancel
|
Guard
|
| 1050
|
833
|
70%
|
N, SP, EX, (J)
|
L
|
| First Active
|
Active
|
Recovery
|
Frame Adv
|
Circuit
|
Invuln
|
| 29
|
24
|
8
|
-14 ~ 9
|
12.0%
|
-
|
|
Maximum lunge. Doesn't look different in terms of hitboxes, but she moves much farther, roughly 1/3rd screen.
|
|
2C
|
| Damage
|
Red Damage
|
Proration
|
Cancel
|
Guard
|
| 1000
|
539
|
60%
|
N, SP, EX, (J)
|
L
|
| First Active
|
Active
|
Recovery
|
Frame Adv
|
Circuit
|
Invuln
|
| 8
|
2
|
20
|
-4
|
10.0%
|
-
|
|
Neco Arc claws the opponent's feet while crouching. The pushback on block is enough to keep her safe from most 2As. You can also Reverse Beat while you're close enough, and you might be able to get away with cancelling into backdash, 236B, delay 623X, or 214X. Just be smart about it.
|
|
Aerial Normals
j.A
|
| Damage
|
Red Damage
|
Proration
|
Cancel
|
Guard
|
| 250
|
147
|
75%
|
SE, N, SP, EX, J
|
LHA
|
| First Active
|
Active
|
Recovery
|
Frame Adv
|
Circuit
|
Invuln
|
| 4
|
4
|
10
|
-
|
3%
|
-
|
|
A small poke in the air. Small and hits mid but can be chained into more j.As for annoying pressure, but ultimately not great.
|
|
j.B
|
| Damage
|
Red Damage
|
Proration
|
Cancel
|
Guard
|
| 600
|
392
|
100%
|
N, SP, EX, J
|
HA
|
| First Active
|
Active
|
Recovery
|
Frame Adv
|
Circuit
|
Invuln
|
| 6
|
3
|
-
|
-
|
8%
|
-
|
|
Neco Arc kicks her little footsie at a downward angle. Use this in combos. You can use this to jump in, but if j.B will hit, j.C will probably hit too, and for more damage.
|
|
j.C
|
| Damage
|
Red Damage
|
Proration
|
Cancel
|
Guard
|
| 800
|
588
|
90%
|
N, SP, EX, J
|
HA
|
| First Active
|
Active
|
Recovery
|
Frame Adv
|
Circuit
|
Invuln
|
| 6
|
3
|
-
|
-
|
11%
|
-
|
|
Neco Arc kicks her little footsie at an upward angle. Same startup and active frames as j.B but more damage and hits much farther out in front of her. You can use this to catch people out of the air or jump in with this.
|
|
Command Normals
j.2B
|
| Damage
|
Red Damage
|
Proration
|
Cancel
|
Guard
|
| 900
|
588
|
100%
|
-
|
LHA
|
| First Active
|
Active
|
Recovery
|
Frame Adv
|
Circuit
|
Invuln
|
| 12
|
-
|
16-69
|
0 (TK)
|
10%
|
-
|
|
Neco Arc body slams straight downward from wherever she is in the air. Fully active until she hits the ground. Hold B to extend recovery up to 69 frames for no reason other than because it's funny to see Neco face down on the ground for a full second. This move is bad and has little to no practical use. You can try to catch your opponent pushing a button, but chances are their hitbox will be better than Neco's j.2B.
|
|
j.2C
|
| Damage
|
Red Damage
|
Proration
|
Cancel
|
Guard
|
| 1100
|
735
|
100%
|
-
|
HA
|
| First Active
|
Active
|
Recovery
|
Frame Adv
|
Circuit
|
Invuln
|
| 4
|
2
|
-
|
-
|
13%
|
-
|
|
Spikes airborne opponents to the ground at an angle. They can tech when they hit the ground, but if they don't, you can follow up for a combo. Use after j.C when going in on a grounded opponent for a silly double overhead starter that deals decent damage.
|
|
Universal Mechanics
Ground Throw
4/6A+D
|
| Damage
|
Red Damage
|
Proration
|
Cancel
|
Guard
|
| 1200
|
672
|
100%
|
-
|
U
|
| First Active
|
Active
|
Recovery
|
Frame Adv
|
Circuit
|
Invuln
|
| 3
|
1
|
22
|
-
|
0.0%
|
-
|
|
Neco uppercuts the opponent away for an untechable knockdown.
|
|
Air Throw
j.4/6A+D
|
| Raw
|
Damage
|
Red Damage
|
Proration
|
Cancel
|
Guard
|
| 1600
|
506
|
30%
|
-
|
U
|
| First Active
|
Active
|
Recovery
|
Frame Adv
|
Circuit
|
Invuln
|
| 2
|
1
|
13
|
-
|
7.0%
|
-
|
|
Neco slams the opponent against the ground using up one ground bounce.
|
| Combo
|
Damage
|
Red Damage
|
Proration
|
Cancel
|
Guard
|
| 1300
|
506
|
100%
|
-
|
U
|
| First Active
|
Active
|
Recovery
|
Frame Adv
|
Circuit
|
Invuln
|
| 2
|
1
|
13
|
-
|
7.0%
|
-
|
|
Neco slams the opponent into the ground for an untechable knockdown. Gives pretty good frame advantage.
|
|
|
|
| Bunker
|
Damage
|
Red Damage
|
Proration
|
Cancel
|
Guard
|
| 500
|
196
|
50%
|
-
|
LHA
|
| First Active
|
Active
|
Recovery
|
Frame Adv
|
Circuit
|
Invuln
|
| 26
|
4
|
19
|
-5
|
0.0%
(-50.0% in blockstun)
|
Clash 1-10
|
| (Clash)
|
Damage
|
Red Damage
|
Proration
|
Cancel
|
Guard
|
| 500
|
196
|
50%
|
-
|
LHA
|
| First Active
|
Active
|
Recovery
|
Frame Adv
|
Circuit
|
Invuln
|
| 8
|
4
|
19
|
-5
|
0.0%/-50.0%
|
Strike 1-7
|
|
Small hitbox, but good forward movement.
|
|
|
|
| Damage
|
Red Damage
|
Proration
|
Cancel
|
Guard
|
| 100
|
0
|
100%
|
-
|
U
|
| First Active
|
Active
|
Recovery
|
Frame Adv
|
Circuit
|
Invuln
|
| 9
|
6
|
26
|
-
|
-100.0% (min)
|
Full 1-14
|
|
Tied for fastest Heat in the game along with NAC.
|
|
|
|
| Ground
|
Damage
|
Red Damage
|
Proration
|
Cancel
|
Guard
|
| 100
|
0
|
100%
|
-
|
U
|
| First Active
|
Active
|
Recovery
|
Frame Adv
|
Circuit
|
Invuln
|
| 11
|
10
|
20
|
-
|
removes all
|
Full 1-39
|
| Air
|
Damage
|
Red Damage
|
Proration
|
Cancel
|
Guard
|
| 100
|
0
|
100%
|
-
|
U
|
| First Active
|
Active
|
Recovery
|
Frame Adv
|
Circuit
|
Invuln
|
| 12
|
10
|
15
|
-
|
removes all
|
Strike 1-30
|
|
Universal burst mechanic. Unlike Crescent/Full Heat activation, the hitbox and frame data doesn't vary between characters. However, you can be thrown out of this move if you input it in the air.
|
|
Special Moves
Grounded Specials
True Ancestor Beam
(EX: Opuba!!)
236A/B/C A A B B EX EX
|
| A
|
Damage
|
Red Damage
|
Proration
|
Cancel
|
Guard
|
| 250*8 (1589)
|
120*8 (742)
|
100%
|
EX
|
LHA
|
| First Active
|
Active
|
Recovery
|
Frame Adv
|
Circuit
|
Invuln
|
| 26
|
16
|
22
|
-9
|
2.0%*8 (16.0%)
|
-
|
|
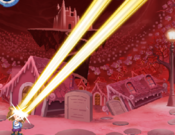
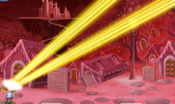
Primarily a zoning tool. Very slow startup. Significant pushback means it's generally safe on block. Must shield each hit individually.
|
| B
|
Damage
|
Red Damage
|
Proration
|
Cancel
|
Guard
|
| 300*7 (1705)
|
120*7 (662)
|
100%
|
EX
|
LHA
|
| First Active
|
Active
|
Recovery
|
Frame Adv
|
Circuit
|
Invuln
|
| 16
|
14
|
34
|
-21
|
2.0%*7 (14.0%)
|
-
|
|
Neco's strongest anti-air option. Use in conjunction with 236A when zoning with beams if they're approaching from the air. Very minus on block, potentially punishable if the opponent is close enough.
|
| EX
|
Damage
|
Red Damage
|
Proration
|
Cancel
|
Guard
|
| 250*26 (3410)
|
150*26 (1988)
|
100%
|
-
|
LHA
|
| First Active
|
Active
|
Recovery
|
Frame Adv
|
Circuit
|
Invuln
|
| 8+22
|
52
|
42
|
-32
|
-100.0%
|
Full 1-9
|
|
Mostly useless. While it does cover an angle 236A/B can't, it's a very small one which makes it negligible.
|
|
EM Wave Ultimate Attack - Necoesthetics
(EX: Super EM Wave Ultimate Attack - Necoesthetics - Stamp Rally East Japan)
623A/B/C A/B A/B EX EX
|
| A
|
Damage
|
Red Damage
|
Proration
|
Cancel
|
Guard
|
| 80*30 (1305)
|
50*6, 32*24 (561)
|
100%
|
-
|
LHA
|
| First Active
|
Active
|
Recovery
|
Frame Adv
|
Circuit
|
Invuln
|
| 6
|
13
|
5
|
+5
|
1.0%*6 (6.0%)
|
-
|
|
Very fast forward disjoint.
|
| B
|
Damage
|
Red Damage
|
Proration
|
Cancel
|
Guard
|
| 80*48 (1344)
|
50*6, 32*42 (609)
|
100%
|
-
|
LHA
|
| First Active
|
Active
|
Recovery
|
Frame Adv
|
Circuit
|
Invuln
|
| 12
|
13
|
3
|
+7
|
1.0%*6 (6.0%)
|
-
|
|
A bit slower than 623A, but almost no recovery.
|
| EX
|
Damage
|
Red Damage
|
Proration
|
Cancel
|
Guard
|
| 150*15, 160*105 (2731)
|
120*15, 40*105 (853)
|
100%
|
-
|
LHA
|
| First Active
|
Active
|
Recovery
|
Frame Adv
|
Circuit
|
Invuln
|
| 1+3
|
30
|
12
|
-2
|
-100.0%
|
-
|
|
Causes Circuit Break for 179 frames on hit. Grounded opponents will be pushed out of the move's hitbox halfway through, making it punishable both on block and on hit.
|
|
Cat Back From The Underworld R (Returns)
214A/B/C (No EX)
|
| A
|
Damage
|
Red Damage
|
Proration
|
Cancel
|
Guard
|
| -
|
-
|
-
|
-
|
-
|
| First Active
|
Active
|
Recovery
|
Frame Adv
|
Circuit
|
Invuln
|
| -
|
-
|
57
|
-
|
-
|
Full 12-51
|
|
Neco burrows under the ground and reappears alongside 2 fakes. 214A places Neco 216 pixels behind the center of the camera (left of center if facing right, right of center if facing left). The fake Necos appear 64 and 320 pixels in front of the camera's center. Note that all of these positions are relative to where the camera is immediately before the teleport takes place.
|
| B
|
Damage
|
Red Damage
|
Proration
|
Cancel
|
Guard
|
| -
|
-
|
-
|
-
|
-
|
| First Active
|
Active
|
Recovery
|
Frame Adv
|
Circuit
|
Invuln
|
| -
|
-
|
57
|
-
|
-
|
Full 12-51
|
|
214B places Neco at the center of the camera. The fake Necos appear 192 pixels behind and 320 pixels in front of the camera's center. Note that all of these positions are relative to where the camera is immediately before the teleport takes place.
|
| C
|
Damage
|
Red Damage
|
Proration
|
Cancel
|
Guard
|
| -
|
-
|
-
|
-
|
-
|
| First Active
|
Active
|
Recovery
|
Frame Adv
|
Circuit
|
Invuln
|
| -
|
-
|
57
|
-
|
-
|
Full 12-51
|
|
214C places Neco 216 pixels in front of the center of the camera (right of center if facing right, left of center if facing left). The fake Necos appear 192 pixels behind and 64 pixels in front of the camera's center. Note that all of these positions are relative to where the camera is immediately before the teleport takes place.
|
|
Neco Packet 2008
421A/B/C
|
| A
|
Damage
|
Red Damage
|
Proration
|
Cancel
|
Guard
|
| Varies
|
Varies
|
Varies
|
-
|
Varies
|
| First Active
|
Active
|
Recovery
|
Frame Adv
|
Circuit
|
Invuln
|
| 49
|
1
|
3
|
Varies
|
Varies
|
-
|
|
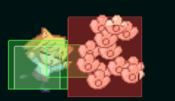
Neco-Arc calls up the homies to help her out. Will summon random Neco-Arcs that do a variety of mostly unhelpful things. The flying Neco-Arcs can be hit by the original, and have a hitbox while falling. This move has a chance of summoning Neco-Archetype-Earth, who does an air unblockable version of Hime's pillar. Neco-Hime is a very strong button if you can luck out.
|
| B
|
Damage
|
Red Damage
|
Proration
|
Cancel
|
Guard
|
| -
|
-
|
-
|
-
|
-
|
| First Active
|
Active
|
Recovery
|
Frame Adv
|
Circuit
|
Invuln
|
| 43
|
1
|
3
|
-
|
-
|
-
|
|
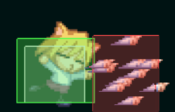
Always summons three Neco-Arcs from either side of the screen that bravely charge into the enemy's shins, only to be defeated by the might of human sturdiness. These Neco-Arcs do no damage, hitstun, nor blockstun, but you can use them as a distraction while you do other things I guess.
|
| EX
|
Damage
|
Red Damage
|
Proration
|
Cancel
|
Guard
|
| Varies
|
Varies
|
Varies
|
-
|
Varies
|
| First Active
|
Active
|
Recovery
|
Frame Adv
|
Circuit
|
Invuln
|
| 1+3
|
1
|
3
|
Varies
|
-100.0%
|
Full 1
|
|
GET 'EM, GIRLS! The EX version randomly summons two of 421A's summons, in addition to a Neco-Arc that performs 22B summon. The move is fast, and the super freeze lets you see what the opponent is doing, letting you check them accordingly. Can be used multiple times in succession, being able to get up to 12 summons on screen at once if you do this during MAX. Maybe you'll get lucky and summon 8 Neco-Himes!
|
|
Abaddon Flare
Abaddon Force
(EX: Elite Neco Corps Abaddon Paris☆Beret)
22A/B/C
|
| A
|
Damage
|
Red Damage
|
Proration
|
Cancel
|
Guard
|
| 300*11 (555-1270)
|
120*11 (216-493)
|
100%
|
EX
|
LH
|
| First Active
|
Active
|
Recovery
|
Frame Adv
|
Circuit
|
Invuln
|
| 23
|
44
|
20
|
-17~-5
|
2.0%*11 (4.0%-10.0%)
|
-
|
|
Yet another mostly useless move. Slow start up, and doesn't carry the opponent like 236A.
|
| B
|
Damage
|
Red Damage
|
Proration
|
Cancel
|
Guard
|
| Varies
|
Varies
|
100%
|
-
|
LHA
|
| First Active
|
Active
|
Recovery
|
Frame Adv
|
Circuit
|
Invuln
|
| 12
|
1
|
29
|
Varies
|
-
|
-
|
|
Spits out a Neco-Arc a set distance away that will walk around, crawl, kick, do a launcher, run with a constant hitbox, or jump and turn into a rocket. They'll perform these moves in a random direction, and perform the rocket move at a random height.
|
| EX
|
Damage
|
Red Damage
|
Proration
|
Cancel
|
Guard
|
| 250*24 (250-2594)
|
150*24 (150-1521)
|
100%
|
-
|
LHA
|
| First Active
|
Active
|
Recovery
|
Frame Adv
|
Circuit
|
Invuln
|
| 9+9
|
40
|
2
|
-11~+29
|
-100.0%
|
-
|
|
Shoots out 3 majestic rocket-ing Necos in cone-like pattern. Not useful
|
|
Nyampsey Roll AC
63214C during MAX, HEAT or BLOOD HEAT
|
| Damage
|
Red Damage
|
Proration
|
Cancel
|
Guard
|
| 200*17 (2302)
|
120*17 (1341)
|
90%
|
-
|
LHA
|
| First Active
|
Active
|
Recovery
|
Frame Adv
|
Circuit
|
Invuln
|
| 4+10
|
66
|
76
|
-60
|
removes all
|
Full 1-128
|
|
Confuses (reversed controls) the opponent on hit, but also always confuses Neco. Fully unburstable.
|
|
Neco One Two Three
6A/[A]~6B~6C
|
| 6A
|
Damage
|
Red Damage
|
Proration
|
Cancel
|
Guard
|
| 400
|
245
|
100%
|
SP
|
LHA
|
| First Active
|
Active
|
Recovery
|
Frame Adv
|
Circuit
|
Invuln
|
| 7
|
4
|
16
|
-8
|
6%
|
-
|
|
A small forward punch, and the starter for the Neco One Two Three rekka. It's like Aoko's One Two Three, but smaller and much harder to land. Usually comes out on accident when you try to dash 5A/2A. You can't cancel 6A into anything but 6B, and only on hit or block.
|
| 6[A]
|
Damage
|
Red Damage
|
Proration
|
Cancel
|
Guard
|
| 1000
|
784
|
60%
|
N, SP, EX
|
H
|
| First Active
|
Active
|
Recovery
|
Frame Adv
|
Circuit
|
Invuln
|
| 28
|
4
|
16
|
-8
|
12%
|
-
|
|
Charged version of 6A that makes it an air unblockable overhead. You can cancel this into Normals, Specials, or EX moves, as well as continuing the rekka on hit or block, so landing this can get you some nice combo potential (if you can spare 27 frames of charging at point blank). Would be really good if Neco was normal size, but she's not, so that's the price you pay. Also interesting to note, cancelling this move into a Normal will count as a Reverse Beat.
|
| ~6B
|
Damage
|
Red Damage
|
Proration
|
Cancel
|
Guard
|
| 400
|
142 / 237
|
60 / 100%
|
[N], [SP], [EX], [(J)]
|
LHA
|
| First Active
|
Active
|
Recovery
|
Frame Adv
|
Circuit
|
Invuln
|
| 8
|
2
|
19
|
-9
|
6%
|
-
|
|
The second hit of the rekka. 6B can only be cancelled into Normals, Specials, EX, or (Jump) if 6[A] was used to start the rekka. Unlike 6[A], cancelling this move into a Normal will NOT count as a Reverse Beat.
|
| ~6C
|
Damage
|
Red Damage
|
Proration
|
Cancel
|
Guard
|
| 600
|
247 / 413
|
60 / 70%
|
N, SP, EX, (J)
|
LHA
|
| First Active
|
Active
|
Recovery
|
Frame Adv
|
Circuit
|
Invuln
|
| 11
|
2
|
16
|
-6
|
8%
|
-
|
|
The third hit of the rekka. Launches into an easy-to-confirm combo. Cancelling this move into a Normal will count as a Reverse beat if 6A was used to start the rekka, but will NOT count as a Reverse Beat if 6[A] was used to start the rekka.
|
|
Aerial Specials
Flying Neco Battleship Gomoran
j.236A/B/C
|
| A
|
Damage
|
Red Damage
|
Proration
|
Cancel
|
Guard
|
| 500
|
294
|
60%
|
EX
|
LHA
|
| First Active
|
Active
|
Recovery
|
Frame Adv
|
Circuit
|
Invuln
|
| 12
|
19
|
18
|
+10
|
3%
|
-
|
|
Neco Arc's own version of Warc's Air Alte Schule, which means it's worse. The ring's hitbox grows in size the longer it stays active, and disappears on hit, block, or when it hits the ground. Use this in neutral if you want to annoy your opponent, and cancel into a super if you catch a stray hit. The hitboxes are kind of small when they first start, but give them time to grow and they can get really annoying.
The projectile is created on frame 8 of startup. Neco Arc has 18 frames of landing recovery, and she can recover while the ring is still active. Frame advantage is calculated using Neco Arc's Lowest Height Falling.
|
| B
|
Damage
|
Red Damage
|
Proration
|
Cancel
|
Guard
|
| 500
|
294
|
50%
|
EX
|
LHA
|
| First Active
|
Active
|
Recovery
|
Frame Adv
|
Circuit
|
Invuln
|
| 22
|
19
|
4
|
-12~+2
|
8%
|
-
|
|
The B version is very similar to the A version, but with a few small changes. The major difference Neco Arc is held in place from frame 1-17 of this move's startup before creating the ring.
The projectile is created on frame 18 of startup. Neco Arc can recover in the air after using this move, so it's best used higher up (-12 TK, -10 Lowest Height Falling, +2 Airborne Recovery.).
|
| EX
|
Damage
|
Red Damage
|
Proration
|
Cancel
|
Guard
|
| 1000
|
980
|
50%
|
-
|
LHA
|
| First Active
|
Active
|
Recovery
|
Frame Adv
|
Circuit
|
Invuln
|
| 1+19
|
-
|
6
|
+4
|
-
|
-
|
|
Bigger version of the other rings. Hitbox size is consistent, and the ring will continue until it hits, gets blocked, or collides with the ground. Use this to end air combos.
The projectile is created on frame 15 of this move's post-flash startup. Frame advantage is calculated from TK height or Lowest Height Falling.
|
|
I Want to Go to Crocodile Country
(EX: Six Segment God Cat)
j.214A/B/C
|
| A
|
Damage
|
Red Damage
|
Proration
|
Cancel
|
Guard
|
| 200*8 (1422)
|
100*8 (693)
|
100%
|
-EX-
|
LHA
|
| First Active
|
Active
|
Recovery
|
Frame Adv
|
Circuit
|
Invuln
|
| 6
|
40
|
8
|
-1
|
2.0*8 (16.0%)
|
-
|
|
Neco-Arc turns into a rocket and flies roughly halfway across the screen.
|
| B
|
Damage
|
Red Damage
|
Proration
|
Cancel
|
Guard
|
| 250*10 (1910)
|
120*10 (891)
|
100%
|
-EX-
|
LHA
|
| First Active
|
Active
|
Recovery
|
Frame Adv
|
Circuit
|
Invuln
|
| 8
|
50
|
8
|
-1
|
2.5*10 (25.0%)
|
-
|
|
Neco-Arc travels faster and farther, almost fullscreen. May also function as a pseudo-airdash.
|
| EX
|
Damage
|
Red Damage
|
Proration
|
Cancel
|
Guard
|
| 120, 300*16 (3178)
|
120, 230*16 (2392)
|
100%
|
-
|
LHA
|
| First Active
|
Active
|
Recovery
|
Frame Adv
|
Circuit
|
Invuln
|
| 11
|
3 (3) 80
|
8
|
-9
|
-100.0%
|
5-34
|
|
Neco-Arc splits into 6 parts before flying fullscreen. Common combo ender for damage. Can also be used when landing a stray j.214A/B.
|
|
Arc Drive
Dawn of the Cat
41236C during MAX or HEAT
|
| Damage
|
Red Damage
|
Proration
|
Cancel
|
Guard
|
| 400*9, 450 (3315)
|
350*9, 380 (2808)
|
100%
|
-
|
LH
|
| First Active
|
Active
|
Recovery
|
Frame Adv
|
Circuit
|
Invuln
|
| 10+4
|
2
|
129 / 208
|
-102
|
removes all
|
Full 1-137 / 1-147, 152-219
|
|
Full screen air unblockable hitgrab. Even on whiff or block, some opponents might fail to punish as only the final 6 frames of recovery are vulnerable.
|
|
Another Arc Drive
Delinquent Cat Gang Leader's Mansion
41236C during BLOOD HEAT
|
| Damage
|
Red Damage
|
Proration
|
Cancel
|
Guard
|
| 450*10, 2000 (4705)
|
380*10, 1800 (3921)
|
100%
|
-
|
LH
|
| First Active
|
Active
|
Recovery
|
Frame Adv
|
Circuit
|
Invuln
|
| 10+4
|
2
|
129 / 208
|
-102
|
removes all
|
Full 1-137 / 1-147, 152-219
|
|
After the regular Dawn of the Cat, Neco Arc summons this at the end instead of just doing nothing.
|
|
Last Arc
Angolmois Hammer
Grounded EX shield during BLOOD HEAT
|
| Damage
|
Red Damage
|
Proration
|
Cancel
|
Guard
|
| 7000
|
4663
|
100%
|
-
|
U
|
| First Active
|
Active
|
Recovery
|
Frame Adv
|
Circuit
|
Invuln
|
| 0+0
|
1
|
68
|
-
|
removes all
|
Full 1-77, 135-148
|
|
Can only be avoided by being invulnerable the frame Neco shields.
|
|
MBAACC Navigation
