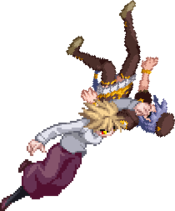
Character Page Progress
Raw PS2 info needs CC 1.07 updates!
This page is still a work in progress, consider joining as an editor to help expand it. Please update this character's roadmap page when one of the editing goals have been reached.
| In Progress |
To-do
|
- Combos:
- Add damage/meter numbers or videos to combos, in a way that would fit best with this section's current layout.
|
- Additional Ressources/Players to watch/ask
- Add any external links to ressources such as video guides or articles.
- If you know any players in particular that can be helpful for learning this character, please add them with, if possible a way to contact them (such as a Discord handle) and a name that can be searched in the match video database.
- Overview/General Gameplan:
- Add a short summary of this character with a list of strengths and weaknesses
- Do your best to describe how to play this character, change or add subsections based on what you would write as a guide.
|
Additional Resources
C-Warc Match Video Database
C-Warc Combo Guide
Notable Players
| Name |
Color
|
Region |
Common Venues |
Status |
Details
|
| Alma |

|
North America |
Netplay |
Active |
C-WArc main. Proficient with a lot of characters, but has allotted the most time to her.
Makes especially good use of her air movement with teleports to maintain a good position in neutral.
|
| MaSa |

|
Japan |
Play Spot BIG ONE 2nd, A-cho |
Inactive |
Former C-WArc main, now moreso known for C-Nero.
|
| okuu (お空) |

|
Japan |
A-cho |
Inactive |
|
Overview
Strengths / Weaknesses
| Strengths
|
- Text goes here after asterisk
- Text goes here after asterisk
|
| Weaknesses
|
- Place text here be sure to use "*" for each point*
|
General Gameplan
Place text here*
Neutral
Place text here*
Pressure
All C normals(charged or otherwise) are +1 on block if rebeated to 5A(w) or 2A(w). All B normals(charged or otherwise) are -2 if rebeated to 5A(w)/2A(w).
2A 5A(w) 2A is a natural frametrap. 2A 5A(w) can whiff cancel into a delayed throw.
2A/5A, 5{B}/5[B], 2C, and 6C/6[C] all have very long cancel windows for staggers.
Every button combos to 6[C] on counter hit for good damage and easy hitconfirms; however, doing a frametrap into a 6[C] blind confirm is less effective against opponents who like to jump, as the lack of counter hit will cause the confirm to drop. All B normals naturally frametrap with an immediate cancel to 6[C], with C normals requiring a slight delay for a frametrap.
5{B} is -5 on block, is easy to hitconfirm off, moves you forward a large amount, and has a very large cancel window as mentioned earlier. 5[B] is an armored overhead that moves you forward an insane amount, so it has a surprising amount of utility despite being pretty reactable.
5C can be charged for frametraps off any button, but it is prone to being low profiled easily, and it whiffs on crouchers at farther ranges.
After doing a move on block, you can cancel into 2AA or 2B/2C for a true string into low, delay 5C/2C for a powerful frametrap, immediate/slight delay 6[C] for another possible frametrap, 2A to be 0 and retain strong cancel options, 5A(w) for a whiff cancel frametrap or to reset your string, or let it the move fully recover for a risky pressure reset(only really recommended to do this with 5{B} or 2A).
2B, 5{B}/5[B](crouch only), and 6[C] are your only meterless options to launch opponents for an air combo, so unless you have one saved for a conversion, mashing becomes much less scary for your opponent if you do not have meter to spare. 5C and 6C both combo to 624C for long distance conversions, at close range 214C lets you combo after into 2B to launch, and 236C can also be done at closer ranges for a good bit of damage into tech trap.
You can iad back in with j.B or j.214A, or jump up and throw out j.214B, followed by airdash j.A, to reset pressure.
For ending blockstrings safely, 214A is usually a good choice. It only leaves a large gap at very far ranges, and when done at ranges where even if they jump they are forced to block, is generally only somewhat minus. 214B is slower, which makes it easier for the opponent to jump out and punish, but is ex cancellable. 236A can catch those trying to mash after your string, but is a highly risky option due to the very high recovery. A rebeat to 5A(w) is the safest option, but that is not always available. If you have no normals left and are pushed out to where 214A/B are too risky, 421C can get you out somewhat safely, but leaves you at noticeable frame disadvantage and is punishable with fullscreen supers.
Okizeme
Place text here
Defense
place text here*
Combos
| Combo Notation Help
|
Disclaimer: Combos are written by various writers, so the actual notation used in pages can differ from the standard one.
For more information, see Glossary and Controls.
|
| X > Y
|
X input is cancelled into Y.
|
| X > delay Y
|
Must wait for a short period before cancelling X input into Y.
|
| X, Y
|
X input is linked into Y, meaning Y is done after X's recovery period.
|
| X+Y
|
Buttons X and Y must be input simultaneously.
|
| X/Y
|
Either the X or Y input can be used.
|
| X~Y
|
This notation has two meanings.
- Use attack X with Y follow-up input.
- Input X then within a few frames, input Y. Usually used for option selects.
|
| X(w)
|
X input must not hit the opponent (Whiff).
|
| j.X
|
X input is done in the air, implies a jump/jump cancel if the previous move was done from the ground.
Applies to all air chain sections:
- Assume a forward jump cancel if no direction is given.
- Air chains such as j.A > j.B > j.C can be shortened to j.ABC.
|
| sj.X
|
X input is done after a super jump. Notated as sj8.X and sj9.X for neutral and forward super jumps respectively.
|
| dj.X
|
X input is done after a double jump.
|
| sdj.X
|
X input is done after a double super jump.
|
| tk.X
|
Stands for Tiger Knee. X motion must be buffered before jumping, inputting the move as close to the ground as possible. (ex. tk.236A)
|
| (X)
|
X is optional. Typically the combo will be easier if omitted.
|
| [X]
|
Input X is held down. Also referred to as Blowback Edge (BE). Depending on the character, this can indicate that this button is held down and not released until indicated by the release notation.
|
| ]X[
|
Input X is released. Will only appear if a button is previously held down. This type of input is referred to as Negative Edge.
|
| {X}
|
Button X should only be held down briefly to get a partially charged version instead of the fully charged one.
|
| X(N)
|
Attack "X" should only hit N times.
|
| (XYZ)xN
|
XYZ string must be performed N times. Combos using this notation are usually referred to as loops.
|
| (XYZ^)
|
A pre-existing combo labelled XYZ is inserted here for shortening purposes.
|
| CH
|
The first attack must be a Counter Hit.
|
| Air CH
|
The first attack must be a Counter Hit on an airborne opponent.
|
| 66
|
Performs a ground forward dash.
|
| j.66
|
Performs an aerial forward dash, used as a cancel for certain characters' air strings.
|
| IAD/IABD
|
Performs an Instant AirDash.
|
| AT
|
Performs an Air Throw. (j.6/4A+D)
|
| IH
|
Performs an Initiative Heat.
|
| AD
|
Performs an Arc Drive.
|
| AAD
|
Performs an Another Arc Drive.
|
Normal Combos
Note: This section will be divided between starter ground strings, aerial followups and ender options. The combo sections following this one will also use these aerial followups/ender options.
Starters
| Condition
|
Notation
|
Damage
vs V.Sion
|
Notes
|
|
| Normal starter, grounded opponent
|
- (2A >) 5B > 2B > 2C > 5C > (Aerial)
|
2295
|
| |
| Meter Gained: 34.2 |
Meter Given (vs C-Moon): 10.2 |
| Basic BnB. |
|
|
| Normal starter, grounded opponent
|
- 2B > 5B > 2C > 5C > (Aerial)
|
2346
|
| |
| Meter Gained: 30.7 |
Meter Given (vs C-Moon): 9.2 |
| Easy confirm off of 2B. |
|
|
| Normal starter, grounded opponent
|
- (2A >) 5B > 2B > 2C > 5A > 5C > (Aerial)
|
2464
|
| |
| Meter Gained: ??? |
Meter Given (vs C-Moon): ??? |
| Use this one on the Necos. |
|
|
| Normal starter, grounded opponent
|
- (2A >) 5B > 5C > 6C > 2B > 2C > (Aerial)
|
2758
|
| |
| Meter Gained: 40.2 |
Meter Given (vs C-Moon): 12 |
| Optimal, max damage starter. 5B must hit point blank for this to connect. Delay your chains out of 5B and 6C to make this easier. |
|
|
| Normal starter, grounded opponent
|
- 5B > 6C > 2B > 2C > 5C > (Aerial)
|
3235
|
| |
| Meter Gained: 36.7 |
Meter Given (vs C-Moon): 11 |
| Used when you are too far for 5B 2B to connect. Use this for catching forward techs in the corner if you don't have 100% for 623C. |
|
|
| Normal starter, grounded opponent
|
- (2A >) 5B > 2B > 6C > 2C > 5C > (Aerial)
|
2758
|
| |
| Meter Gained: 140.2 |
Meter Given (vs C-Moon): 12 |
| Not really useful, but a decent hitconfirm nonetheless. |
|
|
| Normal starter, grounded opponent
|
- (2A >) 5B > 2B > delay 2C > 6[C] > 5C > (Aerial)
|
3191
|
| |
| Meter Gained: ??? |
Meter Given (vs C-Moon): ??? |
| Optimal hitconfirm. Use if your 5B didn't hit point blank. |
|
|
Aerials
| Condition
|
Notation
|
Damage
vs V.Sion
|
Notes
|
|
| Aerial followup
|
|
1941
|
| |
| Meter Gained: 29 |
Meter Given (vs C-Moon): 8.7 |
| Basic aerial. |
|
|
| Aerial followup
|
- j.CB > j.66 j.B(1) > sdj.BC > Ender
|
???
|
| |
| Meter Gained: ??? |
Meter Given (vs C-Moon): ??? |
| Nin combo from MBAC. You'll rarely have to use this ender. |
|
|
| Aerial followup
|
- j.B > j.66 j.B(1) > sdj.BC > Ender
|
???
|
| |
| Meter Gained: ??? |
Meter Given (vs C-Moon): ??? |
| Alternate version of the Nin combo. Used when you are too far for j.BC to hit. |
|
|
| Aerial followup
|
|
???
|
| |
| Meter Gained: ??? |
Meter Given (vs C-Moon): ??? |
| Used if the opponent is very low or has small hurtboxes. |
|
|
| Aerial followup
|
- j.B(1) > j.66 j.B(1) > j.C, land sj8.C > j.B(1) > sdj.BC > Ender
|
???
|
| |
| Meter Gained: ??? |
Meter Given (vs C-Moon): ??? |
| Shin nin combo. The new aerial that you want to try to hit as much as possible. This version is possible off her optimal BnB, as well as her 6[C] hit confirm. However in order to hit this with the 5B > 5C > 6C > 2B > 2C starter, 2C must not be delayed after 2B (generally a problem for people who have been playing Warc for a while. If you do 2B delay 2C, instead do the following below:) |
|
|
| Aerial followup
|
- j.A > j.66 j.B(1) > j.C, land sj8.C > j.B(1) > sdj.BC > Ender
|
???
|
| |
| Meter Gained: ??? |
Meter Given (vs C-Moon): ??? |
| The j.A Shin nin combo. Helps stablize hitconfirming into the combo. |
|
|
| Aerial followup, 100% meter
|
- j.CB > sdj.AAC > j.66 j.214C
|
???
|
| |
| Meter Gained: ??? |
Meter Given (vs C-Moon): ??? |
| Midscreen crossover j214C combo. Not very useful with the advent of Shin Nin combos, which gives you knockdown that doesn't crossover, but still gives good mixup. If you feel like it, the rest of these are listed below. |
|
|
Character-Specific j.214C crossover combos:
| Condition
|
Notation
|
Damage
vs V.Sion
|
Notes
|
|
| Aerial followup, 100% meter
|
- j.CB > sdj.A > j.B(1) > j.C > j.66 j.214C
|
???
|
???
|
|
| Aerial followup, 100% meter
|
- j.CB > sdj.AAC > j.66 j.214C
|
???
|
???
|
|
| Aerial followup, 100% meter
|
- j.CB > sdj.B(1) > j.C > j.66 j.214C
|
???
|
???
|
|
| Aerial followup, 100% meter
|
- j.CB > sdj.BC > j.66 j.214C
|
???
|
???
|
|
Enders
| Condition
|
Notation
|
Damage
vs V.Sion
|
Notes
|
|
| Airborne opponent
|
|
1300
|
| |
| Meter Gained: 0.0 |
Meter Given (vs C-Moon): 0.0 |
| Standard ender. Be aware that in MBAA airthrows have generally been nerfed. |
|
|
| Airborne opponent
|
|
2028
|
| |
| Meter Gained: 32.0 |
Meter Given (vs C-Moon): 9.6 |
| Another standard ender. Gives decent oki and does the most damage. |
|
|
| Airborne opponent, 100% meter
|
|
1848
|
| |
| Meter Gained: -100.0 |
Meter Given (vs C-Moon): 1.1 |
| Use this after j.BC > sdj.BC. Also possible after Shin nin, but it's pretty tough. |
|
|
| Airborne opponent, 100% meter
|
|
1803
|
| |
| Meter Gained: -92.0 |
Meter Given (vs C-Moon): 3.5 |
| Easier way to end Shin Nin with j.214C. A good trick to inputting this is inputting it as j.214A~5~C. |
|
|
Corner Combos
236A Combos
These combos are very flashy and give you very high meter gain (usually at least 150%). Some of the variations can prove to be rather difficult due to some character's hitboxes and the fact that you want the first hit of 236A to whiff. Delay the followups after 236 for as long as possible, this will keep the opponent lower to the ground and is the only way to make some of these even possible.
If you land a 2AA, j.AB or j.B starter into 5B etc. you can tack on an extra 236A on most characters with 5B/5C 5A 236A.
| Condition
|
Notation
|
Damage
vs V.Sion
|
Notes
|
|
| Normal starter, grounded opponent
|
- (2A >) 5B > 5C > 6C > 2B > 2C > 236A, 5B > 236A > (Aerial)
|
???
|
???
|
|
| Normal starter, grounded opponent
|
- (2A >) 5B > 5C > 6C > 2B > 2C > 236A, 5B > 5A > 236A > (Aerial)
|
???
|
???
|
|
| Normal starter, grounded opponent
|
- (2A >) 5B > 5C > 6C > 2B > 2C > 236A, 5B > 236A, 5A > 236A > (Aerial)
|
???
|
???
|
|
| Normal starter, grounded opponent
|
- (2A >) 5B > 5C > 6C > 2B > 2C > 236A, 5B > 236A, 5C > 5A > 236A > (Aerial)
|
???
|
???
|
|
Corner OTG w/ Throw
When you finally land a throw with C-Warc in the corner You have 2 options here.
- Option 1: Wait
This option is for when you predict the opponent will tech. Since Warc's throw is ground techable, you can react to all teching with 2B (ideally you want to use 5B, although 2B is much easier due to its active frames). This scores you high damage + high meter gain and will certainly make your opponent reconsider next time you throw them.
- Option 2: OTG the opponent
This relies on your opponent not teching but will give you extra meter and tack on a bit of extra damage to your throw. It also sets up another tech punish opportunity, however you cannot OTG the opponent a second time.
Use 2B > 5B > 2C > 5C > 5AA. On some characters you can OTG with 5B (making it easier to tech punish with 5B, since you don't have to switch stick position). For these characters use 5B > 2B > 2C 5C > 5AA instead.
Characters that can be struck with 5B OTG:
- Arcueid
- Red Arcueid
- Kohaku
- Kouma
- Nanaya
- Nero
- Roa
Situational Combos
Combos off 623C wallslam
| Condition
|
Notation
|
Damage
vs V.Sion
|
Notes
|
|
| 623C starter
|
|
???
|
| |
| Meter Gained: ??? |
Meter Given (vs C-Moon): ??? |
| Use this when your back is touching the wall. |
|
|
| 623C starter
|
|
???
|
| |
| Meter Gained: ??? |
Meter Given (vs C-Moon): ??? |
| Works from one to three characters away. |
|
|
| 623C starter
|
- 2B > 6[C] > 5C > (Aerial)
|
???
|
| |
| Meter Gained: ??? |
Meter Given (vs C-Moon): ??? |
| Works about one to two character lengths away. If you're greedy you can do 2B > 6[C] > 2C > 5C > (Aerial) but you're likely to whiff the 5C. |
|
|
| 623C starter
|
- 2C > 6[C] > 5C > (Aerial)
|
???
|
| |
| Meter Gained: ??? |
Meter Given (vs C-Moon): ??? |
| Works about two character spaces away. Do the 2C as late as possible. |
|
|
| 623C starter
|
|
???
|
| |
| Meter Gained: ??? |
Meter Given (vs C-Moon): ??? |
| Works from about three character lengths away to right outside of midscreen. Input 5C as 4C so you don't do 6C by accident. |
|
|
| 623C starter, 100% meter
|
|
???
|
| |
| Meter Gained: ??? |
Meter Given (vs C-Moon): ??? |
| Full screen. |
|
|
| 623C starter, 150% meter
|
- 63214C, 66 (Ground Normal) > (Aerial)
|
???
|
| |
| Meter Gained: ??? |
Meter Given (vs C-Moon): ??? |
| Midscreen when you aren't confident in dash 5C. |
|
|
EX Shield Hitconfirms
| Condition
|
Notation
|
Damage
vs V.Sion
|
Notes
|
|
| Grounded opponent
|
|
???
|
???
|
|
| Airborne opponent, 5A counterhit
|
- CH 5A, 66 5A > 5B > (Aerial)
|
???
|
| |
| Meter Gained: ??? |
Meter Given (vs C-Moon): ??? |
| Very easy confirm, low damage. |
|
|
| Airborne opponent, 5A counterhit
|
- CH 5A > 623C > (Followup)
|
???
|
| |
| Meter Gained: ??? |
Meter Given (vs C-Moon): ??? |
| Use this when your back is near the corner. Good damage and sideswap. |
|
|
Aerial CH Hitconfirms
| Condition
|
Notation
|
Damage
vs V.Sion
|
Notes
|
|
| Counterhit starter, airborne opponent
|
- 2A/5B > 2C > 5C > (Aerial)
|
???
|
| |
| Meter Gained: ??? |
Meter Given (vs C-Moon): ??? |
| Very easy confirm, decent damage. |
|
|
| Counterhit starter, airborne opponent
|
- 2B > 6[C] > 5C > (Aerial)
|
???
|
| |
| Meter Gained: ??? |
Meter Given (vs C-Moon): ??? |
| Somewhat difficult but very rewarding. Practice this to get the feel of when to do 2B, you want to hit it as low as possible. |
|
|
| Counterhit starter, airborne opponent
|
- 2C > 6[C] > 5C > (Aerial)
|
???
|
| |
| Meter Gained: ??? |
Meter Given (vs C-Moon): ??? |
| Difficult hitconfirm and doesn't work on the whole cast, you want to hit 2C as low as possible. This is your highest damage confirm outside of 6[C] confirms. |
|
|
Off of j.C or j.214A/B counterhits:
| Condition
|
Notation
|
Damage
vs V.Sion
|
Notes
|
|
| Counterhit starter, airborne opponent
|
- 3C into any previous confirm
|
???
|
| |
| Meter Gained: ??? |
Meter Given (vs C-Moon): ??? |
| Tacks on extra damage and meter. Pretty easy to do. |
|
|
| Counterhit starter, airborne opponent
|
- 6[C] > 5B > 2C > 5C > (Aerial)
|
???
|
| |
| Meter Gained: ??? |
Meter Given (vs C-Moon): ??? |
| Very difficult to confirm in to this, but gives you the highest damage. |
|
|
| Counterhit starter, airborne opponent, corner only, 150% meter
|
- 3C > 5B > 63214C, 3C > 2C > 6C > 5C > (Aerial)
|
???
|
| |
| Meter Gained: ??? |
Meter Given (vs C-Moon): ??? |
| This is just for flash. You want to hit the 5B as low as possible and immediately cancel into 63214C, followed by 3C. 6[C] is not possible in this combo due to the system's wallbounce limit |
|
|
Move Descriptions
| Frame Data Help
|
| Header
|
Tooltip
|
| Move Box Colors
|
Light gray = Collision Box (A move lacking one means it can go through the opponent's own collision box).
Green: Hurt Boxes.
Red: Hit(/Grab) Boxes.
Yellow: Clash Boxes (When an active hitbox strikes a clash box, the active hitbox stops being active. Multi-hit attacks can beat clash since they will still progress to the next hitbox.)
Magenta: Projectile-reflecting boxes OR Non-hit attack trigger boxes (usually).
Blue: Reflectable Projectile Boxes.
|
| Damage
|
Base damage done by this attack.
(X) denotes combined and scaled damage tested against standing V. Sion.
|
| Red Damage
|
Damage done to the recoverable red health bar by this attack. The values are inherently scaled and tested against standing V. Sion.
(X) denotes combined damage.
|
| Proration
|
The correction value set by this attack and the way it modifies the scaling during a string. See this page for more details.
X% (O) means X% Overrides the previous correction value in a combo if X is of a lower percentage.
X% (M) means the current correction value in a combo will be Multiplied by X%. This can also be referred to as relative proration.
|
| Circuit
|
Meter gained by this attack on hit.
(X%) denotes combined meter gain.
-X% denotes a meter cost.
|
| Cancel
|
Actions this move can be cancelled into.
SE = Self cancelable.
N = Normal cancelable.
SP = Special cancelable.
CH = Cancelable into the next part of the same attack (Chain in case of specials).
EX = EX cancelable.
J = Jump cancelable.
(X) = Cancelable only on hit.
-X- = Cancelable on whiff.
|
| Guard
|
The way this move must be blocked.
L = Can block crouching
H = Can block standing.
A = Can block in the air.
U = Unblockable.
|
| Startup
|
Amount of frames that must pass prior to reaching the active frames. Also referred to as "True Startup".
|
| Active
|
The amount of frames that this move will have a hitbox.
(x) denotes frame gaps where there are no hitboxes is present. Due to varied blockstuns, (x) frames are difficult to use to determine punish windows. Generally the larger the numbers, the more time you have to punish.
X denotes active frames with a duration separate from its origin move's frame data, such as projectile attacks. In this case, the total length of the move is startup+recovery only.
|
| Recovery
|
Frames that this move has after the active frames if not canceled. The character goes into one frame where they can block but not act afterwards, which is not counted here.
|
| Advantage
|
The difference in frames where you can act before your opponent when this move is blocked (assuming the move isn't canceled and the first active frame is blocked).
If the opponent uses a move with startup that is at least 2 frames less than this move's negative advantage, it will result in the opponent hitting that move.
±x~±y denotes a range of possible advantages.
|
| Invul
|
Lists any defensive properties this move has.
X y~z denotes X property happening between the y to z frames of the animations. If no frames are noted, it means the invincibility lasts through the entire move.
Invicibility:
- Strike = Strike invincible.
- Throw = Throw invincible.
Hurtbox-Based Properties:
- Full = No hurtboxes are present.
- High = Upper body lacks a hurtbox.
- Low = Lower body lacks a hurtbox.
Miscellaneous Properties
- Clash = Frames in which clash boxes are active.
- Reflect = Frames in which projectile-reflecting boxes are active.
- Super Armor = Frames in which the character can take hits without going into hit stun.
|
Normal Moves
Standing Normals
|
|
| Damage
|
Red Damage
|
Proration
|
Cancel
|
Guard
|
| 350
|
196
|
75% (O)
|
-SE-, -N-, -SP-, -EX-, (J)
|
LH
|
| First Active
|
Active
|
Recovery
|
Frame Adv
|
Circuit
|
Invuln
|
| 5
|
4
|
8
|
0
|
4.0%
|
-
|
|
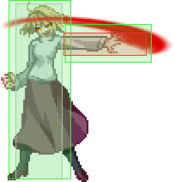
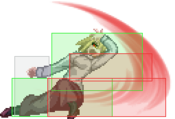
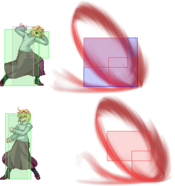
A swipe like motion with the hand at about shoulder height. Generally used for reverse beats to continue pressure or guard break. The hitbox's size has been lessened so all characters can duck under it.
|
|
|
|
| 5B
|
Damage
|
Red Damage
|
Proration
|
Cancel
|
Guard
|
| 700
|
490
|
100%
|
N, SP, EX, (J)
|
LH
|
| First Active
|
Active
|
Recovery
|
Frame Adv
|
Circuit
|
Invuln
|
| 8 ~ 15
|
4
|
20
|
-9
|
6.0%
|
-
|
|
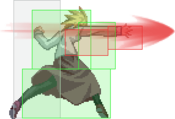
Warc swipes downward while stepping forward. A very strong move, lots of hit stun and block stun, but slow recovery. Also her strongest combo starter.
|
| 5{B}
|
Damage
|
Red Damage
|
Proration
|
Cancel
|
Guard
|
| 500*2 (863)
|
(507)
|
75% (O)
|
N, SP, EX, (J)
|
LH
|
| First Active
|
Active
|
Recovery
|
Frame Adv
|
Circuit
|
Invuln
|
| 18 ~ 27
|
6
|
17
|
-5
|
5.0%, 4.0% (9.0%)
|
-
|
|
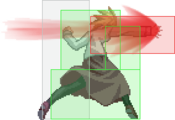
Larger hitbox and moves even farther forward while hitting twice. Little pushback, good for blockstrings as long as you reverse beat or chain out of it.
|
| 5[B]
|
Damage
|
Red Damage
|
Proration
|
Cancel
|
Guard
|
| 600
|
392
|
60% (O)
|
N, SP, EX, (J)
|
H
|
| First Active
|
Active
|
Recovery
|
Frame Adv
|
Circuit
|
Invuln
|
| 27
|
4
|
17
|
-6
|
5.0%
|
-
|
|
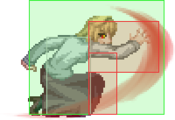
Quick overhead, moves Warc VERY far forward, has little recovery and one hit of super armor. Lifts opponent off the ground on hit, so adjust your combo accordingly. Has quite a few uses.
|
|
|
|
| 5C
|
Damage
|
Red Damage
|
Proration
|
Cancel
|
Guard
|
| 975
|
686
|
90% (M)
|
N, SP, EX, (J)
|
LH
|
| First Active
|
Active
|
Recovery
|
Frame Adv
|
Circuit
|
Invuln
|
| 5 ~ 31
|
4
|
25
|
-11
|
9.75%
|
-
|
|
Warc steps in and thrusts her arm forward. Active on frame 5 minimum making it a great counter-poke, and can be delayed by holding C for up to 28f. The animation is deceiving as the move only reaches to her hand, however it reaches down enough to hit crouchers. Has little pushback but not much stun.
|
| 5[C]
|
Damage
|
Red Damage
|
Proration
|
Cancel
|
Guard
|
| 2500
|
1960
|
100%
|
-
|
U
|
| First Active
|
Active
|
Recovery
|
Frame Adv
|
Circuit
|
Invuln
|
| 43
|
2
|
27
|
-
|
18.0%
|
-
|
|
Looks the same as 5C, but has VERY slow charge time (42 frames!) and probably won't hit anyone who is awake. Better to use this as a stagger in blockstrings by half-charging.
|
|
Crouching Normals
|
|
| 2A
|
Damage
|
Red Damage
|
Proration
|
Cancel
|
Guard
|
| 280
|
176
|
70% (O)
|
-SE-, -N-, -SP-, CH, -EX-, (J)
|
LH
|
| First Active
|
Active
|
Recovery
|
Frame Adv
|
Circuit
|
Invuln
|
| 5
|
3
|
9
|
0
|
3.5%
|
-
|
|
A swipe to the opponents knees that comes out on frame 5. Hits mid.
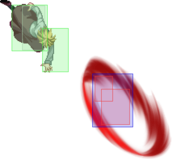
|
| 2A~2A
|
Damage
|
Red Damage
|
Proration
|
Cancel
|
Guard
|
| 250 (449)
|
(341)
|
100%
|
SE, N, SP, EX, (J)
|
LA
|
| First Active
|
Active
|
Recovery
|
Frame Adv
|
Circuit
|
Invuln
|
| 5
|
4
|
9
|
-1
|
2.5%
|
-
|
|
Warc swipes with her other arm. Has good stun for an A and hits low, hit confirming from here is very basic. If 2A whiffs this move will not come out.
|
|
|
|
| Damage
|
Red Damage
|
Proration
|
Cancel
|
Guard
|
| 700
|
392
|
75% (O)
|
N, SP, EX, (J)
|
L
|
| First Active
|
Active
|
Recovery
|
Frame Adv
|
Circuit
|
Invuln
|
| 7
|
5
|
16
|
-6
|
6.0%
|
-
|
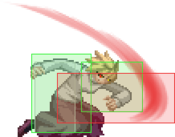
|
A low sweep that starts up quickly. Can be used as a poke from medium ranges and whiff canceled for pressure, and also as an anti-air for characters without a low reaching air move. Lifts opponent on hit and is used in her BnBs.
|
|
|
|
| Damage
|
Red Damage
|
Proration
|
Cancel
|
Guard
|
| 1000
|
686
|
75% (O)
|
N, SP, EX, (J)
|
L
|
| First Active
|
Active
|
Recovery
|
Frame Adv
|
Circuit
|
Invuln
|
| 8
|
4
|
28
|
-14
|
9.0%
|
-
|
|
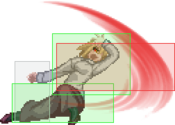
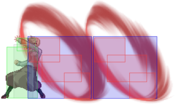
Warc gets low to the ground and does a very quick, large swipe with her hand. Has good blockstun and can be used as an anti-air thanks to it's large vertical hitbox. It also works as a long rang poke since it will tag crouchers unlike 5C. Really terrible on whiff, so don't whiff it!
|
|
Aerial Normals
|
|
| Damage
|
Red Damage
|
Proration
|
Cancel
|
Guard
|
| 300
|
147
|
75% (O)
|
SE, N, SP, EX, J
|
LHA
|
| First Active
|
Active
|
Recovery
|
Frame Adv
|
Circuit
|
Invuln
|
| 6
|
4
|
10
|
-
|
3.0%
|
-
|
|
A scratch-like move that starts up fast. The hitbox is somewhat small, can be used to set up a high/low when IADing with j.B
|
|
|
|
| Damage
|
Red Damage
|
Proration
|
Cancel
|
Guard
|
| 510, 200
|
313, 98
|
80% (O)
|
N, SP, EX, J
|
HA
|
| First Active
|
Active
|
Recovery
|
Frame Adv
|
Circuit
|
Invuln
|
| 5
|
3 (4) 3
|
-
|
-
|
5.0%, 2.0% (7.0%)
|
-
|
|
Warc does two long forward swipes with her arms. The startup is extremely fast, the hitbox is very large so using this as an aerial poke and an anti-air are common. However, there is a hurtbox on the swipes so don't be TOO liberal with it. Don't whiff this, as you will be stuck in recovery until landing.
|
|
|
|
| Damage
|
Red Damage
|
Proration
|
Cancel
|
Guard
|
| 950
|
637
|
90% (M)
|
N, SP, EX, J
|
LHA
|
| First Active
|
Active
|
Recovery
|
Frame Adv
|
Circuit
|
Invuln
|
| 6
|
2
|
-
|
-
|
9.5%
|
-
|
|
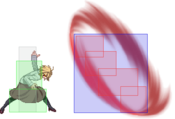
In a hook shape, Warc does a large upwards swipe. On hit, the opponent is launched vertically in to the air. Has short horizontal reach but starts up fast, so using it as an anti-air for opponents above you is a decent use. Don't whiff this like j.B. Jumping in with this and reverse beating to j.B creates a strong high/low.
|
|
Command Normals
|
|
| Damage
|
Red Damage
|
Proration
|
Cancel
|
Guard
|
| 1600
|
1274
|
55% (O)
|
-
|
L
|
| First Active
|
Active
|
Recovery
|
Frame Adv
|
Circuit
|
Invuln
|
| 20
|
3
|
20
|
-8
|
12.5%
|
Super Armor 5-22
|
|
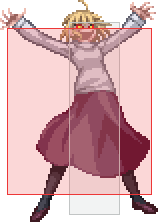
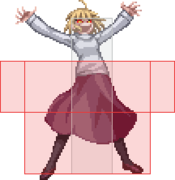
Looks just like 2C but it has longer startup and super armor. Knocks down ground opponents and pops air opponents upwards. Completely untechable for ground opponents and ground techable for aerial opponents.
|
|
|
|
| 6C
|
Damage
|
Red Damage
|
Proration
|
Cancel
|
Guard
|
| 900
|
588
|
80% (O)
|
N, SP, EX, (J)
|
LH
|
| First Active
|
Active
|
Recovery
|
Frame Adv
|
Circuit
|
Invuln
|
| 11 ~ 22
|
5
|
24
|
-11
|
6.0%
|
-
|
|
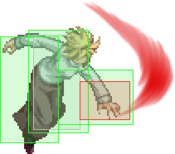
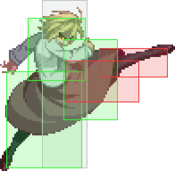
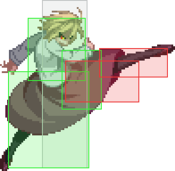
Warc does a side kick while moving forward. Due to the forward movement, it is extremely useful for combos and pressure. Decent for jumpouts but not useful as an anti-air. Long recovery on whiff so try not to whiff it. Whiff cancel this to continue pressure.
|
| 6[C]
|
Damage
|
Red Damage
|
Proration
|
Cancel
|
Guard
|
| 1700
|
1372
|
80% (O)
|
N, SP, EX, (J)
|
LH
|
| First Active
|
Active
|
Recovery
|
Frame Adv
|
Circuit
|
Invuln
|
| 19
|
5
|
22
|
-9
|
17.0%
|
-
|
|
Adds damage/guard damage/and a blowback effect on hit. Great for staggers and whiff canceling.
|
|
|
|
j.2C
~8
|
Damage
|
Red Damage
|
Proration
|
Cancel
|
Guard
|
300*6, 800 (2064)
300*6, 500 (1849)
|
(1062)
(921)
|
100%
50% (O)
|
-
|
LHA, HA
|
| First Active
|
Active
|
Recovery
|
Frame Adv
|
Circuit
|
Invuln
|
| 4
|
2 (2) x3, 2, 2 (4) 1 (1) 4
|
14
|
-9 (TK)
|
4.0%*6, 8.0% (32.0%)
4.0%*6, 5.0% (29.0%)
|
-
|
|
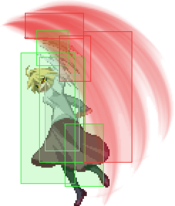
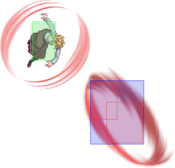
Warc spins while clawing the opponent with both arms. Used to end air combos for knockdown (last hit needs to connect). Has one hit of super armor so you can use this to beat out shield counters.
Holding up after doing the move will remove knockdown properties and cause the attack to do less damage. Absolutely useless.
|
|
Universal Mechanics
|
|
| Damage
|
Red Damage
|
Proration
|
Cancel
|
Guard
|
| 1200
|
588
|
70%
|
-
|
U
|
| First Active
|
Active
|
Recovery
|
Frame Adv
|
Circuit
|
Invuln
|
| 3
|
1
|
20
|
-
|
0.0%
|
-
|
|
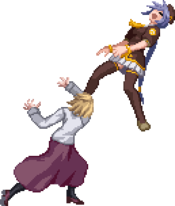
Warc grabs the opponent and tosses them the direction you held when throwing. Ground techable, but this sets up a strong OTG/tech punish mixup for Warc in the corner.
|
|
|
|
| Damage
|
Red Damage
|
Proration
|
Cancel
|
Guard
|
| 1600 (Raw)/1300
|
522
|
30%
|
-
|
U
|
| First Active
|
Active
|
Recovery
|
Frame Adv
|
Circuit
|
Invuln
|
| 2
|
1
|
12
|
-
|
0.0%
|
-
|
|
A grab that catches the opponent and slams them to the ground. The recovery has been nerfed, so your oki will be limited to basic things such as 5B or 2A on opponents who have a fast wakeup time.
|
|
|
|
| Bunker
|
Damage
|
Red Damage
|
Proration
|
Cancel
|
Guard
|
| 500
|
196
|
50%
|
-
|
LHA
|
| First Active
|
Active
|
Recovery
|
Frame Adv
|
Circuit
|
Invuln
|
| 26
|
4
|
19
|
-5
|
0.0%
(-50.0% in blockstun)
|
Clash 1-10
|
| (Clash)
|
Damage
|
Red Damage
|
Proration
|
Cancel
|
Guard
|
| 500
|
196
|
50%
|
-
|
LHA
|
| First Active
|
Active
|
Recovery
|
Frame Adv
|
Circuit
|
Invuln
|
| 8
|
4
|
19
|
-5
|
0.0%/-50.0%
|
Strike 1-7
|
|
Downward claw attack.
|
|
|
|
| Damage
|
Red Damage
|
Proration
|
Cancel
|
Guard
|
| 100
|
0
|
100%
|
-
|
U
|
| First Active
|
Active
|
Recovery
|
Frame Adv
|
Circuit
|
Invuln
|
| 23
|
8
|
25
|
-
|
-100.0% (min)
|
Full 1-30
|
|
Longest Heat startup in the game.
|
|
|
|
| Ground
|
Damage
|
Red Damage
|
Proration
|
Cancel
|
Guard
|
| 100
|
0
|
100%
|
-
|
U
|
| First Active
|
Active
|
Recovery
|
Frame Adv
|
Circuit
|
Invuln
|
| 11
|
10
|
20
|
-
|
removes all
|
Full 1-39
|
| Air
|
Damage
|
Red Damage
|
Proration
|
Cancel
|
Guard
|
| 100
|
0
|
100%
|
-
|
U
|
| First Active
|
Active
|
Recovery
|
Frame Adv
|
Circuit
|
Invuln
|
| 12
|
10
|
15
|
-
|
removes all
|
Strike 1-30
|
|
Universal burst mechanic. Unlike Crescent/Full Heat activation, the hitbox and frame data doesn't vary between characters. However, you can be thrown out of this move if you input it in the air.
|
|
Special Moves
Grounded Specials
|
|
| A
|
Damage
|
Red Damage
|
Proration
|
Cancel
|
Guard
|
| 800, 1200 (1381)
|
(678)
|
50% (O)
|
-
|
LH
|
| First Active
|
Active
|
Recovery
|
Frame Adv
|
Circuit
|
Invuln
|
| 11
|
1 (4) 8
|
19
|
-17 ~ -7*
|
8.0%*2 (16.0%)
|
High 1-9
|
- Warc swipes upwards and creates a wall of blood. Air unblockable. The A, B and EX versions each have their own varying uses.
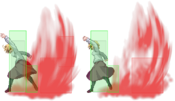
A small blood wall that hits 2 times. Mainly used as anti-air since it has an excellent hitbox and startup but you can only follow up if the last hit is the only one that connects. If you are spaced correctly you can also use this to potentially catch mashers but don't try too often.
|
| B
|
Damage
|
Red Damage
|
Proration
|
Cancel
|
Guard
|
| 300*8 (1910)
|
(742)
|
100%
|
-EX-
|
LH
|
| First Active
|
Active
|
Recovery
|
Frame Adv
|
Circuit
|
Invuln
|
| 30
|
18
|
21
|
-10
|
3.0%*8 (24.0%)
|
-
|
|
8 hit, large bloodwall. The startup as you can see is long but once the wall appears it will not disappear even if you are hit. This move is EX-cancellable after release so you can use this to cover a 63214C. The wall travels far forward and reaches high so it can also be used as an anti-jump out/mash. If you are going to use this, take advantage of its excellent coverage for 63214C and the air-unblockable property.
|
| EX
|
Damage
|
Red Damage
|
Proration
|
Cancel
|
Guard
|
| 600, 400*2, 600, 400*3, 200 (2821)
|
(2080)
|
100%
|
-
|
LH (1-2, 4-8), LHA (3)
|
| First Active
|
Active
|
Recovery
|
Frame Adv
|
Circuit
|
Invuln
|
| 3+4
|
2 (2) 2 (1) 2, (5) 18
|
36
|
-41
|
-100.0%
|
Full 1-11, Clash 8-11
|
|
8 hit EX blood wall with Warc rising along the wall. Very invincible and has some clash frames while rising. Charge -> Uppercut -> Jump -> Shock wave (x 5) is how each hit can be organized. Only the "jump" portion of the move is air unblockable. This move has terrible recovery and does not reach behind her or reach directly above her, so only use this sparingly as it may spell the end of the round for you. Opponents can time a circuit spark and punish you for using this too (Don't EVER use this against H-Moon in heat). If you manage to get only the 5 hits of the wave to hit, you can follow up with a combo.
|
|
|
|
| A
|
Damage
|
Red Damage
|
Proration
|
Cancel
|
Guard
|
| -
|
-
|
-
|
-EX-
|
-
|
| First Active
|
Active
|
Recovery
|
Frame Adv
|
Circuit
|
Invuln
|
| -
|
-
|
34
|
-
|
-
|
Full 7-26
|
| B
|
Damage
|
Red Damage
|
Proration
|
Cancel
|
Guard
|
| -
|
-
|
-
|
-
|
-
|
| First Active
|
Active
|
Recovery
|
Frame Adv
|
Circuit
|
Invuln
|
| -
|
-
|
34
|
-
|
-
|
Full 7-26
|
- Warc teleports forward a certain distance depending on which button you pressed. Not terribly useful on the ground, but the aerial versions give you some extra movement.
A: Teleports a short distance forward. It is EX-Cancelable but the window is short.
B: Same as A version but lacks the EX-Cancel and moves farther forward.
|
| EX
|
Damage
|
Red Damage
|
Proration
|
Cancel
|
Guard
|
| 0, 1500 (1453)
|
0
|
45% (O)
|
-
|
LH
|
| First Active
|
Active
|
Recovery
|
Frame Adv
|
Circuit
|
Invuln
|
| 4+5
|
8
|
11
|
-3
|
-100.0%
|
Full 5-18
|
|
Ground EX teleport. Warc teleports forward after startup, "grabbing" the opponent and holding them above her head. She will then throw them the opposite direction into the wall, allowing a follow-up combo should you be in range as the opponent cannot tech until they hit the ground. This is an important part to your corner tech-punish game, as you can catch forward techs into this move for large damage and to keep them in the corner. Can also be used to get out of sloppy pressure as it is invincible after startup and safe on block. If spaced correctly to hit during later active frames, it can be up to +4. Is a hitgrab, so when used in a combo, the opponent cannot burst for the remainder of that combo.
|
|
|
|
| A
|
Damage
|
Red Damage
|
Proration
|
Cancel
|
Guard
|
| 1000
|
294
|
100%
|
-
|
LHA
|
| First Active
|
Active
|
Recovery
|
Frame Adv
|
Circuit
|
Invuln
|
| 18
|
26
|
5
|
-6
|
3.0%
|
-
|
- Called the "Ika Ring" by some, all of the rings will disappear after traveling a certain distance aside from j.214C. It is very important as a Warc player to use these moves properly.
Basic pressure finisher. Can be used as an anti air against characters with larger air moves like Riesbyfe or Kohaku. Has little proration so a follow-up counter hit combo will be strong. The large amount of active frames on this attack makes it an excellent meaty after j.214C.
|
| B
|
Damage
|
Red Damage
|
Proration
|
Cancel
|
Guard
|
| 1000*2 (1968)
|
(578)
|
100%
|
-EX-
|
LHA
|
| First Active
|
Active
|
Recovery
|
Frame Adv
|
Circuit
|
Invuln
|
| 25 (44)
|
45
|
5
|
-6
|
3.0%*2 (6.0%)
|
-
|
|
Startup is slower than A, but in exchange it is EX cancelable. Can also be used to finish pressure. If air guarded 623C or 63214C will ensure a guardbreak into a followup. Keep mind of where you are on the screen if attempting this though, as 623C will give you no followup if your back is not close to the corner. This can also be used when driving the opponent into the corner to catch chicken blocks. Be wary of the startup though.
|
| EX
|
Damage
|
Red Damage
|
Proration
|
Cancel
|
Guard
|
| 500*10 (3349)
|
(1953)
|
-5%*10
|
-
|
LH
|
| First Active
|
Active
|
Recovery
|
Frame Adv
|
Circuit
|
Invuln
|
| 5+12 (5+32)
|
46
|
22
|
12
|
-100.0%
|
Full 1-9
|
|
Releases 2 large, multi-hitting rings. Shield-bunker bait but if they guard you have the advantage (+12). Using this at the end of 214B to continue pressure was used a lot, however, with the introduction of 63214C, seeing this move is rare. Using this for Guard Crush strings is possible though as it does a good amount of guard bar damage.
|
|
|
|
| A/B
|
Damage
|
Red Damage
|
Proration
|
Cancel
|
Guard
|
| -
|
-
|
-
|
-CH-
|
-
|
| First Active
|
Active
|
Recovery
|
Frame Adv
|
Circuit
|
Invuln
|
| -
|
-
|
32
|
-
|
-
|
Full 9-22
|
| C
|
Damage
|
Red Damage
|
Proration
|
Cancel
|
Guard
|
| -
|
-
|
-
|
-CH-
|
-
|
| First Active
|
Active
|
Recovery
|
Frame Adv
|
Circuit
|
Invuln
|
| -
|
-
|
35
|
-
|
-
|
Full 12-25
|
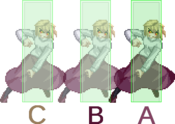
- After a short startup, Warc teleports backwards. Invincibility startup and distance vary with button.
A: Fakeout. Warc teleports and appears in the same spot. The move has some invincibility so it can go through some things (although unreliably).
B: Same distance as 623A, but backwards. Start up is a little longer than A version.
C: Same distance as 623B, but backwards. Invlun starts up a little longer than 623B, but much longer than 421A.
|
|
|
|
| Damage
|
Red Damage
|
Proration
|
Cancel
|
Guard
|
| 500*N
|
294*N
|
50% (O)
|
-
|
LHA
|
| First Active
|
Active
|
Recovery
|
Frame Adv
|
Circuit
|
Invuln
|
| 10+8
|
26
|
21
|
-21 ~ 34
|
-150.0%
|
-
|
|
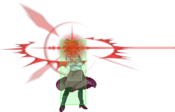
THE BIG RED. Spiciness in your mouth. Warc raises her arm and throws out a huge, fast, 7-hit ring that costs 150% meter. Does not travel full-screen but damn near. The opponent will be flung into the wall and depending on how far from the corner you are they can tech at different intervals. It is air blockable but Warc recovers fast enough to get an easy guardbreak. This move has a crazy amount of uses: Guaranteeing a guard break, extending pressure, establishing pressure and a couple flashy combos. However, there is no invincibility, it can be dodged without proper cover and is shield-bunker bait. The pros for this move are great though and absolutely overcome the negatives with correct use.
|
|
Aerial Specials
|
|
| A/B
|
Damage
|
Red Damage
|
Proration
|
Cancel
|
Guard
|
| -
|
-
|
-
|
-
|
-
|
| First Active
|
Active
|
Recovery
|
Frame Adv
|
Circuit
|
Invuln
|
| -
|
-
|
32
|
-
|
-
|
Full 5-25
|
| C
|
Damage
|
Red Damage
|
Proration
|
Cancel
|
Guard
|
| -
|
-
|
-
|
-
|
-
|
| First Active
|
Active
|
Recovery
|
Frame Adv
|
Circuit
|
Invuln
|
| -
|
-
|
31
|
-
|
-
|
Full 5-24
|
- Aerial version of Warc's teleport series.
A: Warc teleports forward in the air. Once completed, you retain all your aerial options; however, you cannot air backdash or do a special.
B: Exact same as A Version but travels farther.
C: An aerial backwards teleport. This is incredibly useful for retreating as it moves you far back and you can fall with a j.B.
|
|
|
|
| A
|
Damage
|
Red Damage
|
Proration
|
Cancel
|
Guard
|
| 1000
|
294
|
60% (O)
|
-EX-
|
LHA
|
| First Active
|
Active
|
Recovery
|
Frame Adv
|
Circuit
|
Invuln
|
| 12
|
X (26)
|
18
|
10
|
3.0%
|
-
|
- Aerial rings. j.214A/B combined with j.B are excellent air moves, giving Warc a strong aerial arsenal.
A blood ring that travels at a 50-55 degree angle and maintains the trajectory until it hits/disappears. Can be EX-canceled until landing. If Warc does not EX cancel, she is in recovery until she lands and can be counter hit at anytime if the opponent passes under it, jumps over it or reads it and shields you. Keeping track of the opponents position when zoning with this is imperative to it's use.
|
| B
|
Damage
|
Red Damage
|
Proration
|
Cancel
|
Guard
|
| 1500
|
490
|
50% (O)
|
-EX-
|
LHA
|
| First Active
|
Active
|
Recovery
|
Frame Adv
|
Circuit
|
Invuln
|
| 22
|
X (26)
|
21*
|
-13
|
8.0%
|
-
|
|
Same as A version but Warc stops in mid-air to throw it. You retain all remaining air-options after throwing this out, so make use of it to cover your aerial approach. You are defenseless while throwing this out though, so be wary. You may EX-cancel for a short period of time after using this move.
|
| EX
|
Damage
|
Red Damage
|
Proration
|
Cancel
|
Guard
|
| 2100
|
2058
|
50% (O)
|
-
|
LHA
|
| First Active
|
Active
|
Recovery
|
Frame Adv
|
Circuit
|
Invuln
|
| 3+17
|
X (26)
|
6
|
6 (TK)
|
-100.0%
|
Full 1-12
|
|
High speed EX ring that has a large amount of inertial push back. On ground hit it causes pop-up and knockdown on air hit, so ending an air combo with this is your best choice. It opens up lots of oki options due to the quick recovery and long knockdown. Can be used to fend off anti air efforts when your air movements have been exhausted, since it is one of the handful of moves that have mid air invincibility.
|
|
|
|
| A
|
Damage
|
Red Damage
|
Proration
|
Cancel
|
Guard
|
| 500 (440)
|
294
|
70% (O)
|
-EX-
|
A
(Whiffs vs Ground.)
|
| First Active
|
Active
|
Recovery
|
Frame Adv
|
Circuit
|
Invuln
|
| 17
|
2
|
29 (21)
|
-
|
5.0%
|
-
|
- Referred to as "Shinso Beam", this move is an eye beam of sorts. Does not hurt grounded opponents.
Very narrow (a few pixels high around her eyes), with less than half screen range. Not useful.
|
| B
|
Damage
|
Red Damage
|
Proration
|
Cancel
|
Guard
|
| 1000 (880)
|
431
|
70% (O)
|
-EX-
|
A
(Whiffs vs Ground.)
|
| First Active
|
Active
|
Recovery
|
Frame Adv
|
Circuit
|
Invuln
|
| 25
|
2
|
29 (21)
|
-
|
10.0%
|
-
|
|
Slow startup. Same height, but full screen range. Not really all that useful.
|
| EX
|
Damage
|
Red Damage
|
Proration
|
Cancel
|
Guard
|
| 1500 (1320)
|
(862)
|
70% (O)
|
-
|
A
(Whiffs vs Ground.)
|
| First Active
|
Active
|
Recovery
|
Frame Adv
|
Circuit
|
Invuln
|
| 3+12
|
2
|
21
|
-
|
-100.0%
|
-
|
|
Fast startup but the hitbox is narrow (Warc's eyes to knees), so you can't use this to zone. If you are further than midscreen when you 623C, you can TK this to tack on some damage. You also retain your aerial options.
|
|
Arc Drive
|
|
| (Point-Blank Hit)
|
Damage
|
Red Damage
|
Proration
|
Cancel
|
Guard
|
| 0, 3000 (1848)
|
(1448)
|
70% (M), 30% (O)
|
-
|
LH
|
| First Active
|
Active
|
Recovery
|
Frame Adv
|
Circuit
|
Invuln
|
| 18
|
9
|
3+60
|
-53
|
removes all
|
Full 27-89
|
| (Moon Drop)
|
Damage
|
Red Damage
|
Proration
|
Cancel
|
Guard
|
| 3000
|
2164
|
30% (O)
|
-
|
U
|
| First Active
|
Active
|
Recovery
|
Frame Adv
|
Circuit
|
Invuln
|
| 30+246
|
1
|
-
|
-
|
removes all
|
Full 27-89
|
|
Moon Drop! What accidentally comes out if you have terrible execution. During the Super flash you cannot move, but you are completely invincible. When you can move, if you are not hit, grabbed or break a grab during the time that the moon is falling, the whole screen will be hit with an unblockable attack. Using this will give up your initiative as the recovery is ridiculously slow. Furthermore, if you do get past that and do not pressure the opponent, the opponent could dodge or back step it. You can use this every blue moon (no pun intended) though since the stages are very large.
Using this at point blank or while the opponent is above you causes an unblockable, untechable launching hit that makes the moon fall faster for a guaranteed hit, but less damage.
|
|
Another Arc Drive
|
|
| (Point-Blank Hit)
|
Damage
|
Red Damage
|
Proration
|
Cancel
|
Guard
|
| 0, 4200 (2772)
|
(2263)
|
75% (M), 40% (O)
|
-
|
LH
|
| First Active
|
Active
|
Recovery
|
Frame Adv
|
Circuit
|
Invuln
|
| 18
|
9
|
3+30
|
-24
|
removes all
|
Full 27-59
|
| (Moon Drop)
|
Damage
|
Red Damage
|
Proration
|
Cancel
|
Guard
|
| 4200
|
3156
|
40% (O)
|
-
|
U
|
| First Active
|
Active
|
Recovery
|
Frame Adv
|
Circuit
|
Invuln
|
| 30+240
|
1
|
-
|
-
|
removes all
|
Full 27-59
|
|
Same as Arc Drive, but for more damage.
Using this at point blank or while the opponent is above you causes an unblockable, untechable launching hit that makes the moon fall faster for a guaranteed hit, but damage equal to hitting with the non-BH arc drive normally.
|
|
Last Arc
|
|
| Damage
|
Red Damage
|
Proration
|
Cancel
|
Guard
|
| (3445~6285)
|
(2782~5096)
|
50% + 50% * remaining BH time
|
-
|
U
|
| First Active
|
Active
|
Recovery
|
Frame Adv
|
Circuit
|
Invuln
|
| 2+4
|
1
|
61
|
-
|
removes all
|
Full
|
|
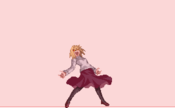
Warc throws her arms back and begins to laugh maniacally while a multitude of chains come out of the ground to trap the enemy. She then releases a stream of energy through the opponent sending them across the screen.
|
|
MBAACC Navigation


