Character Page Progress
This page is almost complete, consider joining as an editor to help finish it up. Please remove this character page's section when no main goals are left.
| In Progress
|
- Add meter gain/given numbers (and video links if needed to the pre-existing combos.
|
Additional Resources
F-Riesbyfe Match Video Database
Full Moon Riesbyfe Matchup Chart by Onemi
Shortening the corner combo to get a mixup by Onemi
- Make sure to delay everything as much as possible. Combined length of both walk backs decide where you land, there are other ways to hide it like delaying the dash or doing a different frame kill.
Notable Players
| Name |
Color
|
Region |
Common Venues |
Status |
Details
|
| BOLTSTRYKE |

|
North America |
Anime Ascension, Frosty Faustings |
Inactive |
|
Foka
(Fオカ) |

|
Japan |
A-cho, KorewaMelty, Play Spot BIG ONE 2nd |
Inactive |
|
kanna
(かんな) |

|
Japan |
A-cho, KorewaMelty, Play Spot BIG ONE 2nd |
Inactive |
|
| Onemi |

|
South America |
Dream Match, Netplay |
Inactive |
|
ragu
(らぐ) |

|
Japan |
A-cho, KorewaMelty |
Inactive |
|
| TSF |

|
Japan |
A-cho |
Inactive |
|
yuu
(ユウ) |

|
Japan |
A-cho, Play Spot BIG ONE 2nd |
Active |
|
Overview

While other moons have a running forward dash, F-Riesbyfe has a hopping dash that covers a set distance. This will hop over knocked down opponents, Necos, Lens during Catwalk and crouching Akiha Tohno (Seifuku)
Strengths Weaknesses
| Strengths
|
- Damaging long range confirms that lead into okizeme from strong pokes
- Great pressure that relies heavily on strike/throw
- Best throw range in the game, only tied with Nero and Hime
- Corner carry from almost any hit
- Unique hop that carries momentum
- One of the only antiair normals in Melty Blood
- Good air normals
- Consistent safejump setups
- Optional 50/50s from her corner BnB at the cost of damage
- One of the best 2As in the game
- Can close out rounds with a fuzzy jump 50/50 if she has MAX
- Damaging IH routes
- Can avoid trades with projectiles/summons with 236A/B/C
- Damaging Air CH routes
- Is very cute and has a cello
|
| Weaknesses
|
- Meter management is hard due to the lack of good supers to waste meter on
- She needs meter for her long range confirms (236C) which adds to the troublesome management
- The hop is a weakness in some matchups.
- Character specific post 236C mixups, and sadly they don't work on some of her harder matchups (VAkiha & Hime most notably)
- 2B doesn't hit on crouchers which hinders her ability stagger normals that have to be low shielded, making her weaker than average to high shield
- Her main poke (5B) can get low profiled by a good amount of characters, luckily her 6C low crushes, but that doesn't really help against Len's catwalk or Ciel's dash
- Weak Gold Air Throw damage
- She probably wouldn't play the cello for you
|
Full Moon Riesbyfe is a rushdown/poke heavy character with a reliable life pool, she can confirm any hit into decent damage, her damage output mostly comes from the counter hits she gets when she's pressuring by doing frametraps or baiting the 1A+D OS/tech throw attempts with j.[C].
Her main mixup comes from the tick throws with her amazing 2A, some left/right setups that usually makes her lose damage and a universal Fuzzy Guard that's confirmable with MAX Mode.
She's really frustrating to play against since she gets a safejump (+ the Fuzzy Guard mixup if she has MAX) and corner carry from pretty much any hit.
Her weaknesses are that she extends her hurtbox a bit when trying to poke (the pokes are still disjointed), her moves don't have a lot of active frames and a lot of recovery.
Since she's so slow, it's hard to approach with her and usually she has to take a lot of bets to get a hit since pushing the wrong button in the wrong context will definitely result in F-Riesbyfe getting hit. In contrast, all her moves are confirmable into something, and even if she's slow, she gets good momentum from her dash, making her effective range actually pretty good.
She doesn't have a good standing overhead, her main frametrap tool (6C) can be safely shielded since she can't jump cancel it to bait shield counters and the only move that forces you to shield low is 2C which won't net much damage. Also, 6C is -2 if you stand block it (point blank) and neutral (-+0) if she's far when stand blocked (the farther she is, the better the frame advantage is, against stand block it can even be +5, but it's unlikely to happen), so if the opponent reads a pattern in her blockstring they can turn the tides to their favor.
But exactly here is when F-Riesbyfe becomes a strong character, because now she gets to bait stand blocks with her amazing 2A (this is also the reason why a lot of players won't even bother in trying to stand block 6C) and get super high damage from baited shields with j.[C].
General Gameplan
Refer to the Overview section.
Pressure
The use of 6C
Moves you closer, is + on block, -2 if stand blocked (can be + depending on the distance even on stand block), forces your opponent to take a defensive option.
(moves in parenthesis have been blocked, this is considering that your opponent disrespects long range 6C and tries to mash/jump after blocking it)
(2A 5B 6B 6C) 214B > delay j.[C] > dj.C > j.6C, land sj8.B[C] sdj.BC > AT = 4095(9)
(2A 5B 6B 6C) 214B > delay j.[C] > j.6C, land 6[B], 5B > 236B = 3728 (7)
Corner combos from 214B if opponent disrespects the 6C.
(2A 5B 6B 6C) 2A > 5B > 6B > 5C > 236A
Example of midscreen combo if opponent disrespects the 6C, so 2A counter-hits, but you can do whatever route you want.
- If the enemy respects your 6C and the 2A is blocked, be sure to constantly mix up when the 6C is going to come to avoid shields, get a grasp on the defensive options that your opponent is taking and capitalize accordingly (punish shields with j.[C], stand blocks with dash 2A, jumps with 5B/2B, etc).
- You can go for 6C at any point of your blockstring, even 2A 6C is a frametrap, but please avoid using 5C, since after it you don't have a single low option, which means stand blocking 6C is free, and blocking any overhead after 5C is free too.
Okizeme
This small jump is a "hop" and can cross knocked down enemies, very useful after 6[B], 2C and 236C knockdowns.
You can cut combos down to get the left/right mixups, not always recommended but it will get anyone that is not aware of the properties of your dash.
This knockdown allows for a safejump with sj[C], you can option select wake up Heat with sj9.[C] 44 5B or sj9.[C] 4A+B (same OS, different inputs) (example), that way if the j.[C] hits Riesbyfe will continue with 5B, and if it doesn't she will backdash, gets blown up against big and active reversals such as Hime's DP. Practice the safejump against all characters since all your routes lead into it and all characters have different wakeup timings/reversal timings.
As a side note, from this knockdown if you have Max mode, you get a 50/50 with either sj9.[C] > dj.C > IH j.C (fuzzy guard mixup) or sj9.[C], 2A (fake fuzzy low). This mixup is specially strong against tall characters because it's hard to guess that she can do a fuzzy guard from that high. It's not always worth it since meter management is important for neutral with her, but you can still do it from time to time, also the reward is very nice.
From fullscreen you can do dash sj9.B and it will safejump, even if the situation isn't very likely, be prepared to improvise your own safejumps.
Defense
623A and B are not real reversals, 623C and 236C are real but are too slow to be actually used as such, however, 236C can be used to invul through moves with long animations (eg. C-Wara 5[C]) or beat things like Nero summoning in pressure, Aoko using orbs, F-P.Ciel rocks etc. However 236C will lose same frame trades due to being a hitgrab.
Your jumping hurtbox is quite wide so jumping out of the corner is harder for her than most characters (which doesn't mean it isn't a good option!), however, the fact that 236X avoids trades gives you answers to characters using projectiles in pressure that most other character's don't have, coupled with your 2A and Full Moon defensive traits, she can wait her turn reliably. Also, her backdash is surpisingly good!
2B can be used to stop instant airdashes on reaction, it obviously can be baited but this will make your opponent think twice about jumping on you to reset pressure.
2C can low profile some moves but at that point it's a huge read.
Combos
| Combo Notation Help
|
Disclaimer: Combos are written by various writers, so the actual notation used in pages can differ from the standard one.
For more information, see Glossary and Controls.
|
| X > Y
|
X input is cancelled into Y.
|
| X > delay Y
|
Must wait for a short period before cancelling X input into Y.
|
| X, Y
|
X input is linked into Y, meaning Y is done after X's recovery period.
|
| X+Y
|
Buttons X and Y must be input simultaneously.
|
| X/Y
|
Either the X or Y input can be used.
|
| X~Y
|
This notation has two meanings.
- Use attack X with Y follow-up input.
- Input X then within a few frames, input Y. Usually used for option selects.
|
| X(w)
|
X input must not hit the opponent (Whiff).
|
| j.X
|
X input is done in the air, implies a jump/jump cancel if the previous move was done from the ground.
Applies to all air chain sections:
- Assume a forward jump cancel if no direction is given.
- Air chains such as j.A > j.B > j.C can be shortened to j.ABC.
|
| sj.X
|
X input is done after a super jump. Notated as sj8.X and sj9.X for neutral and forward super jumps respectively.
|
| dj.X
|
X input is done after a double jump.
|
| sdj.X
|
X input is done after a double super jump.
|
| tk.X
|
Stands for Tiger Knee. X motion must be buffered before jumping, inputting the move as close to the ground as possible. (ex. tk.236A)
|
| (X)
|
X is optional. Typically the combo will be easier if omitted.
|
| [X]
|
Input X is held down. Also referred to as Blowback Edge (BE). Depending on the character, this can indicate that this button is held down and not released until indicated by the release notation.
|
| ]X[
|
Input X is released. Will only appear if a button is previously held down. This type of input is referred to as Negative Edge.
|
| {X}
|
Button X should only be held down briefly to get a partially charged version instead of the fully charged one.
|
| X(N)
|
Attack "X" should only hit N times.
|
| (XYZ)xN
|
XYZ string must be performed N times. Combos using this notation are usually referred to as loops.
|
| (XYZ^)
|
A pre-existing combo labelled XYZ is inserted here for shortening purposes.
|
| CH
|
The first attack must be a Counter Hit.
|
| Air CH
|
The first attack must be a Counter Hit on an airborne opponent.
|
| 66
|
Performs a ground forward dash.
|
| j.66
|
Performs an aerial forward dash, used as a cancel for certain characters' air strings.
|
| IAD/IABD
|
Performs an Instant AirDash.
|
| AT
|
Performs an Air Throw. (j.6/4A+D)
|
| IH
|
Performs an Initiative Heat.
|
| AD
|
Performs an Arc Drive.
|
| AAD
|
Performs an Another Arc Drive.
|
Using 2B in combos: it generally adds around 200-300 damage but cannot be recommended:
- The bonus damage is often worth it only if the combo started with 2A.
- The chain "2A 5B 2B 6B" will link only if the 2A is performed as close as possible.
- The 2B does not hit crouching enemies.
Damage example: (combos are tested on VSion)
- 5B 6B 5C 236A = 4377(4)
- 5B 2B 6B 5C 236A = 4403(5)
- 2A 5B 6B 5C 236A = 3401(5)
- 2A 5B 2B 6B 5C 236A = 3770(6)
Disclaimer:
- First of all, learn the combos that end in 236A/B/C, because that is what you'll use the most, while her air combo routes aren't exactly intuitive or damaging.
- Please look at the "Notes" sections on combos, they have tips on utility.
Normal Combos
| Condition
|
Notation
|
Damage
vs V.Sion
|
Notes
|
|
| Normal starter, grounded opponent
|
- 2A > 5B > 6B > 5C > 236A/236C/AD
|
3401
|
| |
| Meter Gained: 48.6 |
Meter Given (vs C-Moon): 17.3 |
Bread and Butter that you adapt depending on your meter management and your opponent's life bar.
3838 damage with 236C ender; 4751 with Arc Drive; 5900 with Another Arc Drive |
|
|
| Normal starter, grounded opponent
|
- 2A > 5B > 6B > 2C > 6C, 214A > j.C > sdj9.BC > AT
|
4069
|
| |
| Meter Gained: ??? |
Meter Given (vs C-Moon): ??? |
| You only do this one for damage, after airthrow you pretty much return to neutral unless you're close to the corner. |
|
|
| Long-range 5B starter, grounded opponent, 100% meter
|
|
4298
|
| |
| Meter Gained: -83.8 |
Meter Given (vs C-Moon): 7.6 |
| Hit confirm poke from long range 5B, this string alone is what makes F-Riesbyfe a strong character because her effective range is huge. |
|
|
| Normal starter, grounded opponent, Max mode
|
- 2A > 5B > 6B > 5C > IH 5B > 5C > AD
|
5506
|
| |
| Meter Gained: ??? |
Meter Given (vs C-Moon): ??? |
| A combo to get used to, when Max Mode is available so you can Initiative Heat on demand. |
|
|
- Aerial Counter-hit
| Condition
|
Notation
|
Damage
vs V.Sion
|
Notes
|
|
| Counter-hit j.C starter, airborne opponent
|
- Air CH j.C, land 5B > 2B > j.C > sdj9.BC > AT
|
4137
|
| |
| Meter Gained: 44.1 |
Meter Given (vs C-Moon): 14.7 |
| Again the typical combo, easier to hit confirm, decent damage, only do this one if you feel like 6[B] won't connect. |
|
|
| Counter-hit j.C starter, airborne opponent
|
- Air CH j.C, land 6[B], 5B > 236B
|
4383
|
| |
| Meter Gained: 52.2 |
Meter Given (vs C-Moon): 18.5 |
| Slightly more complex because of 6[B] timing, better damage, corner carry, better oki. |
|
|
| Counter-hit j.C starter, airborne opponent
|
- Air CH j.C, land 6[B], 5C > 236B
|
4530
|
| |
| Meter Gained: 54.0 |
Meter Given (vs C-Moon): 19.1 |
| Same as the one above but instead of 5B, using 5C. Listed as a different combo because the timing is way more strict and for 200 more damage it might not be worth dropping. In other words, use it only if you feel confident in your timings. |
|
|
| Counter-hit j.C starter, airborne opponent, midscreen only
|
- Air CH j.C, land 6[B], 2C > 214B > IAD j.6C, land 6[B], 5B > 236B
|
4341
|
| |
| Meter Gained: ??? |
Meter Given (vs C-Moon): ??? |
| Less damage than the one above, 6[B] 2C link for style points, way more meter gain. Only works midscreen. |
|
|
- Shield Counter
- You can replicate the Air-Counter hit combos from CH 236D, they won't be listed again for the sake of space.
| Condition
|
Notation
|
Damage
vs V.Sion
|
Notes
|
|
| Shield Counter starter
|
- D~236D, 5B > 2B > j.C > sdj9.BC > AT
|
2011
|
| |
| Meter Gained: 45.9 |
Meter Given (vs C-Moon): 13.8 |
| Again the typical combo. |
|
|
| Shield Counter starter
|
|
1641
|
| |
| Meter Gained: 43.0 |
Meter Given (vs C-Moon): 14.6 |
| Less damage, less meter, everything else is better, get used to this combo, you will use it a lot. |
|
|
| Shield Counter starter
|
- D~236D, (dash under) 2AA > 236A
|
1373
|
| |
| Meter Gained: ??? |
Meter Given (vs C-Moon): ??? |
| Side switch combo, useful when you have your back against the corner. |
|
|
| Shield Counter starter
|
- D~236D, 2C > 214B > IAD j.6C, land 6[B], 5B > 236B
|
2016
|
| |
| Meter Gained: ??? |
Meter Given (vs C-Moon): ??? |
| Corner carry from midscreen. |
|
|
- Raw Air Throw
| Condition
|
Notation
|
Damage
vs V.Sion
|
Notes
|
|
| Raw Airthrow starter
|
|
2380
|
| |
| Meter Gained: 40.5 |
Meter Given (vs C-Moon): 14.6 |
| Easy combo after a raw airthrow (golden airthrow). |
|
|
| Raw Airthrow starter
|
- Raw AT, land 2C > 6C, 214A > j.C > sdj9.BC > AT
|
2839
|
| |
| Meter Gained: ??? |
Meter Given (vs C-Moon): ??? |
| Slightly more complex because of the "6C, 214A" link, better damage, worse oki. |
|
|
Corner Combos
- Please note that you can add 6C after 5C and link 214B depending on the spacing. It will add some damage, meter gain and corner carry but it's hard to get the proper spacing. It's easier against crouching small bodies and standing tall bodies.
- If your hitcount is at 10 at 6[B] when you do the last combo, the last moves won't work because hitstun decay kills that ender, you change the 5B 236B ender for 2AAA 236A (you can do even more 2As against bigger characters, but three is universal). Also note that you can do more hits on purpose to get more meter, it isn't much more but it's an option.
- If the starter is j.C/j.[C] the delayed jump timing is different.
| Condition
|
Notation
|
Damage
vs V.Sion
|
Notes
|
|
| Normal starter, grounded opponent
|
- 2A > 5B > 6B > 5C > 214B > IAD j.6C, land (microwalk backwards or forward depending on distance) 6[B], 5B > 236B
|
4250
|
| |
| Meter Gained: ??? |
Meter Given (vs C-Moon): ??? |
| Corner carry combo from about middle screen. The difficulty is on 6[B]. |
|
|
| Normal starter, grounded opponent
|
- 2A > 5B > 6B > 5C > 214B > j.[C] > dj.C > j.6C, land sj8.B[C] > sdj9.BC > AT
|
5223
|
| |
| Meter Gained: ??? |
Meter Given (vs C-Moon): ??? |
| Typical corner combo, that deals a good amount of damage. You can meaty with 5C after this. |
|
|
| Normal starter, grounded opponent
|
- 2A > 5B > 6B > 5C > 214B > j.[C] > j.6C, land, microwalk backwards 6[B], 5B > 236B
|
4883
|
| |
| Meter Gained: ??? |
Meter Given (vs C-Moon): ??? |
| The trick in this combo is to delay the jump after 214B and hit with 5B as low to the ground as possible, this is the most important combo in the corner. |
|
|
- Near-corner 6[C]
| Condition
|
Notation
|
Damage
vs V.Sion
|
Notes
|
|
| 6[C] starter
|
|
2484
|
| |
| Meter Gained: ??? |
Meter Given (vs C-Moon): ??? |
| Works from midscreen too, obviously not the most damaging route but it's the only one that works there, also, you can replace 236B with 236C to get a really small damage boost (259 damage) but using meter you would potentially need for long range 5B confirms and not getting the safejump is not worth it. |
|
|
| 6[C] starter
|
- 6[C] > j7.C > delay j.6C, land 6[B] > 5B > 236B
|
3362
|
| |
| Meter Gained: ??? |
Meter Given (vs C-Moon): ??? |
| Self-explanatory 236B hard knockdown route, the difference between this one and the others it that you don't use a jump cancel, so if you feel like if, you can change the 5B 236B for 2C and get a better knockdown for left/right mixups, in exchange, you lose 889 damage.. |
|
|
| 6[C] starter
|
- 6[C], delay 5C > j9.C > dj.C > delay j.6C, land sj8.BC > sdj9.BC > AT
|
3891
|
| |
| Meter Gained: ??? |
Meter Given (vs C-Moon): ??? |
| If it's too hard for you, skip the second j.B, this combo is similar to other damage corner routes, but it's way harder, also against some characters you might end up in the corner after 5C (namely Aoko, i haven't tested on all characters), so you can replace it with 5B. |
|
|
- Aerial Counter-hit
| Condition
|
Notation
|
Damage
vs V.Sion
|
Notes
|
|
| Counter-hit j.C starter, airborne opponent
|
- Air CH j.C, land 6[B], 2C > 214B > j.[C] > j.6C, land (microwalk backwards or forward depending on distance) 6[B], 5B > 236B
|
4983
|
|
| Meter Gained: ??? |
Meter Given (vs C-Moon): ??? |
(Video) |
A really hard combo, the trick is to land the 2C as close to the ground as possible and delay the 214B, then you have to delay the jump. A lot of reward, this is her best combo out of an air counter hit. Only works in the corner.
Look at the video link if you are having trouble with it. |
|
|
- Shield Counter
- You can replicate the Air-Counter hit combos from CH 236D, they won't be listed again for the sake of space.
| Condition
|
Notation
|
Damage
vs V.Sion
|
Notes
|
|
| Shield Counter starter
|
- D~236D, 2C > 214B > j.[C] > j.6C, land 6[B], 5B > 236B
|
2446
|
| |
| Meter Gained: ??? |
Meter Given (vs C-Moon): ??? |
| Corner combo, notably better reward than the routes in the Normal Combos section. |
|
|
| Shield Counter starter
|
- D~236D, 2C > 214B > j.[C] > dj.C > j.6C, land sj8.B[C] > sdj9.BC > AT
|
2680
|
| |
| Meter Gained: ??? |
Meter Given (vs C-Moon): ??? |
| Corner again, use it only to seal a round because you don't get oki from this, but it's the most damage from non CH 236D. |
|
|
- Raw Air Throw
| Condition
|
Notation
|
Damage
vs V.Sion
|
Notes
|
|
| Raw Airthrow starter, corner only
|
- Raw AT, land 2C > delay 214A > delay j7.A > j.6C, land 6[B] 5B 236B
|
2711
|
| |
| Meter Gained: ??? |
Meter Given (vs C-Moon): ??? |
| Corner only and it allows you to get both decent damage and safejump oki, on cats replace jA with jC. |
|
|
Move Descriptions
| Frame Data Help
|
| Header
|
Tooltip
|
| Move Box Colors
|
Light gray = Collision Box (A move lacking one means it can go through the opponent's own collision box).
Green: Hurt Boxes.
Red: Hit(/Grab) Boxes.
Yellow: Clash Boxes (When an active hitbox strikes a clash box, the active hitbox stops being active. Multi-hit attacks can beat clash since they will still progress to the next hitbox.)
Magenta: Projectile-reflecting boxes OR Non-hit attack trigger boxes (usually).
Blue: Reflectable Projectile Boxes.
|
| Damage
|
Base damage done by this attack.
(X) denotes combined and scaled damage tested against standing V. Sion.
|
| Red Damage
|
Damage done to the recoverable red health bar by this attack. The values are inherently scaled and tested against standing V. Sion.
(X) denotes combined damage.
|
| Proration
|
The correction value set by this attack and the way it modifies the scaling during a string. See this page for more details.
X% (O) means X% Overrides the previous correction value in a combo if X is of a lower percentage.
X% (M) means the current correction value in a combo will be Multiplied by X%. This can also be referred to as relative proration.
|
| Circuit
|
Meter gained by this attack on hit.
(X%) denotes combined meter gain.
-X% denotes a meter cost.
|
| Cancel
|
Actions this move can be cancelled into.
SE = Self cancelable.
N = Normal cancelable.
SP = Special cancelable.
CH = Cancelable into the next part of the same attack (Chain in case of specials).
EX = EX cancelable.
J = Jump cancelable.
(X) = Cancelable only on hit.
-X- = Cancelable on whiff.
|
| Guard
|
The way this move must be blocked.
L = Can block crouching
H = Can block standing.
A = Can block in the air.
U = Unblockable.
|
| Startup
|
Amount of frames that must pass prior to reaching the active frames. Also referred to as "True Startup".
|
| Active
|
The amount of frames that this move will have a hitbox.
(x) denotes frame gaps where there are no hitboxes is present. Due to varied blockstuns, (x) frames are difficult to use to determine punish windows. Generally the larger the numbers, the more time you have to punish.
X denotes active frames with a duration separate from its origin move's frame data, such as projectile attacks. In this case, the total length of the move is startup+recovery only.
|
| Recovery
|
Frames that this move has after the active frames if not canceled. The character goes into one frame where they can block but not act afterwards, which is not counted here.
|
| Advantage
|
The difference in frames where you can act before your opponent when this move is blocked (assuming the move isn't canceled and the first active frame is blocked).
If the opponent uses a move with startup that is at least 2 frames less than this move's negative advantage, it will result in the opponent hitting that move.
±x~±y denotes a range of possible advantages.
|
| Invul
|
Lists any defensive properties this move has.
X y~z denotes X property happening between the y to z frames of the animations. If no frames are noted, it means the invincibility lasts through the entire move.
Invicibility:
- Strike = Strike invincible.
- Throw = Throw invincible.
Hurtbox-Based Properties:
- Full = No hurtboxes are present.
- High = Upper body lacks a hurtbox.
- Low = Lower body lacks a hurtbox.
Miscellaneous Properties
- Clash = Frames in which clash boxes are active.
- Reflect = Frames in which projectile-reflecting boxes are active.
- Super Armor = Frames in which the character can take hits without going into hit stun.
|
Normal Moves
Standing Normals
|
|
| Damage
|
Red Damage
|
Proration
|
Cancel
|
Guard
|
| 350
|
252
|
75% (O)
|
-N-, -SP-, -EX-, (J)
|
L
|
| First Active
|
Active
|
Recovery
|
Frame Adv
|
Circuit
|
Invuln
|
| 9
|
3
|
10
|
-1
|
3.15%
|
-
|
|
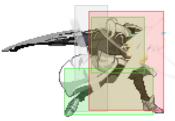
Ries pokes at the opponent feet with her shield. This move isn't mashable but it hits low. Links into 2A on counter hit
|
|
|
|
| Damage
|
Red Damage
|
Proration
|
Cancel
|
Guard
|
| 800
|
606
|
100%
|
N, SP, EX, (J)
|
LH
|
| First Active
|
Active
|
Recovery
|
Frame Adv
|
Circuit
|
Invuln
|
| 10
|
2
|
19
|
-6
|
7.2%
|
-
|
|
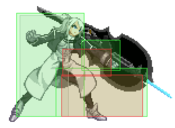
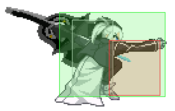
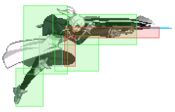
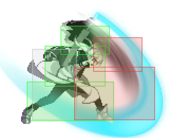
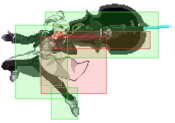
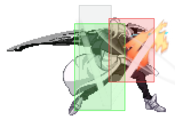
Thrust the shield forward, pretty good reach but, from top the bottom the hitbox is thin as it comes to a point, so be careful. As an example, Ciel's dash can pass under it. You will mainly use this for whiff punishes since the prorate on it is amazing and is easily one of the best grounded starters in the game, be ready to buffer 5C and hitconfirm into 236C for long range confirms and 214B for close ones. This move is also good for picking up air counter hits that are a bit far away.
|
|
|
|
| Damage
|
Red Damage
|
Proration
|
Cancel
|
Guard
|
| 1000
|
505
|
90% (O)
|
N, SP, EX, (J)
|
LH
|
| First Active
|
Active
|
Recovery
|
Frame Adv
|
Circuit
|
Invuln
|
| 13
|
2
|
18
|
-2
|
9.0%
|
-
|
|
A strike that advances a decent amount, you want to use this on characters with low dash postures since 5B would probably whiff on them. If your reactions are sharp enough, you can hitconfirm into 236C on hit and cancel into 6C on block. Links into 5B on counter hit so it's a great normal to bait crouch tech Option Selects.
|
|
Crouching Normals
|
|
| Damage
|
Red Damage
|
Proration
|
Cancel
|
Guard
|
| 300
|
252
|
70% (O)
|
-SE-, -N-, -SP-, -EX-, (J)
|
L
|
| First Active
|
Active
|
Recovery
|
Frame Adv
|
Circuit
|
Invuln
|
| 4
|
4
|
5
|
3
|
2.7%
|
-
|
|
Ries throws a fast punch. This move is fast, mashable and good for resetting pressure after a 6C, or establishing pressure after a hop in. This is one of the best 2As in the game so go ahead and use it to your heart's content.
|
|
|
|
| Damage
|
Red Damage
|
Proration
|
Cancel
|
Guard
|
| 700
|
404
|
80% (O)
|
N, SP, EX, (J)
|
H
(Whiffs vs Crouch.)
|
| First Active
|
Active
|
Recovery
|
Frame Adv
|
Circuit
|
Invuln
|
| 9
|
4
|
21
|
-10
|
5.4%
|
Clash 6-12
|
|
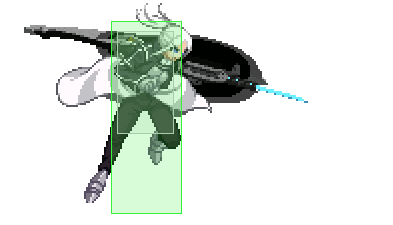
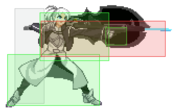
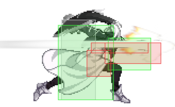
Thrust the shield in a 45° diagonal angle with plenty of clash frames. There are usually two outcomes when using this move: One, you beat out whatever they were doing and CH them or hit them. In that case you could pick it up again for a combo if you can read that far. Two, you clash with what the opponent threw out, in that case its best to cancel into 623B. This way you will beat almost anything that they opponent cancels into (you can also cancel into a jump but the utility varies from matchup to matchup). Its reach is pretty long and its one of the only far reaching moves of any moon that does not mix her own hurtbox in it so it can be pretty good, but the recovery isn't great, so if you're playing against characters with double airdashes avoid whiffing this.
|
|
|
|
| Damage
|
Red Damage
|
Proration
|
Cancel
|
Guard
|
| 700
|
404
|
65% (O)
|
N, SP, EX, (J)
|
L
|
| First Active
|
Active
|
Recovery
|
Frame Adv
|
Circuit
|
Invuln
|
| 11
|
3
|
22
|
-7
|
7.2%
|
-
|
|
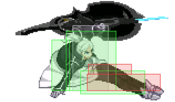
A slide that hits low. The forward momentum distance is not that long, so it is hard to connect it from moves like 5B if they hit opponent towards the tip of the move. You won't be using this move like H or C. Instead, you'll use this move to beat high shield, and you can confirm into (delay 6C) 214A air combo or 214B routes.
|
|
Aerial Normals
|
|
| Damage
|
Red Damage
|
Proration
|
Cancel
|
Guard
|
| 300
|
151
|
75% (O)
|
SE, N, J
|
HA
|
| First Active
|
Active
|
Recovery
|
Frame Adv
|
Circuit
|
Invuln
|
| 6
|
4
|
10
|
-
|
2.7%
|
-
|
|
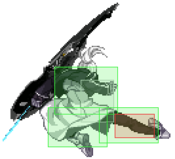
Angled kick that looks like Crescent's j.B. Pretty standard active frames and startup despite not looking like it.
|
|
|
|
| Damage
|
Red Damage
|
Proration
|
Cancel
|
Guard
|
| 700
|
404
|
90% (O)
|
N, J
|
HA
|
| First Active
|
Active
|
Recovery
|
Frame Adv
|
Circuit
|
Invuln
|
| 9
|
6
|
--
|
-
|
6.3%
|
-
|
|
Sideways, midair, strike with the shield with good horizontal reach, an air to air tool that is a force to be reckoned with. You'll want to use this move preemptively. This way, you can discourage air approaches and take counter hits from the opponent in order to gain momentum. As an example, this move can rival Nero's j.C pretty well.
|
|
|
|
| j.C
|
Damage
|
Red Damage
|
Proration
|
Cancel
|
Guard
|
| 900
|
606
|
90% (O) / 50% (O)
|
N, J
|
HA
|
| First Active
|
Active
|
Recovery
|
Frame Adv
|
Circuit
|
Invuln
|
| 11
|
3
|
--
|
-
|
7.2%
|
-
|
|
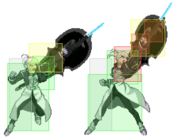
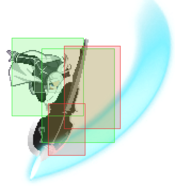
A wide, downward swing of the shield that covers 180 deg. from top to bottom, but it is not nearly as big as it looks. The release is a bit slow, so if you try it from a low air dash you'll end up landing before it can come out. Also, your own hurtbox extends for a long time so caution is needed. Do not rely on this move because it's easy to antiair and turns you into dead weight most of the time, once it's out however, it's hard to contest. Good for combos, also fuzzies.
|
| j.[C]
|
Damage
|
Red Damage
|
Proration
|
Cancel
|
Guard
|
| 1500
|
1212
|
90% (O)
|
N, J
|
HA
|
| First Active
|
Active
|
Recovery
|
Frame Adv
|
Circuit
|
Invuln
|
| 21
|
3
|
--
|
-
|
13.5%
|
-
|
|
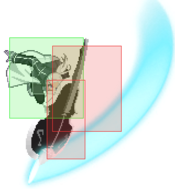
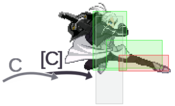
The charged version of j.C improves the hitbox in front of Ries as well as the block and hitstun significantly in exchange for charge time. You definitely want to be careful about throwing j[C] out because it will count as a counter if you are hit by something during the startup. You can use this move while rising so it's active on the way down, which helps quite a bit in resetting pressure and it's mainly used to shimmy or bait shields. F-moon uses j.[C] for corner combos as well.
|
|
Command Normals
|
|
| 6B
|
Damage
|
Red Damage
|
Proration
|
Cancel
|
Guard
|
| 800
|
505
|
100%
|
SP, EX, (J)
|
LH
|
| First Active
|
Active
|
Recovery
|
Frame Adv
|
Circuit
|
Invuln
|
| 13
|
4
|
16
|
-2
|
7.2%
|
Reflect 9-16
|
|
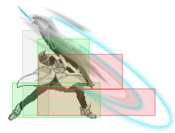
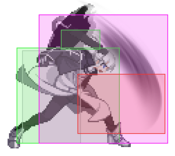
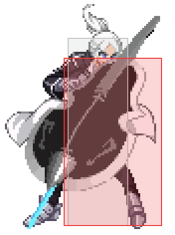
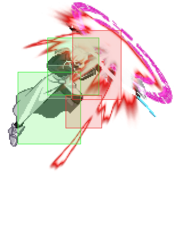
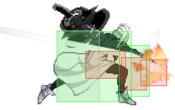
Forward hit with the shield, as stepping in hit with the shield that is longer than seen. This attack can also reflect certain projectiles (purple box).
|
| 6[B]
|
Damage
|
Red Damage
|
Proration
|
Cancel
|
Guard
|
| 1200
|
707
|
100%
|
SP, EX, (J)
|
L
|
| First Active
|
Active
|
Recovery
|
Frame Adv
|
Circuit
|
Invuln
|
| 22
|
3
|
10
|
5
|
10.8%
|
-
|
|
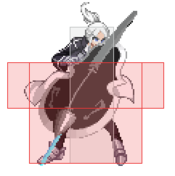
The charged version of 6B, it becomes a sweep when you charge it. 5B 6[B] can frametrap from long range and it's your second option for frame advantage, so you will want to make your opponent scared of it. Unlike the uncharged version, it doesn't reflect projectiles.
|
|
|
|
| 6C
|
Damage
|
Red Damage
|
Proration
|
Cancel
|
Guard
|
| 1000
|
505
|
60% (O)
|
SP, EX
|
LH
|
| First Active
|
Active
|
Recovery
|
Frame Adv
|
Circuit
|
Invuln
|
| 12
|
8
|
6
|
-2 (vs Stand.)
1 (vs Crouch.)
|
9.0%
|
Low 7-19
|
|
A small jump kick with variable frame advantage, the further you are, the more + it gets (it can be + against standing opponents thanks to this). Cancel window starts as soon as you touch the ground. The lower part of Ries is invincible alowing for low crushes, so it complements 5B perfectly to poke. This move is great for blockstrings and can be added before 214B in combos if you can hit with the late frames of the move (further) for a bit of extra damage. Links into 5B on counter hit regardless of distance.
|
| 6[C]
|
Damage
|
Red Damage
|
Proration
|
Cancel
|
Guard
|
| 1000
|
505
|
60% (O)
|
SP, EX
|
HA
|
| First Active
|
Active
|
Recovery
|
Frame Adv
|
Circuit
|
Invuln
|
| 29
|
8
|
9
|
1
|
9.0%
|
Low 24-36
|
|
The charged version of 6C is an overhead. Causes a wallslam on hit, a combo is possible after it, it's very slow so only use it as a knowledge check.
|
|
|
|
| Damage
|
Red Damage
|
Proration
|
Cancel
|
Guard
|
| 850
|
606
|
68% (M)
|
-
|
HA
|
| First Active
|
Active
|
Recovery
|
Frame Adv
|
Circuit
|
Invuln
|
| 10
|
3
|
--
|
-
|
7.65%
|
-
|
|
Wallslams on hit, commonly used in combos or as an ender (delay j.6C) to get more time to charge when you need meter, it also puts the opponent above you after the combo ends which can be more advantageous than an air throw ender. Forget about using this as an air to air, poor activity frames, doesn't hit crouchers, easy to low profile, low reward most of the time and jB outclasses it in neutral.
|
|
Universal Mechanics
|
|
| Damage
|
Red Damage
|
Proration
|
Cancel
|
Guard
|
| 1500
|
782
|
100%
|
-
|
U
|
| First Active
|
Active
|
Recovery
|
Frame Adv
|
Circuit
|
Invuln
|
| 3
|
1
|
20
|
-
|
0.0%
|
-
|
|
Riesbyfe carries her opponent to the ground using the tip of Gamaliel. Untechable knockdown. You can safejump some characters with IAD jA/B after this. Best throw range in the game.
|
|
|
|
| Damage
|
Red Damage
|
Proration
|
Cancel
|
Guard
|
| 1600 (1408, Raw)/1500
|
888
|
30%
|
(Any if Raw)
|
U
|
| First Active
|
Active
|
Recovery
|
Frame Adv
|
Circuit
|
Invuln
|
| 2
|
1
|
12
|
-
|
0.0%
|
-
|
|
Riesbyfe grabs the opponent then slashes them with Gamaliel. Ground bounces the opponent if done raw, causes an untechable knockdown but leaves you at a long distance as a combo ender where you can sometimes meaty with 5C. Great damage for an AT.
|
|
|
|
| Ground
|
Damage
|
Red Damage
|
Proration
|
Cancel
|
Guard
|
| 500 (345)
|
202
|
50%
|
(SP), (EX), (J)
|
LHA
|
| First Active
|
Active
|
Recovery
|
Frame Adv
|
Circuit
|
Invuln
|
| 9
|
4
|
18
|
-4
|
4.5%
|
-
|
|
Same animation as 214A. It rarely hits behind her.
|
| Aerial
|
Damage
|
Red Damage
|
Proration
|
Cancel
|
Guard
|
| 500 (345)
|
202
|
50%
|
-
|
HA
|
| First Active
|
Active
|
Recovery
|
Frame Adv
|
Circuit
|
Invuln
|
| 9
|
4
|
-
|
-
|
4.5%
|
-
|
|
Same animation as j.6C, so it's pretty good for an air shield counter, sadly, air shields are a big commitment.
|
|
|
|
| Bunker
|
Damage
|
Red Damage
|
Proration
|
Cancel
|
Guard
|
| 500
|
202
|
50%
|
-
|
LHA
|
| First Active
|
Active
|
Recovery
|
Frame Adv
|
Circuit
|
Invuln
|
| 26
|
4
|
19
|
-5
|
0.0%
(-50.0% in blockstun)
|
Clash 1-10
|
| (Clash)
|
Damage
|
Red Damage
|
Proration
|
Cancel
|
Guard
|
| 500
|
202
|
50%
|
-
|
LHA
|
| First Active
|
Active
|
Recovery
|
Frame Adv
|
Circuit
|
Invuln
|
| 8
|
4
|
19
|
-5
|
0.0%/-50.0%
|
Strike 1-7
|
|
A charging shield bunker. Has decent range.
|
|
|
|
| Damage
|
Red Damage
|
Proration
|
Cancel
|
Guard
|
| 100
|
0
|
100%
|
-
|
U
|
| First Active
|
Active
|
Recovery
|
Frame Adv
|
Circuit
|
Invuln
|
| 17
|
2
|
30
|
-
|
-100.0% (min)
|
Full 1-18
|
|
Good horizontal range, not as good vertical range, it doesn't hit from behind as much as other heatboxes but the forward range is worth it.
|
|
Circuit Spark
A+B+C during hitstun/blockstun at MAX
|
| Ground
|
Damage
|
Red Damage
|
Proration
|
Cancel
|
Guard
|
| 100
|
0
|
100%
|
-
|
U
|
| First Active
|
Active
|
Recovery
|
Frame Adv
|
Circuit
|
Invuln
|
| 11
|
10
|
20
|
-
|
removes all
|
Full 1-39
|
|
Standard universal Circuit Spark.
|
| Air
|
Damage
|
Red Damage
|
Proration
|
Cancel
|
Guard
|
| 100
|
0
|
100%
|
-
|
U
|
| First Active
|
Active
|
Recovery
|
Frame Adv
|
Circuit
|
Invuln
|
| 12
|
10
|
15
|
-
|
removes all
|
Strike 1-30
|
|
Same as above, standard air Circuit Spark.
|
|
Special Moves
|
|
|
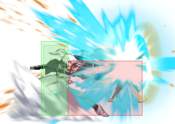
Pile bunker, locks on to the opponent with the stake of the shield, then blows them to the opposite side of the screen, this attack is air-unblockable. Being different from the other two moons' 236 and having unique, gameplay changing properties, this is one of the defining moves of F-Ries. Cannot clash.
|
| A
|
Damage
|
Red Damage
|
Proration
|
Cancel
|
Guard
|
| 0, 3000 (2557)
|
(2152)
|
100%
|
-
|
LH
|
| First Active
|
Active
|
Recovery
|
Frame Adv
|
Circuit
|
Invuln
|
| 14
|
2
|
20
|
-4
|
0.0%, 22.5%
|
-
|
|
The fastest version, easy to use in combos. After connecting this, you can safejump. Do not rely on this move for blockstrings, look at the frame advantage.
|
| B
|
Damage
|
Red Damage
|
Proration
|
Cancel
|
Guard
|
| 0, 3000 (2557)
|
(2152)
|
100%
|
-
|
LH
|
| First Active
|
Active
|
Recovery
|
Frame Adv
|
Circuit
|
Invuln
|
| 21
|
2
|
21
|
-5
|
0.0%, 27.0%
|
-
|
|
Mainly used to finish her corner route with 5B 236B, but she needs a low hitcount to do so. More damage and meter gain than 236A.
|
| [B]
|
Damage
|
Red Damage
|
Proration
|
Cancel
|
Guard
|
| 3000
|
2323
|
100%
|
-
|
H
|
| First Active
|
Active
|
Recovery
|
Frame Adv
|
Circuit
|
Invuln
|
| 42
|
3
|
25
|
-10
|
27.0%
|
-
|
|
Charged version becomes an overhead and is unshieldable, mainly used to catch backdashes but it's a hard read, frame advantage is also awful on block so don't expect to go unpunished.
|
| EX
|
Damage
|
Red Damage
|
Proration
|
Cancel
|
Guard
|
| 3000
|
2323
|
100% (O)
|
-
|
LH
|
| First Active
|
Active
|
Recovery
|
Frame Adv
|
Circuit
|
Invuln
|
| 1+16
|
2
|
21
|
-5
|
-100.0%
|
Full 1-16
|
|
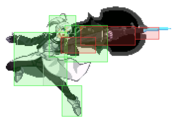
Ries hops forward during the super flash to hitgrab the opponent. Mainly used to hitconfirm long range 5B 5C. It has some invul. Don't rely too much on this or you'll end up losing all of your meter, however, its utility is amazing to change the pace of the match.
Usually, you can hop over downed opponents for a crossup. However there are character specific issues:
Hime. Can't hop over.
Nanaya. Need to add a small delay, or 2A whiffs.
Miyako. Can't hop over.
Ciel. Gotta be fast. Recommended to use 66/44 for extra buffer.
Sion. Need to add a small delay, or 2A whiffs.
Wara. Can't hop over.
Kohaku. Can't hop over.
Akiha. Gotta be fast. Recommended to use 66/44 for extra buffer. Need to add a small delay after hop, or 2A whiffs.
V.Akiha. Can't hop over.
Seifuku. Need to add a delay or micro step forward so they crouch block. You can hop over them then.
Len. Need to add a small delay, or 2A whiffs.
Necos. Need to add a delay or micro step forward so they aren't downed. You can hop over them then.
|
|
|
|
|
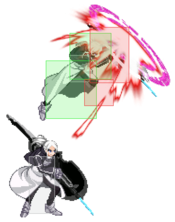
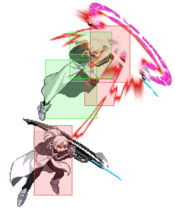
Ries rushes up and in with burning shield uppercut.
|
| A
|
Damage
|
Red Damage
|
Proration
|
Cancel
|
Guard
|
| 1500
|
1010
|
100%
|
-
|
LH
|
| First Active
|
Active
|
Recovery
|
Frame Adv
|
Circuit
|
Invuln
|
| 7
|
12
|
24
|
-18
|
13.5%
|
-
|
|
Standard DP, its hitbox is ok and there is no invincibility, you will not be using this move that much outside antiairing. Good reward on air counter hit, also exceptional active frames.
|
| B
|
Damage
|
Red Damage
|
Proration
|
Cancel
|
Guard
|
| 1500
|
1010
|
100%
|
-
|
LH
|
| First Active
|
Active
|
Recovery
|
Frame Adv
|
Circuit
|
Invuln
|
| 9
|
18
|
26
|
-26
|
13.5%
|
Full 1-8
|
|
Rises higher than the A version and has full startup invincibility but the hurtbox comes at the same time as the hitbox. If you are going to try anything for a no-meter reversal, this is your best option, but you might not want to put too much faith in this move as a reversal. The best way to use this move is after a 2B clash in order to beat out jump-ins, the reward on counter hits is great, also exceptional active frames.
|
| EX
|
Damage
|
Red Damage
|
Proration
|
Cancel
|
Guard
|
| 1000*4 (2977)
|
(2065)
|
80% (O, first hit), 100%
|
-
|
LH
|
| First Active
|
Active
|
Recovery
|
Frame Adv
|
Circuit
|
Invuln
|
| 1+6
|
20
|
26
|
-26
|
-100.0%
|
Full 1-8
|
|
Actually a reversal unlike the other ones, and has really high damage, especially as a reversal. Mainly used to seal rounds due to how easy it is to shield it on reaction, however, you might still catch people off guard if they're staggering with B or C normals.
|
|
|
|
| A
|
Damage
|
Red Damage
|
Proration
|
Cancel
|
Guard
|
| 707
|
505
|
80% (O)
|
-EX-, (J)
|
LH
|
| First Active
|
Active
|
Recovery
|
Frame Adv
|
Circuit
|
Invuln
|
| 10
|
6
|
12
|
0
|
6.3%
|
-
|
|
Mainly used as a launcher after 2C.
|
| [A] (Max)
|
Damage
|
Red Damage
|
Proration
|
Cancel
|
Guard
|
| 1200
|
808
|
60% (M)
|
(EX)
|
LH
|
| First Active
|
Active
|
Recovery
|
Frame Adv
|
Circuit
|
Invuln
|
| 32
|
2
|
21
|
-5
|
6.3%
|
-
|
|
You're better off ignoring this move. Half charge can be used but why would you. Wallslams on hit, awful reward on hit and block.
|
| B
|
Damage
|
Red Damage
|
Proration
|
Cancel
|
Guard
|
| 600
|
404
|
70% (O)
|
-EX-, (J)
|
LH
|
| First Active
|
Active
|
Recovery
|
Frame Adv
|
Circuit
|
Invuln
|
| 9
|
2
|
23
|
-7
|
5.4%
|
-
|
|
Wallslams on hit and can be jump cancelled. Used in combos and frametraps after long range 6C where no other move would reach.
|
| [B] (Max)
|
Damage
|
Red Damage
|
Proration
|
Cancel
|
Guard
|
| 600*3 (1399)
|
(941)
|
70% (O)
|
(EX)
|
LH
|
| First Active
|
Active
|
Recovery
|
Frame Adv
|
Circuit
|
Invuln
|
| 36
|
14
|
7
|
4 ~ 1
|
5.4%*3 (16.2%)
|
-
|
|
Good on block, wallslams on hit like the uncharged version, but is extremely easy to shield on reaction considering the only other move that uses a similar animation is 214[A] which also has to be stand shielded. Rarely used, mainly as a knowledge check.
|
| C
|
Damage
|
Red Damage
|
Proration
|
Cancel
|
Guard
|
| 1000
|
808
|
60% (O)
|
-EX-, (J)
|
H
|
| First Active
|
Active
|
Recovery
|
Frame Adv
|
Circuit
|
Invuln
|
| 28
|
2
|
16
|
0
|
9.0%
|
-
|
|
This version becomes a somewhat slow, but deceptive overhead; because there is no charge flash it is not that easy to read. On hit, you can IH, 236C, or AD/AAD to maximize damage. This version is not chargeable however.
|
|
Arc Drive
|
|
| Damage
|
Red Damage
|
Proration
|
Cancel
|
Guard
|
| 800*6, 2500 (3626)
|
(3065)
|
50% (O)
|
-
|
LH
|
| First Active
|
Active
|
Recovery
|
Frame Adv
|
Circuit
|
Invuln
|
| 2+10
|
21
|
35
|
-20
|
removes all
|
-
|
|
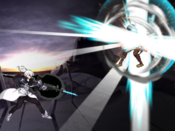
Ries' Arc Drive. A thrust with the Shield that is much like Ciel's Arc Drive from MBAC. It is quite strong so use it in IH combos. Dubious as a reversal because it's even worse than the other options due to how slow it is. You can also use it on reaction against projectiles. Gives you a safejump.
|
|
Another Arc Drive
|
|
| Damage
|
Red Damage
|
Proration
|
Cancel
|
Guard
|
| 1200, 7500 (4832)
|
(3483)
|
50% (O)
|
-
|
LH
|
| First Active
|
Active
|
Recovery
|
Frame Adv
|
Circuit
|
Invuln
|
| 3+11
|
18
|
36
|
-10 ~ 8
|
removes all
|
Full 1-31
|
|
Thrusts Gamaliel forward similar to her Arc Drive, hitgrabs the opponent in for a single hit of big damage. Stronger than the AD and moves a bit further. Gives you enough time to hop over in the mirror match, otherwise you can just safejump.
|
|
Last Arc
|
|
| Damage
|
Red Damage
|
Proration
|
Cancel
|
Guard
|
| 550*19, 2000 (4000 ~ 7500)
|
(3500 ~ 6500)
|
50% + 50% * remaining BH time
|
-
|
U
|
| First Active
|
Active
|
Recovery
|
Frame Adv
|
Circuit
|
Invuln
|
| 0
|
1+0
|
61
|
-
|
removes all
|
-
|
|
One of the best Last Arcs thanks to its fullscreen hitbox, but being 1f active and instant means it'll whiff against opponents in the middle of an invincible move more easily.
|
|
MBAACC Navigation
