Character Page Progress
This page is still a work in progress, consider joining as an editor to help expand it. Please update this character's roadmap page when one of the editing goals have been reached.
| In Progress |
To-do
|
- Overview
- (Add a short summary with what type of playstyle can be associated with H-Roa?)
|
|
Additional Resources
H-Roa Match Video Database
Melty Bits: H-Roa
H-Roa Tutorial by sibladeko (tonberry)
Notable Players
| Name |
Color
|
Region |
Common Venues |
Status |
Details
|
| grungrah |

|
North America |
Chicago Melty, Netplay |
Inactive |
|
| Janson (Jアンソン) |

|
Japan |
A-cho |
Inactive |
|
| Red Melon (赤いメロン) |

|
Japan |
Play Spot BIG ONE 2nd |
Active |
Known mostly for C-Roa, but also proficient with a secondary H-Roa. Mostly uses H to fight Nero.
|
| tamao (たまお) |

|
Japan |
A-cho |
Inactive |
Uses multiple colors.
|
| TonberryMage |

|
North America |
|
Inactive |
Was one of the very best players in the NA scene while active. Not a lot of footage.
|
Overview
Playstyle
 H-Roa is a simple but effective 'all-rounder' with excellent space control tools and well rounded offense. H-Roa is a simple but effective 'all-rounder' with excellent space control tools and well rounded offense. |
| Pros |
Cons |
- Strong Neutral: Aside from Roa's universally strong mobility and normals, H-Roa can control screen space with 214X, and can catch falling airborne opponents with 236A.
- Good Offense: Reverse Beat, strong reset options and a lot of forward-advancing normals let H-Roa stay on the offensive for a long time, should the opponent not contest.
- Effective Meter Usage: H-Roa has overall great uses for meter. Half Moon Bunker to escape pressure, 236C to end combos, and 214C as a multi-purpose move.
- Stable, Consistent Gameplan: H-Roa is easy to learn and his tools are consistent enough to reliably challenge a few top tiers, most notably Nero.
|
- Linear Mix: H-Roa lacks reliable mixup options to open up opponents. He has to rely on either risky resets with 236B and 6C or strike/throw to open up his opponents.
- Meter Hungry: Despite his wealth of excellent EX moves, H-Roa's combos have subpar metergain, even if you decide to forgo oki entirely.
|
General Gameplan
H-Roa is a simple to learn, but overall strong character with the tools to deal with most situations. His neutral is strong, sporting a long ranged poke in 214B, and he can quickly catch whiffed pokes and landings with 236A. Once he gets his opponent to block, he can effortlessly keep resetting pressure thanks to his infamous 236B and on-block jump cancellable 6C as ways to stay in. He can use meter to make his already powerful offense even stronger with 214C, and it also gives him some leeway on defense thanks to having Half Moon Bunker. Unfortunately, his actual mixup game is not very strong. He relies on pressure resets in order to open up opponents unless he wants poor reward from strike/throw. A majority of his combos also don't grant a lot of meter for him, which makes managing meter important for this character.
Neutral
Roa's neutral is considerably good, featuring very good poking tools for space control and strong overall movement thanks to his fast dashes. His 236A sports very good startup for it's reach and usability, being able to punish many things at long range, most infamously being able to interrupt or punish Nero's summons on reaction, and his 214A/B cover good angles whilst being air-unblockable. While his ground-to-air game is decent, it requires either a 214A/B or a rising j.A. j.A is less committal, as it's quick to start and recover. The reward from a CH 214A/B is strong, but in order to use it as an anti-air it must be used pre-emptively. You'll use your aerial buttons a lot to control the ground, so get used to j.A for air to airs and j.B to protect space. 236A/B are air-unblockable, so you can catch opponents who are falling from a jump. Also, fair to note, if you get a regular 214A/B hit, you can link into 236C. Incredibly important should an opponent not get CH, but you still want the hard knockdown. 214C is also an option that can easily lockdown neutral, if not outright skip it entirely. This can lead into 2 situations: you force the opponent into a risky approach, or they respect it and you get to start your pressure.
Pressure
Once you get your opponent to block, it's time to go crazy. This is H-Roa's ace in the hole. Whilst he may lack any actual mixup from his pressure, he gains the ability to reset it at will thanks to 2 moves: 6C and 236B. 236B is infamous, being H-Roa's most hated move. Once you get a good knockdown with 236A, you'll more often than not time this to hit meaty and start your relentless pressure. If they just keep respecting you, your aim is then to reset them over and over to either break their guard bar, or force them to act to avoid guard break.
Unfortunately, the opponent can just hold up and jump over your 236B on reaction. To condition the opponent to not do that, you can do a lot of things:
- Delayed 6C and 6[C] can catch anyone trying to jump, even when pushed out a bit
- A blocked 6C jump cancelled into IAD j.B can catch opponents trying to jumping out of pressure or force them to block and lead back into a pressure string, even if they hold 7 to jump after blockstun ASAP. If j.B forces them down from high enough, this can go into an air unblockable 5A/5B.
- Delayed 214B will also do fine, but net no reward if you don't spend meter to confirm into 236C.
- At times, you can try reverse beating into 5A/2A and IADing into an air throw or an air combo.
Once the opponent is conditioned to not jump out, you can jump cancel 6C and IAD into a j.B or j.C to reset and continue your pressure, and even rebeat those air buttons to j.A for a double overhead too. If this is the case, more skillful opponents will try to Shield your j.B/j.C. If they get too Shield happy, do an empty air dash to make them whiff their Shield.
As a Half-Moon, meter management is important so you don't go into Heat, get hit once, and lose everything. 214C is great for that purpose. You can get a whole second of plus frames, should everything be spaced properly. Far more than enough to continue your blockstring.
Okizeme
His oki is sadly nothing to write home about. You can do the basic stuff; netural jump drifts, crossups, tick throws, sandooris, you name it. It's just not stuff that's exclusive to him. Most of the time, you will just time your 236B to hit meaty and call it a day, but he does have options if you want to keep your opponent guessing.
Defense
Defense is cut and dry if you don't have meter. Blocking is usually a good option, since you do not have to risk much whilst doing so. If you really want to get out of pressure without spending meter, 623B is a quick reversal with full invuln. If you do notice a gap in the opponent's pressure, 2A is a good, albiet stubby abare option. With meter, however, you gain access to Half Moon Bunker as arguably his best "get off me" move. It is quite expensive, costing 100% meter, but if you are really desperate to escape pressure then don't be afraid to use it. If it does land, you get a hard knockdown, which is huge because you can meaty with 236B. You can also use 623C as a reversal option, which sports faster startup (2+0, compared to 623B's first active frame at frame 4), higher damage, and a wallbounce, allowing you to return to neutral. It's risky and costs just as much as Bunker, though, so if you do use it make sure you can land it if possible.
Combos
| Combo Notation Help
|
Disclaimer: Combos are written by various writers, so the actual notation used in pages can differ from the standard one.
For more information, see Glossary and Controls.
|
| X > Y
|
X input is cancelled into Y.
|
| X > delay Y
|
Must wait for a short period before cancelling X input into Y.
|
| X, Y
|
X input is linked into Y, meaning Y is done after X's recovery period.
|
| X+Y
|
Buttons X and Y must be input simultaneously.
|
| X/Y
|
Either the X or Y input can be used.
|
| X~Y
|
This notation has two meanings.
- Use attack X with Y follow-up input.
- Input X then within a few frames, input Y. Usually used for option selects.
|
| X(w)
|
X input must not hit the opponent (Whiff).
|
| j.X
|
X input is done in the air, implies a jump/jump cancel if the previous move was done from the ground.
Applies to all air chain sections:
- Assume a forward jump cancel if no direction is given.
- Air chains such as j.A > j.B > j.C can be shortened to j.ABC.
|
| sj.X
|
X input is done after a super jump. Notated as sj8.X and sj9.X for neutral and forward super jumps respectively.
|
| dj.X
|
X input is done after a double jump.
|
| sdj.X
|
X input is done after a double super jump.
|
| tk.X
|
Stands for Tiger Knee. X motion must be buffered before jumping, inputting the move as close to the ground as possible. (ex. tk.236A)
|
| (X)
|
X is optional. Typically the combo will be easier if omitted.
|
| [X]
|
Input X is held down. Also referred to as Blowback Edge (BE). Depending on the character, this can indicate that this button is held down and not released until indicated by the release notation.
|
| ]X[
|
Input X is released. Will only appear if a button is previously held down. This type of input is referred to as Negative Edge.
|
| {X}
|
Button X should only be held down briefly to get a partially charged version instead of the fully charged one.
|
| X(N)
|
Attack "X" should only hit N times.
|
| (XYZ)xN
|
XYZ string must be performed N times. Combos using this notation are usually referred to as loops.
|
| (XYZ^)
|
A pre-existing combo labelled XYZ is inserted here for shortening purposes.
|
| CH
|
The first attack must be a Counter Hit.
|
| Air CH
|
The first attack must be a Counter Hit on an airborne opponent.
|
| 66
|
Performs a ground forward dash.
|
| j.66
|
Performs an aerial forward dash, used as a cancel for certain characters' air strings.
|
| IAD/IABD
|
Performs an Instant AirDash.
|
| AT
|
Performs an Air Throw. (j.6/4A+D)
|
| IH
|
Performs an Initiative Heat.
|
| AD
|
Performs an Arc Drive.
|
| AAD
|
Performs an Another Arc Drive.
|
IMPORTANT NOTE ABOUT ALL COMBOS LISTED: Only AT enders are listed. Any combo which ends in an airthrow can also end in j.236B or j.236C. j.236B only beats AT for damage if all three hits connect, and you must sdj to land all three. Combos can be done at any position on the stage unless otherwise specified.
Normal Combos
| Condition
|
Notation
|
Damage
vs V.Sion
|
Notes
|
|
| Normal starter, grounded opponent
|
- 2A > 5B > 2B > 5C(1) > 5A6AA > 6[C] > 236A
|
3534
|
| |
| Meter Gained: 46.5% |
Meter Given (vs C-Moon): 19.9% |
| Standard combo for okizeme. Allows for meaty 236B. Can be done off 2A, j.B, or j.C, but 5A can whiff if the j.B/j.C isn't close enough. |
|
|
| Normal starter, grounded opponent
|
- 5B > 2B > 5C(1) > 5A6AA > 6C > j.BC > j.BC > AT
|
4339
|
| |
| Meter Gained: 52.8% |
Meter Given (vs C-Moon): 22.6% |
| Standard combo without the 6[C] link. |
|
|
| Normal starter, grounded opponent
|
- 5B > 2B > 5C(2) > 6C > 236A
|
3213
|
| |
| Meter Gained: 32.2 |
Meter Given (vs C-Moon): 13.8 |
| Use if you're too far away for 5A6AA to land, most notably if you land 5B from it's maximum range. |
|
|
| Normal starter, grounded opponent
|
- 2A > 5B > 2B > 5C(1) > 5A6AA > 6[C] > 214A, j.BC > dj.BC > AT
|
4722
|
| |
| Meter Gained: 64.7 |
Meter Given (vs C-Moon): 27.7 |
| AT => 214B isn't airtight but will force an opponent to block if they lack a good reversal (beats out several DPs, notably most Nanaya DPs). If you're struggling to land the first j.B, hold 8/9 after the 214A and input j.B as soon as you're off the ground. |
|
|
| 236B starter, grounded opponent
|
- 236B, 2A > 5B > j.BC > dj.BC > AT
|
4410
|
| |
| Meter Gained: 38.1% |
Meter Given (vs C-Moon): 16.3% |
| 236B pickup. You can replace 2A > 5B with 5B > 6C for extra damage, but it requires a sdj to work on some characters and is significantly tighter. |
|
|
| CH starter, grounded/air opponent
|
- (214A/B), (2C >) 6C > j.BC > dj.BC > AT
|
3706
|
| |
| Meter Gained: 42.0% |
Meter Given (vs C-Moon): 18.0% |
| Baby CH 214A/B confirm, works from basically anywhere. 2C is optional, but makes the combo easier to land. Removing it adds 200 damage & slightly less meter. |
|
|
| CH starter, grounded/air opponent
|
- (214A/B), 6[C] > delay 214A/B, j.BC > dj.BC > AT
|
4571
|
| |
| Meter Gained: 45.5% |
Meter Given (vs C-Moon): 19.5% |
| Slightly harder confirm. You can do this off aerial hits that are further away. Your range is dependent upon the range you can land 6[C] at. |
|
|
| CH starter, grounded/air opponent
|
- (214A/B), 6[C], 5A > 6C > j.BC > dj.BC > AT
|
4598
|
|
| Meter Gained: 47.6% |
Meter Given (vs C-Moon): 20.4% |
(Video) |
| 6[C] > 5A is a link. You can only do this if you're within 5A range or closer (roughly the same range as 214A). Hit the 6[C] above the middle of its hitbox so the opponent pops up enough for your 5A to land. If this explanation doesn't make sense, look at the video. |
|
|
| CH starter, grounded/air opponent
|
- (214A/B), 236B > 5B > 6C > j.CB > dj.BC > AT
|
4825
|
| |
| Meter Gained: 50% |
Meter Given (vs C-Moon): 21.4% |
236B should be done quickly for 5B to work, otherwise 2A is also good.
j.CB dj.BC route does more dmg than j.BC j.BC. |
|
|
| CH starter, grounded opponent
|
- CH 236B, 6C > j.BC > dj.BC > AT
|
5150
|
| |
| Meter Gained: 39.2% |
Meter Given (vs C-Moon): 16.8% |
| CH 236B confirm. You can add a 2A in for more stability, but you lose 500 damage. You can also do this route off an air CH 236A most of the time. |
|
|
| CH starter, grounded opponent
|
- 6[C] > IAD 9 j.C, land j.BC > dj.BC > AT
|
4958
|
| |
| Meter Gained: 38.1% |
Meter Given (vs C-Moon): 16.3% |
| CH 6[C] confirm. IAD 8/9 will work, IAD 7 won't. You have to do this immediately following the 6[C] otherwise it'll drop. If you didn't get the CH, you have enough time to do a non-236B meaty anyway, so this is worth going for whenever possible. |
|
|
| Raw Airthrow starter, airborne opponent
|
|
2061
|
| |
| Meter Gained: 12.6% |
Meter Given (vs C-Moon): 5.4% |
| gAT combo for oki. 2A must happen as soon as you hit the ground, otherwise the 236A KD is techable. |
|
|
Metered Combos
| Condition
|
Notation
|
Damage
vs V.Sion
|
Notes
|
|
Normal starter, grounded opponent
100% meter
|
- 2A > 5B > 2B > 5C(1) > 5A6AA > 6[C] > 214A, 236C
|
4671 (214A)
4516 (236A)
|
| |
| Meter Gained: 46.5% (236A), 43% (214A) - 100.0% |
Meter Given (vs C-Moon): 43.2% (236A), 41.7% (214A) |
| Meter dump BnB. Gives the best of both worlds in terms of oki and damage. You can replace 214A with 236A for less damage, but higher metergain. |
|
|
Normal starter, grounded opponent
Heat mode
|
- 2A > 5B > 2B > 5C(1) > 5A6AA > 6[C] > 236A > 41236C
|
5544
|
| |
| Meter Gained: -all% |
Meter Given (vs C-Moon): 25.1 |
| Arc Drive combo. Useful for when you are in Heat and need the extra damage to kill. Otherwise, use the route above. |
|
|
CH starter, grounded opponent
100% meter
|
- CH 214A/B, delay 6[C] > 214C, 6[C], 5A > 6C > j.BC > j.BC AT
|
5696
|
|
| Meter Gained: -66%* |
Meter Given (vs C-Moon): 29.0% |
(Video) |
| Only generates 16% before superflash. Delay the first 6[C] such that they're just barely not OTG'd by the 214C. Second 6[C] should hit as close to the end of 214C as possible. If this explanation doesn't make sense, look at the video. |
|
|
CH starter, grounded opponent
100% meter
|
- CH 214A/B, delay 6[C], 5A > 6C > 214B > 236C
|
4885
|
| |
| Meter Gained: -68% |
Meter Given (vs C-Moon): 37.4% |
| Corner only. Same rules as usual apply to the 6[C], 5A > 6C. |
|
|
Normal starter, grounded opponent
100% meter
|
- 236A > 214C, 6C > j.BC > j.BC > AT
|
4464
|
| |
| Meter Gained: -84% |
Meter Given (vs C-Moon): 20.1% |
| OTG meter dump combo off 236A, no CH required. |
|
|
Normal starter, grounded opponent
100% meter
|
- 236A > 214C, 6[C], 5A > 6C > j.BC > j.BC > AT
|
5045
|
| |
| Meter Gained: -82% |
Meter Given (vs C-Moon): 25.2% |
| Higher damage variant of the combo above. The 6[C] timing changes based on how many hits of 214C connect. |
|
|
Move Descriptions
| Frame Data Help
|
| Header
|
Tooltip
|
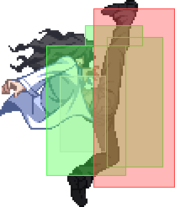
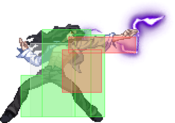
| Move Box Colors
|
Light gray = Collision Box (A move lacking one means it can go through the opponent's own collision box).
Green: Hurt Boxes.
Red: Hit(/Grab) Boxes.
Yellow: Clash Boxes (When an active hitbox strikes a clash box, the active hitbox stops being active. Multi-hit attacks can beat clash since they will still progress to the next hitbox.)
Magenta: Projectile-reflecting boxes OR Non-hit attack trigger boxes (usually).
Blue: Reflectable Projectile Boxes.
|
| Damage
|
Base damage done by this attack.
(X) denotes combined and scaled damage tested against standing V. Sion.
|
| Red Damage
|
Damage done to the recoverable red health bar by this attack. The values are inherently scaled and tested against standing V. Sion.
(X) denotes combined damage.
|
| Proration
|
The correction value set by this attack and the way it modifies the scaling during a string. See this page for more details.
X% (O) means X% Overrides the previous correction value in a combo if X is of a lower percentage.
X% (M) means the current correction value in a combo will be Multiplied by X%. This can also be referred to as relative proration.
|
| Circuit
|
Meter gained by this attack on hit.
(X%) denotes combined meter gain.
-X% denotes a meter cost.
|
| Cancel
|
Actions this move can be cancelled into.
SE = Self cancelable.
N = Normal cancelable.
SP = Special cancelable.
CH = Cancelable into the next part of the same attack (Chain in case of specials).
EX = EX cancelable.
J = Jump cancelable.
(X) = Cancelable only on hit.
-X- = Cancelable on whiff.
|
| Guard
|
The way this move must be blocked.
L = Can block crouching
H = Can block standing.
A = Can block in the air.
U = Unblockable.
|
| Startup
|
Amount of frames that must pass prior to reaching the active frames. Also referred to as "True Startup".
|
| Active
|
The amount of frames that this move will have a hitbox.
(x) denotes frame gaps where there are no hitboxes is present. Due to varied blockstuns, (x) frames are difficult to use to determine punish windows. Generally the larger the numbers, the more time you have to punish.
X denotes active frames with a duration separate from its origin move's frame data, such as projectile attacks. In this case, the total length of the move is startup+recovery only.
|
| Recovery
|
Frames that this move has after the active frames if not canceled. The character goes into one frame where they can block but not act afterwards, which is not counted here.
|
| Advantage
|
The difference in frames where you can act before your opponent when this move is blocked (assuming the move isn't canceled and the first active frame is blocked).
If the opponent uses a move with startup that is at least 2 frames less than this move's negative advantage, it will result in the opponent hitting that move.
±x~±y denotes a range of possible advantages.
|
| Invul
|
Lists any defensive properties this move has.
X y~z denotes X property happening between the y to z frames of the animations. If no frames are noted, it means the invincibility lasts through the entire move.
Invicibility:
- Strike = Strike invincible.
- Throw = Throw invincible.
Hurtbox-Based Properties:
- Full = No hurtboxes are present.
- High = Upper body lacks a hurtbox.
- Low = Lower body lacks a hurtbox.
Miscellaneous Properties
- Clash = Frames in which clash boxes are active.
- Reflect = Frames in which projectile-reflecting boxes are active.
- Super Armor = Frames in which the character can take hits without going into hit stun.
|
Normal Moves
Standing Normals
|
|
| 5A
|
Damage
|
Red Damage
|
Proration
|
Cancel
|
Guard
|
| 300
|
192
|
75% (O)
|
-SE-, -N-, -SP-, -CH-, -EX-, (J)
|
LH
|
| First Active
|
Active
|
Recovery
|
Frame Adv
|
Circuit
|
Invuln
|
| 5
|
4
|
9
|
-1
|
2.1%
|
-
|
|
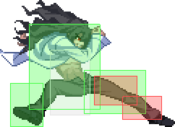
Standard mid-hitting kick. Unless you're using this for stagger pressure using 5A6A > 2A > 5A6A, you're much better off saving this for Reverse Beat.
|
| 5A~6A
|
Damage
|
Red Damage
|
Proration
|
Cancel
|
Guard
|
| 600
|
384
|
80% (M)
|
N, SP, -CH-, EX, (J)
|
LH
|
| First Active
|
Active
|
Recovery
|
Frame Adv
|
Circuit
|
Invuln
|
| 8
|
4
|
16
|
-5
|
4.2%
|
-
|
|
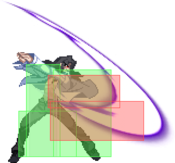
Can be used in pressure by rebeating to 2A afterwards. Better hitbox than 5A, but you lose 5A(w) in case you need to cancel a poorly spaced 5C. On the upside, it is forward advancing so it keeps your pressure going.
|
| 5A~6A~6A
|
Damage
|
Red Damage
|
Proration
|
Cancel
|
Guard
|
| 1000
|
768
|
60% (O)
|
(N), SP, EX, (J)
|
LH
|
| First Active
|
Active
|
Recovery
|
Frame Adv
|
Circuit
|
Invuln
|
| 10
|
4
|
17
|
-3
|
7.0%
|
-
|
|
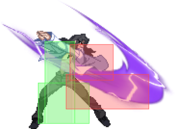
Launches on hit. Usually combo filler, but it is special cancellable, so it does not outright end your pressure.
|
|
|
|
| Damage
|
Red Damage
|
Proration
|
Cancel
|
Guard
|
| 550
|
384
|
80% (O)
|
N, SP, EX, (J)
|
LH
|
| First Active
|
Active
|
Recovery
|
Frame Adv
|
Circuit
|
Invuln
|
| 9
|
5
|
13
|
-3
|
3.85%
|
-
|
|
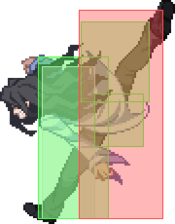
Solid normal with a slight disjoint. Can be used to combo after a regular 236B hit, but the window is tight.
|
|
|
|
| Damage
|
Red Damage
|
Proration
|
Cancel
|
Guard
|
| 400, 550 (825)
|
(548)
|
80% (O), 90% (M)
|
N, SP, EX, (J)
|
LH
|
| First Active
|
Active
|
Recovery
|
Frame Adv
|
Circuit
|
Invuln
|
| 9
|
3 (10) 7
|
14
|
-16, -3 ~ 0
|
2.8%, 3.85% (6.65%)
|
-
|
|
This button looks really cool, until you realize the second hit whiffs on most crouching hitboxes unless at point blank, and then you realize it just sucks. Hitting with the later hitbox of 5C(2) is 0 on block. You should be cancelling before the second hit in nearly every situation.
|
|
Crouching Normals
|
|
| Damage
|
Red Damage
|
Proration
|
Cancel
|
Guard
|
| 300
|
192
|
75% (O)
|
-SE-, -N-, -SP-, -EX-, (J)
|
LH
|
| First Active
|
Active
|
Recovery
|
Frame Adv
|
Circuit
|
Invuln
|
| 5
|
4
|
8
|
0
|
2.1%
|
-
|
|
Stubby mid-hitting chop, but it's good for staggers and tick throws since it's 0 on block, as well as being a good abare option. Unless you plan on staggering 5A6A > 2A > 5A6AA, use this as your redash in pressure.
|
|
|
|
| Damage
|
Red Damage
|
Proration
|
Cancel
|
Guard
|
| 550
|
336
|
80% (O)
|
N, SP, EX, (J)
|
L
|
| First Active
|
Active
|
Recovery
|
Frame Adv
|
Circuit
|
Invuln
|
| 8
|
6
|
14
|
-5
|
4.2%
|
-
|
|
A solid low poke. It's startup means you can use this out of a blocked 236B to frametrap, but obviously you have to be careful not to do this too often, as it's only airtight if your input is frame perfect, so you can get reversal'd. On the other hand, it makes for a decent frametrap & leaves both your A normals open for rebeats.
|
|
|
|
| Damage
|
Red Damage
|
Proration
|
Cancel
|
Guard
|
| 900
|
672
|
55% (O)
|
N, SP, EX, (J)
|
L
|
| First Active
|
Active
|
Recovery
|
Frame Adv
|
Circuit
|
Invuln
|
| 9
|
11
|
13
|
-6
|
6.3%
|
-
|
|
One of H-Roa's best grounded normals. With 11 active frames, you can use this to confirm off pretty much any counterhit 214X or 6C, and you can afford to be far more lenient with your timing. Dash 2C will cover a large amount of space on the ground. 2C can be used to punish any tech in the corner on reaction, and dash 2C will cover both neutral and forward tech at midscreen.
|
|
Aerial Normals
|
|
| Damage
|
Red Damage
|
Proration
|
Cancel
|
Guard
|
| 250
|
144
|
75% (O)
|
SE, N, SP, EX, J
|
LHA
|
| First Active
|
Active
|
Recovery
|
Frame Adv
|
Circuit
|
Invuln
|
| 6
|
4
|
10
|
-
|
1.75%
|
-
|
|
Strong air-to-air poke. Use this to scout in the air, control space, and more.
|
|
|
|
| Damage
|
Red Damage
|
Proration
|
Cancel
|
Guard
|
| 600
|
288
|
85%
|
N, SP, EX, J
|
HA
|
| First Active
|
Active
|
Recovery
|
Frame Adv
|
Circuit
|
Invuln
|
| 7
|
4
|
-
|
-
|
4.2%
|
-
|
|
H-Roa's best air normal. You can use this in IAD Resets to force stand block & also to tag people above you as the top of the hitbox is disjointed. You'll be using this a lot both to protect space and contest air buttons. Doesn't hit below Roa.
|
|
|
|
| Damage
|
Red Damage
|
Proration
|
Cancel
|
Guard
|
| 950
|
672
|
90% (O)
|
N, SP, EX, J
|
HA
|
| First Active
|
Active
|
Recovery
|
Frame Adv
|
Circuit
|
Invuln
|
| 8
|
4
|
-
|
-
|
6.65%
|
-
|
|
The bottom part of Roa's leg is slightly disjointed. This is your normal of choice if your opponent is below you, and your best jump-in.
|
|
Command Normals
|
|
| 6C
|
Damage
|
Red Damage
|
Proration
|
Cancel
|
Guard
|
| 1000
|
678
|
100%
|
SP, EX, J
|
LH
|
| First Active
|
Active
|
Recovery
|
Frame Adv
|
Circuit
|
Invuln
|
| 13
|
2
|
17
|
-1 (+14)
|
7.0%
|
-
|
|
+14 when jump cancelled. You can end blockstrings on this often, but be careful not to get too predictable. You can frametrap with a 214B afterwards, but if it's blocked you return to neutral.
|
| 6[C]
|
Damage
|
Red Damage
|
Proration
|
Cancel
|
Guard
|
| 1400
|
1152
|
100%
|
SP, EX, J
|
LH
|
| First Active
|
Active
|
Recovery
|
Frame Adv
|
Circuit
|
Invuln
|
| 25
|
5
|
14
|
-1 (+14)
|
9.8%
|
-
|
|
As before, +14 when jump cancelled. You can use this to catch mashing, as it's mostly disjointed. It also does significantly more guard damage.
|
|
Universal Mechanics
|
|
| Neutral
|
Damage
|
Red Damage
|
Proration
|
Cancel
|
Guard
|
| 1000
|
384
|
50%
|
-
|
U
|
| First Active
|
Active
|
Recovery
|
Frame Adv
|
Circuit
|
Invuln
|
| 3
|
1
|
20
|
-
|
0.0%
|
See desc
|
|
Ground throw. On hit, invuln during throw animation. Techable knockdown, but you can OTG off this. Use 2C to catch techs on reaction in the corner/dash 2C to catch forward/neutral tech outside the corner.
|
| ~2
|
Damage
|
Red Damage
|
Proration
|
Cancel
|
Guard
|
| 800
|
384
|
50%
|
-
|
U
|
| First Active
|
Active
|
Recovery
|
Frame Adv
|
Circuit
|
Invuln
|
| 3
|
1
|
20
|
-
|
0.0%
|
-
|
|
Does less damage, but the knockdown is untechable.
|
|
|
|
| Damage
|
Red Damage
|
Proration
|
Cancel
|
Guard
|
1600 (Raw)
1200 (Ender)
|
576
|
100%
|
-
|
U
|
| First Active
|
Active
|
Recovery
|
Frame Adv
|
Circuit
|
Invuln
|
| 2
|
1
|
12
|
-
|
0.0%
|
-
|
|
Regular airthrow. Recovery is on landing. If you do not want to return to neutral after an air combo, use this. Oki out of it is pretty bad.
|
|
|
|
| Standing
|
Damage
|
Red Damage
|
Proration
|
Cancel
|
Guard
|
| 500 (345)
|
198
|
40%
|
SP, EX, (J)
|
LHA
|
| First Active
|
Active
|
Recovery
|
Frame Adv
|
Circuit
|
Invuln
|
| 9
|
4
|
18
|
-4
|
3.5%
|
-
|
|
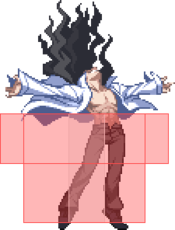
H-Roa's standing shield counter. Looks like the second hit of 5C. This applies for the other shield counters as well: "For H-Moon, shielding hits that would cause Auto Shield Counter, if the shield is successful on the first frame of the shield box, there is a 2 frame window where throw can be input after the shield." Window is 14f if it wouldn't trigger shield counter, and can also be cancelled into dash. You can manually input a shield counter with 236D on projectiles.
|
| Crouching
|
Damage
|
Red Damage
|
Proration
|
Cancel
|
Guard
|
| 1500 (1035)
|
662
|
50%
|
SP, EX, (J)
|
LA
|
| First Active
|
Active
|
Recovery
|
Frame Adv
|
Circuit
|
Invuln
|
| 9
|
4
|
18
|
-4
|
10.5%
|
-
|
|
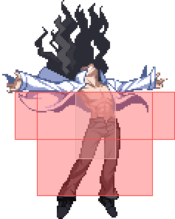
H-Roa's crouching shield counter. Looks like 2C. Same notes as above.
|
| Air
|
Damage
|
Red Damage
|
Proration
|
Cancel
|
Guard
|
| 500 (345)
|
198
|
50%
|
-
|
HA
|
| First Active
|
Active
|
Recovery
|
Frame Adv
|
Circuit
|
Invuln
|
| 9
|
4
|
-
|
+14
|
3.5%
|
-
|
|
Air shield counter.
|
|
|
|
| Neutral
|
Damage
|
Red Damage
|
Proration
|
Cancel
|
Guard
|
| 500
|
192
|
50%
|
-
|
LHA
|
| First Active
|
Active
|
Recovery
|
Frame Adv
|
Circuit
|
Invuln
|
| 26
|
4
|
19
|
-5
|
0.0%
|
Clash 1-10
|
| (Clash)
|
Damage
|
Red Damage
|
Proration
|
Cancel
|
Guard
|
| 500
|
192
|
100%
|
-
|
LHA
|
| First Active
|
Active
|
Recovery
|
Frame Adv
|
Circuit
|
Invuln
|
| 8
|
4
|
19
|
-5
|
0.0%
|
Strike 1-7
|
|
Similar to C-Moon 6C.
|
| Blockstun
|
Damage
|
Red Damage
|
Proration
|
Cancel
|
Guard
|
| 0
|
0
|
100%
|
-
|
LHA
|
| First Active
|
Active
|
Recovery
|
Frame Adv
|
Circuit
|
Invuln
|
| 19
|
3
|
22
|
-7
|
-100.0%
|
-
|
|
H-Moon specific reversal bunker.
|
|
|
|
| Ground
|
Damage
|
Red Damage
|
Proration
|
Cancel
|
Guard
|
| 100
|
0
|
100%
|
-
|
U
|
| First Active
|
Active
|
Recovery
|
Frame Adv
|
Circuit
|
Invuln
|
| 11
|
10
|
20
|
-
|
removes all
|
Full 1-39
|
| Air
|
Damage
|
Red Damage
|
Proration
|
Cancel
|
Guard
|
| 100
|
0
|
100%
|
-
|
U
|
| First Active
|
Active
|
Recovery
|
Frame Adv
|
Circuit
|
Invuln
|
| 12
|
10
|
15
|
-
|
removes all
|
Strike 1-30
|
|
Universal burst mechanic. Unlike Crescent/Full Heat activation, the hitbox and frame data doesn't vary between characters. However, you can be thrown out of this move if you input it in the air.
|
|
Special Moves
Grounded Specials
236[B] 236[B]
|
| A
|
Damage
|
Red Damage
|
Proration
|
Cancel
|
Guard
|
| 1500
|
1152
|
100%
|
-
|
LH
|
| First Active
|
Active
|
Recovery
|
Frame Adv
|
Circuit
|
Invuln
|
| 12
|
5
|
29
|
-6 to -2
|
10.5%
|
High 4-11, Full 12-27
|
|
236A is mainly used to disrespect spacing and punish whiffed normals. While it can be -6 on block, there are 5 active frames with each hitbox having an individual hitstun, so hitting with the 3rd active frame or later leaves you safe on block (5th frame if ex-guard is accounted). You should only be using this when you're sure it'll hit, since your reward off this is either low damage if you have meter, OTG 2A mash in the corner for a bit more meter and maybe a tech trap, or 236B oki. However, this move is air unblockable, and therefore your go-to for sniping landings and other reads.
|
| B
|
Damage
|
Red Damage
|
Proration
|
Cancel
|
Guard
|
| 1500
|
1152
|
100%
|
-
|
LH
|
| First Active
|
Active
|
Recovery
|
Frame Adv
|
Circuit
|
Invuln
|
| 32*
|
5
|
13
|
7 to 11
|
10.5%
|
High 7-31, Full 32-47
|
|
The infamous 236B Soko. Holding B can delay the startup to up to 42f, depending on how long B is held. H-Roa's simple, but effective pressure reset. The move that makes people hate your character. At +7 on block, this special can be used to reset, start pressure, and gives H-Roa some of his best meterless damage on a CH. This will also cross up your opponent if used near max range.
|
| [B]
|
Damage
|
Red Damage
|
Proration
|
Cancel
|
Guard
|
| -
|
-
|
-
|
-
|
-
|
| First Active
|
Active
|
Recovery
|
Frame Adv
|
Circuit
|
Invuln
|
| 20
|
X
|
16
|
-
|
-
|
-
|
|
This is the feint. You can use this in your pressure to redash, as a way to fake people out who expect 236B. You can also use this as a (gimmicky) oki setup, where you do 236[B] 2A, 236[B] throw, or 236{B}. If they start throw teching, use 236[B] 5B to call it out. You mainly use this move for mind games, as it has a decent amount of recovery.
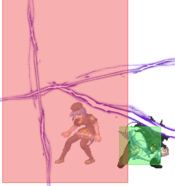
|
| EX
|
Damage
|
Red Damage
|
Proration
|
Cancel
|
Guard
|
| 400, 300*20 (3043)
|
(3195)
|
50% (O)
|
-
|
LHA
|
| First Active
|
Active
|
Recovery
|
Frame Adv
|
Circuit
|
Invuln
|
| 5+7
|
120
|
26
|
-24
|
-100.0%
|
High 3-11, Full 12-132
|
|
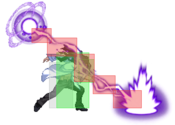
This move looks very similar to C/H-Ciel's 236C, but it doesn't have full invuln. Use this to punish a lot of situations where opponent uses some kind of projectile. This move is also good for catching whiffed pokes with long recovery. It can also be used as a combo ender to get the best of both worlds for oki and damage.
|
|
|
|
| A
|
Damage
|
Red Damage
|
Proration
|
Cancel
|
Guard
|
| 500, 1000 (1351)
|
(1038)
|
100%
|
-EX-
|
LH
|
| First Active
|
Active
|
Recovery
|
Frame Adv
|
Circuit
|
Invuln
|
| 5
|
7
|
42
|
-31, -27
|
2.1%, 7.0% (9.1%)
|
-
|
|
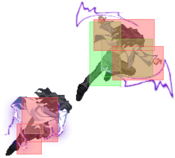
A fast, albiet outclassed anti-air. Both of it's hits are air unblockable, but in reality you are better off with either rising j.A or 214A/B to catch an opponent in the air. As such, this move does not see a lot of use.
|
| B
|
Damage
|
Red Damage
|
Proration
|
Cancel
|
Guard
|
| 500*3, 1000 (2133)
|
(1639)
|
100%
|
-
|
LH (1), LHA (2-4)
|
| First Active
|
Active
|
Recovery
|
Frame Adv
|
Circuit
|
Invuln
|
| 4
|
12
|
46
|
-40, -36,
-32, -30
|
2.1%*3, 7.0% (13.3%)
|
Full 1-5
|
|
H-Roa's meterless reversal, has full invuln. Only the first hit is air unblockable, but you can use this like you would any other DP. Goes at a decent angle. You can use this to tack on damage after your OTG ground throw if you really need the extra damage to kill.
|
| EX
|
Damage
|
Red Damage
|
Proration
|
Cancel
|
Guard
|
| 400*6, 1000 (2706)
|
(1982)
|
100%
|
-
|
LH
|
| First Active
|
Active
|
Recovery
|
Frame Adv
|
Circuit
|
Invuln
|
| 2+0
|
25
|
44
|
-58 (min)
|
-100.0%
|
Full 1-4
|
|
Essentially a better version of 623B, with faster startup, higher damage and a wallslam which allows you to return to neutral, whilst being completely air unblockable and maintaining invincibility. Notably, the 2+0 startup means this cannot be safejumped by C/H-Moon characters unless their safejump outspaces it.
|
|
|
|
| A/B
|
Damage
|
Red Damage
|
Proration
|
Cancel
|
Guard
|
| 1000
|
768
|
70% (O)
|
-
|
LH
|
| First Active
|
Active
|
Recovery
|
Frame Adv
|
Circuit
|
Invuln
|
| 16
|
12
|
14
|
-4
|
7.0%
|
-
|
|
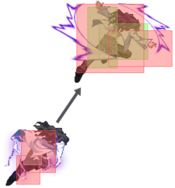
214A will cover behind you, 214B will cover the air. This special is good and once again gives you very solid damage, particularly on air CH. Air unblockable, use 214A to preemptively anti-air and use 214B as a poke. Be aware of its significant startup and recovery, because you can be hit out of startup easily, and opponents can whiff punish you if they have particularly long-reaching normals (Satsuki dash 2C, for example).
|
| EX
|
Damage
|
Red Damage
|
Proration
|
Cancel
|
Guard
|
| 450*8 (2867)
|
(2427)
|
100%
|
-
|
LH
|
| First Active
|
Active
|
Recovery
|
Frame Adv
|
Circuit
|
Invuln
|
| 5+13
|
X (55)
|
16
|
12 ~ 61
|
-100.0%
|
-
|
|
A multi-purpose move that can be used effectively in multiple ways. You can use it in neutral for lockdown or to force a risky approach from your opponent, you can use it in pressure as a safe meter dump and a pressure reset, and you can use it to extend combos for extra damage. It also recovers during active frames, making it hard to punish. Get used to spending your meter with this move a ton.
|
|
Aerial Specials
|
|
| A
|
Damage
|
Red Damage
|
Proration
|
Cancel
|
Guard
|
| 800
|
480
|
75% (O)
|
(EX), (J)
|
LHA
|
| First Active
|
Active
|
Recovery
|
Frame Adv
|
Circuit
|
Invuln
|
| 12
|
3
|
3
|
3 (TK)
|
5.6%
|
-
|
|
Slow for an air-to-air, but can be used to change your momentum to throw off landing snipes. Be careful though, because this move doesn't cover above or below you, and leaves you open to punishes if you whiff it too high. However, it's plus on TK, so you can do tk.236A in pressure and stay safe. Also, you can link it in certain air combos with j.BC j.236a sdj j.BC AT for style points. Use this at the end of your combos to return to neutral, but be aware it's a bit more height-sensitive than j.236B. However, it has less landing recovery.
|
| B
|
Damage
|
Red Damage
|
Proration
|
Cancel
|
Guard
|
| 700*3 (1579)
|
(866)
|
75% (O)
|
EX, J
|
LHA
|
| First Active
|
Active
|
Recovery
|
Frame Adv
|
Circuit
|
Invuln
|
| 15
|
3 (3) 3 (3) 3
|
9
|
-1 (TK)
|
4.9%*3 (14.7%)
|
-
|
|
This move looks really bad on paper. It's slower than j.236A, has more recovery, and gives your opponent more time to react. However: it requires 3 individual shields AND it covers above and below you, while j.236A doesn't. You can use this to catch people trying to antiair you at weird angles since it's disjointed. Use this at the end of your combos to return to neutral, while leaving your opponent in an awkward situation.
|
| EX
|
Damage
|
Red Damage
|
Proration
|
Cancel
|
Guard
|
| 400*6 (1591)
|
(1145)
|
75% (O)
|
-
|
LHA
|
| First Active
|
Active
|
Recovery
|
Frame Adv
|
Circuit
|
Invuln
|
| 3+11
|
12
|
6
|
5 (TK)
|
-100.0%
|
Full 1-25
|
|
This is a true air reversal. With that said, it's metered on a Half Moon character with subpar meter gain. You can use this to tack on extra damage at the end of an air combo. It covers slightly more room than j.236B, and it's +5, but the pushback means that you can't really use it like you would with j.236A. It does require individual shields for any players crazy enough to go for it.
|
|
Arc Drive
|
|
| Damage
|
Red Damage
|
Proration
|
Cancel
|
Guard
|
| 7000 (3080)
|
(2137)
|
50% (O)
|
-
|
LH
|
| First Active
|
Active
|
Recovery
|
Frame Adv
|
Circuit
|
Invuln
|
| 7+6
|
2
|
38
|
-15
|
removes all
|
Full 7-8, 13-14
|
|
Used as a high damage combo ender or as an OTG, otherwise not really notable since it's a hitgrab. If you combo someone when you are in Heat and need the extra damage to get a kill, this is what you should be going into.
|
|
Character specific notes
| Character |
Raw 236C follow-up midscreen
|
| Aoko |
2A 2C. Can 5A6AA.
|
| Tohno |
2A 2C. Can 5A6AA.
|
| Hime |
2A 6C or 2A 236A.
|
| Nanaya |
2A 2C. Can 5A6AA.
|
| Kouma |
2A 2C. Can 5A6AA.
|
| Miyako |
2A 2C. Can 5A6AA.
|
| Ciel |
2A 2C. Can 5A6AA.
|
| Sion |
Only in the corner.
|
| Ries |
2A 6C or 2A 236A.
|
| VSion |
Only in the corner.
|
| Wara |
2A 6C or 2A 236A.
|
| Roa |
2A 2C. Can 5A6AA.
|
| Akiha |
2A 6C or 2A 236A.
|
| Arc |
2A 2C. Can't 5A6AA.
|
| PCiel |
2A 2C. Can 5A6AA.
|
| WArc |
2A 6C or 2A 236A.
|
| VAkiha |
2A 6C or 2A 236A.
|
| Mech |
2A 2C. Can 5A6AA.
|
| Seifuku |
2A 6C or 2A 236A.
|
| Satsuki |
2A 6C or 2A 236A.
|
| Len |
2A 6C or 2A 236A.
|
| Ryougi |
2A 2C. Can 5A6AA.
|
| WLen |
2A 2C. Can 5A6AA.
|
| Nero |
2A 2C 2A 2C. Can 5A6AA.
|
| NAC |
2A 2C. Can 5A6AA.
|
| Hisui |
2A 6C or 2A 236A.
|
| Neco |
2A 2C. Can 5A6AA.
|
| Kohaku |
2A 2C. Can 5A6AA.
|
MBAACC Navigation


