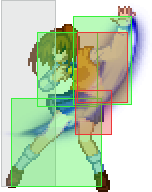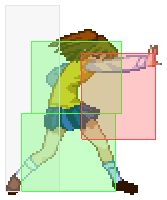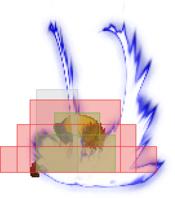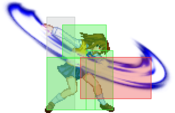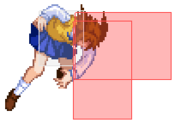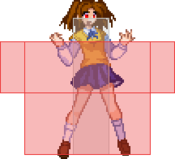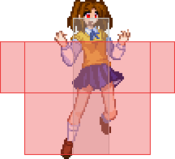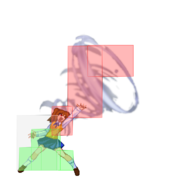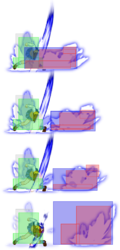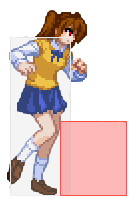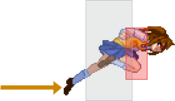
Name: Satsuki Yumizuka (弓塚 さつき)
Nicknames: Sacchin
Voiced by: Omi Minami (南 央美)
Type: Dead Apostle
Gender: Female
Birthday: Aug 15
Sizes: 79 / 59 / 82
Height: 161cm
Weight: 45kg
Eye Color: Red
Hair Color: Brown
Overview
Playstyle
|
H-Satsuki is an extremely well-rounded rushdown character. Her execution can be exactly as easy or as hard as whoever is piloting her desires.
Compared to F-Satsuki and C-Satsuki, H-Satsuki has faster movement and can chain her air normals, allowing a more fluid neutral. |
| Pros |
Cons |
- Strong Pressure Afforded by a jump cancellable 214A, a throw that actually hard knockdowns, a fast ground dash, and reaching normals.
- Good Buttons for All Game States Pressure, defense, or neutral. H-Satsuki is never left lacking.
- Suite of Anti-Air Tools 5A, 5C, and of course 623C.
- Meter Control H-Satsuki always has something she can spend meter on to stay out of Heat until she's ready.
|
- Restrictive Okizeme She has to sacrifice meter and/or damage to even get a meaty outside the corner.
- Corner Carry Barring the advanced routes, her normal midscreen BnB gives mediocre corner carry.
|
Move Descriptions
| Frame Data Help
|
| Header
|
Tooltip
|
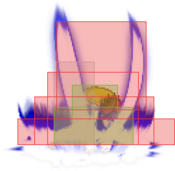
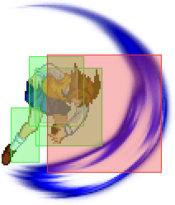
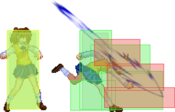
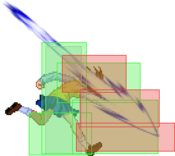
| Move Box Colors
|
Light gray = Collision Box (A move lacking one means it can go through the opponent's own collision box).
Green: Hurt Boxes.
Red: Hit(/Grab) Boxes.
Yellow: Clash Boxes (When an active hitbox strikes a clash box, the active hitbox stops being active. Multi-hit attacks can beat clash since they will still progress to the next hitbox.)
Magenta: Projectile-reflecting boxes OR Non-hit attack trigger boxes (usually).
Blue: Reflectable Projectile Boxes.
|
| Damage
|
Base damage done by this attack.
(X) denotes combined and scaled damage tested against standing V. Sion.
|
| Red Damage
|
Damage done to the recoverable red health bar by this attack. The values are inherently scaled and tested against standing V. Sion.
(X) denotes combined damage.
|
| Proration
|
The correction value set by this attack and the way it modifies the scaling during a string. See this page for more details.
X% (O) means X% Overrides the previous correction value in a combo if X is of a lower percentage.
X% (M) means the current correction value in a combo will be Multiplied by X%. This can also be referred to as relative proration.
|
| Circuit
|
Meter gained by this attack on hit.
(X%) denotes combined meter gain.
-X% denotes a meter cost.
|
| Cancel
|
Actions this move can be cancelled into.
SE = Self cancelable.
N = Normal cancelable.
SP = Special cancelable.
CH = Cancelable into the next part of the same attack (Chain in case of specials).
EX = EX cancelable.
J = Jump cancelable.
(X) = Cancelable only on hit.
-X- = Cancelable on whiff.
|
| Guard
|
The way this move must be blocked.
L = Can block crouching
H = Can block standing.
A = Can block in the air.
U = Unblockable.
|
| Startup
|
Amount of frames that must pass prior to reaching the active frames. Also referred to as "True Startup".
|
| Active
|
The amount of frames that this move will have a hitbox.
(x) denotes frame gaps where there are no hitboxes is present. Due to varied blockstuns, (x) frames are difficult to use to determine punish windows. Generally the larger the numbers, the more time you have to punish.
X denotes active frames with a duration separate from its origin move's frame data, such as projectile attacks. In this case, the total length of the move is startup+recovery only.
|
| Recovery
|
Frames that this move has after the active frames if not canceled. The character goes into one frame where they can block but not act afterwards, which is not counted here.
|
| Advantage
|
The difference in frames where you can act before your opponent when this move is blocked (assuming the move isn't canceled and the first active frame is blocked).
If the opponent uses a move with startup that is at least 2 frames less than this move's negative advantage, it will result in the opponent hitting that move.
±x~±y denotes a range of possible advantages.
|
| Invul
|
Lists any defensive properties this move has.
X y~z denotes X property happening between the y to z frames of the animations. If no frames are noted, it means the invincibility lasts through the entire move.
Invicibility:
- Strike = Strike invincible.
- Throw = Throw invincible.
Hurtbox-Based Properties:
- Full = No hurtboxes are present.
- High = Upper body lacks a hurtbox.
- Low = Lower body lacks a hurtbox.
Miscellaneous Properties
- Clash = Frames in which clash boxes are active.
- Reflect = Frames in which projectile-reflecting boxes are active.
- Super Armor = Frames in which the character can take hits without going into hit stun.
|
Normal Moves
Standing Normals
|
|
| 5A
|
Damage
|
Red Damage
|
Proration
|
Cancel
|
Guard
|
| 250
|
144
|
75% (O)
1 Hit
|
-SE-, -N-, -SP-, -CH-, -EX-, (J)
|
LH
|
| First Active
|
Active
|
Recovery
|
Frame Adv
|
Circuit
|
Invuln
|
| 4
|
3
|
9
|
0
|
1.96%
|
-
|
|
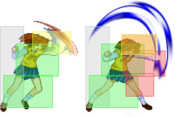
Good face smacker with decent range for its startup. Neutral on block. Acceptable anti-air against many less disjointed jump-ins.
|
| 5A~6A
|
Damage
|
Red Damage
|
Proration
|
Cancel
|
Guard
|
| 600
|
384
|
80% (M)
1 Hit
|
N, SP, -CH-, EX, (J)
|
LH
|
| First Active
|
Active
|
Recovery
|
Frame Adv
|
Circuit
|
Invuln
|
| 8
|
4
|
16
|
-5
|
4.2%
|
-
|
|
Second hit of 6AAA, forward momentum and -5f on block.
|
| 5A~6A~6A
|
Damage
|
Red Damage
|
Proration
|
Cancel
|
Guard
|
| 1000
|
768
|
60% (O)
2 Hits
|
(N), SP, EX, (J)
|
LH
|
| First Active
|
Active
|
Recovery
|
Frame Adv
|
Circuit
|
Invuln
|
| 10
|
4
|
14
|
0
|
7.0%
|
-
|
|
Third hit of 6AAA, special and super cancel only when blocked. Neutral on block with massive pushback.
|
|
|
|
| Damage
|
Red Damage
|
Proration
|
Cancel
|
Guard
|
| 700
|
403
|
100%
1 Hit
|
N, SP, EX, (J)
|
LH
|
| First Active
|
Active
|
Recovery
|
Frame Adv
|
Circuit
|
Invuln
|
| 9
|
7
|
15
|
-7
|
7.2%
|
-
|
|
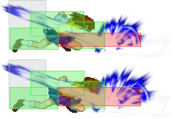
Satsuki's version of a sword normal, sort of.
- Lots of range and forward movement, plus 100% proration, make it exceptionally good in pressure and combos. Using this move is often only slightly worse, and much safer, than redashing after a pressure reset.
- It's less useful in neutral than it looks, because the forward movement is usually unnecessary with her dash, and the total duration is long on whiff. The hitbox is also deceptively low to the ground, so it's poor at catching people who just jumped in comparison to 5A or 5C.
- Often used to OTG after 623B in combos.
|
|
|
|
| 5C
|
Damage
|
Red Damage
|
Proration
|
Cancel
|
Guard
|
| 850
|
672
|
90% (O)
1 Hit
|
N, SP, EX, (J)
|
LH
|
| First Active
|
Active
|
Recovery
|
Frame Adv
|
Circuit
|
Invuln
|
| 10
|
5
|
14
|
-1
|
5.95%
|
Clash 8-14
|
|
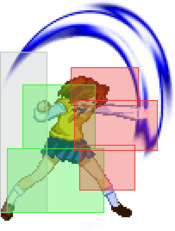
Great upwards poke, a bit slow on startup but has clash. Minor forward momentum.
|
| 5[C]
|
Damage
|
Red Damage
|
Proration
|
Cancel
|
Guard
|
| 1700
|
1152
|
85%
1 Hit
|
N, SP, EX, (J)
|
LH
|
| First Active
|
Active
|
Recovery
|
Frame Adv
|
Circuit
|
Invuln
|
| 19
|
5
|
13
|
0
|
10.5%
|
-
|
|
Juggles on hit, neutral on block, fast charge and more forward momentum than uncharged version.
|
|
Crouching Normals
|
|
| Damage
|
Red Damage
|
Proration
|
Cancel
|
Guard
|
| 300
|
144
|
73% (O)
1 Hit
|
-SE-, -N-, -SP-, -EX-, (J)
|
L
|
| First Active
|
Active
|
Recovery
|
Frame Adv
|
Circuit
|
Invuln
|
| 4
|
4
|
9
|
-1
|
2.8%
|
-
|
|
Less range than 5A, but it hits low.
|
|
|
|
| Damage
|
Red Damage
|
Proration
|
Cancel
|
Guard
|
| 600
|
360
|
100%
1 Hit
|
N, SP, EX, (J)
|
LH
|
| First Active
|
Active
|
Recovery
|
Frame Adv
|
Circuit
|
Invuln
|
| 8
|
4
|
10
|
+1
|
7.0%
|
-
|
|
Short range. However...
- It's a 100% proration move, so it's good combo filler and an amazing starter.
- It's +1 on block, so it's good in pressure, particularly after forward-moving buttons like 6a.
- It's disjointed and doesn't move your hurtbox forward, so doing a meaty microwalk 2B after corner AT will make reversal heat attempts whiff you. (The only characters it works iffily on are the ones whose hurtboxes are too thin for 2B to actually reach them, and even then, you'll still make the heat whiff.)
- It's got a fairly short total duration, so it's not as bad to whiff as her other B and C buttons. Combine this with the way it's disjointed without extending your hurtbox and the great reward on hit, and it's better than 5B in neutral in more situations than it may seem at first.
|
|
2C 2C 2[C] 2[C]
|
| 2C
|
Damage
|
Red Damage
|
Proration
|
Cancel
|
Guard
|
| 800, 600 (1206)
|
(788)
|
70% (O), 55% (O)
1 Hit, 1 Hit
|
N, SP, EX, (J)
|
L
|
| First Active
|
Active
|
Recovery
|
Frame Adv
|
Circuit
|
Invuln
|
| 5
|
6
|
24
|
-15
|
2.8%, 3.5% (6.3%)
|
-
|
|
Absolute menace of a sweep.
- 5F startup and huge range make this one of the best abare buttons in the game. Fair warning, though; if you hold C for any longer than 2 frames when you input this move, you'll delay the hitbox coming out by that many frames. To make the most of this move, you'll need to practice getting 1-2f taps.
- Useful for catching people trying to challenge your pressure resets, since almost no other button can contest its speed at that range. Just do this instead of redashing or hitting 5B, and watch people get hit.
- Horrific frame advantage on block, so you should always cancel this move into something else.
|
| 2[C]
|
Damage
|
Red Damage
|
Proration
|
Cancel
|
Guard
|
| 900*2, 950 (2057)
|
(1226)
|
70% (O)
1 Hit, 1 Hit, 1 Hit
|
N, SP, EX, (J)
|
L
|
| First Active
|
Active
|
Recovery
|
Frame Adv
|
Circuit
|
Invuln
|
| 27
|
10
|
15
|
3
|
4.2%, 2.8%, 2.1% (9.1%)
|
-
|
|
Charged version.
- Has longer startup, 3 hits, plus on block, massive guard damage.
- Useful in pressure and some character-specific combos.
|
|
Aerial Normals
|
|
| Damage
|
Red Damage
|
Proration
|
Cancel
|
Guard
|
| 300
|
192
|
75% (O)
1 Hit
|
SE, N, J
|
LHA
|
| First Active
|
Active
|
Recovery
|
Frame Adv
|
Circuit
|
Invuln
|
| 5
|
4
|
10
|
-
|
2.1%
|
-
|
|
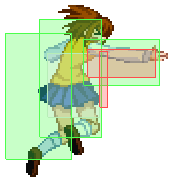
Pretty good j.A—a face smack that hits straight out in front of her. What more could you want?
- Despite that little downward bit of red, it cannot hit any crouchers immediately out of IAD. It will hit them with a slight delay, however.
|
|
|
|
| j.B
|
Damage
|
Red Damage
|
Proration
|
Cancel
|
Guard
|
| 600
|
384
|
90% (O)
1 Hit
|
N, J
|
HA
|
| First Active
|
Active
|
Recovery
|
Frame Adv
|
Circuit
|
Invuln
|
| 8
|
5
|
-
|
-
|
4.2%
|
-
|
|
~45 degree downward swipe with a hitbox parallel to the ground.
- Good disjoints make this your preferred horizontal air-to-air for outspacing your opponent.
- Also usable as a jump-in, and occasionally as a high in a high/low.
|
| j.[B]
|
Damage
|
Red Damage
|
Proration
|
Cancel
|
Guard
|
| 1000
|
672
|
70% (O)
1 Hit
|
N, J
|
LHA
|
| First Active
|
Active
|
Recovery
|
Frame Adv
|
Circuit
|
Invuln
|
| 19
|
7
|
17
|
-
|
7.0%
|
-
|
|
~45 degree downward swipe which shoots a "sonic boom" that stops forward air momentum and pushes Sacchin back as if she had air backdashed.
|
|
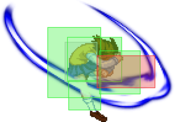
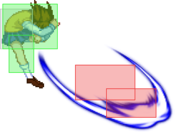
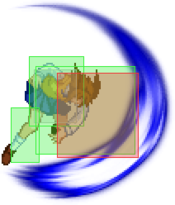
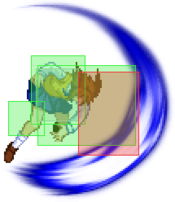
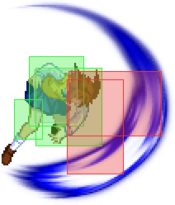
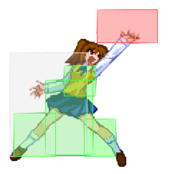
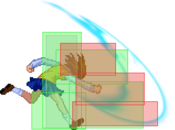
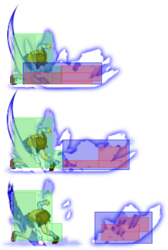
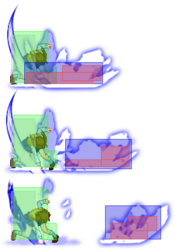
Rising j.C hitbox. Rising j.C hitbox. Falling j.C hitbox. Falling j.C hitbox. Charged j.[C] hitbox. Charged j.[C] hitbox.
|
| j.C
|
Damage
|
Red Damage
|
Proration
|
Cancel
|
Guard
|
| 900
|
576
|
85% (M) / 50% (O)
1 Hit
|
N, J
|
HA
|
| First Active
|
Active
|
Recovery
|
Frame Adv
|
Circuit
|
Invuln
|
| 9
|
4
|
-
|
-
|
6.3%
|
-
|
|
Great j.C.
- Better downward hitbox than j.B, but slower; extends your hurtbox for a few frames before becoming active.
- Amazing jump in move. If you hit the jump in high enough, there's enough time to rebeat into a j.B before landing.
- Not as good for mix as C's, since both it and her airdashes have longer startup (9f airdash/airbackdash + 6f startup for C, vs. 11f airdash/airbackdash + 8f startup for H; hits on f16 vs. hits on f20).
- This move has the bizarre property of having a different hitbox rising and falling. The first pictured hitbox is for rising, the second for falling. (The startup and active frames are the same for both.)
|
| j.[C]
|
Damage
|
Red Damage
|
Proration
|
Cancel
|
Guard
|
| 2100
|
1488
|
50%
1 Hit
|
N, J
|
HA
|
| First Active
|
Active
|
Recovery
|
Frame Adv
|
Circuit
|
Invuln
|
| 27
|
4
|
-
|
-
|
11.2%
|
-
|
|
Charged j.[C]. The beloved dunk.
- Ground bounces on hit, and does a ton of damage even when prorate is high.
- Deceptively useful, because her hurtbox retracts significantly during the windup. If you want ground catwalk, you play Len; but if you want air catwalk, j.[C] is here for you.
- Hard to antiair (look at that hitbox!) and often trades even if her opponent does anti-air it, because of the ground bounce on hit. Of course, the windup is slow in exchange.
- Half charge j.[C] lets you set up j.B reverse beats without waiting for floaty air momentum for as long.
|
|
Command Normals
|
|
| 3C
|
Damage
|
Red Damage
|
Proration
|
Cancel
|
Guard
|
| 1000
|
672
|
60% (O)
1 Hit
|
SP, EX
|
L
|
| First Active
|
Active
|
Recovery
|
Frame Adv
|
Circuit
|
Invuln
|
| 13
|
12
|
19
|
-13 ~ -2
|
7.0%
|
-
|
|
It's basically Blanka slide, only special cancellable. A bit slow on startup, but after the initial bit of startup, it will duck high attacks.
- One of your most common ways to catch jumpouts in pressure and an integral part of your BnB.
- Bad on block except at the end of its range, so you probably want to cancel it into 214A, 22A, 236A, 22B>EX cancel, etc. in pressure.
|
| 3[C]
|
Damage
|
Red Damage
|
Proration
|
Cancel
|
Guard
|
| 1500
|
1152
|
70% (O)
1 Hit
|
SP, EX, (J)
|
L
|
| First Active
|
Active
|
Recovery
|
Frame Adv
|
Circuit
|
Invuln
|
| 26
|
8
|
13
|
-3 ~ 4
|
10.5%
|
-
|
|
Charged slide; longer range, longer startup, better advantage.
- The forward motion is good. However, the long startup and telegraphed cancel options make this a risky move to use in pressure, even though it's safe at worst at -3f.
- Goes into big damage j.[C] combos on raw hit, though, making it useful for hard callouts.
|
|
Universal Mechanics
|
|
| Damage
|
Red Damage
|
Proration
|
Cancel
|
Guard
|
| 1400
|
576
|
30%
0 Hits
|
-
|
U
|
| First Active
|
Active
|
Recovery
|
Frame Adv
|
Circuit
|
Invuln
|
| 3
|
1
|
20
|
-
|
0.0%
|
-
|
|
Goes both ways, hard knockdown.
|
|
|
|
| Damage
|
Red Damage
|
Proration
|
Cancel
|
Guard
|
| 1600 (1408, Raw)
|
506
|
30%
1 Hit
|
-
|
U
|
| First Active
|
Active
|
Recovery
|
Frame Adv
|
Circuit
|
Invuln
|
| 2
|
1
|
12
|
-
|
-
|
-
|
|
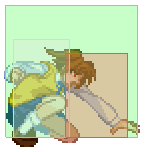
Unusually good AT for ending combos.
- First, it builds meter and grants an untechable knockdown.
- Second, you can always get a meaty after AT ender in the corner.
- HSats's 5B moves forward enough that she still gets good pressure. Microwalk 2B deters high shields, outspaces C-Moon heat, and is +1. Walk back 5C allows her to safely clash many reversals and punish. 2C deters high shield, and hits low should people be greedily standblocking her. And dash 5A/2A will also meaty if done perfectly. (This is extremely difficult to do on normal wakeup speeds, though, since you have to cancel dash into 5A/2A as early as possible.)
- Finally, the airthrow's recovery can be cancelled with airdodge for 50 meter, allowing you to airdodge and then airdash and j.B meaty (and safejump!), even midscreen where you can't normally meaty—all while dumping meter to avoid an early heat. Extremely solid.
|
|
|
|
| Standing
|
Damage
|
Red Damage
|
Proration
|
Cancel
|
Guard
|
| 500 (345)
|
198
|
50%
1 Hit
|
(SP), (EX), (J)
|
LHA
|
| First Active
|
Active
|
Recovery
|
Frame Adv
|
Circuit
|
Invuln
|
| 9
|
4
|
18
|
-4
|
3.5%
|
-
|
|
Same animation as C-Moon 5C.
|
| Crouching
|
Damage
|
Red Damage
|
Proration
|
Cancel
|
Guard
|
| 1500 (1117)
|
714
|
50%
1 Hit
|
(SP), (EX)
|
LA
|
| First Active
|
Active
|
Recovery
|
Frame Adv
|
Circuit
|
Invuln
|
| 9
|
4
|
18
|
-4
|
10.5%
|
-
|
|
Same animation as 2C.
|
| Aerial
|
Damage
|
Red Damage
|
Proration
|
Cancel
|
Guard
|
| 500 (345)
|
198
|
50%
1 Hit
|
-
|
HA
|
| First Active
|
Active
|
Recovery
|
Frame Adv
|
Circuit
|
Invuln
|
| 9
|
4
|
-
|
-
|
3.5%
|
-
|
|
Same animation as j.C.
|
|
|
|
| Neutral
|
Damage
|
Red Damage
|
Proration
|
Cancel
|
Guard
|
| 500
|
192
|
50%
1 Hit
|
-
|
LHA
|
| First Active
|
Active
|
Recovery
|
Frame Adv
|
Circuit
|
Invuln
|
| 26
|
4
|
19
|
-5
|
0.0%
|
Clash 1-10
|
| (Clash)
|
Damage
|
Red Damage
|
Proration
|
Cancel
|
Guard
|
| 500
|
192
|
50%
1 Hit
|
-
|
LHA
|
| First Active
|
Active
|
Recovery
|
Frame Adv
|
Circuit
|
Invuln
|
| 8
|
4
|
19
|
-5
|
0.0%
|
Strike 1-7
|
|
A 214A-like shield bunker.
|
| Blockstun
|
Damage
|
Red Damage
|
Proration
|
Cancel
|
Guard
|
| 0
|
0
|
100%
1 Hit
|
-
|
LHA
|
| First Active
|
Active
|
Recovery
|
Frame Adv
|
Circuit
|
Invuln
|
| 19
|
3
|
22
|
-7
|
-100.0%
|
-
|
|
H-Moon specific reversal bunker.
|
|
|
|
| Ground
|
Damage
|
Red Damage
|
Proration
|
Cancel
|
Guard
|
| 100
|
0
|
100%
1 Hit
|
-
|
U
|
| First Active
|
Active
|
Recovery
|
Frame Adv
|
Circuit
|
Invuln
|
| 11
|
10
|
20
|
-
|
removes all
|
Full 1-39
|
| Air
|
Damage
|
Red Damage
|
Proration
|
Cancel
|
Guard
|
| 100
|
0
|
100%
1 Hit
|
-
|
U
|
| First Active
|
Active
|
Recovery
|
Frame Adv
|
Circuit
|
Invuln
|
| 12
|
10
|
15
|
-
|
removes all
|
Strike 1-30
|
|
Universal burst mechanic. Unlike Crescent/Full Heat activation, the hitbox and frame data doesn't vary between characters. However, you can be thrown out of this move if you input it in the air.
|
|
Special Moves
A A B B EX EX
|
| A
|
Damage
|
Red Damage
|
Proration
|
Cancel
|
Guard
|
| 1000 (968)
|
(631)
|
100%
0 Hits
|
-
|
LH
|
| First Active
|
Active
|
Recovery
|
Frame Adv
|
Circuit
|
Invuln
|
| 17
|
3
|
12
|
-3
|
0.0%
|
-
|
|
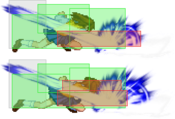
Satsuki dashes then tries to grab the opponent with her hand.
- Blockable, but safe on block at -3. In exchange, it catches jumpouts.
- Gives a hard knockdown on hit that allows for a safejump.
- Satsuki has a lower profile during the actual movement, which lets her duck some projectiles.
|
| B
|
Damage
|
Red Damage
|
Proration
|
Cancel
|
Guard
|
| 1000 (968)
|
(631)
|
100%
0 Hits
|
-
|
U
(Whiffs vs Air.)
|
| First Active
|
Active
|
Recovery
|
Frame Adv
|
Circuit
|
Invuln
|
| 34
|
2
|
20
|
-
|
0.0%
|
-
|
|
Satsuki dashes and does a command throw; you can go into a combo via OTG just like 623B. It's slow, but if it's not overused, it functions well against opponents conditioned to block.
- As 236a, Satsuki has a lower profile during the movement that lets her duck some projectiles.
- Oddly, it won't grab C/H-Moon dodge at the normal ranges you'd use it, even though the A version would. This is because the dodge makes you pass through them and pushes the grab box past the opponent, even in the corner.
|
| EX
|
Damage
|
Red Damage
|
Proration
|
Cancel
|
Guard
|
| 1600 (1550)
|
(1302)
|
60% (M)
0 Hits
|
-
|
LH
|
| First Active
|
Active
|
Recovery
|
Frame Adv
|
Circuit
|
Invuln
|
| 2+20
|
2
|
20
|
-4
|
-100.0%
|
Full 1-15
|
|
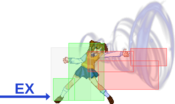
236A, only it has 623C effects on hit. It's invul on frame 1, but loses that invul well before active frames.
- Can be useful for punishing certain projectiles, like F-Aoko's EX Fireball.
- Very safe if blocked because of the massive pushback.
|
|
A A B B EX EX
|
| A
|
Damage
|
Red Damage
|
Proration
|
Cancel
|
Guard
|
| 1000 (968)
|
(631)
|
100%
0 Hits
|
-
|
U
(Whiffs vs Ground.)
|
| First Active
|
Active
|
Recovery
|
Frame Adv
|
Circuit
|
Invuln
|
| 8
|
8
|
24
|
-
|
0.0%
|
High 1-10
|
|
The 623s are Sacchin's trademark antiair throws.
- Despite having high invuln and good active frames, it's a mediocre antiair; its only saving grace as antiair is it can't be air shielded. It works, but
- it has poor reward, since it only gives a hard knockdown and ~1k damage, and
- the effective startup time is longer than it looks since it's on a 623 input.
- However, it gives the same hard knockdown as 236A, and can connect off OTG strings. This gives it some use as a combo ender.
|
| B
|
Damage
|
Red Damage
|
Proration
|
Cancel
|
Guard
|
| 1000 (968)
|
(631)
|
100%
0 Hits
|
-
|
U
(Whiffs vs Ground.)
|
| First Active
|
Active
|
Recovery
|
Frame Adv
|
Circuit
|
Invuln
|
| 14
|
2
|
34
|
-
|
0.0%
|
Full 1, High 2-15
|
|
B version is also a poor antiair. However, that's not its use: it's excellent combo filler, since it gives an OTGable knockdown and has 100% prorate.
|
| EX
|
Damage
|
Red Damage
|
Proration
|
Cancel
|
Guard
|
| 2000 (1937)
|
1302
|
60% (M)
0 Hits
|
-
|
U
(Whiffs vs Ground.)
|
| First Active
|
Active
|
Recovery
|
Frame Adv
|
Circuit
|
Invuln
|
| 2+6
|
2
|
34
|
-
|
-100.0%
|
Full 1-3, High 4-9
|
|
Probably Satsuki's single best move. It's
- an incredible anti-air, with 7f startup, a massive hitbox, and good reward on hit;
- the preferred midcombo meterdump, since it does a fat 2k damage before scaling and sets your bounce count back to 1; and
- a good combo ender that can also set up her strongest okizeme mixups.
Get used to buffering 623 in neutral when you're looking to burn meter.
|
|
A A B B EX EX
|
| A
|
Damage
|
Red Damage
|
Proration
|
Cancel
|
Guard
|
| 1000
|
480
|
90% (M)
1 Hit
|
-EX-, J
|
LH
|
| First Active
|
Active
|
Recovery
|
Frame Adv
|
Circuit
|
Invuln
|
| 9
|
4
|
19
|
-5
|
6.3%
|
-
|
|
Fast and really important for combos; jump cancellable on hit or block. It's a good choice in pressure after 3C, since you can confirm into your bnb if 3c hits, and jump cancel it to attempt to reset pressure or wall out their escape if it's blocked. Also EX cancellable, even on whiff--though it's harder to set up 214a whiff ex bite on H than it is on C.
|
| B
|
Damage
|
Red Damage
|
Proration
|
Cancel
|
Guard
|
| 700, 800 (1475)
|
(756)
|
70% (O)
0 Hits, 0 Hits
|
-
|
H, LH
|
| First Active
|
Active
|
Recovery
|
Frame Adv
|
Circuit
|
Invuln
|
| 31
|
5
|
21
|
-2
|
7.0%, 8.4% (15.4%)
|
-
|
|
Really terribly slow overhead, unlike the Crecent version you can't charge or cancel it, so it's even worse. Though it's safe on block, it's completely punishable if it gets shielded. However it is an overhead so using it once in a blue moon won't get you killed. Because of this move being a 2-hit, it's always air techable even on counterhit so you can't really get good combos off it without meter.
|
| EX
|
Damage
|
Red Damage
|
Proration
|
Cancel
|
Guard
|
| 2400
|
1920
|
45% (M)
0 Hits
|
-
|
LH
|
| First Active
|
Active
|
Recovery
|
Frame Adv
|
Circuit
|
Invuln
|
| 2+7
|
3
|
27
|
-2
|
-100.0%
|
Full 1-6
|
|
Your reversal. Although it's not invuln through the active frames, the hitbox is guaranteed to come out, so it may as well be invuln unless the trade will kill you. It's safe on block at -2, but it's weak to people doing meaty 2a/5a and shielding on reaction to the flash, like all reversals with postflash startup. Followup combos are possible on non-trades if you're closer to the corner.
|
|
A A B B EX (2nd Projectile) EX (2nd Projectile)
|
| A
|
Damage
|
Red Damage
|
Proration
|
Cancel
|
Guard
|
| 1000
|
768
|
100%
1 Hit
|
-
|
LH
|
| First Active
|
Active
|
Recovery
|
Frame Adv
|
Circuit
|
Invuln
|
| 17
|
11
|
9
|
-2
|
7.0%
|
-
|
|
Air unblockable projectile that travels really fast. It might as well be instant except for near the very end where it goes up higher. Basically resembles Terry Bogard's Power Wave. Frame advantage is slightly better from max range, but that's farther than you're likely to be during pressure.
6f slower startup than 22B, but safe on block at -2f.
|
| B
|
Damage
|
Red Damage
|
Proration
|
Cancel
|
Guard
|
| 1000
|
768
|
100%
1 Hit
|
-EX-
|
LH
|
| First Active
|
Active
|
Recovery
|
Frame Adv
|
Circuit
|
Invuln
|
| 11
|
11
|
19
|
-12
|
7.0%
|
-
|
|
Fast startup, EX cancellable. Slightly more range than 22A. Terribly unsafe on block anywhere near the opponent at -12f. However this move is extremely useful as a jump trap as you can cancel into 623C to catch them if they jump over. 22B also combos into 623C if they get hit by the 22B. Near max range 22B can also combo into 236C.
|
| EX
|
Damage
|
Red Damage
|
Proration
|
Cancel
|
Guard
|
| 800, 200*3, 650 (1791)
|
(1107)
|
50% (O)
1 Hit, 0 Hits*3, 1 Hit
|
-
|
LH
|
| First Active
|
Active
|
Recovery
|
Frame Adv
|
Circuit
|
Invuln
|
| 2+8
|
11 (5) 6 (2) 4
|
19
|
21
|
-100.0%
|
-
|
|
Fast startup, does a 22A/B wave immediately followed by a larger version. Not very useful outside of guaranteed guard break setups, but does give frame advantage on block now. Being too close to the opponent stuck in the corner can lead to this move being punishable on block.
|
|
|
|
| Damage
|
Red Damage
|
Proration
|
Cancel
|
Guard
|
| 2500
|
1424
|
100%
0 Hits
|
-
|
U
(Whiffs vs Air.)
|
| First Active
|
Active
|
Recovery
|
Frame Adv
|
Circuit
|
Invuln
|
| 3+0
|
1
|
28
|
-
|
-100.0%
|
Full 3
|
- It's a command throw, about 1.2 Satsukis in range. (The range is just right to do dash 5aa ex bite or dash 2aa ex bite during pressure.) Has invulnerable startup, and it's really fast. Drains the damage it deals in life, as well as giving hard knock down.
|
|
Arc Drive
|
|
| Damage
|
Red Damage
|
Proration
|
Cancel
|
Guard
|
| 3300
|
2496
|
50% (O)
0 Hits
|
-
|
U
(Whiffs vs Air.)
|
| First Active
|
Active
|
Recovery
|
Frame Adv
|
Circuit
|
Invuln
|
| 4+12
|
1
|
27
|
-
|
removes all
|
Full 1-16, High 17-19
|
|
Basically a useless version of Kohaku's arc drive. It's a fully invulnerable throw, but jumpable on reaction. You probably can't combo into it either.
|
|
General Gameplan
H-Satsuki trades the vortex-focused playstyle of C and F for a straightforward, well-rounded rushdown game.
- Her neutral is good. She has fast movement, and her buttons range from situational to downright criminal. 5B and 5C are excellent ground buttons, j.[B] offers one of the best space control options in the game, and 623C is the same huge anti-air you know and love from C and F.
- Her pressure is excellent. Her buttons move her far forward, and they have amazing framedata. This gives her plenty of reset opportunities during pressure, as well as ways to stay in if she doesn't reset. And should her opponent downback, then EX Bite, her metered command grab, takes care of that. While she may only play a strike/strike and a strike/throw game, she's as good at it as you could ask for.
- Her okizeme is good. She can't emulate C/F's setplay without meter, and she doesn't keep momentum off midscreen airthrow. However, her corner airthrow puts the opponent back into her pressure, and she can cover most of her opponent's wakeup options through OSes and proper spacing. That's ultimately all she needs to run her gameplan.
- Her combo reward is good. She can deal high damage with specific starters, though she does average damage most of the time. Her corner carry is passable, even if she can't take opponents to the corner off any stray hit. And her meter gain is plenty serviceable.
- Her defense is okay. She has great abare with 2C, and her reward off standing shield counter can reach 5k if she spends meter. However, she has the same problem as other H-Moons: she struggles without meter to threaten bunker. And her reversal, 214C, can be shielded on reaction to the flash if her opponent meatied with a jab.
- She interacts with H-moon mechanics well outside of defense; she's among the best at controlling when she enters heat, since she has useful meter spends in every gamestate.
Neutral
Place text here*
Pressure
H-Satsuki's blockstring game is pretty strong, and you can force people to block for a long time with a basic understanding of rebeat pressure and her specific moves that are good for it. Her 5C is a good move to charge up often as it charges quite quickly, 2C is also a good move to charge up due to massive blockstun, guard damage, and frame advantage; but should be done more sparingly because of the much longer startup. Generally you will be starting your blockstrings with 5B from any range other than point blank, and 2A or possibly 5A if you are in their face.
From neutral generally you want to go for a... 5B for forward momentum and decent pressure reset. 2C because it's faster and will stuff almost all pokes at a bit of a distance. 22B if you are spaced out a bit for catching jumps (buffer 623 and press C on reaction to jumps and to hit confirm). Or alternatively IAD or regular jump 9 and go for a jump attack. If you aren't pushed back too far, dash EX Bite can be a really strong tool.
The most important things to be paying attention to (other than your opponent), is whether or not you've used your 2A/5A for rebeats, so that you don't hit the wrong button, or try to rebeat when it's not possible. If you've already used both your 2A and 5A just make sure to end with 22A or something else safe.
Basic Blockstrings:
- (2A >) 5B > 5C > 2C > 3C > 22A
- Resets to neutral and builds respect that you'll want when going for rebeats.
- 5B > 5C > (2C >) 5A/2A(w) > (Neutral Reset)
- Normally you want to rebeat after either 5C or 2C, mix it up.
- ...6A6EE > 22A / (Neutral Reset)
- 6A6EE is an option select that beats shield bunkering, learning the timing to stagger it as much as possible is very useful as well. The last hit of 5A6AA is neutral on block but it has a lot of pushback, so you should probably cancel into 22A until you get some respect, then you can sneak in some other stuff.
- ...5A6A > (etc) > 3C > 22A
- 5A6A forward momentum is pretty useful, but the second hit is terrible on block so you should always be canceling it into something else.
- Any B button cancelled into 5[C] is a natural frametrap. 2B into 5[C] in particular is a very strong option because a CH 5[C] yields a disgustingly high reward if you convert properly. Counterhitting people with this will discourage them from challenging resets after 2B, which is +1 on block, and even if they block 5[C] when you do go for it, it's 0 on block so you can still try to reset.
Okizeme and Mixups
Keep in mind that H-Satsuki has a slightly different air backdash than the other moon styles, which changes the effectiveness of her various mixups. Primarily, since it's a bit slower, but has an upwards hop like movement, the crossup IABD mixup is a lot easier to see, however you can also use air dodge for that mixup. In addition to this, when backdashing over people's heads, you are able to do so lower to the ground, even if they are standing.
Corner
Satsuki's primary corner 3.5-way gimmicks come from 623C when the opponent is just outside of the corner. The best setup for this is (etc) > 623B, OTG > 623C. You can't get that setup without 200% meter unless you confirm into a 5A6AA combo or some other situational combo that can lead to 623B. Another more basic setup off a regular chain that still works is just 3C > ASAP cancel 623C. Satsuki's mixups can go several ways, but they're only a true 2 way at best, and only in the corner. Simply autopiloting them probably won't get you very far against anyone capable of reacting decently so try to get in their head with your variety of options.
Basic corner mixup:
- Delay (Based on character wakeup timing)...
- dash (Pushes opponent into the corner) j8...
- ...land 2A/2C
- ...j.44 > j.C, land 5B > (etc)
- dash (Doesn't push opponent into the corner) j8...
- ...land 2A/2C
- ...j.44 > j.C, land 5B > (etc)
- ...dj.IABD (after crossup) > j.C, land 5B > (etc)
"dj.IABD" can be input with either 4 [crossup] (9 / 7) 4 or [crossup] (9 / 7) 4AB, whichever you find easiest. You have to be pretty fast to actually make it look deceiving.
Here is an example of how it would look in practice
Midscreen
The initial setup for midscreen is a lot easier than the corner setups. So long as you end with a 623C you're good to go. Remember from before that the 3C > 214A > j.BC, land 623C is a really good combo extender for midscreen so that you maintain both damage and oki. If you didn't already know about it, drifting is done by holding 4 or 6 in mid air after a neutral jump or double jump.
The mixups listed below are just the generic stuff that goes as many ways as possible. You probably want to base your oki off these, but don't forget there is always all sorts of other tricks available to you like j.C wiffs or j.[C] fakeouts.
Here's the basic mixup you should be going for most the time midscreen:
- 623C, delay (Based on character wakeup timing) sj9...
- dj8 (BEFORE Crossup)...
- ...land 2A/2C
- ~[6] (Crossup)...
- ...land 2A/2C
- ...j.44 (Second Crossup) > j.C, land 5B > (etc)
- dj8 (AFTER Crossup)...
- ...land 2A/2C
- ~[6] (Second Crossup)...
- ...land 2A/2C
- ...j.44 (Third Crossup) > j.C, land 5B > (etc)
Fuzzy Setups
- deep j.C(blocked) > dj[9].C (hits) > slight pause j.B, land 5A6AA / 5A > 5B > 5C > 2C > 3C > (etc)
Nero and Wara specific. [9] is to avoid dsj; slight pause is to make the j.b confirm into combo.
Defense
As an H moon character your defensive options are quite limited however, you are not just any H-moon character you are H- Satsuki and she comes along with her own set of good tools to get you out of sticky situations.
H-214D
First and foremost, H-moon bunker(214D during blockstun) is what you will be doing to just avoid dealing with pressure, it uses up 100 meter to do an unavoidable (unless they were baiting) hard knockdown that can allow you to turn the tide of battle. An important thing to note about H-214D is that if it lands as a counter hit, it gives you enough time to set up a mixup equivalent to what you would get off 623C
5A
While not as powerful as C-Satsuki’s it functions similarly and gets the job done. Keep people out of your direct airspace by throwing this out as a very powerful anti-air that you can easily combo off of. Not to mention its incredibly fast startup of 4f and you have a great mashing tool in your hands
2A
If you find yourself in a situation where you are uncomfortable trying to 5A mash then do this. It has the same startup but noticeably less range.
2C
Insane mashing button, use it whenever you know they are gonna try to dash reset or go for some gimmick, it is also fantastic at winning the post throw-tech scramble as there are no moves fast or long enough to contest. Incredible range and an even scarier startup at 5f!!! Remember that this move only knocks them down on the second hit, however you can confirm off 2C(1) with 236A. While 2C is incredible powerful it is easily beaten by IAD’s and with its recovery you are certain to eat a fat combo after they go over it.
5D
Ah H-Moon Shield, it has its uses although very few. Mostly used for when you have a hard read on something especially if it’s something that your buttons can’t really deal with too effectively (Len j.2C, Nero j.B, Satsuki j.C etc.). Fortunately for such a high risk move the reward is actually pretty good depending on the conversion you do, going into your basic bnb won’t net you much but converting into j.[C] j.[C] can do over 3k and can give you full screen corner carry or 623C mix depending on the situation.
2D
Used for if you know a low is coming. Off of a normal hit you can go for a 214A > air bnb routes or 623C routes if you're willing to spend the meter. It's real strength is in the CH confirms. On CH you can link into 2C and go for a very damaging combo (4k+) so the high risk might sometimes be worth it.
236C
Has some i-frames at the start making it good for when people throw out single projectiles or buttons with long recovery other than that the move doesn’t have much use.
214C
Your only actual reversal that is good but not great. You will mostly be doing this move when they meaty or if there is a gap in their pressure. It is AUB though it’s vertical range is quite poor, it is safe on block only being -2 so you can try to win the scramble that will ensue after it gets blocked, if it gets blocked, since this move is prone to being shielded since the super flash can act as a reaction test for pressing 5D depending on your opponent. Be careful with this move, it’s good but it’s not that good.
623C
If you know your opponent likes to jump reset during pressure and their jump-in beats 5A and you don’t wanna risk messing up 5D then go for it, snatch your opponent out of the air and take your turn back. Do keep in mind that this move is not invul nor is it out immediately so you can be hit out of it on startup if they are close.
Combos
| Combo Notation Help
|
Disclaimer: Combos are written by various writers, so the actual notation used in pages can differ from the standard one.
For more information, see Glossary and Controls.
|
| X > Y
|
X input is cancelled into Y.
|
| X > delay Y
|
Must wait for a short period before cancelling X input into Y.
|
| X, Y
|
X input is linked into Y, meaning Y is done after X's recovery period.
|
| X+Y
|
Buttons X and Y must be input simultaneously.
|
| X/Y
|
Either the X or Y input can be used.
|
| X~Y
|
This notation has two meanings.
- Use attack X with Y follow-up input.
- Input X then within a few frames, input Y. Usually used for option selects.
|
| X(w)
|
X input must not hit the opponent (Whiff).
|
| j.X
|
X input is done in the air, implies a jump/jump cancel if the previous move was done from the ground.
Applies to all air chain sections:
- Assume a forward jump cancel if no direction is given.
- Air chains such as j.A > j.B > j.C can be shortened to j.ABC.
|
| sj.X
|
X input is done after a super jump. Notated as sj8.X and sj9.X for neutral and forward super jumps respectively.
|
| dj.X
|
X input is done after a double jump.
|
| sdj.X
|
X input is done after a double super jump.
|
| tk.X
|
Stands for Tiger Knee. X motion must be buffered before jumping, inputting the move as close to the ground as possible. (ex. tk.236A)
|
| (X)
|
X is optional. Typically the combo will be easier if omitted.
|
| [X]
|
Input X is held down. Also referred to as Blowback Edge (BE). Depending on the character, this can indicate that this button is held down and not released until indicated by the release notation.
|
| ]X[
|
Input X is released. Will only appear if a button is previously held down. This type of input is referred to as Negative Edge.
|
| {X}
|
Button X should only be held down briefly to get a partially charged version instead of the fully charged one.
|
| X(N)
|
Attack "X" should only hit N times.
|
| (XYZ)xN
|
XYZ string must be performed N times. Combos using this notation are usually referred to as loops.
|
| (XYZ^)
|
A pre-existing combo labelled XYZ is inserted here for shortening purposes.
|
| CH
|
The first attack must be a Counter Hit.
|
| Air CH
|
The first attack must be a Counter Hit on an airborne opponent.
|
| 66
|
Performs a ground forward dash.
|
| j.66
|
Performs an aerial forward dash, used as a cancel for certain characters' air strings.
|
| IAD/IABD
|
Performs an Instant AirDash.
|
| AT
|
Performs an Air Throw. (j.6/4A+D)
|
| IH
|
Performs an Initiative Heat.
|
| AD
|
Performs an Arc Drive.
|
| AAD
|
Performs an Another Arc Drive.
|
Combo Theory
BnBs
Meterless
| Condition
|
Notation
|
Damage
vs V.Sion
|
Notes
|
|
| Anywhere
|
- 2A > (2B) > 5B > 5C > 2C(2) > 3C > (slight delay) 214A > j.(A)BC > (s)dj.(A)BC > AT
|
4413
|
|
| Meter Gained: 71% |
Meter Given (vs C-Moon): 30.4% |
(Video) |
Basic BnB. You'll use this a lot.
- Only include 2B if you start the combo point blank.
- Getting j.ABC sdj.ABC AT requires you to delay 214A almost as much as possible after 3C. Just doing j.bc dj.bc AT doesn't require any delay.
|
|
|
| Anywhere, close hit
|
- 2A > (2B) > 5B > (5C) > 5A6AA, 2C(2) > 3C > (slight delay) 214A > j.ABC > (s)dj.(A)BC > AT
|
4790
|
| |
| Meter Gained: 84.4% |
Meter Given (vs C-Moon): 36% |
Basic combo that has better damage and metergain.
- Omit 5C if you start the combo from too far away, or else 5A6AA whiffs.
- This is your best combo on Arc and Sion, since your advanced character specifics don't work.
|
|
|
Metered
| Condition
|
Notation
|
Damage
vs V.Sion
|
Notes
|
|
| Anywhere, 100% meter
|
- 2A > (2B) > 5B > 5C > 2C(2) > 3C > 623C, 2C(1) > 5[C] > j.BC > (s)dj.(A)BC > AT
|
4867
|
| |
| Meter Gained: -48.9% |
Meter Given (vs C-Moon): 33.6% |
Easiest metered confirm that's still worth doing. Gives worse damage, meter, and carry than the next combo, but is more forgiving to time—especially on Akiha, Sei, VAkiha, Warc, Hime, Mech, Ries, and Ryougi.
- 623C counts as a grab, so any combo with 623C cannot be circuit sparked after the 623C connects. Fair warning: your opponent can spark on reaction to the 623C flash, so you ideally want to 623C before they enter MAX.
- 3C>623C doesn't work on Necos; do 3C>236C instead if you're midscreen, or the combo in the note below if you're in the corner.
- In the corner, you can add some damage by recovering after 3C and doing an OTG into 623C. E.G., 2A > (2B) > 5B > 5C > 2C(2) > 3C, 5B 2C 623C, 2C(1) > 5[C] > j.BC > (s)dj.(A)BC > AT
|
|
|
| Anywhere, 100% meter
|
- 2A > (2B) > 5B > 5C > 2C(2) > 3C > 623C, 2C(2) > 3C > (slight delay) 214A > j.ABC > (s)dj.(A)BC > AT
|
4882
|
| |
| Meter Gained: -45.4% |
Meter Given (vs C-Moon): 37.2% |
Your go-to metered extension off the BnB. It adds a decent amount of damage to your combo.
- If you want to meterdump midcombo, this is your go-to choice.
- 3C>623C doesn't work on Necos; do 3C>236C instead if you're midscreen, or the combo below if you're in the corner.
- In the corner, you can add some damage by recovering after 3C and doing an OTG into 623C. E.G., 2A > (2B) > 5B > 5C > 2C(2) > 3C, 5B 2C 623C, 2C(2) > 3C > (slight delay) 214A > j.ABC > (s)dj.(A)BC > AT
- I would recommend practicing this combo on Akiha, not VSion. Learning it on VSion will teach you to 2C too early.
- Ries will only get hit by 2C once instead of twice at this timing; 2C earlier vs. Ries.
|
|
|
| Anywhere, close hit, 100% meter
|
- 2A > (2B) > 5B > (5C) > 5A6AA > 2C(2) > 3C > 623C, 2C(2) > 3C > (slight delay) 214A > j.ABC > (s)dj.(A)BC > AT
|
5182
|
| |
| Meter Gained: -32.3% |
Meter Given (vs C-Moon): 44% |
| Metered extension of the 5A6AA BnB. |
|
|
Intermediate
Meterless
| Condition
|
Notation
|
Damage
vs V.Sion
|
Notes
|
|
| Midscreen, want additional corner carry
|
- 2A > (2B) > 5B > 5C > 2C(2) > 3C > (slight delay) 214A > j.BC > j.66, j.A > sdj.ABC > AT
|
4411
|
|
| Meter Gained: 71% |
Meter Given (vs C-Moon): 30.4% |
(Video) |
Corner carry combo.
- Distance traveled is based on delay of 214A and whether or not you use sdj after j.66 j.A. The amount you want to delay 214A varies between characters.
- You may need to 214A > j8.BC instead of 214A > j9.BC at certain spacings on certain characters.
- Buffer 66 while j.C is active.
- If you have trouble getting j.A sdj.ABC, you can do j.A dj.A(A)C AT instead.
- Remember that you cannot airdodge airdash after airthrow, since you've already burned your airdash midcombo.
- This, and similar combos can technically be done in the corner; there's just no reason to, since j.ABC sdj.ABC AT does very slightly better damage and has identical metergain.
|
|
|
| Midscreen, close hit, want additional corner carry
|
- 2A > (2B) > 5B > 5C > 5A6AA > 2C(2) > 3C > (slight delay) 214A > j.BC > j.66, j.A > sdj.ABC > AT
|
4791
|
|
| Meter Gained: 84.2% |
Meter Given (vs C-Moon): 36% |
(Video) |
Corner carry combo with 5A6AA.
- Better carry than the above combo.
- Same notes as the above combo, especially the advice to j8.BC.
|
|
|
Anywhere, close hit
- Aoko, Miyako, Seifuku, Len, W.Len, Nero, Kohaku, P.Ciel, Ciel, Wara, Kouma, Nanaya, Tohno, Ries
|
- 2A > (2B) > 5B > (5C) > 5A6AA > 2[C], 2C(2) > 3C > (slight delay) > 214A > j.ABC > j.(A)BC > AT
|
5436*
|
|
| Meter Gained: 93.3% |
Meter Given (vs C-Moon): 41.1% |
(Video) |
Character specific 5A6AA combo. Extremely worthwhile; does more damage than even the metered universal BnBs.
- Damage and metergain is on Miyako, who has the same defense modifiers as VSion.
- Can do 2[C] 3C instead for minor damage loss, should 2[C] 2C 3C be troublesome.
- Ries:
- Ries will not get hit by the second hit of 2[C] unless you have at least 4 hits before 5a6aa.
- Ries is never hit by all 3 hits of 2[C]. Do ...5A6AA > 2[C](2)> 3C... on Ries.
- Nero:
- Nero needs at least 3 hits before 5A6AA.
|
|
|
Midscreen, close hit, want additional corner carry
- Akiha, PCiel, WLen, Kohaku, Kouma, Wara, Aoko, Tohno, Nanaya, Ciel, Nero, Len, Miyako, Seifuku, Ries
|
- 2A > (2B) > 5B > (5C) > 5A6AA > 2[C] > 2C(2) > 3C > (slight delay) 214A > j.BC > j.66, j.A > (s)dj.ABC > AT
|
5437*
|
|
| Meter Gained: 93.3% |
Meter Given (vs C-Moon): 41.1% |
(Video) |
Corner carry version of the above combo.
- Damage and metergain is on Miyako, who has the same defense modifiers as V.Sion.
|
|
|
| Anywhere, successful 5D
|
- 5D, j.8[C], (slight delay) sdj.[C], land > IAD j.C > land > j.(A)BC > dj.BC > AT
|
3549
|
| |
| Meter Gained: 65.8% |
Meter Given (vs C-Moon): 18.7% |
Full corner carry off standing shield counter.
- Timing to jump after SC is different on CH 5D, normal hit 5D, and anti-air 5D (adjust for height).
- If IAD j.C > rejump j.ABC dj.BC AT is too hard or risky, you can substitute dash j.ABC dj.BC AT without losing much damage.
|
|
|
| Anywhere, successful 5D
|
- 5D, j.8[C], (slight delay) sdj.[C], land > 3[C] > j.BC > dj.BC > AT
|
3907
|
| |
| Meter Gained: 67.9% |
Meter Given (vs C-Moon): 27.6% |
| More damage and metergain than the above combo with arguably easier execution but a bit less corner carry, enough that fullscreen you won't be able to meaty with 5B but any less than that and you will be able to.
*Try to time your j.B after 3[C] as early as possible as this can be sort of tight to land. |
|
|
| Raw AT starter, corner to corner
|
- AT > dj.[C], land > dash 2C > 3C > 214A > j.BC > dj.BC > j.66, j.A > AT
|
3357
|
| |
| Meter Gained: 67.9% |
Meter Given (vs C-Moon): 29.1% |
A raw AT with good damage and corner to corner carry.
- Remember that you cannot airdodge airdash after airthrow, since you've already burned your airdash midcombo.
- You can do dash 2C > 5C > 623C and go for mixup if you need to burn your meter to avoid going into heat or are already in heat, otherwise it's probably better to get the corner and keep the meter.
|
|
|
Metered
| Condition
|
Notation
|
Damage
vs V.Sion
|
Notes
|
|
| Midscreen, want additional corner carry, 100% meter
|
- 2A > (2B) > 5B > 5C > 2C(2) > 3C > 623C, 2C(2) > 3C > (slight delay) 214A > j.BC > j.66, j.A > sdj.ABC > AT
|
4883
|
|
| Meter Gained: -45.4% |
Meter Given (vs C-Moon): 37.2% |
(Video) |
| Corner carry combo with 623C. |
|
|
| Anywhere, 100% meter
|
- 2A/5A > (2B) > 5B > 5C > 2C(2) > 3C > 623C, 2C(2) > 5[C], (fully recover) 5A > 5C > j.BC > dj.BC > AT
|
5029
|
|
| Meter Gained: -44.9% |
Meter Given (vs C-Moon): 37.6% |
(Video) |
Alternative meterdump combo. It does better damage than the one listed under BnBs, but has finicky character-specific timings and is sensitive to gravity. The following info is based on tests recorded here.:
- There's a sweetspot at 8 hits before 623C where there's a (probably difficult, but) mostly universal late 2c timing; it works on everyone but Ries. This timing is best practiced on Akiha. You can do 3C , [OTG string] > 623C to add hits to get to 8 if you have fewer than 8.
- Timing information otherwise:
- Any 2C hit is fine
- Tohno, Nanaya, Miyako, Roa, PCiel, Len
- Early 2C
- Aoko, Kouma, Ries, Sion, VSion, Arc, Mech, Sats, WLen, Nero, Hisui, Kohaku
- Later 2C
- Late 2C at 7+ hits before 623C, early 2C at fewer
- Early 2C at 7+ hits before 623C, and late 2C with fewer
|
|
|
| CH and Air CH, Anywhere, 100% meter
|
- CH(X) > 5[C] > 623B > 5B > (2B) > 623C > 2C(2) > 5[C], (fully recover) 5A > 5C > j.BC > dj.BC > AT
|
6748*
|
| |
| Meter Gained: -50.2% |
Meter Given (vs C-Moon): 36.5% |
This can be done off any Normal that lands as a CH but the damage will vary.
- Damage calculated on V.Sion using a j.C starter.
- You can omit the 2B in 5B > 2B when in the corner(midscreen you have no choice but to omit) but that will only increase the damage by 1 at the cost of meter gain, roughly 5% meter.
|
|
|
| Anywhere, air counterhit, 100% meter
|
- Air CH, (5B) > 5C > 623B, 5C > 623C, 2C > 3C > 214A > j.ABC > j.BC > AT
|
6021*
|
| |
| Meter Gained: -55% |
Meter Given (vs C-Moon): 33.7% |
Strong air CH confirm.
- Damage calculated with an air CH j.C starter.
- This, and other combos with 623B, cannot be circuit sparked after 623B.
- Can pick up after the air CH with 5C for a much easier time connecting 623B but slightly less damage. Can also pick up after the air CH with 5[C], instead, for more damage.
- Can OTG with 5B instead for 30 damage less (5991 total). (5b is easier to connect after 623b, but harder to buffer 623c behind.) In the corner, can OTG with 5B 2B for 21 damage less (6000 total).
- OTG 5C can be plinked to make the link 1f more lenient. Input 5C~E, and make sure you don't hold either button.
|
|
|
| Anywhere, air counterhit, 100% meter
|
- Air CH, (5B) > 5C > 623B, 5C > 623C, 2C > 5[C], (fully recover) 5A > 5C > j.BC > dj.BC > AT
|
6263*
|
| |
| Meter Gained: -53.7% |
Meter Given (vs C-Moon): 35% |
Alternate air CH confirm.
- Can catch after the air CH with 5C > 623B, which is much easier, but incurs 162 damage loss (6101 total). Can catch with 5[C] 623B, which is easier or harder depending on spacing, for 277 damage gain (6540 total).
- Can OTG with 5B instead of 5C for minor damage loss.
- OTG 5C can be plinked to make the link 1f more lenient. Input 5C~E, and make sure you don't hold either button.
- Although this is superficially similar to the 2c 5[c] 5a 5c combo listed above, the timing of the 2C after the 623C is different since the gravity is different. The timing that works on VSion will work on everyone, at this gravity.
|
|
|
| Midscreen - Corner, successful 5D, 100% meter
|
- 5D, j.9[C] > j.[C], land > (2[C]), 2C > (dl.5B) > 5C > 623B, otg > 623C (> 2C > (dl.5B) > 5C > 623B, otg > 623A)
|
5644
|
| |
| Meter Gained: 80.9% |
Meter Given (vs C-Moon): 44.9% |
And who says H-moon Shield Counter sucks, here's a 5D combo that hits like a truck.
- Use sj.9[C] when you land this Midscreen so that you can come into the corner with enough time to do 2[C].
- Timing is different on CH, normal hit, and antiair 5D.
|
|
|
| Raw AT starter, corner
|
- AT > dj.[C], land > 2[C], 2C > 5C > 623B, 5B > 2C > 623C > 2C > 5C > 623B, 5B > 2C > 623A
|
4102
|
| |
| Meter Gained: 61.7% |
Meter Given (vs C-Moon): 36.8% |
| Very good damage off of a raw AT in the corner for the cost of 100 meter |
|
|
| Successful 2D, coutnerhit
|
- 2D CH, 2C > 3C > 22A, 5A > 623B, 5B > 5A > 623C, 2C > 5C > 623B
|
4230
|
| |
| Meter Gained: ? |
Meter Given (vs C-Moon): 18.4% |
| Amazing damage off of a 2D starter, works only with a CH. You can't otg into 623A ender off of 623B at the end so either leave it at that or go for 5B otg and techtrap to force respect. In the corner you can substitute the 5B > 5A otg for the usual 5B > 2C otg and get a 623A ender with it as well. |
|
|
Advanced
5A(w)6AA j.[C]
| Condition
|
Notation
|
Damage
vs V.Sion
|
Notes
|
|
Anywhere, close hit, 100% meter
- Aoko, Tohno, Nanaya, Hime, Mech, Satsuki, Roa, W.Arc, and Ciel
|
- 2AAA > 2B > 5B > 5C > 2C, 5A(w)6AA, j.[C], dj.9, j.[C], land > dash 2C / 2[C], 2C > (dl.5B) > 5C > 623B, otg > 623C
|
5624*
|
|
| Meter Gained: -2.7% |
Meter Given (vs C-Moon): 44.3% |
(Video) |
Character specific combo that works on Aoko, Tohno, Nanaya, Hime, Mech, Satsuki, Roa, WArc, and Ciel.
- Damage calculated on Aoko.
|
|
|
| Anywhere, close hit, 100% meter
|
- 2AAA > 2B > 5B > 5C > 2C > 5A(w)6AA, j.[C] > j.[C], land > dash 5[C] > 623B, otg > 623C
|
5979*
|
|
| Meter Gained: -10.1% |
Meter Given (vs C-Moon): 40.7% |
(Video) |
Altered version for Wara and Kouma, because 2C and 2[C] either won't land, or will land very awkwardly. Just stick with doing 5[C].
- Damage calculated on Wara.
|
|
|
Anywhere, close hit, 100% meter
- V.Sion, Ryougi, and Kohaku
|
- 2AAA > 5B > 5C > 2C > 5A(w)6AA, j.[C] > j.[C], land > dash 2C / 2[C], 2C > (dl.5B) > 5C > 623B, otg > 623C
|
5355
|
|
| Meter Gained: -7.6% |
Meter Given (vs C-Moon): 41.8% |
(Video) |
Altered version for V.Sion, Ryougi and Kohaku.
- 2[C], 2C does not work on Ryougi.
|
|
|
Anywhere, close hit, 100% meter
- Ries, Akiha, V.Akiha, P.Ciel, V.Sion, and Kohaku
|
- 2AA > 2B > 5B > 5C > 2C > 5A(w)6AA, j.[C] > j.[C], land > dash 2C / 2[C], 2C > (dl.5B) > 5C > 623B, otg > 623C
|
5534
|
|
| Meter Gained: -5.5% |
Meter Given (vs C-Moon): 42.7% |
(Video) |
You must be very close up when landing the 2AA, preferably you'd be doing it with dash momentum.
- 2[C], 2C does not work on Ries
|
|
|
| Anywhere, close hit, 100% meter
|
- 2AA > 2B > 5C > 2C > 5A(w)6AA, j.[C] > j.[C], land > dash 2C / 2[C], 2C > (dl.5B) > 5C > 623B, otg > 623C
|
5178*
|
|
| Meter Gained: -11.1% |
Meter Given (vs C-Moon): 40.3% |
(Video) |
| Gotta be very close up when doing 2AA, so you will most likely be doing it off a dash.
|
|
|
623C walk back 2C 5A(w)6AA j.[C]
| Condition
|
Notation
|
Damage
vs V.Sion
|
Notes
|
|
| Anywhere, 5-6 hits before 623C, 100% meter
|
- (2B > 5B > 5C > 2C > 3C) > 623C, walk back, 2C > slight delay 5A(w)6AA, j.[C], land > 2[C], 2C > (dl.5B) > 5C > 623B, 5B > 2C > 623A
|
5871
|
| |
| Meter Gained: -34.6% |
Meter Given (vs C-Moon): 46.4% |
This combo is very difficult, but gives excellent reward with a low prorate starter like 2B or 5B.
- You do not have to do the starter string in parentheses; you just need to have 5-6 hits before 623C.
- Damage calculated on V.Sion with the example starter.
|
|
|
| Corner, grounded counterhit, 100% meter
|
- CH X > 5[C] > 623B, 5B > 2B > 623C > walk back > 2C > 5A(w)6AA, j.[C], land > 2[C], 2C > (dl.5B) > 5C > 623B, 5B > 2C > 623A
|
7724
|
| |
| Meter Gained: -32.9% |
Meter Given (vs C-Moon): 46.8% |
Very hard combo that has crazy reward. Effectively requires you to anticipate that you'll CH and pilot into 5[C].
- Damage calculated on V.Sion with a CH 5[C] starter.
|
|
|
Situational combos
| Condition
|
Notation
|
Damage
vs V.Sion
|
Notes
|
|
| Anywhere, CH, 100% meter
|
- 2C(1) CH > 3[C] > j.[C], dj.9, j.[C], land > dash 2C / 2[C], 2C > 5C > 623B, otg > 623C, 2C > 5C > 623B, otg > 623A
|
6796
|
| |
| Meter Gained: ? |
Meter Given (vs C-Moon): 44.3% |
| A situational confirm for when you know you will CH with 2C. You need to immediately cancel the first hit into 3[C] for it to connect as a combo. Carries the opponent corner to corner. Damage, meter gain and meter given all differ depending on which route and otg you had to use with the values listed being calculated with the 2[C], 2C route and a 5B > 2C otg. |
|
|
Additional Resources
Satsuki Discord
Notable Players
| Name |
Color
|
Region |
Common Venues |
Status |
Details
|
| ura |

|
Japan |
Play Spot BIG ONE 2nd |
Active |
The best H-Satsuki player. Extremely well balanced playsyle, excellent neutral and great adaptation. A must watch if you want to see the full potential of H-Sats.
|
| akahoshi (赤星) |

|
Japan |
A-cho |
Active |
Mainly plays C-Satsuki but plays H sometimes. Likes to do long intricate blockstrings and flashy routing.
|
| OnionLust |

|
North America |
Netplay |
Active |
Plays all 3 moons but mains H. Prioritizes mixups more than most on this character. Always willing to talk about Satsuki and can be found in every Melty server, OnionLust#1215.
|
MBAACC Navigation

