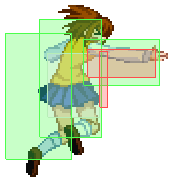
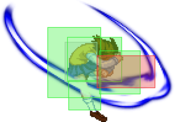
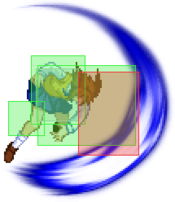
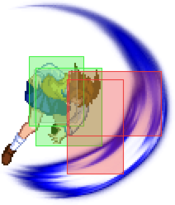
Melty Blood/MBAACC/Satsuki Yumizuka/Full Moon
Overview
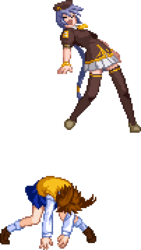
| F-Satsuki is a technical rushdown character with a unique playstyle and strong, loopable okizeme. Considered a counter-pick character by some, but F-Satsuki is a complete character on her own. | |
| Pros | Cons |
Move Descriptions
| Frame Data Help | |
|---|---|
| Header | Tooltip |
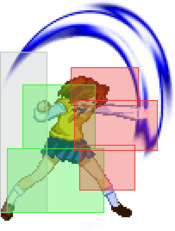
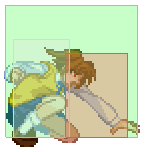
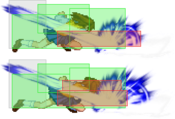
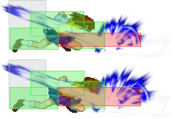
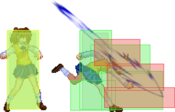
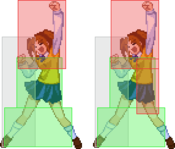
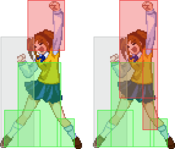
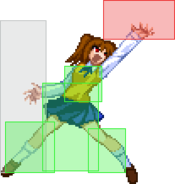
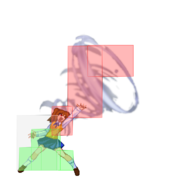
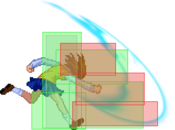
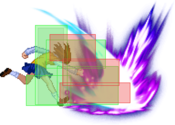
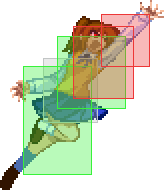
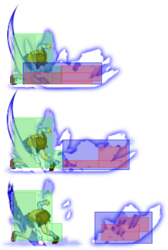
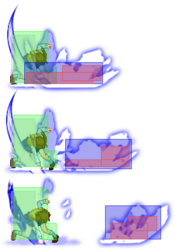
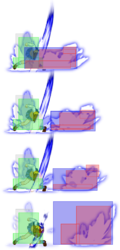
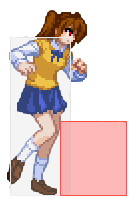
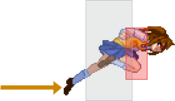
| Move Box Colors |
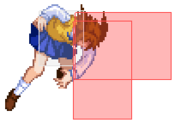
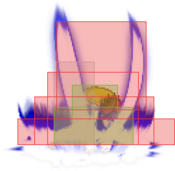
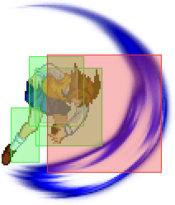
Light gray = Collision Box (A move lacking one means it can go through the opponent's own collision box). |
| Damage | Base damage done by this attack.
(X) denotes combined and scaled damage tested against standing V. Sion. |
| Red Damage | Damage done to the recoverable red health bar by this attack. The values are inherently scaled and tested against standing V. Sion.
(X) denotes combined damage. |
| Proration | The correction value set by this attack and the way it modifies the scaling during a string. See this page for more details.
X% (O) means X% Overrides the previous correction value in a combo if X is of a lower percentage. |
| Circuit | Meter gained by this attack on hit.
(X%) denotes combined meter gain. |
| Cancel | Actions this move can be cancelled into.
SE = Self cancelable. |
| Guard | The way this move must be blocked.
L = Can block crouching |
| Startup | Amount of frames that must pass prior to reaching the active frames. Also referred to as "True Startup". |
| Active | The amount of frames that this move will have a hitbox. (x) denotes frame gaps where there are no hitboxes is present. Due to varied blockstuns, (x) frames are difficult to use to determine punish windows. Generally the larger the numbers, the more time you have to punish. |
| Recovery | Frames that this move has after the active frames if not canceled. The character goes into one frame where they can block but not act afterwards, which is not counted here. |
| Advantage | The difference in frames where you can act before your opponent when this move is blocked (assuming the move isn't canceled and the first active frame is blocked). If the opponent uses a move with startup that is at least 2 frames less than this move's negative advantage, it will result in the opponent hitting that move. |
| Invul | Lists any defensive properties this move has.
X y~z denotes X property happening between the y to z frames of the animations. If no frames are noted, it means the invincibility lasts through the entire move. Invicibility:
Hurtbox-Based Properties:
Miscellaneous Properties
|
Normal Moves
Standing Normals
5A
5B
5C
5C
5[C] |
|---|
Crouching Normals
2A
2B
2C
2C 2C 2[C] 2[C]
|
|---|
Aerial Normals
j.A
j.B
j.C
j.C
j.[C] |
|---|
Command Normals
3C
3C
3[C] |
|---|
Universal Mechanics
Ground Throw
Ground Throw
6/4A+D |
|---|
Air Throw
Air Throw
j6/4A+D |
|---|
Shield Counter
Shield Counter
236D after a successful Shield (Air OK) |
|---|
Shield Bunker
Shield Bunker
214D in neutral or blockstun |
|---|
Blood Heat
Blood Heat
A+B+C during MAX |
|---|
Circuit Spark
Circuit Spark
A+B+C during hitstun/blockstun at MAX |
|---|
Special Moves
236X
Sacchin Arm: Aerial Dash
236A/[A]/B/[B]/C |
|---|
623X
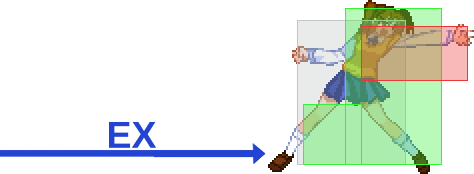
Sacchin Arm: Chasing the Uncatchable Dream 623A/[A]/B/[B]/C A A [A] [A] B B [B] [B] EX EX
|
|---|
214X
Here I go~! 214A/[A]/B/[B]/C A A B B [B] [B] EX EX
|
|---|
421X
22X
Don't come near me! 22A/B/C A A B B EX (2nd Projectile) EX (2nd Projectile)
|
|---|
63214C
Sorry, just one bite!
63214C |
|---|
Arc Drive
Now I'm mad...!
41236C during MAX/Heat |
|---|
Another Arc Drive
Now I'm mad...!
41236C during Blood Heat |
|---|
Last Arc
Reality Marble - Depletion Garden
Grounded EX Shield during Blood Heat |
|---|
General Gameplan
F-Satsuki's gameplan revolves around scoring a hit, carrying the opponent to the corner, and starting her setplay. It is common for one opening to vortex into an entire round. She can opt for an aggressive gameplan that attempts to overwhelm the opponent to score that opening, or she can play a slower, reactive style and wait for the opponent to overextend.
Neutral
F-Satsuki has a very strong kit for controlling neutral on the ground and protecting her airspace:
- 5B, 5C, and 5[C] move her forward and have hearty disjoints that cover both ground and IAD approach angles. A 236C or 623C can be buffered behind them depending on how you expect them to connect.
- 623C is an infamously large anti air command grab that can be used to catch obvious air approaches and jumpout attempts.
- 236C is invulnerable in the middle of its animation and moves Satsuki forward a considerable amount, allowing her to punish projectiles and other moves with poor recovery on reaction. Buffer the 236 input when you expect a punishable move to come out, and only press C when you visually confirm it.
- 2C is a ludicrously fast sweep that hits on frame 5 and can be convert even at max range as 2C(1) > 236C. Defensively, the active frames can be used as a wall on the ground to stuff approaches. Offensively, dash 2C is extremely hard to react to and has very good range.
- 3C and 3[C] are slow but can low profile many hitboxes. Unsafe on whiff and close range, but safe at max range. Convert 3C into 5B > 623C.
- 22A and 22B occupy a decent amount of space on the ground which can stuff out grounded approaches. This is most notable with 22B as this can be EX cancelled to catch jumps with a buffered 623C
- j.7B and rising j.A are powerful (while committal) answers to air approaches if you do not have the time for a 5[C] or 623X anti air.
- j.C launches the opponent into a techable knockdown. If they miss the tech, you can convert with 5B > 623C. On a tech, you can attempt to chase and punish. When this move counterhits, you have time to land and catch them with 5B/5C > 623 or 2C before they land.
Pressure
F-Satsuki has many buttons that are disjointed and plus on block, allowing for lengthy pressure sequences full of frametraps. Because she lacks good overheads, meterless command grabs, and has a poor universal throw F-Satsuki banks on suffocating with range and plus frames until the opponent commits to an escape and punishes it.
Pressure Tools
- 5A/2A: +3 Functionally identical moves. Very likely you start your pressure string with this move.
- 5B: -2~+3 Keeps you in their face and plus. Catches jumps and converts to 623[B]/623C. Has cancels to 2B, 5C/5[C], and 2C, so has to be respected. Frame traps into itself very well too.
- 2B: +3 Decent pressure filler and similar useage to 5B, though not as good.
- 5C: +0 Not an extremely good move in pressure. Ends your pressure.
- 5[C] +4 Naturally frame traps from Satsuki's other normals. Gives very high damage on CH. Because of the high pushback, pressure can become very scrambly if blocked.
- 2C -15 Important because of its speed and range, but don't overuse, because on block you have to commit hard to continue pressure.
- 3C -13~-2 Naturally frame traps, but otherwise forces a gamble to keep pressure going on block. Can cancel into 236[A].
- 3[C] -1~6 On block can be canceled into 623[A] to reassert frame advantage. However, the startup is telegraphed and can be jumped or shielded. Use sparingly.
- 214X RPS
- 214A: -5 on hit and block, but can be converted on counterhit. In general, try to avoid hitting with 214A
- 214A(whiff): EX cancel into EX Bite.
- 214[A]: Safest cancel after a blocked 3C. React to what they do and punish, or just go for a reset if they're scared.
- 214B: Slow overhead that leads into full combo on connect. Catches jumpouts because it is air-unblockable. Safe on block, but very easy to shield.
- 214[B]: What makes this move good is that it is unshieldable, so if they show they are willing to shield 214B, go for this and collect your massive reward.
- 236[A] A feint which will put you right in their face. Mashable, but if you have their respect it can be a good reset. 2A/5A and 63214C are the most common moves to use out of the hop.
- 236B +4 Very slow, but very plus.
- 22A -2 Sounds bad on paper, but the move can be converted on CH and you also play at the two character length spacing better than most characters, even at -2.
- 22C +21 Only use it when you know you won't get bunkered. Decent to use to avoid entering MAX.
- 63214C Your only good way to get players to stop blocking. Unfortunately costs 100 meter. Can be done out of 236[A].
- IAD j.C Pressure reset, but risky to go for because of shield.
Example strings:
2A > delay 2A > delay 2A, redash 2A > ...
2A > delay 63214C
... > 5B > 2B, 5B > 2B, 5B > 2B > ...
... > 5B, 5B, 5B, 5B > ...
... > 5B/2B > 5[C] > ...
... > 236B, 5B > ...
... > 3C > 236[A], 63214C
... > 5[C] > 22A, 2C > 3C > ...
... > 3[C] > delay 623[A] > ...
... > 5C > 3C > 214A(whiff), 63214C
Okizeme
Full Moon Satsuki's gameplan revolves around okizeme. Getting one hit in can lead to the opponent eating combo after combo. F-Satsuki's 623A anti-air hitgrab leads to a very long, untechable knockdown. Remember that each character in the game has unique wakeup speeds for different sorts of knockdowns. Most of the time, the small difference in wakeup timing is not a problem, but some characters require extra delay to meaty, while Miyako in particular's wakeup is so short some setups cannot hit meaty without extra workarounds. C-Satsuki Knockdown Durations
Sandoori
Sandoori is a technique where Satsuki double jumps and immediately airdashes back, which allows a very hard to react to crossup high. Input frame perfectly, sandoori is only 2 frames slower than a regular airdash back.
The input for sandoori can be 496, 476, or 76A+B. These inputs are all based on your original facing direction. For the two manual inputs, 4 can be input before or after crossing over, but the other inputs have to be after you are already past them. 496 will give a very fast sandoori. 476 will give a slower sandoori, because of required time to go from 7 to 6. It has the perk of moving you closer to your opponent, so in some cases where 496 will overshoot, 476 will be perfect. If the manual input is challenging, then it is acceptable to use the airdash macro instead.
Mixups
Midscreen 623A 3-Way
Example Route: 2C > 3C > 623[A], j.8[C] > sdj.[C], land 66 > 2C > 3C > 623[A], 623[A]
Your best meterless mixup.
- Dash j.8...
- airdash back j.C
- superjump sandoori j.C
- land 5A/2A/2C
- j.8 delay airdash j.C(whiff)
- crossup or same-side 2A/5A/2C based on delay timing
- 4~5A > small delay 236[B]
- crossup or same-side 2A/5A/2C based on delay timing
Midscreen 623C 3-Way
Example Route: 2C > 3C > 623[A], j.9[C], land 66 > 2C > 3C > 623[A], 623C
Very simply end a combo midscreen with 623C. Midscreen 623C will only ever give you a 3-way mixup. There are two major setups.
- slight delay dash j.8...
- airdash back j.C
- superjump sandoori j.C
- land 2C
- sj.9~j.8 drift...
- airdash back j.C
- crossup or same-side land 2C based on j.8 timing.
Cornersteal 623C 4-Way
Example Route: 2C > 3C > 623[A], j.8[C] > sdj.[C], land 2[C], 5B > 623[B], 5A > 5B > 2C > 623C
623C oki is even more potent near the corner where you can make it ambiguous if the opponent is fully in the corner or if there is a tiny gap. Because of the built-in ambiguity of crossup vs sameside, and the ability to hit high or low off the same jump timing, 623C corner oki is a true 4-way mixup. The idea is that you push their character on the ground a small amount that makes it unclear whether they are snug in the corner or not. If you opt for the sandoori option, consider inputting with the macro if you are not completely sure if there is a gap or not; you will just do a double jump airdash if there ends up not being a gap.
- slight delay dash j.8...
- airdash back j.C
- sandoori j.C
- crossup or same-side land 2C based on j.8 timing.
Midscreen 421A/B 4-Way
Example Route: 214B, 421A
An extremely good setup midscreen which allows for a meterless 4-way mixup. 421A and 421B can be used nearly interchangeably. The differences between the moves are that 421A is easier to hit because it is faster, throws a shorter distance, and leaves you slightly closer after the throw.
- 421A...
- crossup land 2C
- airdash back j.C
- j.B whiff sameside land 2C
- sandoori j.C
- 236[B]236[A]
- crossup or same-side 2A/5A/2C based on delay timing
Unblockable Setup
Example Route: 2C > 3C > 623[A], j.8[C] > sdj.[C], land 66 > 2[c], 2C > 3C > 623[A], 623C, 5E(Blood Heat), 5B/3C/214A~41236C
Satsuki's Another Arc Drive does not respect throw protection, so by making an opponent block a move with sufficient blockstun, she can cancel into an unavoidable AAD. Against players who know about this setup, you will have to play RPS, which if you win you will deal roughly 5k damage. 5B will beat low shield, 3C will beat high shield, and 214A will beat dodge and backdash. If you expect a reversal move, you can back off and see what they do. You have a few seconds to get the AAD off another way.
Extensive F-Satsuki Okizeme Guide
Heat OS
Many of F-Satsuki's setups can be made heat-safe with 5AA > 5C as 5C will clash on heat, allowing you to confirm into a full combo with 3C. This is particularly strong against characters with poor defensive options. If you think there is a chance that the opponent would rather heat on wakeup than gamble on holding your oki, land and go for this string as a meaty low option.
Of course, you have access to the universal heat OS, too.
Defense
2A and 2C are generally her best abare options, notably with 2C as its speed and range are hard for many characters to contest when pressed on a gap in a blockstring. 2C(1) > 236C has more range than 2C(2).
214C is a decent reversal which loses invulnerability on the same frame as its hitbox comes out. The fact that it moves Satsuki forward may assist in escape even if the move whiffs. You can attempt to input 214C during pressure gaps, but you can't mash it because 214C 214C 214C will be interpreted as mashing 421C.
Raw 236C will catch greedy specials in pressure. Nero summons, VAki charge pillar, PCiel lightning, and much more. The 236 input can be buffered to allow you to only complete the move by pressing C when you have visually confirmed your opponent is committing.
EX Bite is not a reversal, but its fast startup and singular i-frame make it viable to challenge players that miss their meaties.
In addition, you also have your universal defensive tools. Shield can be used to punish predictable attacks. Shield counter is usually enough, but if your shield counter is being OSed, switch to 623C. Probably your most important defensive tool is EX Guard. Not only does it push your opponent out and give you an opening to jump out, it also prevents them from building meter as quickly.
Combos
| Combo Notation Help | |
|---|---|
| Disclaimer: Combos are written by various writers, so the actual notation used in pages can differ from the standard one. | |
| X > Y | X input is cancelled into Y. |
| X > delay Y | Must wait for a short period before cancelling X input into Y. |
| X, Y | X input is linked into Y, meaning Y is done after X's recovery period. |
| X+Y | Buttons X and Y must be input simultaneously. |
| X/Y | Either the X or Y input can be used. |
| X~Y | This notation has two meanings.
|
| X(w) | X input must not hit the opponent (Whiff). |
| j.X | X input is done in the air, implies a jump/jump cancel if the previous move was done from the ground. Applies to all air chain sections:
|
| sj.X | X input is done after a super jump. Notated as sj8.X and sj9.X for neutral and forward super jumps respectively. |
| dj.X | X input is done after a double jump. |
| sdj.X | X input is done after a double super jump. |
| tk.X | Stands for Tiger Knee. X motion must be buffered before jumping, inputting the move as close to the ground as possible. (ex. tk.236A) |
| (X) | X is optional. Typically the combo will be easier if omitted. |
| [X] | Input X is held down. Also referred to as Blowback Edge (BE). Depending on the character, this can indicate that this button is held down and not released until indicated by the release notation. |
| ]X[ | Input X is released. Will only appear if a button is previously held down. This type of input is referred to as Negative Edge. |
| {X} | Button X should only be held down briefly to get a partially charged version instead of the fully charged one. |
| X(N) | Attack "X" should only hit N times. |
| (XYZ)xN | XYZ string must be performed N times. Combos using this notation are usually referred to as loops. |
| (XYZ^) | A pre-existing combo labelled XYZ is inserted here for shortening purposes. |
| CH | The first attack must be a Counter Hit. |
| Air CH | The first attack must be a Counter Hit on an airborne opponent. |
| 66 | Performs a ground forward dash. |
| j.66 | Performs an aerial forward dash, used as a cancel for certain characters' air strings. |
| IAD/IABD | Performs an Instant AirDash. |
| AT | Performs an Air Throw. (j.6/4A+D) |
| IH | Performs an Initiative Heat. |
| AD | Performs an Arc Drive. |
| AAD | Performs an Another Arc Drive. |
Combo Theory
Execution
2[C], 2C
This link helps Satsuki manage her spacing in corner combos where she wants a corner steal ender. 2[C] has three hits and 2C has two. Connecting all five hits is challenging and requires different timings on different characters. Ryougi and Riesbyfe literally cannot be hit by all three hits of 2[C] under any circumstance.
The trick to make this link easier is to do 2[C] early so that the first two hits whiff and only the third hits. Then you will have a huge window to land the 2C followup.
2C Pickup
Some characters' hurtbox shrinks vertically when they are hit in the air, and first hit of 2C does not have sweep properties. So what can often happen is that when using 2C to catch a falling opponent, the first hit of 2C will connect and shrink the opponent's hurtbox and make 2C's second hit whiff.
The remedy for this is to do 2C early and only connect the second hit.
623[A], j.[C]
1 frame link.
What you can do to significantly improve consistency is employ a technique called "plinking". Plinking takes advantage of how Melty interprets inputs to let you press the same button twice very quickly. This will make the link 2 frames instead of 1. To perform the plink, when you input j.[C], press and hold C, then 1 frame later press E. Make sure you are not holding any direction when you press E, or the plink will not work. If you get the plink, it should look like this:
Kouma and Riesbyfe
You need to put a delay between 3C and 623[A] during your normal BnB, otherwise the 623[A] grab hitbox will connect instead of the launch hitbox.
Versus Riesbyfe specifically, if you are able to get the combo counter to 6 before inputting 623[A], then you don't have to do the delay anymore.
Kouma is the only character that cannot be hit by 2[C] after j.[C]. His hurtbox is missing its head right before he lands. 2[C] actually has a slightly shorter hitbox than 2C and will whiff while 2C does not.
Corner Loop
Example route: 2C > 3C > 623[A], j.8[C] > sdj.[C], land 2[C], 5B > 5[C] > delay 623[B], 5B > 2C > 623C, (2C > 3C > 623[A], 623C)xN
Good loop to use to close out the final pixel in a healthbar. Will fail to OTG if your hitcount is in the 30s. Very meter hungry.
Miscellaneous
OTG Strings
A good rule of thumb for what OTG string to use is to use as few attacks as possible. For example, after 236B, simply 5B > 623C is the optimal OTG string.
Midscreen, when 5B > 623C stops working, you can still 22B > 623C for a while.
Air Button Cancels
Unlike a majority of characters in MBAACC, F-Satsuki cannot cancel her air buttons on hit or block into jump or other buttons. The only cancel she has access to is Instant Heat.
However, j.[C] follows the same cancel rules every other in the game uses, meaning she can jump or do an attack.
Ground Bounce/Wall Bounce Limit
Ground bounce and wall bounce are treated as the same thing, so this section will refer to them both simply as "bounces".
You are allowed 2 bounces in your combo. If you do a third, the person being comboed will enter an uncomboable state until they recover. This is a strict limitation for most characters, but Satsuki is blessed with a tool to ignore it. 623C resets the bounce limit back to 1, so she is allowed to extend her combos for very long. To see some examples of Satsuki bending the rules, refer to the Corner Loops section above this.
If you use 236C/623C when your bounce limit is still at 2, it will force you down to 1, so you must adjust your routing. 623C, 2C > 3C > 623[A], j.[C] > sdj.[C], land 66 > 2C will whiff on the final 2C, for example.
Jump Cancel Limit
Only one jump cancel is allowed per combo. You can Instant Heat your 623[A] to save your jump cancel, but it doesn't grant you any significant damage and it's still a 1 frame link to connect your j.[C].
Essential Combos
Combos
Additional Resources
F-Satsuki Match Video Database
Ale_Man's F-Satsuki Combo Video
Chace's F-Satsuki Blog
Satsuki Discord
Notable Players
| Name | Color | Region | Common Venues | Status | Details |
|---|---|---|---|---|---|
| Ale_Man | South America | Dream Match, Netplay | Active | Creator of the "F de Facha" combo video, has a good knowledge for techs with F-Sats, also has a YouTube channel with exhibitions. Subscribe to Zanzibarland | |
| Chace<3 | North America | Netplay | Active | NA F-Satsuki main and 214C > 2C enthusiast. Active in both discords and always willing to chat about the character. Posts FSats tech on their YouTube page and their F-Satsuki Blog | |
| Fang | North America | Netplay | Active | Lain's Dad and active NA CSats player. Plays Full Moon as a secondary. Great resource/lab monster, maintains the C and F Satsuki wiki pages. | |
| Ridory | Japan | Netplay | Active | C-Satsuki main who uses a secondary F-Satsuki for counterpick reasons. |

