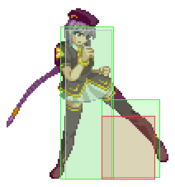
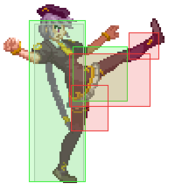
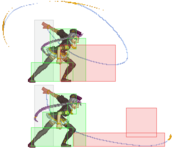
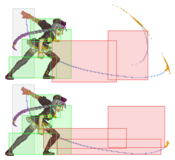
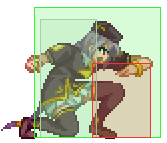
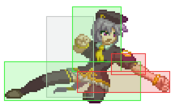
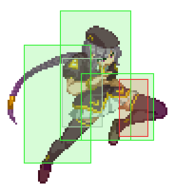
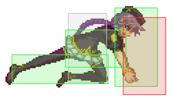
Character Page Progress
This page is still a work in progress, consider joining as an editor to help expand it. Please update this character's roadmap page when one of the editing goals have been reached.
| In Progress |
To-do
|
- Combos:
- Add damage, meter gain/given numbers and video links to the pre-existing combos.
|
- Additional Ressources/Players to watch/ask
- If you know any players in particular that can be helpful for learning this character, please add them with, if possible a way to contact them (such as a Discord handle) and a name that can be searched in the match video database.
- Overview/General Gameplan:
- Add a short summary of this character with a list of strengths and weaknesses
- Do your best to describe how to play this character, change or add subsections based on what you would write as a guide.
|
Additional Resources
F-Sion Match Video Database
Melty Bits: F-Sion
F-Sion Basic Resources
Notable Players
| Name |
Color
|
Region |
Common Venues |
Status |
Details
|
| チェスト (chesuto) |

|
Japan |
KorewaMelty |
Inactive |
|
| ユウ (yuu) |

|
Japan |
A-Cho |
Inactive |
A very patient F-Sion player with a good understanding of neutral play and some creative combo routes.
|
| Cristu (Cristu#0259) |

|
Brazil |
Netplay |
Inactive |
|
Manabe
(眞鍋#0927) |

|
North America |
Netplay |
Inactive |
|
Overview
Playstyle
|
F-Sion is a fast and simple to understand character with a set of tools for every occasion. |
| Pros |
Cons |
- Forward movement: F-Sion has amazing run speed and a fast airdash with a slight upward angle. This enables her to very effectively close the distance between her and the opponent, while also proving extremely useful for running under airborne opponents and whiff punishing by running into the recovering opponent with a button.
- Versatile: She has an access to a varied set of normals, command normals and specials, all with their unique purposes. This ensures she has an answer to nearly every situation she may find herself in during the match.
- Corner pressure: Once she corners the opponent, F-Sion can run a very effective strike/throw pressure due to having many plus on block normals, three standing overheads, amazing cancel windows on some of her normals and a great run.
- Air to Air: All of her air normals are great for sniping approaches due to either disgusting amounts of active frames or disjoints.
|
- Backwards movement: Contrary to her amazing forward movement, F-Sion's backwards movement is underwhelming due to her backdash covering little distance and her walking speed being slower when moving back than when moving forward. This means she will have to rely on her air backdash for retreating, which not only is hard to properly utilize out of a run but also makes her movement easier to predict.
- Awkward command normals: Due to having slow command normals on all of her 6X and 3X inputs other than 6A and 3A, carrying run momentum over onto her best normals will require good execution. This can make grounded neutral feel very awkward to play, as you might often find yourself unintentionally doing command normals you didn't mean to or stopping in place before getting a normal out.
- Stubby range: While much better at range than her C and H counterparts, F-Sion still mostly features normals designed for close-range combat, meaning she will need to be patient and properly utilize her great movement in order to win neutral against characters that outrange her.
|
Unique Mechanics
Sion has an Ammo gauge that affects how many bullets can be shot from her 236 specials. If she runs out of ammo after one of these specials, she will automatically go into a reloading state during the move's recovery, where she loads all bullets back in but is left vulnerable and very minus.
General Gameplan
Neutral
F-Sion is really fast, and the moment she touches you she's plus and threatens 5k-6k damage all the time, really scary for low health characters. Simply methodically approaching with dash 2A/5B can be a problem. 236A is 12F anti-zone harassment tool nets a combo or free dash in on counterhit. 214A is 16 frames and much slower, but provides a better reward into a 50/50. High mobility/ shield gamble reward, with the addition of 623A/B makes air approaches/landings scary for opponents. She's a pretty aggressive character, and has the tools to fight pretty much any character in the game.
Pressure
- 2A > 2A
- 2A > 5B - Basic frame trap
- 2A > 2B - Basic frame trap. Slightly tougher timing, but more plus on block
- 2A > Throw - Not very threatening, but still sometimes you gotta throw people
- 2A > 22B - Same as above but more risky for higher reward, honestly does a good amount of damage. Command grab.
- 5B...5B...
- 2B > 5C > (236A) - Fairly safe frame trap or auto pilot string, catches jumpers
- 2B > 5{C} > (236A) - Half charge exists to catch mashing
- 2B > 5[C] > (236A) - Overhead, opponent can mash before its active or shield.
- 2B > 5CC - +10 pressure reset if you believe they'll block, jumpable, mashable, shieldable
- Button > 6C - Another pressure reset tool that low crushes is a counter hit > into death > true at all percents combo
- 236A x N - netplay infinite
Frametrap character, hit them 2-3 times to win the game.
Okizeme
== Generic Hard Knockdown == Simple effective stuff, you'll usually do this after j.214c, unteched air throw, or 236C.
== 214A == 50/50 MIX. Works on every character except Hime
- Input is 214A hits > upback > slight delay airdash > (Mixup option) > land > 5B/2B or Throw
Whether or not you whiff an air normal on the way down determines which side you're on
| Same Side |
Crossup
|
| Button |
Delayed Button
|
| Gotta use a button. |
No button
|
== 6C == Deadbody crossup.
- Slightly changing the timing makes it same side. Not as potent as the 214A mix but much easier to do.
== 5CC in hitstun == Gimmick reset, that is harder to react to than dropping your combo to do 6B/2A and getting counter hit by competent player
- Some long ass combo > 5CC. Becomes +10 or knocks down on counter hit.
Defense
Your default defensive option should always be blocking - don't mash anything if you don't have a good reason to and don't fully believe it will work. Use the time spent blocking to look for patterns in your opponent's offense and the opportunity to escape. Against most of the cast, good blocking will eventually make your opponent have to pick between resetting to neutral or taking risks that you can exploit, especially if you properly utilize ex guarding. Once this happens and/or once you feel like you have a feel for your opponent's offense you can start using your other options in order to escape.
- 623B is a strong meterless reversal that deals a hefty amount of damage. It's great for catching jumps and iads, as well as for discouraging "fake" offense. You can also use this to make the opponent think twice about doing close-range stagger pressure, just don't get too predictable with it.
- 623A is a gimmicky reversal that can be useful in some situations. It has 1f of invulnerability, after which the lower half of your hurtbox will disappear until the move becomes active. This lets you beat attacks with hitboxes low to the ground, but most importantly this move can be EX cancelled on hit, block and whiff, letting you either remain safe or perform a short combo into 214A knockdown. This move is great for stealing momentum, but it's gimmicky nature can be exploited by wary opponents and shouldn't be relied on too much.
- Jumping out is a great option for escaping pressure once your opponent is pushed out too far to catch jump startup. This becomes even stronger if you properly utilize ex guarding and fuzzy jumping.
- Abare unfortunately isn't F-Sion's strongest point, as her A normals are both small and low to the ground, meaning they won't work as panic anti-airs. If you really need to mash then use 2B, this move is great due to it's forward movement, disjoint and low profile, and only sometimes outclassed by 5B in some rare or specific situations, such as catching low iads from far away. 2C, despite having great range and disjoint, is too slow to use it as an abare. It can catch some cocky redashes, but often in these situations you will be able to jump, which is a much safer option.
- 1A+D is an option select that will result in you either teching a throw, blocking or performing a low shield. If you block or shield depends on the timing so you should always aim to do it as late as possible in order to avoid accidently whiffing a low shield. You should always be ready to confirm the eventual shield into shield counter if you happen to land it. A strong option but can be easily called out by wary opponents, so you shouldn't rely on it all the time.
- Shield can be used to call out flowcharting and very reactable resets. Your best option off of shield will usually be a shield counter, off of which F-Sion's reward is pretty decent. Despite this, it shouldn't be used to gamble if you can avoid it.
- 22C is a situational metered reversal with some extra horizontal range. Beats stuff like F-Sion's 236A or Ryougi's knife toss at certain distances.
- Arc Drive is very situational as it requires you to be in MAX or Heat. This is essentially just another metered reversal that will get you killed if it's blocked. Due to it starting with Sion throwing an air unblockable bullet above her, it can be used as an anti-air.
- Another Arc Drive is even more situational due to requiring Blood Heat. Unlike the regular arc drive, this one starts with Sion running forward at the opponent in order to launch them into the air before throwing the bullet. Due to this you can think of it as a better 22C.
Combos
| Combo Notation Help
|
Disclaimer: Combos are written by various writers, so the actual notation used in pages can differ from the standard one.
For more information, see Glossary and Controls.
|
| X > Y
|
X input is cancelled into Y.
|
| X > delay Y
|
Must wait for a short period before cancelling X input into Y.
|
| X, Y
|
X input is linked into Y, meaning Y is done after X's recovery period.
|
| X+Y
|
Buttons X and Y must be input simultaneously.
|
| X/Y
|
Either the X or Y input can be used.
|
| X~Y
|
This notation has two meanings.
- Use attack X with Y follow-up input.
- Input X then within a few frames, input Y. Usually used for option selects.
|
| X(w)
|
X input must not hit the opponent (Whiff).
|
| j.X
|
X input is done in the air, implies a jump/jump cancel if the previous move was done from the ground.
Applies to all air chain sections:
- Assume a forward jump cancel if no direction is given.
- Air chains such as j.A > j.B > j.C can be shortened to j.ABC.
|
| sj.X
|
X input is done after a super jump. Notated as sj8.X and sj9.X for neutral and forward super jumps respectively.
|
| dj.X
|
X input is done after a double jump.
|
| sdj.X
|
X input is done after a double super jump.
|
| tk.X
|
Stands for Tiger Knee. X motion must be buffered before jumping, inputting the move as close to the ground as possible. (ex. tk.236A)
|
| (X)
|
X is optional. Typically the combo will be easier if omitted.
|
| [X]
|
Input X is held down. Also referred to as Blowback Edge (BE). Depending on the character, this can indicate that this button is held down and not released until indicated by the release notation.
|
| ]X[
|
Input X is released. Will only appear if a button is previously held down. This type of input is referred to as Negative Edge.
|
| {X}
|
Button X should only be held down briefly to get a partially charged version instead of the fully charged one.
|
| X(N)
|
Attack "X" should only hit N times.
|
| (XYZ)xN
|
XYZ string must be performed N times. Combos using this notation are usually referred to as loops.
|
| (XYZ^)
|
A pre-existing combo labelled XYZ is inserted here for shortening purposes.
|
| CH
|
The first attack must be a Counter Hit.
|
| Air CH
|
The first attack must be a Counter Hit on an airborne opponent.
|
| 66
|
Performs a ground forward dash.
|
| j.66
|
Performs an aerial forward dash, used as a cancel for certain characters' air strings.
|
| IAD/IABD
|
Performs an Instant AirDash.
|
| AT
|
Performs an Air Throw. (j.6/4A+D)
|
| IH
|
Performs an Initiative Heat.
|
| AD
|
Performs an Arc Drive.
|
| AAD
|
Performs an Another Arc Drive.
|
_____________________________________________________________________________________________________________________________________________________
Combo Theory
F-Sion combo routing has several different branching paths, in order to make learning easier and to alleviate repetition, every possible ender will not be listed. It's important to understand how F-sion combos function, and quickly adjust your routing based on the situation to perform them consistently in real matches.
- Every combo can be done anywhere on the screen.
- The timing of all the combos have the same "flow" so if you practice them you'll grow very accustomed to it.
- Ending combos with air throw in the corner gives decent frame advantage. j.C > 2A punishes forward tech, j.214c punishes neutral/back tech (easy to get the spacing in combos that flow like j.BC > dj.ABC), otherwise you get a meaty on no tech.
- Ending air combos prematurely with j.214A on whiff enables F-Sion to land much faster than the opponent, forcing an air-tech landing tech chase situation. Useful option in midscreen if you can't get whip okizeme or depending on the matchup for characters who have trouble landing.
- j.214C can be added as an ender onto any double jump air combo for extra damage, hard knockdown, and excellent corner carry.
- Combos into 214C give the potential to deal high damage and end combos into 214A, enabling F-Sion's 50/50 mixup.
- 6B > 5C
- 5[C](2) > 214B is only natural at a mid or close range.
- 6C > 2A links on natural combo, on counter-hit opting for 5b nets more damage.
All combos were tested on Sion Tatari (standing). All damage and meter gain calculations are thus based on such, unless otherwise specifically stated. If there are any calculations in parentheses, that means they're calculations showing how much more you gain for tighter confirms (optional normals in the combo that do more damage.) If they're not listed, despite such parenthesized normals being in the transcript, it was omitted because it follows the basic pattern of either:
- A starters resulting in less damage but more meter if you stack them on before B/C starters due to scaling
- j.A always adding more damage and meter in air combo finishers
- j.B/C always adding more damage if used as starters, on top of more meter
_____________________________________________________________________________________________________________________________________________________
Beginner Combos
Simple and effective combos suited for beginners picking up the character.
Visual Demonstration for basic combos
Visual Demonstration for intermediate/optimal combos
| Condition
|
Notation
|
Damage
vs V.Sion
|
Notes
|
|
| Anywhere, Normal starter, grounded opponent
|
- 5B > 2B > 5C(2) > 214B, (delay 5B >) j.BC > dj.ABC > AT
|
4521
|
| |
| Meter Gained: 63.0 |
Meter Given (vs C-Moon): ??? |
5B is optional, if you're having trouble simply omit it.
- Air throw ender will provide a forward ground tech trap in the corner with j.C[w] but nothing midscreen.
|
|
|
| Anywhere, Normal starter, grounded opponent
|
|
2724
|
| |
| Meter Gained: 31.5 |
Meter Given (vs C-Moon): ??? |
Sacrifice damage and meter compared to the above combos for a hard knockdown/okizeme setup.
- 214A sets up a strong 50/50 mixup, so learning combos involving this move even as basic as this one is important.
|
|
|
| Anywhere, Normal starter, grounded opponent, 100% meter
|
- 5B > 2B > 2C > 214C, 5A > 5B > 5C(2) > 3C > 214A
|
4414
|
| |
| Meter Gained: -63.5 |
Meter Given (vs C-Moon): ??? |
For when you're willing to sacrifice 100 Meter for a more damaging version of the above knockdown route.
- If you're having trouble linking 5B after 214C, you can opt to do 5AA/2AA instead.
|
|
|
Anywhere, Air
- Universal Basic Combo #4 (Gold Air Throw)
|
- Gold AT > air dash cancel > j.C, land j.ABC > dj.ABC > AT
|
2845
|
| |
| Meter Gained: 45 |
Meter Given (vs C-Moon): ??? |
Basic conversion after Gold Air Throw.
- Note that you want to do the air dash cancel sooner rather than later, otherwise the air combo might not connect correctly.
|
|
|
Anywhere, Counterhit
- Universal Basic Combo #5 Shield Counter/Aerial Counterhit starter
|
- Shield Counter/Air CH, 5B > j.BC > dj.ABC > AT
|
4145
|
| |
| Meter Gained: 49.5 |
Meter Given (vs C-Moon): ??? |
| (Calculated off of j.C CH) You can add a couple of 5As at the beginning before 5B or even do 2B > 5C(1) before the aerial combo instead, but this is the most practical confirm positioning-wise. |
|
|
Intermediate Combos
Advanced combos that teach integral combo theory routes that are flexible. Important because ensuring the efforts of practicing easier variants of combos are not all for naught. A Must learn for any aspiring F-Sion player.
| Condition
|
Notation
|
Damage
vs V.Sion
|
Notes
|
|
Anywhere, grounded opponent, bullets loaded > 1
- Universal Intermediate Combo #1
|
- 5B > 2B > 2C/3C > 236A, 5B > j.BC > dj.ABC > AT
|
4815
|
| |
| Meter Gained: 65.7 |
Meter Given (vs C-Moon): 21.9 |
Go-to gun combo confirm. Damage calculated with 2C.
Basic 236A into 5B link combo.
It's more practical to do this with 2C instead of 3C, as the hitstun will be more lenient for the link and the damage greater. If you must confirm off of 3C into 236A however, do it in the corner, or linking it will be much harder due to spacing. Try to be as close as possible too. |
|
|
Anywhere, grounded opponent
- Universal Intermediate Combo #2
|
- 5B > 2B > 5C(2) > 214B, j9.[C] > dj.7 > delay j.[C] > j.214A, land j.BC > dj.ABC > AT
|
4921
|
| |
| Meter Gained: 73.8 |
Meter Given (vs C-Moon): 26.8 |
The basic j.[C] loop rep. Possible off of any number of hits, or even no hits, before 5C.
If you're going to start learning any F-Sion combo to master them all, begin with this. You'll always be needing this as stated above, this works with any number of hits, meaning gravity isn't really a factor. Learning the timing on delay j.[C] is very important. |
|
|
Anywhere, Gold Air Throw
- Universal Intermediate Combo #3
|
- Gold AT> j.66 > j.[C] > air drift back delay j.[C] > 3B > j8 > j.BC > dj.BC > AT
|
3159
|
| |
| Meter Gained: 55.5 |
Meter Given (vs C-Moon): ??? |
Normal conversion off of air throw.
Similar structure from the beginner Gold AT combo. holding 8 after 3B triggers an automatic super jump cancel to get the extra height needed for the combo. Builds a lot of meter |
|
|
Shield Counter/Aerial Counterhit, 100% meter
- Universal Intermediate Combo #4
|
- Shield Counter/Aerial CH, (2C >) (214A ender) > 214C > Conversion of choice
|
variable
|
| |
| Meter Gained: variable |
Meter Given (vs C-Moon): variable |
For if you wanna spend 100 Meter instead to convert Shield Counters and Aerial CHs into a full ground combo.
Add 2C if you can for better end damage. |
|
|
Optimized Combos
More challenging, but still practical combos that maximize damage/meter gain
| Condition
|
Notation
|
Damage
vs V.Sion
|
Notes
|
|
Anywhere, grounded opponent
- Universal Advanced Combo #1
|
- (2A*n) > 5B > 2B > 5C(2) > 214B, j9.[C] > dj.7 > j.[C] > j.214A, land slight delay 3B > j7.[C] > dj.8 > delay j.[C] > j.214A, land j.BC > dj.ABC > AT
|
5308
|
| |
| Meter Gained: 104.4 |
Meter Given (vs C-Moon): ??? |
| This is F-Sion's staple optimized BnB. It maximizes the j.[C] loop reps and boasts both high damage and excellent meter gain. Somewhat difficult, but luckily only mainly requires precision on height control rather than reliance on opponents hurtbox positions relative to their location point. Four hits before 5C is a good rule of thumb for consistencies sake, as it'll significantly affect the gravity for the rest of the combo to be true. It is still possible to do this with only 2 or 3 hits before 5C, but is much more difficult to land the j.[C] delay links. Mastering this route is crucial due to it's sheer damage output and having multiple branching routes that yield good reward and is flexible to accommodate a variety of situations. |
|
|
Anywhere, grounded opponent, 100% meter
- Universal Advanced Combo #2
|
- (2A*n) > 5B > 2B > 5C(2) > 214B, j9.[C] > dj.7 > delay j.[C] > j.214C, land j7.[C] > dj.8 > delay j.[C] > j.214A, land slight delay 3B > j7.[C] > dj.8 > delay j.[C] > j.214A, land j.BC > dj.ABC > AT
|
6101
|
| |
| Meter Gained: -27.8 |
Meter Given (vs C-Moon): ??? |
The ultimate j.[C] loop.
Unlike the above version, it uses 100 meter and doesn't require four hits before 5C(2) for almost 1k extra damage. Three reps of j.[C] loops followed by the air combo finisher. A fourth rep is possible if the combo starts at a specific amount of meter close to max. |
|
|
Anywhere, grounded opponent, 100% meter
- Universal Advanced Combo #3
|
- (2A*n) > 5B > 2B > 5C(2) > 214B, J.9[C] > delay j7.[C] > j.214A > long delay 623A (1) > 214C > 5A > 5B > 5C(2) > 3C > 214A
|
4207
|
| |
| Meter Gained: -32.1 |
Meter Given (vs C-Moon): 26 |
| j.C loop that ends in 214A hard knockdown. The 623A must be delayed otherwise you'll be airborne and be unable to do the 214C cancel. |
|
|
Situational Combos
These combos are more situational but may still apply.
| Condition
|
Notation
|
Damage
vs V.Sion
|
Notes
|
|
| Anywhere, grounded opponent
|
- 2/3C > 214C, 5B > 2B > 5C(2) > 214B, j9.[C] > dj.7 > delay j.[C] > j.214A, land slight delay 3B > j7.[C] > dj.8 > delay j.[C] > j.214A, land j.BC > dj.ABC > AT
|
4248
|
| |
| Meter Gained: -28.8% |
Meter Given (vs C-Moon): ??? |
(Calculated off of 3C) For when you get a knockdown with 2/3C and can confirm quickly eonugh into the 214C for pickup. Good as both are OTG, safe on block, and confirmable on their own.
Considering F-Sion's toolset, this is the only thing 214C will be practically good for.
Super combo obviously, requires 100 Meter. |
|
|
| Anywhere, grounded opponent
|
- 2AA > 5B > 2B > 5C(2) > 214B, j9.[C] > dj.7 > delay j.[C] > j.214A
|
3491
|
| |
| Meter Gained: 58 |
Meter Given (vs C-Moon): 22 |
| Very difficult but strong meterless hard knockdown combo, the delays and height control must be done very precisely. May not be practical depending on your execution. |
|
|
| 236C Reload combo
|
- Simple j.[C] loop/string > (236A) > 236C
|
variable
|
| |
| Meter Gained: -variable |
Meter Given (vs C-Moon): variable |
| Hard knockdown route for the sake of reloading bullets. |
|
|
Move Descriptions
| Frame Data Help
|
| Header
|
Tooltip
|
| Move Box Colors
|
Light gray = Collision Box (A move lacking one means it can go through the opponent's own collision box).
Green: Hurt Boxes.
Red: Hit(/Grab) Boxes.
Yellow: Clash Boxes (When an active hitbox strikes a clash box, the active hitbox stops being active. Multi-hit attacks can beat clash since they will still progress to the next hitbox.)
Magenta: Projectile-reflecting boxes OR Non-hit attack trigger boxes (usually).
Blue: Reflectable Projectile Boxes.
|
| Damage
|
Base damage done by this attack.
(X) denotes combined and scaled damage tested against standing V. Sion.
|
| Red Damage
|
Damage done to the recoverable red health bar by this attack. The values are inherently scaled and tested against standing V. Sion.
(X) denotes combined damage.
|
| Proration
|
The correction value set by this attack and the way it modifies the scaling during a string. See this page for more details.
X% (O) means X% Overrides the previous correction value in a combo if X is of a lower percentage.
X% (M) means the current correction value in a combo will be Multiplied by X%. This can also be referred to as relative proration.
|
| Circuit
|
Meter gained by this attack on hit.
(X%) denotes combined meter gain.
-X% denotes a meter cost.
|
| Cancel
|
Actions this move can be cancelled into.
SE = Self cancelable.
N = Normal cancelable.
SP = Special cancelable.
CH = Cancelable into the next part of the same attack (Chain in case of specials).
EX = EX cancelable.
J = Jump cancelable.
(X) = Cancelable only on hit.
-X- = Cancelable on whiff.
|
| Guard
|
The way this move must be blocked.
L = Can block crouching
H = Can block standing.
A = Can block in the air.
U = Unblockable.
|
| Startup
|
Amount of frames that must pass prior to reaching the active frames. Also referred to as "True Startup".
|
| Active
|
The amount of frames that this move will have a hitbox.
(x) denotes frame gaps where there are no hitboxes is present. Due to varied blockstuns, (x) frames are difficult to use to determine punish windows. Generally the larger the numbers, the more time you have to punish.
X denotes active frames with a duration separate from its origin move's frame data, such as projectile attacks. In this case, the total length of the move is startup+recovery only.
|
| Recovery
|
Frames that this move has after the active frames if not canceled. The character goes into one frame where they can block but not act afterwards, which is not counted here.
|
| Advantage
|
The difference in frames where you can act before your opponent when this move is blocked (assuming the move isn't canceled and the first active frame is blocked).
If the opponent uses a move with startup that is at least 2 frames less than this move's negative advantage, it will result in the opponent hitting that move.
±x~±y denotes a range of possible advantages.
|
| Invul
|
Lists any defensive properties this move has.
X y~z denotes X property happening between the y to z frames of the animations. If no frames are noted, it means the invincibility lasts through the entire move.
Invicibility:
- Strike = Strike invincible.
- Throw = Throw invincible.
Hurtbox-Based Properties:
- Full = No hurtboxes are present.
- High = Upper body lacks a hurtbox.
- Low = Lower body lacks a hurtbox.
Miscellaneous Properties
- Clash = Frames in which clash boxes are active.
- Reflect = Frames in which projectile-reflecting boxes are active.
- Super Armor = Frames in which the character can take hits without going into hit stun.
|
Normal Moves
Standing Normals
|
|
| Damage
|
Red Damage
|
Proration
|
Cancel
|
Guard
|
| 350
|
202
|
75% (O)
|
-SE-, -N-, -SP-, -EX-, (J)
|
L
|
| First Active
|
Active
|
Recovery
|
Frame Adv
|
Circuit
|
Invuln
|
| 5
|
4
|
5
|
3
|
3.15%
|
-
|
|
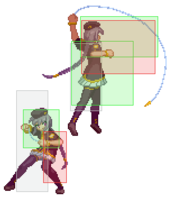
Standing low kick. Great pressure starter tool, used very similarly to 2A due to the + frames. Sometimes used in gold air throw pickups.
|
|
Remember, the "F" stands for footsies. Remember, the "F" stands for footsies.
|
| Damage
|
Red Damage
|
Proration
|
Cancel
|
Guard
|
| 800
|
505
|
80% (O)
|
N, SP, EX, (J)
|
LH
|
| First Active
|
Active
|
Recovery
|
Frame Adv
|
Circuit
|
Invuln
|
| 8
|
5
|
10
|
0
|
7.2%
|
-
|
|
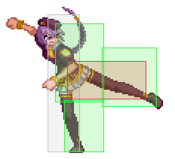
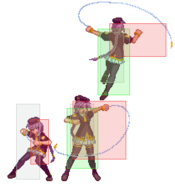
Standing mid forward kick. Sion's best normal across all three moons, period. This move's hitbox is big, it's slightly disjointed, it has a good angle for backwalk anti-airing, it's her best starter from the ground unless you're going for multi-divekick loops, and even at max range with this move it is still very much your turn as you can cancel into 5C or a special or go for a 6C reset to stay in. Great for tick throws.
|
|
Cast your line... Cast your line... Reel 'em in. Reel 'em in.
|
| 5C
|
Damage
|
Red Damage
|
Proration
|
Cancel
|
Guard
|
| 600*2 (1181)
|
(795)
|
90% (O)
|
N, SP, CH, EX, (J)
|
LH
|
| First Active
|
Active
|
Recovery
|
Frame Adv
|
Circuit
|
Invuln
|
| 11
|
1 (1) 4
|
19
|
-5
|
5.4%
|
-
|
|
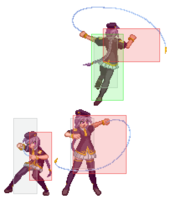
Big whip mid. This move is primarily used for pressure, as its applications in neutral are better suited to certain other options like 236A. In pressure, this move is a key mixup point, as you can stagger into a special, cancel into 5CC to reset your pressure, or 3C to catch jumpout attempts. Do not whiff this.
|
| 5[C]
|
Damage
|
Red Damage
|
Proration
|
Cancel
|
Guard
|
| 800*2 (1265)
|
(798)
|
60% (O)
|
N, SP, CH, EX, (J)
|
H
|
| First Active
|
Active
|
Recovery
|
Frame Adv
|
Circuit
|
Invuln
|
| 26
|
5
|
19
|
-5
|
7.2%
|
-
|
|
Big disjointed charged whip double overhead. This is your second overhead, and is mainly used as a late-string mixup. This move is half-chargeable, giving you access to a 5{C}>cancel mixups, though none of your options off the cancel are fast enough to be unreactable. This move hitting twice is mainly a gimmick, though the first hit is cancellable as well, leading to some very niche mixups.
|
| ~C
|
Damage
|
Red Damage
|
Proration
|
Cancel
|
Guard
|
| 700
|
606
|
80% (O)
|
-SP-, -EX-
|
LHA
|
| First Active
|
Active
|
Recovery
|
Frame Adv
|
Circuit
|
Invuln
|
| 24
|
1
|
7
|
10
|
5.4%
|
-
|
|
Sion reels the whip back in for a + on block mid hit. This is one of your key resets and one of your main options at the end of a blockstring, as it's heavily + and vacuums your opponent on block, giving you the perfect spacing for a microdash 2A. The gap between 5C and 5CC is very jumpable, and if your opponent is feeling dangerous, you could very well eat an IAD for your trouble. Don't over-rely on this, and make sure to mix up your options out of 5C.
|
|
Crouching Normals
|
|
| Damage
|
Red Damage
|
Proration
|
Cancel
|
Guard
|
| 300
|
151
|
75% (O)
|
-SE-, -N-, -SP-, -EX-, (J)
|
L
|
| First Active
|
Active
|
Recovery
|
Frame Adv
|
Circuit
|
Invuln
|
| 4
|
4
|
6
|
2
|
2.7%
|
-
|
|
Basic crouching low elbow. Great pressure starter tool, typically used out of a dash cancel. Standard F-Moon + frames make it good for long, safe staggers by cancelling into itself or into 5B.
|
|
Blockstring Extender 2011 Blockstring Extender 2011
|
| Damage
|
Red Damage
|
Proration
|
Cancel
|
Guard
|
| 500
|
303
|
100%
|
N, SP, EX, (J)
|
L
|
| First Active
|
Active
|
Recovery
|
Frame Adv
|
Circuit
|
Invuln
|
| 8
|
3
|
11
|
1
|
4.5%
|
-
|
|
Crouching low punch. Great stagger tool as it has just enough + frames for some early cancels or to cover stagger into your C normals. This move slides Sion forward slightly, which is a great boon considering this character has to always compensate for her normals pushing her back during her block pressure. Notable for having 100% prorate, meaning you have no reason not to throw this move into your ground strings pre-launch.
|
|
|
|
| Damage
|
Red Damage
|
Proration
|
Cancel
|
Guard
|
| 1200
|
808
|
80% (O)
|
SP, EX
|
L
|
| First Active
|
Active
|
Recovery
|
Frame Adv
|
Circuit
|
Invuln
|
| 14
|
3
|
22
|
-7
|
10.8%
|
-
|
|
Huge disjointed low sweep with the whip. This move is mainly used for whiff punishing on the ground as well as stagger pressure, mainly confirmed into 214A/C for oki. Extremely jumpable, as the hitbox is only about as big as the whip itself and is out later than the animation suggests. Do not whiff this.
|
|
Aerial Normals
|
|
| Damage
|
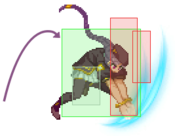
Red Damage
|
Proration
|
Cancel
|
Guard
|
| 300
|
151
|
75% (O)
|
SE, N, SP, EX, J
|
HA
|
| First Active
|
Active
|
Recovery
|
Frame Adv
|
Circuit
|
Invuln
|
| 5
|
8
|
7
|
-
|
2.7%
|
-
|
|
Quick overhead knee strike. Extremely good air normal to box with at Sion's preferred range. This move is quick, often beats out other moves for counterhits, mashing it works as a multi-overhead on jumpin, and is extremely active, allowing you to check badly spaced air approaches by doing instant j.A out of a jump. Has poor range, though, and shouldn't be over-relied on as a defensive air-to-air.
|
|
Incoming! Incoming!
|
| Damage
|
Red Damage
|
Proration
|
Cancel
|
Guard
|
| 700
|
505
|
90% (O)
|
N, SP, EX, J
|
HA
|
| First Active
|
Active
|
Recovery
|
Frame Adv
|
Circuit
|
Invuln
|
| 8
|
6
|
-
|
-
|
6.3%
|
-
|
|
Big slightly disjointed down and forward overhead chop. This move is a good example of why Sion's air neutral is great. The hitbox comes out relatively quick and will beat out most things that are at a 45 degree angle below you, though coming down right on top of someone with it might cause you to trade with their anti air. It's an incredible jumpin and is very good to throw out in neutral because it's so active and big that it can often catch people pressing buttons with a counterhit. Don't throw this out at point blank and people will be afraid.
|
|
Press this one. A lot. Press this one. A lot. Kyaa! Kyaa!
|
| j.C
|
Damage
|
Red Damage
|
Proration
|
Cancel
|
Guard
|
| 1000
|
606
|
90% (M)
|
SP, EX, J
|
HA
|
| First Active
|
Active
|
Recovery
|
Frame Adv
|
Circuit
|
Invuln
|
| 7
|
2
|
-
|
-
|
9.0%
|
-
|
|
Big disjointed flip kick overhead. Incredible button. Sion can get away with throwing this button out whenever she feels the need to threaten above or in front of her, either to air to air, create space or snipe air normals. Not a great jumpin, as it has a blind spot at the 45 degree angle below her, though she does have a 66>9>4A+B safejump setup with it.
|
| j.[C]
|
Damage
|
Red Damage
|
Proration
|
Cancel
|
Guard
|
| 1000
|
515
|
98% (M)
|
SP, EX, J
|
HA
|
| First Active
|
Active
|
Recovery
|
Frame Adv
|
Circuit
|
Invuln
|
| 18
|
4
|
24
|
-
|
9.0%
|
-
|
|
Charged disjointed flip kick overhead. This is mainly used in her bnb to add damage, though it can be used as a gimmick in neutral since you retain your air options on whiff.
|
|
Command Normals
It has clash frames before it's active making it much harder to use as an anti-air It has clash frames before it's active making it much harder to use as an anti-air
|
| Damage
|
Red Damage
|
Proration
|
Cancel
|
Guard
|
| 800
|
505
|
65% (O)
|
(SP), (EX), (J)
|
LH
|
| First Active
|
Active
|
Recovery
|
Frame Adv
|
Circuit
|
Invuln
|
| 13
|
4
|
12
|
2
|
7.2%
|
Clash 10-12
|
|
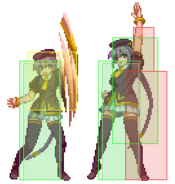
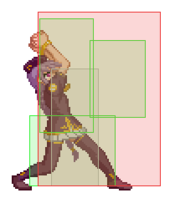
Jump cancellable uppercut launcher. Holding 8 has a special super jump cancel, otherwise 7/9 are typical jump cancels. Mainly used as a rejump for j.[c] loop combos, but situationally can be a useful stagger for frametraps. It's plus on block, but it's difficult to use as a pressure tool due to the pushback and the fact that it's uncancellable otherwise.
|
|
Extremely infamous overhead Extremely infamous overhead For when you're living in their head rent free For when you're living in their head rent free
|
| 6B
|
Damage
|
Red Damage
|
Proration
|
Cancel
|
Guard
|
| 700
|
404
|
72% (O)
|
(N), (SP), (EX), (J)
|
H
|
| First Active
|
Active
|
Recovery
|
Frame Adv
|
Circuit
|
Invuln
|
| 25
|
2
|
19
|
-3
|
6.3%
|
-
|
|
Uncancellable standing overhead knee. This move is a core part of your mixup with F-Sion. Not easily reactable mid blockstring, especially if you have been laying on the stagger as you're supposed to. This move is safe on block, but uncancellable, so if they do block it your turn is over. A good idea would be to autoconfirm it into 5C, so you immediately go into your bnb if it hits.
|
| 6[B]
|
Damage
|
Red Damage
|
Proration
|
Cancel
|
Guard
|
| 700
|
404
|
75% (O)
|
N, SP, EX, (J)
|
H
|
| First Active
|
Active
|
Recovery
|
Frame Adv
|
Circuit
|
Invuln
|
| 31
|
3
|
15
|
0
|
6.3%
|
-
|
|
Cancellable charged launcher version of 6B. This move is mainly used for gimmicks, as it's very reactable and your opponent can shield you for using it. However, if they do block it, you get a frametrap into 5C as it's cancellable. Launch is air untech and can lead into some very flashy combos.
|
|
"Dou desu" "Dou desu"
|
| Damage
|
Red Damage
|
Proration
|
Cancel
|
Guard
|
| 1200
|
808
|
60% (O)
|
SP, EX
|
L
|
| First Active
|
Active
|
Recovery
|
Frame Adv
|
Circuit
|
Invuln
|
| 13
|
12
|
10
|
-4 ~ 7
|
10.8%
|
-
|
|
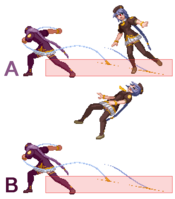
Big forward sliding low sweep. Low profiles, but since the startup is so significantly long that it cannot snipe shallow jump ins in the same way Tohno slide does, however it's useful in very specific telegraphed situations to low profile moves like H-Ryougi 22C on an okizeme situation. Special cancellable on block. 236A is a good choice to keep yourself safe or slightly stagger it's cancel window for a frametrap. In rare occasions if you hit later in it's active frames, it can become advantageous on block, up to +7, though starting around the distance from which you can make it +4 you will no longer be able to capitalize due to your moves lacking the range needed to make use of these plus frames.
|
|
Yet another + frame reset Yet another + frame reset
|
| Damage
|
Red Damage
|
Proration
|
Cancel
|
Guard
|
| 1000
|
808
|
70% (O)
|
-
|
H
|
| First Active
|
Active
|
Recovery
|
Frame Adv
|
Circuit
|
Invuln
|
| 26
|
9
|
4
|
3 ~ 9
|
9.0%
|
-
|
|
Sion lunges forward for an overhead. This move is bad at first glance because it's more reactable than 6B and doesn't combo except on counterhit usually, though certain matchups allow her to start a combo without CH. However, what you're really fishing for here is either a 2A crush (she shifts her hurtbox surprisingly high, though she doesn't get any low invuln, so this is matchup specific) or for the + frame reset, whether the opponent blocks or not. The frame advantage is variable depending on how late the move connects, being influenced by distance from which you do it and the opponent's height, shorter characters providing more frame advantage. This move is surprisingly safe on whiff provided you don't get hit out of the startup.
|
|
Universal Mechanics
|
|
| Damage
|
Red Damage
|
Proration
|
Cancel
|
Guard
|
| 1500
|
757
|
100%
|
-
|
U
|
| First Active
|
Active
|
Recovery
|
Frame Adv
|
Circuit
|
Invuln
|
| 3
|
1
|
20
|
-
|
0.0%
|
-
|
|
Sion grabs the opponent and kicks them. Untechable knockdown.
|
|
|
|
| Damage
|
Red Damage
|
Proration
|
Cancel
|
Guard
|
| 1600 (Raw)/1300
|
505
|
30%
|
(Any if Raw)
|
U
|
| First Active
|
Active
|
Recovery
|
Frame Adv
|
Circuit
|
Invuln
|
| 2
|
1
|
12
|
-
|
0.0%
|
-
|
|
Standard air throw. Ground bounces the opponent if done raw, ground techable if done as a combo ender.
|
|
|
|
| Ground
|
Damage
|
Red Damage
|
Proration
|
Cancel
|
Guard
|
| 500 (345)
|
202
|
50%
|
(SP), (EX), (J)
|
LHA
|
| First Active
|
Active
|
Recovery
|
Frame Adv
|
Circuit
|
Invuln
|
| 9
|
4
|
18
|
-4
|
4.5%
|
-
|
|
Same animation as other moons' 3C.
|
| Air
|
Damage
|
Red Damage
|
Proration
|
Cancel
|
Guard
|
| 500 (345)
|
202
|
50%
|
-
|
HA
|
| First Active
|
Active
|
Recovery
|
Frame Adv
|
Circuit
|
Invuln
|
| 9
|
4
|
-
|
-
|
4.5%
|
-
|
|
Same animation as j.C.
|
|
|
|
| Bunker
|
Damage
|
Red Damage
|
Proration
|
Cancel
|
Guard
|
| 500
|
202
|
50%
|
-
|
LHA
|
| First Active
|
Active
|
Recovery
|
Frame Adv
|
Circuit
|
Invuln
|
| 26
|
4
|
19
|
-5
|
0.0%
(-50.0% in blockstun)
|
Clash 1-10
|
| (Clash)
|
Damage
|
Red Damage
|
Proration
|
Cancel
|
Guard
|
| 500
|
202
|
50%
|
-
|
LHA
|
| First Active
|
Active
|
Recovery
|
Frame Adv
|
Circuit
|
Invuln
|
| 8
|
4
|
19
|
-5
|
0.0%/-50.0%
|
Strike 1-7
|
|
Similar to 5C, but the huge hurtboxes also appear on whiff
|
|
|
|
| Damage
|
Red Damage
|
Proration
|
Cancel
|
Guard
|
| 100
|
0
|
100%
|
-
|
U
|
| First Active
|
Active
|
Recovery
|
Frame Adv
|
Circuit
|
Invuln
|
| 16
|
5
|
25
|
-
|
-100.0% (min)
|
Full 1-20
|
|
Standard Heat hitbox.
|
|
|
|
| Ground
|
Damage
|
Red Damage
|
Proration
|
Cancel
|
Guard
|
| 100
|
0
|
100%
|
-
|
U
|
| First Active
|
Active
|
Recovery
|
Frame Adv
|
Circuit
|
Invuln
|
| 11
|
10
|
20
|
-
|
removes all
|
Full 1-39
|
| Air
|
Damage
|
Red Damage
|
Proration
|
Cancel
|
Guard
|
| 100
|
0
|
100%
|
-
|
U
|
| First Active
|
Active
|
Recovery
|
Frame Adv
|
Circuit
|
Invuln
|
| 12
|
10
|
15
|
-
|
removes all
|
Strike 1-30
|
|
Universal burst mechanic. Unlike Crescent/Full Heat activation, the hitbox and frame data doesn't vary between characters. However, you can be thrown out of this move if you input it in the air.
|
|
Special Moves
Grounded Specials
Gun Gun Stand Name: Seven Bullets Stand Name: Seven Bullets
|
| A
|
Damage
|
Red Damage
|
Proration
|
Cancel
|
Guard
|
| 500
|
252
|
70% (O)
|
EX
|
LHA
|
| First Active
|
Active
|
Recovery
|
Frame Adv
|
Circuit
|
Invuln
|
| 13
|
3
|
16
56 (Reload)
|
-1
-40 (Reload)
|
2.7%
|
-
|
|
Single forward shot with the gun. Reaches forward about half-screen. -1 on block. Great neutral tool, as it's very safe on block, and can fish for ch whiff punishes very well. It can also be cancelled into for some sneaky ch combo starters. Easy to whiff against aerial approaches, as the hitbox cuts off lower than it seems.
|
| B
|
Damage
|
Red Damage
|
Proration
|
Cancel
|
Guard
|
| 250*7 (1443)
|
870
|
97%*7 (M)
|
-
|
LHA
|
| First Active
|
Active
|
Recovery
|
Frame Adv
|
Circuit
|
Invuln
|
| 15
|
3 (7)*6, 3
|
31
59 (Reload)
|
-13
-40 (Reload)
|
0.9%*7 (6.3%)
|
-
|
|
Seven shots forward with the gun. Reaches forward full screen. Pretty terrible frame advantage even on hit. This is mainly used to discourage full-screen zoning, as even on hit at mid-range you could potentially be punished by a special that's 10f or less if it can reach you. Using this against approaches is generally discouraged as it doesn't give you much damage and it's slower to get out than 236A. Do not whiff this.
|
| EX
|
Damage
|
Red Damage
|
Proration
|
Cancel
|
Guard
|
| 1500 ~ 3000
|
1010 ~ 2044
|
100%
|
-
|
LHA
|
| First Active
|
Active
|
Recovery
|
Frame Adv
|
Circuit
|
Invuln
|
| 3+11
|
2
|
61
|
-35
|
-100.0%
|
-
|
|
Big single forward shot that eats your remaining bullets. Reaches forward full screen. Does more damage the less ammo you have. Pretty unsafe on block, but gives you a very workable hard knockdown as a whiff punish even from fullscreen. This move is also good to cancel into mid-combo from time to time if you want to carry fully to the corner, especially to manage your meter and not go into max. Do not whiff this.
|
|
Ken, is that you? Ken, is that you?
|
| A
|
Damage
|
Red Damage
|
Proration
|
Cancel
|
Guard
|
| 1000, 800 (1682)
|
(697)
|
100%, 60% (O)
|
EX
|
LHA, LH
|
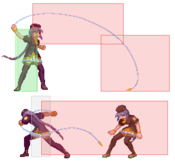
| First Active
|
Active
|
Recovery
|
Frame Adv
|
Circuit
|
Invuln
|
| 4
|
2 (2) 8
|
31
|
-21
|
9.0%, 7.2% (16.2%)
|
Full 1, Low 2-5
|
|
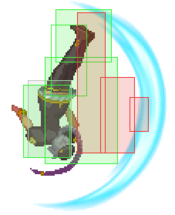
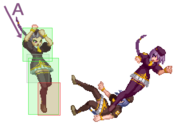
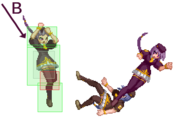
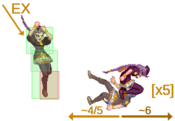
Pretty standard light DP. Invulnerable for 1 frame, and has no low hurtbox until hitbox. It is EX cancelable, even in the air, meaning if you catch someone by CH you can cancel into 214C and extend into oki, or keep your turn with an early j.214C cancel, provided you don't try to actually grab the opponent with the divekick. Works as a pretty alright anti-air, as you'll likely win any trades that come from it. Big recovery.
Following character's 2A will whiff and get counter hit by this move:
Moons	Character
C	WLen
C	Wara
F	Aoko
F	Arc
F	Red Arc
F	PCiel
CH	Seifuku
CH	Ciel
CH	VAkiha
CH	Hisui
CH	Kouma
CH	Akiha
CH	Ries
CH	Ryougi
CHF	Len
CHF	Mech
CHF	NecoMech
CHF	Miyako
CHF	Neco
CHF	NAC
CHF	Sion (Also F moon 5A whiffs!)
CHF	VSion
|
| B
|
Damage
|
Red Damage
|
Proration
|
Cancel
|
Guard
|
| 800, 500, 300*5 (2375)
|
(1147)
|
100%
|
-
|
LH
|
| First Active
|
Active
|
Recovery
|
Frame Adv
|
Circuit
|
Invuln
|
| 4
|
18
|
32
|
-25
|
7.2%, 4.5%, 2.7%*5 (24.2%)
|
Full 1-7
|
|
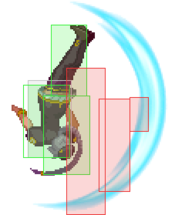
This is Sion's true reversal in the form of a somewhat typical DP, and it is one of the best in its class. This move has gigantic hitboxes, it's active, it's got long invulnerability and it does heavy amounts of damage for a meterless reversal. As an antiair it's great if a bit risky. It hits behind her as well, making certain crossup setups useless against her if you feel brave. The downside to this move is that it doesn't cause Sion to rise fast enough to escape certain active setplay options like C-Kohaku plants. Punishable as all get out on block. Do not whiff this.
|
| EX
|
Damage
|
Red Damage
|
Proration
|
Cancel
|
Guard
|
| 800, 500, 400*5 (3101)
|
(2012)
|
100%
|
-
|
LH(1), LHA(2-7)
|
| First Active
|
Active
|
Recovery
|
Frame Adv
|
Circuit
|
Invuln
|
| 2+2
|
18
|
34
|
-31
|
-100.0%
|
Full 1-10
|
|
This move is a much more niche reversal than 623B as it's much more telegraphed and doesn't even have the anti air applications of B DP's unblockable hits, nor does it have enough extra invuln to get you out of most big, active setups. However, you DO get around 3000 damage if all seven hits connect, giving you a good way to send a message to someone overeager to hit you meaty. You will die for using this on block. Do not whiff this.
|
|
You must whip it You must whip it Here we go! Here we go!
|
| A
|
Damage
|
Red Damage
|
Proration
|
Cancel
|
Guard
|
| 0, 1000 (880)
|
622
|
100%
|
-
|
LA
|
| First Active
|
Active
|
Recovery
|
Frame Adv
|
Circuit
|
Invuln
|
| 17
|
4
|
13
|
-5
|
9.0%
|
-
|
|
Quick and decently safe whip toss. Grants hard knockdown and automatically spaces the opponent to get your left/right oki mixup. Also works as a great punish against zoners who are over-eager to wall you out. Not very punishable on block.
|
| B
|
Damage
|
Red Damage
|
Proration
|
Cancel
|
Guard
|
| 0, 100 (80)
|
0
|
92% (M)
|
(J)
|
LA
|
| First Active
|
Active
|
Recovery
|
Frame Adv
|
Circuit
|
Invuln
|
| 17
|
4
|
21
|
-13
|
0.0%
|
-
|
|
Unsafe whip toss. This is your main launcher for combos, and isn't really used in neutral all that much except as perhaps a hard whiff punish since the damage is so low and if you whiff you're much more vulnerable to being punished due to its higher recovery. Staple move, but only mid-combo.
|
| EX
|
Damage
|
Red Damage
|
Proration
|
Cancel
|
Guard
|
| 350*4 (1334)
|
(960)
|
100%*3, 70% (M)
|
-
|
LHA
|
| First Active
|
Active
|
Recovery
|
Frame Adv
|
Circuit
|
Invuln
|
| 5+17
|
4
|
23
|
-13
|
-100%
|
-
|
|
Sion throws out the whip and reels the opponent in. This is your main metered extension tool on the ground, and allows you to get very good damage as well as oki for your investment. It doesn't combo from 5C, so you need to actively choose to opt for 2C > 214C if you're doing this midcombo. If you manage to catch the opponent with 3C, this will give you a lot more reward than you usually would reap from anti-jumping and make them respect your blockstrings a lot more. Very unsafe on block.
|
|
|
|
| A
|
Damage
|
Red Damage
|
Proration
|
Cancel
|
Guard
|
| 300, 2000 (2237)
|
(1764)
|
100%
|
-
|
L
|
| First Active
|
Active
|
Recovery
|
Frame Adv
|
Circuit
|
Invuln
|
| 19
|
6
|
11
|
-5 ~ -1
|
0.9%
|
-
|
|
Instant forward lunge hitgrab. Grants similar knockdown to j.214A, mainly a gimmick move to trick people into mashing, as you can immediately DP them as a hard callout after.
|
| B
|
Damage
|
Red Damage
|
Proration
|
Cancel
|
Guard
|
| 100, 2000 (2037)
|
(1764)
|
100%
|
-
|
U
|
| First Active
|
Active
|
Recovery
|
Frame Adv
|
Circuit
|
Invuln
|
| 36
|
12
|
20
|
-
|
0.9%
|
-
|
|
Runs forward and lunges at her opponent. Real command grab. Grants great knockdown and can grab certain characters out of summons to get out of the corner, though it's mainly relegated to niche gimmick uses as the damage is low and it has a distinct sound and visual cue.
|
| EX
|
Damage
|
Red Damage
|
Proration
|
Cancel
|
Guard
|
| 100, 700*5 (3270)
|
(1403)
|
100%
|
-
|
HA
(Whiffs vs Crouch.)
|
| First Active
|
Active
|
Recovery
|
Frame Adv
|
Circuit
|
Invuln
|
| 1+9
|
8
|
22
|
-18
|
-100.0%
|
Full 1-9
|
|
Weird instant lunge reversal hitgrab. Duckable from point blank. This move is really niche as a reversal unless you want to get through fireballs for some reason or as a very hard callout to counterplay to your pressure. On hit it acts like an EX divekick. Not worth going for if you're not absolutely sure it'll connect.
|
|
Aerial Specials
The reason your combos work The reason your combos work
|
| A
|
Damage
|
Red Damage
|
Proration
|
Cancel
|
Guard
|
| 100, 1200 (1262)
|
(1079)
|
100%
|
-
|
LH
(Whiffs vs Air.)
|
| First Active
|
Active
|
Recovery
|
Frame Adv
|
Circuit
|
Invuln
|
| 12
|
X
|
4
|
2 ~ -3
|
0.9%
|
-
|
|
Quick, basic divekick hit grab. Safe on block unless you hit your opponent's head. Can't grab in the air. This is mainly a tool for fastfall rejump during loop combos or to follow your opponent down and be there in time to meaty 2A after an airthrow ender. Pretty dangerous to use in neutral as you're in a chable state from startup until you land.
|
| B
|
Damage
|
Red Damage
|
Proration
|
Cancel
|
Guard
|
| 100, 800 (900)
|
(394)
|
100%
|
-
|
U
|
| First Active
|
Active
|
Recovery
|
Frame Adv
|
Circuit
|
Invuln
|
| 30
|
X
|
22
|
-
|
0.9%
|
-
|
|
Slow divekick. A real command grab. Can't grab in the air. This move is mainly used as a mixup if you think it'll kill or if you want to catch your opponent sleeping. It grants pretty poor knockdown and doesn't do a lot of damage at all so it's a very niche application. Do not whiff this.
|
| EX
|
Damage
|
Red Damage
|
Proration
|
Cancel
|
Guard
|
| 100, 700*5 (3270)
|
(1403)
|
100%
|
-
|
HA
|
| First Active
|
Active
|
Recovery
|
Frame Adv
|
Circuit
|
Invuln
|
| 3+2
|
X
|
6
|
4 ~ -5
|
-100.0%
|
Full 1-3
|
|
EX divekick hitgrab. Very fast fall, grabs in the air. On hit, she slams the opponent into the ground five times. This is what you'll be spending meter on usually, as it's a great way to end combos off of confirms mid-screen if you want that corner or to add damage. It also perfectly spaces you for a j9.BC fuzzy setup. Don't go randomly throwing it out against people as it's very easily shieldable on reaction.
|
|
Arc Drive
|
|
| AD
|
Damage
|
Red Damage
|
Proration
|
Cancel
|
Guard
|
| 100, 450*10 (3076)
|
(2313)
|
90% (O)
|
-
|
LH, LHA
|
| First Active
|
Active
|
Recovery
|
Frame Adv
|
Circuit
|
Invuln
|
| 9
|
33 (18) 19
|
81
|
-133 (First Hit)
|
removes all
|
Full 1-133
|
| ~C Max.
|
Damage
|
Red Damage
|
Proration
|
Cancel
|
Guard
|
| 400*6 (4023)
|
(2082)
|
-
|
-
|
-
|
| First Active
|
Active
|
Recovery
|
Frame Adv
|
Circuit
|
Invuln
|
| -
|
-
|
-
|
-
|
-
|
-
|
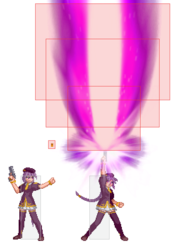
|
Sion flips an air unblockable bullet into the sky and then fires a huge purple laser upward from her gun. You get more hits if you mash C as she fires the laser. The bullet is incredibly active, leading to some interesting hard callouts if you want to commit the meter versus aerial opponents. Has ludicrous amounts of invuln starting from frame 1, though it's a free punish for the opponent if it's blocked.
|
|
Another Arc Drive
|
|
| AAD
|
Damage
|
Red Damage
|
Proration
|
Cancel
|
Guard
|
| 900, 800*10 (3740)
|
(3191)
|
50%
|
-
|
LH
|
| First Active
|
Active
|
Recovery
|
Frame Adv
|
Circuit
|
Invuln
|
| 1+6 ~ 1+7
|
3
|
43
|
-28
|
removes all
|
Full 1-(Until end of active frames)
|
| ~C Max.
|
Damage
|
Red Damage
|
Proration
|
Cancel
|
Guard
|
| 800*6 (4832)
|
(2976)
|
-
|
-
|
-
|
| First Active
|
Active
|
Recovery
|
Frame Adv
|
Circuit
|
Invuln
|
| -
|
-
|
-
|
-
|
-
|
-
|
|
Sion runs forward. If she runs into an enemy, she will automatically throw out an uppercut, which will launch the opponent high into the sky before she performs her normal arc drive animation. This move has incredibly situational use, but if you're in blood heat versus a character who's spacing you out with big normals, you can use this to run through and punish them for it and regain your turn.
|
|
Last Arc
GUN GUN
|
| Damage
|
Red Damage
|
Proration
|
Cancel
|
Guard
|
| 10450
|
5895
|
50% + 50% * remaining BH time
|
-
|
-
|
| First Active
|
Active
|
Recovery
|
Frame Adv
|
Circuit
|
Invuln
|
| -
|
-
|
-
|
-
|
removes all
|
-
|
|
Sion spins around, anchoring herself with etherlite before she fires a massive purple blast from her pistol. This is a pretty standard last arc, all things considered, but it's a much better return for your meter burn than AAD considering that even at the bottom of your meter you'll still do nearly 6000 damage. It wall slams after the hits, which gives you no real oki off of it, but considering that even against Akiha you can reasonably expect to take half of your opponent's life bar at minimum, it does the job it's meant to do and looks fantastic while it does so.
|
|
MBAACC Navigation


