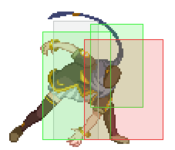
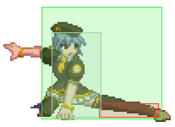
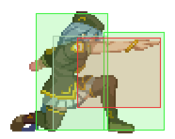
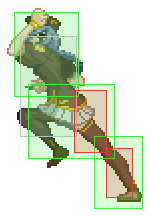
Melty Blood/MBAACC/Sion TATARI/Half Moon
Character Page Progress
This page is mostly complete, consider joining as an editor to help expand finish it up. Please update this character's roadmap page when one of the editing goals have been reached.
| In Progress | To-do |
|---|---|
|
|
Guides
Made by the mysterious mage himself. A occasional visitor in the actor's room that makes the best of plays. Take a page out of the mage's book and you too can work magic
Additional Resources
MBAC directory with in depth discussion
Notable Players
| Name | Color | Region | Common Venues | Status | Details |
|---|---|---|---|---|---|
| Norainu |
Japan | A-cho | Active | Understands the character at her core. Incredibly strong player who has stuck with her since older versions. Strongest 1.07 H-VSion. | |
| BAB | Japan | A-cho | Active | Wild style, does not commit to more optimal routing but keeps true to the character’s aggressive nature. Watch them to understand H-VSion’s common scramble situations and turn stealers. | |
| Asura | Japan | KorewaMelty | Inactive | Another solid H-VSion but unfortunately scarce amount of sets exist on YT. Recommended to pursue through niconico or wait for the videos to be reposted to YT. | |
| Sp00ky | North America | Inactive | Ahead of his time in Melty Bread AC and AA threads, an aggressive H-VSion who presents mixtures of both the school of Wagu and THER. One of the best H-VSions. | ||
| Bizzy | North America | Netplay | Inactive | Very solid H-VSion player in NA. Also the one who created the guide for this character. Feel free to ask them any questions in the main server. | |
| Klinsytatari (klinsytatari#8040) |
North America | Netplay | Active | Found in community server. Always willing to help out H-VSion players with advice. | |
| gonzaguinha | Brazil | Netplay | Active | Solid H-VSion. Found in Reverse Beat Brasil and MeltySud servers. |
Overview
| Strengths |
|
| Weaknesses |
|
Sion gives into her vampiric impulses and becomes VSion, taking from her original moveset and morphing it to resemble a more aggressive version of Sion. H-VSion is a basic, yet solid character with surprising depth in her kit emphasised by her mobility, pressure, and okizeme. Her ability to close the gap against any character and threaten them through both her ground dash and the air momentum she receives from it, her decent reward on hit, numerous ways to spend meter, and potent mixups is testament to her remaining dominance despite changes to her kit from Console/PS2 to 1.07. This character will make you feel the wind in your hair as you continually learn and develop.
General Gameplan
H-VSion isn’t really bound by anything and can be played in numerous ways despite her buttons and movement appearing to suggest a more in-your-face playstyle where you’re consistently bulldogging your opponent, daresay engaging in a “gorilla” playstyle. While her optimal position is to be in-your-face, there are multiple routes for H-VSion to get there. Understanding how to control her movement in tandem with options that allow her to claim space, such as dash5A/2A and use of 7/8/9 j.A/6A, are essential to operating her gameplan. H-VSion wants to hit you and lock you into the corner while still maintaining an advantage over you, be it in how she structures her okizeme, pressure, or her ability to concede and reestablish neutral dominance, which Sp00ky highlights exceptionally well in their article about the two schools of VSion: THER and Wagu.
Neutral
H-VSion has a tool for every situation and understanding how these tools can operate in a match is essential. However, before getting into the usage of buttons in neutral, it is important to once again consider H-VSion’s unique movement.
Ground Movement Mentioned in the Strengths/Weaknesses section, H-VSion’s dash has an acceleration period where her movement begins slower, but rapidly spikes until it is capped at 700-2060. For frame of reference, C-Sion’s acceleration minorly spikes from 1600-1700. While this can make pressure more awkward for closing the gap on tools such as redashes, the acceleration to 2060 allows for H-VSion to achieve insane momentum and dash potential, granting her access to options such as dashing under people, intercepting air movement, and allowing for the establishment of her aerial mobility through dash momentum.
Jump/Air movement H-VSion has access to 7/8/9, super jump forward (29), and air super double jump forward (j.29). The premise of these options imitate other Melty characters despite her unique speed. 7, Upback, allows for movement backwards, which can open up opportunities to protect H-VSion’s space with j.A/C. 8, neutral jump, in tandem with the ability to drift by holding [6] or [4], allows for H-VSion to contest and protect space. 9, forward jump, presents a more aggressive approach to taking and intercepting opponents. Both superjumps allow you to claim increasingly more space at the cost of accidental overcommitment. Additionally they can also be used to maneuver around certain neutral options, such as Ciel’s Black Keys/214X series. However, a more tantalizing suggestion would be the utilization of dash momentum alongside 8/9 rather than only committing to super jumps for claiming space. This combination of neutral/forward jump and dash momentum can lead to some insane movement interactions by using dash momentum to influence neutral jump’s drift, making 8[4] move H-VSion forward slightly until the momentum halts, and 8[6] acting as a faster-paced forward jump. Furthermore, the dash momentum influences her air dash greatly, causing Airdash Back (j.44/j.4A+B) to move her back slightly compared to normal ABD and her Airdash forward (j.66/j.6A+B)
Pressing the Buttons
The A Series
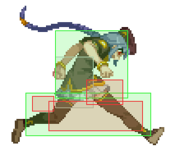
5A/2A: Your main tools for controlling ground space and pressing advantages. While they are stubby in nature your movement will carry them to victory. However, one of the greater weaknesses is occasional inconsistency at beating opponents who wish to jump forward/iad in reaction to H-VSion tools. Alternatively there may be times where they are already approaching the apex of their jump while you’re dashing at them. This is where the most groaned about tool comes into play.
6A: Potent tool to lock down opponents once 5A/2A connect with fantastic cancel frames. Beefier active frames and hitbox open up other opportunities such as the ability to snipe/intercept upbacking/7 usage, anti-air, and straight up stuff some neutral tools.
6AA: The movement forward and hitbox allow for 6AA to kill some backdash attempts, while also hitconfirming into H-VSion’s potent 6C corner carry combo.
j.A/j.6A: Destroyer of worlds. Dash 9j.A and 8j.A are fantastic tools at intercepting opponents trying to rise or caught scouting in the air. j.7A also provides potent space control against opponents who commit to aggressive air options. j.6A complements this usage by sacrificing the powerful low-vertical hitbox of j.A for MBAC levels of frame data that cover a higher vertical space than j.A while also being able to immediately cancel. This tool is very underrated. Another thing to mention about j.A: This is arguably H-VSion’s best Air-to-Ground hitbox. While some players may argue for j.B/C’s prowess it is clear that both buttons require specific spacing/timings to actually function as AtG while also nabbing confirms, while j.A does not need a specific situation outside of your opponent being below you. Make use of this in tandem with j.AC to lock your opponent down.
The B/Cs:
5B: A bold anti-air, the truest backhand. While it isn't a marvel like C-VSion’s 4B, it makes up for it in speed and how it complements H-VSion’s speed. This tool can dominate ground interactions where opponents are trying to jump in reaction against your dashin attempts. On Air Counter hit, it is possible to confirm into big damage and decimate the opponent’s momentum while enabling H-VSion’s gameplan. Furthermore it provides an excellent pressure starter.
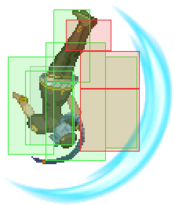
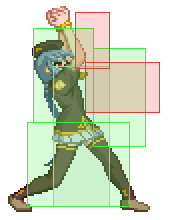
6[C]: The charged/Blowback Edge version of 6C that sacrifices frames for a ridiculous vertical disjointed hitbox. On block H-VSion is advantageous, but where it truly shines is its massive groundbounce and potential to stuff Air to Ground tools and opponents who like to remain at the double-jump height. The Dopamine from hitting this tool is something else.
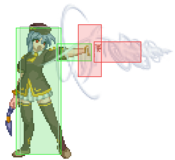
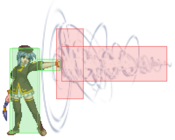
6[B]: How can we not consider this absolute unit? 6[B], while not giving as much reward and conversion power as FMoon’s because of H-VSion’s supers, this remains a potent tool in H-VSion’s arsenal for feinting space control and presenting the opponent with a beefy hitbox that can stop some character specific approaches and most importantly prevent low-AD control. However, as it does not have a clash frame anymore, be mindful of its ability to get stuffed by certain movement and neutral tools. Do not let its weaknesses of startup and nerf get to you, experiment with numerous applications like dashunder 6[B] and also watch out for characters who are forced to block it crouching, as it can nab you easy frame advantage.
j.B: Shallow hitbox makes this tool limited in its ability to contest Air to Ground space outside of its designated function, which is to guard the space behind H-VSion while she’s in the air. Can catch players off guard attempting to do greedy dashunders.
j.C: Solid at defending H-VSion’s vectors with its honest hitbox. Can also be used as a twitch Air-to-Air i.e 9j.C should you sniff out an opponent’s option and wish to intercept or control that vector. Note that if you want the style, 9j.C>j.2B can allow for easy conversions off of air counterhit into solid damage or, if your wits are about you, 6C combos. Delicious. IABD j.C is also a method of safely disengaging, however this option should be used in tandem with j.A/6A and the potential threat of neutral jump/forward jump to catch opponents off guard. j.2B: Fundamental part of H-VSion’s neutral game as it can act not only as a fastfall to play mindgames with your opponent, but can snipe some grounded buttons in tandem with movement such as IAD/66 or IABD/44. Something to note: this tool has incredible air untech on hit, meaning you can hit someone with it while they're in midair and, in most situations, be able to link 5B or rejump j.A/6A to confirm.
The Specials:
236A: Can be used as a tool to snipe greedy ground approaches, but has horrible recovery on whiff. Experiment with it and know its risks.
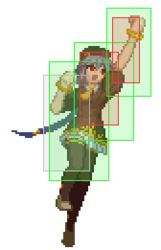
623A: Defacto Anti-Air with upper body invulnerability until midway through active frames. Solid at stopping committal options and nets decent reward. Also another option to experiment with in neutral, maybe use the 623A to low profile some character’s pokes and punish.
214A/B/C: Summons! Despite their prominence in pressure and setplay these tools have their purpose in neutral. 214A, while having high recovery and being Air Blockable, still has the potential to snipe some preemptive air approaches and intercept opponents. It’s unique attribute is its obscene untech time on hit, you can react an eon late and 9j.C will still probably connect. 214B can be established as a tool to control a certain space of the screen, making it potent as a zoning tool to lock down the ground game. 214C allows for H-VSion to establish her advance safely. However, all of these summons require full attention by the H-VSion to establish them, understanding how their opponent can circumvent dealing with the summon, how they can snipe the startup, how they can still contest your approach, move around you, and more.
Pressure
The Pressure and Blockstring concepts were initially brought about in very old MBAC VSion threads, mainly Sp00ky’s Blockstring Yomi and Art of Random thread. While it could be argued that these pressure concepts were in a realm where Bara canceling existed therefore being inapplicable to 1.07, H-VSion’s pressure still revolves around the exact same concepts discussed in Sp00ky’s threads.
Your goal in pressure will vary between character and especially opponent but will always come down to “how do I open up my opponent” at the ranges that VSion can operate, which tend to be at close or mid range (think of your 5C’s coverage). Refer to the movelist below for frame data, which will likely assist in making sense of H-VSion’s pressure game, revolving around tools such as 5/2A, 5/2B, 5C, 6A/AA, j.2B, iad, etc.
Establishing the ability to mix in new options to open up your opponent is an absolute necessity as the opponent starts to respect your pressure more and more. However, initially establishing this respect, your level 0-1 pressure concepts, will open the door for you to experiment with the character.
Level 0 H-VSion Pressure Strings
2AAA/5AAA: Ol’ Reliable. Dash5/2As incredible speed allow this to be a consistent threat regardless of level. Most importantly it keeps you point blank and opens up numerous options to go into.
5A6A: Another Ol’ Reliable, you can go into numerous options/pressure possibilities through its incredibly long active frames. Something to keep in mind: 2A restores your ability to 5A6A, therefore chains such as 5A6A 2A 5A6A are possible and can open up other routes to fake out your opponent’s pattern recognition. X > 5C5A6A is also valid for being a blockstring ender, provided you have the means to commit and confirm your frame trap through 6AA/B2C etc.
5C 236B: Want a pressure reset? This can work. Players may tend to try and ex guard your 5C to push you out, so you can insert this option to catch downbacking and achieve easy +4 which can install fear in your opponent for respect.
Level 1 H-VSion Pressure Strings
966/96A+B j.A j.C: Basic airdash string that goes into grounded blockstrings with good advantage. You can mix in iad j.A/ delay j.C or even iad j.A land2A to catch people off guard. 5B ~ 2B / 2B ~ 5B: Basic B normal stagger pressure. Both normals have good cancel frames and 2B is +-0 which opens up the opportunity to fake resets and establish further respect. 2B 2B: At certain spaces can stuff mashout/abare. 5/2AA/5B/2B > j.2B: Method of beating out stronger ground abare tools, can also be used to feint tick throw game and blow up mashing/option selects.
Cool so we’ve established Level 0-1. Remember, when you’re doing cool stuff in pressure like iad j.6A into 6C, or dash backdash etc., you will have to eventually reset to level 0 to influence your opponent’s preparation for new decisions and options. Doing Level2+ Pressure concepts is fine and good until your opponent starts beating you with the simplest of tools that, with conditioning of Level0-1 tech, would put consideration into the opponent’s actions. Remember though: when they’ve begun to respect these options: throw. them. off. Dash iabd j.AC, dash backdash, iad j.6A etc., open them up and release the box of tricks to achieve her win condition: setups and damage.
Don’t be afraid to experiment with various resets and string enders. Even if it’s minus, you gotta try this: 5B or 5C dashin/iad, 5AA summon, etc. Try new things and experiment with opening them up.
Okizeme
The Summons:
Varies between 214C and 214B. When beginning as H-VSion, 214C is the easiest to grasp and will assist in understanding Satsuki’s application. 214C: Acts as insurance. There are 3 areas of interaction with 214C. I have listed a few concepts to apply in these areas
Before Akiha Kicks
- 2AAA vs. 2A throw vs. 2A6C vs. 2A~2A~2A
- 2A iad j.AC vs. 2A iad j.A vs. 2A iad j.6A.
Blockstun of Akiha Kick
- 6C
- Iad j.AC vs iad j.A vs iad j.6A (whiff) j.C vs iad j.6A (whiff) land2A
Post-Kick
- 2AAA vs. 2A throw vs. 2A6C vs 2A~2A~2A
- Iad j.AC vs iad j.A vs iad j.6A (whiff) j.C vs iad j.6A (whiff) land2A
-As your opponent begins to respect the most basic of establishment (through 2AAA), you will unlock different ways to blend your opponent. However, you may notice that Akiha can sometimes let you down in certain areas, such as reward post kick or midscreen.
This is where 214B shines.
214B: You can apply the same concepts to the three periods of 214C, except this time the threat of Satsuki’s longer windup can act as additional insurance, especially with the reward that you can get off of hitting them with Satsuki (See Satsuki routing). Furthermore, in the midscreen, the potential area it covers and Pushback from blocked summon allows the H-VSion to extend her reach and push the opponent to the corner. Note: Once they begin to respect the initial setups from Akiha/Satsuki, you can start mixing in interesting gimmicks that abuse their respect. Here’s a few to get you started and get your mind experimenting:
- Midscreen 6C 6C Akiha, dash 6C (Crosses up) > Akiha kicks > Spot Dodge (swaps to original side) 2A.
- Midscreen 2C/623C Akiha, dash 9 airdodge j.2B (Crosses up, baits dps, relies on opponent crouching)
- Midscreen 2C Satsuki, iad j.B (crossup) 9j.2B (original side) > Satsuki Hits > 6C.
Which Ways and You: 623C and Corner Vacuum: 623C has the unique property of vacuuming the opponent into a certain spot because it is a canned animation. Therefore, it is possible to space H-VSion at certain distances where the opponent will be pushed out. This allows H-VSion to setup interesting Left/Rights / Which-Ways off of simply 623C.
Example: 2C5C5AA6B (1hit) 623C.
From here, H-VSion can mix how she decides where to go, be it by microdashing to push or pretend to push the opponent or divekicking at certain heights.
But what if we can set this up and decide which way H-VSion WILL go? This is where 2C tk j.2B routing shines.
- Example A: 5A6AA 6C 6[C] j.2[B] 2C tk j.2B 2C5C 5AA5B 623C
- Example B: 5A6AA 6C 6[C] j.2[B] 2C tk j.2B 2C5C 5AA5B ~ 623C
By alternating the cancel window of 5B 623C, we can decide if the combo WILL pull the opponent out, or if it won’t. Without delay, VSion dummy will be pulled in this example, but with delay, the VSion dummy will not be pulled and will still be in the corner. Some characters will unfortunately have bigger hitboxes, resulting in this setup not working. However, with other delays (hint: 2C5C~5AA5B) you can still establish a spacing where the opponent WILL be vacuumed out of the corner.
Defense
A normals: These are the lifeblood of your abare. Having a 4F 2A and an ease of access to confirms from 2A5A6A, 2A5A2C, or fuzzy 5A5B can make H-VSion’s abare quite strong. Additionally, use of 9j.A can stop players with poor dashA/B normals who primarily reset through dashins, allowing H-VSion to force blockstun and pressure the opponent or, alternatively, escape the corner and reset to neutral. Another use of A normals is in combination with VSion’s dash, dashA being a good way to close space should the opponents look to space themselves in the corner against you and potentially granting you an element of surprise. Be mindful of your distance for confirms and map accordingly, as well as checking how the opponent interacts with your disrespect and gauge your risk/reward.
236C/623C uses: Both can serve as reversals. 236C, similar to C/H Wara’s 236C, has a decent amount of vulnerability prior to the claw coming out (around 12f), allowing it to stuff out some frametraps and enable a hitconfirm into decent air throw damage. If the opponent is unable to interact with the situation and chooses to block, the H-VSion is granted frame advantage and can use this to either pressure the opponent or escape the corner. It’s weakness being moves that can snipe the invulnerability before the claw comes out, such as sliding sweeps (C/H Nanaya 2C) or normals that have tons of active frames (C-Hisui 2B), which is where 623C can come in.It is invulnerable until its short active frame passes, unlike 236C and acts as a basic shoryuken. However, 623C is slower than other reversals, allowing it to be shielded on super flash if the opponent plays a character that can cancel an A normal’s recovery frames into shield. Should the opponent block it, H-VSion will eat B starter damage, but if timed correctly during frame traps/staggers, it can nab VSion an easy 2k into summon/left right setplay.
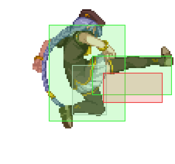
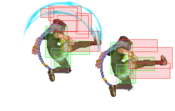
Divekick/IAD/719: Divekick can serve as a potential abare against characters who have lower 2A/2Bs and rely on these dashins, alternatively sweeps that move them forward (think Nanaya). You need to have your wits about you if you decide to use this tool. IAD j.A can also work against opponents who have spaced themselves our reasonably and can be used in tandem with dashA to check opponents on their pressure spacing. 719 can also work with the plethora of defensive aerial options that allow VSion to change air trajectory/stall in the air such as j.236X, Dodge, and j.2B. However, be mindful of opponent spacing, as recklessly using 719 to escape the corner while opponents space themselves correctly can blow frames and result in resuming opponent pressure.
Combos
| Combo Notation Help | |
|---|---|
| Disclaimer: Combos are written by various writers, so the actual notation used in pages can differ from the standard one. | |
| X > Y | X input is cancelled into Y. |
| X > delay Y | Must wait for a short period before cancelling X input into Y. |
| X, Y | X input is linked into Y, meaning Y is done after X's recovery period. |
| X+Y | Buttons X and Y must be input simultaneously. |
| X/Y | Either the X or Y input can be used. |
| X~Y | This notation has two meanings.
|
| X(w) | X input must not hit the opponent (Whiff). |
| j.X | X input is done in the air, implies a jump/jump cancel if the previous move was done from the ground. Applies to all air chain sections:
|
| sj.X | X input is done after a super jump. Notated as sj8.X and sj9.X for neutral and forward super jumps respectively. |
| dj.X | X input is done after a double jump. |
| sdj.X | X input is done after a double super jump. |
| tk.X | Stands for Tiger Knee. X motion must be buffered before jumping, inputting the move as close to the ground as possible. (ex. tk.236A) |
| (X) | X is optional. Typically the combo will be easier if omitted. |
| [X] | Input X is held down. Also referred to as Blowback Edge (BE). Depending on the character, this can indicate that this button is held down and not released until indicated by the release notation. |
| ]X[ | Input X is released. Will only appear if a button is previously held down. This type of input is referred to as Negative Edge. |
| {X} | Button X should only be held down briefly to get a partially charged version instead of the fully charged one. |
| X(N) | Attack "X" should only hit N times. |
| (XYZ)xN | XYZ string must be performed N times. Combos using this notation are usually referred to as loops. |
| (XYZ^) | A pre-existing combo labelled XYZ is inserted here for shortening purposes. |
| CH | The first attack must be a Counter Hit. |
| Air CH | The first attack must be a Counter Hit on an airborne opponent. |
| 66 | Performs a ground forward dash. |
| j.66 | Performs an aerial forward dash, used as a cancel for certain characters' air strings. |
| IAD/IABD | Performs an Instant AirDash. |
| AT | Performs an Air Throw. (j.6/4A+D) |
| IH | Performs an Initiative Heat. |
| AD | Performs an Arc Drive. |
| AAD | Performs an Another Arc Drive. |
- Note that all aerial enders can either be finished with the normal Air Throw or j.236C. Air Throw enders can also be followed up with j.2B. For the rest of this combo guide we'll simply use AT as the notation.
- These are just some of the basic combos. Please refer to this guide here
Starter
Enders
OTG Pick ups
Normal Combos
Corner Combos
Move Descriptions
| Frame Data Help | |
|---|---|
| Header | Tooltip |
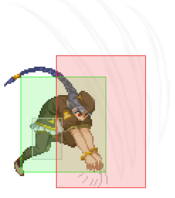
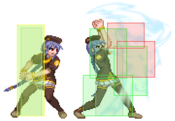
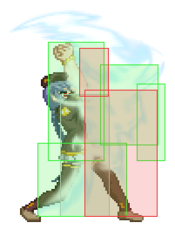
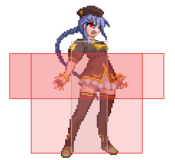
| Move Box Colors |
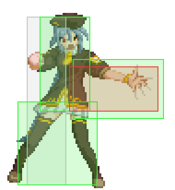
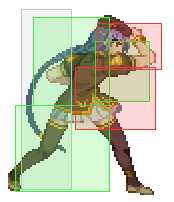
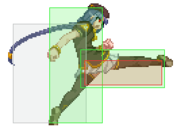
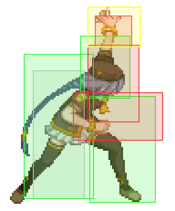
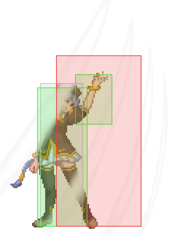
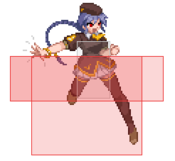
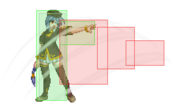
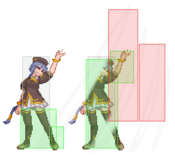
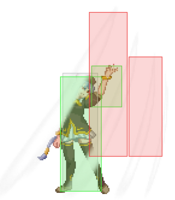
Light gray = Collision Box (A move lacking one means it can go through the opponent's own collision box). |
| Damage | Base damage done by this attack.
(X) denotes combined and scaled damage tested against standing V. Sion. |
| Red Damage | Damage done to the recoverable red health bar by this attack. The values are inherently scaled and tested against standing V. Sion.
(X) denotes combined damage. |
| Proration | The correction value set by this attack and the way it modifies the scaling during a string. See this page for more details.
X% (O) means X% Overrides the previous correction value in a combo if X is of a lower percentage. |
| Circuit | Meter gained by this attack on hit.
(X%) denotes combined meter gain. |
| Cancel | Actions this move can be cancelled into.
SE = Self cancelable. |
| Guard | The way this move must be blocked.
L = Can block crouching |
| Startup | Amount of frames that must pass prior to reaching the active frames. Also referred to as "True Startup". |
| Active | The amount of frames that this move will have a hitbox. (x) denotes frame gaps where there are no hitboxes is present. Due to varied blockstuns, (x) frames are difficult to use to determine punish windows. Generally the larger the numbers, the more time you have to punish. |
| Recovery | Frames that this move has after the active frames if not canceled. The character goes into one frame where they can block but not act afterwards, which is not counted here. |
| Advantage | The difference in frames where you can act before your opponent when this move is blocked (assuming the move isn't canceled and the first active frame is blocked). If the opponent uses a move with startup that is at least 2 frames less than this move's negative advantage, it will result in the opponent hitting that move. |
| Invul | Lists any defensive properties this move has.
X y~z denotes X property happening between the y to z frames of the animations. If no frames are noted, it means the invincibility lasts through the entire move. Invicibility:
Hurtbox-Based Properties:
Miscellaneous Properties
|
Normal Moves
Standing Normals
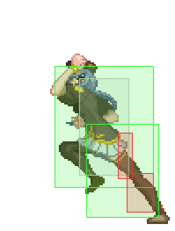
5A
5A
5A~6A~6A |
|---|
5B
5C
Crouching Normals
2A
2B
2C
Aerial Normals
j.A
j.B
j.C
Command Normals
6B
6B
6[B] |
|---|
3C
6C
6C
6[C] |
|---|
j.6A
j.2B
j.2B
j.2[B] |
|---|
Universal Mechanics
Ground Throw
Ground Throw
6/4A+D |
|---|
Air Throw
Air Throw
j.6/4A+D |
|---|
Shield Counter
Shield Counter
Auto after a successful Shield (Air OK) |
|---|
Shield Bunker
Shield Bunker
214D in neutral or blockstun |
|---|
Circuit Spark
Special Moves
Grounded Specials
236X
Terror News (Lie)
236A/B/[B]/C |
|---|
623X
Terror News (Malice)
623A/B/C |
|---|
214X
Replicant Conductor (Osiris)
214A/B/C (No EX) |
|---|
Aerial Specials
j.236X
Busy Bug
j.236A/B/C |
|---|
Arc Drive
Cruel Blood
41236C during Heat |
|---|


