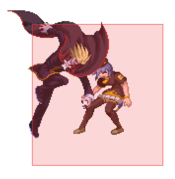
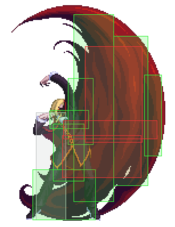
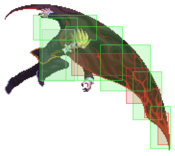
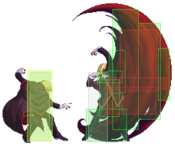
Character Page Progress
This page is still a work in progress, consider joining as an editor to help expand it. Please update this character's roadmap page when one of the editing goals have been reached.
| In Progress |
To-do
|
- Combos:
- Add damage, meter gain/given numbers and video links to the pre-existing combos.
- Move Descriptions:
- Expand upon to the shorter descriptions, cite their uses, add captions where helpful, etc.
- Double check/complete frame data for moves which are harder to determinate. (ex: AAD, LA)
|
- Additional Ressources/Players to watch/ask
- If you know any players in particular that can be helpful for learning this character, please add them with, if possible a way to contact them (such as a Discord handle) and a name that can be searched in the match video database.
- Overview/General Gameplan:
- Add a short summary of this character with a list of strengths and weaknesses
- (Write the Defense section.)
|
Guides
Made by the tech master himself. It's got all you need to play the character probably more. Brasil's own nightmare that gives a gift to you.
Additional Resources
F-Warachia Match Video Database
F-Wara guide by Receita Federal
Notable Players
| Name |
Color
|
Region |
Common Venues |
Status |
Details
|
kuroshiro
(黒白) |

|
Japan |
A-cho,
Play Spot BIG ONE 2nd |
Active |
Funny Warachia. He is the player that comes to mind for F-Wara due to his proficiency, techs and solid play that perfectly defines the character.
|
ReceitaFederal
|

|
South America |
Netplay |
Active |
True man of South America. Mostly posts tech on his twitter
⣿⣿⣿⣿⣿⣿⣿⣿⣿⣿⣿⣿⣿⣿⣿⣿⣿⣿⣿⣿⣿⣿⣿⣿⣿⣿⣿⣿⣿⣿
⣿⣿⣿⣿⣿⣿⣿⣿⣿⡿⠿⠿⠛⠉⠛⢿⣿⣿⣿⣿⣿⣿⣿⣿⣿⣿⣿⣿⣿⣿
⣿⣿⣿⣿⣿⣿⣿⠟⠋⠀⠀⠀⠀⠀⠀⢸⣿⣿⣿⣿⣿⢏⣾⣿⣿⣿⣿⣿⣿⣿
⣿⣿⣿⣿⣿⠿⠇⠀⠀⠀⠀⠀⠀⠀⠀⠈⠻⢿⣿⣿⢋⣾⡿⠿⣛⣻⣽⣿⣿⣿
⣿⣿⣿⡏⠀⠀⠀⠀⠀⠀⠀⠀⠀⠀⠀⠀⢀⣄⠈⠁⠉⠒⣚⣉⣉⣛⣛⣻⣿⣿
⣿⣿⣿⡇⠀⣤⣾⠃⠀⠀⠀⠀⠀⠀⠀⠀⠀⠉⠃⣤⣶⡝⢶⣬⣙⢿⣿⣿⣿⣿
⣿⣿⣿⣿⡀⣿⣿⣦⣾⡄⠀⣾⠖⠀⣀⣾⣷⣿⣿⣾⣿⣿⣆⣿⣿⣷⣿⣿⣿⣿
⣿⣿⣿⣿⣿⣿⣿⣿⣿⣷⡆⠀⣤⣾⣿⣿⣿⣿⣿⣿⣿⣿⣿⣼⣿⣿⣿⣿⣿⣿
⣿⣿⣿⣿⣿⣿⣿⣿⣿⣿⡄⢰⣿⣿⣿⣿⣿⣿⣿⣿⣿⣿⣿⣿⣿⣿⣿⣿⣿⣿
⣿⣿⣿⣿⣿⣿⣿⣿⣿⣿⣿⣾⣿⣿⣿⣿⣿⣿⣿⣿⣿⣿⣿⣿⣿⣿⣿⣿⣿⣿
ES BRASILERO Y TIENE MIX TIENE FACHA TIENE FACTOR INTIMIDANTE NO TIENE RUN UP THROW ES FWARA
|
Overview

F-Warachia's movement options are different from other moons. His forward dash goes airborne (Morrigan-style dash), his airdash goes slightly downwards and his air backdash slightly upwards.
Strengths / Weaknesses
| Strengths
|
- Large Normals: F-Wara has the best mid and long-range pokes of all his other moons, having standing B which covers a lot of space in front of him leading into his most damaging combos
- Good Antiair
- Excellent Mixups on Hard Knockdown: Having his unique ground dash that puts him airborne and his air dash that angles slightly downward, it allows for F-Wara to mixup his opponents on hard knockdown
|
| Weaknesses
|
- Large Hurtbox
- Unorthodox Ground and Airdash
|
General Gameplan
Always remember that F-Wara's dash is the only one that goes airborne. It's not very fast, so mobility isn't as great as his other Moons, but he makes up for this with mixups, zoning and move priority (eventhough his other Moons have plenty of it).
A few tips on his dash: If you're using A+B to dash, if you input 6A+B and instantly change your direction to 4, you will still continue dashing in the same direction. The only way to stop dashing is to put your stick to neutral, or let go of your direction keys, where you will start falling. If you are trying to do dash j.A instant overhead, if you input the j.A right after you let go of your directions, the forward and upward momentum will still continue, sending you further while doing j.A. This will have you fly over your crouching opponent, whiffing your overhead. To avoid this, input your dash, let go of your directions and let yourself fall for a teeny, weeny bit before inputting j.A. The j.A will come out while you are falling, keeping you in place and successfully hitting a crouching opponent.
236, 214 and 22 are all EX-cancellable, meaning they are IH cancellable as well. Basically, you can IH right after the projectile comes out.
Neutral
F-Wara maintains the range of all his other Moons' j.B. As F-Wara's dash is airborne, you will find yourself spending a lot of time in the air if you choose to be more mobile. Use jB to keep your opponent at bay or to get counterhits. On the ground, you can use all his forms of the 22 series which he retains from the other Moons as well. As usual, use them wisely because they come out slowly and if you get hit, the tornado disappears. Don't react to jump-ins or rush-ins using them; predict when they will come at you and use them.
TK j.236 fireballs are also good zoning tools. TK j.2369A can get air CH's from careless jump-ins. More details on the fireballs are in the specials section.
Pressure
F-Wara has quite good pressure tools at his disposal.
- 2B is your main tool in blockstrings. It has forward momentum, relatively fast and quite advantageous on block. Even if you're too far away for it to hit, if your opponent decides to poke, they will eat a counterhit because of the extended hitbox touching your 2B.
- 2B recover 2A is airtight with good timing and at point blank.
- If you're too far, BE2C is a good stagger.
- Mix in IAD j.B if you're too far away and the opponent starts poking. IAD j.B j.236B will get the fireball to hit. This stuffs out pokes and lets you land and followup with combo or pressure. j.236A, however, will have the fireball appear behind your opponent.
- If the opponent starts respecting, put in some dash high/low mixups. This is the main girth of F-Wara's mixup game. Basically, dash j.A for an overhead, or dash jC to whiff and land and go low with 2A or throw. IAD's are about the same, only slower.
Throw/Post-j421 Okizeme
- Throws and j.421C should give you enough time to set up a Haze and do a dash high/low, given that the opponent respects. With good timing, this tactic beats pokes, but it all has to be done as early as possible. With the Haze there, feel free to go to Haze combos for maximum damage if you land a hit. If you smell a DP, just set the Haze up and wait it out to block it.
- TK j.2369A can cross-up or not depending on timing. If you input the 2369 slowly, you will cross-up.
- 236B will summon a fireball right when the opponent wakes up, stuffing out pokes. You will recover soon enough to continue pressure, with a 2A followup being airtight, or even better, dash high/low. Again, if you sense a DP coming, just summon it and wait it out.
- A raw dash will almost always crossup on a knockdown'd opponent. If you input the dash late, right when he/she starts to wake up, his/her collision box will start rising, causing your dash to not cross-up.
Defense
place text here*
Combos
| Combo Notation Help
|
Disclaimer: Combos are written by various writers, so the actual notation used in pages can differ from the standard one.
For more information, see Glossary and Controls.
|
| X > Y
|
X input is cancelled into Y.
|
| X > delay Y
|
Must wait for a short period before cancelling X input into Y.
|
| X, Y
|
X input is linked into Y, meaning Y is done after X's recovery period.
|
| X+Y
|
Buttons X and Y must be input simultaneously.
|
| X/Y
|
Either the X or Y input can be used.
|
| X~Y
|
This notation has two meanings.
- Use attack X with Y follow-up input.
- Input X then within a few frames, input Y. Usually used for option selects.
|
| X(w)
|
X input must not hit the opponent (Whiff).
|
| j.X
|
X input is done in the air, implies a jump/jump cancel if the previous move was done from the ground.
Applies to all air chain sections:
- Assume a forward jump cancel if no direction is given.
- Air chains such as j.A > j.B > j.C can be shortened to j.ABC.
|
| sj.X
|
X input is done after a super jump. Notated as sj8.X and sj9.X for neutral and forward super jumps respectively.
|
| dj.X
|
X input is done after a double jump.
|
| sdj.X
|
X input is done after a double super jump.
|
| tk.X
|
Stands for Tiger Knee. X motion must be buffered before jumping, inputting the move as close to the ground as possible. (ex. tk.236A)
|
| (X)
|
X is optional. Typically the combo will be easier if omitted.
|
| [X]
|
Input X is held down. Also referred to as Blowback Edge (BE). Depending on the character, this can indicate that this button is held down and not released until indicated by the release notation.
|
| ]X[
|
Input X is released. Will only appear if a button is previously held down. This type of input is referred to as Negative Edge.
|
| {X}
|
Button X should only be held down briefly to get a partially charged version instead of the fully charged one.
|
| X(N)
|
Attack "X" should only hit N times.
|
| (XYZ)xN
|
XYZ string must be performed N times. Combos using this notation are usually referred to as loops.
|
| (XYZ^)
|
A pre-existing combo labelled XYZ is inserted here for shortening purposes.
|
| CH
|
The first attack must be a Counter Hit.
|
| Air CH
|
The first attack must be a Counter Hit on an airborne opponent.
|
| 66
|
Performs a ground forward dash.
|
| j.66
|
Performs an aerial forward dash, used as a cancel for certain characters' air strings.
|
| IAD/IABD
|
Performs an Instant AirDash.
|
| AT
|
Performs an Air Throw. (j.6/4A+D)
|
| IH
|
Performs an Initiative Heat.
|
| AD
|
Performs an Arc Drive.
|
| AAD
|
Performs an Another Arc Drive.
|
Normal Combos
| Condition
|
Notation
|
Damage
vs V.Sion
|
Notes
|
|
| Normal starter, grounded opponent
|
- 2A > (5B(2) >) 2B > 2C > 6C j.C > dj.C > AT/j.421C
|
???
|
| |
| Meter Gained: ??? |
Meter Given (vs C-Moon): ??? |
| The most basic of combos. As usual, starting with 2A prorates and deals less damage. 5B(2) can be omitted because in some, if not most cases, it will push you out too far to connect 2B. |
|
|
| Normal starter, grounded opponent
|
- 2A > (5B(2) >) 2B > 2C > 6C > 22A, sj8.B > dj.C > AT/j.421C
|
???
|
| |
| Meter Gained: ??? |
Meter Given (vs C-Moon): ??? |
| Same as above, with the added spice of 22A tornado, just because you can. Be sure to manually do sj8 right after the tornado. |
|
|
| Normal starter, grounded opponent
|
- 2A > 5B > 2C > 6C > (22A, sj8) j.C dj.C > AT/j.421C
|
???
|
| |
| Meter Gained: ??? |
Meter Given (vs C-Moon): ??? |
| Same as the basic, only without 2B. Depending on timing and spacing (not sure if by character), 2C might be only one hit, so you gotta be careful. |
|
|
| Normal starter, grounded opponent
|
- 2A > 5B > 5C > j.C > dj.C > AT/j.421C
|
???
|
| |
| Meter Gained: ??? |
Meter Given (vs C-Moon): ??? |
| A good combo with good range and can easily confirm into EX 623C combo. So far on Ryougi (not sure if there are others), 5C will be 2 hits instead of 3 unless you delay a bit after 5B. |
|
|
| Normal starter, grounded opponent
|
- 2A > 5B > 5C > 6C > sj8.C > dj.C > AT/j.421C
|
???
|
| |
| Meter Gained: ??? |
Meter Given (vs C-Moon): ??? |
| Does more damage than above, but is character specific. Replacing the first j.C with j.B has higher chance of success. |
|
|
| Normal starter, grounded opponent
|
- 2A > 5B > 2C(1) > 2A > 2C/5C > 6C > (22A) j.C > dj.C > AT/j.421C
|
???
|
| |
| Meter Gained: ??? |
Meter Given (vs C-Moon): ??? |
| Only works if 2C hits late, letting you recover to catch the opponent with a 2A and followup. Not worth doing on purpose because it is very dependent on timing and spacing, but I thought I'd throw it here. |
|
|
| Normal starter, grounded opponent
|
- (Anything) > 2C > 6C > 623A
|
???
|
| |
| Meter Gained: ??? |
Meter Given (vs C-Moon): ??? |
| This is your standard oki combo because 623A gives hard knockdown. Bear in mind that only the last hit causes the hard knockdown, meaning all 6 hits must connect. If only 5 hits connect, prepare for the opponent to tech. Doing 2B 2C 6C is no problem. For 5B 2C 6C, be sure to do 2C delay 6C. If you don't delay, 623A has a chance of doing only 5 hits and giving no hard knockdown. |
|
|
Metered Combos
F-Wara only has one EX move that can be used in combos, and that is 623C, and even that is under conditions. Basically, 623C isn't a free ride to damage when used in combos. You have to make sure that 623C can be combo'd afterwards. Basically, 623C can be split into a few parts:
- Wara goes up.
- Wara goes down.
- Wara goes up again.
- Wara goes down again.
- Wara goes up once more.
- Wara goes down once more.
- Wara goes up a final time.
- Wara goes down a final time.
- Wara lands and recovers.
Normally, a combo with 623C will have parts 1, 5 and 9 land hits on the opponent. The most important part to remember is that no.9 MUST hit. This will kick the opponent up a final time to give you enough time to recover and followup. HOWEVER, if no.7 hits, chances are that the combo is ruined because this will hit the opponent and make no.9 whiff instead, causing them to hit the floor before you can followup. But do not fret, all of 623C's hits are untechable, so if you realize you cannot combo anymore, change to oki.
| Condition
|
Notation
|
Damage
vs V.Sion
|
Notes
|
|
| Normal starter, grounded opponent, 100% meter
|
- 2A > 5B > 5C > 6C > 623C (, 2B(1) > 2[C])xN
|
???
|
| |
| Meter Gained: ??? |
Meter Given (vs C-Moon): ??? |
| This is so far the most reliable universal starter to the EX combo which often fulfills the conditions to make followup possible. Do 2B too early, the opponent can airtech. Do 2B too late, it will OTG. Sometimes 2[C] will be one hit only because of bad timing or spacing where the opponent is too high or far away. If this happens, either switch to 2A 2C ender or try to continue the loop which will be harder. After the loop, you can do 6C 623A for oki or aerial combo for damage, which by now should not be necessary because the full combo would already net around 5k and an aerial combo won't add much more because of the high hit count. |
|
|
| Normal starter, grounded opponent, 100% meter
|
- (Anything) > 2C > 214A > 623C
|
???
|
| |
| Meter Gained: ??? |
Meter Given (vs C-Moon): ??? |
| This will summon a Haze right when you knock the opponent down, then cancel it into 623C to deal more damage and kick the opponent into the air, giving them airtime and you more time to do oki, but not combo because this will not meet the above-mentioned requirements. TKj.2369A followup will bring you closer to the opponent and put a fireball above them, stuffing out jump-outs and continuing pressure. If your mixups manage to hit, proceed with Haze combos for maximum damage since the Haze is out. In the corner, use 214B instead. |
|
|
Haze Combos
F-Wara's 214 Haze increases the aerial hitstun of your moves if your opponent is touching it. This makes certain combos possible in the presence of Haze.
| Condition
|
Notation
|
Damage
vs V.Sion
|
Notes
|
|
| Normal starter, grounded opponent, 214 set beforehand
|
- 2A > 5B > 2[C] > (2B > 2[C])xN
|
???
|
| |
| Meter Gained: ??? |
Meter Given (vs C-Moon): ??? |
| The same rules apply as the EX combos. |
|
|
Move Descriptions
| Frame Data Help
|
| Header
|
Tooltip
|
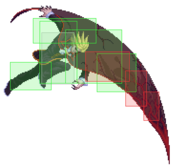
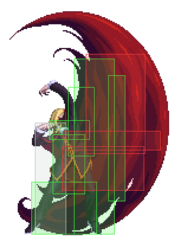
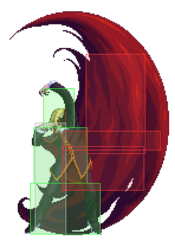
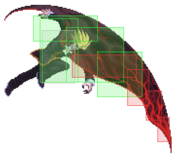
| Move Box Colors
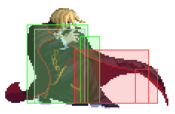
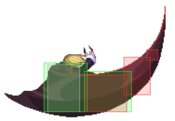
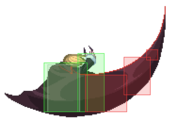
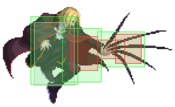
|
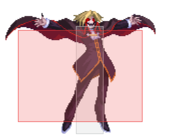
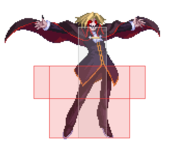
Light gray = Collision Box (A move lacking one means it can go through the opponent's own collision box).
Green: Hurt Boxes.
Red: Hit(/Grab) Boxes.
Yellow: Clash Boxes (When an active hitbox strikes a clash box, the active hitbox stops being active. Multi-hit attacks can beat clash since they will still progress to the next hitbox.)
Magenta: Projectile-reflecting boxes OR Non-hit attack trigger boxes (usually).
Blue: Reflectable Projectile Boxes.
|
| Damage
|
Base damage done by this attack.
(X) denotes combined and scaled damage tested against standing V. Sion.
|
| Red Damage
|
Damage done to the recoverable red health bar by this attack. The values are inherently scaled and tested against standing V. Sion.
(X) denotes combined damage.
|
| Proration
|
The correction value set by this attack and the way it modifies the scaling during a string. See this page for more details.
X% (O) means X% Overrides the previous correction value in a combo if X is of a lower percentage.
X% (M) means the current correction value in a combo will be Multiplied by X%. This can also be referred to as relative proration.
|
| Circuit
|
Meter gained by this attack on hit.
(X%) denotes combined meter gain.
-X% denotes a meter cost.
|
| Cancel
|
Actions this move can be cancelled into.
SE = Self cancelable.
N = Normal cancelable.
SP = Special cancelable.
CH = Cancelable into the next part of the same attack (Chain in case of specials).
EX = EX cancelable.
J = Jump cancelable.
(X) = Cancelable only on hit.
-X- = Cancelable on whiff.
|
| Guard
|
The way this move must be blocked.
L = Can block crouching
H = Can block standing.
A = Can block in the air.
U = Unblockable.
|
| Startup
|
Amount of frames that must pass prior to reaching the active frames. Also referred to as "True Startup".
|
| Active
|
The amount of frames that this move will have a hitbox.
(x) denotes frame gaps where there are no hitboxes is present. Due to varied blockstuns, (x) frames are difficult to use to determine punish windows. Generally the larger the numbers, the more time you have to punish.
X denotes active frames with a duration separate from its origin move's frame data, such as projectile attacks. In this case, the total length of the move is startup+recovery only.
|
| Recovery
|
Frames that this move has after the active frames if not canceled. The character goes into one frame where they can block but not act afterwards, which is not counted here.
|
| Advantage
|
The difference in frames where you can act before your opponent when this move is blocked (assuming the move isn't canceled and the first active frame is blocked).
If the opponent uses a move with startup that is at least 2 frames less than this move's negative advantage, it will result in the opponent hitting that move.
±x~±y denotes a range of possible advantages.
|
| Invul
|
Lists any defensive properties this move has.
X y~z denotes X property happening between the y to z frames of the animations. If no frames are noted, it means the invincibility lasts through the entire move.
Invicibility:
- Strike = Strike invincible.
- Throw = Throw invincible.
Hurtbox-Based Properties:
- Full = No hurtboxes are present.
- High = Upper body lacks a hurtbox.
- Low = Lower body lacks a hurtbox.
Miscellaneous Properties
- Clash = Frames in which clash boxes are active.
- Reflect = Frames in which projectile-reflecting boxes are active.
- Super Armor = Frames in which the character can take hits without going into hit stun.
|
Normal Moves
Standing Normals
|
|
| Damage
|
Red Damage
|
Proration
|
Cancel
|
Guard
|
| 500
|
303
|
78% (O)
|
-SE-, -N-, -SP-, -EX-, (J)
|
LH
|
| First Active
|
Active
|
Recovery
|
Frame Adv
|
Circuit
|
Invuln
|
| 5
|
4
|
5
|
3
|
4.5%
|
-
|
|
A high jab into the air. Whiffs crouchers. Relatively short range, as per many other F-Moon characters.
|
|
|
|
| Damage
|
Red Damage
|
Proration
|
Cancel
|
Guard
|
| 600, 450*2 (1284)
|
(746)
|
80% (O)
|
N, SP, EX, (J)
|
LH
|
| First Active
|
Active
|
Recovery
|
Frame Adv
|
Circuit
|
Invuln
|
| 9
|
9
|
12
|
2
|
6.3%, 4.05%*2 (14.4%)
|
-
|
|
3 hits. Third hit kicks the opponent into the air.
|
|
|
|
| Damage
|
Red Damage
|
Proration
|
Cancel
|
Guard
|
| 500*3 (1452)
|
(880)
|
100%
|
N, SP, EX, (J)
|
LH
|
| First Active
|
Active
|
Recovery
|
Frame Adv
|
Circuit
|
Invuln
|
| 11
|
9
|
15
|
-1/-4
|
4.5%*3 (13.5%)
|
-
|
|
3 hits. A relatively fast (compared to his other Moons' 5C's), far-reaching move.
|
|
Crouching Normals
|
|
| Damage
|
Red Damage
|
Proration
|
Cancel
|
Guard
|
| 300
|
151
|
76% (O)
|
-SE-, -N-, -SP-, -EX-, (J)
|
L
|
| First Active
|
Active
|
Recovery
|
Frame Adv
|
Circuit
|
Invuln
|
| 4
|
4
|
5
|
3
|
2.1%
|
-
|
|
Low-hitting poke. Reaches further than it seems.
|
|
|
|
| Damage
|
Red Damage
|
Proration
|
Cancel
|
Guard
|
| 400*2 (748)
|
(566)
|
90% (O)
|
N, SP, EX, (J)
|
L
|
| First Active
|
Active
|
Recovery
|
Frame Adv
|
Circuit
|
Invuln
|
| 8
|
7
|
8
|
4
|
3.6%*2 (7.2%)
|
-
|
|
2 hits, hits low, has forward momentum, advantageous on block and main girth of blockstrings. The first hit has very little hitstun. If you somehow do a 2A > 2B(1) > 2C combo, the opponent can recover so fast that they block the 2C because of low hitstun.
|
|
|
|
| 2C
|
Damage
|
Red Damage
|
Proration
|
Cancel
|
Guard
|
| 800, 600 (1157)
|
(846)
|
70% (O)
|
N, SP, EX, (J)
|
LH
|
| First Active
|
Active
|
Recovery
|
Frame Adv
|
Circuit
|
Invuln
|
| 11
|
8
|
17
|
-3
|
7.2%, 5.4% (12.6%)
|
-
|
|
2 hits. Rare example of a mid-hitting 2C. Untechable knockdown on hit.
|
| 2[C]
|
Damage
|
Red Damage
|
Proration
|
Cancel
|
Guard
|
| 1000, 700 (1417)
|
(1007)
|
70% (O)
|
N, SP, EX, (J)
|
LH
|
| First Active
|
Active
|
Recovery
|
Frame Adv
|
Circuit
|
Invuln
|
| 20
|
8
|
10
|
4
|
9.0%, 6.3% (15.3%)
|
-
|
|
Held version does more damage and recovers faster.
|
|
Aerial Normals
|
|
| Damage
|
Red Damage
|
Proration
|
Cancel
|
Guard
|
| 300
|
101
|
75% (O)
|
SE, N, SP, EX, J
|
HA
|
| First Active
|
Active
|
Recovery
|
Frame Adv
|
Circuit
|
Invuln
|
| 7
|
4
|
10
|
-
|
2.1%
|
-
|
|
Fast overhead. Coupled with dashing, it makes an almost instant overhead.
|
|
|
|
| Damage
|
Red Damage
|
Proration
|
Cancel
|
Guard
|
| 800
|
606
|
90% (O)
|
N, SP, EX, J
|
HA
|
| First Active
|
Active
|
Recovery
|
Frame Adv
|
Circuit
|
Invuln
|
| 9
|
10
|
-
|
-
|
7.2%
|
-
|
|
Unlike the other Moons, this one is only 1 hit, but has long active frames, making it hit even when you execute it while falling from the highest point of a jump. Its range is just as good as the other moons, but because of its 1-hit nature, it makes tricks like air-to-air j.B land j.B > dj.C AT/j.421C a la C-Moon no longer doable.
|
|
|
|
| Damage
|
Red Damage
|
Proration
|
Cancel
|
Guard
|
| 400*3 (1162)
|
(702)
|
100%
|
N, SP, EX, J
|
HA
|
| First Active
|
Active
|
Recovery
|
Frame Adv
|
Circuit
|
Invuln
|
| 12
|
8
|
-
|
-
|
5.4%*3 (16.2%)
|
-
|
|
3 hits, only last hit is cancellable to anything. Its only difference from other moons is being 1 frame faster.
|
|
Command Normals
|
|
| 6C
|
Damage
|
Red Damage
|
Proration
|
Cancel
|
Guard
|
| 1000
|
707
|
75% (O)
|
SP, EX, (J)
|
LHA
|
| First Active
|
Active
|
Recovery
|
Frame Adv
|
Circuit
|
Invuln
|
| 16
|
7
|
19
|
-8
|
11.7%
|
-
|
|
Launcher. Although it reaches high, it's air-blockable and quite slow, making it a bad anti-air.
|
| 6[C]
|
Damage
|
Red Damage
|
Proration
|
Cancel
|
Guard
|
| 1500
|
1010
|
60% (O)
|
SP, EX, (J)
|
H
|
| First Active
|
Active
|
Recovery
|
Frame Adv
|
Circuit
|
Invuln
|
| 29
|
7
|
14
|
-3
|
13.5%
|
-
|
|
Held version is an overhead, but be careful as it is only special cancellable on block.
|
|
|
|
| Damage
|
Red Damage
|
Proration
|
Cancel
|
Guard
|
| 1000
|
606
|
60% (O)
|
N/A
|
HA
|
| First Active
|
Active
|
Recovery
|
Frame Adv
|
Circuit
|
Invuln
|
| 22
|
2
|
-
|
-
|
9.9%
|
-
|
|
Delayed downward hitting move like j.C, only it knocks down the opponent. Instantly inputting this as a TK (ie j8.2C) gives OTG opportunities, which unfortunately F-Wara can't make much use of. However, he can use that time for mixups instead.
|
|
Universal Mechanics
|
|
| Damage
|
Red Damage
|
Proration
|
Cancel
|
Guard
|
| 1300
|
606
|
60%
|
-
|
U
|
| First Active
|
Active
|
Recovery
|
Frame Adv
|
Circuit
|
Invuln
|
| 3
|
1
|
20
|
-
|
0.0%
|
-
|
|
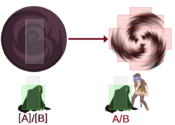
Wara cloaks the opponent and makes them fall from the top of the screen. Untechable knockdown.
|
|
|
|
| Damage
|
Red Damage
|
Proration
|
Cancel
|
Guard
|
| 1600 (Raw)/1200
|
505
|
30%
|
(Any if Raw)
|
U
|
| First Active
|
Active
|
Recovery
|
Frame Adv
|
Circuit
|
Invuln
|
| 2
|
1
|
12
|
-
|
0.0%
|
-
|
|
Standard type of grab and slash air throw.
|
|
|
|
| Ground
|
Damage
|
Red Damage
|
Proration
|
Cancel
|
Guard
|
| 500 (345)
|
202
|
50%
|
(SP), (EX), (J)
|
LHA
|
| First Active
|
Active
|
Recovery
|
Frame Adv
|
Circuit
|
Invuln
|
| 9
|
4
|
18
|
-4
|
4.5%
|
-
|
|
Same as his Shield Bunker.
|
| Aerial
|
Damage
|
Red Damage
|
Proration
|
Cancel
|
Guard
|
| 500 (345)
|
202
|
50%
|
-
|
HA
|
| First Active
|
Active
|
Recovery
|
Frame Adv
|
Circuit
|
Invuln
|
| 9
|
4
|
-
|
-
|
3.5%
|
Full 1-8
|
|
Same animation as j.C/j.2C. Has the unique property of being fully invulnerable during startup.
|
|
|
|
| Bunker
|
Damage
|
Red Damage
|
Proration
|
Cancel
|
Guard
|
| 500
|
202
|
50%
|
-
|
LHA
|
| First Active
|
Active
|
Recovery
|
Frame Adv
|
Circuit
|
Invuln
|
| 26
|
4
|
19
|
-5
|
0.0%
(-50.0% in blockstun)
|
Clash 1-10
|
| (Clash)
|
Damage
|
Red Damage
|
Proration
|
Cancel
|
Guard
|
| 500
|
202
|
50%
|
-
|
LHA
|
| First Active
|
Active
|
Recovery
|
Frame Adv
|
Circuit
|
Invuln
|
| 8
|
4
|
19
|
-5
|
0.0%/-50.0%
|
Strike 1-7
|
|
A 6C with extended hurtboxes.
|
|
|
|
| Damage
|
Red Damage
|
Proration
|
Cancel
|
Guard
|
| 100
|
0
|
100%
|
-
|
U
|
| First Active
|
Active
|
Recovery
|
Frame Adv
|
Circuit
|
Invuln
|
| 21
|
8
|
25
|
-
|
-100.0% (min)
|
Full 1-28
|
|
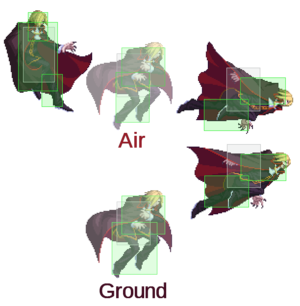
This is the largest Heat hitbox in the game, though most of that reach is behind him. Tied for second longest Heat startup with V.Sion and Aoko.
|
|
|
|
| Ground
|
Damage
|
Red Damage
|
Proration
|
Cancel
|
Guard
|
| 100
|
0
|
100%
|
-
|
U
|
| First Active
|
Active
|
Recovery
|
Frame Adv
|
Circuit
|
Invuln
|
| 11
|
10
|
20
|
-
|
removes all
|
Full 1-39
|
| Air
|
Damage
|
Red Damage
|
Proration
|
Cancel
|
Guard
|
| 100
|
0
|
100%
|
-
|
U
|
| First Active
|
Active
|
Recovery
|
Frame Adv
|
Circuit
|
Invuln
|
| 12
|
10
|
15
|
-
|
removes all
|
Strike 1-30
|
|
Universal burst mechanic. Unlike Crescent/Full Heat activation, the hitbox and frame data doesn't vary between characters. However, you can be thrown out of this move if you input it in the air.
|
|
Special Moves
Grounded Specials
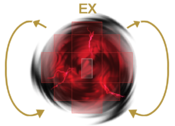
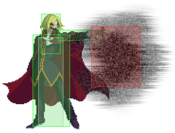
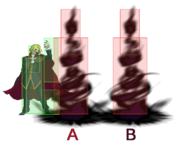
No fireball sprites, framedisplay is bugged. No fireball sprites, framedisplay is bugged.
|
| A
|
Damage
|
Red Damage
|
Proration
|
Cancel
|
Guard
|
| 100
|
101
|
70% (O)
|
-
|
LHA
|
| First Active
|
Active
|
Recovery
|
Frame Adv
|
Circuit
|
Invuln
|
| 15
|
X
|
41
|
-21
|
4.5%
|
-
|
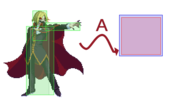
- Summons a fireball in front of F-Wara. Two fireballs can be active at once. Trying to perform the EX version while one fireball is already active will make you perform the B version instead. This rule applies no matter whether you've used the grounded version or the airborne one.
Quickly summons a fireball that doesn't travel far and moves up and down very little, whiffing crouchers.
|
| B
|
Damage
|
Red Damage
|
Proration
|
Cancel
|
Guard
|
| 100
|
101
|
70% (O)
|
-
|
LHA
|
| First Active
|
Active
|
Recovery
|
Frame Adv
|
Circuit
|
Invuln
|
| 29
|
X
|
29
|
-9
|
4.5%
|
-
|
|
Takes a while to start up, then summons a fireball that travels twice as far as A version and moves up and down a lot, hitting crouchers. Has less recovery after the projectile become active than the A version.
|
| EX
|
Damage
|
Red Damage
|
Proration
|
Cancel
|
Guard
|
| 1500
|
1212
|
70% (O)
|
-
|
LHA
|
| First Active
|
Active
|
Recovery
|
Frame Adv
|
Circuit
|
Invuln
|
| 6+23
|
X
|
29
|
-3
|
-100.0%
|
-
|
|
EX version is similar to the B one, but is much more damaging, and induces more blockstun along with taking away around 30% of your opponent's guard bar.
|
|
|
|
| A
|
Damage
|
Red Damage
|
Proration
|
Cancel
|
Guard
|
| 350*6 (1935)
|
(1116)
|
100%
|
-EX-
|
LHA
|
| First Active
|
Active
|
Recovery
|
Frame Adv
|
Circuit
|
Invuln
|
| 10
|
40
|
28
|
-8
|
2.7%*6 (16.2%)
|
Full 7-49
|
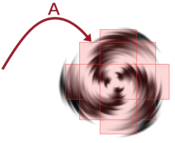
- Turns F-Wara into a 2D spinning top of doom.
Goes in an upward arc and lands a little further in front. Last hit leads to an untechable knockdown.
|
| B
|
Damage
|
Red Damage
|
Proration
|
Cancel
|
Guard
|
| 350*7 (2219)
|
(1279)
|
100%
|
-EX-
|
LHA
|
| First Active
|
Active
|
Recovery
|
Frame Adv
|
Circuit
|
Invuln
|
| 18
|
46
|
28
|
-8
|
2.7%*7 (18.9%)
|
Full 14-63
|
|
Goes in a straight line forward. Last hit also leads to an untechable knockdown.
|
| EX
|
Damage
|
Red Damage
|
Proration
|
Cancel
|
Guard
|
| 400*17 (2456)
|
(1855)
|
50% (O)
|
-
|
LHA
|
| First Active
|
Active
|
Recovery
|
Frame Adv
|
Circuit
|
Invuln
|
| 11+11
|
108
|
35
|
-10
|
-100.0%
|
Full 1-129
|
|
Sends F-Wara in a crazy amusement park ride of death as described in the metered combo section. All hits leads to an untechable knockdown. Can be used as a sort of DP if the opponent decides to use a late meaty. If the conditions stated before are met, followup with 2B 2C is possible.
|
|
|
|
| A
|
Damage
|
Red Damage
|
Proration
|
Cancel
|
Guard
|
| 100*N
|
50*N
|
100%
|
-
|
U
|
| First Active
|
Active
|
Recovery
|
Frame Adv
|
Circuit
|
Invuln
|
| 30
|
X
|
9
|
-
|
1.8%*N
|
-
|
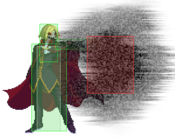
- Referred to as Haze, which is a better name overall. Summons a TV static projectile that increases aerial hitstun, deals very little damage and gives you and your opponent meter depending on the version used. Only one haze can be active at a time.
Generates a forward moving haze which lasts for ~6 seconds. Gives you 1.8% and the opponent 0.6% each instance. A haze passing by a stationary opponent causes 5 instances. Maximum of 12 instances.
|
| B
|
Damage
|
Red Damage
|
Proration
|
Cancel
|
Guard
|
| 150*N
|
101*N
|
100%
|
-
|
U
|
| First Active
|
Active
|
Recovery
|
Frame Adv
|
Circuit
|
Invuln
|
| 30
|
X
|
9
|
-
|
4.5%*N
|
-
|
|
Generates a stationary haze which lasts for ~3 seconds. Gives you 4.5% and the opponent 1.5% each instance. Maximum of 6 instances.
|
| EX
|
Damage
|
Red Damage
|
Proration
|
Cancel
|
Guard
|
| 300*N
|
202*N
|
100%
|
-
|
U
|
| First Active
|
Active
|
Recovery
|
Frame Adv
|
Circuit
|
Invuln
|
| 2+27
|
X
|
10
|
-
|
-100.0%, 4.5%*N
|
-
|
|
Generates a bigger stationary haze which does the same thing as B haze, except that it deals more damage. Same hitbox as B despite the bigger sprite.
|
|
|
|
| A
|
Damage
|
Red Damage
|
Proration
|
Cancel
|
Guard
|
| -
|
-
|
-
|
-
|
-
|
| First Active
|
Active
|
Recovery
|
Frame Adv
|
Circuit
|
Invuln
|
| -
|
-
|
26
|
-
|
-
|
Full 7-20
|
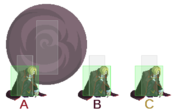
- Just your everyday teleport. Use the B and C version to occasionally escape corner pressure when there's a big window of opportunity, but the long recovery won't help you much.
Puts F-Wara back right where he originally was. Recovers quickly.
|
| B
|
Damage
|
Red Damage
|
Proration
|
Cancel
|
Guard
|
| -
|
-
|
-
|
-
|
-
|
| First Active
|
Active
|
Recovery
|
Frame Adv
|
Circuit
|
Invuln
|
| -
|
-
|
35
|
-
|
-
|
Full 7-20
|
|
Puts F-Wara a little further in front with a slightly longer recovery.
|
| C
|
Damage
|
Red Damage
|
Proration
|
Cancel
|
Guard
|
| -
|
-
|
-
|
-
|
-
|
| First Active
|
Active
|
Recovery
|
Frame Adv
|
Circuit
|
Invuln
|
| -
|
-
|
41
|
-
|
-
|
Full 7-20
|
|
Puts F-Wara a lot further in front with a long recovery.
|
|
|
|
| A
|
Damage
|
Red Damage
|
Proration
|
Cancel
|
Guard
|
| 250*9 (1753)
|
(1417)
|
100%
|
-EX-
|
LHA
|
| First Active
|
Active
|
Recovery
|
Frame Adv
|
Circuit
|
Invuln
|
| 25
|
X
|
18
|
-7
|
1.8%*9 (16.2%)
|
-
|
| [A]
|
Damage
|
Red Damage
|
Proration
|
Cancel
|
Guard
|
| 250*9 (1753)
|
(1417)
|
100%
|
-EX-
|
LHA
|
| First Active
|
Active
|
Recovery
|
Frame Adv
|
Circuit
|
Invuln
|
| 24
|
X
|
21
|
-7
|
1.8%*9 (16.2%)
|
-
|
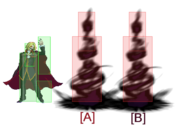
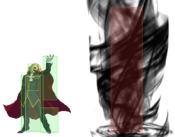
- Summons a tornado that spikes out from the ground. Reaches as high as any character can jump (except maybe Hime). If you get hit while summoning, the tornado will disappear.
A version summons a tornado right in front of you. The charged version goes ahead a little further.
|
| B
|
Damage
|
Red Damage
|
Proration
|
Cancel
|
Guard
|
| 250*9 (1753)
|
(1417)
|
100%
|
-EX-
|
LHA
|
| First Active
|
Active
|
Recovery
|
Frame Adv
|
Circuit
|
Invuln
|
| 25
|
X
|
20
|
-9
|
1.8%*9 (16.2%)
|
-
|
| [B]
|
Damage
|
Red Damage
|
Proration
|
Cancel
|
Guard
|
| 250*9 (1753)
|
(1417)
|
100%
|
-EX-
|
LHA
|
| First Active
|
Active
|
Recovery
|
Frame Adv
|
Circuit
|
Invuln
|
| 24
|
X
|
23
|
-9
|
1.8%*9 (16.2%)
|
-
|
|
B version summons a tornado a little further than 22[A]. 22[B] almost traverses the entire screen.
|
| EX
|
Damage
|
Red Damage
|
Proration
|
Cancel
|
Guard
|
| 250*N
|
101*N
|
100%
|
-
|
LHA
|
| First Active
|
Active
|
Recovery
|
Frame Adv
|
Circuit
|
Invuln
|
| 6+12
|
X
|
44
|
-8 to +34
|
-100.0%
|
-
|
|
Summons a big tornado right in front of you which slowly moves forward. If opponents get hit, they get sent upwards.
Used to get +frames when opponent is in the corner.
|
|
Aerial Specials
|
|
| A
|
Damage
|
Red Damage
|
Proration
|
Cancel
|
Guard
|
| 100
|
101
|
70% (O)
|
-
|
LHA
|
| First Active
|
Active
|
Recovery
|
Frame Adv
|
Circuit
|
Invuln
|
| 17
|
X
|
12
|
-6 (TK)
|
4.5%
|
-
|
- Aerial fireball summons. Works the same as grounded version.
Summons an A version fireball. Follows the momentum of the jump; moves forward with a forward jump, backwards with a backward jump and floats a little with a neutral jump.
|
| B
|
Damage
|
Red Damage
|
Proration
|
Cancel
|
Guard
|
| 100
|
101
|
70% (O)
|
-
|
LHA
|
| First Active
|
Active
|
Recovery
|
Frame Adv
|
Circuit
|
Invuln
|
| 17
|
X
|
12
|
-1
|
4.5%
|
-
|
|
Completely stops all jump momentum before summoning a B version fireball. Once the summoning is complete, the jump momentum is resumed. If TK'd close to the ground, F-Wara will summon, then continue to float upwards, continuing the arc of the jump. No aerial movement after summoning.
|
| EX
|
Damage
|
Red Damage
|
Proration
|
Cancel
|
Guard
|
| 1500
|
1212
|
70% (O)
|
-
|
LHA
|
| First Active
|
Active
|
Recovery
|
Frame Adv
|
Circuit
|
Invuln
|
| 1+20
|
X
|
12
|
2 (TK)
|
-100.0%
|
Full 1-4
|
|
Summons an EX fireball. No matter the momentum, F-Wara will float a little backwards.
|
|
|
|
A
/ [A]
|
Damage
|
Red Damage
|
Proration
|
Cancel
|
Guard
|
| 350*N
|
202*N
|
100%
|
-
|
LHA
|
| First Active
|
Active
|
Recovery
|
Frame Adv
|
Circuit
|
Invuln
|
| 13
|
17~48
|
53~54
/ 73~74
|
-
|
2.7%*N
|
Full 9-X
|
- Your ordinary Wara-certified aerial top-spinner.
Spins forward.
|
B
/ [B]
|
Damage
|
Red Damage
|
Proration
|
Cancel
|
Guard
|
| 280*N
|
151*N
|
100%
|
-
|
LHA
|
| First Active
|
Active
|
Recovery
|
Frame Adv
|
Circuit
|
Invuln
|
| 13
|
19~66
|
61~62
/ 81~82
|
-
|
1.35%*N
|
Full 9-X
|
|
Spins forward with a little delay.
|
| EX
|
Damage
|
Red Damage
|
Proration
|
Cancel
|
Guard
|
| 500*N
|
404*N
|
100%
|
-
|
LHA
|
| First Active
|
Active
|
Recovery
|
Frame Adv
|
Circuit
|
Invuln
|
| 1+13
|
31~67
|
57~93
|
-
|
-100.0%
|
Full 11-X
|
|
Spins forward with lots of untechable hits.
|
|
Arc Drive
|
|
| Damage
|
Red Damage
|
Proration
|
Cancel
|
Guard
|
| 100, 500*10, 4000 (3284)
|
(2584)
|
50% (O)
|
-
|
LHA
|
| First Active
|
Active
|
Recovery
|
Frame Adv
|
Circuit
|
Invuln
|
| 6+13
|
1 (1) 2 (2) 2 (2) 2 (2) 2 (2) 2 (4) 2
|
48
|
-32
|
removes all
|
Full 1-88
|
|
One of the more useful arc drives in the game. It is a multi-hitting tornado that ends in a large untechable knockdown. It has full invincibility from start to finish and is great for punishing moves full screen. Is unsafe on block, but it is hard to punish fullscreen.
|
|
Another Arc Drive
|
|
| Damage
|
Red Damage
|
Proration
|
Cancel
|
Guard
|
| 15020 (5014)
|
(3764)
|
-
|
-
|
LHA
|
| First Active
|
Active
|
Recovery
|
Frame Adv
|
Circuit
|
Invuln
|
| 5+12
|
2 (2) 2 (2) 2 (2) 2 (2) 2 (4) 2
|
46
|
-27
|
removes all
|
Full 1-2; 5-81
|
|
Similar to the above, adds various C/H-Wara 214 summons for more damage if this hits.
|
|
Last Arc
|
|
| Damage
|
Red Damage
|
Proration
|
Cancel
|
Guard
|
| 15410 (3700 ~ 7000)
|
(3100 ~ 5700)
|
50% + 50% * remaining BH time
|
-
|
U
|
| First Active
|
Active
|
Recovery
|
Frame Adv
|
Circuit
|
Invuln
|
| 6+9
|
-
|
-
|
-
|
removes all
|
Full
|
|
Performs a large unblockable attack similar to j.421C, moving forward then back across the screen. If either of these attacks connects, a final blockable fullscreen attack will trigger after the second pass. Circuit Breaks the opponent on superflash; this effect is unavoidable.
While difficult, it's sometimes possible to maneuver around the first two attacks and punish Wara's recovery. Characters with sufficient invulnerability can also attempt to invul through hits, including use of EX moves so long as their superflash (and thus meter spend) triggers before the Last Arc superflash. Getting hit while armored will still trigger the final attack sequence. More practically, Wara's Last Arc damage is heavily dependent on maximizing the number of hits that connect. Opponents can greatly reduce damage taken by jumping to take an air hit rather than getting hit on the ground, sometimes reducing damage by more than 50%. In some circumstances this can even leave Wara punishable on hit:
- Air hits will often lead to knockdown before the second pass, which will OTG. This will usually still connect to the final attack, but that sequence becomes ground techable. This typically leaves Wara -8~9 on neutral tech.
- Knockdown will sometimes instead occur from the second pass with enough time to enter wakeup before the final sequence, or it may connect on a downed opponent in the middle of its hitbox and thus give the opponent time to recover before the final sequence. This will greatly reduce damage and leave Wara -28 on block.
Wara's Last Arc is in counterhit state for the duration of its recovery.
|
|
MBAACC Navigation

