Character Page Progress
This page is mostly complete, consider joining as an editor to help finish it up. Please update this character's roadmap page when one of the editing goals have been reached. When no main goals are left, please remove this section from this page.
| In Progress |
To-do
|
- Move descriptions:
- Expand upon the move descriptions, cite their uses, add captions where helpful, etc.
|
- Combos:
- Add damage, meter gain/given numbers and video links to the existing combos.
|
Additional Resources
H-WLen Match Video Database
Notable Players
| Name |
Color
|
Region |
Common Venues |
Status |
Details
|
| art |

|
North America |
Netplay |
Active |
AKA hwlen. Goes by art#7081 on Discord. Player who has used in time a variety of names, hence his footage may be hard to find and sort.
Likely to be the most experienced H-WLen outside of Japan, while also playing a multitude of characters well.
|
| haku (ハク) |

|
Japan |
Play Spot BIG ONE 2nd |
Active |
Plays every White Len moon.
|
| mikan (魅柑) |

|
Japan |
A-Cho |
Active |
Mostly plays H-WLen and makes the most out of her mixups.
|
| nic |

|
North America |
Netplay |
Active |
Active in Melty Blood Community Server and Meltycord. Mains C-WLen, but is proficient with H and has good knowledge of the character.
|
| Oufan |

|
Europe |
Netplay |
Active |
Strong French White Len player. Active in Meltycord.
Proficient at all moons and plays this one for some matchups.
|
| ViviMayoi |

|
North America |
Netplay |
Active |
Active in Melty Blood Community Server. Proficient with her secondary H-WLen.
|
Overview
Strengths Weaknesses
| Strengths
|
- High health
- Non metered reversal
- High range command grab
- Good ground to air options
- Fast forwards walk and backwards walk
- Forward run accelerates to top speed instantly
- Good mixup and decent pressure in corner
|
| Weaknesses
|
- Slow floaty jump
- Poor air mobility
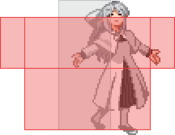
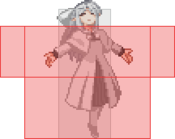
- One of a few characters whose hurtbox doesn't get any smaller when she runs
- Most midscreen pressure options can be backdashed
- Grounded hit confirms outside 5C range are awkward and/or low damage
- NOT AN ANTI ZONER
|
General Gameplan
The goal of H-WLen depends on the particular matchup. In general, she is most effective when she is able to get a hit in neutral which leads to a hard knockdown in the corner. From there, she can use her normals and command grab to repeat pressure and okizeme.
Neutral
H-WLen is quite comfortable on the ground in most matchups. The goal of her grounded neutral is to get into a range where dash instant 2A will connect with the opponent. She can use her fast walk to advance and retreat on the ground with 5B or 236A to control the space in front of her. Both 5B and 236A have periods of extended hurtbox on startup so they can get counterhit sometimes. 236A additionally loses against IAD for a full combo so it is best to use it more sparingly. Against air approaches, she can walk back out of range or dash under the opponent. Unlike the vast majority of the cast, her forward dash does not lower her hurtbox so a quick reaction or guess is needed for this option. She also has the options of directly challenging air approaches with 236B and 214A/B. The former is used preemptively as it has longer startup but is very active while the latter can be used as more traditional anti-air specials. 214B has completely invcincible startup but is more unsafe on whiff than 214A. All three moves are air unblockable.
Aerial neutral is where H-WLen suffers greatly compared to the standard character. The vertical velocity of her jump is about 20% slower than most of the cast which means it is very difficult to reach an advantageous spacing while in the air. However, when she is able to get a good spacing her j.A has good horizontal reach, her j.C covers above her quite well, and her j.2C covers below her decently well. To discourage opponents from simply outranging her she has j.[B] which, once active, remains active until she lands. This is a double-edged sword however as it gives the opponent time to move into position to hit her landing recovery or simply shield the move. For stalling in the air she has the standard air dodge and she also keeps her air movement options after j.236[A]. Both of these can be good in moderation. Finally, her slow air movement means that she is very prone to being dashed under. She can use j.214A to hit an opponent behind her when this happens. From a risk/reward standpoint this is a gimmick as j.214A is punishable on block when used at this height. However, it can be useful as a deterrent to an opponent who tries to gain momentum off every dash under.
Pressure
Most of the threat in H-WLen's pressure comes from her command grab which gives her a hard knockdown. Because of this, her pressure is poor midscreen as backdash escapes command grab as well as many of her staggers. The lack of forward movement on 2B combined with the awkwardness of combo'ing into and out of 2C means that her pressure tends to have many reverse beats. The notable normal for pressure is 5C which moves her forward a good amount and is plus on block (but minus when ex-guarded). This combined with the range on her command grab means that she is able to throw/strike at points deep in her pressure strings.
Some sample strings:
- 66 2A > 5{B} > 5{C} > 5A6A > 4{B} (command grab is in range after any normal)
- 66 2A > 5{C}, 2A > 5{C}, 2A > 5[C] (command grab is in range after any 5C)
If the opponent guesses correctly on longer pressure strings without resets, she will run out of usable normals. In this case, she can either frametrap directly into 236a to catch jumps and mash or into 623[A] from 4B. Her 623[A] is punishable on block (just like 623A) but it is special cancellable on block so it must be cancelled into 236A to make it safer. Her 236A is very minus and will give the opponent to start their own pressure or escape so it should be used as a last ditch effort to catch a jump or mash. Specifically in the Satsuki matchup, it can be directly punished by 2C so it is not advisable to use it at all in her 2C range.
As a final note, she can use 236C to secure a redash or if she needs to meter dump.
Okizeme
After airthrow (midscreen):
After airthrow (corner)
While her airthrow oki is much weaker than her 623a ender, she stays actionable after the throw. She also has enough time to land and oki from there.
- j.236[A]. This DOES NOT HIT MEATY!! but can be used as a knowledgecheck as it also catches DPs. Use this with care.
- Airdash j.B/j.2C j.C. double overhead. (J.2C often whiffs on crouchers). The double overhead doesn't work well on smaller characters, but hitting the opponent with an air normal will allow you to start your pressure.
- Airdash j.A(w) grab
She can also land and continue her oki that way
- microwalk 2A vs microwalk command grab (strike/throw mixup)
- microdash 2A vs microdash j.214A (low/high mixup)
After hard knockdown with 236[a] (midscreen)
- 623[B], 2A vs 623B (low/high mixup)
After hard knockdown with 236[A] (corner)
- microdash 2A vs microdash j.214A (low/high mixup)
- 623[B], 2A vs 623B (low/high mixup)
- forward jump double overhead, single overhead, delayed airdash overhead, empty jump mixup (double overhead does not work on shorter characters)
- forward jump overhead -> rising j.2C > j.236A (fuzzy overhead mixup)
Defense
H-WLen has some unconventional defensive tools in addition to the standard mechanic ones so she can be hard to pin down on defense if someone is not used to her options.
Standard defensive options:
- Jump
- Unmetered bunker 214D, creates a tech punish situation on hit
- Metered bunker 214D, consumes 100% and causes hard knockdown (using this in the mid-game while below 180% means she will likely not be able to hit heat that round)
- Dodge
H-WLen defensive options:
- 2A (she has a slow 2A but the range is about average)
- 214A (has invincibility until airborne, can be confusing to confirm)
- 214B (true reversal)
- Both can be low profiled
- Both can be buffered fairly safely while blocking (leave some time between attempts to avoid getting 421)
- 22B (true reversal, has no hitbox, much more punishable than dodge but can be confusing to punish)
Combos
| Combo Notation Help
|
Disclaimer: Combos are written by various writers, so the actual notation used in pages can differ from the standard one.
For more information, see Glossary and Controls.
|
| X > Y
|
X input is cancelled into Y.
|
| X > delay Y
|
Must wait for a short period before cancelling X input into Y.
|
| X, Y
|
X input is linked into Y, meaning Y is done after X's recovery period.
|
| X+Y
|
Buttons X and Y must be input simultaneously.
|
| X/Y
|
Either the X or Y input can be used.
|
| X~Y
|
This notation has two meanings.
- Use attack X with Y follow-up input.
- Input X then within a few frames, input Y. Usually used for option selects.
|
| X(w)
|
X input must not hit the opponent (Whiff).
|
| j.X
|
X input is done in the air, implies a jump/jump cancel if the previous move was done from the ground.
Applies to all air chain sections:
- Assume a forward jump cancel if no direction is given.
- Air chains such as j.A > j.B > j.C can be shortened to j.ABC.
|
| sj.X
|
X input is done after a super jump. Notated as sj8.X and sj9.X for neutral and forward super jumps respectively.
|
| dj.X
|
X input is done after a double jump.
|
| sdj.X
|
X input is done after a double super jump.
|
| tk.X
|
Stands for Tiger Knee. X motion must be buffered before jumping, inputting the move as close to the ground as possible. (ex. tk.236A)
|
| (X)
|
X is optional. Typically the combo will be easier if omitted.
|
| [X]
|
Input X is held down. Also referred to as Blowback Edge (BE). Depending on the character, this can indicate that this button is held down and not released until indicated by the release notation.
|
| ]X[
|
Input X is released. Will only appear if a button is previously held down. This type of input is referred to as Negative Edge.
|
| {X}
|
Button X should only be held down briefly to get a partially charged version instead of the fully charged one.
|
| X(N)
|
Attack "X" should only hit N times.
|
| (XYZ)xN
|
XYZ string must be performed N times. Combos using this notation are usually referred to as loops.
|
| (XYZ^)
|
A pre-existing combo labelled XYZ is inserted here for shortening purposes.
|
| CH
|
The first attack must be a Counter Hit.
|
| Air CH
|
The first attack must be a Counter Hit on an airborne opponent.
|
| 66
|
Performs a ground forward dash.
|
| j.66
|
Performs an aerial forward dash, used as a cancel for certain characters' air strings.
|
| IAD/IABD
|
Performs an Instant AirDash.
|
| AT
|
Performs an Air Throw. (j.6/4A+D)
|
| IH
|
Performs an Initiative Heat.
|
| AD
|
Performs an Arc Drive.
|
| AAD
|
Performs an Another Arc Drive.
|
Note in her corner combos involving j.214A
j.214A creates a ground bounce icicle below and behind her. This is what needs to hit for the combo to work due to the location of the icicle, this is either hard or impossible from low hit count or 4B starters.
Depending on the spacing, j.214A either gets a "clean" hit which is just the icicle hitting, or a "dirty" hit where one hit of the j.214A also hits them. Sometimes dirty hits do not cause a ground bounce which ends the combo.
- Clean hit continuation: 5B > 2C
- Dirty hit continuation: 5A > 2C
- Can't do the 5A6AA extensions if you already used a bounce from starters like j.214A
Launchers leading into j.214A
Most of the combos only mention one of the launchers, but hwlen has several launchers that lead into icicle oki, ensuring better reward even off awkward confirms.
(All of these launchers can be followed up by j.b > dj.214a)
- 2C > 5AA/5C
- 2C > 5A > 5B
- 4B/4[B]
- 5[B]
- 623A > (2C >) 5B/5C/4B
If a confirm has no chance of leading into her icicle oki normally, you can use 236C to extend your combo and get the 623A knockdown.
Starters
| Condition
|
Notation
|
Damage
vs V.Sion
|
Notes
|
|
| Normal starter, grounded opponent
|
- 2A > 5C > 5A6AA, (2A >) 2C > 5B/5C
|
???
|
| |
| Meter Gained: ??? |
Meter Given (vs C-Moon): ??? |
| This is one of her favored starters you may see. Though there are some things to this such as, the 2A after 5A6AA MUST be omitted against Ryougi. 2C needs to be heavily delayed against some characters to avoid a crossunder. |
|
|
| Normal starter, grounded opponent
|
|
???
|
| |
| Meter Gained: ??? |
Meter Given (vs C-Moon): ??? |
| A basic starter to use. |
|
|
| Normal starter, grounded opponent
|
- 5B > (2B >) 623A > (2C >) 4B
|
???
|
| |
| Meter Gained: ??? |
Meter Given (vs C-Moon): ??? |
1. 5B > 623A only combos on standing opponents.
2. 5B and 2B don't combo into 623A at max range, 236A is the only continuation for this situation (still needs to be standing for 5B) |
|
|
| Normal starter, air counterhit
|
|
???
|
| |
| Meter Gained: ??? |
Meter Given (vs C-Moon): ??? |
| A common starter since this move anti airs and it allows for some combo routes depending on the situation. |
|
|
j.214A starter, grounded opponent
Works On: All but Ryougi
|
- j.214A, 2A/5A > 2C > 5B (> 5C)
|
???
|
| |
| Meter Gained: ??? |
Meter Given (vs C-Moon): ??? |
| An overhead starter. Usually seen for oki. 2A/5A > 2C does not connect on Ryougi |
|
|
Enders
| Condition
|
Notation
|
Damage
vs V.Sion
|
Notes
|
|
| Air Ender
|
- j.BC > dj.BC > AT/j.214B/C
|
???
|
| |
| Meter Gained: ??? |
Meter Given (vs C-Moon): ??? |
| The usual air string. No 236[A] oki in exchange for more consistency and damage. Not every route leads into her better ender, so this sees regular use. |
|
|
| Air Ender
|
- j.BC > dj.C > j.2C > (j.B >) AT/j.214B/C
|
???
|
| |
| Meter Gained: ??? |
Meter Given (vs C-Moon): ??? |
| A slightly more optimized version of the usual air string, but BC BC works as well. No 236[A] oki in exchange for more consistency and damage. Not every route leads into her better ender, so this sees regular use. |
|
|
| Midscreen
|
- j.B > (j.C) > dj.214A > dash 2A > 2C > 623A > 236[A]
|
???
|
| |
| Meter Gained: ??? |
Meter Given (vs C-Moon): ??? |
| Midscreen version of her oki ender. Your most important ender. The j.C can make this surprisingly hard. |
|
|
| Corner/Close to the corner
|
- j.B > (j.C) > (dj.2C >) dj.214A > 5A/5B > 2C > 623A > 236[A]
|
???
|
| |
| Meter Gained: ??? |
Meter Given (vs C-Moon): ??? |
| Her most important ender, leading into her oki. |
|
|
Normal Combos
Note: All these enders can also be changed into her aerial enders. Doing j.C after j.B can make these combos much harder.
| Condition
|
Notation
|
Damage
vs V.Sion
|
Notes
|
|
| Normal starter, grounded opponent
|
- 2A > 2B > 2C > 5AA > j.B > (j.C >) dj.214A > dash 2A > 2C > 623A > 236[A]
|
???
|
| |
| Meter Gained: ??? |
Meter Given (vs C-Moon): ??? |
| One of the basic combos to know. Only use 5C if you go for her air ender. |
|
|
| Normal starter, grounded opponent
|
- 2A > 5C > 5B > 2B > 623A > 2C > 4B > j.B > dj.214A > dash 2A > 2C > 623A > 236[A]
|
???
|
| |
| Meter Gained: ??? |
Meter Given (vs C-Moon): ??? |
| This is a combo to use when you are unsure about the combo below connecting for some reason. |
|
|
| Normal starter, grounded opponent
|
- 2A > 5C > 5A6AA, (2A >) 2C > 5B/delay 5C > j.B > (j.C >) dj.214A > dash 2A > 2C > 623A > 236[A]
|
4002
|
| |
| Meter Gained: 54.7% |
Meter Given (vs C-Moon): 23.4% |
| Your most common starter. 2C needs to be heavily delayed against some characters to not crossunder. The 5C launcher makes the combo harder, if you decide to add the j.C, beware. Damage is assuming 5B and no j.C. |
|
|
j.214A starter, grounded opponent
Works On: All but Ryougi
|
- j.214A, 2A/5A > 2C > (623A >) 5B/delay 5C > j.B > (j.C >) dj.214A > dash 2A > 2C > 623A > 236[A]
|
???
|
| |
| Meter Gained: ??? |
Meter Given (vs C-Moon): ??? |
| Overhead starter combo. While 623A adds more damage to the combo, midscreen it can become hard to impossible to add it, due to the risk of crossing under. This is very character dependant, and also depends at what position you hit j.214A at. If 2C crosses under, there is no way 623A is going to hit. In the corner there is no risk to adding it though. |
|
|
| Air counterhit
|
- CH 236B/5C/5D(Shield Counter), 2C > 5B/delay 5C > j.B > (j.C >) dj.214A > dash 2A > 2C > 623A > 236[A]
|
???
|
| |
| Meter Gained: ??? |
Meter Given (vs C-Moon): ??? |
| Air counter hit combo. |
|
|
| Low shield counter
|
- 2D > 623A > 2C > 5B > j.B > (j.C >) dj.214A > dash 2A > 2C > 623A > 236[A]
|
???
|
| |
| Meter Gained: ??? |
Meter Given (vs C-Moon): ??? |
| Low shield counter combo that works without a counterhit |
|
|
| Raw airthrow starter
|
- Raw AT, 2C > (623A >) 5B > j.B > (j.C >) dj.214A > dash 2A > 2C > 623A > 236[A]
|
???
|
| |
| Meter Gained: ??? |
Meter Given (vs C-Moon): ??? |
| Airthrow combo. Diffrent then the j.214A starter, there is no risk to adding 623A in this combo. |
|
|
Corner Combos
| Condition
|
Notation
|
Damage
vs V.Sion
|
Notes
|
|
| Normal starter, grounded opponent
|
- 2A > 5C > 5A6AA, 2C > 5B > j.B > dj.214A, 5B > 2C > 5A6AA > 5[B]/5[C] > j.C > sdj.BC > AT/j.214B/C
|
4842
|
| |
| Meter Gained: ??? |
Meter Given (vs C-Moon): ??? |
| Difficult extension as the last air sequence is a link, refer to the notes when doing this combos with another 5A6AA extension. |
|
|
| Normal starter, grounded opponent
|
- 2A > 5C > 5A6AA, 2C > 5B > j.B > dj.214A, 5B > 2C > 5A6AA > 2A(w), j.AB > dj2C > j.214A, 5A/5B > 2C > 623A > 236[A]
|
4704
|
| |
| Meter Gained: ??? |
Meter Given (vs C-Moon): ??? |
| A 1 frame link but also gives oki with more damage tacked on. |
|
|
j.214A/Ground throw starter
Works On: All but Ryougi
|
- j.214A/Ground throw, 2A > 2C > 623A > 5B > j.B > (j.C >) (dj.2C >) dj.214A, 2A/5B > 2C > 623A > 236[A]
|
???
|
| |
| Meter Gained: ??? |
Meter Given (vs C-Moon): ??? |
| A grab and overhead combo that ends in icicle oki. |
|
|
Ground throw starter
Works On: All but Ryougi
|
- Ground throw, 2A > 2C > 623A > 5B/5C > j.B > (j.C >) dj.214A, 5B > 2C > 5A6AA > 2A(w), j.AB > dj.2C > j.214A, 5A > 2C > 623A > 236[A]
|
3560
|
| |
| Meter Gained: ??? |
Meter Given (vs C-Moon): ??? |
| Diffrent than the full 2A(w) combo, this is a 3 frame link, making it much easier |
|
|
Move Descriptions
| Frame Data Help
|
| Header
|
Tooltip
|
| Move Box Colors
|
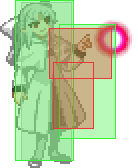
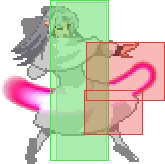
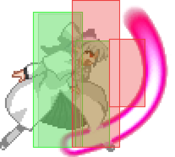
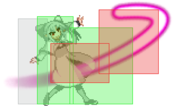
Light gray = Collision Box (A move lacking one means it can go through the opponent's own collision box).
Green: Hurt Boxes.
Red: Hit(/Grab) Boxes.
Yellow: Clash Boxes (When an active hitbox strikes a clash box, the active hitbox stops being active. Multi-hit attacks can beat clash since they will still progress to the next hitbox.)
Magenta: Projectile-reflecting boxes OR Non-hit attack trigger boxes (usually).
Blue: Reflectable Projectile Boxes.
|
| Damage
|
Base damage done by this attack.
(X) denotes combined and scaled damage tested against standing V. Sion.
|
| Red Damage
|
Damage done to the recoverable red health bar by this attack. The values are inherently scaled and tested against standing V. Sion.
(X) denotes combined damage.
|
| Proration
|
The correction value set by this attack and the way it modifies the scaling during a string. See this page for more details.
X% (O) means X% Overrides the previous correction value in a combo if X is of a lower percentage.
X% (M) means the current correction value in a combo will be Multiplied by X%. This can also be referred to as relative proration.
|
| Circuit
|
Meter gained by this attack on hit.
(X%) denotes combined meter gain.
-X% denotes a meter cost.
|
| Cancel
|
Actions this move can be cancelled into.
SE = Self cancelable.
N = Normal cancelable.
SP = Special cancelable.
CH = Cancelable into the next part of the same attack (Chain in case of specials).
EX = EX cancelable.
J = Jump cancelable.
(X) = Cancelable only on hit.
-X- = Cancelable on whiff.
|
| Guard
|
The way this move must be blocked.
L = Can block crouching
H = Can block standing.
A = Can block in the air.
U = Unblockable.
|
| Startup
|
Amount of frames that must pass prior to reaching the active frames. Also referred to as "True Startup".
|
| Active
|
The amount of frames that this move will have a hitbox.
(x) denotes frame gaps where there are no hitboxes is present. Due to varied blockstuns, (x) frames are difficult to use to determine punish windows. Generally the larger the numbers, the more time you have to punish.
X denotes active frames with a duration separate from its origin move's frame data, such as projectile attacks. In this case, the total length of the move is startup+recovery only.
|
| Recovery
|
Frames that this move has after the active frames if not canceled. The character goes into one frame where they can block but not act afterwards, which is not counted here.
|
| Advantage
|
The difference in frames where you can act before your opponent when this move is blocked (assuming the move isn't canceled and the first active frame is blocked).
If the opponent uses a move with startup that is at least 2 frames less than this move's negative advantage, it will result in the opponent hitting that move.
±x~±y denotes a range of possible advantages.
|
| Invul
|
Lists any defensive properties this move has.
X y~z denotes X property happening between the y to z frames of the animations. If no frames are noted, it means the invincibility lasts through the entire move.
Invicibility:
- Strike = Strike invincible.
- Throw = Throw invincible.
Hurtbox-Based Properties:
- Full = No hurtboxes are present.
- High = Upper body lacks a hurtbox.
- Low = Lower body lacks a hurtbox.
Miscellaneous Properties
- Clash = Frames in which clash boxes are active.
- Reflect = Frames in which projectile-reflecting boxes are active.
- Super Armor = Frames in which the character can take hits without going into hit stun.
|
Normal Moves
Standing Normals
|
|
| 5A
|
Damage
|
Red Damage
|
Proration
|
Cancel
|
Guard
|
| 350
|
192
|
78% (O)
|
-SE-, -N-, -SP-, -CH-, -EX-, (J)
|
LH
|
| First Active
|
Active
|
Recovery
|
Frame Adv
|
Circuit
|
Invuln
|
| 4
|
4
|
9
|
-1
|
2.8%
|
-
|
|
Fastest mid normal WLen has. Can hit crouchers. Not effective at being an anti-air.
|
| 5A~6A
|
Damage
|
Red Damage
|
Proration
|
Cancel
|
Guard
|
| 600
|
384
|
80% (M)
|
N, SP, -CH-, EX, (J)
|
LH
|
| First Active
|
Active
|
Recovery
|
Frame Adv
|
Circuit
|
Invuln
|
| 8
|
4
|
16
|
-5
|
4.2%
|
-
|
|
Slight forward slide and then summons energy ball.
|
| 5A~6A~6A
|
Damage
|
Red Damage
|
Proration
|
Cancel
|
Guard
|
| 1000
|
768
|
60% (O)
|
(N), SP, EX, (J)
|
LH
|
| First Active
|
Active
|
Recovery
|
Frame Adv
|
Circuit
|
Invuln
|
| 11
|
4
|
16
|
-2
|
7.0%
|
-
|
|
Downward swing with energy ball that covers a good amount of vertical space although timing it to counter air approaches is difficult. She slides forwards which might help in catching an opponent out. Launches for chaining into air normals.
|
|
|
|
| 5B
|
Damage
|
Red Damage
|
Proration
|
Cancel
|
Guard
|
| 500*2 (887)
|
(511)
|
80% (O)
|
N, SP, EX, (J)
|
LH
|
| First Active
|
Active
|
Recovery
|
Frame Adv
|
Circuit
|
Invuln
|
| 9
|
8
|
9
|
-2, 3 (vs Stand.)
-5, -3 (vs Crouch.)
|
3.15%*2 (6.3%)
|
-
|
|
Large forward swing with energy ball. WLen move slightly forward. Can be cancelled after the first hit into another move, but the second move is likely to miss if only the edge of 5B hits due to pushback.
|
| 5[B]
|
Damage
|
Red Damage
|
Proration
|
Cancel
|
Guard
|
| 600*2 (906)
|
(725)
|
60% (O)
|
N, SP, EX, (J)
|
LH
|
| First Active
|
Active
|
Recovery
|
Frame Adv
|
Circuit
|
Invuln
|
| 26
|
8
|
8
|
-1, 4 (vs Stand.)
-4, -2 (vs Crouch.)
|
3.85%*2 (7.7%)
|
-
|
|
Similar to 5B, but moves WLen forward more and both hits wallslam. Due to this, if 5[B] hits a grounded opponent in the corner with no space left behind them, the wallslam will use up two bounces unless its cancelled after the first hit.
|
|
|
|
| 5C
|
Damage
|
Red Damage
|
Proration
|
Cancel
|
Guard
|
| 700, 400 (990)
|
(654)
|
75% (O)
|
N, SP, EX, (J)
|
LH
|
| First Active
|
Active
|
Recovery
|
Frame Adv
|
Circuit
|
Invuln
|
| 10
|
9
|
8
|
-2, 1
|
4.2%, 2.1% (6.3%)
|
-
|
|
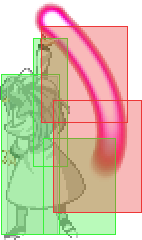
Swings a ball from in front of her to over her. Works fairly decently as an anti-air.
|
| 5[C]
|
Damage
|
Red Damage
|
Proration
|
Cancel
|
Guard
|
| 1200
|
960
|
65% (O)
|
N, SP, EX, (J)
|
LH
|
| First Active
|
Active
|
Recovery
|
Frame Adv
|
Circuit
|
Invuln
|
| 22
|
6
|
11
|
-2
|
6.3%
|
-
|
|
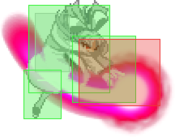
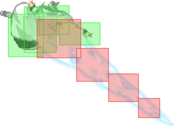
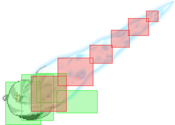
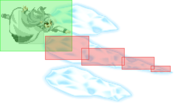
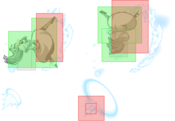
Like 5C, but moves her considerably forward and launches her opponents.
|
|
Crouching Normals
|
|
| Damage
|
Red Damage
|
Proration
|
Cancel
|
Guard
|
| 350
|
192
|
75% (O)
|
-SE-, -N-, -SP-, -EX-, (J)
|
L
|
| First Active
|
Active
|
Recovery
|
Frame Adv
|
Circuit
|
Invuln
|
| 5
|
4
|
9
|
-1
|
2.45%
|
-
|
|
Reaches forward with energy ball. Has more horizontal reach than 5A.
|
|
|
|
| Damage
|
Red Damage
|
Proration
|
Cancel
|
Guard
|
| 650
|
384
|
70% (O)
|
N, SP, EX, (J)
|
LH
|
| First Active
|
Active
|
Recovery
|
Frame Adv
|
Circuit
|
Invuln
|
| 9
|
4
|
14
|
-3
|
4.5%
|
-
|
|
Summons energy ball and then sends it forwards. Barely outranged by 5B which is helped by its forward slide.
|
|
|
|
| Damage
|
Red Damage
|
Proration
|
Cancel
|
Guard
|
| 960
|
768
|
65% (O)
|
N, SP, EX, (J)
|
L
|
| First Active
|
Active
|
Recovery
|
Frame Adv
|
Circuit
|
Invuln
|
| 12
|
6
|
17
|
-5
|
6.72%
|
-
|
|
Forward pounce which causes hard knockdown. Cannot input a cancel action until after hitstop, so the timing needs to be slightly later.
|
|
Aerial Normals
|
|
| Damage
|
Red Damage
|
Proration
|
Cancel
|
Guard
|
| 350
|
192
|
70% (O)
|
SE, N, SP, EX, J
|
LHA
|
| First Active
|
Active
|
Recovery
|
Frame Adv
|
Circuit
|
Invuln
|
| 6
|
4
|
10
|
-
|
2.8%
|
-
|
|
Pokes in front of her.
|
|
|
|
| j.B
|
Damage
|
Red Damage
|
Proration
|
Cancel
|
Guard
|
| 700
|
288
|
95% (O)
|
N, SP, EX, J
|
HA
|
| First Active
|
Active
|
Recovery
|
Frame Adv
|
Circuit
|
Invuln
|
| 7
|
9
|
-
|
-
|
5.6%
|
-
|
|
Energy ball in front of her torso. Covers more vertical space than jA but not as far forward.
|
| j.[B]
|
Damage
|
Red Damage
|
Proration
|
Cancel
|
Guard
|
| 700
|
288
|
95% (O)
|
N, SP, EX, J
|
HA
|
| First Active
|
Active
|
Recovery
|
Frame Adv
|
Circuit
|
Invuln
|
| 15
|
X
|
-
|
-
|
5.6%
|
-
|
|
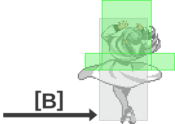
Slower to start active frames, but will remain active until just before landing
|
|
|
|
| Damage
|
Red Damage
|
Proration
|
Cancel
|
Guard
|
| 900
|
576
|
90% (M)
|
N, SP, EX, J
|
HA
|
| First Active
|
Active
|
Recovery
|
Frame Adv
|
Circuit
|
Invuln
|
| 8
|
3
|
-
|
-
|
7.0%
|
-
|
|
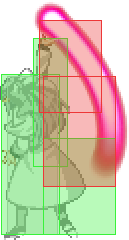
Swings in an arc slightly above and in front of her.
|
|
Command Normals
|
|
| 4B
|
Damage
|
Red Damage
|
Proration
|
Cancel
|
Guard
|
| 800
|
528
|
65% (O)
|
N, SP, EX, (J)
|
LH
|
| First Active
|
Active
|
Recovery
|
Frame Adv
|
Circuit
|
Invuln
|
| 11
|
3
|
23
|
-8
|
5.6%
|
-
|
|
Launcher. Chainable into other normals.
|
| 4[B]
|
Damage
|
Red Damage
|
Proration
|
Cancel
|
Guard
|
| 1000
|
672
|
65% (O)
|
N, SP, EX, (J)
|
LH
|
| First Active
|
Active
|
Recovery
|
Frame Adv
|
Circuit
|
Invuln
|
| 22
|
4
|
19
|
-5
|
5.6%
|
-
|
|
Similar to 4B, but moves WLen forward considerably.
|
|
|
|
| Damage
|
Red Damage
|
Proration
|
Cancel
|
Guard
|
| 1050
|
624
|
85% (M) / 40% (O)
|
N, SP, EX, J
|
HA
|
| First Active
|
Active
|
Recovery
|
Frame Adv
|
Circuit
|
Invuln
|
| 9
|
3
|
-
|
-
|
6.3%
|
-
|
|
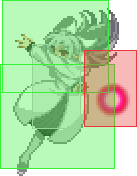
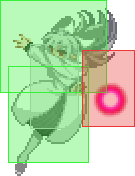
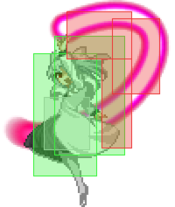
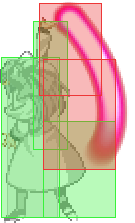
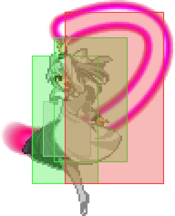
Downward arm swing that also produces an energy ball. The outer ring of the energy ball is not a hitbox, only the inner, white area will damage.
|
|
Universal Mechanics
|
|
| Damage
|
Red Damage
|
Proration
|
Cancel
|
Guard
|
| 1400
|
480
|
30%
|
-
|
U
|
| First Active
|
Active
|
Recovery
|
Frame Adv
|
Circuit
|
Invuln
|
| 3
|
1
|
20
|
-
|
0.0%
|
-
|
|
WLen launches the opponent in the air. Comboable near the corner.
Midscreen, throw combos into 623C on Hime and Ryougi only.
|
|
|
|
| Damage
|
Red Damage
|
Proration
|
Cancel
|
Guard
|
1600 (1408, Raw)
1200
|
409
|
30%
|
-
|
U
|
| First Active
|
Active
|
Recovery
|
Frame Adv
|
Circuit
|
Invuln
|
| 2
|
1
|
12
|
-
|
0.0%
|
-
|
|
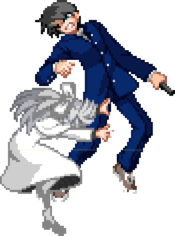
Throw the opponent to the ground. Untechable knockdown as a combo ender, and WLen can recover in the air afterwards.
|
|
|
|
| Standing
|
Damage
|
Red Damage
|
Proration
|
Cancel
|
Guard
|
| 500 (345)
|
198
|
50%
|
(SP), (EX), (J)
|
LHA
|
| First Active
|
Active
|
Recovery
|
Frame Adv
|
Circuit
|
Invuln
|
| 9
|
4
|
18
|
-4
|
3.5%
|
-
|
|
Same animation as 4B.
|
| Crouching
|
Damage
|
Red Damage
|
Proration
|
Cancel
|
Guard
|
| 1500 (1117)
|
714
|
50%
|
(SP), (EX)
|
LA
|
| First Active
|
Active
|
Recovery
|
Frame Adv
|
Circuit
|
Invuln
|
| 9
|
4
|
18
|
-4
|
10.5%
|
-
|
|
Same animation as 2C.
|
| Aerial
|
Damage
|
Red Damage
|
Proration
|
Cancel
|
Guard
|
| 500 (345)
|
198
|
50%
|
-
|
HA
|
| First Active
|
Active
|
Recovery
|
Frame Adv
|
Circuit
|
Invuln
|
| 9
|
4
|
-
|
-
|
3.5%
|
-
|
|
Same animation as j.C.
|
|
|
|
| Neutral
|
Damage
|
Red Damage
|
Proration
|
Cancel
|
Guard
|
| 500
|
192
|
50%
|
-
|
LHA
|
| First Active
|
Active
|
Recovery
|
Frame Adv
|
Circuit
|
Invuln
|
| 26
|
4
|
19
|
-5
|
0.0%
|
Clash 1-10
|
| (Clash)
|
Damage
|
Red Damage
|
Proration
|
Cancel
|
Guard
|
| 500
|
192
|
50%
|
-
|
LHA
|
| First Active
|
Active
|
Recovery
|
Frame Adv
|
Circuit
|
Invuln
|
| 8
|
4
|
19
|
-5
|
0.0%
|
Strike 1-7
|
|
Upward-angled bunker.
|
| Blockstun
|
Damage
|
Red Damage
|
Proration
|
Cancel
|
Guard
|
| 0
|
0
|
100%
|
-
|
LHA
|
| First Active
|
Active
|
Recovery
|
Frame Adv
|
Circuit
|
Invuln
|
| 19
|
3
|
22
|
-7
|
-100.0%
|
-
|
|
H-Moon specific reversal bunker.
|
|
|
|
| Ground
|
Damage
|
Red Damage
|
Proration
|
Cancel
|
Guard
|
| 100
|
0
|
100%
|
-
|
U
|
| First Active
|
Active
|
Recovery
|
Frame Adv
|
Circuit
|
Invuln
|
| 11
|
10
|
20
|
-
|
removes all
|
Full 1-39
|
| Air
|
Damage
|
Red Damage
|
Proration
|
Cancel
|
Guard
|
| 100
|
0
|
100%
|
-
|
U
|
| First Active
|
Active
|
Recovery
|
Frame Adv
|
Circuit
|
Invuln
|
| 12
|
10
|
15
|
-
|
removes all
|
Strike 1-30
|
|
Universal burst mechanic. Unlike Crescent/Full Heat activation, the hitbox and frame data doesn't vary between characters. However, you can be thrown out of this move if you input it in the air.
|
|
Special Moves
Grounded Specials
A A [A] [A] B B EX EX
|
| A
|
Damage
|
Red Damage
|
Proration
|
Cancel
|
Guard
|
| 800
|
528
|
100%
|
-EX-
|
LHA
|
| First Active
|
Active
|
Recovery
|
Frame Adv
|
Circuit
|
Invuln
|
| 14
|
8
|
14
|
-7
|
5.6%
|
-
|
| [A]
|
Damage
|
Red Damage
|
Proration
|
Cancel
|
Guard
|
| 200*9 (1289)
|
(619)
|
95% (M)*9
|
-EX-
|
LHA
|
| First Active
|
Active
|
Recovery
|
Frame Adv
|
Circuit
|
Invuln
|
| 68
|
18
|
66
|
56
|
0.84%*9 (7.56%)
|
-
|
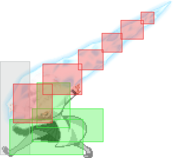
- WLen summons an ice spike in front of her.
Sends a diagonally downward spike.
If held, the icicle's hitbox is active once it shatters, hitting 9 times. WLen will recover just before this hits.
|
| B
|
Damage
|
Red Damage
|
Proration
|
Cancel
|
Guard
|
| 800
|
528
|
100%
|
-
|
LH
|
| First Active
|
Active
|
Recovery
|
Frame Adv
|
Circuit
|
Invuln
|
| 15
|
12
|
13
|
-10
|
5.6%
|
-
|
|
Sends an upward air unblockable spike.
|
| EX
|
Damage
|
Red Damage
|
Proration
|
Cancel
|
Guard
|
| 300*7, 500 (2048)
|
(1613)
|
50% (O)
|
-
|
LH
|
| First Active
|
Active
|
Recovery
|
Frame Adv
|
Circuit
|
Invuln
|
| 3+7
|
17
|
18
|
-17 ~ 18
|
-100.0%
|
Full 1-3
|
|
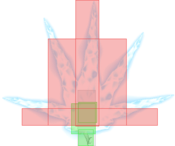
WLen summons several ice spikes around her, hitting 8 times.
|
|
|
|
| A
|
Damage
|
Red Damage
|
Proration
|
Cancel
|
Guard
|
| 1000
|
768
|
45% (O)
|
(N), (SP), (EX), (J)
|
L
|
| First Active
|
Active
|
Recovery
|
Frame Adv
|
Circuit
|
Invuln
|
| 14
|
8
|
18
|
-8
|
1.4%
|
High 4-31
|
| [A]
|
Damage
|
Red Damage
|
Proration
|
Cancel
|
Guard
|
| 1000
|
768
|
45% (O)
|
(N), SP, EX, (J)
|
L
|
| First Active
|
Active
|
Recovery
|
Frame Adv
|
Circuit
|
Invuln
|
| 21
|
8
|
18
|
-8
|
1.4%
|
High 4-38
|
- WLen spins and performs a followup depending on the version used.
Upper body invicible low version. Untechable knockdown and can be cancelled like a non-A normal on hit.
Can be held to go a bit farther and become special-cancellable on block.
|
| B
|
Damage
|
Red Damage
|
Proration
|
Cancel
|
Guard
|
| 600
|
336
|
100%
|
(N), (SP), (EX), (J)
|
H
|
| First Active
|
Active
|
Recovery
|
Frame Adv
|
Circuit
|
Invuln
|
| 37
|
6
|
5
|
7
|
2.8%
|
Low 5-42
|
| [B]
|
Damage
|
Red Damage
|
Proration
|
Cancel
|
Guard
|
| -
|
-
|
-
|
-
|
-
|
| First Active
|
Active
|
Recovery
|
Frame Adv
|
Circuit
|
Invuln
|
| -
|
-
|
37
|
-
|
-
|
Low 5-21
|
|
Lower body invincible overhead version. Same cancel properties as 623A. +7 on block.
Can be held for a feint version.
|
| EX
|
Damage
|
Red Damage
|
Proration
|
Cancel
|
Guard
|
| 200*12, 400*2 (2470)
|
(1720)
|
100%
|
-
|
LHA
|
| First Active
|
Active
|
Recovery
|
Frame Adv
|
Circuit
|
Invuln
|
| 1+5
|
38 (10) 6
|
23
|
-17
|
-100.0%
|
Full 1-3
|
|
A multi-hit combo that hits mid and ends with a wallslam. The last hit is an automatic frame-trap that is as tight as possible, as it hits on the opponent's neutral frame.
|
|
|
|
| A
|
Damage
|
Red Damage
|
Proration
|
Cancel
|
Guard
|
| 700*2 (1296)
|
(889)
|
100%
|
-
|
LH
|
| First Active
|
Active
|
Recovery
|
Frame Adv
|
Circuit
|
Invuln
|
| 5
|
6
|
27
|
-15, -12
|
4.9%*2 (9.8%)
|
Full 1-2
|
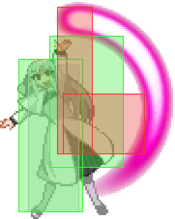
- Flipkick series for standard anti-air/reversal purposes.
Quick, small flipkick with very short invulnerability.
|
| B
|
Damage
|
Red Damage
|
Proration
|
Cancel
|
Guard
|
| 900*2 (1666)
|
(1244)
|
100%
|
-
|
LH
|
| First Active
|
Active
|
Recovery
|
Frame Adv
|
Circuit
|
Invuln
|
| 5
|
6
|
40
|
-28, -25
|
6.3%*2 (12.6%)
|
Full 1-7
|
|
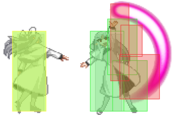
Meterless reversal and high reaching. It is fully air unblockable, however, it can be low profiled on the ground (by attacks such as C-Arc's 2B).
|
| EX
|
Damage
|
Red Damage
|
Proration
|
Cancel
|
Guard
|
| 600*6 (2989)
|
(1887)
|
100%
|
-
|
LH
|
| First Active
|
Active
|
Recovery
|
Frame Adv
|
Circuit
|
Invuln
|
| 2+5
|
6 (7) 6 (7) 6
|
41
|
-55, -52
|
-100.0%, ~1.48%*6 (-91.1%)
|
Full 1-9, 19-22, 32-35
|
|
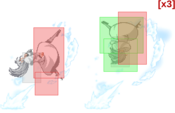
Performs three flip kicks in succession. Doesn't get low profiled unlike 214B.
|
|
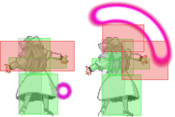
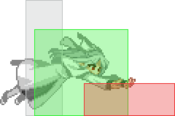
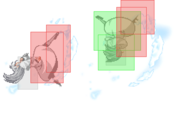
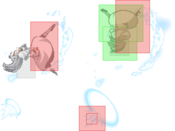
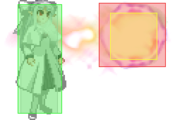
(Hurtbox while held) (Hurtbox while held)
|
| A
|
Damage
|
Red Damage
|
Proration
|
Cancel
|
Guard
|
| -
|
-
|
-
|
-
|
-
|
| First Active
|
Active
|
Recovery
|
Frame Adv
|
Circuit
|
Invuln
|
| 37
|
5 ~ 365
|
-
|
-
|
-
|
Full 27-36
|
| B / [B] (Max)
|
Damage
|
Red Damage
|
Proration
|
Cancel
|
Guard
|
| -
|
-
|
-
|
-
|
-
|
| First Active
|
Active
|
Recovery
|
Frame Adv
|
Circuit
|
Invuln
|
| 37
|
1 ~ 359 / 360
|
16 / 17
|
-
|
-
|
Full 27-36, 38 / 397-398*
|
| C
|
Damage
|
Red Damage
|
Proration
|
Cancel
|
Guard
|
| -
|
-
|
-
|
-
|
-
|
| First Active
|
Active
|
Recovery
|
Frame Adv
|
Circuit
|
Invuln
|
| 37
|
1 ~ 360
|
13
|
-
|
-
|
Full 27-36, 38-46*
|
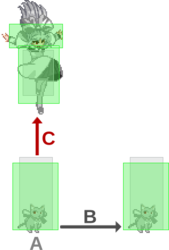
- WLen makes herself invisible before reappearing in a different position depending on the version used. Can be held for a while to make WLen stay invisible, though there will actually be sparkle effects coming from her position and she is vulnerable in this state.
A: WLen reappears at her initial position.
B: Reappears about 3 characters forward from her initial position. If you manage to hold the invisibility for 360 frames, WLen will reappear about double of this distance away.
C: Reappears in the air directly above her original position, and can go into any air actions from there.
|
|
|
|
| A
|
Damage
|
Red Damage
|
Proration
|
Cancel
|
Guard
|
| -
|
-
|
-
|
-
|
-
|
| First Active
|
Active
|
Recovery
|
Frame Adv
|
Circuit
|
Invuln
|
| -
|
-
|
41
|
-
|
-
|
Full 18-28
|
| B
|
Damage
|
Red Damage
|
Proration
|
Cancel
|
Guard
|
| -
|
-
|
-
|
-
|
-
|
| First Active
|
Active
|
Recovery
|
Frame Adv
|
Circuit
|
Invuln
|
| -
|
-
|
35
|
-
|
-
|
Full 1-19
|
| C
|
Damage
|
Red Damage
|
Proration
|
Cancel
|
Guard
|
| -
|
-
|
-
|
-
|
-
|
| First Active
|
Active
|
Recovery
|
Frame Adv
|
Circuit
|
Invuln
|
| -
|
-
|
39
|
-
|
-
|
-
|
| D
|
Damage
|
Red Damage
|
Proration
|
Cancel
|
Guard
|
| -
|
-
|
-
|
-
|
-
|
| First Active
|
Active
|
Recovery
|
Frame Adv
|
Circuit
|
Invuln
|
| 23
|
X
|
5
|
-
|
-
|
-
|
- WLen ducks down then goes into a teleport/fakeout depending on the version used.
A: WLen teleports about 4.5 characters forwards.
B: Fakes out her 214 series before reappearing at her original positions.
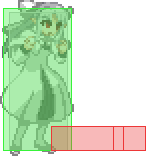
C: Fakes out her 623 series then reappears a short distance forward, which can actually cross up opponents. Has a Len catwalk-like hurtbox on frames 5-34.
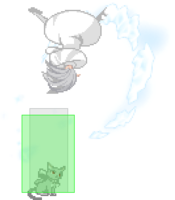
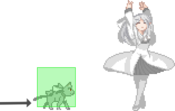
D: WLen transforms into a cat, and remains like this until a button is pressed. In this form, she is unable to do anything including block.
|
|
|
|
| A
|
Damage
|
Red Damage
|
Proration
|
Cancel
|
Guard
|
| 1900
|
1440
|
100%
|
-
|
U
(Whiffs vs Air.)
|
| First Active
|
Active
|
Recovery
|
Frame Adv
|
Circuit
|
Invuln
|
| 5
|
1
|
24
|
-
|
0.0%
|
-
|
- Command grab series. Improved from her C-Moon counterpart: A has added range, and B makes her run much faster.
WLen grabs the opponent and tosses them forward. No action can be taken until the opponent hits the ground. This is the biggest command grab in the game, and your main threat in pressure. Almost every blocked normal leads into this move.
|
| B
|
Damage
|
Red Damage
|
Proration
|
Cancel
|
Guard
|
| 2200
|
1440
|
100%
|
-
|
U
(Whiffs vs Air.)
|
| First Active
|
Active
|
Recovery
|
Frame Adv
|
Circuit
|
Invuln
|
| 12 ~ 32
|
1
|
29
|
-
|
0.0%
|
-
|
|
WLen runs forward a short distance and attempts to grab the opponent. No action can be taken until the opponent hits the ground.
|
| EX
|
Damage
|
Red Damage
|
Proration
|
Cancel
|
Guard
|
| 600 (528)
|
(422)
|
50%
|
(SP), (EX), (J)
|
U
(Whiffs vs Air.)
|
| First Active
|
Active
|
Recovery
|
Frame Adv
|
Circuit
|
Invuln
|
| 4+0
|
1
|
29
|
-
|
-100.0%
|
Full 5
|
|
WLen grabs the opponent and tosses them forward. Special and jump cancellable if this lands, letting you get a combo off of this. Not invul until active so can't be used on defence the same way Kouma's EX grab can.
|
|
Aerial Specials
A A [A] [A] B B EX EX
|
| A
|
Damage
|
Red Damage
|
Proration
|
Cancel
|
Guard
|
| 800
|
528
|
100%
|
-
|
LHA
|
| First Active
|
Active
|
Recovery
|
Frame Adv
|
Circuit
|
Invuln
|
| 12
|
12
|
8
|
-9 (TK)
|
7.0%
|
-
|
- Air ice spikes that are great for fishing for counterhits (specifically j.236A and j.236B).
WLen sends an ice spike forward aiming low.
|
| [A]
|
Damage
|
Red Damage
|
Proration
|
Cancel
|
Guard
|
| 200*7 (1087)
|
(522)
|
95% (M)*7
|
-J-
|
LHA
|
| First Active
|
Active
|
Recovery
|
Frame Adv
|
Circuit
|
Invuln
|
| 59
|
14
|
46 (11)
|
-
|
0.84%*7 (5.88%)
|
-
|
|
Aerial equivalent of 236[A] exclusive to H-Moon. Jump cancelable.
|
| B
|
Damage
|
Red Damage
|
Proration
|
Cancel
|
Guard
|
| 800
|
528
|
100%
|
-
|
LHA
|
| First Active
|
Active
|
Recovery
|
Frame Adv
|
Circuit
|
Invuln
|
| 9
|
12
|
8
|
-13 (TK)
|
7.7%
|
-
|
|
WLen sends an ice spike forward aiming high. While it's not air unblockable, TK236B can be used as an anti air as it comes out faster than the grounded version.
|
| EX
|
Damage
|
Red Damage
|
Proration
|
Cancel
|
Guard
|
| 600*8 (2752) (*)
|
(2419)
|
90% (M)*8
|
-
|
LHA
|
| First Active
|
Active
|
Recovery
|
Frame Adv
|
Circuit
|
Invuln
|
| 1+19
|
29
|
8
|
19 (TK)
|
-100.0%
|
Full 1-13
|
|
WLen sends eight ice spikes at random positions diagonally downwards from her. If you are falling and use this move too close to the ground, the spikes do not come out.
|
|
|
|
| A
|
Damage
|
Red Damage
|
Proration
|
Cancel
|
Guard
|
| 600*2 (1111)
|
(711)
|
100%
|
-
|
LHA, (HA)
|
| First Active
|
Active
|
Recovery
|
Frame Adv
|
Circuit
|
Invuln
|
| 4 (5)
|
6 (4)
|
4
|
-14, -11 (TK)
|
3.5%*2 (7.0%)
|
Full 1-2
|
- Air flipkicks which spawn an icicle projectile below WLen that hits overhead.
Quick, small flipkick with very short invulnerability. If the flip whiffs, frame advantage is determined by when the projectile is blocked. WLen can be safe (but not plus) if the projectile is blocked low enough. This projectile gives a combo everytime you manage to hit it.
|
| B
|
Damage
|
Red Damage
|
Proration
|
Cancel
|
Guard
|
| 900*2 (1666)
|
(1067)
|
100%
|
-
|
LHA, (HA)
|
| First Active
|
Active
|
Recovery
|
Frame Adv
|
Circuit
|
Invuln
|
| 4 (5)
|
6 (4)
|
4
|
-25, -22 (TK)
|
6.3%*2 (12.6%)
|
Full 1-7
|
|
Meterless air reversal. The projectile of this version will only lead into a combo in specific situations (usually on counterhit).
|
| EX
|
Damage
|
Red Damage
|
Proration
|
Cancel
|
Guard
|
| 600*6 (2989)
|
(1887)
|
100%
|
-
|
LHA
|
| First Active
|
Active
|
Recovery
|
Frame Adv
|
Circuit
|
Invuln
|
| 1+3 (1+4)
|
6 (7) 6 (7) 6 (4)
|
8
|
-56, -53 (TK)
|
-100.0%, ~1.48%*6 (-91.1%)
|
Full 1-2
|
|
Performs three flip kicks in succession. This attack is mostly used as a damage combo ender.
|
|
Arc Drive
|
|
| Damage
|
Red Damage
|
Proration
|
Cancel
|
Guard
|
| 440*N
|
345*N
|
50% (O)
|
-
|
LHA
|
| First Active
|
Active
|
Recovery
|
Frame Adv
|
Circuit
|
Invuln
|
| 8+9
|
X
|
38
|
-7 (min)
|
removes all
|
Full 1-8, Clash 17-X
|
|
Sends out a slow moving orb that hits multiple times and clashes with other hitboxes. If it hits or is blocked, you can run an opponent to the corner. Can also be used to pressure the opponent in the corner. Sadly, this move can be low profiled by moves like Len's cat walk and Satsuki's 3C.
|
|
MBAACC Navigation
