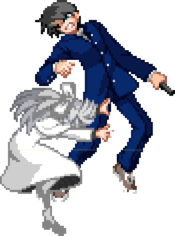
Character Page Progress
This page is still a work in progress, consider joining as an editor to help expand it. Please update this character's roadmap page when one of the editing goals have been reached.
| In Progress |
To-do
|
|
|
- Additional Ressources/Players to watch/ask
- Add any external links to ressources such as video guides or articles.
- If you know any players in particular that can be helpful for learning this character, please add them with, if possible a way to contact them (such as a Discord handle) and a name that can be searched in the match video database.
- Overview:
- Add a short summary of this character with a list of strengths and weaknesses
- Combos:
- Add damage, meter gain/given numbers and video links to the existing combos.
|
Additional Resources
C-WLen Match Video Database
Notable Players
| Name |
Color
|
Region |
Common Venues |
Status |
Details
|
nic hole
(nic hole#7093) |

|
North America |
Netplay |
Active |
Found in Meltycord and Melty Blood Community server.
|
MarisaMage
(MarisaMage#6599) |

|
North America |
Netplay |
Active |
Loves to zone and play keepaway.
Open to answering any questions about the character.
|
| oufan |

|
Europe |
Netplay |
Inactive |
Found in Meltycord.
|
ru-sha
(るーしゃ) |

|
Japan |
Play Spot BIG ONE 2nd |
Active |
|
yu-hi
(ゆーひ) |

|
Japan |
Play Spot BIG ONE 2nd,
KorewaMelty |
Active |
|
Overview
Strengths / Weaknesses
| Strengths
|
- Text goes here after asterisk
- Text goes here after asterisk
|
| Weaknesses
|
- Place text here be sure to use "*" for each point*
|
General Gameplan
White Len generally suffers in neutral compared to other characters, so your goal is to get your opponent in the corner and mix them until you win. Luckily, her combos corner carry very well, so the majority of your effort should be focused towards pressure and mixups.
Neutral
White Len's tools in neutral are pretty lackluster, so using them to the best of your ability really requires you to outplay your opponent. Her main goal is to really condition her opponents into believing you are committed to a pattern, and then switching it up. While her ability to actively play neutral is underwhelming, her ability to passively zone in the case of something like a life lead or just an overzealous opponent can be some of the best in the game. Switching from passive play to active play on a dime is very important to getting your gameplan started.
Ground Neutral
- White Len's neutral on the ground is reliant on spacing and patience, with her walk speed being pretty good. Poking with moves such as 2B and 5B can net you some stray hits, but at max range, they usually cant be converted into a full combo and instead will reset to neutral. However, at the range where you can convert, 5B (and sometimes 2B) has green, meaning trading with faster moves like most 5As is inevitable if you don't use it very carefully. However, 5B is quick enough that you can catch IADs and opponents moving backwards too slowly. The slight disjoint on 5B can be use to get air CHs which is the best way to use the normal. 236A can also be used as a massive disjoint, but it's super slow and can be beat out by moves such as C-Sion 214x. You can catch jump ins with 236B or 236C, with the latter allowing you to convert into your BnB through 2C. Though you need to input 236B pretty early due to its long startup, it is deceptively active for a long time. Additionally, 236B can be tk'd to reduce recovery frames significantly. As for approaching actively, throwing 421A/B and running into it is a good choice. Setting up stuff for insurance such as a basketball to cover your landing can cover for her lack of fast movement. IAD can be used as a risky "maybe they won't react to this" approach option combined with j.B or j.2C, especially if your opponent is trying to sweep you in order to beat or trade with 421A. However, none of her jump ins are meaningfully disjointed, so be careful.
Air Neutral
- Her neutral in the air is more stinted, with all of her air normals being pretty stubby. However, compared to on the ground, her movement in the air is much better. When it comes to normals, her biggest horizontal air normal is j.A, but it extends her hurtbox very far, so it should be used to preemptively catch bigger, slower buttons. Her j.[B], which is her most reliably disjointed air normal, is smaller than her j.A, and is usually done after an airdash. j.[B], along with its uncharged version, are both very active and can annoy characters that poke massive green such as Nero and Wara. Her next air normal, j.C, is used for catching people above White Len, and is disjointed enough to net air CH sometimes. Finally, j.2C is pretty green but only has 6f of startup, so it can be used to whiff punish or counterpoke when considering the size of the hitbox. For extra range, j.236x can be used closer to the ground, as you can't act after you use the move until you hit the ground again. Her j.214A and j.214[A] can be used to escape at a slightly different angle, but should not be relied on due to their slow speed. As for jump ins, her j.2C is your best bet, but it has very few active frames and barely any disjoint, so it's easy to get antiaired if you're not careful. j.[B] can be used for more disjoint but is obviously much slower. Lastly. this character can SCHMOOVE and NO ONE is allowed to tell me otherwise. Her basketballs, which I explain more about below, allow her to drift in different ways depending on which one you use.
Basketballs
- White Len's j.[C] and j.2[C] are projectiles used to control space. While handy in full screen or even half screen situations, you can be counterhit very easily due to their slow charge time and massive recovery frames, so making sure you don't fall into a predictable rhythm is important. You can launch 3 basketballs before having to fall back to the ground. Before hitting the ground, you can j.236A/B or j.214B if your opponent is trying to catch your landing. Both j.236A and B launch, so a hit nets an air CH into a free combo. Her j.[C] also allows you to drift across the screen with a lot of horizontal momentum, while j.2[C] will stop your forward horizontal momentum. A very safe way to retreat is jumping back into j.2[C], as it stops your opponents forward ground movement. Combined with airdodge, both of these tools can be used to fly across the screen. This is especially important because without basketball drift, it can be pretty easy to predict where she is moving.
Playing Lame (Passive Zoning)
- This is getting its own section because it's important. FIRSTLY. if you're committed to this character for certain MUs, you have to accept that you have to play lame for some matchups. 421A is your best friend because it doesn't go away on hit, has a pretty solid vertical and horizontal hitbox, and is AUB. Most trades with this move are favorable, especially on jump ins—even super disjointed moves like C-Sats j.C (though it's a losing trade with j.[C]!). It also comes out pretty early, leaving only a small window where it can be interrupted. Your second tool is icicle, charged and uncharged, which is pretty self explanatory. Since 236B is air unblockable, carefully using it with 214A and 421A can protect you against almost any jump in.
Pressure
White Len's pressure is mainly reliant on staggers and charges due to her inability to redash for her pressure safely. Generally, charging her attacks will allow you to continue her pressure, while the staggered normals keep the charged attacks as ambiguous as possible. In addition, she has other mix built into her character in the form of her 623x.
Charged Moves
4[B], 5[B], 2[C], 5[C]
- These moves will make White Len step forward, allowing her to continue her pressure. Using these will allow you to push yourself back in without your opponent realizing, but overuse of them can lead your opponent to mash as you charge, so don't let your opponent catch on. You can also catch your opponents mashing by using frametraps, especially ones that use charged normals as well.
236[A]
- 236[A] should be used as a last ditch pressure reset, as it is extremely slow and can be noticed very easily. However, due to its massive range, it can be used from a distance, allowing you to use it after you have exhausted the rest of your resources. If hit, White Len can dash back in and continue her pressure.
236A
- You won't be using this as much; 236A is mainly used to call out opponents rather than to continue pressure. Due to how disjointed the move is, it can be used to catch stray DPs or mashing, but its slow startup can be beaten out by long range attacks your opponent has. Your opponent can air tech after getting hit though, so you have to be ready with more pressure or they can simply get hit by this to get out.
236B
- This move functions similarly to 236A, but is used to catch jumpouts instead due to it being air unblockable.
Redash
White Len's redash is really bad because it takes at least 25 frames for a dash 5A or dash throw, but she can cancel all normals into dash. This is easily mashed out on though, so you might wanna use IAD reset instead. Because of how ambiguous backdash is from forward dash, backdash into a long normal like 2B might also be a good tool to reset your rebeats or strings.
Fuzzy
White Len has a fuzzy on a jump in or an IAD after something like a charged icicle. Below is a general example.
IAD j.2C > j.A > dj.2C > j.236A
There are a variety of followups you can do instead of j.236A, like j.[C] or side switch j.214[A], so get creative!
2B > 623x
While you can cancel into 623x no matter where you are in your blockstring, cancelling it out of 2B is notable due to it allowing you to squeeze in at least one more attack from a long range without having to use 236x. Don't force this, as it's really unsafe.
2B > 623A
- This is a low frametrap, which is used to catch jumpouts or mashing if you have conditioned your opponent to do either. If you hit 2B too far away, it can be jumped out of. Unsafe on block.
2B > 623[A]
- This is a delayed low, which can be used to mix up the timing of your opponent's block and punish. However, 623[A] can be mashed or jumped out of, so use it sparingly. Unlike the other variants, 623[A] is special cancellable on block, which allows you to 214B j.214A to continue your pressure. You are minus if you decide to go for j.214A, but you can mix it up with j.236A to throw out a hitbox instead. Unsafe on block.
2B > 623B
- This is your overhead mix, which can be cancelled into 623A for your BnB. It can be jumped and mashed out of, but it has low invulnerability so that might trick your opponent the first time they fall for it. 623B is actually plus on block, allowing you to 2C after for a frametrap.
2B > 623[B]
- 623[B] should be used if your opponent is blocking 623B's overhead, and instead allows you to 2A for a low. If your opponent is backdashing out of your 623x mix, you can use 623[B] to feint your spin and follow up with 2B or something similar to catch your opponent. This variant can be beat by jumping or mashing.
2B > 22C
- 22C is White Len's most noncommittal mix, but it's still pretty committal. While it beats out normal mashing, a delayed mash will still hit you during the recovery frames. While it does not carry you the full distance of the spin, it does teleport you forward a slight amount, meaning you can hit the opponent with another 2B or a move with a similar range.
Command Throws
White Len's command throws are pretty good, as they give oki and have a pretty big range.
63214A
- While having a relatively big range, White Len's pressure keeps her at a range where this throw isn't super accessible. Recommended places to use this are after 623[B], on a redash/airdash, or on a feint.
63214B
- White Len running forward before grabbing definitely lets the player close the distance, but her dash not having the mirage effect gives this away. Additionally, there's some weird throw protection on this move, so be careful about using this too often.
63214C
- Her EX command throw can combo into a BnB, but you will need another 100 meter if you want to combo into oki with any meaningful amount of damage.
Defense
Place text here*
Combos
| Combo Notation Help
|
Disclaimer: Combos are written by various writers, so the actual notation used in pages can differ from the standard one.
For more information, see Glossary and Controls.
|
| X > Y
|
X input is cancelled into Y.
|
| X > delay Y
|
Must wait for a short period before cancelling X input into Y.
|
| X, Y
|
X input is linked into Y, meaning Y is done after X's recovery period.
|
| X+Y
|
Buttons X and Y must be input simultaneously.
|
| X/Y
|
Either the X or Y input can be used.
|
| X~Y
|
This notation has two meanings.
- Use attack X with Y follow-up input.
- Input X then within a few frames, input Y. Usually used for option selects.
|
| X(w)
|
X input must not hit the opponent (Whiff).
|
| j.X
|
X input is done in the air, implies a jump/jump cancel if the previous move was done from the ground.
Applies to all air chain sections:
- Assume a forward jump cancel if no direction is given.
- Air chains such as j.A > j.B > j.C can be shortened to j.ABC.
|
| sj.X
|
X input is done after a super jump. Notated as sj8.X and sj9.X for neutral and forward super jumps respectively.
|
| dj.X
|
X input is done after a double jump.
|
| sdj.X
|
X input is done after a double super jump.
|
| tk.X
|
Stands for Tiger Knee. X motion must be buffered before jumping, inputting the move as close to the ground as possible. (ex. tk.236A)
|
| (X)
|
X is optional. Typically the combo will be easier if omitted.
|
| [X]
|
Input X is held down. Also referred to as Blowback Edge (BE). Depending on the character, this can indicate that this button is held down and not released until indicated by the release notation.
|
| ]X[
|
Input X is released. Will only appear if a button is previously held down. This type of input is referred to as Negative Edge.
|
| {X}
|
Button X should only be held down briefly to get a partially charged version instead of the fully charged one.
|
| X(N)
|
Attack "X" should only hit N times.
|
| (XYZ)xN
|
XYZ string must be performed N times. Combos using this notation are usually referred to as loops.
|
| (XYZ^)
|
A pre-existing combo labelled XYZ is inserted here for shortening purposes.
|
| CH
|
The first attack must be a Counter Hit.
|
| Air CH
|
The first attack must be a Counter Hit on an airborne opponent.
|
| 66
|
Performs a ground forward dash.
|
| j.66
|
Performs an aerial forward dash, used as a cancel for certain characters' air strings.
|
| IAD/IABD
|
Performs an Instant AirDash.
|
| AT
|
Performs an Air Throw. (j.6/4A+D)
|
| IH
|
Performs an Initiative Heat.
|
| AD
|
Performs an Arc Drive.
|
| AAD
|
Performs an Another Arc Drive.
|
Note: Delays/links are variable depending on combo and opponent. (I'll rework this section because I don't like the starters and enders format. For now just do 2A/5A 5C 2C 623A 2B 623A 5B 4B 236C [4] 2[C] 623A 2B 623A into any setup (421X, 236[A], etc) if you want to learn a BNB.)
Enders
| Condition
|
Notation
|
Damage
vs V.Sion
|
Notes
|
|
| Air Ender
|
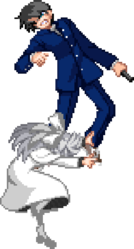
- j.BC > sdj.BC > j.2C > AT
|
3574
|
| |
| Meter Gained: 45.0% |
Meter Given (vs C-Moon): 13.5% |
| Basic air combo. You can air dash after the throw for a j.[C] or a j.2C to continue pressure. (Damage is the ender by itself with nothing before it.) |
|
|
| 100% Meter
|
- 236C ([4]), delay 2[C] > 623A > delay 2B > 623A
|
3283
|
| |
| Meter Gained: -87.6% (12.4%) |
Meter Given (vs C-Moon): 17.5% |
| Uses meter. Sets up oki. You can forego the last two moves if you find the timing troublesome. (Damage is the ender by itself with nothing before it.) |
|
|
| 100% Meter into Air Combo
|
- 236C ([4]), delay 2[C] > 623A > delay 2B > 623A > 4B > j.BC > j.2C > sdj.BC > j.2C > AT
|
4291
|
| |
| Meter Gained: -61.0% (39.0%) |
Meter Given (vs C-Moon): 36.1% |
| This route is meant for prioritizing damage. Follow up like a normal AT ender. (Damage is the ender by itself with nothing before it.) |
|
|
BnB combos
| Condition
|
Notation
|
Damage
vs V.Sion
|
Notes
|
|
| Normal starter, grounded opponent
|
- (5B >) 2B > 623A > 5B > 5C > (Ender)
|
2554
|
| |
| Meter Gained: 30.0% |
Meter Given (vs C-Moon): 9.0% |
| Basic mid-screen/corner BnB, works from a good distance. If you start the combo with 5B, you can't use it after 623A. (Damage and Meter amounts are without an ender.) |
|
|
| Normal starter, grounded opponent, okizeme (expand notes)
|
- (2A >) 5C > 2C > 623A > delay 2B > 623[A] > 5B > 4B > (Ender)
|
3324
|
| |
| Meter Gained: 55.5% |
Meter Given (vs C-Moon): 16.6% |
| Wlen's best BnB, only works when fairly close but puts opponent into a corner from almost anywhere. End the combo at 623[A] for oki. (Damage and Meter amounts are without an ender.) |
|
|
Throw Combos
| Condition
|
Notation
|
Damage
vs V.Sion
|
Notes
|
|
| Corner Throw starter
|
- Throw > 2A > 5C > (Ender)
|
1768
|
| |
| Meter Gained: 12.5% |
Meter Given (vs C-Moon): 3.7% |
| Throw combo, corner only. (Damage and Meter amounts are without an ender.) |
|
|
| Mid-screen Throw starter
|
- Throw > 2B > 623[A] > 5B > 5C > (Ender)
|
2431
|
| |
| Meter Gained: 30.0% |
Meter Given (vs C-Moon): 9.0% |
| Character specific 1f 2B link throw combo that is possible in mid-screen. Works on Ciel, P.Ciel, Sion, V.Sion, Roa, Miyako. (Damage and Meter amounts are without an ender.) |
|
|
| Mid-screen Throw starter
|
|
1580?
|
| |
| Meter Gained: 5.0% |
Meter Given (vs C-Moon): 1.5% |
| You can't get much out of this, but use it if you want...I guess? Works on Len, WLen. |
|
|
| Mid-screen Ground Throw starter
|
- Throw > 2B(1) > 5B(1) > 214B~j.214B
|
???
|
| |
| Meter Gained: ??? |
Meter Given (vs C-Moon): ??? |
| This is actually super sick but also really hard. Works on Mech Hisui. |
|
|
| Mid-screen Ground Throw starter
|
|
2370
|
| |
| Meter Gained: -100.0% (0.0%) |
Meter Given (vs C-Moon): 24.4% |
| Definitely the easiest out of the mid-screen throw starters; I actually recommend going for this one. Works on Roa, Hime, Ryougi, Sion, VSion. |
|
|
| Mid-screen Ground Throw starter
|
- Throw > 623C > 623B > 2[C] > 623A > 2B > 623A > 5B > 5C > Air Combo
|
???
|
| |
| Meter Gained: ??? |
Meter Given (vs C-Moon): ??? |
| Really difficult, but definitely the most rewarding out of the mid-screen throw combos. 623C > 623B is a harder link than throw > 623C is; don't be fooled. Works on Hime, Ryougi. |
|
|
| Mid-screen Ground Throw starter
|
- Throw > 2A > j.2CB > dj.BC2C > AT
|
???
|
| |
| Meter Gained: ??? |
Meter Given (vs C-Moon): ??? |
| The throw > 2A link is more intuitive than the other ones, but getting j.2C off can be difficult. Works on Hime. |
|
|
| Mid-screen Ground Throw starter
|
- Throw > 2B > 4[B] > j.BC > j.BC2C > AT
|
???
|
| |
| Meter Gained: ??? |
Meter Given (vs C-Moon): ??? |
| The other mid-screen Miyako throw combo is better. Just use that one. Works on Miyako. |
|
|
| Corner Golden Air Throw Starter
|
- gAT 623A 2B 2B 2B 5A(whiff) 2B 623A 5B 4B 5C j.BC j.ABC AT
|
???
|
| |
| Meter Gained: ??? |
Meter Given (vs C-Moon): ??? |
| What are you doing? You absolute madman. Works on VSion. |
|
|
| 63214C starter
|
- 63214C > delay 623[A] > 5B > 5C > j.BC > dj.BC > AT
|
2948
|
| |
| Meter Gained: -74.3% (25.7%) |
Meter Given (vs C-Moon): 19.0% |
| Ex-command throw combo. |
|
|
| 63214C starter
|
- 63214C > delay 623[A] > delay 2B > 623[A]
|
1818
|
| |
| Meter Gained: -94.1% (5.9%) |
Meter Given (vs C-Moon): 6.4% |
| Ex-command throw combo, ending in an oki setup. |
|
|
| 63214C starter
|
- 63214C > 623B > 623[A] > 2B > (5A(w)) > 2B > 623A > 5B > 5C > (Ender)
|
2674
|
| |
| Meter Gained: -78.6% (21.4%) |
Meter Given (vs C-Moon): 16.0% |
| Character specific. Strut your stuff. Works on V.Sion, ...? (Damage and Meter amounts are without an ender.) |
|
|
| 63214C starter
|
- 63214C > 623B > delay 2[C] > 623A > delay 2B > 623[A] > 5B > 5C > (Ender)
|
2735
|
| |
| Meter Gained: -76.5% (23.5%) |
Meter Given (vs C-Moon): 17.5% |
| Optimal damage for an EX-command throw combo. (Damage and Meter amounts are without an ender.) |
|
|
Advanced Combos
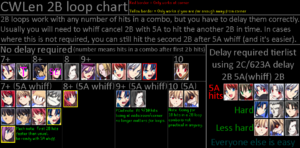
Double 2B Routes
On certain characters, White Len can do either 623A > 2B > 5A(w), 2B or 623A > 2B, 2B to extend her midscreen BNB and reset the current reverse beat chain, giving her a bit more damage. Doing 2B loops also allows for combos where 236C hits only once, reducing proration. These combos are gravity-specific, so depending on how many hits you do into 623A, you can do these routes on different sets of characters. A chart specifying hit counts is shown below.
Below is a general double 2B route.
| Condition
|
Notation
|
Damage
vs V.Sion
|
Notes
|
|
| Normal starter, grounded opponent, 100% meter
|
- 2A > 5C > 2C > 623A > 2B > 5A(w), 2B > 5[C] > delay 236C(1), 2C > 623A > 2B > 623A > 4B > j.BC > j.2C > sdj.BC > j.2C > AT
|
4990
|
| |
| Meter Gained: -6.8% (93.2%) |
Meter Given (vs C-Moon): 54.5% |
|
|
Move Descriptions
| Frame Data Help
|
| Header
|
Tooltip
|
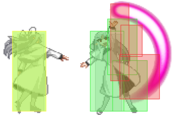
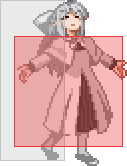
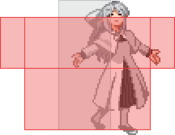
| Move Box Colors
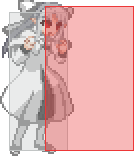
|
Light gray = Collision Box (A move lacking one means it can go through the opponent's own collision box).
Green: Hurt Boxes.
Red: Hit(/Grab) Boxes.
Yellow: Clash Boxes (When an active hitbox strikes a clash box, the active hitbox stops being active. Multi-hit attacks can beat clash since they will still progress to the next hitbox.)
Magenta: Projectile-reflecting boxes OR Non-hit attack trigger boxes (usually).
Blue: Reflectable Projectile Boxes.
|
| Damage
|
Base damage done by this attack.
(X) denotes combined and scaled damage tested against standing V. Sion.
|
| Red Damage
|
Damage done to the recoverable red health bar by this attack. The values are inherently scaled and tested against standing V. Sion.
(X) denotes combined damage.
|
| Proration
|
The correction value set by this attack and the way it modifies the scaling during a string. See this page for more details.
X% (O) means X% Overrides the previous correction value in a combo if X is of a lower percentage.
X% (M) means the current correction value in a combo will be Multiplied by X%. This can also be referred to as relative proration.
|
| Circuit
|
Meter gained by this attack on hit.
(X%) denotes combined meter gain.
-X% denotes a meter cost.
|
| Cancel
|
Actions this move can be cancelled into.
SE = Self cancelable.
N = Normal cancelable.
SP = Special cancelable.
CH = Cancelable into the next part of the same attack (Chain in case of specials).
EX = EX cancelable.
J = Jump cancelable.
(X) = Cancelable only on hit.
-X- = Cancelable on whiff.
|
| Guard
|
The way this move must be blocked.
L = Can block crouching
H = Can block standing.
A = Can block in the air.
U = Unblockable.
|
| Startup
|
Amount of frames that must pass prior to reaching the active frames. Also referred to as "True Startup".
|
| Active
|
The amount of frames that this move will have a hitbox.
(x) denotes frame gaps where there are no hitboxes is present. Due to varied blockstuns, (x) frames are difficult to use to determine punish windows. Generally the larger the numbers, the more time you have to punish.
X denotes active frames with a duration separate from its origin move's frame data, such as projectile attacks. In this case, the total length of the move is startup+recovery only.
|
| Recovery
|
Frames that this move has after the active frames if not canceled. The character goes into one frame where they can block but not act afterwards, which is not counted here.
|
| Advantage
|
The difference in frames where you can act before your opponent when this move is blocked (assuming the move isn't canceled and the first active frame is blocked).
If the opponent uses a move with startup that is at least 2 frames less than this move's negative advantage, it will result in the opponent hitting that move.
±x~±y denotes a range of possible advantages.
|
| Invul
|
Lists any defensive properties this move has.
X y~z denotes X property happening between the y to z frames of the animations. If no frames are noted, it means the invincibility lasts through the entire move.
Invicibility:
- Strike = Strike invincible.
- Throw = Throw invincible.
Hurtbox-Based Properties:
- Full = No hurtboxes are present.
- High = Upper body lacks a hurtbox.
- Low = Lower body lacks a hurtbox.
Miscellaneous Properties
- Clash = Frames in which clash boxes are active.
- Reflect = Frames in which projectile-reflecting boxes are active.
- Super Armor = Frames in which the character can take hits without going into hit stun.
|
Normal Moves
Standing Normals
|
|
| Damage
|
Red Damage
|
Proration
|
Cancel
|
Guard
|
| 350
|
196
|
78% (O)
|
-SE-, -N-, -SP-, -EX-, (J)
|
LH
|
| First Active
|
Active
|
Recovery
|
Frame Adv
|
Circuit
|
Invuln
|
| 4
|
3
|
8
|
1
|
4.0%
|
-
|
|
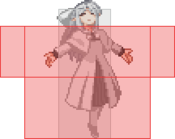
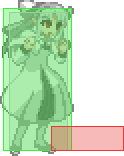
Fastest mid normal WLen has. Can hit crouchers. Not effective at being an anti-air. Pretty good for stagger pressure due to being +1.
|
|
|
|
| 5B
|
Damage
|
Red Damage
|
Proration
|
Cancel
|
Guard
|
| 500*2 (887)
|
(512)
|
80% (O)
|
N, SP, EX, (J)
|
LH
|
| First Active
|
Active
|
Recovery
|
Frame Adv
|
Circuit
|
Invuln
|
| 9
|
8
|
9
|
-2, 3 (vs Stand.)
-5, -3 (vs Crouch.)
|
4.5%*2 (9.0%)
|
-
|
|
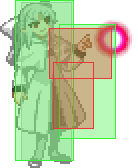
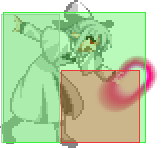
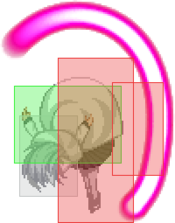
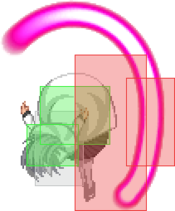
A fairly long ranged move that can be effective as a poke and an anti-air. Take note that the pushback of this move will often push her too far to convert into any major combos. Also, be wary that when she uses this move, your green hitbox will extend almost to the tip of her attack.
|
| 5[B]
|
Damage
|
Red Damage
|
Proration
|
Cancel
|
Guard
|
| 600*2 (906)
|
(739)
|
60% (O)
|
N, SP, EX, (J)
|
LH
|
| First Active
|
Active
|
Recovery
|
Frame Adv
|
Circuit
|
Invuln
|
| 26
|
8
|
8
|
-1, 4 (vs Stand.)
-4, -2 (vs Crouch.)
|
5.5%*2 (11.0%)
|
-
|
|
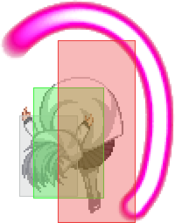
Similar to 5B, except it wallslams your opponent.
|
|
|
|
| 5C
|
Damage
|
Red Damage
|
Proration
|
Cancel
|
Guard
|
| 700, 400 (990)
|
(667)
|
75% (O)
|
N, SP, EX, (J)
|
LH
|
| First Active
|
Active
|
Recovery
|
Frame Adv
|
Circuit
|
Invuln
|
| 10
|
9
|
8
|
-2, 1
|
6.0%, 3.0% (9.0%)
|
-
|
|
Swings a ball from in front of her to over her. Works fairly decently as an anti-air.
|
| 5[C]
|
Damage
|
Red Damage
|
Proration
|
Cancel
|
Guard
|
| 1200
|
980
|
65% (O)
|
N, SP, EX, (J)
|
LH
|
| First Active
|
Active
|
Recovery
|
Frame Adv
|
Circuit
|
Invuln
|
| 22
|
6
|
11
|
-2
|
9.0%
|
-
|
|
Like 5C, but moves her considerably forward and launches her opponents.
|
|
Crouching Normals
|
|
| Damage
|
Red Damage
|
Proration
|
Cancel
|
Guard
|
| 350
|
147
|
70% (O)
|
-SE-, -N-, -SP-, -EX-, (J)
|
L
|
| First Active
|
Active
|
Recovery
|
Frame Adv
|
Circuit
|
Invuln
|
| 5
|
3
|
9
|
0
|
3.5%
|
-
|
|
Fastest low WLen has to offer. Has a better horizontal reach than 5A.
|
|
PLEASE use with caution PLEASE use with caution
|
| Damage
|
Red Damage
|
Proration
|
Cancel
|
Guard
|
| 600*2 (1064)
|
(695)
|
80% (O), 55% (O)
|
N, SP, EX, (J)
|
L
|
| First Active
|
Active
|
Recovery
|
Frame Adv
|
Circuit
|
Invuln
|
| 8
|
3 (8) 5
|
13
|
-14, -6
|
5.0%*2 (10.0%)
|
-
|
|
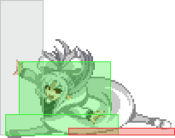
WLen attacks twice in a yo-yo fashion. Only the second hit sweeps as the first one only pushes opponents out. This move is punishing if whiffed, due to the long duration (not necessarily just the recovery). Has a niche use as an antiair. Would be cool if Kamone decided to make THE LONG RANGE MOVE GOOD AT LONG RANGE, but it only hits once at its longest range and can't confirm into much else if it does, so don't space it too well.
|
|
2C2C/[C](Whiff/Block)~2C
OR
2C/[C](Hit)~2C 2C 2C 2[C] 2[C] 2CC (2C/[C] Whiff/Block) 2CC (2C/[C] Whiff/Block) 2CC (2C/[C] Hit) 2CC (2C/[C] Hit)
|
| 2C
|
Damage
|
Red Damage
|
Proration
|
Cancel
|
Guard
|
| 1000
|
686
|
58% (O)
|
N, SP, -CH-, EX, (J)
|
L
|
| First Active
|
Active
|
Recovery
|
Frame Adv
|
Circuit
|
Invuln
|
| 10
|
8
|
16
|
-6
|
12.0%
|
-
|
|
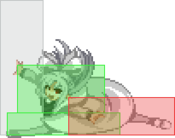
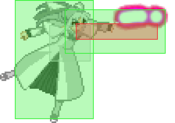
WLen does a split that sweeps her opponent. Shorter range than 2B, but has better insurance of a knockdown. Paper thin, so not useful as a low profile antiair, but it is fairly disjointed.
|
| 2[C]
|
Damage
|
Red Damage
|
Proration
|
Cancel
|
Guard
|
| 1200
|
882
|
60% (O)
|
N, SP, -CH-, EX, (J)
|
L
|
| First Active
|
Active
|
Recovery
|
Frame Adv
|
Circuit
|
Invuln
|
| 24
|
8
|
9
|
-1
|
15.0%
|
-
|
|
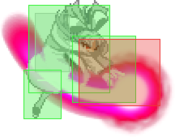
Like 2C, except she is displaced slightly forward after. The vertical hitbox is also extended. VERY nice in pressure.
|
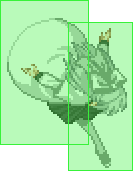
~2C
(2C/[C] Whiff/Block)
|
Damage
|
Red Damage
|
Proration
|
Cancel
|
Guard
|
| 800
|
588
|
60% (O)
|
-
|
H
|
| First Active
|
Active
|
Recovery
|
Frame Adv
|
Circuit
|
Invuln
|
| 29
|
5
|
13
|
-6
|
13.0%
|
-
|
~2C
(2C/[C] hit)
|
Damage
|
Red Damage
|
Proration
|
Cancel
|
Guard
|
| 600
|
392
|
50% (O)
|
(J)
|
LHA
|
| First Active
|
Active
|
Recovery
|
Frame Adv
|
Circuit
|
Invuln
|
| 13
|
2
|
29
|
-19
|
10.0%
|
-
|
|
Does an overhead for 2CC, or if they were hit by 2C, ground bounces and launches them, which can be jump cancelled with 8/9. However, 2CC is not recommended since it is easy to react to and leads to a weak BnB.
|
|
Aerial Normals
|
|
| Damage
|
Red Damage
|
Proration
|
Cancel
|
Guard
|
| 350
|
196
|
70%
|
SE, N, SP, EX, J
|
LHA
|
| First Active
|
Active
|
Recovery
|
Frame Adv
|
Circuit
|
Invuln
|
| 6
|
4
|
10
|
-
|
4.0%
|
-
|
|
Pokes in front of her.
|
|
|
|
| j.B
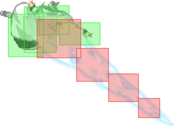
|
Damage
|
Red Damage
|
Proration
|
Cancel
|
Guard
|
| 700
|
294
|
95% (O)
|
N, SP, EX, J
|
HA
|
| First Active
|
Active
|
Recovery
|
Frame Adv
|
Circuit
|
Invuln
|
| 7
|
9
|
-
|
-
|
8.0%
|
-
|
|
Attacks slightly in front of her. j.B and its charged version are both amazing in counterpoke air to air situations due to how active they are.
|
| j.[B]
|
Damage
|
Red Damage
|
Proration
|
Cancel
|
Guard
|
| 700
|
294
|
95% (O)
|
N, SP, EX, J
|
HA
|
| First Active
|
Active
|
Recovery
|
Frame Adv
|
Circuit
|
Invuln
|
| 15
|
15
|
-
|
-
|
8.0%
|
-
|
|
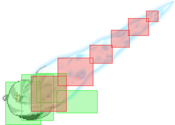
Like j.B, but stays active considerably longer and reduces the size of her lower hurtbox.
|
|
Layup Layup
|
| j.C
|
Damage
|
Red Damage
|
Proration
|
Cancel
|
Guard
|
| 900
|
588
|
90% (M)
|
N, SP, EX, J
|
HA
|
| First Active
|
Active
|
Recovery
|
Frame Adv
|
Circuit
|
Invuln
|
| 8
|
3
|
-
|
-
|
10.0%
|
-
|
|
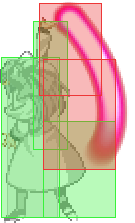
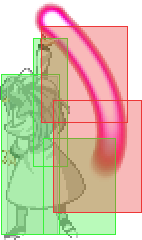
Swings in an arc slightly above and in front of her.
|
| j.[C]
|
Damage
|
Red Damage
|
Proration
|
Cancel
|
Guard
|
| 550
|
196
|
80% (O)
|
-
|
LHA
|
| First Active
|
Active
|
Recovery
|
Frame Adv
|
Circuit
|
Invuln
|
| 26
|
X
|
14
|
-
|
5.0%
|
-
|
|
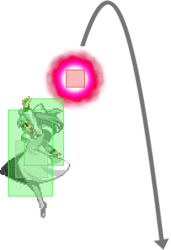
A ball projectile comes out and falls. Changes her jump trajectory after she releases the ball. Disappears when she is hit.
|
|
Command Normals
|
|
| 4B
|
Damage
|
Red Damage
|
Proration
|
Cancel
|
Guard
|
| 800
|
539
|
65% (O)
|
N, SP, EX, (J)
|
LH
|
| First Active
|
Active
|
Recovery
|
Frame Adv
|
Circuit
|
Invuln
|
| 11
|
3
|
23
|
-8
|
8.0%
|
-
|
|
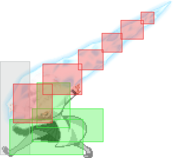
Launcher. Chainable into other normals. Difficult to use as an antiair due to the forward movement, but very good when used correctly.
|
| 4[B]
|
Damage
|
Red Damage
|
Proration
|
Cancel
|
Guard
|
| 1000
|
686
|
65% (O)
|
N, SP, EX, (J)
|
LH
|
| First Active
|
Active
|
Recovery
|
Frame Adv
|
Circuit
|
Invuln
|
| 22
|
4
|
19
|
-5
|
8.0%
|
-
|
|
Similar to 4B, but moves WLen considerably forward.
|
|
|
|
| Damage
|
Red Damage
|
Proration
|
Cancel
|
Guard
|
| 800
|
588
|
60% (O)
|
-
|
H
|
| First Active
|
Active
|
Recovery
|
Frame Adv
|
Circuit
|
Invuln
|
| 32
|
3
|
12
|
0
|
13.0%
|
-
|
|
Initially looks like 2[C], but she'll do a fast flip overhead that she does during the latter part of 2CC. Leads to a weak knockdown. Can be OTG'd in the corner into a full combo. It being 0 on block combined with her 4f 5A and 4f dp means that most opponents will respect it if blocked.
|
|
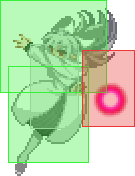
SLAM DUNK SLAM DUNK
|
| j.2C
|
Damage
|
Red Damage
|
Proration
|
Cancel
|
Guard
|
| 1050
|
637
|
85% (M)
|
N, SP, EX, J
|
HA
|
| First Active
|
Active
|
Recovery
|
Frame Adv
|
Circuit
|
Invuln
|
| 7
|
3
|
-
|
-
|
9.0%
|
-
|
|
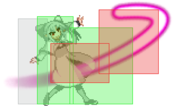
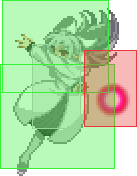
Attacks with a lower angled attack. Mostly used as her main jump in, though the back foot extending green lower than the red can lead to situations like C-Nero 2A antiairing the attack without any issues. Has heavier proration than her other air normals.
|
| j.2[C]
|
Damage
|
Red Damage
|
Proration
|
Cancel
|
Guard
|
| 550
|
200
|
80%
|
-
|
LHA
|
| First Active
|
Active
|
Recovery
|
Frame Adv
|
Circuit
|
Invuln
|
| 21
|
X (28)
|
23
|
-
|
5.0%
|
-
|
|
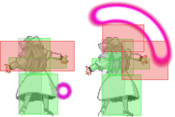
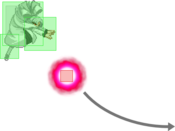
Sends out a ball projectile that arcs downwards then slightly upwards before disappearing. The ball will not hit if the opponent is too close to White Len's hands. Changes her trajectory when she sends out the ball.
|
|
Universal Mechanics
|
|
| Damage
|
Red Damage
|
Proration
|
Cancel
|
Guard
|
| 1400
|
490
|
30%
|
-
|
U
|
| First Active
|
Active
|
Recovery
|
Frame Adv
|
Circuit
|
Invuln
|
| 3
|
1
|
20
|
-
|
0.0%
|
-
|
|
WLen launches the opponent in the air. Comboable near the corner.
|
|
|
|
| Damage
|
Red Damage
|
Proration
|
Cancel
|
Guard
|
1600 (1408, Raw)
1200
|
417
|
30%
|
-
|
U
|
| First Active
|
Active
|
Recovery
|
Frame Adv
|
Circuit
|
Invuln
|
| 2
|
1
|
12
|
-
|
0.0%
|
-
|
|
Throw the opponent to the ground. Untechable knockdown as a combo ender, and WLen can recover in the air afterwards.
|
|
|
|
| Bunker
|
Damage
|
Red Damage
|
Proration
|
Cancel
|
Guard
|
| 500
|
196
|
100%
|
-
|
LHA
|
| First Active
|
Active
|
Recovery
|
Frame Adv
|
Circuit
|
Invuln
|
| 26
|
4
|
19
|
-5
|
0.0%
(-50.0% in blockstun)
|
Clash 1-10
|
| (Clash)
|
Damage
|
Red Damage
|
Proration
|
Cancel
|
Guard
|
| 500
|
196
|
100%
|
-
|
LHA
|
| First Active
|
Active
|
Recovery
|
Frame Adv
|
Circuit
|
Invuln
|
| 8
|
4
|
19
|
-5
|
0.0%/-50.0%
|
Strike 1-7
|
|
Upward-angled bunker.
|
|
|
|
| Damage
|
Red Damage
|
Proration
|
Cancel
|
Guard
|
| 100
|
0
|
100%
|
-
|
U
|
| First Active
|
Active
|
Recovery
|
Frame Adv
|
Circuit
|
Invuln
|
| 19
|
3
|
25
|
-
|
-100.0% (min)
|
Full 1-21
|
|
Forward positioned Heat hitbox.
|
|
|
|
| Ground
|
Damage
|
Red Damage
|
Proration
|
Cancel
|
Guard
|
| 100
|
0
|
100%
|
-
|
U
|
| First Active
|
Active
|
Recovery
|
Frame Adv
|
Circuit
|
Invuln
|
| 11
|
10
|
20
|
-
|
removes all
|
Full 1-39
|
| Air
|
Damage
|
Red Damage
|
Proration
|
Cancel
|
Guard
|
| 100
|
0
|
100%
|
-
|
U
|
| First Active
|
Active
|
Recovery
|
Frame Adv
|
Circuit
|
Invuln
|
| 12
|
10
|
15
|
-
|
removes all
|
Strike 1-30
|
|
Universal burst mechanic. Unlike Crescent/Full Heat activation, the hitbox and frame data doesn't vary between characters. However, you can be thrown out of this move if you input it in the air.
|
|
Special Moves
Special Movement
|
|
Forward /
(Held)
|
Damage
|
Red Damage
|
Proration
|
Cancel
|
Guard
|
| -
|
-
|
-
|
-
|
-
|
| First Active
|
Active
|
Recovery
|
Frame Adv
|
Circuit
|
Invuln
|
| -
|
-
|
30 /
21
|
-
|
-
|
Full 6-26 /
Full 6-15, High 16-X
|
|
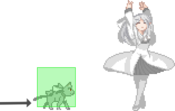
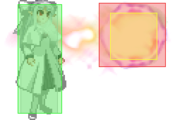
Spawns an illusion of several WLens walking forward while the real one goes through an invulnerable teleport. Holding forward makes WLen appear earlier, in which she runs indefinitely in an upper body invulnerable state. Tap dash's collision removal is longer than hold dash.
|
| Back
|
Damage
|
Red Damage
|
Proration
|
Cancel
|
Guard
|
| -
|
-
|
-
|
-
|
-
|
| First Active
|
Active
|
Recovery
|
Frame Adv
|
Circuit
|
Invuln
|
| -
|
-
|
29
|
-
|
-
|
Strike 1-5, Full 6-24
|
|
Spawns the same illusion as forward dash, with WLen just walking back a short distance away after teleporting.
|
|
Grounded Specials
A A [A] [A] B B [B] [B] EX EX
|
| A
|
Damage
|
Red Damage
|
Proration
|
Cancel
|
Guard
|
| 800
|
539
|
100%
|
-EX-
|
LHA
|
| First Active
|
Active
|
Recovery
|
Frame Adv
|
Circuit
|
Invuln
|
| 14
|
8
|
14
|
-7
|
8.0%
|
-
|
| [A]
|
Damage
|
Red Damage
|
Proration
|
Cancel
|
Guard
|
| 200*9 (1289)
|
(625)
|
95% (M)*9
|
-EX-
|
LHA
|
| First Active
|
Active
|
Recovery
|
Frame Adv
|
Circuit
|
Invuln
|
| 68
|
18
|
66
|
56
|
1.2%*9 (10.8%)
|
-
|
|
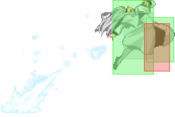
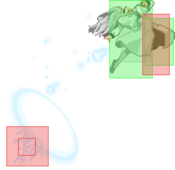
WLen sends an ice spike forward aiming low, but hits mid. Can be used as a blockstring ender especially when half charged. When held, it does not damage when summoned at first, but shatters into 9 hits afterwards.
|
| B
|
Damage
|
Red Damage
|
Proration
|
Cancel
|
Guard
|
| 800
|
539
|
100%
|
-
|
LH
|
| First Active
|
Active
|
Recovery
|
Frame Adv
|
Circuit
|
Invuln
|
| 15
|
12
|
13
|
-10
|
8.0%
|
-
|
| [B]
|
Damage
|
Red Damage
|
Proration
|
Cancel
|
Guard
|
| 200*9 (1289)
|
(625)
|
95% (M)*9
|
-EX-
|
LHA
|
| First Active
|
Active
|
Recovery
|
Frame Adv
|
Circuit
|
Invuln
|
| 67
|
X (18)
|
0
|
55
|
1.2%*9 (10.8%)
|
-
|
|
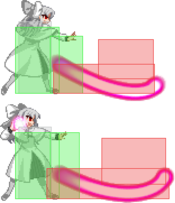
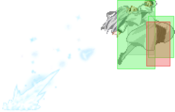
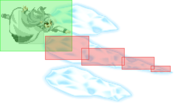
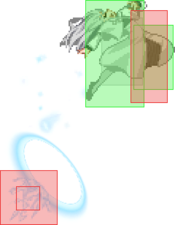
WLen sends an ice spike forward aiming high, but hits mid. One of her most powerful neutral tools, as her hurtbox shrinks down significantly. Air unblockable if uncharged. Can be used as an anti-air and leads into combos on counterhit. Can be held like A version.
|
| EX
|
Damage
|
Red Damage
|
Proration
|
Cancel
|
Guard
|
| 300*7, 500 (2048)
|
(1648)
|
50% (O)
|
-
|
LH
|
| First Active
|
Active
|
Recovery
|
Frame Adv
|
Circuit
|
Invuln
|
| 3+7
|
17
|
18
|
-17 ~ 18
|
-100.0%
|
Full 1-3
|
|
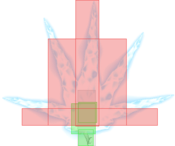
WLen summons a number of ice spikes in a flower around her. Used mid-combo for extra damage. Can also be used as an anti air in certain situations.
|
|
A A B B [B] [B] EX EX
|
| A
|
Damage
|
Red Damage
|
Proration
|
Cancel
|
Guard
|
| 1000
|
784
|
45% (O)
|
(N), (SP), (EX), (J)
|
L
|
| First Active
|
Active
|
Recovery
|
Frame Adv
|
Circuit
|
Invuln
|
| 14
|
8
|
18
|
-8
|
2.0%
|
High 4-31
|
| [A]
|
Damage
|
Red Damage
|
Proration
|
Cancel
|
Guard
|
| 1000
|
784
|
45% (O)
|
(N), SP, EX, (J)
|
L
|
| First Active
|
Active
|
Recovery
|
Frame Adv
|
Circuit
|
Invuln
|
| 21
|
8
|
18
|
-8
|
2.0%
|
High 4-38
|
|
WLen spins forward and hits low with a kick. Can be cancelled into anything except itself on hit. Can be held to delay the attack slightly and to allow her to special cancel it on block. Minus uncharged but safe if held and special cancelled.
|
| B
|
Damage
|
Red Damage
|
Proration
|
Cancel
|
Guard
|
| 600
|
343
|
100%
|
(N), (SP), (EX), (J)
|
H
|
| First Active
|
Active
|
Recovery
|
Frame Adv
|
Circuit
|
Invuln
|
| 37
|
6
|
5
|
7
|
4.0%
|
Low 5-42
|
| [B]
|
Damage
|
Red Damage
|
Proration
|
Cancel
|
Guard
|
| -
|
-
|
-
|
-
|
-
|
| First Active
|
Active
|
Recovery
|
Frame Adv
|
Circuit
|
Invuln
|
| -
|
-
|
37
|
-
|
-
|
Low 5-21
|
|
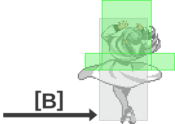
WLen spins forward and hits high with her cat's bell. Very nice for low crush, though a good amount of 2As still hit high enough to win anyway. Opponents should be looking to mash 5A if possible. Can be held to cancel the attack as a feint so you can perform 2A or throw afterwards. Fairly plus, 2B frame traps afterwards.
|
| EX
|
Damage
|
Red Damage
|
Proration
|
Cancel
|
Guard
|
| 200*12, 400*2 (2470)
|
(1754)
|
100%
|
-
|
LHA
|
| First Active
|
Active
|
Recovery
|
Frame Adv
|
Circuit
|
Invuln
|
| 1+5
|
38 (10) 6
|
23
|
-17
|
-100.0%
|
Full 1-3
|
|
A multi-hit combo that hits mid and ends with a wallslam. The last hit is an automatic frame-trap that is as tight as possible, as it hits on the opponent's neutral frame.
|
|
|
|
| A
|
Damage
|
Red Damage
|
Proration
|
Cancel
|
Guard
|
| 1400 / 900 / 700
|
980 / 735 / 539
|
60% (O)
|
-EX-
|
LH
|
| First Active
|
Active
|
Recovery
|
Frame Adv
|
Circuit
|
Invuln
|
| 4
|
10
|
34
|
-26
|
13.0% / 11.0% / 9.0%
|
Full 1-5
|
|
WLen leaps into the air. Can do any air EX moves as a follow up. Her main reversal. Can be cancelled into j.236C to potentially make it safe on block but leaves a gap between the two moves that can lead to it still getting punished by fast or invul attacks as well as some shield follow ups. Can combo on both air and ground CH for some of her highest damage routes, but ground CH conversions are 1f links.
|
| B
|
Damage
|
Red Damage
|
Proration
|
Cancel
|
Guard
|
| 800
|
666
|
100%
|
-SP-, -CH-, -EX-
|
LH
|
| First Active
|
Active
|
Recovery
|
Frame Adv
|
Circuit
|
Invuln
|
| 11
|
10
|
30
|
-22
|
6.0%
|
-
|
| ~214A
|
Damage
|
Red Damage
|
Proration
|
Cancel
|
Guard
|
| -
|
-
|
-
|
-EX-
|
-
|
| First Active
|
Active
|
Recovery
|
Frame Adv
|
Circuit
|
Invuln
|
| 6
|
X
|
9
|
-
|
-
|
-
|
| ~214B
|
Damage
|
Red Damage
|
Proration
|
Cancel
|
Guard
|
| 600*3 (1605)
|
(1125)
|
100%
|
EX
|
LHA
|
| First Active
|
Active
|
Recovery
|
Frame Adv
|
Circuit
|
Invuln
|
| 6
|
9
|
8
|
-
|
6.0%, 5.0*2 (16.0%)
|
-
|
|
WLen leaps into the air but lands further forward than 214A. Can be cancelled into either any j.236X or j.214A/B, even on whiff.
|
| EX
|
Damage
|
Red Damage
|
Proration
|
Cancel
|
Guard
|
| 800, 200*20, 800 (3271)
|
(2324)
|
100%
|
-
|
LHA
|
| First Active
|
Active
|
Recovery
|
Frame Adv
|
Circuit
|
Invuln
|
| 2+4
|
9
|
31
|
-22
|
-100.0%
|
Full 1-5
|
|
A multi-hit combo that hits mid and ends with a wallslam. Hits OTG. Invulnerable startup. Useful for escaping insurance like Nero summons if you hit confirm into it with something like 2B.
|
|
A A B (+ ~4/6 First Hits) B (+ ~4/6 First Hits) EX EX
|
| A
|
Damage
|
Red Damage
|
Proration
|
Cancel
|
Guard
|
| 1000
|
784
|
100%
|
-
|
LH
|
| First Active
|
Active
|
Recovery
|
Frame Adv
|
Circuit
|
Invuln
|
| 55
|
72
|
43
|
-
|
10.0%
|
-
|
|
WLen tosses an ice flower in front of her that persists for ~2 seconds. Distance can be controlled with [4], neutral, or [6].
|
B (1st Hit)
(2nd Hit)
|
Damage
|
Red Damage
|
Proration
|
Cancel
|
Guard
|
| 500, 1000 (1468)
|
(1152)
|
100%
|
-
|
LH
|
| First Active
|
Active
|
Recovery
|
Frame Adv
|
Circuit
|
Invuln
|
68
69
|
68
72
|
49
|
-
|
5.0%, 10.0% (15.0%)
|
-
|
|
WLen tosses a small ice flower in front of her that bounces forward another character space and becomes a large ice flower. Distance can be controlled with [4], neutral, or [6]. Each flower persists for ~2 seconds.
|
| EX
|
Damage
|
Red Damage
|
Proration
|
Cancel
|
Guard
|
| 200*8, 1000 (2528)
|
(1907)
|
100%
|
-
|
LHA
|
| First Active
|
Active
|
Recovery
|
Frame Adv
|
Circuit
|
Invuln
|
| 4+9
|
28 (3) 3
|
16
|
14
|
-100.0%
|
Full 4-53
|
|
WLen tosses multiple ice spears 1-3 character spaces in front of her. It doesn't hit right in front of her and can be jumped on a reaction if the opponent hasn't committed to anything. Not great as a reversal due to it not being invuln until frame 4, but very good as a gap callout in pressure even against stuff like C-Nero 5[C]. Be careful about using this move too much, as the slow startup can sometimes fail to catch opponents in some situations. Plus on block, the "my turn now" move. Cannot be shielded.
|
|
|
|
| A
|
Damage
|
Red Damage
|
Proration
|
Cancel
|
Guard
|
| -
|
-
|
-
|
-
|
-
|
| First Active
|
Active
|
Recovery
|
Frame Adv
|
Circuit
|
Invuln
|
| -
|
-
|
41
|
-
|
-
|
Full 18-28
|
- Mind game teleportation moves best used when the opponent is knocked down outside of corner and you're standing over their body. Combine with 66 and 6[6] for extra mind games.
WLen ducks down, turns into a cat, and reappears a short distance forward.
|
| B
|
Damage
|
Red Damage
|
Proration
|
Cancel
|
Guard
|
| -
|
-
|
-
|
-
|
-
|
| First Active
|
Active
|
Recovery
|
Frame Adv
|
Circuit
|
Invuln
|
| -
|
-
|
35
|
-
|
-
|
Full 1-19
|
|
WLen performs a feint 214 and reappears exactly where she started. This move is invuln like her 214A but can be punished. Mostly used to trip up people blocking DP.
|
| C
|
Damage
|
Red Damage
|
Proration
|
Cancel
|
Guard
|
| -
|
-
|
-
|
-
|
-
|
| First Active
|
Active
|
Recovery
|
Frame Adv
|
Circuit
|
Invuln
|
| -
|
-
|
39
|
-
|
-
|
-
|
|
WLen performs a feint 623 and reappears a short distance forward. This moves far enough to cross up if WLen is point blank. Has a Len catwalk-like hurtbox on frames 5-34.
|
| D
|
Damage
|
Red Damage
|
Proration
|
Cancel
|
Guard
|
| -
|
-
|
-
|
-
|
-
|
| First Active
|
Active
|
Recovery
|
Frame Adv
|
Circuit
|
Invuln
|
| 23
|
X
|
5
|
-
|
-
|
-
|
|
WLen transforms into a cat. In this form, she is unable to do anything including block. Has the same animation as the start of 22A, so it can be used to feint teleport.
|
|
|
|
| A
|
Damage
|
Red Damage
|
Proration
|
Cancel
|
Guard
|
| 1900
|
1470
|
100%
|
-
|
U
(Whiffs vs Air.)
|
| First Active
|
Active
|
Recovery
|
Frame Adv
|
Circuit
|
Invuln
|
| 5
|
1
|
29
|
-
|
0.0%
|
-
|
|
WLen grabs the opponent and tosses them forward. No action can be taken until the opponent hits the ground.
|
| B
|
Damage
|
Red Damage
|
Proration
|
Cancel
|
Guard
|
| 2200
|
1470
|
100%
|
-
|
U
(Whiffs vs Air.)
|
| First Active
|
Active
|
Recovery
|
Frame Adv
|
Circuit
|
Invuln
|
| 12 ~ 32
|
1
|
29
|
-
|
0.0%
|
-
|
|
WLen runs forward a short distance and attempts to grab the opponent. No action can be taken until the opponent hits the ground.
|
| EX
|
Damage
|
Red Damage
|
Proration
|
Cancel
|
Guard
|
| 600 (528)
|
(431)
|
60%
|
(SP), (EX), (J)
|
U
(Whiffs vs Air.)
|
| First Active
|
Active
|
Recovery
|
Frame Adv
|
Circuit
|
Invuln
|
| 4+0
|
1
|
29
|
-
|
-100.0%
|
Full 5
|
|
WLen grabs the opponent and tosses them forward. Can combo afterwards with a special or jump cancel.
|
|
Aerial Specials
|
|
| A
|
Damage
|
Red Damage
|
Proration
|
Cancel
|
Guard
|
| 800
|
539
|
100%
|
-
|
LHA
|
| First Active
|
Active
|
Recovery
|
Frame Adv
|
Circuit
|
Invuln
|
| 12
|
12
|
8
|
-9 (TK)
|
10.0%
|
-
|
|
WLen sends an ice spike forward aiming low.
|
| B
|
Damage
|
Red Damage
|
Proration
|
Cancel
|
Guard
|
| 800
|
539
|
100%
|
-
|
LHA
|
| First Active
|
Active
|
Recovery
|
Frame Adv
|
Circuit
|
Invuln
|
| 9
|
12
|
8
|
-13 (TK)
|
11.0%
|
-
|
|
WLen sends an ice spike forward aiming high. Very important neutral tool if tk'd, reducing its recovery.
|
| EX
|
Damage
|
Red Damage
|
Proration
|
Cancel
|
Guard
|
| 600*8 (2752) (*)
|
(2470)
|
90% (M)*8
|
-
|
LHA
|
| First Active
|
Active
|
Recovery
|
Frame Adv
|
Circuit
|
Invuln
|
| 1+19
|
29
|
8
|
19 (TK)
|
-100.0%
|
Full 1-13
|
|
WLen sends eight ice spikes at random positions diagonally downwards from her.
|
|
|
|
| A / [A]
|
Damage
|
Red Damage
|
Proration
|
Cancel
|
Guard
|
| -
|
-
|
-
|
-EX-
|
-
|
| First Active
|
Active
|
Recovery
|
Frame Adv
|
Circuit
|
Invuln
|
| 6 / 16
|
X
|
9
|
-
|
-
|
-
|
|
WLen quickly descends back to the ground. Held version keeps her airborne slightly longer, but has a fast acceleration speed. Held version passes through opponents as well.
|
| B
|
Damage
|
Red Damage
|
Proration
|
Cancel
|
Guard
|
| 800*3 (2142)
|
(1650)
|
100%
|
EX
|
LHA
|
| First Active
|
Active
|
Recovery
|
Frame Adv
|
Circuit
|
Invuln
|
| 5 (6)
|
9 (4)
|
8
|
-19 (TK)
|
6.0%, 8.0%, 7.0% (21.0%)
|
-
|
|
WLen leaps forward. If she makes contact with the opponent, she'll perform a flip kick. Ends combos unless proceeded by an EX move, usually j.214C. The backwards hitbox HKDs, which stops people on the ground chasing you while you're in the air. Also can combo into basketball, leading to a full air conversion.
|
| EX
|
Damage
|
Red Damage
|
Proration
|
Cancel
|
Guard
|
| 400, 450, 500 (1193)
|
(998)
|
65% (M)
|
(N), (SP), (EX), (J)
|
LHA
|
| First Active
|
Active
|
Recovery
|
Frame Adv
|
Circuit
|
Invuln
|
| 1+5
|
6
|
8
|
-20 (TK)
|
-100.0%
|
Full 1, High 2-3
|
|
WLen leaps forward. If she makes contact with the opponent, she'll perform a flip kick that's fully cancellable after the third hit, usually into air throw.
|
|
Arc Drive
|
|
| Damage
|
Red Damage
|
Proration
|
Cancel
|
Guard
|
| 440*N
|
352*N
|
50% (O)
|
-
|
LHA
|
| First Active
|
Active
|
Recovery
|
Frame Adv
|
Circuit
|
Invuln
|
| 8+9
|
X
|
38
|
-7 (min)
|
removes all
|
Full 1-8, Clash 17-X
|
|
Sends out a slow moving orb that hits multiple times and clashes with other hitboxes. If it hits or is blocked, you can run an opponent to the corner.
|
|
Another Arc Drive
|
|
| Damage
|
Red Damage
|
Proration
|
Cancel
|
Guard
|
| 0, 700*32 (4779)
|
(3725)
|
50% (O)
|
-
|
LHA
|
| First Active
|
Active
|
Recovery
|
Frame Adv
|
Circuit
|
Invuln
|
| 8+0
|
X
|
70
|
-38 (min)
|
removes all
|
Full 1-58
|
|
Sends out a fast orb that, if hits, goes into a cutscene. Do not use this in a combo unless you feel like giving your opponent 100 or more meter.
|
|
Last Arc
|
|
| Damage
|
Red Damage
|
Proration
|
Cancel
|
Guard
|
| 1000, 500*6, 5000 (3827 ~ 7285)
|
(2864 ~ 5424)
|
50% + 50% * remaining BH time
|
-
|
U
|
| First Active
|
Active
|
Recovery
|
Frame Adv
|
Circuit
|
Invuln
|
| 4+0
|
1
|
46
|
-
|
removes all
|
Full 1-4
|
|
A full screen Last Arc. Like other "catch" Last Arcs, it will miss characters that have been downed for whatever reason or characters with temporarily missing hitboxes such as C/F-Nero's forward dash.
|
|
MBAACC Navigation
