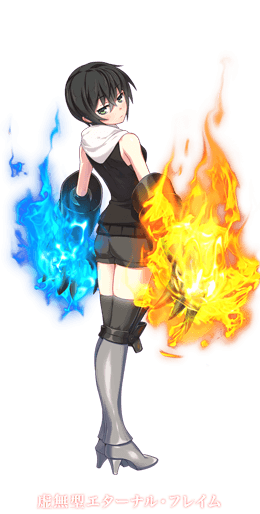
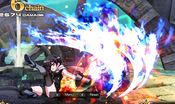
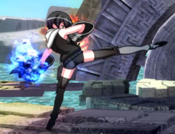
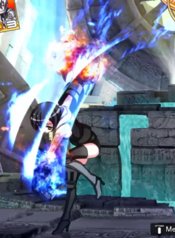
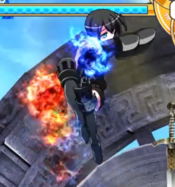
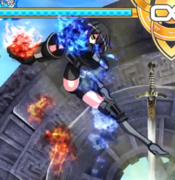
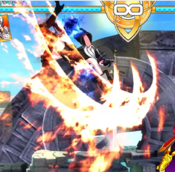
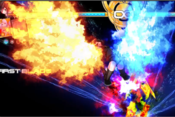
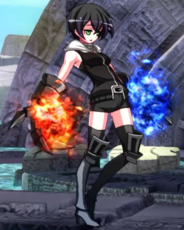
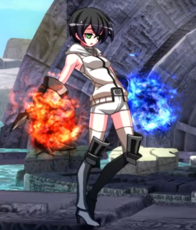
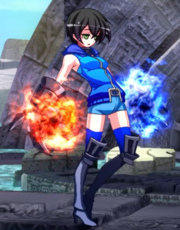
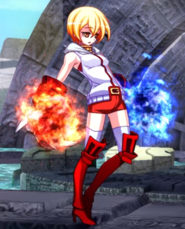
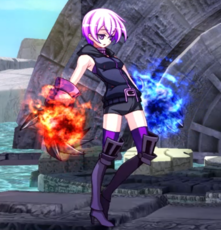
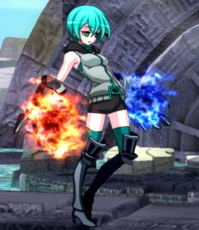
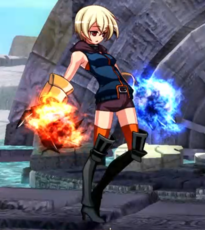
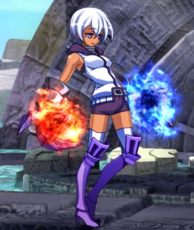
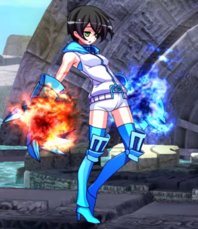
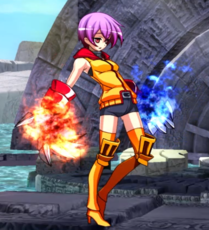
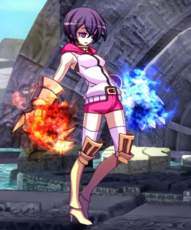
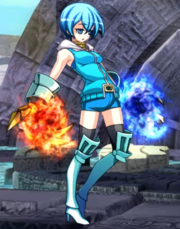
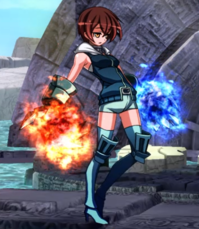
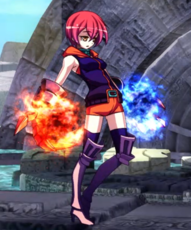
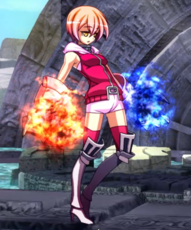
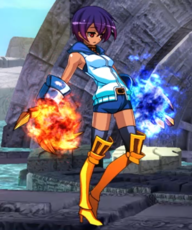
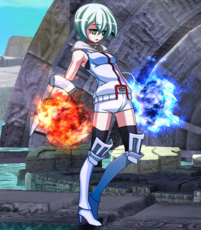
 Eternal Flame
Profile
- EN Name: Void Eternal Flame
- JP Name: 虚無型エターナル・フレイム
- Voice Actress: Juri Nagatsuma
- Element: Fire
- Health: 19500
Overview
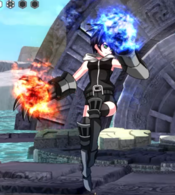
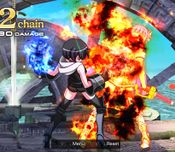
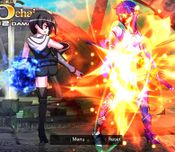
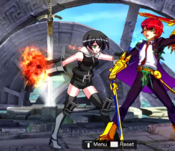
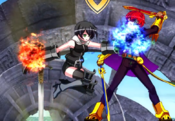
Close-to-midrange character with many large normals. Has the fastest run speed in the game. A large majority of her moveset procs the fire element, allowing her to get combos involving the elemental damage multiplier quite easily.
Strengths/Weaknesses
| Strengths |
Weaknesses
|
- Fastest movement (Run/Airdash) in the game
- Very good frame data with a range of fast buttons, large stagger windows and lots of + frames
- Insane corner carry, Normal throw is a godpress and 236XX will cover an absurd distance on hit.
- Great mixup with tick throw/63214D
- Dash, 2B, 2C, and 236X can low profile
- Can self-stack fire element for consistently high damage
- High base damage elemental super (623XX)
- Bionic arm
|
- Has a long sliding animation after running which can cause issues in re-establishing pressure
- Signifcant non-cancellable dash startup
- Buttons are overall not great at contesting neutral, especially air to air
- Command grab is the only throw in the game that can be rolled through.
- Bad backwards movement
- DP can be made to whiff easily
|
Recommended Support Knights
- Evaline: 1-cost ice assist, gives Eternal Flame a projectile to use, lets her combo off her J.D and confirm off it, and lets her counter hit with 5D for corner carry
- Enide: 1-cost wind assist that, when pair with Evaline, lets Eternal Flame get easy corner carry and gives her more opportunities to confirm into her high damage corner routes
- Balin: 2-cost fire assist, can be used as a good combo tool to add more damage and also functions as an addition neutral tool. Also lets you do DP+Assist as a defensive option
- Mordred: 3-cost fire assist, used purely for augmenting her already high damage output. Trades flexibility and consistency for the ability to meter dump for high damage
Normal Moves
5A
5A
|
| Damage
|
Guard
|
Startup
|
Active
|
Recovery
|
Frame Adv
|
Starter Scaling
|
Combo Scaling
|
Element
|
| 500
|
M
|
6
|
-
|
-
|
-1
|
-
|
-
|
-
|
Standard jab. Short range
|
|
5AA
5AA
|
| Damage
|
Guard
|
Startup
|
Active
|
Recovery
|
Frame Adv
|
Starter Scaling
|
Combo Scaling
|
Element
|
| 700
|
M
|
6
|
-
|
-
|
+1
|
-
|
-
|
Fire
|
Gut punch. +1 on block. Good stagger window, Decent hitbox for a jab follow-up, great for frame traps and has fire element. What more to ask for?
|
|
5AAA
5AAA
|
| Damage
|
Guard
|
Startup
|
Active
|
Recovery
|
Frame Adv
|
Starter Scaling
|
Combo Scaling
|
Element
|
| 400*3
|
M
|
12
|
-
|
-
|
+3
|
-
|
-
|
-
|
Lightning Legs. +3 on block but has considerable pushback. For when you need to frame trap them again.
|
|
5AAAA
5AAAA
|
| Damage
|
Guard
|
Startup
|
Active
|
Recovery
|
Frame Adv
|
Starter Scaling
|
Combo Scaling
|
Element
|
| 1800
|
M
|
11
|
-
|
-
|
-4
|
-
|
-
|
Fire
|
Identical animation to 2C(2). However it is not a low and doesn't knock down. Impossible to frame trap with due to 5AAA's cancel window.
|
|
5AAAAA
5AAAAA
|
| Damage
|
Guard
|
Startup
|
Active
|
Recovery
|
Frame Adv
|
Starter Scaling
|
Combo Scaling
|
Element
|
| 2400
|
M
|
17
|
-
|
-
|
-5
|
-
|
-
|
-
|
236-esque auto-combo ender. Builds meter. Lucky last frame trap for the road. Can't perform rekka followups from this move.
|
|
5B
5B
|
| Damage
|
Guard
|
Startup
|
Active
|
Recovery
|
Frame Adv
|
Starter Scaling
|
Combo Scaling
|
Element
|
| 1000
|
M
|
9
|
-
|
-
|
-5
|
-
|
-
|
-
|
Surprisingly large range poke. Reaches as far as 2C. Can't combo into 5C at max range but can combo into 236B.
|
|
5C
5C
|
| Damage
|
Guard
|
Startup
|
Active
|
Recovery
|
Frame Adv
|
Starter Scaling
|
Combo Scaling
|
Element
|
| 1900
|
M
|
14
|
-
|
-
|
-5
|
-
|
-
|
Fire
|
Large range but significant whiff recovery. Risky to use as a poke. Can combo into 236B at max range. Can gatling into 2C indefinitely if it wasn't for pushback, as 5C>2C>5C>2C... is possible on block and on hit.
|
|
6C
6C
|
| Damage
|
Guard
|
Startup
|
Active
|
Recovery
|
Frame Adv
|
Starter Scaling
|
Combo Scaling
|
Element
|
| 1400
|
M
|
11f
|
-
|
-
|
-8
|
-
|
-
|
Fire
|
Anti-air. Reaches slightly behind EF to hit cross-ups. Launches on hit. Not much horizontal range but the vertical range isn't bad.
|
|
2A
2A
|
| Damage
|
Guard
|
Startup
|
Active
|
Recovery
|
Frame Adv
|
Starter Scaling
|
Combo Scaling
|
Element
|
| 400
|
M
|
6
|
-
|
-
|
-4
|
-
|
-
|
-
|
Standard crouching jab. Can gatling into itself twice before auto-combo.
|
|
2B
2B
|
| Damage
|
Guard
|
Startup
|
Active
|
Recovery
|
Frame Adv
|
Starter Scaling
|
Combo Scaling
|
Element
|
| 900
|
L
|
8
|
-
|
-
|
-8
|
-
|
-
|
-
|
Low poke. Fairly short range but can sometimes low profile.
|
|
2C
2C
|
| Damage
|
Guard
|
Startup
|
Active
|
Recovery
|
Frame Adv
|
Starter Scaling
|
Combo Scaling
|
Element
|
| 1200*2
|
L/M
|
13
|
-
|
-
|
0
|
-
|
-
|
Fire
|
Only first hit is a low. Second hit has slightly further range. Neutral on block, great pressure tool and poke with good range. Just don't whiff. Can gatling into 5C indefinitely if it wasn't for pushback, as 2C>5C>2C>5C... is possible on block and on hit.
|
|
j.A
j.A
|
| Damage
|
Guard
|
Startup
|
Active
|
Recovery
|
Frame Adv
|
Starter Scaling
|
Combo Scaling
|
Element
|
| 500
|
H
|
7
|
-
|
-
|
-
|
-
|
-
|
-
|
Air to air jab. Short range but can chain into itself infinitely.
|
|
j.B
j.B
|
| Damage
|
Guard
|
Startup
|
Active
|
Recovery
|
Frame Adv
|
Starter Scaling
|
Combo Scaling
|
Element
|
| 800
|
H
|
8
|
-
|
-
|
-
|
-
|
-
|
-
|
Fairly small hitbox and angled 45* can make it awkward to hit. Not a great air normal but its there when you need a fast air to ground button.
|
|
j.C
j.C
|
| Damage
|
Guard
|
Startup
|
Active
|
Recovery
|
Frame Adv
|
Starter Scaling
|
Combo Scaling
|
Element
|
| 1800
|
H
|
13
|
-
|
-
|
-
|
-
|
-
|
Fire
|
Infamous air dash jump-in button. A big enough hitbox to hit behind EF and a large amount of untech time with fire element makes it a staple in both neutral and combos. Not jump cancellable on hit or block.
|
|
Elemental Attacks
5D
Melt
5D
|
| Damage
|
Guard
|
Startup
|
Active
|
Recovery
|
Frame Adv
|
Starter Scaling
|
Combo Scaling
|
Element
|
| 2500
|
M
|
23
|
-
|
-
|
-9
|
-
|
-
|
Fire, Strike
|
Wall bounces on hit. Causes wall bounce into slump on ground counter-hit. Can delete projectiles during active frames and can hit behind. Big frame trap button with good reward.
|
|
2D
Phosphorus
2D
|
| Damage
|
Guard
|
Startup
|
Active
|
Recovery
|
Frame Adv
|
Starter Scaling
|
Combo Scaling
|
Element
|
| 1500,500*4
|
M
|
14
|
-
|
-
|
-2
|
-
|
-
|
Fire, Strike(1), Projectile
|
Gunflame! Amazing pressure tool. Can be up to +23 on block at max range and recovers fast enough to still establish pressure if the opponent rolls through.
|
|
j.D
Blaze
j.D
|
| Damage
|
Guard
|
Startup
|
Active
|
Recovery
|
Frame Adv
|
Starter Scaling
|
Combo Scaling
|
Element
|
| 3200
|
M
|
14
|
-
|
-
|
-
|
-
|
-
|
Fire, Projectile
|
The button that makes EF impossible to anti air. EF blasts below her with a huge hitbox and can delete projectiles. Bounces back during active frames and recovers airborne. Knocks down on hit. Not an overhead
|
|
Throws
5/6B+C
Forward Throw
5/6B+C
|
| Damage
|
Guard
|
Startup
|
Active
|
Recovery
|
Frame Adv
|
Starter Scaling
|
Combo Scaling
|
Element
|
| 2500
|
Throw
|
7
|
-
|
-
|
-
|
-
|
-
|
Fire
|
God press on a normal throw? God bless. EF carries the opponent to the edge of the screen infront of her before slamming them. Air techable.
|
|
4B+C
Back Throw
4B+C
|
| Damage
|
Guard
|
Startup
|
Active
|
Recovery
|
Frame Adv
|
Starter Scaling
|
Combo Scaling
|
Element
|
| 2500
|
Throw
|
7
|
-
|
-
|
-
|
-
|
-
|
Fire
|
God press on a normal throw? God bless. EF carries the opponent to the edge of the screen behind her before slamming them. Air techable.
|
|
j.B+C
Air Throw
j.B+C
|
| Damage
|
Guard
|
Startup
|
Active
|
Recovery
|
Frame Adv
|
Starter Scaling
|
Combo Scaling
|
Element
|
| 2500
|
Throw
|
7
|
-
|
-
|
-
|
-
|
-
|
Fire
|
God press in the air. Same as her ground throws.
|
|
Special Moves
236A/B/C
Back Blow
236A/B/C Grand Viper Grand Viper
|
| Version
|
Damage
|
Guard
|
Startup
|
Active
|
Recovery
|
Frame Adv
|
Starter Scaling
|
Combo Scaling
|
Element
|
| 236A
|
1600
|
M
|
13
|
-
|
-
|
-8
|
-
|
-
|
-
|
| 236B
|
2000
|
M
|
17
|
-
|
-
|
-6
|
-
|
-
|
-
|
| 236C
|
2400
|
M
|
28
|
-
|
-
|
+2
|
-
|
-
|
-
|
Each version travels increasingly further. Can low profile and is invulnerable to mid/high attacks while dashing until 1F before active.
|
|
236A/B/C~236A/B/C
Heat Scorcher
236A/B/C during Back Blow
|
| Version
|
Damage
|
Guard
|
Startup
|
Active
|
Recovery
|
Frame Adv
|
Starter Scaling
|
Combo Scaling
|
Element
|
| 236A
|
300*3
|
M
|
8
|
-
|
-
|
-7
|
-
|
-
|
Fire
|
| 236B
|
400*5
|
M
|
8
|
-
|
-
|
-9
|
-
|
-
|
Fire
|
|
|
| 236C
|
1800
|
M
|
10
|
-
|
-
|
-12
|
-
|
-
|
Fire
|
|
|
|
623A/B/C
Heat Inferno
623A/B/C
|
| Version
|
Damage
|
Guard
|
Startup
|
Active
|
Recovery
|
Frame Adv
|
Starter Scaling
|
Combo Scaling
|
Element
|
| 623A
|
1000,2000
|
M
|
7
|
-
|
-
|
-
|
-
|
-
|
Fire
|
| 623B
|
1400,2400
|
M
|
7
|
-
|
-
|
-
|
-
|
-
|
Fire
|
Only B version is a reversal
|
| 623C
|
500,2600*2
|
M
|
6
|
-
|
-
|
-
|
-
|
-
|
Fire
|
|
|
| j.623X
|
1200,2000
|
M
|
10
|
-
|
-
|
-
|
-
|
-
|
Fire
|
All air versions are identical. Not a reversal.
|
|
63214D
Heat Burst
63214D
|
| Damage
|
Guard
|
Startup
|
Active
|
Recovery
|
Frame Adv
|
Starter Scaling
|
Combo Scaling
|
Element
|
| 2500
|
Throw
|
10
|
3f
|
-
|
-
|
-
|
-
|
Fire
|
Psuedo-grab. Cannot be cancelled or comboed into, Can be rolled through but is still subject to other throw invulnerabilities.
|
|
Million Skill
236XX
Blazing Hands
236XX
|
| Damage
|
Guard
|
Startup
|
Active
|
Recovery
|
Frame Adv
|
Starter Scaling
|
Combo Scaling
|
Element
|
| 5900(1567)
|
M
|
15
|
-
|
-
|
-
|
-
|
-
|
Fire
|
Knocks down on hit. Not invincible. pretty much exclusively a combo tool, but has absurd corner carry
|
|
623XX
Magic Turret
623XX
|
| Damage
|
Guard
|
Startup
|
Active
|
Recovery
|
Frame Adv
|
Starter Scaling
|
Combo Scaling
|
Element
|
| 1500,240*90
|
M
|
9
|
-
|
-
|
-27
|
-
|
-
|
Fire
|
Does more damage the closer to the opponent EF is. Extremely positive if the opponent blocks projectiles.
|
|
Million Excalibur
World Blaze-Out
214XX
|
| Damage
|
Guard
|
Startup
|
Active
|
Recovery
|
Frame Adv
|
Starter Scaling
|
Combo Scaling
|
Element
|
| 8890
|
M
|
12
|
-
|
-
|
-24
|
-
|
-
|
Fire
|
Full screen punish and combo ender Requires matchup knowledge/ proper assists to punish consistently, as void will pass through the opponent, usually leaving her a full screen away unless she puts herself in the corner.
|
|
Combos
Solo Combos
Midscreen
Autocombo for hard knockdown and meter gain.
- 5AA > 5C > 2C(1) > 5C > 236B > 236C (4625)
Highest damage advantageous 5A confirm with no resource usage. (5AA>6C>623C does 18 more damage, but resets to neutral.)
- 5AA > 5C > 2C(1) > 5C > 236XX (6190)
High damage solo super confirm.
- 5AA > 5C > 2C(1) > 5C > 236XX > EB > 236XX (8327)
300 meter combo. Microdash may be needed if not close to corner.
- 5AA > 6C > jc > j.C > j.D > IAD (4347)
j.D knockdown from midscreen 5A.
- (on crouch) 5AA > 5C > 5D > run up > 6C > jc > j.C > j.D (5519)
Meterless crouch confirm.
- 623B>dl j.C> 6c>jc>j.B>jc>j.B>j.D
Combo off of meterless reversal.
Corner
- 5AA > 6C > 5D > 6C > 623XX (7016-7464)
Final damage depends on how close you can get before the 6C.
- 63214D > microdash > 6C > 5D > 6C > jc > j.C > j.D (3955)
Highest damage meterless solo unblockable combo with knockdown.
- 63214D > microdash > 6C > 5D > 5C > 236XX (5725)
- 63214D > microdash > 6C > 5D > 6C > 623XX (6723)
Support Knight Combos
Midscreen
2 Mana, 100 Meter:
- 5AA > 2C(1) > 5C > Evaine > dash Enide > dash 6C > iad j.C > land 623XX > airdash j.B > j.C > land 6C> jc > j.C > j.D (7781)
- 5AA > 5C > 2C(1) > 5C > Mercenary > dash 5C > 236XX (7989)
- 5AA > 6C > 623C > Mercenary > airdash j.C > land 623XX (9821)
2 Mana, 200 Meter:
- 5A > 5B > 5C > Evaine > dash Enide > dash 6C > 623A > land 623XX > airdash j.B > j.C > land 623XX (10754)
- 5A > 5B > 5C > Evaine > dash Enide > dash 6C > 623A > land 623XX > airdash j.B > j.C > land 5AA > 5C > 236XX (9760)
4 Mana, 200 Meter:
- 5A > 5B > 5C > Evaine > dash Enide > dash 6C > 623A > land 623XX > j.623B > Mercenary > airdash j.C > land 623XX (12849)
- 5AA > 2C(1) > 5C > Evaine > dash Enide > dash 6C > iad j.C > land 623XX > j.623B > Mercenary > land > 236XX (11090)
- 5A > 5B > 5C > Evaine > dash Enide > dash 6C > 623A > land 623XX > j.623B > Balin > airdash j.C > land 623XX (12448)
- 5A > 5B > 5C > Evaine > dash Enide > dash 6C > 623A > 6C > 5D > 2C(1) > 5C > 623A(1) > Balin > land 5C > 236XX (9614)
- 63214D > Mercenary > Evaine > dash Enide > dash 6C > iad j.C > land 623XX > airdash j.B > j.C > land 623XX (9145)
Midscreen unblockable confirm.
Corner
2 Mana 100 Meter:
- 5AA > 2C(1) > 5C > 623B > Mercenary > land 5C > 236XX (8413)
- 63214D > microdash > 6C > 5D > 2C(1) > 5C > 623A(1) > Balin > land 5C > 236XX (7652)
- 63214D > microdash > 6C > 5D > 2C(1) > 5C > 623A(1) > Balin > airdash j.C > land 623XX (8760)
Videos
Colors
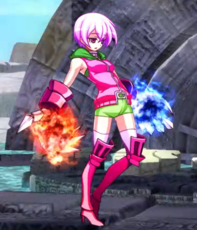
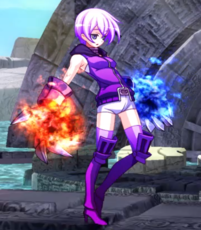
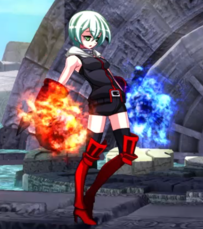
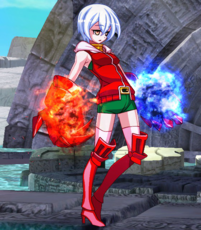
Note: Colors 20 and 21 were pre-order exclusives for JP PSN and Amazon respectively. Unfortunately, they aren't selectable on Steam without the use of Cheat Engine.
External Links
| General
|
|
|
|
| Characters
|
|
|
|
| Fire
|
|
| Ice
|
|
| Wind
|
|
| No Element
|
|
