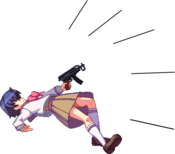
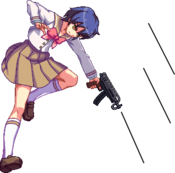
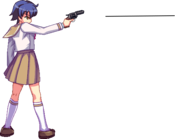
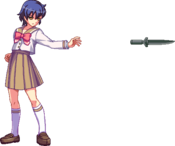
Nitroplus Blasterz: Heroines Infinite Duel/Ein
Profile
Name: Ein, a.k.a. "Phantom"
Debuted in: Phantom - PHANTOM OF INFERNO
Voice Actor: Ayahi Takagaki (高垣彩陽)
Introduction: A girl codenamed "Phantom". She was the strongest assassin for the secret organization known as Inferno. A cold-blooded killer with no known past, she changed when she met her partner. Together with him, she escaped the organization, and the two of them are now on the run.
Summary
Ein has normals with great startup, reach and hitboxes, as well as having the fastest mobility of any character. With extremely fast projectiles that can quickly create a gap and a command grab, she’s a character who can fight well at any range and positioning. To balance those strengths out, she has the lowest health of any character and weak reversal options, so when an opponent gets in or she makes a mistake in movement, it’s not uncommon for her to just lose. Ein is tough to use for beginners to fighting games, but capable in the hands of an intermediate or higher level player.
Command List
If you are having trouble reading inputs, check out the Notation section!
Movement
As mentioned above, Ein is top of the class in terms of mobility, largely due to her run, which is extremely fast (in contrast to her rather small 5D), and her forward airdash covers more space than anyone else's
Normals
5A 2A [6A / cl.B] st.B 2B 5C 2C [5E/2E] is basic chain route. Any deviations from that route will be noted as an additional or limited.
5A
|
|---|
6A
|
|---|
c.5B
|
|---|
f.5B
|
|---|
5C
|
|---|
5E / 5[E]
|
|---|
2A
|
|---|
2B
|
|---|
2C
|
|---|
2E
|
|---|
jA
|
|---|
jB
|
|---|
jC
|
|---|
jE
|
|---|
BC Ground Throw Ground Throw
|
|---|
jBC Air Throw Air Throw
|
|---|
Specials
Palm stroke
623A/B/C |
|---|
Vz61 Scorpion 214A/B/C / j214A/B/C A A B B C C
|
|---|
Chris Reeve's Edge 41236A/B/C Nani?! Nani?!
|
|---|
Supers
Palm stroke Combo
623AB |
|---|
Colt Python
236AB |
|---|
.44 Automag
j214AB |
|---|
Variable Rush
All Variable Rushes allow you to do a sequence of attacks depending on if you hit the A, B, or C button. If you press nothing, the VR will end. If your VR is blocked, you have the option to press nothing, or keep attacking. Even if you keep attacking, you could still stop at any time, assuming you don't execute the final attack.
Depending on what combination of buttons you use, you can come up with some useful strings.
CE
|
|---|
Lethal Blaze
GEPARD-M1
236236BC |
|---|
Combos
Please check out the Notation section, for help on understanding how to read and write combos!
Meterless
2A 2B 2E 214C > j.B dj9.B E
2A 2B 2E 214C > j.B dj9.B C 214AB
2A 2B 2E 214C > (delay) j.C > (land) 66 214B > 6A > j9.B > dj9.B E
- Meterless combos from a sweep. You need to be close enough for C Scorpion to juggle, so don’t expect this to work from long range, but it’ll do higher damage than longer ranged confirms. Rather than fishing for this route at neutral, expect to hit this from okizeme or from a jump-in. Tack on a .44 Auto Magnum for extra damage if it’ll kill.
(corner) ...2C>623C, dash 5A>6A>214B, 6A>j.B>j.C>j.214C, j.B>j.C>j.B>j.E
Standard corner route. The dash on the 5A needs to be very deep, make sure to buffer it. The second 6A will also drop if the confirm string contains 3 or more A moves or 2 or more Bs, so do something different in that situation.
(corner) ...2C>623C, dash 5A>6A, j.A>j.B>j.C>jc>j.C>j.E.
For when you have too much proration on your string to do the previous combo, or just don't feel confident that you'll hit it.
(near corner) 5A>5C>5E>623C, dash 5A>6A>j.A>j.B>j.C>j.C>j.E.
(corner) 5A>5C>5E>5D, 5A>6A>j.B>j.E>j.214C, j.B>j.C>j.B>j.E.
For when you get the rare 5C confirm. If you input the 5C as B+C, you’ll option select a throw break against an opponent’s vanishing guard.
6A>j.A>j.B>j.C>j.B>j.E
Standard anti-air confirm with a knockdown.
(corner) dash 6A>214B, 5C>623C, dash 5A>6A>j.B>j.C>j.B>j.E.
For when you absolutely know they're going to try to jump out of your corner game and need to tell them to sit down, although j.C is pretty good at that too.
j.C air-to-air>j.D > j.C 214A
(j.C air-to-air>j.D > j.C 214C > j.B 214B
j.C air-to-air counter hit>j.D, delay j.C, dash 6A> j.A>air combo to j.E
(near corner) j.C air-to-air counter hit>j.D, delay j.C, dash 6A>214B, (dash) 5C>623C, dash 5A>6A>air combo.
(corner) j.C air-to-air counter hit>j.D, delay j.C, dash 6A>j.214B, dash 6A>214B, c.B>6A>air combo.
j.C on regular hit doesn't give you much, but on counter hit it really, really hurts for how many situations you can get the confirm in, especially in the corner.
j.E air CH, dash 6A>214B, dash 6A>air combo.
(corner) j.E CH, dash 6A>j.214B, dash 6A>214B, 5C>623C, dash 5A>6A>air combo.
j.E has a very good box for people below you, and if you score that corner counter hit they basically just die, so don't be afraid to try it instead of j.C.
Throw(1)>j.D, delay j.C, dash 214B, dash 6A>air combo.
(in or near corner) Throw(1)>j.D, delay j.C, dash 214B, dash 5C>623C, dash 5A>6A>air combo.
Confirms for throw. Also doable from airthrow, which also needs less distance from the corner for the second to work. The midscreen variant, meanwhile, has almost full corner carry, which is nice.
Meter Extensions
...2C>623AB, dash 6A> air combo.
For when you only have one stock and need to squeeze out a little more damage for the kill. Also works from Chris Reeve.
Any air combo>j.214A>j.214AB, 236AB/>Assist cancel, (delay) Variable Rush.
Generally what you end rounds with. The Variable Rush can be extended long enough using the A ender to combo into slow, damaging assists like Carol, so it can be worth choosing those. This is also possible from 214B, though that only really pops up in Extend Blast sequences.
- 2B 2E blast 214B 6D 66214B 66 5B 6A air combo
Assist Extensions
Most reasonably fast assists (Henri, Franco etc.) can be combo'd similarly to the sequences shown in the above sections. This one is just going to detail where you can squeeze out more damage through less orthodox ones.
- (near corner) 5/2B>2C>623B>Amy, dash 6A(Amy hits)>delay j.214B, dash 6A>214B, 5C>623C, dash 5A>6A>air combo.
Actually monstrous damage for a confirm that regular. Amy is also good at restricting movement, which is something Ein wants, so she's a reasonable choice.
- j.C air hit>j.D, j.C>Amy, j.214B (Amy Hit), dash 6A>214B, dash 6A>air combo/dash 5C>623C etc.
She also makes your non-CH j.C hits significantly more rewarding. What a good, good girl.
Blocked move>Sakura, B Chris Reeve, 2A>5C>623C, dash 5A>6A>air combo.
For reasons seemingly unrevealed, canceling into Sakura specifically from a close enough move, then landing a Chris Reeve immediately after won't switch sides, and the B version has little enough recovery to combo after. Sakura is probably better used for oki, and it's not too much damage, but if you think the mixup will work (or just want to make people ask what exactly happened there), then go for it.
- 214A>Miyuki>dash~214B>dash 6A>air combo.
This doesn't exactly fit the stipulation of "less orthodox", but its included because its one of the best ways of converting A Scorpion, turning it from a nuisance to an actual threat without the need for meter. If they're nearer to the corner, you can do dash 5C>623C etc. instead of the 6A, although you have to hit the 5C kind of lower than usual to make the 623C hit.
- 214A>Akane, j.214B, dash 6A>air combo/5C>623C etc.
Another assist that lets you convert well off A Scorpion. You can push them forward with the dash for a good amount of time and still be able to follow up, so the corner carry is good.
- (air combo starter)> jB>jC>j(214B)>j214A+B > dragon > 214A > (double jump 214A+B or 214B after dragon hits)
- (corner) 2B>2C>623x>Akane>Dargon>236236B+C
A corner only way to combo into level 3, may take practice to get aim right
- 41236x>Henri/Franco>Dragon>236236B+C>aim
harder to aim midscreen
- 2B>2C>(corner 623x)>Franco>Dragon>236236B+C
Extend Blast Confirms
1/2 Hit string>EB, dash 5B>6A>5C>2E>214A>j.D, delay j.C, dash 214B, 5C>623C>5D, 5A>6A>air combo>j.214AB, 236B/>Assist cancel, Variable A ender.
Big numbers if you have all the resources plus a Carol. If you want to make this more burst safe, or just don't have an assist, you can do 623B>5D 214B then super instead of the 623C and land quick enough to connect Variable after.
(corner) Chris Reeve>EB, back throw>j.D, j.C>delay j.214B, 623C>5D, c.B>6A>air combo(>super extension).
Strategy
Neutral
Using Scorpion
Ein’s Scorpion is strong not only because of its movement and startup speed, but also because she doesn’t have to care if it hits or is blocked, only if it misses. Aim for making contact with the opponent rather than hitting them. 1 – C Scorpion is the version you’ll use the most. 2 – A Scorpion will miss if the opponent ducks, so you can’t just do it constantly, but you can mitigate that by using the ground version to catch a landing opponent and force them to take some chip, or as a counter to an opponent’s standing moves. 3 – B Scorpion is best for poking at an opponent above and far away from Ein. It’s safe as long as even one bullet touches the opponent, and sets up for using C or A Scorpion while the opponent falls after blocking.
Meeting Approaches
When your opponent has a life deficit, it’s easy to make them hang themselves on your normals. Keep these in mind as your main strategy in those situations. 1. 2B and 2C as your main ground pokes 2. 6A and trip guard 2C as your main anti-airs, as well as jC and airthrow as your main air-to-airs 3. Keep forward jumps, airdashes and Escape in mind as varied angles the opponent could approach from
Each of these options can be hitconfirmed into combos. Ending that combo with a j.E and using Ein’s okizeme to score a stronger hit is the best plan.
Okizeme
Jump-in or Late Airdash
This is the basic oki that can be used following a j.E combo ender or a Chris Reeve. Easy to set up a safejump by just holding up-forward after j.E, from which you have a few options. Jump-in A or B, empty jump followed by a low with 5A or a throw. When going for a late airdash, use j.A j.B then land with 5A. If you manage to jump over the opponent, j.A and j.B both have crossup hitboxes, so you can also air backdash into them with that same chain.
Mixups
5A
Ein’s 5A is likely the best standing low in the game. It’s also jump cancellable, so you can easily move into an overhead from it. It’s great as a meaty, as well as being very strong against air Vanishing Guard because it doesn’t hit an opponent in the air very easily. Blasterz has slow jabs in general, so it’s still a relatively weak option in some mixups against an opponent mashing their own jab or a throw.
j.C Whiff
Ein’s j.C is really hard to hit a grounded opponent with, so it’s good as a whiff to throw off the opponent. On landing, you can go for 5A or throw. Since it’s such a good air-to-air it’ll also catch an opponent trying to jump out. Like 5A, this is also weak to an opponent mashing jabs or throw out of your pressure.
Crossups
Ein has multiple jump attacks with great crossup hitboxes (jA, jB and jE). jB is a great standard crossup when you jump over the enemy. jA is useful on the opponent’s wakeup because of its long active frames. Crossup into air backdash crossup jB, jD to crossup the opponent, air-turning jA, meaty short-hop jA crossups, etc. Ein’s got a lot of wiggle room to make her crossups difficult to see, but you also need to worry about Vanishing Guard. It blocks on both sides, so pair her crossup ability with a Partner Blitz to force the opponent into guessing.
Chris Reeve
Ein’s command grab is a constant threat during all of her other mixups. It’s effective even when she throws it out from mid-range. Since you can cancel normals into it, it’s also a strong option to beat an opponent’s attempts to mash out. Cover an opponent’s attempts to jump out of it with Palm Strike, 6A, dashing 5B, or jC.
Links
JP: Ein page on the Japanese NPB wiki
Colors
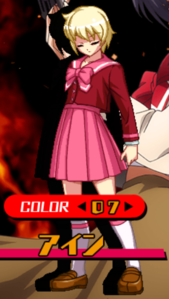
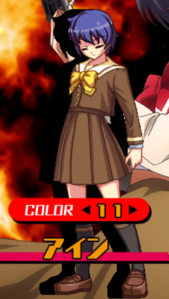
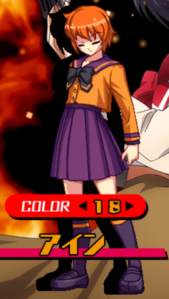
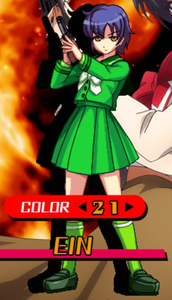
Click the pictures to see the full resolution.
