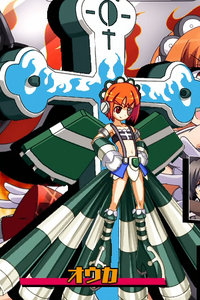
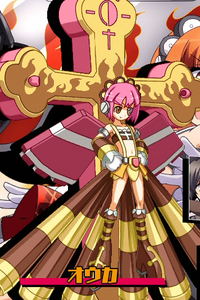
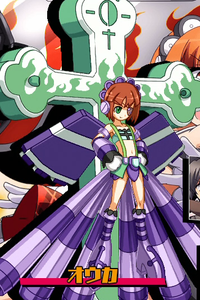
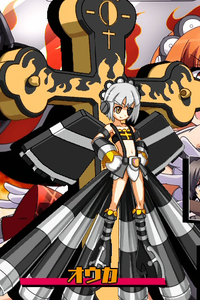
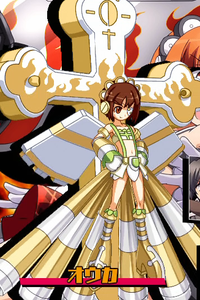
Nitroplus Blasterz: Heroines Infinite Duel/Ouka
Profile
Name: Ouka
Debuted in: OKSTYLE. Also, whatever this is, I guess.
Voice Actor: Hisako Kanemoto (金元寿子)
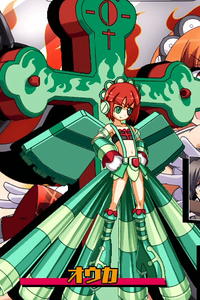
Introduction: Nitroplus's former mascot character, the goth loli weapon of mass destruction, Exterminator Ouka! With the mysterious animal-esque Pandagawa by her side, she aims to reclaim her throne through some hard work and a little bit of elbow grease.
Summary
A character with huge damage, a huge arsenal of projectiles, and an even huger hitbox. She has a surprisingly quick dash for her size, a command float, a counter, rising overheads via j.C and her mid-float attacks, and more. However, keep in mind that her attacks can be sluggish and her size makes her an easy target to hit.
Command List
If you are having trouble reading inputs, check out the Notation section!
Normals
5A 2A [6A / cl.B] st.B 2B 5C 2C [5E/2E] is basic chain route. Any deviations from that route will be noted as an additional or limited.
5A [Low/JC]
A low kick. Like Ein's, it's a standing low. It has short range, so you'll mainly use it out of a dash for pressure and oki. Its hitbox extends upwards a bit, so it can be used for certain combo pickups.
6A [Mid/JC]
Ouka punches straight upward. A universal anti-air move, though its range is shorter than it looks. Also, unlike other characters' 6As, Ouka is only upper body invulnerable for a moment during startup. As an anti-air, you'll mostly use it by dashing underneath an opponent. It can hit grounded opponents at close range and also cancel from cl.B, but canceling into B from 6A will only get you st.B.
cl.B [Mid/JC/Launch]
An upward swing using Ouka's claw. It has reasonably quick startup and a large, wide upward hitbox, making it usable as an antiair. Outside of that, it's useful for starting punish combos, pressure, and combo filler. Launches opponent on hit.
st.B [Mid]
A lunging stab using Ouka's claw. It moves Ouka forward, making it a good long-range poke and approach tool. Serves as her primary grounded poke as well as one of her few combo tools that keeps the opponent grounded.
5C [Mid/Ground bounce] Limited Chain - Does not chain into 2C.
A downward cross slash using both of Ouka's claws. It has pretty short range and long recovery for a C move, so it's mainly used as a combo tool. Ground bounces the opponent on hit, allowing for followups. Keep in mind that given its slow startup, cl.B > 5C isn't a true blockstring and can be beaten out.
5E [Mid/Blowback]
Ouka attacks by flying straight forward. Wall slams on hit. Its startup is slow, but the huge distance it travels gives it a lot of range. Primarily used for combos or surprise attacks. Can guard break if held for the maximum amount of time (though it will clash with Banishing Guard). It's also projectile invulnerable while moving, so it can be used to attack while slipping past projectiles. Can be special, super, and Escape cancelled.
2A [Low/Self-Cancel]
A kick while crouching. Ouka's quickest normal, so use it to mash out of pressure at close range. 5A doesn't cancel into itself, so this works better as a pressure tool.
2B [Mid/Jump state]
A rising headbutt. Ouka's 2B is unique in that it places her in midair. Since she can use jumping normals while in the air in this way, 2B is a great combo and pressure tool. However, 2B cannot chain into j.A. It looks like it'd be a good antiair at first glance, but it really isn't.
2C [Low]
Ouka fires guns from her skirt while spinning forward. The attack is a damaging, multi-hit move that lasts an extremely long time. A good pressure tool that's hard to interrupt when cancelled from 5B that proves to be one of Ouka's main tools. Even if its blocked, Ouka can special or Escape cancel to maintain pressure. But she's wide open if it whiffs, so at least try to make them block it.
2E [Low/Launches on CH]
A slide. Slow startup, but very long range. Knocks down on hit and launches the opponent on counter hit. Lowers Ouka's body during the move, allowing her to low profile under projectiles. It's best to use the move on its own to approach or for surprise attacks - the startup is so slow that it can't combo from any normal besides CH st.B. Besides, it can still be special and Escape cancelled on block.
j.A [Overhead/JC]
A vernier-ignited kick at a downward angle. It attacks at a downward angle, making it Ouka's primary choice for jumpins. But unlike most characters, Ouka's j.A is a bit of a dodgy choice for rising air-to-airs and combo pickups.
j.B [Overhead/JC]
Ouka stabs sideways with her claw. It has decent range, making it a serviceable air-to-air or aerial poke. Its hitbox doesn't extend very far downward, making it not suited for jumpins. It's best to learn her j.B > j.A combo route.
j.C [Overhead/Ground slam]
Ouka fires a spiked ball diagonally towards the ground. It has long range and a big hitbox. Can be done as a rising overhead. Ouka's second major poking and mixup tool. It ground slams on hit, though, so there's not much you can follow up with. Also, if it hits the ground itself, the sparks flying around the point of impact will have hitboxes.
j.E [Overhead/Blowback]
Like 5B, Ouka attacks by flying straight forward. Blows back on hit. Again, if you hold this move to the max, it will crush regular blocks (and clash with Banishing Guard). Also projectile invulnerable during the move, just like 5E. Can be special, super, or Escape cancelled.
j.6C/j.2C - Special Attack [Mid/Projectile]
A command normal usable in the air - Ouka fires a machine gun horizontally or at a downward angle, respectively. j.6C's bullets are reasonably fast and reach the edge of the screen, making the move serve as a poke as long as you don't expect much in terms of damage. j.2C works as a blockstring from 2B and can replace j.C in combos when you don't want a ground slam. Can be special or super cancelled.
Specials
236 A/B/C (Air OK) - Guided Missiles of Indiscriminate Destruction
Ouka fires multiple guided missiles. The differences between the ABC versions is probably... speed and power? (more testing needed). While they are guided missiles, by no means do they actively home in on an opponent. They're used less for combos and more for things like poking in neutral, ending blockstrings safely, pressuring opponents on wakeup, or catching air techs.
214 A/B/C (Air OK) - High Speed Spiffy Boots
Ouka fires jets boosters from her boots and goes into flight mode. Using it again while in flight mode will return her to normal. The A version will cause Ouka to ascend or descend vertically, the B version will cause her to advance forward, and the C version will cause her to retreat into an Immelmann turn and fly behind her opponent.
Additionally, flight mode gives Ouka access to a new set of air normals (explained below). They're useful for combos, blockstrings, and surprise attacks, as well as high/low or left/right mixups on wakeup. Also a useful followup for a blocked 5C.
- High Speed Boots > j.A [Overhead]
A vernier-ignited kick at a downward angle. It shares its animation with her 5A, a low, so it's a useful mixup tool and a jumpin from High Speed Boot maneuvers.
- High Speed Boots > j.B [Overhead]
Ouka swings up a spiked ball that launches the opponent upward. The attack has a wide hitbox underneath Ouka due to where the swing begins, but it also has long range above her. Sadly, given the state Ouka must be in to use this move, it's not usable as an antiair and is mostly restricted to combos.
- High Speed Boots > j.C [Overhead]
Ouka swings down a spiked ball and then swings it back up. This attack has surprisingly long range and covers a large area, so it's a strong aerial poke. Launches opponents diagonally upward on hit. Keep in mind that it's a two hit move when cancelling in combos.
623 A/B/C (Air OK) - Artillery Mk.Pa
Ouka calls a laser fired from the sky. The button press determines the position of the laser, which all knock down on hit. It's a powerful special used for pokes, combos, ending blockstrings, and many more. You could consider the A version to be one of Ouka's most important specials, capable of making almost any normal (even 2C and 2E) safe on block. To make up for its power, there's a random chance that a Pandagawa will fall along with it, making it difficult to combo off of. The Pandagawa has a hitbox, so he'll often cut your combos short if you're not careful.
22 A/B/C (Air OK) - Optical Armor: Physical
A counter move that activates when hit by either projectiles or physical attacks. The button press determines the length the shield is active. When struck, the opponent will be blown back. The blow back has startup, however, so your opponent may not get hit. If the counter hits, you can follow up with a super, partner call, or combo blast.
Supers
623+AB (Air OK) - Fevered Drill Missile
Ouka shouts and fires a missile at an upward angle. Launches the opponent upward on hit that allows for followups, so it's mainly used in combos. It's difficult to hit an opponent with it in neutral given its trajectory, but its startup is quick and the missile launches even if you're hit (verification required), so throwing it out as an anti-air can work even if you expect a trade.
236+AB (Air OK) - A Maiden's Secret: Battle Skirt
Ouka fires a barrage of machine gun bullets straight horizontally. This super's angle is much easier to work with, making it easy to combo into while still getting solid damage. That said, it has zero invincibility and is almost impossible to combo off of given its amount of hits - in fact, it prorates so heavily that if the super doesn't hit cleanly, the opponent will likely float out and be able to air tech.
As a side note, it's possible to perform the air version of this super while rising - if done so, Ouka will keep the jump's momentum and slowly rise during the super, making it easier to score all of the hits.
360+AB (Air OK) - Tactical Sacrifice: Suicide Strike Salvation
Ouka rushes toward her opponent, grabs them, rises into the air, and piledrives them into ground. While spinning. An extremely damaging command grab and the main source of Ouka's damage. It can be avoided post-super flash by jumping, so it's hard to make the opponent fear it as a mixup, but it is invincible (Ouka's only invincible move!), so it works as a reversal or Vanishing Guard cancel. It can be comboed into, usually from a regular grab or Kaigen's assist. You can also squeeze more damage out of this move by Combo Blasting or calling an assist afterwards.
Variable Rush
The 2-bar universal ranbu. Unlike other characters', Ouka's Variable Rush has her jump upwards during the first hit. The opponents are locked in for the duration of the super. It's possible to continue the super even if the opponent blocks it. Startup is invincible, so it's usable as a reversal.
A A A
Most guaranteed damage.
B B B
Allows you to continue into an aerial combo.
C C C
The final hit is a tight link that deals a critical hit and huge damage if done correctly. Very difficult, more for swag than practicality.
Lethal Blaze
236236 BC - Ouka Crucifiction Genocide ver.11
Ouka flies into space and slams down a massive beam sword. It takes a while to start up, but it hits fullscreen. That said, its damage isn't particularly high given its meter costs - using three different supers will give you more damage overall. The biggest problem is that Ouka basically can't combo into it on her own, instead needing an assist to do so.
Combos
Please check out the Notation section, for help on understanding how to read and write combos!
Meterless
[2A/5A] cl.B 5C 5E [623B/C]
- A relatively easy combo, but if the opponent isn't grounded, 5C>5E will whiff. Saya in particular makes this hard - 5C bounces her higher than other characters, making this combo almost always whiff on her.
[2A/5A] cl.B 5C 214B j.B j.C(2) 623B
- This is Ouka's bread and butter. Thankfully, it works even if the opponent is in the air. This will drop if j.C doesn't hit twice, so try not to cancel on the first hit.
([2A/5A] 6A) st.B 2C 623A (2C OTG)
- A combo from an st.B poke. This combo also works as a blockstring. The 2C OTG does add damage, but it also allows them to tech, putting you in a less than favorable situation. If you have meter, you can replace 623A with 236AB to increase damage.
[6A/cl.B/2B] j.9B dj.9B j.C 623A
- Combo from antiair. 2B would be used in grounded strings instead of as an anti-air, but the route is the same. You don't need to manually jump cancel to get 2B>j.B, so don't waste your second jump that early.
cl.B edge hit 623A > 5A cl.B j.9B dj.9B j.C 23A
- A combo for when you antiair with the upper edge of j.B. It's practically impossible to hit confirm this, so you'll need to input 623A preemptively.
2B j.B j.A j.B cl.B j.9B dj.9B J.C 623A
- Corner-only combo. Only works if it starts with 2B.
5E [623B/C]
- A consistent combo from 5E starter. If you're near the corner, you can extend this with 5D or 623A.
5E CH > cl.B j.9B j.9B j.C 623A
- Combo off of counter hit 5E.
2E 623A
- Combo off of slide. 623A makes 2E safe on block too, so don't worry about confirming before using it.
2E CH 623A > 5A cl.B j.9B dj.9B j.C 623A
- Combo off of counter hit slide.
Rising J.C 623B
- Combo from j.C. Mostly used with rising j.C. 623B also makes j.C safe on block, so use it regardless.
j.C CH j.D > j.B j.C 623A
- A j.C counter hit combo.
j.C CH > 214B j.A j.B j.C(2) 623B
- Another j.C counter hit combo.
[236A/B/C] > [623B/C]
- Whenever your missiles hit in neutral.
j.B j.9(j.A) j.B j.C 623A
- Ouka's bnb air route. Add j.A to make it more consistent.
j.B j.A j.B j.9A j.B j.C 623A
- A damage-oriented air route. Has more limited starters.
j.B [J.6C/J.2C] 623A > J.B
- A route utilizing j.6C/j.2C. If you're near the corner, you can replace the final j.B with a cl.B to pick them up again.
j.B j.A j.B j.9A j.B [j.6C/j.2C] 623A > j.B
- An evolution of the above route. The final j.B can be comboed after.
(Flight mode)j.B j.C(2) 623B
- Ouka's basic flight mode route.
(Flight mode)j.A j.B j.E
- If you start a combo in flight mode, you can connect j.E after j.B. You can increase the damage with a special or j.D.
(Flight mode)j.A j.C 214B > cl.B 623A > cl.B
- A ground pickup route in flight mode.
Throw > 5D > 5C 2C
- A standard combo that works on almost all characters... though 5C 2C whiffs on Saya. These four moves are enough to get 4.5k damage.
Grab 5D > (microdash)6A st.B 5C 214B j.B j.C(2) 623B
- A damage-oriented grab combo. It uses the bnb, so it's easy to execute.
Grab 5D > 2B j.B j.A j.B > cl.B j.9B dj.9B j.C 623A
- A grab combo that goes into the aerial route. The final j.C is hard to hit if you're not in the corner. The trick is to input the 2B j.B j.A j.B > cl.B as quickly as possible.
Grab 5D > 5C 5E > 623A > 5A cl.B 2B j.6C 623A
- A corner-only grab combo... that still doesn't work on Saya.
Air grab j.D > j.A j.2C 623A > j.B > (5A) cl.B j.9A j.B j.C 623A
- A rather difficult air grab combo. If done low to the ground, the j.D may force you to land, allowing you to follow up with grounded normals.
Metered and Partners
...5E > 236AB
- Combo from 5E. 623AB can also hit at certain distances.
2E [236AB/Variable Rush]
- Combo from 2E. It's easier to connect metered moves from 2E.
...j.B [j.9A j.B/j.9B] 236AB
- When you want to add damage to an air combo.
...j.B j.9B j.6C 623AB
- Also when you want to add damage to an air combo. You can continue your combo after a 623AB.
(Flight mode)j.B j.C(2) 623B > 236AB
- When you want to add damage to Ouka's bnb.
(Flight mode)j.B j.C(2) 623AB >~
- Usable in the corner.
...623AB hit > cl.B j.9B dj.9B j.C 623A
- One way to combo off of a 623AB hit. Only usable when combo isn't heavily prorated.
~623AB hit > 5[E] > 5CE
- Another way to combo off of a 623AB hit using Variable Rush. The timing is strict.
(When your opponent is high up)623A > [623AB/5CE]
- 623A slams your opponent down to earth, allowing you to combo.
[22A/B/C] > 236AB
- Combo off of successful counter.
Grab > 360AB
- Command grab off of regular grab. Ouka's main source of damage, so learn it. 236AB is possible too, but there's no reason to choose it damage-wise.
Air grab > 236AB
- A stable air grab combo. Sadly, 360 AB doesn't work here.
Grab > 236236BC
- When you want to Lethal Blaze off of a grab.
5[E] > 236236BC
- You can connect a Lethal Blaze after 5[E] on hit.
2E CH > 236236BC
- Only doable from 2E on counter hit.
5[E] Guard Crush> [360AB/236236BC]
- When you've guard crushed the opponent with 5[E]
[2A/5A] cl.B 5C <Partner Blitz> (> 5E) > <Partner Hit> > Combo
- Standard Partner Blitz route.
2E <Partner Blitz> > cl.B (2B j.B) > <Partner Hit> > Combo
- Partner Blitz route off of 2E.
st.B 2C <Partner Blitz> > 2A cl.B <Partner Hit> > Combo
- Partner Blitz route off of 2C. You can hit 6A after the Partner Blitz if you're in the corner, making this a go-to combo.
[2A/5A] cl.B 5C 214B j.B j.C(2) 623B <Partner Blitz> > j.E > <Partner Hit> > Combo
- Ouka's bnb route with a Partner Blitz. You can replace j.E with an air dash j.B or j.C. Varies based on partner.
- You'll have plenty of opportunities to use this, but 623B runs the risk of dropping a Pandagawa and dropping your combo.
j.E> <Partner Blitz> > cl.B (5C) > Partner Hit > Combo
- A Partner Blitz combo off of j.E. When you use Partner Blitz as j.E hits, Ouka will maintain her momentum and continue charging forward.
[22A/B/C] <Partner Blitz> > Combo
- Partner Blitz off of a counter. Certain partners might not hit the opponent once they're flung into the air.
360AB <Partner Blitz> > j.C <Partner Hit> > Combo
- Basic route for a Partner Blitz combo off of command grab.
Kaigen
Crumples the opponent on air or ground hit. Easily combos with SPD, allowing you to get high damage for just a bar. It's also nice how she attacks almost immediately after being called.
[2A/5A] cl.B 5C 214B j.B j.C(2) 623B <Kaigen> > Air dash > land > 360AB
- Ouka's bnb with added Kaigen. Dash to close in after Kaigen hits. To time Kaigen properly, call her at around the third or fourth hit of 623B.
[2A/5A] cl.B 5C <Kaigen> (> 5D) > 360AB
- Another bnb with Kaigen. The above combo will sometimes drop due to random Pandagawas, so go with this if you want to be safe.
2E <Kaigen> > cl.B (5D) > 360AB
- A Kaigen combo starting from 2E. Kaigen will whiff if 2E counter hits, so be careful.
(Grab >) 360AB > <Kaigen> > Air dash > land > 360AB
- A Kaigen combo off of command grab. Just call your partner as quickly as possible and it'll connect.
[22A/B/C] <Kaigen> > Dash > 360AB
- Kaigen off a counter. If the opponent is still in the air, Kaigen will whiff.
Another Blood
It takes a long time before she can be used, but she can give Ouka the time she needs to activate Lethal Blaze by dragging downed opponents into the air, so the two work exceptionally well together. She really ups the reward on rising j.C mixups, for one. That'd be enough to make her a worthy choice, but Ouka can also use 623X to bring opponents back down and combo afterwards. She also hits pretty much immediately after being called.
...[623A/B] <Another Blood> > Combo
- The basic Another Blood route. She can launch after a knockdown, so she'll combo after just about any 623A/B.
Rising j.C <Another Blood> > Combo
- Another Blood off of rising j.C. An important tool to add damage off of rising j.C.
(Grab >) 360AB > <Another Blood> > Combo
- Another Blood off of SPD. This will also combo if you're quick about calling your partner.
<Another Blood Hit> [623B/C] > 236AB
- The first followup to an Another Blood hit. Ouka's able to combo even after Another Blood lifes the opponent so high.
<Another Blood Hit> > 623A > CE
- The second followup to an Another Blood hit. If they're close, you can go for Variable Rush.
<Another Blood Hit> > 236236AB
- The third followup to an Another Blood hit. Your basic combo if you have three bars.
Akane Tsunemori
A bit harder to combo into SPD with than Kaigen, but she has excellent combo potential otherwise and recovers quicker than the assists above. You don't need to change your routes much between her Paralyzer or Eliminator and it's relatively easy to combo into level 3 with her to boot.
[2A/5A] cl.B 5C 214B j.B> j.C(2) 623B <Akane> > j.E > Combo
- Using Akane in Ouka's bnb. It works when she gets Eliminator, too. Call Akane as soon as 623B hits.
[2A/5A] cl.B 5C <Akane> > 5E > 214B j.B j.C(2) 623B
- Another Ouka bnb that uses Akane. This one works fine with Eliminator assists as well. The above combo can randomly drop due to Pandagawa, so use this to make it guaranteed.
([2A/5A] 6A) st.B 2C <Akane (Paralyzer)> > 6A (5D) > 360AB
- Use this to get an SPD with Akane. It's hard to get 6A unless you're right next to them or in the corner, though.
2E <Akane> > cl.B 214B j.B j.C(2) 623B
- An Akane combo off of 2E. If you get an Eliminator, use 2E <Akane> > cl.B st.B > Combo.
(Grab >) 360AB <Akane Paralyzer> > j.C > Combo
- An Akane combo off of SPD. Use j.C as quickly as soon as you can act out of the Partner Blitz. Sadly, this doesn't combo if you get Eliminator.
Blast
Ground ABC > (microdash) cl.B 5C 214B j.B j.C(1) j.E j.D j.B~
- A blast combo. Under construction!
Ground ABC > (microdash) 5C 214B j.C(2) 214B cl.B 623A > cl.B~
- Another blast combo that's also under construction.
(Flight Mode) j.A j.B j.E ABC cl.B 5C 214B j.B j.C(2) 214B~
- A flight mode blast combo that is, again, under construction.
360AB ABC j.214B j.B j.C(2)~
- Yep, under construction too.
Strategy
TODO
Links
JP: Ouka page on the Japanese NPB wiki
Combo videos
Colors
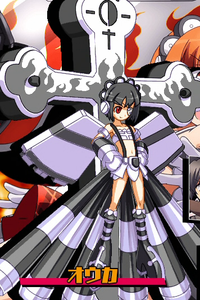
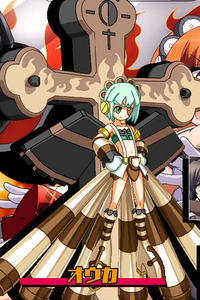
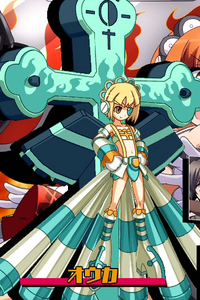
Click the pictures to see the full resolution.
