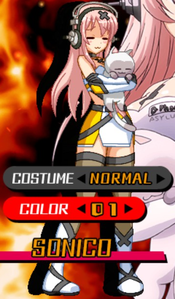
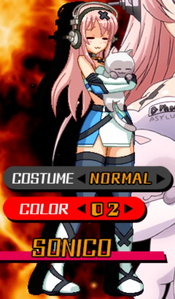
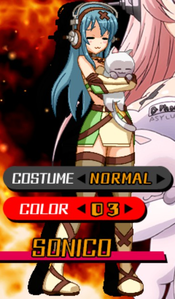
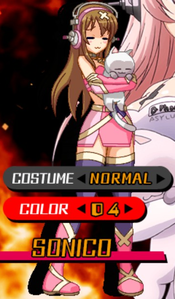
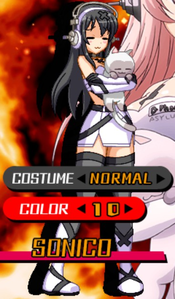
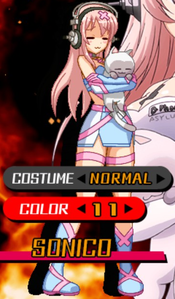
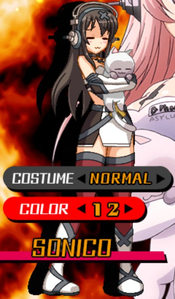
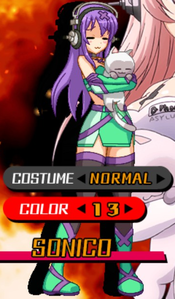
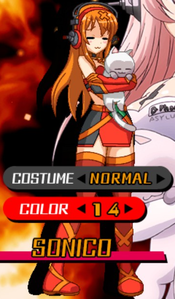
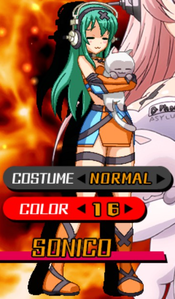
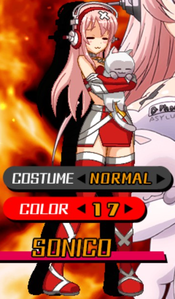
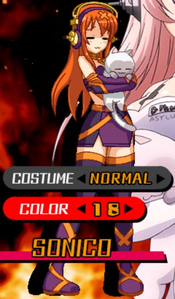
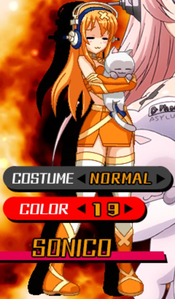
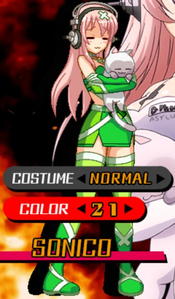
Nitroplus Blasterz: Heroines Infinite Duel/Sonico
Profile
Name: Super Sonico
Debuted in: The 2006 Nitro Super Sonico concert, as the mascot
Voice Actor: Super Sonico
Introduction: A hard working modern-day college student who's a part-time gravure model, waitress at her hometown pub, and the vocalist and guitarist for her band, First Astronomical Velocity. She lives on her own with her five cats. Her favorite foods are chashu ramen and macarons.
Summary
Sonico is defined by two things: Strong knockdown game (with a good oki tool in her 5E that can also give her very tricky high/lows), and normals that are performed by her cats instead of herself, thus not extending her hurtbox and letting her perform them in the air as well as on the ground. She has low HP and fairly small damage output, though, and her reversal options are poor, with even her backdash having no invuln on it by virtue of actually being a backwards run. You will want to use her excellent 6A attack often, since it sets up many of your combos and also use her unusual air low attacks and overheads to keep the opponent in fear on defense.
Command List
If you are having trouble reading inputs, check out the Notation section!
Movement
Sonico has the standard movement options everyone does, except for the above-mentioned backwards run in place of a backdash, trading the utility of invuln for better ability to create distance than anyone else. Her jumps are almost as floaty as Saya's, but she can fall down quicker by using one of her air specials (she keeps in the recovery though), and her j.D starts moving her to the ground very quickly. Her airdashes don't cover much distance, but also don't last very long, making them somewhat safer than others.
Normals
A note on Sonico's normal moves: All of her B, C and E buttons are performed by one of the three cats that follow her around. The cats form a line, with the foremost performing the next-used move and then moving to the back. The range of these moves is dependent on the cat's position and not Sonico's, and all can be performed in the air, too (your recovery while performing them in the air still carries over to when you land, you won't return to neutral immediately). The cats do not have a hurtbox, but will lose their hitbox if Sonico is hit before they connect. None of the cat normals are chainable into others, and all can be cancelled into her specials, supers and jumps on whiff.
5A (7F)
The cat in Sonico's arms does a slash. Very large cancel window, hits crouchers, cancellable into everything except for 2A.
5AA
Three slashes from armcat. Can whiff if the 5A hit from far enough. Is cancellable into everything 5A is, but only on the last hit.
5AAA
Armcat punches, knocking the opponent away and down. Chains into B/C/E moves.
2A (6F)
Crouching armcat slash. Unlike other 2As, this is not indefinitely chainable into itself (a third input will give you 6A), and also doesn't whiff cancel into her 5A. Cancels into everything.
6A (7F)
Upwards armcat swing. Invuln, large, and pretty good reward compared to Sonico's other neutral confirms.
j.A (6F)
Armcat double slash. Serviceable but not brilliant air jab
j.AA/2A (10F)
Big downward swing that knocks down, go-to jump-in unless you have a 5[E] set up.
5B (10F)
Reasonably far cat leap. Is jump cancellable, but not at the earliest point it can hit; if they're sufficiently close, you'll need to delay it.
2B (13F)
The cat slides across the ground. Go-to low option, knocks down.
6B (16F)
The cat travels to the opponent and headbutts them. Only tracks their vertical position, but will reach fullscreen if they remain on the ground. Jump cancellable.
5C (15F)
Cat leaps into the air. 4 Hits. Is plus if performed at the right distance (you can even link a 5/2A after if it hits).
2C (6F)
Cat leaps into the air. The disjointed box and fast startup make for a decent anti-air. Jump cancelable
6C (30F)
Cat leaps and does a downward slash. Is an overhead, and plus enough to link into 5A after.
5E (17~117F)
The key to Sonico's oki and how she converts off her mixups: Holding the button leaves you able to act before it hits, letting you be plus on block and giving a wallbounce on hit, which can be followed up with 214C midscreen and 6A in the corner. If you can find the space, this is also a good neutral tool, as it covers a wide amount of space and lets you get in if it's blocked.
2E (15F)
Cat sweeps across the floor. Very big range and hits low, and unlike other sweeps, its special-cancellable.
Specials
Ouch! Drop Kick (214A/B/C, 12F for A/B versions, 15F for C)
Like Sonico's normals, none of her specials are performed by her, instead calling her bandmates. 214C is a prime tool to catch people trying to zone at fullscreen, coming in from directly behind them and letting you followup with 623C into supers. Both this and 421X share a cooldown of sorts where you can't perform either until a small amount of time after the bandmate goes off-screen, and both of them will keep active if Sonico is hit. Neither can be assist/super cancelled.
Wha Wha Wha? Knee Drop (421A/B/C, 23F, air OK)
A bandmate drops on the opponent, with button determining the position. Another anti-zoning tool, and is also used for crossups (you need resources to convert though). It also hits overhead, and the A version is used in air combos to get another chain.
Be Calm... Drumming (623A/B/C, 12F, air OK)
Bandmate comes out to uppercut. Not a reversal. Generally used to convert into supers from 214C/air combos. The air version's fastfall will actually crossup in the corner on everyone outside of Saya, Ethica, Ignis, and Sonico herself.
Unseeable... Beating (236A/B/C, 11F)
Sends a bandmate forward, drumming on the opponent when they reach them. Kind of acts like a projectile, but you're in recovery the entire time, so it doesn't really have the utility; more or less a combo tool for easy knockdowns/damage in EB.
Supers
Suzu-Chan! (421AB, 15F)
Big drop kick into another one that wallbounces. Slow, but has invuln and pushes them far away if they block. Can combo from 236AB.
Fuuri-chan? (236AB)
A 236X followed by a 623X. Generally the super you confirm into for meter extensions. Very fast, but does not have invuln.
No, Noodles! (214AB, air OK)
In addition to the three that constantly follow her around, Sonico is also accompanied by a fourth cat that starts the match asleep. At intervals of about 7 seconds, it'll wake up and move to her position, then fall asleep and repeat the process. 214AB is what this cat is for: A command grab performed at whatever position it currently is. You can combo off it easily, and, like the other cat moves, you can perform it in the air, so it's a good option in both neutral and (if its near you) offense.
Variable Rush
All Variable Rushes allow you to do a sequence of attacks depending on if you hit the A, B, or C button. If you press nothing, the VR will end. If your VR is blocked, you have the option to press nothing, or keep attacking. Even if you keep attacking, you could still stop at any time, assuming you don't execute the final attack.
Depending on what combination of buttons you use, you can come up with some useful strings.
Cat leaps at the opponent, then all the others maul them. B ender launches, A ender does the most damage, and C ender scales the best in combo, but knocks the opponent down further away than the A version.
~236A/B/C > Variable Rush From a 236X ender, you can easily combo into Variable Rush. Doing it from 236C is easy to time, but the A or B version requires canceling on the last hit of the attack.
Throw > Variable Rush You can also easily combo into a Variable Rush after a throw.
Lethal Blaze
Cover Girl's Photogenic (236236BC)
Makes all of Sonico's attacks unblockable for a short time, which would be nice if you didn't really, really need the meter for damage; this is basically never used.
Combos
Please check out the Notation section, for help on understanding how to read and write combos!
Meterless
Sonico's meterless combos are most entirely centered around 6A/2C into an air combo ending with j.AA. The full sequence is j.A>j.A>j.421A, j.A(1)>j.A>j.AA>delay j.2C>j.D, j.2A(>j.E), but you need to subtract moves depending on whatever the confirm's proration is (although you can get the 421A to j.A link from almost anything). It's possible to get this sequence from most anything that isn't a cat normal without 5[E] to back it up.
5E 63214C 6A air combo(if your backs to combo and normals can reach after drop kick hits)
6A>jA>djc>jA421A>land>jA>djc>jAA
Sonico’s optimal combos involve a rejump. Besides what was listed above, some other combos that follow this structure are:
6A > jc > j.A (2 hits) > djc > j.A (2 hits) > 421A > j.A > djc > j.A (2 hits) > j.AA
6A > jc > j.A (2 hits) > djc > j.A (2 hits) > 421A > 236A
Combo starter rules
You can only get the rejump route under certain conditions. Otherwise, you must omit the jump for the combo to connect and just use something like j.A (2 hits) > djc > j.A (2 hits) > j.AA after launching them.
6A or 2C > air combo loop twice
5AA > 6A > air combo loop twice
2AAA > air combo loop twice
5AA > 236C > air combo loop once
5E or 214X > 6A > air combo loop once
2D > j.2A > 2B > 2C > air combo loop once
Air combo variations
j.A (2 hits) > djc > j.A (2 hits) > j.AA (> charged 5E)
This is how you set up your okizeme on knockdown. You hold the button with your thumb or whatever you don’t need for the rest of your moves so you can continue pressuring while the cat charges.
j.A (2 hits) > djc > j.A (2 hits) > 421A (> 236A)
Grants a stable knockdown and damage.
j.A (2 hits) > djc > j.A (2 hits) > j.AA > delayed j.2C (>j.D > j.2A)
Use if Suzu is currently on cooldown.
sj.A (2 hits) > 421A
Use this if you hit the opponent from a longer range than usual, such as the max range of 6A and aren’t close enough for other routes.
Other Ground Combos
You can't just fish for 6A all day, so you will need to know how to get more damage from things such as overheads or knockdowns. Remember that you can use a 6C overhead to open up opponents, then combo into 6A if you're right on top of them or into a 236X attack if you're at a slight distance.
5AAA > 214C (> 623C)
Basic route from continuous 5A presses. This is easy to execute, but the damage and okizeme afterwards are not so good.
2B > 236B or 623A
Basic combo to perform during your high/low mixups. Difficult to hitconfirm, so it will usually just be input regardless of whether or not the opponent blocked.
j.2B > 623A or 421A
Basic combo from an air low. Like the above combo, it is difficult to hitconfirm. 421A gives lower damage and you can’t cancel it into a super, but since this sequence is a low followed by an overhead, you have a chance of hitting the opponent even if one of the attacks was blocked.
j.2B > djc > dj.2C > 421A
A rare combo that doesn’t come up often in matches. It is dependent on the position of the cats, so it doesn’t always hit.
Throw Combos
Throw > 5D > 2C or 6A > jc > j.A (2 hits) > djc > dj.A (2 hits) > 421A > j.A (2 hits) > djc > dj.A(2 hits) > j.AA
Sonico’s basic throw combo. 2C is less damaging, but easier to connect. Unfortunately, the proration is heavy and this does not cause much damage.
Air Throw > j.D > j.A (2 hits) > j.AA > j.2C > j.A(2 hits) > djc > dj.A (2 hits) > j.AA
Basic air throw combo. It is a little difficult to execute because you have to do the j.D at the end of the throw with proper timing for this combo to connect.
Metered Extensions
The standard metered extension from your air combos is j.421A, j.A>j.AA>j.623A>236AB, 421AB. That's pretty much it: There isn't any better way sans assist cancels for your meter to add more damage. Seems unappealing, but its the price you pay for your oki/neutral game being as good as it is.
5AAA>236A/B
5E 63214C 236A+B
5B, 6B, 5E, et cetera > 236AB
If you hit the opponent with a normal that doesn’t launch them into the air, you can confirm this into 236AB from any distance.
~236A/B/C > 236AB
If you do a combo and it ends in a 236X attack, you can connect into 236AB from any distance. However, the timing of canceling into it should be at the moment of the last hit of the 236X move.
~236A/B/C > 421AB
Same as the above route, but for when you want a knockdown.
~214A/B/C > 236AB
If you land a 214, you can get a 236AB. However, this must be delayed until after the wall bounce and not done as a cancel, as the distance could make the attack miss otherwise.
~623A/B/C > 421AB
This works from any distance. Useful when you want to convert an air low into big damage without having to use partners or a combo blast.
~236AB > 421AB
From 236AB, you can get a knockdown by spending another bar of meter. Input the 421AB at the moment that Fuuri disappears.
Assist Extensions
The following combo structure ideas work for most partners. More details about specific partners are given later.
5AAA > Partner Blitz > 214A/B/C > Partner’s attack hits > ender of your choice
Basic combo structure from a partner cancel after continuous A presses.
~j.2A or j.AA > 623A > Partner Blitz > 421A > Partner’s attack hits > ender of your choice
Basic combo structure for a partner cancel during an air combo.
j.2A or j.AA > Partner Blitz > j.2C > Partner’s attack hits > ender of your choice
Basic combo structure for a partner cancel during the rejump section of an air combo.
2B or 2E > Partner Blitz > 6A > Partner’s attack hits > ender of your choice
Basic combo structure for a partner cancel from a low starter.
j.2B > Partner Blitz > j.2C > Partner’s attack hits > ender of your choice
Basic combo structure for a partner cancel from an air low starter.
j.2B > 623A > Partner Blitz > 421A > Partner’s attack hits > ender of your choice
Alternate air low combo.
j.2A or j.AA > 623A > Partner Blitz > 421A > Partner’s attack hits > ender of your choice
Combo performed from a low air hit such as from a 2D hit.
236A/B/C > Partner Blitz > 6A, 421C, or 421AB > Partner’s attack hits > ender of your choice
Basic combo structure for a partner cancel from 236X. Use 6A if you are close to the opponent or 421X if far.
236AB > Partner Blitz > 421C or 421AB > Partner’s attack hits > ender of your choice
Basic combo structure for a partner cancel from 236AB. The juggle properties change depending on when 236AB is canceled. There is nothing wrong with canceling during the end of the attack, but if you cancel during the first big shock wave, the opponent will not launch and remain on the ground even if the 236AB initially hit them while they were in the air. If you cancel during the second shock wave, you can still connect into your Variable Rush.
236AB > Partner Blitz > 236AB > Partner’s attack hits > ender of your choice
Basic combo structure for a partner cancel during a double 236AB. Works from any distance where the partner will hit. Even if you cancel it during the last grounded hit of 236AB, it will connect, but this is probably more stable if you cancel it a bit early.
...j.421A, j.A>j.AA.j.623A(1)>Carol, 5B>236AB, 421AB (Carol Hit), j.2A/421AB.
The most standard assist extension, the reason Carol's such a common pick, and generally how you end rounds.
214C/5E, 623C(1)>Carol, 623C(1)>236AB, 421AB (Carol hit), j.2A/421AB.
Same concept from the fullscreen confirms.
Throw>Carol, dash throw>Variable A ender (Carol hit), 421AB.
You can also combo into Carol from Variable Rush. This is also doable from Kaigen restands if you're using her.
5E >Carol >236A+B > secondary assist cancel> 421A+B > bugs hit >421A+B maybe possible to do 421 A+B without assist canceling though it's a lot harder
5E > Carol > 236A=B > blast or secondary assist cancel >Lethal Blaze A ender Do not allow 236A+B to launch
6A > jA > djc > jA > j421A > jA > djc >jAA another blood 421A+B
just basic sonico combo turned into an elevator combo. 421A+B timing is a little tricky
Combo Blast Routes
Grounded Combo Blast > 6A > Air Combo The stable combo blast that prevents the opponent from using escape blast once you get in a hit.
Combo Blast as the opponent is falling to the ground from a low > 236C (>5D > 6A) > Air Combo Combo done from something like a 2B or 2E starter. Can be started from a throw. You can go directly into your j.A air combo from 236C and don’t actually have to use 6A here.
Combo Blast as the opponent is falling to the ground from a low > 236C > 5D > 236C (> 5D > 6A) > air combo 236C loop. It drops easily if done too close to the opponent. From the starter of 5AA > 236C > Combo Blast > 5D, you can input the loop up to 3 times.
~j.A > Combo Blast > 421A > 236C (>5D > 6A) > Air Combo Combo Blast from a j.A hit. It is convenient because it grants you a larger amount of air loops and a large amount of damage.
j.2B > Combo Blast > 6A > Air Combo A Combo Blast route starting from an air low. A valuable way to increase the damage off of a stray j.2B.
j.2B > 623A > Combo Blast > 236C (>5D > 6A) > Air Combo A more intricate combo from an air low starter.
Throw > Combo Blast > 236C (>5D > 6A) > Air Combo Throw starter. You can go directly into your j.A air combo from 236C and don’t actually have to use 6A here.
Air Throw > Combo Blast > 421A > 236C (>5D > 6A) > Air Combo Air throw starter.
Strategy
Partner Choices
Carol
Carol is how Sonico ends rounds, making up for her otherwise low output by being easily comboable from double super/Variable routes.
5AAA > Carol > 214C > 236AB > ender of your choice Carol combo from continuous 5A hits. However, it may drop, depending on the location of the opponent.
~ > Carol > 236AB > 421AB > ender of your choice Basic combo into Carol using 2 bars of meter.
~ > Carol > 236C > Variable Rush (A series) > ender of your choice Carol Combo where the A Variable Rush eats up time until the locusts show up.
~236AB > Carol > 236C > Variable Rush (A series) > ender of your choice Another Variable Rush Carol combo. Uses 3 bars of meter, but is more stable than the above combo. The timing to use Carol is right after the first big shock wave of 236AB.
Yoishi
Cat moves are fairly horizontal, meaning Sonico can struggle in air-to-air situations, but that's not a problem if you just straight up stop them from jumping. Yoishi's also good at keeping them in the corner post-mixup, something Sonico can otherwise have problems with.
Akane
Akane's stagger time is large enough for you to get Noodles set up, and comboable into through the 236AB restand.
Kaigen
Kaigen is another option for getting big damage to end rounds. If you want, you can even double up and use her to combo into Carol, though that's probably unnecessary. Because she cause enemies on both the ground and in the air to enter a crumple state, you can input a Variable Rush from any distance and get good damage. 214AB may also be entered afterwards depending on the location of the enemy when they are collapsing to their knees from the crumple.
5AAA > 214C > 236AB > Kaigen (> Dash up throw) > Variable Rush
Basic combo into Kaigen from a 5A continuous hit starter. After she hits, you can dash up and input a throw for more damage if you get there before the opponent falls to the ground. Martial can also be canceled into after the second big shock wave of 236AB before the opponent is launched into the air.
2A or 5A > 5B > 236C > Kaigen (> 214AB) > Throw > Variable Rush
Another Kaigen activation from a ground combo. 214AB can be added depending on the position of Noodles, the sleeping cat.
~j.A(2 hits) > djc > dj.A (2 hits) > 421A (> 236A) > 236AB > Kaigen > Throw > Variable Rush
Kaigen combo from the end of an air combo. Probably the most commonly used route for this partner. If you use 236A instead of 236AB, you can do this route meterless, but if you want it to be more stable and not risk a drop, use 236AB.
2B, j.2B, 2E, or j.2E > Kaigen (> 2C or j.2C > 214AB) > Throw > Variable Rush
Kaigen combo from a low starter.
Iria
Blocks opponents from approaching, and can combo into 421AB. animation hides cat calls, specials, etc.
Yuki
Sonico's level 3 disabling blocking, can make it more difficult to deal with than normal. Provides zombie setplay. Takes a while to get ready, but as soon as you can summon her, this partner has the power to bring forth a comeback even from a disadvantageous round. She combos easily into a knockdown after a 421X attack.
~j.A (2 hits) > djc > j.A (2 hits) > j.AA > 623A > Yuki > 421A > Yuki hits
Basic structure for Yuki in an air combo. Zombies will start shuffling towards the opponent as they wake up.
2B or j.2B > 623A > Yuki > 421A > Yuki hits
A combo from a low or an air low starter.
~236AB > Yuki > (delay) 421C > Yuki hits
236AB Yuki combo. If the distance for Yuki to travel to reach the opponent is too far, slightly delay 421C in order to make sure everything connects.
Miyuki
Very easy to use since you can combo into her from a hitconfirm. It is recommended to use her from 6B or 5E long distance confirms and j.2B air low hitconfirms. If Miyuki hits, pick up the opponent with 6A and do an air combo. On that note, be careful if the opponent is also using Miyuki. If Suzu’s 421X or 214X attacks are Vanishing Guarded, you can be counterattacked by Miyuki even if you are in the air and using a j.421X attack.
Angela
Although she takes even longer to attack than Carol, the damage is huge, so it is very useful for a character like Sonico that has low combo damage. Since many of Sonico’s attacks eat up a lot of time, Angela can be incorporated into combos easily.
5AAA > Angela > 236AB > 214AB or Variable Rush (A series) > ender of your choice
Angela combo from continuous 5A starter.
~ > Angela > 236AB > 421AB > ender of your choice
Basic combo structure for comboing into Angela. With only 2 bars, Angela can easily be incorporated into a combo.
~ > Angela > Variable Rush (A series) > ender of your choice
Combo structure for Angela using Variable Rush to eat up time.
~236AB > Angela > Variable Rush (A series) > ender of your choice
Another VR Angela combo. Uses 3 bars of meter, but is more stable than the above combo. The timing to use carol is right after the first big shock wave of 236AB.
Akane
Extends basic combos and j.2B damage with a Paralyzer shot. You can kill an opponent with an Eliminator shot. The startup is good and this partner is easy to use. It is also easy to get a chance to set up a 214AB and charged 5E okizeme from the Paralyzer shot.
Paralyzer combos:
These work when the opponent is not in the red health state.
2B or 2E > Akane > 6A > Paralyzer hits > dash up j.A into air combo rejump route.
An Akane combo from a low starter.
j.2B > 623A > Akane > immediate 421A > Paralyzer hits > dash up j.A into air combo rejump route
An Akane combo from an air low starter.
Air combo > j.A > slightly delayed 2C > Akane > 421A > Paralyzer hits > delayed 236B (> 236AB > 421AB)
Akane combo from your basic air route.
~236AB > Akane > 6B > Paralyzer hits > dash up throw (> 5D > charged 5E or 2D > charged 5E)
Another basic Akane combo. The timing to use Akane is right after the first big shock wave of 236AB.
Eliminator combos:
These work when the opponent is near death with a red health bar.
2B or j.2B > 623A > Akane > 421A > Eliminator hits > 236AB or VR
An Akane combo from a low starter.
~236AB > Akane > 421C > Eliminator hits > 236AB or VR
The basic structure to combo into Akane’s Eliminator. 236AB into Akane is okay to use from all distances, but if you are very far from the enemy, you may need to delay the 421C.
~236AB > Akane > 214B > Eliminator hits > 236AB or VR
Another Akane combo. The timing to use Akane is right after the first big shock wave of 236AB.
Advanced Techniques
Throw Break 2C Option Select
Sonico’s 2C can be input while trying to break a throw. The way to do it is to input B+C while crouching. Since 2C has a fast startup, it is good for abare and interrupting the opponent’s attacks.
Whiff Canceling
Sonico’s 2B, 5B, 6B, 2C, 5E, j.2B, j.B, j.6B, j.2C, and j.E can be jump canceled before they even hit the opponent. If you use this, you can attack with both 5E and 421X at the same time while holding 5E for a charge and j.2B in preparation for an anti-air or counterattack. This will also help you set up a pseudo unblockable from 421C or 421AB from the range of 2B or j.2B.
Corner Crossup
Sonico’s 623C can lead to a crossup that is difficult to see in the corner by jumping over the opponent there. Vanishing Guard will allow the opponent to defend on both sides, but this is still a useful way to open the opponent up.
Rising Super Jump j.2B and j.6C
If you input j.2B or j.6C while still rising of of the ground from a super jump, it makes the mixup even harder to see for the opponent. This is especially good for j.2B, as the cat is not viewable on the screen from this position.
Backdash Canceling
During your backdash, you can’t guard since you are actually running backwards. However, you can still cancel into things such as Vanishing Guard, jumps, normals, et cetera, so don’t be afraid to use it.
Links
JP: Sonico page on the Japanese NPB wiki
Colors
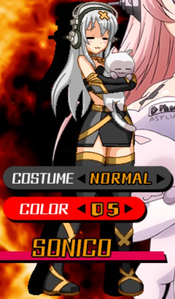
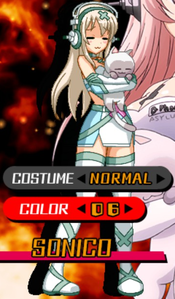
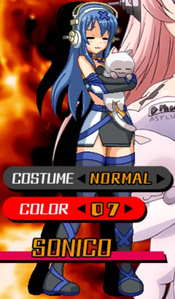
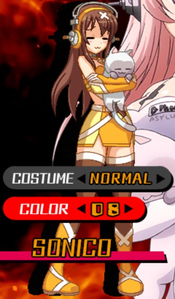
Click the pictures to see the full resolution.

