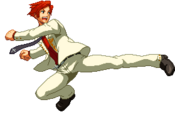
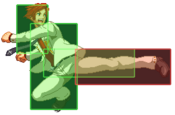
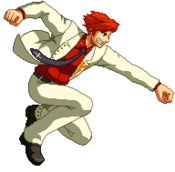
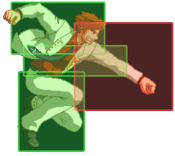
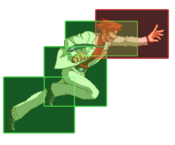
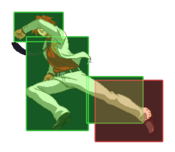
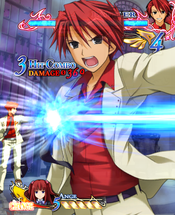
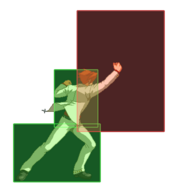
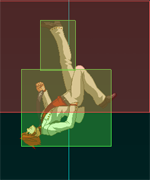
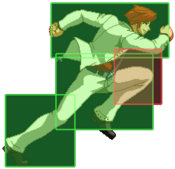
Ougon Musou Kyoku/Battler Ushiromiya

From Mizuumi Wiki
Jump to navigation Jump to search
Battler Ushiromiya

Background

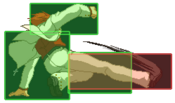
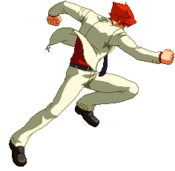
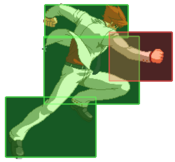
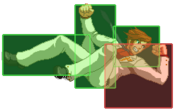
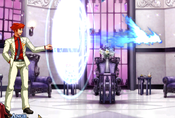
Ushiromiya Battler, the protagonist of Umineko no Naku Koro ni. He seeks to prove that the Rokkenjima murders from October 1986 were committed by human means, in opposition to the Golden Witch Beatrice. His role in Ougon Musou Kyoku's story changes depending on who he's teamed up with, whether it's reclaiming Beatrice's title as the Golden Witch, forming his own harem as the Game Master, or finally putting an end to Beatrice's game.

Introduction

Battler is an all rounder with emphasis on neutral control and closest to shoto function in this game. His main strength lies in his dominant mid screen neutral with his j.5c, 5b and 3b, but he can also play more aggressive with his decent dash, air normals and divekick, meaning he has versatile playstyle which can fit multiple gameplans. He can zone with his fireballs quite well, and they can also be used as meaty tool for safe oki

Battler still has some things he's below average in: he doesn't have threatening mixups and has to rely on universal stagger pressure and throws to open opponent up, and even then he doesn't have best damage Even so his neutral dominance, safe oki and versatile ability of regenerating HP make him good beginner pick to fit in multiple teams.


Strengths Weaknesses
  • Really good neutral: Battler is very hard to contest there due to his good jump button of tie (j.5C) which covers alot of screen and gives combo on hit. His 3B and 5B are great fast pokes too, which work well with his fast dash speed.
  • Versatile specials: His EX DP especially is a good reversal, being almost impossible to punish and does good amount of guard damage, forcing guard breaks. His fireball works decently for zoning, and works well as meaty on oki against many characters.
  • Fits to many teams: His versatile neutral and ability makes him very good main character on any team to start pressure with to control neutral once that is done, and helps to cover his weaknesses.
  • Not the highest damage: Battler's damage is just ok, and he often cannot stun people fast for this reason, and again needs his partner to do this.
  • Pressure ends pretty fast: Battler's buttons aren't advantageous enough to often continue pressure for very long time, and pressure goes back to neutral quite fast.

Ability

Resurrection
Gradually restores your health for a brief period of time.

Battler's ability is as simple as it gets - you heal over time. That's all there is to it, no drawbacks whatsoever. The sheer simplicity and effectiveness of this ability is what makes it great, since whoever he's teamed up with will automatically benefit from it activating. As such, entering the Meta World often is a viable tactic with Battler on the team.

The amount healed isn't massive, at 45 per second up to a maximum of 405 for the entirety of its duration, but multiple activations of it will stack incredibly well.

Move List

Normal Moves

Standing

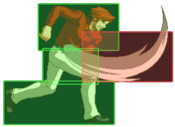
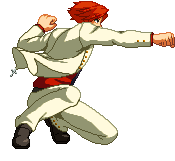
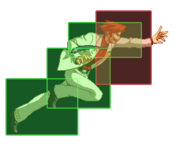
c.5A
Battler-c5A-Raw.png
Battler-c5A.png
Damage RecDamage Startup Active Recovery Guard Cancel Adv Hit Adv Block Invul
69 x 4 6 6 HL (J), Special, SP, Meta -2 -2 x
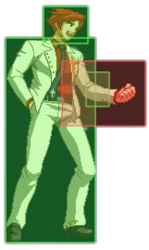
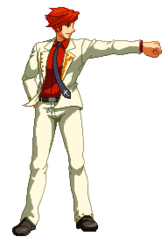
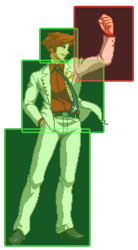
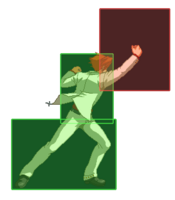
  • Battler punches the opponent in the gut.
Toggle Hitboxes
Toggle Hitboxes
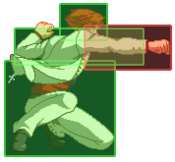
f.5A
Battler-f5A-Raw.png
Battler-f5A.png
Damage RecDamage Startup Active Recovery Guard Cancel Adv Hit Adv Block Invul
54 x 4 5 3 HL (J), Special, SP, Meta +2 +2 x
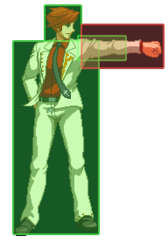
  • Battler punches with a straight jab.
  • Whiffs on crouchers
  • Can be used as a preemptive anti-air if you can predict enemy jumps well. It can also be a pure anti-air if used right.
Toggle Hitboxes
Toggle Hitboxes


c.5B
Battler-c5B-Raw.png
Battler-c5B.png
Damage RecDamage Startup Active Recovery Guard Cancel Adv Hit Adv Block Invul
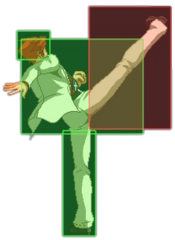
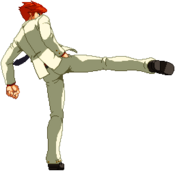
150 x 4 7 16 HL (J), Special, SP, Meta -7 -9 x
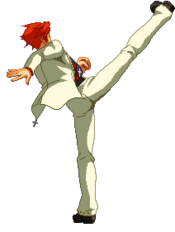
  • Battler performs a high kick.
  • Can be used as an anti-air, but not reliable
Toggle Hitboxes
Toggle Hitboxes
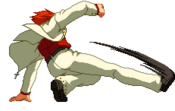
f.5B
Battler-f5B-Raw.png
Battler-f5B.png
Damage RecDamage Startup Active Recovery Guard Cancel Adv Hit Adv Block Invul
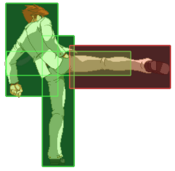
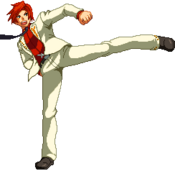
135 x 8 4 12 HL (J), Special, SP, Meta ±0 +2 x
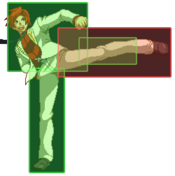
  • Battler performs a roundhouse kick.
  • Excellent poking tool.
Toggle Hitboxes
Toggle Hitboxes


6B
Battler-6B-Raw.png
Battler-6B.png
Damage RecDamage Startup Active Recovery Guard Cancel Adv Hit Adv Block Invul
150 x 13 4 19 HL (J), Special, SP, Meta -5 -8 x
  • Battler steps forward and performs a reverse roundhouse kick.
  • Moves Battler forward and has high range, for a nice poke. The move is not safe however, and has slow startup.
Toggle Hitboxes
Toggle Hitboxes


c.5C
Battler-c5C-Raw.png
Battler-c5C.png
Battler-c5C-Raw 2.png
Battler-c5C 2.png
Damage RecDamage Startup Active Recovery Guard Cancel Adv Hit Adv Block Invul
270 x 4 4,8 16 HL (J), Special, SP, Meta, Dash -3 -6 x
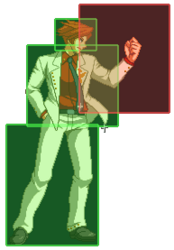
  • Battler punches with an uppercut.
  • Can be used as an anti-air if predicted well.
  • Stagger is extremely long, allowing you plenty of time to decide and look for bursts.
Toggle Hitboxes
Toggle Hitboxes
f.5C
Battler-f5C-Raw.png
Battler-f5C.png
Damage RecDamage Startup Active Recovery Guard Cancel Adv Hit Adv Block Invul
240 x 13 5 27 HL (J), Special, SP, Meta, Dash -7 -10 x
  • Battler punches with a hook.
Toggle Hitboxes
Toggle Hitboxes


6C
Battler-6C-Raw.png
Battler-6C.png
Damage RecDamage Startup Active Recovery Guard Cancel Adv Hit Adv Block Invul
300 x 26 3 24 H Meta KD -5 x
  • Battler uses his jacket to beat down his opponent. Knocks down. Hits overhead.
  • On Counter Hit, you can Meta declare and get a restand combo. This is a very rare occurrence, but if your partner is Erika, it can be a nice guaranteed form of damage after. successful hit.
  • The slowest overhead in the game, use this if you know you're going to hit it, since it's not safe.
Toggle Hitboxes
Toggle Hitboxes

Crouching

2A
Battler-2A-Raw.png
Battler-2A.png
Damage RecDamage Startup Active Recovery Guard Cancel Adv Hit Adv Block Invul
54 x 4 5 5 HL Special, SP, Meta ±0 ±0 x
  • Battler crouches and punches with a cross straight.
Toggle Hitboxes
Toggle Hitboxes


2B
Battler-2B-Raw.png
Battler-2B.png
Damage RecDamage Startup Active Recovery Guard Cancel Adv Hit Adv Block Invul
150 - 5 6 6 L Special, SP, Meta -1 -3 x
  • A simple low kick.
Toggle Hitboxes
Toggle Hitboxes


3B
Battler-3B-Raw.png
Battler-3B.png
Damage RecDamage Startup Active Recovery Guard Cancel Adv Hit Adv Block Invul
150 - 6 10 16 L Special, SP, Meta -10-/-1 -12/-3 x
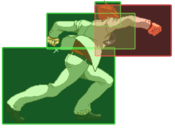
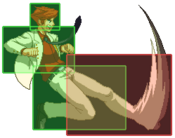
  • A sliding low kick.
  • Much more useful in combos than 2B, although the startup is somewhat slower and is subject to whiff punishes. The low hitbox and long active frames, however, cake this the most important combo starter in Battler's arsenal.
Toggle Hitboxes
Toggle Hitboxes


2C
Battler-2C-Raw.png
Battler-2C.png
Damage RecDamage Startup Active Recovery Guard Cancel Adv Hit Adv Block Invul
210 - 9 5 30 L Special, SP, Meta KD -13 x
  • Battler performs a reverse low kick. Knocks down.
Toggle Hitboxes
Toggle Hitboxes

Jumping

j.8A
Battler-J8A-Raw.png
Battler-J8A.png
Damage RecDamage Startup Active Recovery Guard Cancel Adv Hit Adv Block Invul
60 x 4 till landing x H Special, SP - - x
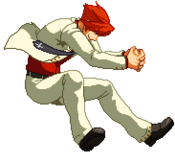
  • Battler performs a midair chop.
  • Active frames last the entire time he's in the air.
Toggle Hitboxes
Toggle Hitboxes


j.7/9A
Battler-J79A-Raw.png
Battler-J79A.png
Damage RecDamage Startup Active Recovery Guard Cancel Adv Hit Adv Block Invul
60 x 5 10 5 H Special, SP ? ? x
  • A midair elbow drop.
Toggle Hitboxes
Toggle Hitboxes


j.8B
Battler-J8B-Raw.png
Battler-J8B.png
Damage RecDamage Startup Active Recovery Guard Cancel Adv Hit Adv Block Invul
150 x 7 9 5 H Special, SP ? ? x
  • Battler does a straight kick in midair.
  • Great anti-air since it has long horizontal reach, may not be recommended to hit crouchers with however.
Toggle Hitboxes
Toggle Hitboxes


j.7/9B
Battler-J79B-Raw.png
Battler-J79B.png
Damage RecDamage Startup Active Recovery Guard Cancel Adv Hit Adv Block Invul
150 - 9 9 5 H Special, SP ? ? x
  • Battler punches with a cross straight in midair.
Toggle Hitboxes
Toggle Hitboxes


j.8C
Battler-J8C 1-Raw.png
Battler-J8C 1.png
Battler-J8C 2-Raw.png
Battler-J8C 2.png
Damage RecDamage Startup Active Recovery Guard Cancel Adv Hit Adv Block Invul
252 - 14 2,3 6 H Special, SP ? ? x
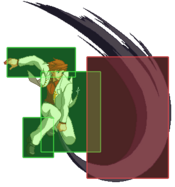
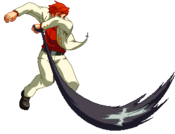
  • Battler pulls out his tie and swings it in a wide arc.
  • Quite possibly Battler's best move period. Insane priority, a lot of hitstun and blockstun for combos and pressure, this move is only limited by its startup, really. Expect to see this a lot.
Toggle Hitboxes
Toggle Hitboxes


j.7/9C
Battler-J79C-Raw.png
Battler-J79C.png
Damage RecDamage Startup Active Recovery Guard Cancel Adv Hit Adv Block Invul
252 - 12 6 4 H Special, SP ? ? x
  • Battler does a midair axe kick.
Toggle Hitboxes
Toggle Hitboxes


j.2C
Battler-J2C-Raw.png
Battler-J2C.png
Damage RecDamage Startup Active Recovery Guard Cancel Adv Hit Adv Block Invul
240 - 12 6 12 H Special, SP KD ? x
  • Battler swings his hands down like a hammer. Knocks down grounded opponents.
Toggle Hitboxes
Toggle Hitboxes

Throw

Throw
B+C
Battler-BCwhiff.png
Whiff animation
Whiff animation
Battler-BC 1.png
Battler-BC 2.png
Damage RecDamage Startup Active Recovery Guard Cancel Adv Hit Adv Block Invul
360 - 0-1 x 31 (if whiffed) UNB - - - x
  • Battler holds the opponent up by the collar and punches them in the face. Opponents can air tech.

Special Moves

【Blue Truth 「青き真実」
236A/B/C
Battler-236A.png
236A version
236A version
Battler-236B.png
236B version
236B version
Battler-236C.png
236C version
236C version
Version Damage RecDamage Startup Active Recovery Guard Cancel Adv Hit Adv Block Invul
236A 300 - 28 x 46 total HLA - +10 +7 x
  • Battler shoots a blue projectile a short distance forward.
  • All versions of the projectile travel almost exactly the same distance.
  • The sigil appearing on battler's hand has a hitbox, though it doesnt deal additional damage.
  • A Version has the fastest startup with the least damage.
Version Damage RecDamage Startup Active Recovery Guard Cancel Adv Hit Adv Block Invul
236B 330 - 36 x 52 total HLA - +10 +7 x
  • B Version has a slower startup with more damage.
Version Damage RecDamage Startup Active Recovery Guard Cancel Adv Hit Adv Block Invul
236C 360 - 42 x 58 total HLA - +10 +7 x
  • C Version has the slowest startup with the most damage.


【Blue Blow「青き一撃」
623A/B/C
Battler-623ABC-Raw.png
Battler-623ABC.png
Version Damage RecDamage Startup Active Recovery Guard Cancel Adv Hit Adv Block Invul
623A 360 - 12 4 23 HL - KD -8 x
  • Battler does an upwards diagonal strike.
  • Mainly used as an anti-air.
  • A, B, and C versions are almost identical, with each version moving battler slightly forward than the previous one.
Version Damage RecDamage Startup Active Recovery Guard Cancel Adv Hit Adv Block Invul
623B 360 - 12 4 23 HL - KD -8 x
Version Damage RecDamage Startup Active Recovery Guard Cancel Adv Hit Adv Block Invul
623C 360 - 12 4 23 HL - KD -8 x
Toggle Hitboxes
Toggle Hitboxes


【Sommelier Finger 「ソムリエフィンガー」
214A/B/C
Battler-214ABC-Raw.png
Battler-214ABC.png
Version Damage RecDamage Startup Active Recovery Guard Cancel Adv Hit Adv Block Invul
214A 300 - 10 6 19 HL - KD -16 x
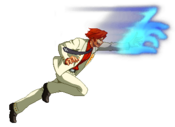
  • Battler charges forward and knocks the opponent upwards with his palms. Can penetrate Ronove's Barrier. The opponent can air-tech if they get hit.
  • A Version - Has the fastest startup and the shortest reach.
Version Damage RecDamage Startup Active Recovery Guard Cancel Adv Hit Adv Block Invul
236B 330 - 13 6 24 HL - KD -24 x
  • B version - Has slower startup and longer reach.
Version Damage RecDamage Startup Active Recovery Guard Cancel Adv Hit Adv Block Invul
236C 360 - 16 6 29 HL - KD -32 x
  • C version - Has the slowest startup and the longest reach.
Toggle Hitboxes
Toggle Hitboxes


【Blue Raid 「青き急襲」
j.214A/B/C
Battler-J214ABC.png
Version Damage RecDamage Startup Active Recovery Guard Cancel Adv Hit Adv Block Invul
j.214A 360 - 24 36 16 HL - KD -1 x
  • Battler does a downwards kick in mid-air.
  • A Version - Shortest distance and slightly shorter landing recovery.
Version Damage RecDamage Startup Active Recovery Guard Cancel Adv Hit Adv Block Invul
j.214B 360 - 24 36 18 HL - KD -2 x
  • B Version - Medium distance and medium landing recovery.
Version Damage RecDamage Startup Active Recovery Guard Cancel Adv Hit Adv Block Invul
j.214C 360 - 24 36 20 HL - KD -6 x
  • C Version - Longest distance and slightly longer landing recovery.

SP Supers


【Sharp Blue Truth 「青き鋭き真実
236A+B
Battler-236SP.png
Damage RecDamage Startup Active Recovery Guard Cancel Adv Hit Adv Block Invul
492 x 25 x 46 (total) HL - KD -7 x
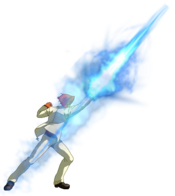
  • Battler shoots a blue projectile laser.
  • Hits fullscreen, and is faster than his non-SP 236 series.


【Absolute Blue Blow 「青き絶対の一撃」
623A+B
Battler-623A+B.png
Damage RecDamage Startup Active Recovery Guard Cancel Adv Hit Adv Block Invul
600 x 10 3,3,3,3 23 HL - KD -7 1-16
  • Battler does a stronger upwards diagonal strike. Hits mid.
  • Invulnerable on startup.
  • Deals 25% guard damage.


【Rapturous Sommelier Time 「満悦のソムリエタイム」
214A+B
Battler-214A+B.png
Damage RecDamage Startup Active Recovery Guard Cancel Adv Hit Adv Block Invul
540 x 10 6 27 HL - KD -36 x
  • Battler charges forward with his palms outstretched and, if it hits, repeatedly "attacks" the opponent for a period of time. Hits mid.


【Elegant Blue Raid 「青き優雅なる急襲」
j.214A+B
Battler-J214ABC.png
Battler-J214A+B 2.png
Damage RecDamage Startup Active Recovery Guard Cancel Adv Hit Adv Block Invul
540 x 25 32(19)15 27 H - - - x
  • Battler does a downwards kick in mid-air, followed by a high backwards somersault kick. Hits high.
  • Invulnerable on startup.
  • Puts the opponent in a juggle state, allowing for further follow-ups.

Level 2 Super

【Checkmate by Melee Logic 「打撃的推理によるチェックメイト」】
236236C
Battler-236236C.png
Damage RecDamage Startup Active Recovery Guard Cancel Adv Hit Adv Block Invul
630 - 12 6 29 HL - KD -6 x
  • Battler rushes forward and performs an 8-hit melee combo on hit. Knocks down on hit. Hits mid.
  • Does not travel the full screen.

Meta Super

【All-Piercing Blue Truth 「全てを穿つ青き真実」
641236C during MetaWorld
Battler-MetaSuper.png
Damage RecDamage Startup Active Recovery Guard Cancel Adv Hit Adv Block Invul
815 x 29 x 84 total HL - KD -56 x
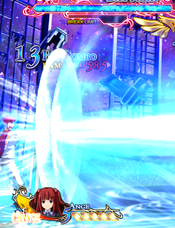
  • Battler shoots a giant blue laser from his hand.
  • Knocks the enemy all the way to the wall.
  • Slightly long startup time and extremely long recovery time. Generally not safe to use it point blank.
  • Generates high amounts of meter for both players.

Frame Data

  KD = Knockdown
                              |          Frames             |  Frame Advantage |
              Attack  | Damage|Startup*| Active  | Recovery |On Hit | On Block | Notes
               Throw  ------------------------------------------------------------------
                 B+C  |  360  |  0-1   |    ?    |    ?     |  TKD  |          |31 Duration on Whiff
             Normals  ------------------------------------------------------------------
                c.5A  |   69  |    4   |    6    |    6     |  -2   |   -2     |
                f.5A  |   54  |    4   |    5    |    3     |  +2   |   +2     |
                  2A  |   54  |    4   |    5    |    5     |  +0   |   +0     |
                c.5B  |  150  |    4   |    7    |   16     |  -7   |   -9     |
                f.5B  |  135  |    8   |    4    |   12     |  +0   |   +2     |
                  2B  |  150  |    5   |    6    |   11     |  -1   |   -3     |
                c.5C  |  270  |    4   |   12    |   16     |  -3   |   -6     |
                f.5C  |  240  |   13   |    5    |   27     |  -7   |  -10     |
                  2C  |  210  |    9   |    5    |   30     |  UKD  |  -13     |
               j8.5A  |   60  |    6   |   12    |    0     |       |          |
               j8.5B  |  150  |    7   |    9    |    5     |       |          |
               j8.5C  |  252  |   14   |    5    |    6     |       |          |
           j(7/9).5A  |   60  |    5   |   10    |    5     |       |          |
           j(7/9).5B  |  150  |    9   |    9    |    3     |       |          |
           j(7/9).5C  |  252  |   12   |    6    |    4     |       |          |
     Command Normals  ------------------------------------------------------------------
                  6B  |  150  |   16   |    4    |   18     |  -5   |   -8     |
                  6C  |  300  |   27   |    3    |   24     |  UKD  |   -5     |
                  3B  |  150  |    6   |   10    |   16     |-10/-1 | -12/-3   |
                j.2C  |  240  |   12   |    6    |   12     |  UKD  |          |See Note A
            Specials  ------------------------------------------------------------------
                236A  |  300  |   28   |    ?    |    46    | +10   |    +7    |
                236B  |  330  |   36   |    ?    |    52    | +10   |    +7    |
                236C  |  360  |   42   |    ?    |    58    | +10   |    +7    |
              j.214A  |  360  |   24   |    36   |    16    |  KD   |    -1    |
              j.214B  |  360  |   24   |    36   |    18    |  KD   |    -2    |
              j.214C  |  360  |   24   |    36   |    20    |  KD   |    -6    |
                623A  |  360  |   14   |    12   |    23    |  KD   |    -8    |
                623B  |  360  |   14   |    12   |    23    |  KD   |    -8    |
                623C  |  360  |   14   |    12   |    23    |  KD   |    -8    |
                214A  |  300  |   10   |    6    |    16    |  KD   |   -16    |
                214B  |  330  |   13   |    6    |    24    |  KD   |   -24    |
                214C  |  360  |   15   |    6    |    29    |  KD   |   -32    |
       SPs and Meta  ------------------------------------------------------------------
              236A+B  |  492  |   25   |    ?    |    46    |  KD   |    -7    |
              623A+B  |  600  |   10   |    12   |    23    |  KD   |    -7    |
            j.214A+B  |  540  |   25   |    47   |    27    |  KD   |   -15    |
              214A+B  |  540  |   10   |    6    |    42    |  KD   |   -36    |
              236x2C  |  630  |   12   |    6    |    29    |  KD   |    -6    |
             641236C  |  815  |   29   |    ?    |    84    |  KD   |   -56    |
  Note A: Knockdown only occurs on grounded opponents.

General Strategy

Feel free to edit this part of the wiki with your tips/strats on how to best use Battler.

Neutral Game
Battler has an excellent neutral game. With tools like j8.C, j8.B, 3B, f.5B, and 236X, he can do a pretty good job of spacing out the opponent, waiting for them to make a mistake in order to punish them with a 3B.

  • j8.C
One of Battler's most important moves. Battler whips out a tie and attacks the opponent with it. It has a huge vertical hitbox, making it perfect for air to airs, although its startup is not one to be envied since it takes 14 frames to attack with it. However, this move does an extremely large amount of blockstun, enough so Battler can land and continue the blockstring with 3B. It also does a high amount of hitstun, allowing for easy hitconfirms. Therefore this move is recommended to be used as often as possible, just make sure to be careful about fast punishes.
NOTE: If you, while the opponent is knocked down, decide to 66, then press 8 which has you jump at a very slight forward angle, just over the person and use j8.C preemptively, you can cross up the opponent.
  • j8.B
Due to the relatively slow startup of Battler's j8.C, this move is generally the better air to air move if you must use it in a pinch. Battler extends his foot out horizontally, decreasing his overall hitbox, and the relative quickness will surprise the opponent.
  • 3B
Battler's sliding kick. One of the most dangerous moves in the game, due to the fact that Battler's slide, unlike under slide moves, is relatively quick, and can be easily hitconfirmed with a 6B. It also makes Battler's hitbox smaller which will make highs and some mids completely whiff. The long distance it travels can easily punish careless dashers and bad jump-ins. The recovery frames are relatively average, but they're long enough for someone with a long range normal to punish, so be careful!
  • f.5B
Battler's f.5B is a very good poke, with good range, and a decent vertical hitbox. It's also +2 on block, which makes it ideal to end blockstrings with to get the edge in the next move. So don't just leave Battler stranded with a recovering 3B, end the blockstring with this move! It can also, like f.5A, catch jumps preemptively, making this one of the safer moves to throw out in the game.
  • 236x
Battler's projectile. It doesn't go far, but you can use it to keep the enemy from being too reckless, since the projectile travels slow enough to catch bad jump ins.
  • 214x
Battler's charging move. The hand has a large hitbox, and Battler does charge pretty fast for a good distance. If timed right, you can punish careless dashes from a good distance, or even bad jump-ins, which 3B would otherwise not be able to reach or be fast enough. It is rather unsafe if you use the move too close to the enemy, so make sure to space it well.
  • j.214x
Battler's air kick. You can use it to go for a forward poke to punish careless dashers running after your back jump or if timed right, be used as an air to air. The priority of this move is pretty good, so it'll likely beat out most other moves. You can use this move as a second overhead after hitting or forcing your opponent to block a j8.C or j9.B/C, since the move is fast, and most people would go immediately to blocking low after blocking an aerial.
  • 623A+B
Battler's SP version of his 623 has invincibility frames. Aside from of its obvious use as a reversal, it can also be used to finish guard breaking the opponent. While the opponent's Break Limit is at 80%, you can use this move to finish it off since 623A+B can't be Guard Touched, rendering the opponent unable to Guard Touch you, then send the opponent into a vulnerable state, then start a combo that can't be bursted for 5 seconds.

Okizeme
While the enemy is knocked down, Battler has several options: set up a 236C blockstring, meaty with a 6C overhead, or just throw the opponent.

  • 236C
If you knock the opponent down then hit them OTG with 3B 2C 236C, they'll be forced to stand up and either take the projectile, which may do enough hitstun that Battler can combo after it, or block it, and be forced to block Battler's pressure or get hit in a frame trap. The optimal way to use this oki is to have the opponent with his back to the corner, but this can be used mid-screen, although it's not as effective. You'd be better off going for the j8.C cross-up or just attempt to start a blockstring immediately.
NOTE: If not timed correctly, the opponent has a small window to use a reversal through the projectile and knock away Battler.
  • 6C
You can use this move in mixups or meaty with this move as oki. However, this move takes 27 frames to start up, making it the slowest overhead in the game. It also is extremely telegraphed so it likely wouldn't be much of use outside of a surprise. Against an aware player, they could jab you out of the move, or punish you on block, assuming you don't cover it with an attack touch, or parry guard touch to get a free combo. This move also knocks down on hit, which means you don't get a good reward off of the move like you would with Erika's 6C. However, if you hit the opponent with this move, they are considered airborne for a very short time, which means that if you get a counter hit, you can cancel into a meta, and continue the combo off of a move where otherwise would knock them down. Make sure not to whiff this move.
  • B+C
Battler grabs the enemy, then punches them into the air. Outside of the typical tick throw, mindgames setups, if they tech in the air and try to press a button, you can punish them with c.5B, which gives a counter hit allowing you to continue the air combo into optimally a 623 or, in case they have a really good aerial, 214 or 623 them out of the air. If they do not attack while teching, which will make them invincible to all attacks until they land on the ground, you can punish them with a 3B, since when they land, they have a couple frames where they cannot block. This also counts as a counter hit. You can also punish them with 214, which when well timed can cover for both an air tech or no tech since the active frames last pretty long. Now if they don't tech, you get a free 236C oki, which makes not teching and teching the move a risky option.

Team Building

Feel free to edit this part of the wiki with your tips/strats what partners are best for Battler to use. Remember I'm watching you.

The information displayed here is from the 2022 Team Tier List from the Ougon Discord Thus, it is open to change, but it should work as a building block for people looking for team pairing ideas. If you are a player of any of the teams and want to change anything feel free to do so.

Reasons to choose Battler for your team:

  • Battler, while being a jack of all trades, greatly excels in neutral domination. His j.8C and 3B alone will be able to out-zone most characters in the midrange. His ability is very good in any situation also, making his teams generally bulky thanks to Resurrection. This is compensated with low damage and poor pressure, so his neutral wins by himself don't tend to lead to much reward.
  • While he tends to work with anybody thanks to his adaptable kit, he greatly benefits from characters that can turn his pokes into bigger risk, or who want to play a more turtly game thanks to his ability.
BTA.png Battler/Ange
  • Solid neutral but overshadowed in almost every way by Ange/Rono. Ange isn’t great at the long game and while she appreciates added bulk from Resurrection, Rono gives this anyway in addition to much higher damage and synergy. This team can be better against Bern teams, though.
BTBBT.png Battler/Black Battler
  • Battler has one of the best neutrals in the game so two of him let you keep that up constantly. Obviously, you’ll struggle against characters Battler doesn’t like, such as Lambdadelta and Lucifer.
  • Black Battler’s terrible HP is offset by the combination of Resurrection and Massacre, and the issue of normal Battler being better with most partners is null because he’s with his counterpart. So this is arguably Black Battler’s best team.
  • The damage on these two is relatively bad, so you need to outplay the opponent to win. Very honest, but they can build meter for each other with their MetaSupers.
BATBETO.png Battler/Beatrice
  • Combining solid neutral with Beatrice’s crazy damage, this team is straightforward and strong.
  • One favorable dynamic is that Battler can use the 5SP Beato gives him from towers to actually return the favor by generating some for her back with his own MetaSuper. This leaves them with a good SP economy, but your opponent will be getting lots of meter too, so you have to actually play against them.
  • Battler’s job is to confirm and corner carry so Beatrice can go to town. You need to be good at both characters to really get the flow of how they should work together.
BATBERN.png Battler/Bernkastel
  • Similar to Bat/Eva in the sense that it has awesome neutral, but its damage is a bit situational. You’ll find that Bern can pressure a bit more constantly than Eva, but the overall playstyle should be similar.
  • Potentially the Bern team with the most staying power, you’ll be able to trigger Resurrection more often than usual especially as the two can build each other meter with their MetaSupers. Still, you’ll have no issue avoiding getting hit if you’re careful so try to focus on counterplay.
  • Brings out the best in Bern’s patient neutral.
BATCHI.png Battler/Chiester 410
  • Great neutral and BreakBoost with Battler’s MetaSuper can be used to bring the opponent’s guard capacity up before approaching, but there’s overall no particular reason to pick 410 over Lucifer for stronger neutral or Beatrice for higher damage. It’s kind of a balance between the two, but this team will struggle terribly for damage, far more than either struggle with anything.
BATDLA.png Battler/Dlanor
  • Plays similarly to Bat/Shan, again there is little reason to pick Dlanor over Ronove for Battler and the combination between ArmorBoost and Resurrection is overkill.
  • Might be a funny team if you want to win through timeout, but Dlanor/Bern means there’s a better option even for that.
BATERI.png Battler/Erika
  • Amazing neutral but their poor damage leaves them struggling to keep up with more damaging partners for either of them.
  • Has answers for almost anything but little to do once they score a hit. Either one can handle neutral by themselves so both are unnecessary. Battler gains almost nothing from Force Counter.
BATEVA.png Battler/EVA-Beatrice
  • A team with no weak points, although the big damage setups even with Eva’s ability can be a bit situational. Expect to dominate almost any character in neutral.
  • The prospect of Attack Touching to Eva adds a dimension of threat to Battler’s pressure that he really wants. Generally quite honest, you just win most exchanges and shut down the opponent’s options bit by bit.
  • Entirely carried by how good the individual characters are, they have no special synergy. Well, Resurrection combined with jelly can give you some breathing room.
  • You could say this team is remarkably balanced; it does well both offensively and defensively.
BATGEO.png Battler/George
  • Overly focused on neutral with limited ability to do damage. Reset-heavy. Both prefer Ronove
BATJESS.png Battler/Jessica
  • ShaveBoost has synergy with Battler’s screenwiping MetaSuper, but Jess/Bern generally does this better and the damage on this team is not at all comparable to Beato/Jess.
  • Resurrection conflicts with Jessica’s predominantly rushdown-based playstyle and Battler prefers Beato for a highly damaging partner. This team can also struggle to keep a meter advantage.
BATKAN.png Battler/Kanon
  • The two of these come together to form a very oppressive neutral. Similar to Bat/Luci the pair has answers for any opponent, but its damage suffers even more. However at least against some opponents, fullscreen trolling with Battler’s MetaSuper buffed with Silent Attack generates free meter advantage for you which is crucial.
  • It can’t be underestimated the extent to which these two can shut down the opponent’s options, so it’s similar to Bat/Rono in that way.
  • Would be a better team if certain characters (BEATRICE) didn’t exist. They can also struggle against bulky teams.
BATLAMB.png Battler/Lambdadelta
  • Bad synergy, Lambda likes a partner who can stun. Hard to hit, but try Jessica instead. No reason to pick Lambda over Beatrice here.
BATLUCI.png Battler/Lucifer
  • One of the best neutral pairs in the game, there’s no character that can really counter both of them, so you’ll have an answer for every situation.
  • You might do a little mixup with Luci, but this is an honest team with honest (low) damage to match. Rely on resets wherever you can as neither of these two can do unprorated damage even though Luci’s ability makes them capable of super long combos. You need to play creative.
BATRON.png Battler/Ronove
  • Combining oppressive neutral with some of the best bulk in the game, this team has very few poor matchups.
  • CounterBoost suits Battler’s playstyle of winning multiple exchanges with his strong normals, and greatly improves damage, his only shortcoming. Ronove's good pressure and sole weakness to projectile stall are augmented by Battler’s ability to approach and corner carry consistently well.
  • An honest team with no real gimmicks, however its high health pool combined with Resurrection let it weather higher damage teams, and neither Battler nor Ronove are meter-hungry, meaning an SP lead will probably be maintained. Better than almost all other teams at stopping momentum, and outperforms them once it’s stopped.
  • It doesn’t have much obvious capacity for mixup, though, so it might be best suited for creative (or grabby) players.
BATROS.png Battler/Rosa
  • Good neutral and Battler has no issue scoring Detachment hits, you can also prevent the opponent’s escape fullscreen with his EX fireball.
  • However this team suffers from low damage and no way to do big corner damage except for Rosa’s costly loops. Generally overshadowed by Rosa/Will, but can have its niche.
BATSHAN.png Battler/Shannon
  • Middling damage and no synergy. Shannon’s ability can be nice on Battler, but it’s not like he needs it to approach or win neutral.
  • A decent defensive team, you might be able to weather out higher damage teams with it, but Bat/Rono is the superior option there.
  • Battler gains nothing from Shannon’s mixup, leaving her to do most of your damage. Will/Shan is better for that."
BATVIR.png Battler/Virgilia
  • A poor man’s Bat/Beato. Battler does not need slowly accumulating SP as he conserves the meter Beatrice gives him better than most of the cast.
  • Bad reaction to pressure.
BATWILL.png Battler/Willard
  • Fantastic neutral between the two and Will can handle all the damage the team needs. Battler can also utilise SPCancel to improve his solo damage. Nevertheless this team is overshadowed by better options.
  • Battler generally prefers Beatrice for her guardbreak setups in addition to similar damage to Will for the same SP. Will prefers Kanon for a fast neutral character to confirm for him as he can capitalise on SPCancel more.
  • SP advantage is more important than extra health for Will, who shines offensively.

Combos

Feel free to edit this part of the wiki with other combos to use, ranging from BnBs to optimized.

Combo Damage Cost Meter Gain Location

Battler's staple BnB.

  • Omit c.5C if enemy is too far away from Battler.
  • On Beatrice and Eva Beatrice slightly delay the 2C after c.5C, otherwise it will whiff.

Basic OTG combo ender into fireball oki.

Optimal Battler combo for crouchers.

  • Works on every character except Erika.
  • Requires a small delay between 3B and c.5C, and has to be extremely close.

Battler's Meta World BnB.

  • Small delays between the metaDeclare, j.C and j.B are required for the combo to hit.
  • The second and third combo ender options will cause stun on most characters.

Very flashy combo that can be done if you feel confident.

Antiair counterhit combo.

  • 623X needs to hit the opponents as high as possible for the first SP2 to reach in time.
  • The second SP2 requires to be not too close nor too far from the corner, hence why around midscreen positioning is required.
  • Buffering the second SP2 helps it come out as soon as possible.
  • [j.214SP]xN
Strange combo that is extremely flashy, but in no way practical.
  • (...) metaDeclare 2B 6B c.5C 2C SP2 xx metaSuper
Another flashy combo. This one is slightly more practical, but is mainly just there for looks.
- Only works midscreen.
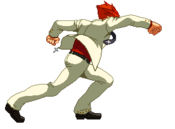
Video Examples

Pictures

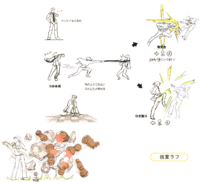
Early artwork of Battler Ushiromiya.
General
FAQ
Menus
HUD
Links
Mods
Mechanics
Touch
Characters