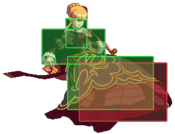
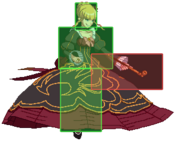
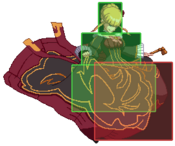
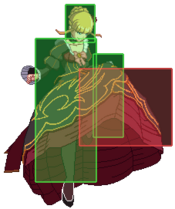
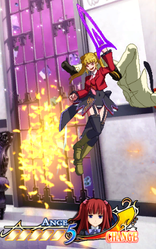
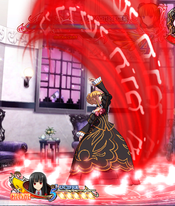
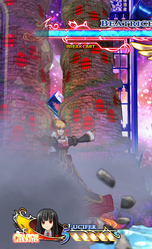
Ougon Musou Kyoku/Beatrice

From Mizuumi Wiki
Jump to navigation Jump to search
Beatrice

Introduction

Main Witch of the series is also runnerup of being the best character in game with her absurd zoning, corner carry, damage and setups. She has almost everything people looking for one sided games like, and she can force checkmate situations quite easy, only being held down by being meter reliant and having unorthodox ground game.


Strengths Weaknesses
  • Really high damage: Especially on corner her damage can get very absurd, with meter she can loop her juggles to guaranteed stun, and her combos often have great corner carry which allows her to do these loops.
  • Oppressing zoning: with stakes and seals (especially SP seal) She can keep people put on situations she's not looping you to death.
  • Great setups: With her MetaSuper, she can setup hard to escape sequences which do alot of chip damage, allow her to do mixups and offer alot damage. Getting stunned from her loop to metasuper sequence is often checkmate for her.
  • Great DP: Access to meterless reversal which acts as good antiair is a privilege.
  • Meter reliant: Without meter she cannot force her most oppressive side as easy
  • Average ground normals: Outside of 3C, Beatrice's ground normals aren't good for traditional play, forcing her to either zone or jump in with her good jump buttons, making her gameplay possibly predicteable.
  • Weak to character specific Oki/OTG routes: Beatrice is the only character that has a different wake up speed than others, 8 frames slower to be exact. This leaves her open to Oki and OTG extensions that only she suffers from, which will be exploited by good players.

Ability

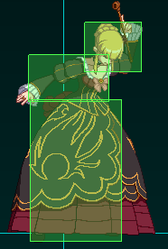
Infinity SP: SP cost of SP Skills turns to 0. Can only be used once for the duration of the ability. Duration: 10 seconds.

As powerful as it sounds. Very powerful for characters that are meter dependent. It does not reduce the cost of Meta Declaring/Negating or SP actions that use the Reserve SP Gauge like Guard Touch.

Move List

Normal Moves

Standing

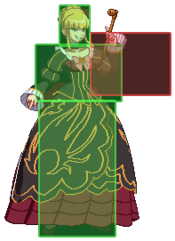
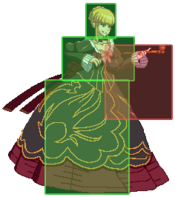
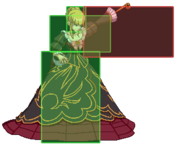
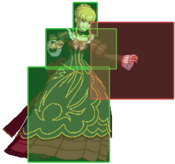
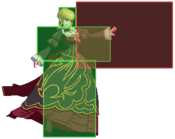
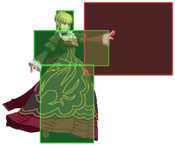
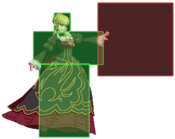
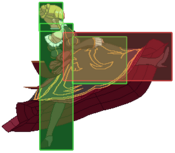
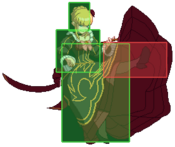
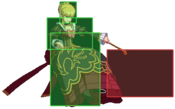
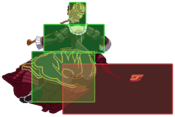
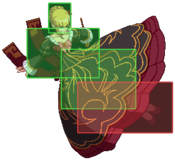
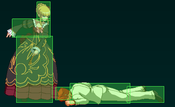
c.5A
Beatrice-c5A-Raw.png
Beatrice-c5A.png
Beatrice-c5A2.png
Damage RecDamage Startup Active Recovery Guard Cancel Adv Hit Adv Block Invul
54 x 3 5 6 HL (J), Special, SP, Meta +1 +1 x
  • Beatrice swings her pipe at the opponent.
Toggle Hitboxes
Toggle Hitboxes
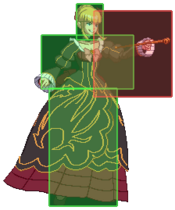
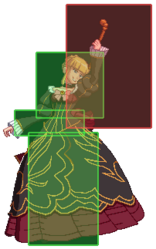
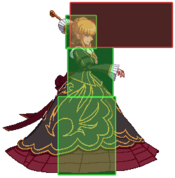
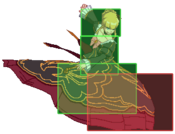
f.5A
Beatrice-5A-Raw.png
Beatrice-f5A.png
Beatrice-f5A2.png
Damage RecDamage Startup Active Recovery Guard Cancel Adv Hit Adv Block Invul
54 x 7 6 4 HL (J), Special, SP, Meta ±0 ±0 x
  • Beatrice swings her pipe at her opponent.
Toggle Hitboxes
Toggle Hitboxes


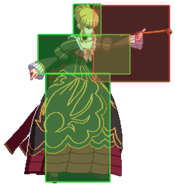
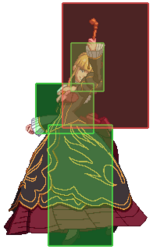
c.5B
Beatrice-c5B-Raw.png
Beatrice-c5B.png
Beatrice-c5B2.png
Beatrice-c5B3.png
Damage RecDamage Startup Active Recovery Guard Cancel Adv Hit Adv Block Invul
168 x 3 10 26 HL (J), Special, SP, Meta -20 -22 x
  • Beatrice swings her pipe at the opponent.
Toggle Hitboxes
Toggle Hitboxes
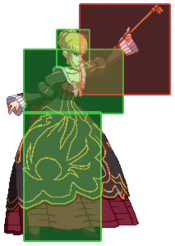
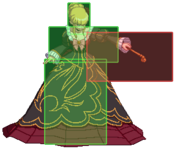
f.5B
Beatrice-5B-Raw.png
Beatrice-f5B.png
Beatrice-f5B2.png
Beatrice-f5B3.png
Beatrice-f5B4.png
Damage RecDamage Startup Active Recovery Guard Cancel Adv Hit Adv Block Invul
150 x 8 7 13 HL (J), Special, SP, Meta -4 -6 x
  • Beatrice swings her pipe at the opponent.
Toggle Hitboxes
Toggle Hitboxes


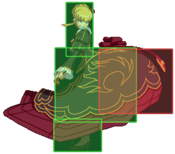
6B
Beatrice-6B-Raw.png
Beatrice-6B.png
Version Damage RecDamage Startup Active Recovery Guard Cancel Adv Hit Adv Block Invul
6B 180 x 20 11 12 H - +2 -1 x
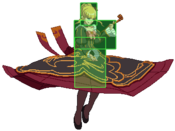
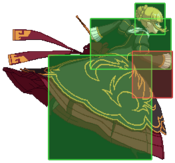
  • Beatrice jumps at the opponent, hitting them with her dress.
Version Damage RecDamage Startup Active Recovery Guard Cancel Adv Hit Adv Block Invul
6[B] 180 x 35 11 12 H Special, SP +2 -1 x
  • When charged it can be cancelled into her air specials.
Toggle Hitboxes
Toggle Hitboxes


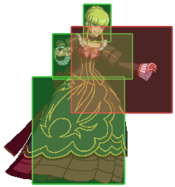
c.5C
Beatrice-c5C-Raw.png
Beatrice-c5C.png
Beatrice-c5C2.png
Damage RecDamage Startup Active Recovery Guard Cancel Adv Hit Adv Block Invul
270 x 8 4 19 HL (J), Special, SP, Meta, Dash +2 -1 x
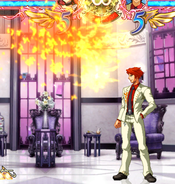
  • Beatrice attacks with an explosion of golden butterflies.
Toggle Hitboxes
Toggle Hitboxes
f.5C
Beatrice-5C-Raw.png
Beatrice-f5C.png
Beatrice-5C2.png
Beatrice-5C3.png
Damage RecDamage Startup Active Recovery Guard Cancel Adv Hit Adv Block Invul
249 x 12 6 22 HL (J), Special, SP, Meta, Dash -3 -6 x
  • Beatrice attacks with an explosion of golden butterflies.
Toggle Hitboxes
Toggle Hitboxes


6C
Beatrice-6C-Raw.png
Beatrice-6C.png
Normal
Normal
Beatrice-6C-charged-Raw.png
Charged
Charged
Version Damage RecDamage Startup Active Recovery Guard Cancel Adv Hit Adv Block Invul
6C 225 x 16 7 21 H (J), Special, SP, Meta, Dash -3 -6 x
  • Beatrice kicks her opponent.
Version Damage RecDamage Startup Active Recovery Guard Cancel Adv Hit Adv Block Invul
6[C] 285 x 29 7 21 H (J), Special, SP, Meta, Dash WS -6 x
  • Wallsplats the opponent.
Toggle Hitboxes
Toggle Hitboxes

Crouching

2A
Beatrice-2A-Raw.png
Beatrice-2A.png
Damage RecDamage Startup Active Recovery Guard Cancel Adv Hit Adv Block Invul
54 x 5 3 8 HL Special, SP, Meta -1 -1 x
  • Beatrice kicks at the opponent.
Toggle Hitboxes
Toggle Hitboxes


2B
Beatrice-2B-Raw.png
Beatrice-2B.png
Damage RecDamage Startup Active Recovery Guard Cancel Adv Hit Adv Block Invul
150 x 8 4 14 L Special, SP, Meta -2 -4 x
  • Beatrice swings her pipe at her opponent, attacking with a trail of golden butterflies.
Toggle Hitboxes
Toggle Hitboxes


2C
Beatrice-2C-Raw.png
Beatrice-2C.png
Damage RecDamage Startup Active Recovery Guard Cancel Adv Hit Adv Block Invul
210 x 6 10 16 L Special, SP, Meta KD -5 x
  • Beatrice spins, attacking the opponent with her chair of golden butterflies.
Toggle Hitboxes
Toggle Hitboxes
3C
Beatrice-3C-Raw.png
Beatrice-3C.png
Damage RecDamage Startup Active Recovery Guard Cancel Adv Hit Adv Block Invul
180 x 8 20 12 L Special, SP, Meta KD -10/+9 x
  • A sliding kick. Knocks down.
Toggle Hitboxes
Toggle Hitboxes

Jumping

j.8A
Beatrice-J8A-Raw.png
Beatrice-J8A.png
Damage RecDamage Startup Active Recovery Guard Cancel Adv Hit Adv Block Invul
60 x 5 9 6 H Special, SP ? ? x
  • Beatrice attacks the opponent with her pipe in midair.
Toggle Hitboxes
Toggle Hitboxes
j.7/9A
Beatrice-J79A-Raw.png
Beatrice-J79A.png
Damage RecDamage Startup Active Recovery Guard Cancel Adv Hit Adv Block Invul
60 x 5 9 6 H Special, SP ? ? x
  • Beatrice attacks the opponent in midair with her knees.
Toggle Hitboxes
Toggle Hitboxes


j.7/8/9B
Beatrice-J8B-Raw.png
Beatrice-JB.png
Damage RecDamage Startup Active Recovery Guard Cancel Adv Hit Adv Block Invul
150 x 11 5 8 H Special, SP ? ? x
  • Beatrice attacks the opponent in midair with one knee.
Toggle Hitboxes
Toggle Hitboxes


j.8C
Beatrice-J8C-Raw.png
Beatrice-J8C.png
Damage RecDamage Startup Active Recovery Guard Cancel Adv Hit Adv Block Invul
252 x 12 9 6 H Special, SP ? - x
  • Beatrice kicks the opponent in midair with both legs.
Toggle Hitboxes
Toggle Hitboxes
j.7/9C
Beatrice-J79C-Raw.png
Beatrice-J79C.png
Damage RecDamage Startup Active Recovery Guard Cancel Adv Hit Adv Block Invul
252 x 17 12 9 H Special, SP ? ? x
  • Beatrice swings her pipe in midair.
Toggle Hitboxes
Toggle Hitboxes

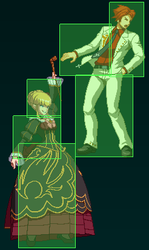
Throw

Throw
Beatrice-BCwhiff.png
Whiff animation
Whiff animation
Beatrice-BC.png
Beatrice-BC2.png
Damage RecDamage Startup Active Recovery Guard Cancel Adv Hit Adv Block Invul
300 - 0-1 x 40 (if whiffed) UNB - ? x x
  • Beatrice grabs her opponent with golden butterflies and knocks them to the ground.

Special Moves


Levitation 「空中浮遊」
j.[8]
Beatrice-8.png
Damage RecDamage Startup Active Recovery Guard Cancel Adv Hit Adv Block Invul
x - ? x ? x - x x x
  • Beatrice floats in the air for a small amount of time. Hold it to increase its duration.


Come to Me, Seven Stakes! 「おいでなさい、七杭!」
236A/B/C
Beatrice-236X.png
Beatrice-236X2.png
Version Damage RecDamage Startup Active Recovery Guard Cancel Adv Hit Adv Block Invul
236A 195 - 14 ? 48 total HLA - -10 -14 x
  • Beatrice summons one of the stakes from a portal in front of her which then flies horizontally across the stage.
Version Damage RecDamage Startup Active Recovery Guard Cancel Adv Hit Adv Block Invul
236B 195 - 14 ? 48 total HLA - -10 -14 x
Version Damage RecDamage Startup Active Recovery Guard Cancel Adv Hit Adv Block Invul
236C 195 - 14 ? 48 total HLA - -10 -14 x


Red Truth 「赤き真実」
623A/B/C
Beatrice-623A.png
623A version
623A version
Beatrice-623B.png
623B version
623B version
Beatrice-623C.png
623C version
623C version
Version Damage RecDamage Startup Active Recovery Guard Cancel Adv Hit Adv Block Invul
623A 300 - 6 ? ? HL - KD -14 x
  • Beatrice sweeps her hand up into the air trailed by red. All versions have invincibility.
Version Damage RecDamage Startup Active Recovery Guard Cancel Adv Hit Adv Block Invul
623B 315 - 8 ? ? HL - KD -15 x
Version Damage RecDamage Startup Active Recovery Guard Cancel Adv Hit Adv Block Invul
623C 330 - 10 ? ? HL - KD -23 x


Surely I Am The Golden Wind! 「妾こそは黄金の風!」
(j.)214A/B/C
Beatrice-214X.png
Ground version
Ground version
Beatrice-J214X.png
Aerial version
Aerial version
Version Damage RecDamage Startup Active Recovery Guard Cancel Adv Hit Adv Block Invul
214A ±480 - 23 ? ? HL - +2 -5 x
  • Beatrice disperses into a swarm of golden butterflies which fly forward and damage the foe on contact. Can destroy single hit projectile during active frames.
Version Damage RecDamage Startup Active Recovery Guard Cancel Adv Hit Adv Block Invul
214B ±480 - 23 ? ? HL - -3 -9 x
Version Damage RecDamage Startup Active Recovery Guard Cancel Adv Hit Adv Block Invul
214C ±480 - 23 ? ? HL - -7 -13 x
Version Damage RecDamage Startup Active Recovery Guard Cancel Adv Hit Adv Block Invul
j.214A ±480 - ? ? ? HL - ? -? x
  • Aerial version of her 214 series.
Version Damage RecDamage Startup Active Recovery Guard Cancel Adv Hit Adv Block Invul
j.214B ±480 - ? ? ? HL - ? -? x
Version Damage RecDamage Startup Active Recovery Guard Cancel Adv Hit Adv Block Invul
j.214C ±480 - ? ? ? HL - ? -? x


Sinister Seal 「不吉なる刻印」
j.236A/B/C
Beatrice-J236A.png
j.236A version
j.236A version
Beatrice-J236B.png
j.236B version
j.236B version
Beatrice-J236C.png
j.236C version
j.236C version
Version Damage RecDamage Startup Active Recovery Guard Cancel Adv Hit Adv Block Invul
j.236A 300 - 14 ? ? HL - ? +2 x
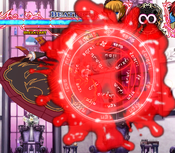
  • Beatrice summons a magical red circle in front of her.
Version Damage RecDamage Startup Active Recovery Guard Cancel Adv Hit Adv Block Invul
j.236B 300 - 14 ? ? HL - ? -6 x
Version Damage RecDamage Startup Active Recovery Guard Cancel Adv Hit Adv Block Invul
j.236C 300 - 14 ? ? HL - ? -14 x

SP Supers


Gouge and Kill, Seven Sisters! 「抉りて殺せ七姉妹!」
236A+B
Beatrice-236SP.png
Beatrice-236SP2.png
Damage RecDamage Startup Active Recovery Guard Cancel Adv Hit Adv Block Invul
492 x ? x 116 (total) HL - KD ? x
  • Beatrice summons all seven stakes from red portals which fly horizontally across the stage, hitting the opponent six times before knocking them away with a final seventh hit.


I'll Say it Again, The Red Truth! 「重ねて言おう、赤き真実!」
623A+B
Beatrice-623A.png
Beatrice-623SP.png
Damage RecDamage Startup Active Recovery Guard Cancel Adv Hit Adv Block Invul
±498 x 7 7(29)12 31 HL - KD -6 1-14
  • Beatrice sweeps her hand up into the air trailed by red twice.
  • Launches the opponent in the air which can lead into a huge juggle combo, making it a very deadly reversal should it hit.
  • Has a noticeable gap between both hits, which is when the move should actually be punished rather than at the end of the second hit, which is -6 and pushes the opponent very far away.


Gaze at my Golden Butterflies and Die! 「見惚れて死ね、黄金蝶に!」
(j.)214A+B
Beatrice-214X.png
Grounded version
Grounded version
Beatrice-J214X.png
Aerial version
Aerial version
Version Damage RecDamage Startup Active Recovery Guard Cancel Adv Hit Adv Block Invul
214SP ±636 x 23 ? ? HL - KD -18 x
  • Beatrice disperses into a swarm of golden butterflies which fly forward and damage the foe on contact for four hits.
Version Damage RecDamage Startup Active Recovery Guard Cancel Adv Hit Adv Block Invul
j.214SP ±636 x ? ? ? HL - KD ? x
  • Aerial version of SP Butterflies. Very important for her corner loops.


Take this, my magic circle!" 「くれてやるわ魔法陣!」
j.236A+B
Beatrice-J236SP.png
Damage RecDamage Startup Active Recovery Guard Cancel Adv Hit Adv Block Invul
±504 x 14 ? 51 (total) HL - ? +28 x
  • Beatrice summons 3 large magical red circles at the opponent's position which sticks to them as it hits.

Level 2 Super


Beatrice's Definition of a Closed Room 「ベアトリーチェの密室定義」
236236C
Beatrice-236236C.png
Damage RecDamage Startup Active Recovery Guard Cancel Adv Hit Adv Block Invul
645 - 8 6 25 HL - KD ? x
  • Beatrice rushes forward at the opponent. If she hits them, she traps them in a closed box and the opponent takes 8 hits.

Meta Super


Summon Twin Battle Towers 「双子の戦塔召喚」
641236C-632146X during MetaWorld
Beatrice-MetaSuper.png
Beatrice-MetaSuper2.png
641236A version
641236A version
Beatrice-MetaSuper3.png
641236B version
641236B version
Beatrice-MetaSuper4.png
641236C version
641236C version
Version Damage RecDamage Startup Active Recovery Guard Cancel Adv Hit Adv Block Invul
641236C x x ? x ? x - x x x
  • Beatrice summons two towers at her current position, which lasts as long as the Meta World is active. While the towers are out, she can do three things:
Version Damage RecDamage Startup Active Recovery Guard Cancel Adv Hit Adv Block Invul
A 500 x ? ? ? x - x x x
  • 641236A: Beatrice destroys her two towers, allowing you to use summon them again at a different place.
Version Damage RecDamage Startup Active Recovery Guard Cancel Adv Hit Adv Block Invul
B 420 x ? ? ? x - x x x
  • 641236B: Beatrice quickly summons a second set of towers behind the opponent, which fires a quick barrage of red projectiles, knocking them away.
Version Damage RecDamage Startup Active Recovery Guard Cancel Adv Hit Adv Block Invul
C ±743 x ? ? ? x - x x x
  • 641236C: Beatrice uses her twin towers to send a barrage of red projectiles, hitting for up to 36 times.

Frame Data

    KD = Knockdown
                              |          Frames             |  Frame Advantage |

              Attack  | Damage|Startup*| Active  | Recovery |On Hit | On Block | Notes
               Throw  ------------------------------------------------------------------
                 B+C  |  300  |  0-1   |    ?    |    ?     |  UKD  |          |40 Duration on Whiff
             Normals  ------------------------------------------------------------------
                c.5A  |   54  |    3   |    5    |    6     |  +1   |   +1     |
                f.5A  |   54  |    7   |    6    |    4     |  +0   |   +0     |
                  2A  |   54  |    5   |    3    |    8     |  -1   |   -1     |
                c.5B  |  168  |    3   |   10    |   26     | -20   |  -22     |
                f.5B  |  150  |    8   |    7    |   13     |  -4   |   -6     |
                  2B  |  150  |    8   |    4    |   14     |  -2   |   -4     |
                c.5C  |  270  |    8   |    4    |   19     |  +2   |   -1     |
                f.5C  |  249  |   12   |    6    |   22     | -3/+2 |  -6/-1   |
                  2C  |  210  |   13   |    3    |   24     |  UKD  |   -5     |
                j.5A  |   60  |    5   |    9    |    6     |       |          |
                j.5B  |  150  |   11   |    5    |    8     |       |          |
               j8.5C  |  252  |   12   |    9    |    6     |       |          |
           j(7/9).5C  |  252  |   17   |   12    |    9     |       |          |
     Command Normals  ------------------------------------------------------------------
                  6B  |  180  |   20   |   11    |   12     | +2/+12|  -1/+9   |
                6[B]  |  180  |   35   |   11    |   12     | +2/+12|  -1/+9   |Special- and SP-cancelable
                  6C  |  225  |   16   |    7    |   21     | -3/+3 |  -6/+0   |
                6[C]  |  285  |   29   |    7    |   21     |   WS  |  -6/+0   |Jump-cancelable at the moment it connects
                  3C  |  180  |    8   |   20    |   12     |  UKD  | -10/+9   |
            Specials  ------------------------------------------------------------------
                236A  |  195  |    ?   |    ?    |    ?     |   ?   |     ?    |
                236B  |  195  |    ?   |    ?    |    ?     |   ?   |     ?    |
                236C  |  195  |    ?   |    ?    |    ?     |   ?   |     ?    |
              j.236A  |  300  |    ?   |    ?    |    ?     |   ?   |     ?    |
              j.236B  |  300  |    ?   |    ?    |    ?     |   ?   |     ?    |
              j.236C  |  300  |    ?   |    ?    |    ?     |   ?   |     ?    |
                623A  |  300  |    6   |    ?    |    ?     |  KD   |     ?    |
                623B  |  315  |    8   |    ?    |    ?     |  KD   |     ?    |
                623C  |  330  |   10   |    ?    |    ?     |  KD   |     ?    |
                214A  |+-480  |    ?   |    ?    |    ?     |   ?   |     ?    |
                214B  |+-480  |    ?   |    ?    |    ?     |   ?   |     ?    |
                214C  |+-480  |    ?   |    ?    |    ?     |   ?   |     ?    |
              j.214A  |+-480  |    ?   |    ?    |    ?     |   ?   |     ?    |
              j.214B  |+-480  |    ?   |    ?    |    ?     |   ?   |     ?    |
              j.214C  |+-480  |    ?   |    ?    |    ?     |   ?   |     ?    |
       SPs and Meta  ------------------------------------------------------------------
              236A+B  |+-585  |    ?   |    ?    |    ?     |  KD   |     ?    |
            j.236A+B  |+-504  |    ?   |    ?    |    ?     |   ?   |     ?    |
              623A+B  |+-498  |    ?   |    ?    |    ?     |  KD   |     ?    |
            j.214A+B  |+-636  |    ?   |    ?    |    ?     |  KD   |     ?    |
              214A+B  |+-636  |    ?   |    ?    |    ?     |  KD   |     ?    |
              236x2C  |  645  |    ?   |    ?    |    ?     |  KD   |     ?    |
             641236C  |  --   |    ?   |    ?    |    ?     |  --   |    --    |
          -> 641236A  |  500  |    ?   |    ?    |    ?     |  --   |    --    |
          -> 641236B  |  420  |    ?   |    ?    |    ?     |  --   |    --    |
          -> 641236C  |+-743  |    ?   |    ?    |    ?     |  --   |    --    |

General Strategy

UNDER CONSTRUCTION

Team Building

Feel free to edit this part of the wiki with your tips/strats what partners are best for Beatrice to use. Remember I'm watching you.

The information displayed here is from the 2022 Team Tier List from the Ougon Discord Thus, it is open to change, but it should work as a building block for people looking for team pairing ideas. If you are a player of any of the teams and want to change anything feel free to do so.

Reasons to pick Beatrice for your team

  • Beatrice has very good zoning and conversions, and her ability allows for a lot of damage or pressure at no meter cost. However, her ground pokes outside of 3C are hard to use, and without meter, she can't push her offense as easily.
  • She benefits from partners that can build meter easily for her, who can fight against her more troublesome MUs, or who make good use of Infinity SP.
BETANGE.png Beatrice/Ange
  • StunBoost with towers can actually be detrimental, because the opponent can escape by jumping and getting stunned and then this team can hardly damage them further. It can also make Beatrice’s corner combos a bit less damaging which is pointless.
  • These two have no synergy, Ange appreciates SP fine but her counter-based MetaWorld is outperformed by George’s and Rono’s.
BATBETO.png Beatrice/Battler
  • Combining solid neutral with Beatrice’s crazy damage, this team is straightforward and strong.
  • One favorable dynamic is that Battler can use the 5SP Beato gives him from towers to actually return the favor by generating some for her back with his own MetaSuper. This leaves them with a good SP economy, but your opponent will be getting lots of meter too, so you have to actually play against them. *Battler’s job is to confirm and corner carry so Beatrice can go to town.
  • You need to be good at both characters to really get the flow of how they should work together.
BETBBAT.png Beatrice/Black Battler
  • One of the few teams where Black Battler could be considered a better partner than Battler, at least for some matchups.
  • The bulk of this team leaves much to be desired and Massacre, even paired with the pair’s high damage, might not do as much to make up for it as one would hope. It also doesn’t trigger for chip damage which is sometimes what Beatrice would be doing more of in MetaWorld; Resurrection is preferable here. *That said, similar to Beato/George, the free SP2s are a great advantage. Beato’s high stun and meter generation pair well with BB’s slightly better neutral, but lower stun and more meter-hungry playstyle, compared to normal Battler.
BETBERN.png Beatrice/Bernkastel
  • MetaBoost towers is really strong, and Bern can handle neutral for Beato with no issue at all, as well as give her some SP back with her MetaSuper and kakera.
  • A bit more patient compared to how Beato usually plays, but like many Bern teams it excels at oppressing. Still, Beato’s general meter disadvantage (for herself) and Bern’s low stun, as well as the team’s overall low health, means you can’t afford to make too many mistakes.
  • You’ll need to form a balanced playstyle that combines Bern’s more careful, systematic pressure with Beato’s more explosive setplay and corner combos. Don’t get greedy, but know when to sustain momentum.
BETCHIE.png Beatrice/Chiester 410
  • 410’s deceptively strong neutral that unfortunately lacks a solid reversal really appreciates the extra SP Beatrice can give. Free SP arrows are a genuinely good option for gaining momentum on almost any character in neutral.
  • However the real advantage this team holds is in BreakBoost towers. One issue Beato suffers from is her inability to keep guardbreaking the opponent as easily over the course of the match (due to guard capacity increasing with each break), which is often her main path to big damage.
  • 410 completely removes this issue and makes those earlier breaks all the faster. That said, it can actually make the opponent’s guard break too fast at least at first, so Beato might need to adapt her gameplan for those first few MetaWorlds.
  • A slightly unwieldy, but very strong, team.
BETDLAN.png Beatrice/Dlanor
  • Worse neutral and damage than Beato/Will. Can barely approach. Dlanor appreciates the free SP2 but George or BB are better for that.
  • Free Dlanor grabs are nice and give Beato some SP back.
BETERIK.png Beatrice/Erika
  • No synergy except for free SP2s from Erika; George or BB would be preferable if that’s what you’re into.
  • They do align with the common good team comp of one neutral character and one damage character, but overall there’s no reason to pick Erika over Luci, Battler or BB for Beatrice. Erikaprefers Ronove too."
EVABET.png Beatrice/EVA-Beatrice
  • The pressure and damage setups these two create together can never be overlooked. Eva will handle neutral and drive the opponent into the corner, so Beatrice can start her setplay for even more damage than usual, then you switch back into Eva and begin jelly setplay on top of it all. Eva’s command grabs also have the rare property of feeding a little more SP back into Beato.
  • That said you will struggle to catch some opponents to begin with; Lambdadelta, Kanon and Ronove can all annoy this pair quite a bit.
  • Regardless of the matchup though, once they get going, their killing power is some of the best in the game.
BETGEOR.png Beatrice/George
  • An underestimated team which probably snowballs better than almost any other. SP2s from George prevent the opponent from touching and he can use them extremely liberally as Beatrice gives him one for free and easily generates the SP for more with her towers. SP2 the opponent, switch to Beatrice, turn 1SP from her into 5SP for George, SP2 them again, repeat.
  • Your momentum never ends if you play correctly and the opponent won’t survive this cycle long; the moment their guard capacity is high in the corner, Beatrice can shred their healthbar. A few confirms will take you far, and George complements Beato’s low-SP playstyle better than anyone.
  • Similar to Beato/Jess though, you need to get George handle neutral so you might not always get into that sweet spot cycle that makes this team so good.
BETJESS.png Beatrice/Jessica
  • If you like big damage however you can get it, this one’s for you. Jessica with an SP lead and a free SP2 is pretty threatening and the massive damage this pair do, both to the healthbar and to guard capacity, is beyond anything any team can endure. One 5B from charged Jessica can win the round.
  • This team stuns extremely easily, and there’s a lot of momentum looping too. The combination of ShaveBoost with the completely unavoidable nature of corner towers (you can even prevent Assault Touch from being a way out) is free damage pure and simple. Three tower shots will land you about 75% of a guarding opponent’s healthbar, and neutralise any SP lead, and also do big guard damage to them, and then you throw Jessica at them. It’s probably unnecessary to go on.
  • With that being said, Jessica will probably be handling pretty much all of your neutral, since you want to open with her and give her an SP lead for most of the match, so don’t expect everything to always go to plan.
  • Dealing with neutral-heavy characters can be a real difficulty for these two.
BETKAN.png Beatrice/Kanon
  • Beatrice’s towers give the opponent so much SP that Silent Attack doesn’t matter, leaving Luci the obvious better option. Her moveset with a more versatile 2C and the ability to 3C is also preferable.
  • You could try to avoid using towers to slowly generate a lead just for your side, but this is generally unnecessary and Rono is better for that.
BETLAM.png Beatrice/Lambdadelta
  • These two guardbreak and loop momentum better than literally any other team. Beato adds a whole dimension of damage to Lambda’s comet and SP konpeito setups. Furthermore Lambda’s uniquely overpowering role when she has meter advantage pairs perfectly with Beato’s playstyle of giving her partner SP. She can also build up SP for Beato better than most partners.
  • This team can complete a foolproof setplay sequence that does way too much damage, and then go directly into projectile stalling. Minor mistakes from the opponent are also punished harshly, so stagger is the order of the day.
  • Despite all this, meterless these two don’t have as much to brag about, and their health is lowish, so they’re weak to rushdown.
BETLUCI.png Beatrice/Lucifer
  • One of the better rushdown teams in the game; just a couple of confirms from Lucifer might be enough to win you the round.
  • Lucifer’s ability to 3C touch into Beatrice’s tower setup is not to be underestimated and adds a real threat to her MetaDeclarations in almost any situation.
  • Expect Beatrice to be lagging behind in meter for the majority of the match, but this is no issue; she only needs one or two meter to take out an entire healthbar and stun, and Lucifer’s SP can be used chiefly to reduce the opponent’s through MetaDeclaring as she has little use for it in neutral.
  • Overall the ability to loop momentum through mixup or guardbreak is what makes this team so lethal and consistent. That being said, this team can struggle defensively, so there isn’t a lot of room for mistakes.
  • It’s one of the better teams on account of its performance when played optimally.
BETRON.png Beatrice/Ronove
  • Plays pretty similar to Beato/Eva and Jess/Rono, but this team struggles with neutral more than either. Still their presence once they gain momentum is what makes them so powerful.
  • Ronove is one of the few characters who have a place in Beatrice’s setplay; you want to judge whether to take a path into Rono’s MetaSuper or Beatrice’s one based on the situation. If Ronove needs SP, go for towers. If you already have the SP lead on Ronove, you can just do his MetaSuper and boost your Beatrice’s SP without giving the opponent any more.
  • In other words this team has a lot of control over the SP dynamic of the match, which is super good.
ROSBEAT.png Beatrice/Rosa
  • Beatrice is probably the one character in the game who appreciates Detachment the least, as her setups are unavoidable either way and she has no serious mixup game.
  • Rosa appreciates SP from towers but no more than the average character.
  • These two struggle greatly with neutral.
  • Generally Will is the better option for Rosa.
BETSHAN.png Beatrice/Shannon
  • Both prefer Will. Weak neutral and bad meterless options. Hard to get into damage-dealing situations.
  • Shannon might just lose to the opponent if both have 5SP.
BETVIR.png Beatrice/Virgilia
  • These two have a fantastic SP economy and control game together, but no better than Beato/Will or Beato/Rono. Both are fairly interchangeable in the corner but neither have a good ability to actually get the opponent there.
  • Great with momentum, but they really have a hard time getting it.
BETWILL.png Beatrice/Willlard
  • A team that leaves no room for error on the opponent’s side, boasting arguably the highest capacity for unburstable damage in the game through Beatrice’s guardbreak setups and Will’s airborne combos. Once you’ve got your first stun, you can probably snowball into a victory before too long.
  • Expect to see a lot of Will j.2C in neutral as this team can struggle with pokes and footsies; its neutral is its only mediocre area.
  • Will’s ability to wear down the opponent’s SP by declaring without dropping a juggle complements Beatrice’s playstyle; just a small SP lead is enough for her to completely overwhelm. To this end the free SP from his MetaSuper and corner carry goes a long way.
  • Overall a team with a very good SP economy. Some situational tower setups can be made safe by SPCancel, and InfinitySP allows Will to do as much damage as possible for as little SP as possible.
  • Simple synergy combined with the sheer strength of both of these characters is what makes this team work so well.
  • As with many Beatrice teams however, it can struggle when it loses the SP advantage; here you’ll likely want to resort to a rushdown strategy, something this team is also perfectly capable of.

Combos

Combo Damage Cost Meter Gain Location

Basic Meterless confirm.

Basic Meterless confirm. Leaves you right infront of the opponent to keep pressure

2SP route. Doesn't work if you aren't near the corner.

Meterless Air counterhit route.

Basic tower set-up.

Remove the first part of the combo and go to the 641236B route directly if you are low on MetaSuper timer.

j.214SP corner loops. Very damaging but you will most likely stun the opponent before using all your SP.

  • "xN" means you can keep repeating the sequence in brackets as long as you have meter.
  • Against certain characters (Shannon, Lambda, Erika, etc.) the initial 5C juggle after 214SP wont come out in time. In that cause use 5B instead.

623SP loop. Not nearly as much damage as her corner loop but you can keep looping until you get to the corner an go into her 214SP corner loop.


Video Examples

Pictures

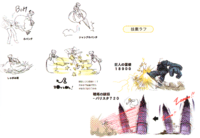
Early artwork of Beatrice.
General
FAQ
Menus
HUD
Links
Mods
Mechanics
Touch
Characters