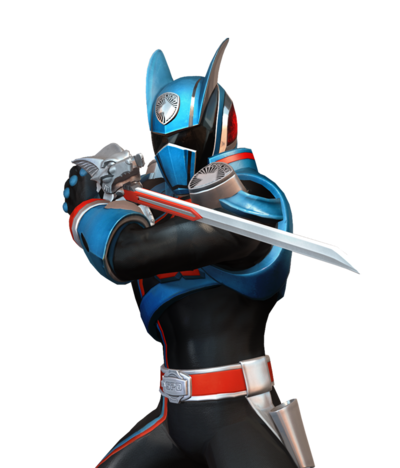
Anubis "Doggie" Cruger
SPD Shadow Ranger Introduction
Health: 1000
Walk Speed: - forward, - back
The commander of S.P.D. on Earth, "Doggie" thought he was the last of his kind. His home planet's population had been decimated by Emperor Gruumm and his armies. Former fellow student and rival Icthior, revealed that Commander Cruger's wife Isinia was in the clutches of Gruumm. Upon defeating Gruumm, the Commander was finally reunited with his love.
Overview
Shadow Ranger is a very unique and open ended character in Battle for the Grid. His centralized mechanic, his 5S stance, is very dynamic and leads to a lot of interesting play patterns. As a high execution character, you will often find yourself pressing lots of buttons in very quick succession. With a powerful forward dash, kara throw, and long range overhead, Dog is consistently a threat on a large portion of the screen. Despite this, his tools in neutral often have very high commitments and can be punished hard. Often benefitting from a character that can keep opponents locked down, Dog's assist is very powerful and can create a near instant 50/50 mixup at any point on the screen. In addition to his assist, he has many tools to support another character even from a tagout position. In order to play Shadow Ranger proficiently, expect to be in training mode frequently while you learn his combos and how to effectively utilize his stance cancels.
Playstyle
|
Anubis "Dog" Cruger is a medium-to-long range character with high damage, high execution, and great support value |
| Pros |
Cons |
- Damage - Dog has consistently high damage with his optimized routes as well a semi-practical infinite
- Pet the Damn Dog - Dog's strike/throw mix is bolstered by a very long kara throw which leads to a ToD
- Airbud - Dog's assist is very strong as a way to call out unsafe options as well as a mixup tool when tagged into
- Tagout Value - Dog has very long-lasting specials such as jS and 5SH that allow for strong tagouts
- Solo Mix - Dog has access to an instant overhead with jH that can really help open up opponents
- Zoomies - Dog has one of the best forward dashes in the game which allows him to cover a lot of ground very quickly
- Whose House??? - Everything Dog does is cool and flashy
|
- Matchup Spread - Dog struggles against the best characters in the game
- Neutral - While Dog has relatively large buttons, he can struggle to control the neutral game as the active character
- Not So Super - While Dog's super is projectile invulnerable, it loses to almost all other options
- Bad Panic Buttons - Dog's EX and anti air are both below average which means he has to deal with more shenanigans on defense
- High Commitment - Dog's most powerful options are very easy to punish and his safer options are low impact
- Afraid to Fly - Dog's jump arc and air-to-air buttons are very poor against much of the roster
- Hit the Lab - Dog's normal combos and neutral require backdash cancels and high APM. His 5L Plinkfinite is full of tight links and inputs
|
Normal Moves
5L
5L
|
| Damage
|
Guard
|
Startup
|
Active
|
Recovery
|
Frame Adv (Block)
|
Frame Adv (Hit)
|
| 35
|
Low/Air
|
7f
|
-
|
-
|
-1
|
-
|
Scuff the Js. A standing low. A good, fast normal to use when you're plus and in their face to catch jump-outs.
|
|
5LL
5LL
|
| Damage
|
Guard
|
Startup
|
Active
|
Recovery
|
Frame Adv (Block)
|
Frame Adv (Hit)
|
| 37*
|
High/Low/Air
|
-
|
-
|
-
|
-4
|
-
|
Push kick. Knocks down. You rarely want this move to actually come out.
|
|
2L
2L
|
| Damage
|
Guard
|
Startup
|
Active
|
Recovery
|
Frame Adv (Block)
|
Frame Adv (Hit)
|
| 35
|
High/Low/Air
|
5f
|
-
|
-
|
-8
|
-
|
Jab with sword hilt. Not a low. Fastest option to mash out of strings. Also useful in juggles midscreen when 5M is too slow to hit before the opponent falls outside its range. Can be linked into from heavy stance cancels until hitstun deteriorates.
|
|
5M
5M Party starter Party starter
|
| Damage
|
Guard
|
Startup
|
Active
|
Recovery
|
Frame Adv (Block)
|
Frame Adv (Hit)
|
| 50
|
High/Low/Air
|
9f
|
-
|
-
|
-2
|
-
|
Basic slash. Pretty average hitbox for a medium, but leads to scary pressure and damaging combos. Dash 5M is a decent approach/whiff punish.
|
|
5MM
5MM
|
| Damage
|
Guard
|
Startup
|
Active
|
Recovery
|
Frame Adv (Block)
|
Frame Adv (Hit)
|
| 50
|
High/Low/Air
|
-
|
-
|
-
|
-1
|
-
|
Turning slash. +3 after Stance Cancel. A second hitbox that you can put out after 5M, used in juggles a lot.
|
|
5MMM
5MMM
|
| Damage
|
Guard
|
Startup
|
Active
|
Recovery
|
Frame Adv (Block)
|
Frame Adv (Hit)
|
| 50
|
High/Low/Air
|
-
|
-
|
-
|
-5
|
-
|
Crossing slash. Restands/Staggers on hit. Sideswaps on hit/block. Good tool to combo from super with if you have enough juggle limit left. Punishable on block, so the side swap property there is mostly only useful if you have an assist covering you and/or are swapping characters.
|
|
2M
2M
|
| Damage
|
Guard
|
Startup
|
Active
|
Recovery
|
Frame Adv (Block)
|
Frame Adv (Hit)
|
| 50
|
Low/Air
|
8f
|
-
|
-
|
-13
|
-
|
Low kick. Slower than 5A but big range and is a low. Cancelable into 5H and 4H. 5M/5MM tend to be better options in combos, but the ability to chain into 4H is very useful when juggle limit is full. In neutral, the low hurtbox and its range make this a very key move.
|
|
5H
5H
|
| Damage
|
Guard
|
Startup
|
Active
|
Recovery
|
Frame Adv (Block)
|
Frame Adv (Hit)
|
| 60
|
High/Low/Air
|
11
|
-
|
-
|
-1
|
-
|
Force slash. +4 after Stance Cancel. Mostly a bigger, slower version of 5M.
|
|
5HH
5HH
|
| Damage
|
Guard
|
Startup
|
Active
|
Recovery
|
Frame Adv (Block)
|
Frame Adv (Hit)
|
| 60
|
High/Low/Air
|
-
|
-
|
-
|
-23
|
-
|
Slash through that knocks the opponent away. Lots of recovery as you'd expect on an auto combo. Can cancel into super but nothing else. Useful for when you confirm a 5H late and aren't in a position where 2H is a great idea.
|
|
2H
2H
|
| Damage
|
Guard
|
Startup
|
Active
|
Recovery
|
Frame Adv (Block)
|
Frame Adv (Hit)
|
| 30
|
Low/Air
|
16f
|
-
|
-
|
-18
|
-
|
Pretty standard sword sweep. +3 after Stance Cancel. Causes a spinning knockdown and is limited to 2 in combos (a third 2H will cause flip out). Stance canceling this move is Doggie's primary way to start juggles from a standing hit, as the high launch from a juggled hit is helpful to correct for accidentally delaying juggles.
|
|
4H
4H
Saber Upper
|
| Damage
|
Guard
|
Startup
|
Active
|
Recovery
|
Frame Adv (Block)
|
Frame Adv (Hit)
|
| 70
|
High/Low
|
8f
|
-
|
-
|
-26
|
-
|
Backward slash. Air-unblockable launcher and anti-air. Pretty fast, jump-cancelable and special-cancelable, thus leading into Stance stuff. In the corner 4H>4S works. Moves Doggie backwards, which can be helpful for Anti-airing, but also makes it a little hard to use in pressure. Cannot kara-cancel into throw for some reason.
|
|
j.L
j.L
|
| Damage
|
Guard
|
Startup
|
Active
|
Recovery
|
Frame Adv (Block)
|
Frame Adv (Hit)
|
| 40
|
High/Air
|
6f
|
-
|
-
|
-
|
-
|
A normal jump-in, which makes it weird for Doggie.
|
|
j.M
j.M
|
| Damage
|
Guard
|
Startup
|
Active
|
Recovery
|
Frame Adv (Block)
|
Frame Adv (Hit)
|
| 50
|
High/Air
|
10f
|
-
|
-
|
-
|
-
|
Drop kick. On hit/block, Doggie will jump back, which can make conversions awkward, but also allows for weird double cross-ups.
|
|
j.H
j.H
|
| Damage
|
Guard
|
Startup
|
Active
|
Recovery
|
Frame Adv (Block)
|
Frame Adv (Hit)
|
| 65
|
High/Air
|
12f
|
-
|
-
|
-
|
-
|
A pretty normal heavy sword slash, except that it causes a huge amount of landing recovery as Doggie rolls and strikes a cool pose. The end of the pose is cancelable so it's not as awful as it looks, but it's enough to make whiffing a j.H extremely bad. Causes a groundbounce on air hit. Comes out only if input near or after the apex of his jump.
|
|
Special Moves
5S
Shadow Form
5S "Shadow..."
Stance Cancel
Mist Finer
"UPPER!"
"For Isinia!"
"Shadow..."
Stance Cancel
Mist Finer
"UPPER!"
"For Isinia!"
|
| Version
|
Damage
|
Guard
|
Startup
|
Active
|
Recovery
|
Frame Adv (Block)
|
Frame Adv (Hit)
|
| Stance
|
0
|
-
|
9f
|
-
|
-
|
-
|
-
|
Doggie enters his Stance. There's some startup before Stance Moves can be done, but not a lot. 53f total recovery if you just let it be.
|
Shadow Slash
5S~L
|
65
|
High/Low/Air
|
14f
|
-
|
-
|
-30
|
-
|
Long-ranged slash. Can immediately cancel into a second slash by pressing L again. Wallbounces on air hit. If you're far from the corner, you can get 2 before the opponent hits the wall and bounces off. The recovery can be partially canceled by pressing S and going back into Stance. This can let you slash a third time to pick up after the wall bounce. If a slash connects on an airborne opponent after Doggie has used his wallbounce, it'll cause a hard knockdown.
|
Shadow Upper
5S~M
|
20, 50
|
High/Low/Air
|
15f
|
-
|
-
|
-26
|
-
|
Dash into an uppercut. An advancing launcher which can be jump-canceled or canceled back into Stance by pressing S. Because you can go straight back into Stance, this lets Doggie chain 2 launchers back to back and/or launch into 5S~L into 5S~H or stance cancel and do whatever.
|
For Isinia
5S~H
|
10x6, 20x2, 50
|
High/Low/Air
|
23f
|
-
|
-
|
-14
|
-
|
Doggie channels the power of his wife, Isinia, and uses it to do a fullscreen energy slash. Connects after a hard knockdown, which makes it a common ender. It also does a good bit of chip and takes up a ton of space if you can manage to get it out in neutral. The hitbox is the light blade and becomes active as soon as that animation starts. If you catch an opponent behind you and get all the hits to connect it'll build roughly a half a stock of meter, which makes this a staple in combos. Ends with a wall bounce or hard knockdown if Doggie has already used his wallbounce. Because the active frames begin behind Doggie, this move is something more like 30f when done point blank. You can do a second For Isinia if the first one hits enough times. Incredibly powerful tag out tool.
FOR HIS WIFE
|
Shadow Cancel
5S~S
|
0
|
-
|
9f
|
-
|
-
|
-
|
-
|
Cancels the Stance. While not instant, it's very fast. You can't buffer the input for stance cancel, so the advantage you get for stance canceling can be a little variable unless your execution is exact.
|
Shadowstep
5S~66
|
0
|
-
|
-
|
-
|
-
|
-
|
-
|
Stance forward dash. Can also be performed with L+M. Has a followup executed by inputting 4S.
|
Guard Breaker
5S~66~4S
|
70
|
High/Air
|
21f
|
-
|
-
|
-16
|
-
|
Overhead slash. Has OTG properties. Though an actual overhead, it isn't really necessary for mixup; if you want, you can just dash forward and then leave Stance and go low or throw or whatever. The overhead doesn't chain into any normals, but it does cancel back into Stance and will combo into 5S~L or 5S~M. Useful for when your opponent is scared of frame traps and wants to try and block it all out.
|
Eviscerate
5S~66~4SS
|
9x2, 70
|
High/Low/Air
|
-
|
-
|
-
|
-
|
-
|
Uppercut slash. Followup to 5S~66~4S.
|
|
4S
Shadow Strike
4S
|
| Version
|
Damage
|
Guard
|
Startup
|
Active
|
Recovery
|
Frame Adv (Block)
|
Frame Adv (Hit)
|
Shadow Strike
4S
|
80
|
High/Air
|
30f
|
-
|
-
|
-
|
-
|
Teleport drop. Groundbounces and has OTG properties. Acts as the start of a rekka. Doesn't track like the assist version does, but hits overhead unlike the assist. Realistically, the overhead isn't a very good mix-up solo, but you can swap out to an assist and make it scarier, or cover the screen up with a bunch of explosions or something. If you've already used your groundbounce, this move will knockdown and the rekka followups won't connect. Because Doggie comes in from such a high point, this move will likely not hit with its initial active frames, especially against crouching opponents. The exact timing of when it'll hit depends on the character's height. Height will also affect the exact disadvantage, but it will always be punishable, with -30 being the general ballpark.
|
Guard Breaker
4SS
|
-
|
High/Air
|
-
|
-
|
-
|
-16
|
-
|
Overhead slash. Identical to 5S~66~4S. The timing for this is weirdly specific after Doggie has landed from the teleport, but if you delay too much it'll whiff. Against a grounded opponent you can just mash it out, but on airborne opponents, you may need to delay a bit. Can cancel into Stance and connect 5S~L.
|
Eviscerate
4SSS
|
9x2, 70
|
High/Low/Air
|
-
|
-
|
-
|
-
|
-
|
Uppercut slash. Identical to 5S~66~4SS. Finishes out the rekka, launching the opponent pretty far. Cancelable into Super when Doggie lands. Going for all rekka hits is good when you're out of juggle limit after a Super but have a groundbounce still.
|
|
6S
Justice Defense
6S
|
| Version
|
Damage
|
Guard
|
Startup
|
Active
|
Recovery
|
Frame Adv (Block)
|
Frame Adv (Hit)
|
| 6S
|
0
|
-
|
-
|
-
|
-
|
-
|
-
|
| Catch
|
20, 1, 66
|
-
|
-
|
-
|
-
|
-
|
-
|
Counter that will also reflect fireballs. Counter window is very tight, but rewarding because it crumples the opponent. Has some recovery even after a reflect, which can make reflecting projectiles a bad idea if there's multiple on screen. Can reflect any projectile, even Gia's Super. Pressing 6SS transitions back into Stance.
|
|
j.S
Saber Slash
j.S
|
| Version
|
Damage
|
Guard
|
Startup
|
Active
|
Recovery
|
Frame Adv (Block)
|
Frame Adv (Hit)
|
| j.S
|
50
|
High/Low/Air
|
16f
|
-
|
-
|
-
|
-
|
Diagonally downwards aerial version of 5S~L. Stops Doggie in the air, which can mess with anti-air attempts.
|
| j.SS
|
50
|
High/Low/Air
|
-
|
-
|
-
|
-
|
-
|
Straight ahead air version of 5S~L. Wallbounces.
|
|
EX Attack
5L+S
Justice Assault
5S+L
|
| Damage
|
Guard
|
Startup
|
Active
|
Recovery
|
Frame Adv (Block)
|
Frame Adv (Hit)
|
| 20x3, 50x2, 70
|
High/Low/Air
|
9+5f
|
-
|
-
|
-14
|
-
|
- If the first hits are blocked, the rest of the move will not come out.
Upon use, Doggie does a move similar to his 4H. If it connects, he performs an altered version of the final hit of his 4S rekka. Invincible on startup, and cancelable to Super, but it tends to not combo unless it's canceled as soon as he lands.
|
|
Throws
Forward Throw
Forward Throw
5M+H/6M+H Get put in T H E B O X Get put in T H E B O X
|
| Damage
|
Guard
|
Startup
|
Active
|
Recovery
|
Frame Adv (Block)
|
Frame Adv (Hit)
|
| 101
|
Throw
|
6
|
-
|
-
|
-
|
-
|
Doggie applies the SPD badge on the opponent. As long as the badge is in place, the opponent can't jump, enabling some silly setups.
|
|
Back Throw
Back Throw
4M+H
|
| Damage
|
Guard
|
Startup
|
Active
|
Recovery
|
Frame Adv (Block)
|
Frame Adv (Hit)
|
| 61
|
Throw
|
6
|
-
|
-
|
-
|
-
|
Doggie performs a crossing slash. Since it's special-cancelable, Doggie can solo combo off his back throw with either 5S~L, 5S~M, or just straight up Super.
|
|
Super
Super
Shadow Saber
H+S "Shadow Saber!" "Shadow Saber!" "Justice is served!" "Justice is served!"
|
| Damage
|
Guard
|
Startup
|
Active
|
Recovery
|
Frame Adv (Block)
|
Frame Adv (Hit)
|
| 1, 80, 50x3, 100
|
High/Low/Air
|
6+7f
|
-
|
-
|
-30
|
-
|
Doggie performs a dashing slash slash that, if it hits, transitions into a cinematic sequence. Not invincible but pretty fast. Although it only covers about half screen, its range increases if the opponent is in a hard knockdown state. On a succesful hit, it crumples the opponent, which means Doggie can follow up from this Super. This move always sideswaps, but this can be negated via 5MMM. This Super is incredibly good, especially given Doggie's great meter gain, the fact that he doesn't need launchers/bounces to keep up juggles, and the sheer number of special moves he has which will keep combos alive when juggle limit is up.
|
|
Tag Actions
Assist
Assist
Shadow Strike
A1/A2
|
| Damage
|
Guard
|
Startup
|
Active
|
Recovery
|
Frame Adv (Block)
|
Frame Adv (Hit)
|
| 60
|
High/Low/Air
|
-
|
-
|
-
|
-
|
-
|
Based on 4S. Unlike the original, this tracks, which makes it a lot more useful. It doesn't hit overhead though.
|
|
Swap Strike
Swap Strike
2A1/A2+S
|
| Damage
|
Guard
|
Startup
|
Active
|
Recovery
|
Frame Adv (Block)
|
Frame Adv (Hit)
|
| 70
|
High/Low/Air
|
6
|
-
|
-
|
-4
|
-
|
Faster than EX Attack, making it a little more reliable as a reversal, but far less damaging. Forces a character switch on hit; knocks down if only one character remains.
Range and animation based on 5M.
Doggie's combos are very damaging, but also very long. If you have some damage on an assist, they might heal it all back by the time you finish your TOD, so consider snapping sometimes.
|
|
Strategy
Neutral and Pressure Theory
In game, Shadow Ranger has incredible range and coverage all backed up with one of the best forward dashes in the game. He has some of the best punishing moves in his 5S→L as well as a way to quickly recover from blocked attacks by using 5S→S or 5S→44 to cancel in and out of stance. In traversing the stage and playing the neutral game, it is integral to understand how stance cancels work. Not only can you cancel normals into specials, Shadow Ranger has a core mechanic where you can cancel specials into specials. That’s where stance canceling comes into play. All of Doggie’s moves can be canceled into another special except for 5S→M when blocked. With a solid understanding of how each of these specials play into each other, you will excel with the character.
5S→L Shadow Ranger’s best mid range tool. Can be used to punish whiffed moves from an opponent and convert into a combo. Also used to punish players who pushblock with the intent to punish immediately after (like when Lord Zedd players pushblock into their 5H). Note that it whiffs on most crouching characters at mid to long range. Be careful against Ranger Slayer, Tommy, Gia, Eric, Mastodon Sentry, Jen, and Kat as they can crouch underneath the slashes at a closer range where they can easily punish you on whiff. To a lesser extent, Zedd, RJ, and Magna Defender can try and punish your slashes in more unique scenarios, but it is more difficult for them.
5S→H Shadow Ranger’s best long range tool. Can be used to cover space and set up pressure for a character tagging in. Even a good tool to set up pressure for an incoming character when using a tag in. On hit, 5S→H can be converted into a combo if you haven’t yet used a wall bounce or you are close enough to a corner. You can connect into super if you do 5S→H→5S→66 super when you are outside of the corner.
5S→S/44 Used to kill recovery frames by canceling into, then right out of, stance. Doing so, more often than not, will leave you with frame advantage. This is Cruger's most powerful tool and learning how to implement stance cancels incredibly important to using the character from a holistic standpoint.
jS(S) A powerful midrange tool that comes out incredibly fast and hits overhead. jS can be performed very early on in your jump as well as low to the ground when you are descending. On whiff, it can be easily punished, however you can still land and cancel its recovery into the 5S stance whether it hits or not. Can be confirmed into 5S→L, 5S→M, 5S→H, 5S→66S, and even 5S→441S with varying degrees of difficulty and unique spacings. In combination with backdash cancels, you can pressure your opponent and keep them guessing, even at the midrange.
6S Your counter and reflector move. The timing to counter physical hits can be tight as only the first handful of frames will successfully counter a strike. Despite this, 6S is a strong reflector against projectiles. You can frequently get a confirm off of a successful reflect as you can cancel 6S into 5S even on whiff. The easiest confirm will be 6S→super, yet at particular ranges you can even confirm 6S→5S→L and even 6S→5S→66. Using this in your neutral game while mixing up options with how you cancel from your stance will threaten constant punishes and get the opponent to think twice about how to approach.
5S→M An anti air launcher that advances Shadow Ranger. It is projectile invulnerable, however it is very unsafe if blocked as it cannot be canceled into anything other than super.
H+S Dog's super. Goes full screen and is fully projectile invulnerable. Used to punish the opponent from full screen or punish the opponent attempting to shoot you without covering themselves.
Opponents who push block will leave you out of range to pressure with normals, but you can continue by either canceling into 5S→L or 5S→S/44. In addition to his specials, Shadow Ranger has one of the best kara/plink cancel grabs in his 1L~M+H. By canceling the startup of his 2L, Shadow Ranger will slide forward to extend his grab range. By incorporating his phenomenal forward dash, the additional momentum extends the range at which he can throw an opponent. With a healthy mix of these options, along with the use of assists and high/low attacks, you will keep your opponent on their toes.
Always remember that 5S→X can be canceled yet again into 5S.
Resets/Mixups
Flipout into 4S for overhead/unblockable with assist
Flipout into crossunder low
Flipout into same side low
Flipout into throw
Restand mixups
5L plink dash low/throw
5L2L5MM delay M for crossup
5L2L5MM2H for low
5L2L5MM plink throw
Team Synergy
Tagging out of his assist allows for quick high low mixups. Characters who can poke from full screen make the best use out of this as it sets up relatively save high low mixups from a distance. As well as this, characters who can keep the opponent grounded for extended periods of time are very strong when setting up Shadow Ranger's assist mixups. Since the assist tracks full screen, it can be an effective confirmation tool as well.
Using Dog as a damage engine is wholly possible as he makes good use of combo states that have not yet been maxed out in combos for a tag in. Tagging into the plinkfinite is also an incredibly powerful option, albeit more difficult.
As a support character, Shadow Ranger is very versatile. Accompanying one of the best assists in the game, he has dynamic and unique tools that allow for often oppressive and controlling tagouts in the neutral. Dog's jS(S) is a great midrange poke that often catches players off guard with an overhead and can even allow for tricky high-low opportunities with a tagout. 5S→H is a great way to control space on the screen, but has a very long start up time. In combination with assists to cover the initial setup, a tag from 5S→H can allow a new character to approach and offer a mixup as well as set up some zoning.
Combos
Tested in 2.6
Basic Bread and Butter
5LMMH 2H 5SM jLH 5MMH 5SS 2L 5MH 5SS 2L 5MMM 4M+H 5SM 5SL 5SH 5S66S 5SLL 5SH 5S66S H+S 4M+H 5SL 5SH 5S66S
Video Example
Advanced Bread and Butter
2M5H 5SSL 5S66 2M5H2H 5SS 5H2H 5SM jL 2L5MMH 5SS 2L5MMM 4S4S 5SL 5SH 5SH 5S 441S4S 5SS 4HSSS H+S 4M+H 5SL 5S66S
Video Example
Videos
Anubis Combo video by Dostrow (2020)
Colors
External Links


.png)

.png)
.png)

.png)


.png)

.png)
.png)


.png)


.png)


.png)


.png)

.png)
.png)
.png)


