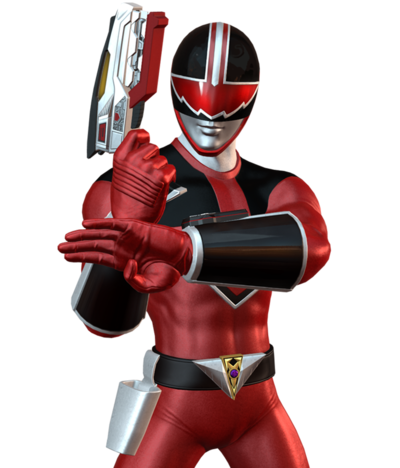
Eric Myers
Quantum Ranger Introduction
Health: 950
Walk Speed: - forward, - back
Cocky and independent, Eric Myers worked for the Silver Guardians as a simple soldier. When the Quantum Morpher was discovered in an archaeological dig, Eric stole it away while the other Time Force Rangers fought Ransik's forces for it. Once he claimed the Quantum Ranger powers for himself, he was able to travel back in time and claim the power of the Q-Rex Zord.
Overview
Eric is a well rounded character with simple tools that often hide a lot of trickery. Sporting excellent mobility and a solid projectile in his 5S Blaster, his neutral largely consists of controlling space and frustrating the opponent into coming to him, where he can pull out the secondary functions on many of his tools in order to throw opponents off guard. He really shines as a support character, often tagging in to extend a combo into his highly potent Quantum Power sword loops, giving any team consistent access to high damage combos that quite often lead to a kill.
Playstyle
|
Eric Myers is a zoner with incredible damage output |
| Pros |
Cons |
- Who shot first - Eric has an incredible 2H that gives him access to some of the best roundstart options in the game
- Swords up - During install, Eric has access to some of the best moves in the game, and the ability to cancel specials into eachother
- Damage - Off most starters, most combos will end up killing an opponent or if not, leave them shy of death
- Let me help - After another character's combo, Eric can easily be tagged in to finish off the remainder of the opponent's health
|
- Q-Rex Arms - Eric has some really, really short arms - his fastest button is super stubby
- 9mm - 5S has relatively low durability when compared to other projectiles in the game
- (Un)Happy Birthday - Eric struggles with happy birthdays, due to his main damage output using wallbounces
|
Normal Moves
Click "Expand" for images of Quantum Power versions of moves (when applicable).
5L
5L
|
| Version
|
Damage
|
Guard
|
Startup
|
Active
|
Recovery
|
Frame Adv (Block)
|
Frame Adv (Hit)
|
| Normal
|
35
|
High/Low/Air
|
-
|
-
|
-
|
-
|
-
|
- Forces flipout on airborne opponents
Typical jab.
|
| Quantum Power
|
35
|
High/Air
|
-
|
-
|
-
|
-
|
-
|
Standing low.
Whiff Cancels
Cancels into the following moves on whiff:
|
|
5LL
5LL
|
| Damage
|
Guard
|
Startup
|
Active
|
Recovery
|
Frame Adv (Block)
|
Frame Adv (Hit)
|
| 80
|
High/Low/Air
|
-
|
-
|
-
|
-
|
-
|
Cannot be used while Quantum Power is active.
|
|
5M
5M
|
| Version
|
Damage
|
Guard
|
Startup
|
Active
|
Recovery
|
Frame Adv (Block)
|
Frame Adv (Hit)
|
| Normal
|
60
|
High/Low/Air
|
-
|
-
|
-
|
-
|
-
|
Regular mid, nothing special.
|
| Quantum Power
|
50
|
High/Low/Air
|
-
|
-
|
-
|
-
|
-
|
Main component of Quantum Power loops.
Whiff Cancels
Cancels into the following moves on whiff:
|
|
5MM
5MM
|
| Damage
|
Guard
|
Startup
|
Active
|
Recovery
|
Frame Adv (Block)
|
Frame Adv (Hit)
|
| 20, 60
|
High/Low/Air
|
-
|
-
|
-
|
-
|
-
|
Cannot be used while Quantum Power is active. The second half won't connect against opponents who block the first.
|
|
5H
5H
|
| Version
|
Damage
|
Guard
|
Startup
|
Active
|
Recovery
|
Frame Adv (Block)
|
Frame Adv (Hit)
|
| Normal
|
70
|
High/Low/Air
|
-
|
-
|
-
|
-
|
-
|
Very slow and with long recovery, making it very committal in neutral.
|
| Quantum Power
|
70
|
High/Low/Air
|
-
|
-
|
-
|
-
|
-
|
- Wallbounces airborne opponents
Whiff Cancels
Cancels into the following moves on whiff:
|
|
5HH
5HH
|
| Damage
|
Guard
|
Startup
|
Active
|
Recovery
|
Frame Adv (Block)
|
Frame Adv (Hit)
|
| 80
|
High/Low/Air
|
-
|
-
|
-
|
-
|
-
|
Cannot be used while Quantum Power is active.
|
|
4H
4H
Prop Up
|
| Damage
|
Guard
|
Startup
|
Active
|
Recovery
|
Frame Adv (Block)
|
Frame Adv (Hit)
|
| -
|
-
|
-
|
-
|
-
|
-
|
-
|
Anti-air. Jump-cancelable. Cannot be used while Quantum Power is active.
|
|
6H
6H
Dome Breaker
|
| Damage
|
Guard
|
Startup
|
Active
|
Recovery
|
Frame Adv (Block)
|
Frame Adv (Hit)
|
| 60
|
High/Air
|
-
|
-
|
-
|
-
|
-
|
- OTG, uses OTG bounce
- Overhead
- Groundbounces OTG, Standing, or Juggle depending on how the opponent is hit.
Eric performs a quick hop forward before coming down with an elbow slam. Hits overhead, and can hit OTG, causing a ground bounce. Be careful using it in combos, as it can sometimes go right over people, causing it to whiff. Can chain back into his standing buttons while Quantum Power is active.
|
|
2L
2L
|
| Damage
|
Guard
|
Startup
|
Active
|
Recovery
|
Frame Adv (Block)
|
Frame Adv (Hit)
|
| 35
|
High/Low/Air
|
-
|
-
|
-
|
-
|
-
|
|
2M
2M
|
| Damage
|
Guard
|
Startup
|
Active
|
Recovery
|
Frame Adv (Block)
|
Frame Adv (Hit)
|
| 60
|
Low/Air
|
-
|
-
|
-
|
-
|
-
|
Eric's fastest low attack.
|
|
2H
2H
Time Fire
|
| Version
|
Damage
|
Guard
|
Startup
|
Active
|
Recovery
|
Frame Adv (Block)
|
Frame Adv (Hit)
|
| Normal
|
50
|
Low/Air
|
-
|
-
|
-
|
-
|
-
|
- OTG
- Uses spin on an knocked down or airborne opponent.
Eric fires a blaster shot at the opponent's feet. Excellent range and hits OTG.
Whiff Cancels
Cancels into the following moves on whiff:
- 4S
- 5S
- 6S
- 5[S]~L (Evasive Gambit stance)
- 4[S]~L (EX)
- 4[S]~H (Super)
|
| Quantum Power
|
-
|
-
|
-
|
-
|
-
|
-
|
-
|
Anti-air. Jump-cancelable.
Whiff Cancels
Cancels into the following moves on whiff:
|
|
j.L
j.L
|
| Damage
|
Guard
|
Startup
|
Active
|
Recovery
|
Frame Adv (Block)
|
Frame Adv (Hit)
|
| 35
|
High/Air
|
-
|
-
|
-
|
-
|
-
|
|
j.M
j.M
|
| Damage
|
Guard
|
Startup
|
Active
|
Recovery
|
Frame Adv (Block)
|
Frame Adv (Hit)
|
| 60
|
High/Air
|
-
|
-
|
-
|
-
|
-
|
|
|
|
j.H
j.H
|
| Version
|
Damage
|
Guard
|
Startup
|
Active
|
Recovery
|
Frame Adv (Block)
|
Frame Adv (Hit)
|
| Normal
|
70
|
High/Air
|
-
|
-
|
-
|
-
|
-
|
|
|
| Quantum Power
|
70
|
High/Air
|
-
|
-
|
-
|
-
|
-
|
Wallbounces against airborne opponents.
|
|
Special Moves
5S
Blaster
5S
|
| Version
|
Damage
|
Guard
|
Startup
|
Active
|
Recovery
|
Frame Adv (Block)
|
Frame Adv (Hit)
|
Blaster
5S
|
20, 20x4, 40
|
High/Low/Air
|
-
|
-
|
-
|
-
|
-
|
- Pseudo spinning knockdown last hit
Up to 5 shots. Gun has a hitbox during startup. Final shot deals more damage than the others.
Cancel Options
Each gunshot except the last can be cancelled into the moves below. The last shot can however cancel into super:
- 4S
- 6S
- Super
- 5[S]~2 (Evasive Gambit)
- 4[S]~L (EX)
|
Maximum
5[S]
|
25x4
|
High/Low/Air
|
-
|
-
|
-
|
-
|
-
|
Shots can be charged by holding S, transitioning to Maximum and ending the barrage. Stopping a hold early will fire a regular shot again and while holding before maximum power you can press 6 or 4 to get 6S or 4S respectively.
|
|
5S~2
Evasive Gambit
5[S]~2 On vacation. On vacation.
|
| Version
|
Damage
|
Guard
|
Startup
|
Active
|
Recovery
|
Frame Adv (Block)
|
Frame Adv (Hit)
|
| Stance
|
-
|
-
|
-
|
-
|
-
|
-
|
-
|
Special stance. Can follow-up with L, M, H, or S. Low-profiles most projectiles.
|
Drop Shot
5[S]~2~S
|
60
|
High/Low/Air
|
-
|
-
|
-
|
-
|
-
|
Shoots while supine. Causes a spin launch on hit.
|
Up Here
5[S]~2~L
|
0
|
-
|
-
|
-
|
-
|
-
|
-
|
Eric teleports into the air, slightly behind his starting position. He can act or block on the way down.
|
Think fast
5[S]~2~M
|
90
|
High/Low/Air
|
-
|
-
|
-
|
-
|
-
|
Eric teleports in front of the opponent before unleashing a punch that wallbounces on hit.
|
Over Here
5[S]~2~H
|
90
|
High/Low/Air
|
-
|
-
|
-
|
-
|
-
|
Same as M teleport, except Eric teleports behind the opponent.
|
|
4S
Formation: Sword
4S
|
| Damage
|
Guard
|
Startup
|
Active
|
Recovery
|
Frame Adv (Block)
|
Frame Adv (Hit)
|
| 10x4, 20
|
High/Low/Air
|
-
|
-
|
-
|
-
|
-
|
Eric tosses his sword up into the air, where it spins in place for a brief period of time. Often used in lieu of a normal launcher in combos, as it causes a special combo state that locks the opponent in place, making it extremely easy to convert from. The angle it flies up at can also give it some use as a meaty on incoming opponents.
|
|
4S~S
Formation: Airblade
4S~S
|
| Version
|
Damage
|
Guard
|
Startup
|
Active
|
Recovery
|
Frame Adv (Block)
|
Frame Adv (Hit)
|
Formation: Airblade
4S~S
|
30, 40
|
High/Air
|
-
|
-
|
-
|
-
|
-
|
|
|
Crashblade
4S~SS
|
30, 40
|
High/Low/Air
|
-
|
-
|
-
|
-
|
-
|
A true anti-air launcher. Chains into S for a ground bounce, allowing you to pick up a combo. Gains invinciblity during Quantum Power.
|
|
6S
Quantum Leap
6S
|
| Version
|
Damage
|
Guard
|
Startup
|
Active
|
Recovery
|
Frame Adv (Block)
|
Frame Adv (Hit)
|
Quantum Leap
6S
|
35x2
|
High/Low/Air
|
-
|
-
|
-
|
-
|
-
|
Eric leaps forward, firing two blaster shots. Can performs several followup actions.
|
Trick Shot
6S~L
|
0
|
-
|
-
|
-
|
-
|
-
|
-
|
Drops to the ground. Transitions into Evasive Gambit stance.
|
Quick Shot
6S~M/H
|
55
|
High/Low/Air
|
-
|
-
|
-
|
-
|
-
|
Fires a third shot. Can be charged. M fires at a diagonally downward angle, while H fires straight ahead.
|
Vaporize
6S~[M]
|
90
|
High/Low/Air
|
-
|
-
|
-
|
-
|
-
|
Charged version of 6S~M. Causes a ground bounce.
|
Hypercharge
6S~[H]
|
10, 20, 60
|
High/Low/Air
|
-
|
-
|
-
|
-
|
-
|
Charged version of 6S~H. Causes a wallbounce.
|
|
j.S
Airblade
j.S
|
| Version
|
Damage
|
Guard
|
Startup
|
Active
|
Recovery
|
Frame Adv (Block)
|
Frame Adv (Hit)
|
Airblade
j.S
|
20, 30
|
High/Air
|
-
|
-
|
-
|
-
|
-
|
Aerial version 4S~S. Still counts as an anti-air launcher, making reaction j.S pretty strong as an anti-air.
|
Crashblade
j.S~S
|
20, 30
|
High/Low/Air
|
-
|
-
|
-
|
-
|
-
|
Followup to Airblade. Causes a ground bounce, allowing you to pick up a combo.
|
|
EX Attack
5L+S
Acceleration Mode
5S+L
|
| Damage
|
Guard
|
Startup
|
Active
|
Recovery
|
Frame Adv (Block)
|
Frame Adv (Hit)
|
| 50x5, 90
|
High/Low/Air
|
-
|
-
|
-
|
-
|
-
|
- Switches sides.
- If the first hit is blocked, the rest of the move will not come out.
Eric knees forward. On hit, he unleashes a flurry of blows before finishing with a teleport into a strike from above, causing a ground bounce. Quite damaging, and easily comboable with a takeover.
|
|
Throws
Forward Throw
Forward Throw
5M+H/6M+H
|
| Damage
|
Guard
|
Startup
|
Active
|
Recovery
|
Frame Adv (Block)
|
Frame Adv (Hit)
|
| 50x2
|
Throw
|
6
|
-
|
-
|
-
|
-
|
Eric pistol whips the opponent before firing a blaster shot into their chest, sending them full screen. Causes a hard knockdown, allowing for 6H or 2H followups anywhere on screen.
|
|
Back Throw
Back Throw
4M+H
|
| Damage
|
Guard
|
Startup
|
Active
|
Recovery
|
Frame Adv (Block)
|
Frame Adv (Hit)
|
| 90
|
Throw
|
6
|
-
|
-
|
-
|
-
|
Eric teleports behind the opponent and kicks them, bouncing them off the wall. OTG follow-ups are possible, but converting into a full combo is exceptionally hard without assists if you aren't throwing the opponent into the corner.
|
|
Quantum Forward Throw
Foolishness
M+H while Quantum Power is active
|
| Damage
|
Guard
|
Startup
|
Active
|
Recovery
|
Frame Adv (Block)
|
Frame Adv (Hit)
|
| 40, 80
|
Throw
|
6
|
-
|
-
|
-
|
-
|
Eric hits the opponent with the hilt of his sword before stabbing them. Causes crumple stun.
|
|
Super
Super
Quantum Power
H+S "I need more Quantum Power!" "I need more Quantum Power!"
|
| Damage
|
Guard
|
Startup
|
Active
|
Recovery
|
Frame Adv (Block)
|
Frame Adv (Hit)
|
| 0
|
-
|
-
|
-
|
-
|
-
|
-
|
Activates Quantum Power install, changing some moves. All normal attacks become special-cancelable on any frame. Normal attacks cancelable into 6H. All sword-based attacks inflict temporary freeze debuff. Airblade gains invincibility.
|
|
Quantum 5S
Quantum: Divide
5S while Quantum Power is active
|
| Damage
|
Guard
|
Startup
|
Active
|
Recovery
|
Frame Adv (Block)
|
Frame Adv (Hit)
|
| 30x3
|
High/Low/Air
|
-
|
-
|
-
|
-
|
-
|
Eric sends out a projectile that looks very similar to Dante's Drive special from Marvel vs Capcom 3. Causes a wall bounce on hit.
|
|
Quantum 6SS
Quantum: Displace
6S while Quantum Power is active Oh baby it's Rapid Slash! Oh baby it's Rapid Slash!
|
| Damage
|
Guard
|
Startup
|
Active
|
Recovery
|
Frame Adv (Block)
|
Frame Adv (Hit)
|
| 10x5, 30
|
High/Low/Air
|
-
|
-
|
-
|
-
|
-
|
Eric dashes forward with a quick series of sword slashes, leaving some afterimages behind him. Can cross up, and causes a spin launch, allowing for a combo pickup. Can also hit OTG.
|
|
Quantum 5L+S
Finish Sequence
5L+S while Quantum Power is active
|
| Damage
|
Guard
|
Startup
|
Active
|
Recovery
|
Frame Adv (Block)
|
Frame Adv (Hit)
|
| -
|
-
|
-
|
-
|
-
|
-
|
-
|
- OTGs
- Switches sides
- If the first hit is blocked, the rest of the move will not come out.
Eric performs an enhanced version of his EX Attack. Doesn't cost meter and has partial unscaled damage, but it uses up the remainder of Eric's Quantum Power timer. It can also hit OTG.
|
|
Tag Actions
Assist
Assist
Maximum
A1/A2
|
| Damage
|
Guard
|
Startup
|
Active
|
Recovery
|
Frame Adv (Block)
|
Frame Adv (Hit)
|
| 19, 10, 54
|
High/Low/Air
|
-
|
-
|
-
|
-
|
-
|
|
|
|
Quantum Assist
Quantum Assist
Quantum: Displace
A1/A2 while Quantum Power is active
|
| Damage
|
Guard
|
Startup
|
Active
|
Recovery
|
Frame Adv (Block)
|
Frame Adv (Hit)
|
| 10x5, 30
|
High/Low/Air
|
-
|
-
|
-
|
-
|
-
|
Causes a spin launch, allowing for a combo pickup. Can also hit OTG.
|
|
Swap Strike
Swap Strike
A1/A2+S
|
| Damage
|
Guard
|
Startup
|
Active
|
Recovery
|
Frame Adv (Block)
|
Frame Adv (Hit)
|
| 70
|
High/Low/Air
|
6
|
-
|
-
|
-
|
-
|
Faster than EX Attack, making it a little more reliable as a reversal, but far less damaging. Forces a character switch on hit; knocks down if only one character remains.
Unlike most Swap Strikes, Eric's has a unique animation: a jumping side kick.
|
|
Strategy
A lot of Eric's gameplan revolves around hanging back and just being a nuisance, shooting off 2H and 5S until your opponent makes a mistake.
Eric can cancel his 5S into both 4S and 6S, making 5S one of his most common buttons in neutral, as he can effectively shut off jumps and keep himself safe.
He is effectively a zoner, but his zoning is outclassed by many other characters. The end goal is to capitalize on a mistake into a TOD.
Team Synergy
Eric can be played anywhere on a team, but he has a particularly potent roundstart in the form of 2H > 6SM.
As the active character, he loves having access to forward moving assists to create a fullscreen mixup by doing 5SSS > 6SM + assist into a quick high/low.
He also a solid assist, and can be tagged in to finish off a combo as the best damage engine in the game. His QP loops and Finish Sequence allow him to kill any character in the cast after an assist tag in.
His solo damage is extremely high, with some of the most potent incoming mix in the game with QP active. This makes him a solo comeback monster.
Combos
Quantum Leap loop
Eric's combo game outside of super is heavily reliant on getting as many 6SH shots in as possible, as this move does pretty solid damage and builds a healthy amount of meter. The way you get these loops is primarily by looping [2L > 5M > 2M > 5H > 6SH] and [4H > 6SH] respectively.
How you get to doing these loops depends heavily on what your starter was, as each of these loops uses a different combo state.
From a grounded start, you will always be able to get two reps each of both loops, as none of your states are used up before getting to the loops.
But off of say, an airblade[j.S] starter, you'll only be able to get one rep of [4H > 6SH], as you've used a launcher. It's important to learn what moves cause what state, so that you always know what you have available to combo with.
Quantum Power loop
Eric's combos enders revolve around converting into a corner loop of [5M > 5H > 6H]xN while Quantum Power is active. The most common way to convert into Quantum Power is by carrying your opponent to the corner, and then doing...
...5SSSSS > H+S > 5M > 5H
Where you go from here depends on whether or not you've used a wall bounce and/or your OTG bounce.
If your 5H will wall bounce, do 6S as they're falling towards your back and then follow up with 5L 5H to knock them down in front of you.
If your OTG 6H will ground bounce, delay 5H after and transition into the loop.
Quantum Power combos should end with Finish Sequence [S+L in super] if you're not confident it will kill without it, as it's essentially a free OTG and does a ton of damage.
Side Switches
Eric has access to some of the easiest side switch routes in the game - all you have to do is change when you're jumping after a 4S. If you dashjump immediately, you'll stay on the same side and keep going forwards, useful for midscreen or corner combos. But if your back is to the corner, all you have to do is dash-under, and jump at the last second of the dash. Doing this will maintain dashjump momentum but facing the other way, allowing you to easily get back to the corner.
Regular routes
All combos tested and working as of version 2.9.
Standard route
2l 5m 2m 5m 4s dashjump/dash-under j.LM (2l 5m 2m 5h 6sh)[x2] 2m 4s j.H (4h 6sh)[x2] 5sssss SUPER[H+S] 5mh 6s 5lh (6h 5m 5h)[Loop] EX
Grab starter
GRAB[M+H] step forward 6h 2l 5m 4s dashjump/dash-under lm j.lm (2l 5m 2m 5h 6sh)[x2] 2l 5m 4s jh 6sh (4h 6sh)[x2] 5sssss SUPER 5mh 6s 5lh (6h 5m 5h)[Loop] EX
Airblade Start
Off of a j.S starter, you have to change your routing a little bit since you won't have access to one launch or your groundbounce. The unfortunate side of this is that you won't be able to build a full 2 bars alone, and will need either an assist or to start with about 1/4 of a bar.
Airblade starter
j.s 2l 5m 4s dashjump/dash-under j.LM (2l 5m 2m 5h 6sh)x2 2m 4s backdash 6sh 4h 6sh 5sssss SUPER[H+S] 5mh 6s 5lh (6h 5m 5h)[Loop] EX
Gunshot combos
Eric has the ability to easily convert off of his gunshots - as long as he has the bar to super. These combos will require a little bit more bar to start off with, as he can't build the entire two bars back without some of the hardest routing he has. The trick to getting these down is to do your super right before the 5th gunshot of your 5s hits.
Gunshot conversion(Back to corner)
5sssss SUPER dash 5hs 6s 5s 6h 5h (6h 5m 5h)[Loop] 6s 2l 5m 2m 5h (4s)x2 j.h 6sh (4h 6sh)x2 5sssss SUPER 5h (6h 5m 5h)[Loop] EX
Gunshot conversion(Midscreen)
5sssss SUPER dash 5h 6s 5lh 6h 5h (6h 5m 5h)[Loop] 6s 2l 5m 2m 5h (4s)x2 j.h 6sh (4h 6sh)x2 5sssss SUPER 5h (6h 5m 5h)[Loop] EX
EX Starter
If you have 3 bars, you can also always kill most of the roster off of an EX > Super starter. The trick for these is to do your super right after the 5th hit of EX, which launches.
EX Starter(Back to corner)
EX SUPER 9j.H dash j.H dash[x2] 6s 5l 5h 6h 5h (6h 5m 5h)x3 6s 2lll 5m 5h 4s 4s j.H 6sh (4h 6sh)x2 5sss 4S~L
EX Starter(Facing-corner)
EX SUPER 9j.H dash j.H 6h 5h (6h 5m 5h)x5 6s 2ll 5m 5h (4s)x2 j.H 6sh (4h 6sh)x2 5sss 4S~L
Ex-Starter(Midscreen)
EX SUPER 9j.H dash j.H 6h 5h (6h 5m 5h)x5 6s 2ll 5m 5h (4s)x2 j.H 6sh (4h 6sh)x2 5sss 4S~L
Advanced Routes
These routes are among Eric's hardest - they're pretty much only used for if you have no assists up or extra bar for your airblade start or gunshot start combos. These require throw whiffs in awkward spots, making them much more execution intense than the standard routes.
Airblade(0 bar Start)
j.s 2m 66 [j.LM]x2 2l 5m 2m 5h 6sh 2l 5m 2m 2h~THROW 2l 5m 2m 5h 6sh 4h 6sh 5s~4 44 6sh 5sssss SUPER jumpback H 6h 5h [6h 5m 5h]x6 5s EX
Gunshots(2 bar start)
5ssss SUPER dash 5h 2h~THROW dash 6h 5h 2h~THROW dash 6s 5l 5h [6h 5m 5h]x3 6h 5m 2l 2l 2h 2l 5m 2m 5h 5s~4 44 6sh 4h 6sh 4h 6sh 5s~4 j.h 6sh 5sssss SUPER 5h [6h 5m 5h]x7 6h 5m EX
Videos
Eric wiki combos by Akaragitsune. (2021)
Eric install mix guide by Grimbakor. (2022)
Colors
External Links


.png)


.png)


.png)


.png)

.png)

.png)

.png)


.png)
.png)


.png)
.png)
.png)

.png)

.png)

.png)

.png)


.png)

.png)
.png)
.png)


