Power Rangers: Battle for the Grid/Kat Manx

From Mizuumi Wiki
Jump to navigation Jump to search
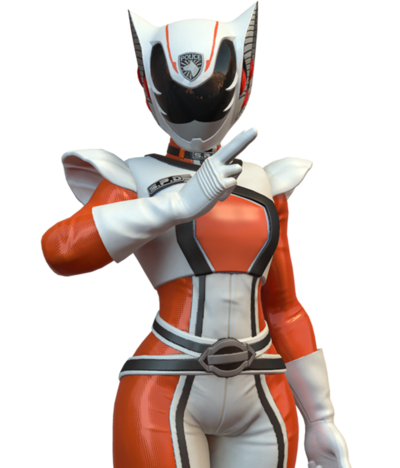
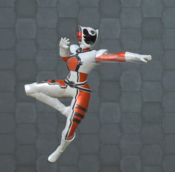
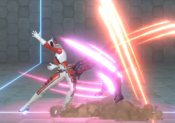
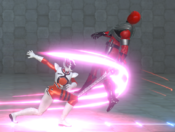
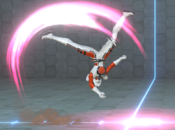
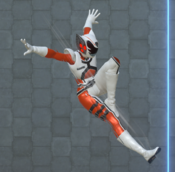
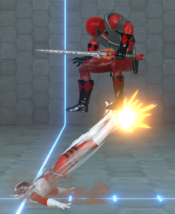
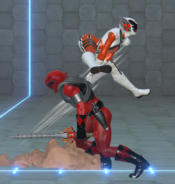
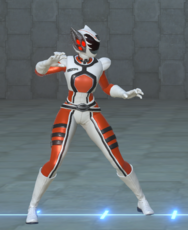
Katherine 'Kat' Manx
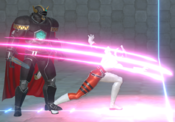
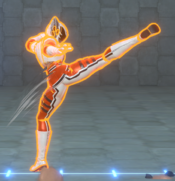
SPD Kat Ranger


Introduction

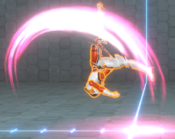
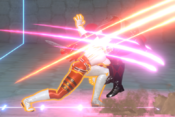
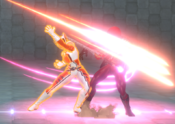
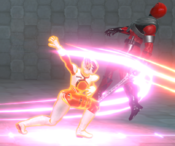
Health: 1000
Walk Speed: 1050 Forward, 580 Back
Chain Rules: Magic Series

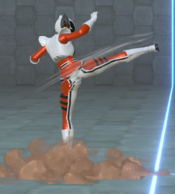
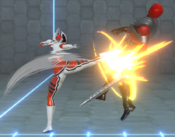
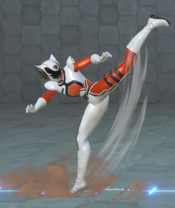
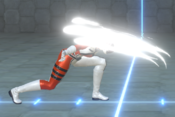
Kat designed most of the S.P.D. Rangers' weapons and is Commander Cruger's trusted assistant and friend. Supreme Commander Birdie recruits her to central command. She returns to Earth with a temporary Morpher and becomes the Kat Ranger.

Overview

Kat is a rushdown character with some of the best grounded mobility in the game. Once she gets in, Kat has the tools needed to stay in or safely disengage on her own terms. However, she can have trouble getting in against characters with bigger buttons or strong zoning gameplans. Her spot in the current meta is saved by her versatile assist and consistent damage off of almost any hit.

Playstyle
Kat Manx is a fast rushdown character with a highly versatile assist
Pros Cons
  • Support Value - Kat's rekka assist has strong lockdown potential, small gaps that allow for left/right mix, and can be confirmed into a ToD
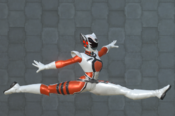
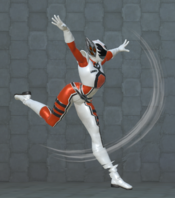
  • Cirque de Soleil - To make up for her lack of projectiles or big buttons, Kat’s specials allow for her to navigate around obstacles, disengage with a situation, or begin a sandwich
  • Damage - Kat's common starters all lead to ToDs, and weirder confirms still lead to consistent damage
  • I Mixed Myself tbh - Kat can set up 50/50s in 5L reset situations with her 2M and has decent strike/throw mix due to her long 2H~M kara throw
  • Air to Air - Kat's air-to-air buttons can compete with the best characters in the game and can lead to kills with good routing
  • Glue Eater - Kat's gameplan is straightforward and her optimized combos are on the easier end of the spectrum, which makes her a great choice for newer players
  • A Little Too Straightforward - Kat's gameplan doesn't change much as players get better, so she can be more easily dealt with by high level players
  • Washed - Kat isn't the beast she used to be in older patches. She has mediocre-to-bad matchups against the best characters in the game
  • Brought Legs to a Gunfight - While Kat's buttons aren't particularly stubby, she is often out-ranged by characters with weapons and projectiles
  • Bad Round Start - Kat's round start options can't compete with a well-composed team, so she is almost required to be a mid or anchor character

Normal Moves

5L
BFTG KAT 5L.png
Damage Guard Startup Active Recovery Frame Adv (Block) Frame Adv (Hit)
35 High/Low/Air 4f - - +4 -

Standard jab. Can be used during juggles to flip the opponent out and set up a crossunder with 6S + assist or with dash 2M, if your combo will not kill.

5LL
BFTG KAT 5LL.png
Damage Guard Startup Active Recovery Frame Adv (Block) Frame Adv (Hit)
60 High/Low/Air - - - -7 -
  • Knocks down. Can be linked with 2M after knockdown and lead into a full combo.
2L
BFTG KAT 2L.png
Low #1: A New Low
Low #1: A New Low
Damage Guard Startup Active Recovery Frame Adv (Block) Frame Adv (Hit)
35 Low/Air 4f - - -3 -

Nice to start pressure with at close range because it chains into itself and will catch an opponent trying to jump out. Easy way to continue a juggle combo after a 2H 5S starter.


5M
BFTG KAT 5M.png
Damage Guard Startup Active Recovery Frame Adv (Block) Frame Adv (Hit)
45 High/Low/Air 7f - - -6 -

Hits at an upward angle. Good for juggle combos. Can be used to pick up for juggles directly after 2H 5S juggle starter, but 2L 5M is much easier for just a little wasted juggle time.

5MM
BFTG KAT 5MM.png
Damage Guard Startup Active Recovery Frame Adv (Block) Frame Adv (Hit)
65 High/Low/Air - - - -8 -
  • Knocks down
2M
BFTG KAT 2M.png
Low #2: The Lows Strike Back
Damage Guard Startup Active Recovery Frame Adv (Block) Frame Adv (Hit)
55 Low/Air 9f - - -4 -

Moves forward very far. Reaches nearly halfscreen if you cancel dash into 2M: very good approach and long range punish. Also hits behind Kat: can be used for crossunders on incoming or after a jab reset. Followup moves will turn Kat around to face the opponent. If you have time, you can dash under and 2M back to the original side for a double crossunder.

4M
Sky High
BFTG KAT 4M.png
Damage Guard Startup Active Recovery Frame Adv (Block) Frame Adv (Hit)
70 High/Low 12f - - -12 -

Standard launcher and dedicated anti-air. Like most launchers, it is air-unblockable except on incoming.


5H
BFTG KAT 5H.png
Damage Guard Startup Active Recovery Frame Adv (Block) Frame Adv (Hit)
65 High/Low/Air 17f - - -8 -

Advancing double swipe.

5HH
BFTG KAT 5HH.png
Damage Guard Startup Active Recovery Frame Adv (Block) Frame Adv (Hit)
70 High/Low/Air - - - -10 -
  • Spinning knockdown.
2H
BFTG KAT 2H.png
Low #3: Revenge of the Lows
Damage Guard Startup Active Recovery Frame Adv (Block) Frame Adv (Hit)
80 Low/Air 9f - - -11 -

Cancellable sweep. 2H 5S is a great way to start a juggle combo after a grounded hit confirm.

6H
BFTG KAT 5HH.png
Pulling double duty
Pulling double duty
Damage Guard Startup Active Recovery Frame Adv (Block) Frame Adv (Hit)
80 High/Low/Air 16f - - -6 -
  • Animation is identical to 5HH but has different properties. Cannot be used in a magic series except for after 5H.
  • Can be cancelled into 4S/5S/6S on hit and block. 4S after a blocked 6H is a very safe exit strategy.

Against airborne opponents, this move uses a wallbounce and finishes in a hard knockdown. This means it can either be picked up before they hit the floor or with an OTG move; both of which lead to a full combo. Can juggle off 5H.


j.L
BFTG KAT j.L.png
Damage Guard Startup Active Recovery Frame Adv (Block) Frame Adv (Hit)
50 High/Air 5f - - - -

Primarily an air-to-air.

j.M
BFTG KAT j.M.png
Damage Guard Startup Active Recovery Frame Adv (Block) Frame Adv (Hit)
60 High/Air 7f - - - -

Good for cross-ups and as an air-to-air against specific matchups.

j.H
BFTG KAT j.H.png
Damage Guard Startup Active Recovery Frame Adv (Block) Frame Adv (Hit)
65 High/Air 7f - - - -

Groundbounces on air hit, good hitstun on grounded hit.

Special Moves

5S
Kat Scratch
5S
BFTG KAT 5S.png
BFTG KAT 5SS.png
BFTG KAT 5SSS.png
Shades of Wolf Fang Fist
Version Damage Guard Startup Active Recovery Frame Adv (Block) Frame Adv (Hit)
Kat Scratch
5S
20, 10x2 High/Low/Air 9f - - -19 -
Kat Scratch 2
5SS
20, 10x2 High/Low/Air - - - -16 -
Kat Scratch 3
5SSS
90 High/Low/Air - - - -24 -

Rekka-type move. Can cancel first and second hits into 4S or 6S. Can plink 4S~L or 6S~L to cancel first or second hit into EX. Very little blockstun on all three rekkas which means on block it is possible to be jabbed out between each rekka. Third rekka launches grounded opponents.

4S
Backflip
4S
BFTG KAT 4S.png
BFTG KAT 4SS.png
Version Damage Guard Startup Active Recovery Frame Adv (Block) Frame Adv (Hit)
Backflip
4S
0 High/Low/Air 8 - - - -
  • Invincible to strikes and projectiles between frames 8-27.

This backflip is one of the few meterless moves in the game with some invincibility. Invincibility starts around the time Kat's hands touch the ground, and ends around the time her feet touch the ground again. It can still be punished, but it can get you away from someone trying to jab punish a rekka.

Cunning Charge
4SS
90 High/Low/Air 31 - - -3 -

Tap S again to do a dash attack. This dash attack staggers, restands, and is plus on block in almost all situations. The dash attack has a pretty big hitbox and can out-prioritize or trade with a lot of moves. Because cat can only do this move by first springing back, she's usually not close enough for the first active frame to hit, the listed startup and advantage are the startup and advantage for doing this point blank, which basically only happens if you're cornered. When done without Kat's back to the wall the startup is longer and the advantage is better, generally being plus

6S
Catwheel
6S
BFTG KAT 6S.png
30x2
Damage Guard Startup Active Recovery Frame Adv (Block) Frame Adv (Hit)
30x2 High/Low/Air 15f - - -2 -
  • OTG, uses OTG bounce.
  • Projectile-immune from frames 7-24.
  • Can be cancelled into 4S on block/hit.
  • Can be cancelled into a plink EX with 4S~L on block or hit.

This wheel kick is safe on block, links to light attacks on hit and is an excellent approach against zoning characters.

Two excellent uses in pressure: the first is that you can cancel a pressure string into this move if you think your opponent will pushblock, and get right back in. 6S also crosses the opponent up without hitting when you are close enough: call an assist or Zord and then do 6S to hit from the back. Tag to your assist to hit from the front after all! Good in juggles for corner carry.

Be wary of using this in juggles while in the corner as it will passthrough female bodies and Eric.

j.S
Kat Dive
j.S
BFTG KAT j.S.png
60
Damage Guard Startup Active Recovery Frame Adv (Block) Frame Adv (Hit)
60 High/Low/Air 12f - - - -
  • OTG, uses OTG bounce.

Divekick. Being able to alter your air trajectory is a great thing to be able to do. You can combo off this divekick on grounded hit if it hits low enough (around most characters' stomachs). Causes a comboable spiral knockdown on air hit. Safe on block. Can cross up even in the corner: if you divekick someone who is completely cornered, it will hit in front and then Kat will land behind the opponent. You can use this to set up some tricky left/rights with assists or Zord. Hits OTG. You have to wait until you reach about head height after a jump before you can hit the button: it will not come out if you hit S too early.

EX Attack

Kat Frenzy
5S+L
BFTG KAT 5S+L.png
BFTG KAT 5S+L (2).png
BFTG KAT 5S+L (3).png
BFTG KAT 5S+L (4).png
Damage Guard Startup Active Recovery Frame Adv (Block) Frame Adv (Hit)
35x3, 40x2, 70 High/Low/Air 8+5f - - -16 -
  • If the first hits are blocked, the rest of the move will not come out.

As of version 1.3, Kat's EX Attack has her perform 6S, then proceeds to perform the entire 5S chain. Has some invincibility.

Can cancel from first or second rekka with 6S~L (6H hold and quickly hit L). Can combo super after.

Throws

Forward Throw
Forward Throw
5M+H/6M+H
BFTG KAT FT.png
Damage Guard Startup Active Recovery Frame Adv (Block) Frame Adv (Hit)
61 Throw 6 - - - -

Can jump-cancel early in the animation for a huge combo, though the throw scales significantly.

Back Throw
Back Throw
4M+H
BFTG KAT BT.png
BFTG KAT BT (2).png
Damage Guard Startup Active Recovery Frame Adv (Block) Frame Adv (Hit)
121 Throw 6 - - - -

No combo solo, but can combo with an assist.

Super

Kat Stunners
H+S
BFTG KAT Super.png
BFTG KAT Super (2).png
Damage Guard Startup Active Recovery Frame Adv (Block) Frame Adv (Hit)
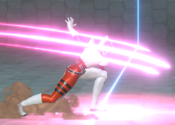
15x17, 120 High/Low/Air 10+1f - - -32 -

Good damage and good chip. Extremely unsafe on block and whiff. Hard knockdown. If the opponent is a little too high up, only some of the rockets will connect and the move will sometimes become unsafe on hit.

Tag Actions

Assist
Assist
Kat Scratch
A1/A2
BFTG KAT Assist.png
Damage Guard Startup Active Recovery Frame Adv (Block) Frame Adv (Hit)
10x3, 9x3, 50 High/Low/Air - - - - -
  • Based on the 5S chain.

Pretty much identical to Yamcha's assist in Dragon Ball FighterZ. Amazing assist for combo-building. Last hit launches on ground hit. Pretty good lockdown assist to keep the opponent still for mixups, but each swipe does not have a lot of blockstun, so careful planning is needed to not leave gaps. Pushes back farther than any other assist in the game, so it has some utility for zoning teams, but she's not that helpful for that purpose until the opponent is right in your face.

Swap Strike
Swap Strike
A1/A2+S
BFTG KAT Swap Strike.png
Damage Guard Startup Active Recovery Frame Adv (Block) Frame Adv (Hit)
70 High/Low/Air 6 - - - -

Faster than EX Attack, making it a little more reliable as a reversal, but far less damaging. Forces a character switch on hit; knocks down if only one character remains.

Same animation and range as 5MM.


Strategy

In neutral, you want to play patiently and wait for an opening to start your offense. Kat is most effective at close range, so you want to stay outside of your opponent's effective range and use movement to trick your opponent into creating an opening, and then move in to start your pressure. Kat has a good wavedash ([M~L]xN or [L+M > down]xN), but if you are not comfortable wavedashing then her run is also quite fast. Pretend to move in and then back out with backdash or 4S. This may bait your opponent to use a slow move or put their assist on cooldown: being patient in your approach will give you openings. Similarly, you can pretend to back away with 4S or jump back, and then come back forward with 4SS or divekick. Kat is a very mobile character, so you want to take advantage of that to become unpredictable and make it hard for your opponent to know how to attack you.

When you see an opening and are ready to make your approach, you can move in with a plain run or dash, 6S, j.M, j.H, j.S, 4SS, or a dash quickly cancelled into 2M. When you do decide to approach, you can strike from several different angles and timings, so be sure to vary your approach and it will be difficult to keep you out, even for dedicated zoning characters. Some characters have difficulty dealing with j.S, and projectile characters have an extremely difficult time dealing with 6S. You may favor one approach or another depending on your opponent. Some assists, like Cenozoic Blue and Jen, can help to lock your opponent down and allow you to run in without fear of running into a big button. If your opponent is jumping a lot, you can either try to challenge them air to air with j.M or j.S, or you can run up to them on the ground and try to tag them with an air unblockable 4M (risky) or a grounded string when they land. If you are feeling fancy, you can use 2M to cross under them and make them block wrong. Some characters are difficult to challenge in the air, but almost nobody can challenge Kat divekick from the air if you can get above them. It is also difficult to stop Kat from getting very close ("almost in") on the ground while they are stuck in their jump arc.

As soon as you make your opponent block something on the ground, you want to call an assist to keep them locked in place. Most good players will pushblock you immediately, so get right back in with 6S, another approach tool listed earlier, or tagging to your assist that you already called in their face. You want to stick on top of the opponent and then open them up with staggered pressure, a throw, or a crossup. If you leave small gaps in your pressure strings, you may catch opponents trying to jab out, jump out, or use an unsafe invincible move. Kat's crossup tools are 6S + assist, j.M, j.S, and 2M on an airborne opponent. Ideally, you want to make the opponent worried about defending one option and then hit them with another. If they are hitting buttons trying to stop a throw attempt, you can use small gaps to counterhit them. If they are scared of staggers and are blocking everything, you can throw them or set up a crossup. Good pushblocking will force you to get back in all over again, if you fail to keep them locked down or re-approach immediately, but that's alright.

When you get a hit, it will either be death or good damage into corner pressure. On a knockdown or on the opponent's incoming, you can use your crossup tools and assists to make setups that are very difficult to block and will let you continue pressuring if they are blocked. If your combo will not kill and you want to be tricky, you can 5L the opponent to flip them out and perform a mixup on them when they are not expecting it: you have just enough time to dash 2M to the other side, or you can do same side, or throw.

On defense, you can sometimes use 4S to get out of weak pressure, but you should rely on good blocking and pushblock. Like most characters, EX is a high reward reversal: Swap Strike is lower reward but is safe. On your incoming, you can use divekick to call out bad setups, but it's generally better to block and then pushblock. When you have space, you can reset to neutral.

If Kat is bleeding, you want to tag her out so she can recover life. Her assist is only good if you are already close to the opponent or have them in a combo, but it is great in those cases. Just be aware that you will need to cover the gaps in her rekkas if you want your pressure to be airtight, but with some labbing you can use these gaps to trap your opponent, or set up crossups with things like Jen airdash or Blue/Quantum teleports.

Team Synergy

Kat can be played in any team position, but she does not have a strong round start. She has a great assist that works with almost any other character, great solo damage, and easy zord routes that make her ideal in the second or third slots on a team. These tools combined with her incoming 50/50s make her great for solo comebacks. Kat as the active character likes to have neutral or lockdown assists to help her close the gap, or damage engines to make TODs even easier.

Combos

Beginner

Combos below are curated with beginners in mind, it will help with learning Kat and in particular get used to her various non-TOD finishers. We recommend new players start here and in time move on to the more advanced combos later.

The various finishers that are available are:

  • 5L dash 2M Jab reset; can land either side of the opponent, cannot be reversed if it is meaty. (video)
  • 5L Throw Jab reset; cannot be reversed if the throw is meaty. (video)
  • [6S]~L EX finisher; to kara EX press and hold 6S and quickly press L afterwards. (video)
  • S+H Super finisher; wait for the opponent to be at the apex of their knockdown arc before pressing. (video)
  • [6S]~L S+H EX Super finisher; same rules apply as before for both of these. (video)
  • 5S 5SSS Rekka finisher; only used when opponent has taken enough damage for you to kill without meter, or to start a zord combo

Back to corner

2MH 5S 2L 5M 6S [5M 2M 5H 6S]x2 [5M 2M 5HSS]x2 finisher (video)

Midscreen

2MH 5S 2L 5M 6S 5M 2M 5H 6S [5M 2M 5HSS]x3 finisher (video)

Facing corner

2MH 5S 2L 5MSS [5M 2M 5HSS]x4 finisher (video)

Optimised TODs

Back to corner

2MH 5S 5M 2M 5H 6S 5M 2M 5H 6H dash (5M 2M 5H 5S x2) 2L 5M 2M 5H 5S 2L 5M 2M 5H 6H 7jS 4M 7jS 7jHS 4M 4SS 8jH dash 5L 2LLL 5M 2M 2H 5SS kara EX super (video)

Midscreen

2MH 5S 5M 2M 5H 6S 5M 2M 5H 6H 2L 5MH 6S dash 5M 2M 5H 6S dash 5M 2M 5H 5S 2L 5MH 6H 7jS 4M 7jS 7jHS 4M 4SS 8jH dash 5L 2LLL 5M 2M 2H 5SS kara EX super (video)

Facing corner

2MH 5S 5M 2M 5H 6H 2L 5MH 6S dash 5M 2M 5H 6S dash (5M 2M 5HS)x2 2L 5M 5H 6H 7jS 4M 7jS 7jHS 4M 4SS 8jH dash 5L 2LLL 5M 2M 2H 5SS kara EX super (video)

Throw Combos

The following combos are for Kat's forward throw. As of yet these combos do not reach the full 1100 but all do over 1000 damage killing most of the cast.

Back to corner

throw 9.jLM 5M 2M 5H 6S 5M 2M 5H 6H dash (5M 2M 5H 5S x2) 2L 5M 2M 5H 5S 2L 5M 5H 6H 7jS 4M 7jS 7jHS 4M 4SS 8jH dash 5L 2LLL 5M 2M 2H 5SS kara EX super (video)

Facing corner

throw 9.jLM 5M 2M 5H 6H 2L 5MH 6S dash 5M 2M 5H 6S dash (5M 2M 5HS)x2 2L 5M 5H 6H 7jS 4M 7jS 7jHS 4M 4SS 8jH dash 5L 2LLL 5M 2M 2H 5SS kara EX super (video)

Zord Combos

All combos are done with the above combos in mind, all combos leading into the zord combo end with 5SSS with the exception of SPD which will have the full notation below.


Dino

A1+A2 5SMSS [5SSMS]x1-2 finisher - (video)


Mega Goldar

A1+A2 5SLS [backdash 6S 5SLS]x1-2 6S finisher - (video)

A1+A2 5SHS [6S 5SS S+H]x1-2 6S finisher - (video)


Dragon

A1+A2 [5SSLS]x2-3 finisher - (video)


Samurai

A1+A2 5SH [move-back 5SS S+H]x1-2 finisher - (video)


SPD

The SPD combos below use an air-unblockable setup on incoming; when SPD M hits an airborne opponent they get a debuff which prevents them from blocking in the air. Paired with a snap the incoming character also has this debuff letting us do a meaty attack on them.

2MH 5S 5M 2M 5H 6S 5M 2M 5H 6H dash (5M 2M 5H 5S x2) 2L 5M 2M 5H 5S 2L 5M 5H 6H 7jS 4M A1+A2 4M 5S 2S+A1 8j.MH 5M 2S+A1 [follow-up]

Follow-up combos below are zord bar-dependent and shown below:

2 bar follow-up

8j.MH 5M [corner combo] (video)

3 bar follow-up

8j.[M]>j.H ]M[ 5M 9j.LM 5M [corner combo] (video)


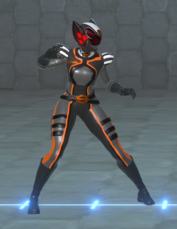
Colors

Color 1
Color 2

External Links


General
Controls
Patch Notes
FAQ
HUD
System
Characters
Anubis "Doggie" Cruger
Kat Manx
Gia Moran
Jason Lee Scott
Tommy Oliver
Lord Drakkon
Mastodon Sentry
Udonna
Magna Defender
Trey of Triforia
Eric Myers
Jen Scotts
Cenozoic Blue Ranger
Dragon Armor Trini
Ranger Slayer
Goldar
Lord Zedd
Dai Shi
Robert "RJ" James
Lauren Shiba
Scorpina
Ryu
Chun-Li
Adam Park
Poisandra
Rita Repulsa
Zords
Dino Megazord
Mega Goldar
Dragonzord
Delta Squad Megazord
Samurai Megazord
Gravezord