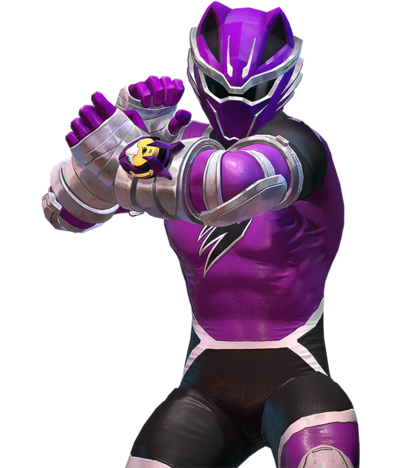
Robert "RJ" James
Jungle Fury Wolf Ranger Introduction
Health: 1000
Walk Speed: - forward, - back
Frame data tested in patch 2.3
Courageous as a wolf, Robert "RJ" James joins as the Jungle Fury Rangers' mentor before revealing that he is the Jungle Fury Wolf Ranger. Originally trained under his father, Master Finn, RJ rejected the Shark Style and instead adopted the wolf spirit for combat. When he is not fighting alongside the Rangers, he runs the Jungle Karma Pizza parlor that also acts as their headquarters.
Overview
RJ is a threat from any point on the screen. You can choose to play RJ aggressively, defensively, or anything in between. He has an extremely strong, well-rounded toolset and does good damage. You can choose to play him as basic or complex as you choose, his 5L kara dash pressure is an effective way to create solo pressure and mixups, but you can choose to play simpler and arguably be just as effective only using assists for pressure and mixups. He has solid defensive options in his 2H which has an excellent hitbox, and his EX which also has a really large hitbox but fairly long startup. He has excellent mobility with access to an excellent dash, j.S, and a combination of 4S~L and back dash for backwards movement. Overall, RJ is a great pick, although he may feel awkward due to long whiff animations.
Playstyle
|
RJ is a strong all-around character with great options for any situation |
| Pros |
Cons |
- Buttons for Days - RJ has a plethora of good buttons. His most notable are his fast 2L, forward-moving 2M, 2H anti-air, and all of his jump buttons
- Ume-Shoryu - RJ's EX is fast, has great range, has a lot of invincibility, and crumples on hit. It can be confirmed into a ToD, even on a trade
- Kitchen-Aid - RJ has strong mixup tools with 6S (high/low and left/right) 5LL (high/low). 5LL can be combined with assists for unblockables
- Runaway Tires - RJ's fireball, wolf wheel, is a full screen poke and anti-fireball tool that confirms into a ToD
- Everyone's Invited - RJ's unblockable reset is easy to time and one of few that works on happy birthdays
- Damage - With good movement, RJ can ToD most of the cast off of any hit
|
- Highly Committal - Many of RJ's strong tools have a lot of recovery and are easily punishable when used poorly
- Cuffing Season - RJ struggles to lock opponents down without a strong lockdown assist
- Hot Tag - RJ's uncharged assist is relatively weak in neutral, so he is often forced to be the point character
- Difficult Disengagements - RJ's backdash has a lot of startup, and his 4S~L is committal, so RJ can have trouble backing away from the opponent
|
Normal Moves
5L
5L
|
| Damage
|
Guard
|
Startup
|
Active
|
Recovery
|
Frame Adv (Block)
|
Frame Adv (Hit)
|
| -
|
High/Low
|
3f
|
-
|
-
|
-7
|
-
|
2 hitting jab. The second hit causes flipout, but both can be chained on hit, meaning RJ can use 1 hit of his jab in juggle combos, even at max juggle limit. Cancelable into 5LL even on whiff. Both hits lead to a jab infinite by chaining into 5M and kara canceling into dash, giving RJ one of the better jab infinites since he can use it in the air. 3f startup makes it tied with some of the fastest normals in the game, although poking with 5L can be risky due to its long whiff. If only the first hit connects with the opponent, you can cancel into other moves even if the second hit of the 5L whiffs which is excellent for pressure either through plink pressure, or other means.
- Juggle immune, first hit only
- Forced flipout, second hit only
|
|
5LL
5LL
|
| Damage
|
Guard
|
Startup
|
Active
|
Recovery
|
Frame Adv (Block)
|
Frame Adv (Hit)
|
| -
|
High
|
-
|
-
|
-
|
-16
|
-
|
Overhead. Doesn't combo from 5LL, Causes a ground bounce on hit.
- Ground bounce on airborne opponents
- Juggle limit immune (OTG only)
|
|
5M
5M
|
| Damage
|
Guard
|
Startup
|
Active
|
Recovery
|
Frame Adv (Block)
|
Frame Adv (Hit)
|
| -
|
High/Low
|
8f
|
-
|
-
|
-7
|
-
|
2 hit advancing kickies. Staple normal for juggles. Goes forward for kara grab. The first hit has minimum hitstun making this normal useful for extending combos past the juggle limit. Like the rest of RJ's auto combos 5M cancels into 5MM even on whiff.
- Juggle limit immune (first hit)
|
|
5MM
5MM
|
| Damage
|
Guard
|
Startup
|
Active
|
Recovery
|
Frame Adv (Block)
|
Frame Adv (Hit)
|
| -
|
High/Low(first hit), High(second hit)
|
-
|
-
|
-
|
-11
|
-
|
Uppercut into elbow. The elbow hits overhead and on air hit causes an otgable knockdown.
- Juggle limit immune (both hits)
- Air unblockable (first hit)
- Hard Knockdown (second hit)
|
|
5H
5H
|
| Damage
|
Guard
|
Startup
|
Active
|
Recovery
|
Frame Adv (Block)
|
Frame Adv (Hit)
|
| -
|
High/Low
|
12f
|
-
|
-
|
-4
|
-
|
Elbow/Knee strike. Causes a spin on ground hit for juggles, ground bounces on air hit for extensions. Like the rest of RJ's auto combos 5H cancels into 5HH even on whiff.
- Ground Bounce (airborne only)
- Soft knockdown (if groundbounce was already used)
- Juggle limit immune (only if groundbounce has not been used or airborne)
|
|
5HH
5HH
|
| Damage
|
Guard
|
Startup
|
Active
|
Recovery
|
Frame Adv (Block)
|
Frame Adv (Hit)
|
| -
|
High/Low
|
-
|
-
|
-
|
-17
|
-
|
Armored followup to 5H. Use to challenge punish attempts on whiffed 5H.
|
|
2L
2L
|
| Damage
|
Guard
|
Startup
|
Active
|
Recovery
|
Frame Adv (Block)
|
Frame Adv (Hit)
|
| -
|
High/Low
|
3f
|
-
|
-
|
-2
|
-
|
|
|
|
2M
2M
|
| Damage
|
Guard
|
Startup
|
Active
|
Recovery
|
Frame Adv (Block)
|
Frame Adv (Hit)
|
| -
|
Low
|
8f
|
-
|
-
|
-9
|
-
|
RJ beat up Joe Higashi and stole his slide, OTGs without a bounce and cancels into either 5H, 2H, or super for combo extension.
|
|
2H
2H
|
| Damage
|
Guard
|
Startup
|
Active
|
Recovery
|
Frame Adv (Block)
|
Frame Adv (Hit)
|
| -
|
High/Low
|
9f
|
-
|
-
|
-22
|
-
|
RJ does a flip kick, does the second part only on hit. Works as a launcher, but since RJ is in recovery until he lands it's more limiting than you might expect for a launcher. Cancelable into j.S while in the air.
|
|
j.L
j.L
|
| Damage
|
Guard
|
Startup
|
Active
|
Recovery
|
Frame Adv (Block)
|
Frame Adv (Hit)
|
| -
|
High
|
3f
|
-
|
-
|
-
|
-
|
jump jab. Hits twice and has a good upwards hitbox for air-to-airing
|
|
j.M
j.M
|
| Damage
|
Guard
|
Startup
|
Active
|
Recovery
|
Frame Adv (Block)
|
Frame Adv (Hit)
|
| -
|
High
|
8f
|
-
|
-
|
-
|
-
|
jump kick, RJ's main air to ground hitbox
|
|
j.H
j.H
|
| Damage
|
Guard
|
Startup
|
Active
|
Recovery
|
Frame Adv (Block)
|
Frame Adv (Hit)
|
| -
|
High
|
5f
|
-
|
-
|
-
|
-
|
2 hit jump punch. Causes a ground bounce on air hit. Good for confirming off of j.L/j.M and potentially leads to more pressure on landing. Good to tag our of falling j.H for hard-to-blockable setups.
- Soft knockdown (first hit, airborne only)
- Groundbounce (second hit, aiborne only)
|
|
Special Moves
5S
Wolf Wheel
5S
|
| Damage
|
Guard
|
Startup
|
Active
|
Recovery
|
Frame Adv (Block)
|
Frame Adv (Hit)
|
| -
|
High/Low
|
19f
|
-
|
-
|
-16
|
-
|
Puts out a spinning wheel projectile. Branches into either 4S 6S or kara EX (performed with 6/4S~L)
- Spin knockdown (vs airborne only)
|
|
5S4S
Wolf Wheel Alpha
5S~4S
|
| Damage
|
Guard
|
Startup
|
Active
|
Recovery
|
Frame Adv (Block)
|
Frame Adv (Hit)
|
| -
|
High/Low
|
-
|
-
|
-
|
-9
|
-
|
RJ punches the wheel to send it forward, causes a hard knockdown
|
|
5S6S
Wolf Wheel Spike
5S~6S
|
| Damage
|
Guard
|
Startup
|
Active
|
Recovery
|
Frame Adv (Block)
|
Frame Adv (Hit)
|
| -
|
High/Low
|
-
|
-
|
-
|
-4
|
-
|
RJ grabs the wheel and then throws it. The wheel will bounce off the ground at an angle if it misses the opponent. Causes a ground bounce
|
|
4S
Backswing Bite
4S
|
| Damage
|
Guard
|
Startup
|
Active
|
Recovery
|
Frame Adv (Block)
|
Frame Adv (Hit)
|
| -
|
High/Low
|
23f
|
-
|
-
|
+3
|
-
|
RJ moves backwards then rushes forward and punches while shouting "bite" in order to confuse and befuddle his opponent. Causes a spin on air hit
|
|
4[S]
Ignition Knuckle
4[S]
|
| Damage
|
Guard
|
Startup
|
Active
|
Recovery
|
Frame Adv (Block)
|
Frame Adv (Hit)
|
| -
|
High/Low
|
-
|
-
|
-
|
-18
|
-
|
By holding down 4S RJ can light his fists on fire, making the rush punch stronger. RJ can also press L to cancel out of the charge, if he cancels after igniting, his fists will stay lit and his next backwing bite will automatically become an ignition knuckle. Wallbounces on hit.
|
|
6S
Pounce
6S
|
| Damage
|
Guard
|
Startup
|
Active
|
Recovery
|
Frame Adv (Block)
|
Frame Adv (Hit)
|
| -
|
-
|
-
|
-
|
-
|
-
|
-
|
RJ leaps forward, cancelable into air normals while falling. Useful to setup cross-ups with assist calls
|
|
j.S
Knee Crush
j.S
|
| Damage
|
Guard
|
Startup
|
Active
|
Recovery
|
Frame Adv (Block)
|
Frame Adv (Hit)
|
| -
|
High/Low
|
17f
|
-
|
-
|
-
|
-
|
RJ crushes you with his knees. OTGs with a bounce and staggers standing opponents. On hit or block can be canceled into j.SS
|
|
j.SS
Wolf Crush
j.SS
|
| Damage
|
Guard
|
Startup
|
Active
|
Recovery
|
Frame Adv (Block)
|
Frame Adv (Hit)
|
| -
|
High/Low
|
-
|
-
|
-
|
-
|
-
|
RJ does an axe kick, causes a ground bounce on air hit and a spin on ground hit.
|
|
EX Special
5L+S
5S+L
|
| Damage
|
Guard
|
Startup
|
Active
|
Recovery
|
Frame Adv (Block)
|
Frame Adv (Hit)
|
| -
|
High/Low
|
-
|
-
|
-
|
-23
|
-
|
Incinerate. Does very little damage for an EX, but crumples opponents, meaning RJ can convert into a full combo. Alternatively RJ can press S again to go into Wolf Spirit Rush for a damaging followup.
|
|
5L+SS
5S+LS
|
| Damage
|
Guard
|
Startup
|
Active
|
Recovery
|
Frame Adv (Block)
|
Frame Adv (Hit)
|
| -
|
High/Low
|
-
|
-
|
-
|
-
|
-
|
Wolf Spirit Rush. Damaging followup that lets RJ use Incinerate like it's a normal EX, cancelable into super and everything. Doesn't cost any additional meter so go for it if the opponent is almost dead or if you have 3 bars at the end of a combo and want it to hurt.
|
|
Throws
Forward Throw
Forward Throw
5M+H/6M+H
|
| Damage
|
Guard
|
Startup
|
Active
|
Recovery
|
Frame Adv (Block)
|
Frame Adv (Hit)
|
| -
|
Throw
|
7f
|
-
|
-
|
-
|
-
|
RJ tosses the opponent up, can be followed up with a 5M for solo combos.
|
|
Back Throw
Back Throw
4M+H
|
| Damage
|
Guard
|
Startup
|
Active
|
Recovery
|
Frame Adv (Block)
|
Frame Adv (Hit)
|
| -
|
Throw
|
7f
|
-
|
-
|
-
|
-
|
Basically the same as forward throw, but RJ prepositions himself and there's a bit more recovery, making followups harder, especially midscreen, but still possible.
|
|
Super
Super
Super
H+S
|
| Damage
|
Guard
|
Startup
|
Active
|
Recovery
|
Frame Adv (Block)
|
Frame Adv (Hit)
|
| -
|
-
|
-
|
-
|
-
|
-
|
-
|
Lunar Cyclone. "What if shin shoryuken had a vacuum effect?" - ShadyK, probably.
|
|
Tag Actions
Assist (Uncharged)
Assist (Uncharged)
A1/A2
|
| Damage
|
Guard
|
Startup
|
Active
|
Recovery
|
Frame Adv (Block)
|
Frame Adv (Hit)
|
| -
|
-
|
-
|
-
|
-
|
-
|
-
|
RJ does Wolf Wheel Spike. Because he's airborne during parts of the move you can takeover in the air and come down with an overhead for high/low setups. Unlike the regular version of this move, the wheel does not have a hitbox when RJ puts it out, it only hits on the way up and on the way down.
|
|
Assist (Charged)
Assist (Charged)
A1/A2 while RJ's hands are glowing
|
| Damage
|
Guard
|
Startup
|
Active
|
Recovery
|
Frame Adv (Block)
|
Frame Adv (Hit)
|
| -
|
-
|
-
|
-
|
-
|
-
|
-
|
RJ does Ignition Knuckle. To do this assist RJ needs to have charged his hands by holding 4S.
|
|
Swap Strike
Swap Strike
2S+A1/A2
|
| Damage
|
Guard
|
Startup
|
Active
|
Recovery
|
Frame Adv (Block)
|
Frame Adv (Hit)
|
| -
|
-
|
-
|
-
|
-
|
+1
|
-
|
Shares it's animation with the first part of 2H
|
|
Strategy
Neutral
5A is very fast, and because only the second hit causes flip-out it works as an anti-air that can lead into full combos. 2M has excellent range and low profiles a lot, so it is his go-to normal in neutral. On contact, it chains into 5H which can then be either chained into 5S4S, 2H (and 2H~M kara grab). 5H cancels into 5HH on whiff as well making it the generally safest option. Poking with 2M5HH can lead to huge reward since 5HH has armor and blows up punish attempts on whiffed 5H. 5S~4S can be a good full screen option, as the wheel will travel full screen and can blow through projectiles while giving a full combo on hit. It is extremely punishable on whiff from close range, so sometimes 5S with no followup is a solid option to bait jump ins and punish accordingly with 2H or initiate a mixup on the opponent's landing frames. 4{S}~L is an excellent means of creating space for safe 5s4s pressure. 4[S]~L done with perfect timing gives RJ access to one of the best "backdashes" in the game despite not having a great real backdash. RJ's overheads are especially good for mix-up, he can make them work by mixing up with 2M, his only low, and 5LL negates all pushblocks. Combined with kara dash pressure from 5L, RJ keeps the opponent guessing with any blocked 5L. This is coupled with his throws being especially good, giving him combos regardless of direction and 5M and 2H kara throw moving RJ forward a fair bit. If you can find or create the time to charge 4[S], it's a very powerful tool. Not really for RJ himself, but it makes his assist into the most dominant neutral assist in the game, maintaining all of the properties of the normal version of 4[S] without going away after use.
Team Synergy
Combos
tested as of version 2.3
Theory
- Launchers (2 per combo): 2H
- OTG bounces (1 per combo: j.S, 5AA
- OTGs (unlimited): 2M, Super
- Spin states (2 per combo): 5S, 4S, j.SS
- Hard Knockdowns (unlimited): 5S~4S, 5MM, 5HH
- Ground bounces (1 per combo): 5H, j.H, j.S, 5S~6S
- Wall bounces (1 per combo): 4[S]
- Crumples (1 per combo): S+L
- Staggers (1 per combo): j.S (standing hit)
- Force flipout (forces a flipout reset): 5L(2)
- Max Limit moves (moves that do not have any of the above properties, but will not cause flipout at max juggle limit): 5.L(1), 5M(1), 2M
Solo
2M > 5HH , 2M > 5H , 5L(1) > 5MM > 2M > 2H , 5L(1) > 5MM > 2M > 2H , 5L(1) > 5M > 5S4S > 5L(whiff)L > H+S
video example
2/10 difficulty, 891 dmg, 0 meter start
This is the beginner RJ bnb. If you connect this with your own back to the corner, you'll have to dash before the 2M pickup after the opening 2M5HH. Most RJ combos are a variation of this, so newcomers may want to start here. It doesn't kill on its own, so a reset should be used first for a full health character.
5M > 5HH > 2M > 2H > 5M > 2M > 5S~4S > 2M > 5H > 5L(1) > 5M > 5L(1) > 2L > 5MM > 5L(whiff)L > 5L(1) > 5M > 5L(1) > 2L > 5MM > 2M > 2H > 5M(1) > 2M > 5S~4S > 5L(whiff)L > S+H
video example
1100 damage solo 0 meter starting BnB. To make this a bit easier, you can remove the "5L(1) > 5M > 5L(1) > 2L > 5MM" sequences and replace them with just "5L(1) > 5MM" or "2L > 5MM" which will lower the damage, but even with both swapped out this combo will do over 1k, making it still a TOD on most of the cast. You can also replace 5HH with 5S~4S which will also lower the damage slightly, but allow you to OTG from an opposite corner starting position with 2 plink dashes.
Assist combos
5HH > Doggie Assist > Dash 5MM > etc...
Conversion using Dog assist, makes picking up full screen hits much easier as it eliminates the need to plink dash, but dog assist will take away RJ's OTG bounce so you sacrifice some meter and damage doing this.
2L > 2M > 5HH > 2M (call quantum) > 5H > 4[S] > quantum assist hits > tag quantum > 2H > 6S~H > 2L > 5M > 2M > 5H > 6S~H > 2L > 5M > 2M > 4S > j.L > j.M > 4S > back dash > 6S~H > 4H > 6S~H > 4H > 6S~H > 5SSSSS > H+S > [5M > 5H > 6H]x7 > 5M > S+L
Conversion from RJ to Quantum Ranger while setting up 4S charge for the stronger assist. [Video Example]
5M > 5HH > 2M > 2H > 5M > 2M > 5S~4S (call jen) > 5LL(whiff)L > 2L > 5M > 4[S] > jen assist hits > 66 > 5MM > 2M > 5HH > 2M > 2H > 5M(1) > 2M > 5S~4S > 5LL(whiff)L > H+S
RJ bnb that calls Jen in to keep the opponent juggled while RJ builds 4S charge, then finishes the combo with super
Zord combos
5S~4S > Activate Mega Goldar > Goldar L >[ 4[S]~66 > 5M(1) > 4S > Goldar L ]xN
Goldar loop, the first hit of 5M has minimum hitstun and charged 4S wallbounces so this loop will work regardless of combo poration. You want to input the L for Goldar during the 4S animation. Additionally, you can dash out of 4[S] with 66 or L+M
5S~4S > Activate goldar > Goldar L >[ 5MM(L) > Goldar L ]xN
Alternative Goldar loop that may be a bit easier, but it will drop at higher poration. You do not want to delay the followup on 5M, otherwise you might get Goldar stomp instead.
5S~4S > Activate Dragonzord (M) > 2M > Dragonzord M hits > [5M > 5S~4S (M) > 2M > Dragonzord M hits]xN
Dragonzord restand loop. You need to delay the 2Ms a bit. It can also be helpful to delay the 5Ms to ensure Dragonzord will be recovered by the time you call for the next stomp.
Videos
Colors
External Links
