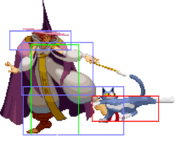
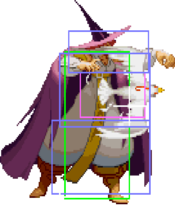
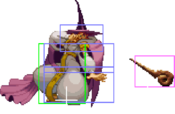
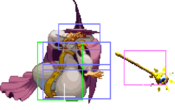
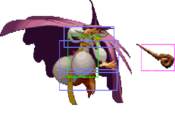
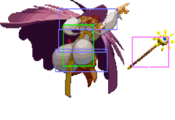
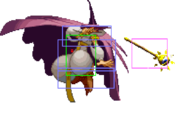
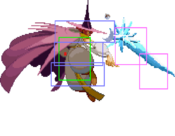
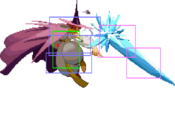
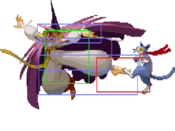
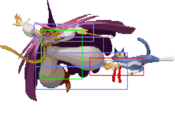
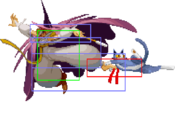
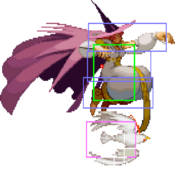
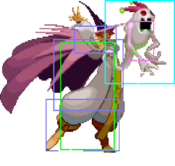
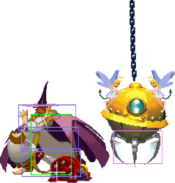
Red Earth/War-Zard/Tessa
Background
In the Year of our Lord 13XX, an incredible amount of storms began erupting around the world. A magician named Tessa noticed this, and realized it was the scent of danger.
" This isn't a natural phenomenon. There's something more...something evil. I must uncover what it is. "
Introduction
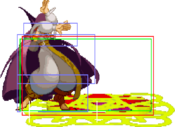
Tessa is a zoner with just about every tool you could want. Good punish game, excellent pressure, great setups, and obviously brutal zoning. Her versatility is one of her greatest attributes; on a dime she can go from playing lame with zoning to getting into the opponent’s face with divekicks and ghosts. Knowing when to switch between these two modes is important, and smart play will be rewarded handsomely.
| Strengths | Weaknesses |
|---|---|
|
|
Normal Moves
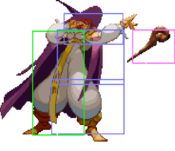
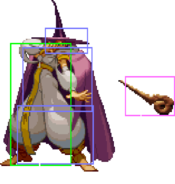
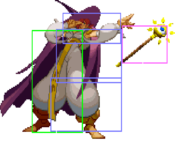
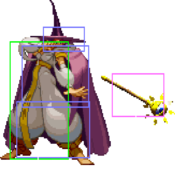
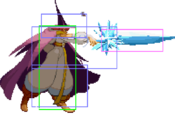
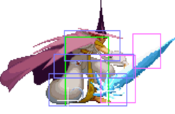
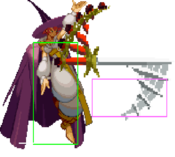
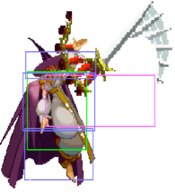
1 Wood staff with 1 followup. Wood staff with 1 followup. Sun staff with 1 followup. Sun staff with 1 followup.
|
|---|
2 Can be ducked but forces stand. Can be ducked but forces stand.
|
|---|
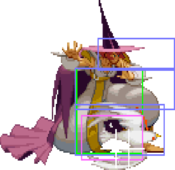
3 Can be ducked but forces stand. Can be ducked but forces stand.
|
|---|
4
|
|---|
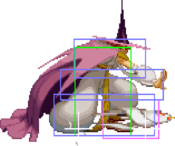
5 Two hits, 6 frame gap between hits. Two hits, 6 frame gap between hits.
|
|---|
6 Staggers Kenji. Staggers Kenji.
|
|---|
cr.1 Wood staff with 1 followup. Wood staff with 1 followup. Sun staff with 1 followup. Sun staff with 1 followup.
|
|---|
cr.2 Forces stand. Forces stand.
|
|---|
cr.3
|
|---|
cr.4
|
|---|
cr.5 Two hits, 2 frame gap between hits. Two hits, 2 frame gap between hits.
|
|---|
cr.6 Staggers Kenji. Staggers Kenji.
|
|---|
j.1 Wood staff with 1 followup. Wood staff with 1 followup. Sun staff with 1 followup. Sun staff with 1 followup.
|
|---|
j.2 Forces stand. Can input Air Chakura Wave on frame 43. Forces stand. Can input Air Chakura Wave on frame 43.
|
|---|
j.3 Forces stand. Can input Air Chakura Wave on frame 43. Forces stand. Can input Air Chakura Wave on frame 43.
|
|---|
j.4
|
|---|
j.5 First and third hit. First and third hit. Second and fourth hit, 2 frame gap between hits. Second and fourth hit, 2 frame gap between hits.
|
|---|
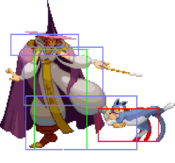
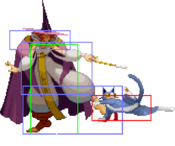
j.6 Staggers Kenji. Can input Air Chakura Wave on frame 15. Staggers Kenji. Can input Air Chakura Wave on frame 15.
|
|---|
Command Normals
df+4
|
|---|
df+5 Can be ducked. Can be ducked.
|
|---|
sj.d+4 Must be in the air for at least 7 frames for the move to come out. Must be in the air for at least 7 frames for the move to come out.
|
|---|
Special Moves
(Super) Chakura Wave QCF+1/2/3 LEVEL 1 (LEVEL 22) LEVEL 1 (LEVEL 22) Tessa’s fireball, hits twice. Tessa’s fireball, hits twice.
|
|---|
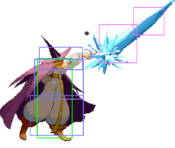
(Super) Reverie Sword DP+1/2/3 LEVEL 1 (LEVEL 28) LEVEL 1 (LEVEL 28) Five hits, 4 frames of invincibility. Five hits, 4 frames of invincibility.
|
Tessa’s invincible uppercut. Without question the best move in the game. You’ll be using this in combos, for punishes, and as anti-airs. |
|---|
(Super) Air Chakura Wave j.QCF+1/2/3 LEVEL 3 (LEVEL 22) LEVEL 3 (LEVEL 22) Tessa’s air fireball, hits twice. Tessa’s air fireball, hits twice.
|
|---|
Glace Cannon QCF+4/5/6 LEVEL 6 LEVEL 6 2 frames of invincibility. 2 frames of invincibility.
|
|---|
Fiamma Cannon R.DP+4/5/6 LEVEL 10 LEVEL 10 2 frames of invincibility. 2 frames of invincibility.
|
|---|
Electron Cannon DP+4/5/6 LEVEL 14 LEVEL 14 2 frames of invincibility. 2 frames of invincibility.
|
|---|
Ghost Jammer HCB+1/2/3 LEVEL 25 LEVEL 25 Staggers Kenji. Staggers Kenji.
|
Tessa sends out a ghost projectile that tracks the opponent. If it hits, four ghosts will gather around the opponent to pummel them after a bit allowing insane pressure opportunities. It also has several iframes. One of her best and most feared projectiles, well worth the startup. |
|---|
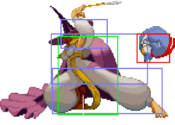
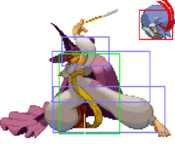
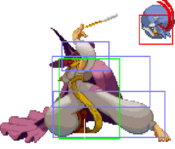
Death Phenomenon HCB+4/5/6 LEVEL 32 LEVEL 32 Can be ducked. Will deal more damage if more hearts connect. Can be ducked. Will deal more damage if more hearts connect. 4 version. 4 version. 5 version. 5 version. 6 version. 6 version.
|
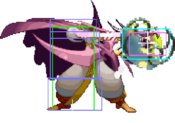
Tessa’s command grab. When it connects, balloons surround the opponent’s head and a timer begins counting down. When it reaches 0, the balloons pop one after another. The popping is unblockable, so this is a very scary move to get hit by. A good meterless punish for whiffed UG’s. It’s greatest downside is that it can be ducked, so it’s a bit tricky to get working. One bizarre quirk is that for whatever reason, Leo’s parry animation will duck this move. |
|---|
Super Moves
Tricicle Edge QCFQCF+1/2/3 LEVEL 1 LEVEL 1 12 frames of invincibility. 12 frames of invincibility.
|
|---|
Hyper Cannon QCFQCF+4/5/6 LEVEL 19 LEVEL 19 Invincible for entire startup. Invincible for entire startup. 4 version. 4 version. 5 version. 5 version. 6 version. 6 version.
|
Tessa brings out her cannon and fires one of three different elemental cannonballs depending on the button pressed. This move is hands down the best super in the game. |
|---|
Universal Mechanics
Throw F+2/3 Loopable. Can be softened. Loopable. Can be softened.
|
|---|
Dash F, F or B, B Forward dash Forward dash Back dash Back dash
|
|---|
Ultimate Guard P+K Ultimate Guard Ultimate Guard Parry Parry
|
|---|
Ultimate Counter R.QCB+1/2/3 Only version. Staggers Kenji. Only version. Staggers Kenji.
|
|---|
Pursuit
U+4/5/6 |
|---|
General Strategy
Overview
Tessa’s main gameplan is switching between zoning and rushdown, so knowing when to switch between the two is important. She has plenty of tools that allow her to excel at both. Usually you should default to zoning when possible while paying attention for any opportunities to go for her powerful mixups. Abuse her good normals and options to completely take control of the match.
Zoning
Chakura Wave is Tessa’s main zoning tool so you’ll be throwing this out a lot to control space on the ground. That said, you should mostly be sticking to performing the air version out of a dash. The dashing version has several benefits: it allows you to move either forward or backward slightly while zoning to help positioning, it has a faster startup than the grounded version, and most importantly it recovers much much quicker. As soon as Tessa touches the ground again, she can perform actions. This can easily catch unsuspecting opponents off guard, so when they try and jump your fireball for a punish they’ll be greeted with an unexpected Reverie Sword.
A tricky but useful technique is the "double fireball", where inputting a chakura wave on the last frame before landing out of a dashing chakura wave will shoot out a second air chakura wave. This allows you to rattle off two fireballs in very quick secession. It's recommended that you use the light version of fireball on the second input as being too late will give you a grounded fireball, meaning that if you input the heavy version you'll be locked into an extremely long startup animation. Once you master the 1f timing however, getting out two heavy dashing chakura waves is highly desirable.
Once you’ve put some fireballs on the screen, it’ll be a good time to unleash a Ghost Jammer here and there. This thing has some tracking on it, meaning that an opponent that tries to jump over your zoning will meet it in the air. It’s really bad news for them if it hits, so make sure it’s a constant threat in their mind. Mix up between throwing out the slow 1 version and fast 3 version to catch them off guard. Having the slow ghost on screen will give you a ton of wiggle room, even if it’s a bit weaker on hit than the 3 version.
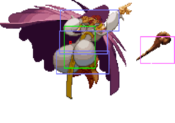
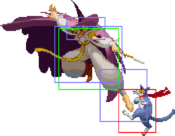
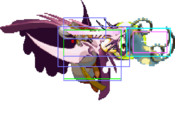
The final piece of the zoning puzzle is Tessa’s bird, specifically j.6. While Chakura Wave covers the ground, this little guy will cover the air. For whatever reason, the bird beats absolutely everything, most notably beating projectiles. It’s so powerful that it even beats out projectile supers! A great tactic is simply jumping back while holding 6 and either releasing to cover the air, or waiting to react to something. If your opponent tries to pursue you in the air? Bird them. They try and chase you on the ground? Wait and release to hit them out of their dash. They try and super on reaction to seeing you charge? Have the bird rip through that super while also nailing them in the process. That said, the one weakness of using this strategy is that you’re completely open while charging the bird. If you’re too reckless, a smart opponent will just wait and hit you with lightning or ice, so play smart.
There are miscellaneous zoning tactics, usually involving 3 normals, but they aren’t critical to her zoning strategies. If you’re looking to experiment, 3 and j.3 are a good start.
Ice Hyper Cannon
Tessa’s qcfqcf.4 super is one of the most devastating punish tools at your disposal. What makes it so good is the effect it has when connecting with the opponent on the ground: it will freeze them solid. What this means is that they’ll be trapped there for quite some time, allowing you to run up and continue with a followup. The most brutal followup? Another cannon. Meaning another freeze. Meaning another followup. This alone would be godly enough, but on top of this property the super also does an insane amount of damage and stun for whatever reason. Usually two cannons is enough to dizzy everyone, and three is a TOD on everyone that can be frozen. For this reason, make sure you steal as many orbs as possible. There is some nuance to it though. The cannon itself must hit in order for the freeze property to take effect, and even then there are some strange punish scenarios where the opponent is knocked down instead of being frozen (for example, interrupting any of Leo’s qcf moves won’t result in a freeze). Tessa herself actually can’t be frozen by the super, so the cannon is much less effective in the mirror. The reason for this is that the cannonball causes the freeze, but the pixies cause a knockdown. So in order to get a freeze to work, the pixies and the cannonball must connect on the same frame, meaning that due to collision boxes and hurtboxes some scenarios will not result in a freeze. The massive amount of stun it inflicts can also screw you over when going for multiple in a row. The worst case scenario is, after the first ice cannon freeze, you try and follow up with another ice cannon but the opponent is stunned on the first hit, crippling the amount of damage done and effectively wasting the orb. For this reason, before attempting a second ice cannon it's a good idea to try to stun the opponent first if they're a low stun character. Still, this move is absolutely deadly and will make your opponents second guess UG’ing mindlessly. All it takes is three orbs and a whiffed UG to end the round.
Anti-air
Tessa has no shortage of anti-airs, but some are certainly better than others. Obviously the opponent can just air block, but you still need to establish that they can’t just get in for free.
- dp.1: Your bread and butter when it comes to anti-airs. Huge hitbox, great horizontal range, insanely fast, hard to punish, and does a decent amount of chip so even if it gets blocked you’re still getting some damage in.
- Jump back j.6: A safe option without too much reward. Good for when you want to run away. Bad for when you’re getting put into the corner.
- df+4: Very low committal anti-air. Having this blocked, whether in the air or on the ground, won't get you killed. In fact, you'll be plus. When it hits, you're able to combo into dp.1 if they're close enough.
- qcfqcf.1/2/3: One of the only true anti-airs in the game as it cannot be blocked in the air. Connect with two to guarantee a dizzy into a possible TOD with cannon. Hoard as many orbs as you can so that you can always have the threat of this move. Simply having them stocked will force your opponent to think twice about jumping at you. One of the main issues here is speed, so you’re going to need to either be really sharp or have anti-airing on your mind. Another unfortunate property of this move is the gap between Tessa and the Tricicle when it comes out. A skilled opponent can "thread the needle" if they're super jumping and steering, land right in front of you and punish you. Always try and be one step ahead when using this anti-air.
Pressure
Not only is Tessa a great zoner, she’s also great at opening up the opponent with pressure. Her divekick is her main pressure and mixup tool. Doing it as fast as possible leaves almost no room for the opponent to react, so a powerful strategy is mixing between divekick and cr.4/cr.5 forcing your opponent to scramble. The most common thing people do under pressure here is UG. This can be a death sentence if you have some orbs. Read this properly, and you can go straight into hyper cannon shenanigans. Doing this a few times will make the opponent much less likely to UG while under divekick pressure, thus making your mixups much safer.
A good time to switch from zoning to rushdown is when the opponent is hit by ghosts. The ghosts will essentially cover you while you go for mixups and add extra damage. The opponent can simply UG to shrug off the ghosts’ attacks, but this also works in your favor. If you suspect they’ll UG, you can simply go for a grab or even Death Phenomenon. So if they UG, grab them. If they don’t for fear of being grabbed, then free mixups with divekick. There is one more method the opponent can employ to avoid these mixups all together, which is simply jumping away while blocking. They no longer have to worry about grabs, overheads, or lows, and can just block the ghosts’ attacks in the air. While doing this they’ll be susceptible to universal guard break setups with elemental supers, but Tessa has an even better counter. Just wait for them to fall to the right height and hit them with qcfqcf.1/2/3 for an unblockable anti-air. However, if you’re out of orbs, then this jumping strategy is a perfect way to escape any ghost pressure. This is yet another reason why it’s crucial for you to stockpile orbs.
One of the best things Tessa can do for oki or when approaching the opponent, is using a low to the ground j.6. Due to how large and far reaching this move is, it can usually cover any roll options, and often will cross up the opponent for a sneaky mixup. Other than that, the main benefit to using j.6 is the massive amount of advantage Tessa gets on hit and block. This effectively locks your opponent down, allowing you to run Tessa's mixup game with divekicks and lows. If the opponent is close to you after blocking the bird (usually after a cross up j.6), a good option is to go for her command grab. If you've conditioned your opponent to block overhead in fear of divekicks, they'll be much less likely to duck thus increasing the chance that her command grab will connect. Another option Tessa has if they block the bird is to simply grab the opponent with 2/3 throw. Tessa can get quite a lot off of her throw, so the opponent is forced to respect this option. Having this many layers to her pressure can make the opponent's head spin, which is exactly what you want, so try and use all of her options to keep them guessing, and hopefully guess wrong.
Setups
GHOST JAMMER SETUPS
Due to how slow light Ghost Jammer is, it’ll stay on the screen for a long time letting you run up to the opponent alongside it to have it protect you while you attempt mixups. This method is best done from full screen to give you plenty of time to run up with the ghost. The opponent has several choices to make here, so having good reactions/a good read is key:
- Attack: An optimistic response that the ghost should cover for you. If they try and poke you while you run up to them, the ghost will catch them. Usually people are smart enough to not do this, but it still should be mentioned.
- Block: What at first glance seems like the safest option, however a blocking opponent is your opportunity to mix between divekick and lows for free. Best part is that if they fail to block the mix, the ghost is right there behind you and will likely hit them, allowing you to apply even more pressure while they now have to deal with ghosts.
- UG: A naive attempt to avoid the mix altogether. Very easy to react to, simply grab them or command grab them. Works even if the UG of the ghost is successful.
- Jump: Thankfully the ghost will track them in the air, so while they can’t be mixed in the air, they still need to block unless they want to eat some ghost pressure. If they end up jumping and block the ghost, you have enough time to land an unblockable anti-air qcfqcf.1/2/3 which can be devastating if you have the orbs.
- Super Jump: This one can be a bit tricky. The ghost won’t be able to follow them all the way up there, and they have a lot of air control making their position unpredictable. If you suspect that they'll take this opportunity to gain some ground on you, try and cross under them and anti-air them from behind. If they've overcommitted to coming in, they won't have enough time to get around the anti-air.
- Counter Projectile: The ghost is the lowest priority projectile in the game, even losing to Kenji kunai. A smart opponent will simply fire off their own projectile if they have one to blow through it while also hitting you in the process. If you find your setup being beaten out by this often, start divekicking over their projectile or approaching with j.6 to stuff it out. Depending on how late they react to the ghost with their fireball, you can potentially get big punishes, so keep an eye out.
DEATH PHENOMENON SETUPS
Tessa actually has a setup involving her command grab for oki, which if performed successfully will put a lot of pressure on your opponent. As a consequence of the strange property of waking up backwards for the first frame after crossing up, the command grab can actually catch opponents rolling behind you even if they’re crouching. So if you suspect they’re going to roll behind you on wakeup, you can catch them with the grab. Spacing and timing is important here, and this setup works best against opponents trying to escape the corner. Best part is that if they do get hit, they’ll be teleported in front of you, right back into the corner. There are some strange quirks however that need to be taken into consideration. Firstly, the opponent is able to hold down+forward to duck the command grab. This is due to the game putting them immediately into preblock (which again, is a consequence of facing backwards after a crossup) which allows them to crouch instantly instead of waking up standing. Secondly, this setup has a much harder time working on Kenji. Long story short, the hitboxes for the hearts are disabled during wakeup but usually reactivate in time to grab the other characters. Kenji is special in that he’s able to duck before the hitboxes activate again. Due to a glitch however, one heart’s hitbox stays active, meaning that if you want this setup to work you’ll have to time it just right so that this one heart connects with Kenji on wakeup. You probably should avoid this setup altogether on Kenji due to this, but if you still want to try for that golden timing, then make sure you activate the command grab before his wakeup animation begins. If you wait until he’s already begun his wakeup animation, the glitch won’t happen and all the hearts will be turned off. Finally, this setup can be tricky to do on Mai Ling given that she can change the distance of her roll, so it’ll take some more precise timing and a good read to get it to work on her.
Once you actually land the command grab on the opponent, the impending unblockable explosions give Tessa some options based on how the opponent reacts to them. Here's what to do for various potential counters to the balloon explosions:
- UG: The most obvious way around taking damage from the balloons is to just UG. In this situation, the opponent concedes that they're going to be taking damage and would rather be thrown than have the highly damaging balloons explode on them, so throw them. Low reward for you, but it's guaranteed damage either way.
- Jump: In the air only one balloon will connect, so a tricky opponent can try and run away right before the counter reaches 0 and jump high into the air, only being hit by a single balloon then landing to UG the few remaining. Chase them down and make them regret putting themselves into a vulnerable position. Reverie Sword is able to hit opponents in an air reset state, so if you're close enough and they do this, you will get a guaranteed DP against them. Obviously the more devastating response would be to use Tricicle, so you can go for that if you can afford the orbs.
- Throw: This is the sneakiest and most effective option of them all. When a character is in a throw animation, either a regular throw or a command grab, their hurtbox disappears until the animation finishes. If timed right, and the correct throw is used, the opponent would be able to completely negate all of the damage due to the balloons popping during this invincible state. Be extremely mindful of this when the clock nears 0, as a smart opponent will be fishing for grabs to negate the balloons.
Instead of waiting and reacting to what the opponent will do for a minor reward, you can try and overwhelm them so that they flinch and end up getting hit by the explosions on the ground. It cannot be overstated how monumental of a reward it is to get all of the explosions to connect with the opponent on the ground. Due to a glitch, hitting the opponent with cr.5 while they're being hit with multiple balloons will freeze the cr.5 hitbox causing many many more hits than should happen connect, absolutely melting the opponent's health bar. So if you feel like going for this, try and put a lot of pressure on them when the timer nears 0 with divekicks and pokes to either make them UG too early or be too overwhelmed to deal with the balloons at all. It won't always work out however, so it can be a risky play.
THROW SETUPS
After a regular 2/3 throw, Tessa has several options for extended damage, some stronger than others if you have a good read. Her options depend on whether or not the opponent softens the throw.
- The opponent softens
- Orbless: The most tried and true followup to a regular throw will be dp.1. This will actually hit the opponent if they soften, which ends up dealing more damage than if they had chosen not to soften in the first place. Also, if they end up not softening, Tessa recovers quickly enough to still perform okizeme. Extremely cheap. You should almost always do dp.1 after throw.
- Orbs: A potentially very wasteful, but fruitful option if you predict that they'll soften is to do Tricicle. Needless to say, if it hits, you can do any of the obvious followups after it, but if it doesn't, then you just wasted an orb which really really stings.
- The opponent doesn't soften
- Orbless: One of the most taboo techniques available can be executed if they either miss the soften window or choose not to soften for fear of being DP'd: throw looping. Walk up to them and throw them again, that simple. If for some reason you decide against throw looping, then the opponent doesn't have to respect your throw options. They can just choose not to soften every time, and you'll sit there doing nothing. Whether you like it or not, putting throw looping on the table adds just the right amount of layers where Tessa's throw can become a really scary tool.
- Orbs: A potentially even more catastrophically wasteful option if you predict that they won't soften is to use poison super to OTG them, which will launch them up allowing you to spend another orb on Tricicle that you can then followup with the usual options. Not really recommended as it requires multiple orbs and a hard read, but it's there if you want to use it.
- Universal
- Whether or not the opponent softens the throw, a lightning super will always combo, so it's a much more consistent way to spend an orb on a throw followup. No reads required. The only difference is that it will do more damage if the opponent chooses not to soften.
TRICICLE SETUPS
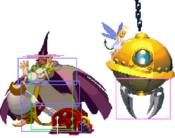
There is an exceedingly gimmicky setup involving Tricicle that you can pull off in various situations. When right next to the opponent, typically when waking up, perform a reversal Tricicle Edge. This alone is a pretty great reversal; it has iframes, does a lot of damage, and recovers quickly. However, the ability to hold the button down to delay the release of the icicles allows for some serious shenanigans. Blocking this move standing will cause a guard break, so in order to avoid this and to avoid any of the chip damage, the opponent usually will attempt to UG the super. If they do so, then they have fallen for the trap. Hold down the punch button and allow the vial to end up behind the opponent, then let go. The icicles will completely whiff, thereby circumventing activating the opponent's UG parry state. From here, Tessa is able to perform any UG punish you wish, most notably an Ice Hyper Cannon. Effectively this setup (if successful) gives you a UG punish for enormous damage at the cost of one orb. A neat consequence of super freeze allows you to "hit confirm" the setup. If you see that the opponent is in the middle of an attack during the super freeze, don't hold down the button and allow the Tricicle to connect. If you see that they're just standing there, then try the setup. A very common opportunity for this setup aside from wakeup reversal is when trying to anti-air with Tricicle. If you know that you're too late, but the super has already come out, you can attempt to hold the button instead. Often the opponent's response is to land and UG to punish your bad timing. Now you're able to punish their punish! As said before, this is very gimmicky and can be a big risk and waste, but when it works out it works out big time.
Matchup Strategy
Tessa
One of the more unpleasant matchups in the game, Tessa mirrors. You will often find yourself stuck in a cycle of blocking/contesting endless Chakura Waves with whoever attempting to jump in getting anti-air’d easily due to Tessa’s floatiness, resetting back to neutral. In these situations, you’ll want to sneak in a neutral jump j.6 somewhere to negate the opponent’s Chakura Wave. Once you get that negation, there’s a couple different approaches. Your fireball will now be the dominant one, so you can start spamming your own fireballs. Of course, the other Tessa can just use her own bird on you just as you did on them. So another option after negating their fireball with your own bird, is to begin your rushdown game. It’s going to take a bit more precision and care here though as the rest of the cast doesn’t have Reverie Sword up their sleeve, so watch out for it when going in. If you don’t feel like going in, you can instead try and poke her with j.3, stalling yourself above her fireballs while getting an overhead hit in that’ll knockdown if she’s in the middle of her airborne dash..
Tessa is also the only character who will not be frozen by a raw ice Hyper Cannon, forcing you to make different and lower damaging punishes. She also gets up surprisingly fast from any ice related move, such as your Tricicle Edge. Fortunately, this applies to you as well, so in some ways this is as much of a blessing as it is a curse. So Tricicle Edge becomes your best punish option, and when landing it make sure to dizzy her as she won’t be on the ground for long otherwise.
Punishes:
Leo
This matchup can be tough for the Leo if they aren’t careful. Because he has no advanced movement option in the air like a double jump or an airdash, a jumping Leo can be a sitting duck against Tessa. Fill the screen with your projectiles and force him to jump. With the proper spacing and orb management, that jump can lead to an entire round for you after landing an anti-air Tricicle TOD combo. Ghosts can be extremely helpful here due to their tracking property, so make sure to use them in tandem with her Chakura Waves. The trick here is that even if the ghost is blocked in the air, they are trapped in a predictable falling animation and forced to block the entire way down. This is your opportunity to land an air unblockable Tricicle for some serious damage.
Still, it's important to be mindful with your zoning. Leo's j.5 is feared for good reason. A good Leo will perfectly time a jump in to go right over your fireball and nail you with j.5 at 3/4 screen. It's a game of chicken for who will mess up their timing. Leo can employ some mind games here however, so look out. The Leo can do an empty jump over your fireball at j.5 distance to bait out your DP and punish it. Often times to get in, Leo's will opt to super jump in instead of normal jump in due to the amount of air control they have. It can be very hard to anti-air the Leo if they manage to get right above you, and their button of choice here, j.d+5, will trade with most options and can even mix you up with cross ups and fake cross ups. The best thing to do in such a situation is to cross under them and obliterate them with Tricicle Edge. If you don't want to spend the orb or don't have an orb, then go for dp.1. This can be risky as often the j.d+5 and dp.1 will trade. This is a VERY important aspect of this matchup that should not be overlooked. You want to avoid anti-air trades at all costs, even if it means giving up space. Trades will always be in Leo's favor. Tessa has low health, and Leo has high health and high damage. A trade against Leo is a victory for Leo, so try and use Tessa's many iframe moves to your advantage. Good timing it absolutely key.
Be careful of getting cornered against Leo, as this is where he is most effective against Tessa. Her zoning will be useless, and her pitiful ground roll won’t be any help escaping the corner. Because of Tessa’s low guard gauge, Leo can easily start applying pressure with his big normals and strike/throw mixups, forcing Tessa to make risky UG’s. You really have two options here, each with their own pros and cons. The first is making use of your invincible options, namely her DP. Getting that knockdown will give you plenty of time to get out of the corner, just be careful about getting punished on block. The other is super jumping out of the corner and steering towards the middle of the stage. An attentive Leo however can try and stop this by putting you in block stun in the air, preventing your escape. Worse still, Leo can now land a guaranteed air guard break combo dealing additional damage and knockdown. So, try to not get cornered while keeping Leo in zoner hell.
Punishes:
 cr.5: Always punish this move if the Leo is reckless with it and isn’t mindful with his spacing. A dp.1 will do the trick at close range, and a lightning super at any range.
 qcfqcf.1/2/3: You will probably always be Ultimate Guarding this move due to how fragile Tessa's guard gauge is, but you can get a better punish than a simple UC. After successfully UGing the super, Tessa can punish with dp.3 for more damage and a knockdown.
 qcf.x: This move is a very interesting case. Against the heavy versions, the rush itself will guard break Tessa so she must UG it. However, there is a considerable gap between the rush and the swing for both qcf.1/2/3 and qcf.4/5/6. During that gap, even after UG’ing the initial rush, Tessa has enough time to squeeze in a qcfqcf.1/2/3, dealing massive damage. You can even fit in a qcfqcf.4, however for some reason Leo does not become frozen after, making qcfqcf.1/2/3 the better punish.
There’s still more to punish with this move, thanks to Tessa’s amazing DP. If the final blow is blocked and Tessa is close enough, you can punish even the lightest versions with dp.3 due to its insane reach. This punish actually comes up a lot due to a bug. If Tessa is crouching, then the rush hits of Leo’s qcf.1/2/3 or qcf.4/5/6 will not combo into the final swing, making the move punishable on hit against crouching Tessa.
Mai Ling
An extremely even matchup, and a very interesting one. Both characters can kill each other with just one mistake, so tensions are always high. Because of this, it is very important that you do not DP recklessly. Mai Ling has many ways of making your DP whiff, which unfortunately for Tessa will lead into a TOD usually only requiring a single orb from Mai. If you’re going to DP, make absolutely sure it either hits or is blocked. Depending on distance, even a grounded blocked DP can spell doom, so be very mindful. You also should avoid going for pursuit against Mai Ling, as whiffing it is another death sentence. Worse still, even if it does connect, then depending on distance she has enough time to roll towards you and mix YOU up on HER wakeup, either rolling behind you for a cross up or in front of you for a fake cross up. Either way, you're dead, so accept that you just won't get that extra bit of damage and instead take this opportunity to back off or apply pressure with oki.
Zoning Mai Ling can be a real challenge. Out of all the cast, she hands down has the best method of getting around Tessa’s zoning, that being her dash. Her dash greatly lowers her hurtbox to the point where she can dash under your projectiles, getting right up into your face. She is even able to dash under Tessa’s DP up close. You’ll want to change up your timing with your fireballs to try and mess up the Mai Ling. Even though it’s a powerful tool for Mai, her dash still takes good timing. Pause for random intervals before back dashing again, try mixing up between forward and back dashing, or even throw in some empty back dashes with no Chakura Wave. Using Ghost Jammer at all can be extremely risky, so only put one out if she's far away or just avoid using it in neutral at all.
If she wasn’t bad enough on the ground, in the air she’s a real headache. That airdash of hers is a serious problem for Tessa. Often it seems like you can just DP her, but if she spaces it well what ends up happening is that the Reverie Sword goes forward way too much, and Mai Ling passes right by it. Then she lands safely, and proceeds to steal the round from you with her TOD of choice. The same thing happens with Tricicle Edge surprisingly, except with the difference being not only are you dead, but you’re dead and down an orb. Because of this, it’s best to just respect her airdash unless you’re certain that she won’t pass right by your anti-air when you go for it. She can try and bait you by superjumping and airdashing back and forth a random number of times to really throw off your timing, so don’t fall for it. Instead, just let her run around in the air and take that time to get a distance on her. Alternatively, you can spend some Ice orbs to punish her airdash with Ice super.
Ultimately, the best thing to do is try your best to stay far away from her. Backdash away while chucking fireballs, and cross under her when you can to avoid getting cornered. Care needs to be taken as always, as she can catch up to you very quickly while airdashing and can even punish your backdash Chakura Wave. So keep your distance while aggravating her into making a mistake. If you’re far away, she can’t hurt you. Sometimes however you'll find that you just can't get away from her. Best thing to do if she's constantly stuck to you is to not hit the panic button and just play it safe. Don't take any risks, just hold downback until you find an opening to get out of there. She will try and take advantage of this with her unbreakable throw, so you can try poking quickly with cr.4's to catch her dashes preventing her from running in and grabbing. Don't mash too much though, as Mai Ling can DP from a safe distance that'll actually hit your cr.4 due to how far reaching it is and go into a full combo. That or she's going for a frame trap with cr.6, which will knock you down and force you to experience her brutal okizeme. Wait until she jumps, then dash under her and get away. Be safe, and either win the battle of attrition or go down the path of mutually assured destruction.
Punishes:
 dp.4/5/6: This one is a bit interesting as it depends on your reaction speed. This move can actually be punished by qcfqcf.4, which is absolutely insane. However, you either need to have a great read or very good reaction time to pull it off. For that reason, you can instead opt for doing a qcfqcf.1/2/3 which is a tad faster allowing you to react a bit easier in exchange for not getting as juicy of a punish. Still, you can DP after the qcfqcf.1/2/3 for a dizzy anyway and continue from there.
 cr.6: After blocking cr.6, you can punish with dp.3 a fair distance away. If she does it up close for some reason, dp.1 is always better because it gives you more time to set up afterwards. Keep in mind that punishing cr.6 can be very risky if you mess up, so a safer and more consistent option is to use lightning super. It'll cost you one orb, but better that than your life if you mess up.
 r.dp.4/5/6: Mai Ling’s divekick doesn’t come up all that often as it’s usually a misinput of dp.4/5/6. Still, Tessa is able to punish it even at its maximum advantage with dp.1. If you want a bit more damage and the move didn’t hit shallow, you can squeeze in an extra 4, making the full punish 4 xx dp.1
 j.ff: The obvious punish is to elemental super if she airdashes recklessly, but obviously any self respecting Tessa will want to qcfqcf.1/2/3 her out of the air. Trying to go for qcfqcf.1/2/3 on reaction can often spell doom for Tessa if the Mai Ling is able to airdash past it, so it’s much better to try and bait her into a compromising position. The bait is this: If you suspect the Mai Ling is trying to instant airdash over your backdash fireballs, do an empty backdash. If your suspicion is correct and she airdashes, you’ll already be on the ground ready to punish with qcfqcf.1/2/3. Happy hunting.
 hcb.4/5/6: This move almost never comes up due to how insane Tessa’s punish is, however it’s important to know it to give a reason for the Mai Ling to never do it. When it does come up, either by accident or foolishness, Tessa can get a qcfqcf.4 after blocking or UGing it. You have plenty of time to react to its long animation, and the window for the punish isn’t very tight, so make sure to kill the Mai Ling every time you block this move.
Kenji
Surprisingly Kenji does very well in this matchup, so don’t think you’re safe just because your opponent is playing a low tier. Kenji’s extreme weakness to ice is a definite plus, however his options while airborne really lets him get around a lot of Tessa’s zoning, neutral, and even anti-airing. When running your zoning against him, he’s obviously going to try jumping over the fireballs. One of the main issues is his j.3 chain normal. The reach on that thing is significant enough that he can cleanly jump over one of your fireballs at a moderate distance and punish with it. The existence of that chain defines the match up, and you’ll be having to deal with an airborne Kenji constantly.
Trying to punish his jumps with Tricicle Edge simply won’t cut it, as he can react to the super flash and double jump out of trouble if he needs to. The entire anti-air meta here is stacked with mind games, so you really need to condition your opponent and get in their head. If you can get them to commit to a double jump before you Tricicle Edge, they’ll be sitting ducks. Be careful though, as the Kenji has tricks of his own. Remember that he can control which direction his double jump will go, so he’s able to manipulate the spacing with his double jump to keep himself in too awkward of a spot for Tricicle Edge to connect. The next logical step then is using Reverie Sword to swat him out of the air, for even if he blocks it, he’ll be taking chip each time while still not getting in. The problem here again is his j.3. The move is disjoint enough that if he jumps in and baits your DP early, he can double jump to safety and cleanly punish the DP in the air with it. Because of all of this, you need to keep a tight eye on him while he’s in the air, check his trajectory and potential trajectories with double jumps. If you hesitate too much, he’ll get free ground on your position with empty jumps while you’re patiently waiting in vain for him to double jump.
The obvious solution to the air situation is double Ice super. Kenji dies very quickly against it, and two will guard break him in the air. But that’s the very issue, you need two orbs to guard break him and deal massive damage. Yes, you start the game with two orbs but you still have two rounds to win. Wasting orbs here is a serious blunder that can cost you the game. A savvy Kenji will keep you at most one orb, allowing him to take many more risks while in the air. This is why it’s crucial that you don’t let him bait you into wasting a Tricicle Edge trying to punish a jump just for him to double jump to safety. You need to have patience. You also need to steal orbs at all costs. Not only will that allow you to be able to punish him in the air, but Kenji is very reliant on orbs for his own gameplan, so taking them for yourself is a huge double win.
Lastly, it’s important to note Tessa’s rushdown against Kenji. Kenji lacks any meaningful reversals, so he’s very susceptible to Tessa’s pressure. If you find that he’s trying to lame you out with the life lead while you have too few orbs to punish him in the air, chase him down and put him into painful mixups. He’ll try to escape to the air, so try and stay one step ahead of him with chip damage from Reverie Sword or a good read with a perfect Tricicle Edge punish that’ll leave him severely wounded. And if you do have orbs to spare, try and throw him. Ice super can be followed up on Kenji after a throw, and the damage is enormous if you use two orbs. Be cautious however, as Kenji has tricks of his own to deal with an oppressive Tessa, that being his kunai super. If you’re in the middle of a divekick or if you’re charging a bird when this super goes off, expect to take massive damage as Tessa seems to be weak to this super for some reason. He can even use this super to punish a backdash Chakura Wave if he’s fast enough, so keep on your toes. Steal the orbs, be patient, and beat him at the mind games.
Punishes:
 f+2: Punishable on hit and block. Easy to react to, simply dp.1. Just remember though, it’s not minus if you’re dead, so don’t forget about this move if you’re low on health.
 r.dp.1/2/3: Depending on the version used, if you blocked it up close you can get anywhere from a dp.1 to a qcfqcf.4. However, if the Kenji whiffs this move from a distance, a raw Ice super will do the trick. If you're close enough however and it whiffs, you can jump in and perform the Kenji only combo: j.6, land, sj.d+4, 4 xx dp.1. Due to Tessa's small hurtbox in the air, the bird will connect with Kenji before the Garlic Breath connects with you.
 dp.1/2/3: Sometimes the Kenji tries to get fancy with his flame pillar zoning. If you’ve got a read on the next pillar’s position and timing, you can get a seriously juicy punish. You’ll need to be in range such that a single forward dash puts you in front of him. Simply dash up and do qcfqcf.4. If he puts the pillar somewhere that isn’t right in front of him, he’ll die. If he puts it in front of him, but doesn’t time it well, the iframes on Hyper Cannon will last through the whole flame pillar and he’ll die.
 dp.4/5/6: One of Kenji’s best specials that he simply can’t use in this matchup if Tessa has an orb. On reaction, you can punish him after he teleports with qcfqcf.1/2/3, which is obviously very very bad for him. He can’t double jump after the teleport, so he is really screwed and probably won’t use it if you have an orb.
 cr.3: This move is so bad that it’s easily punished on hit. While the punish isn’t specific to Tessa, it’s very important to remember so that you aren’t harassed at range by this disjoint chain. When you block or are hit by this move, you have enough time to react and punish with Ice super. Due to Kenji’s weakness, this is a massive punish, and as such you probably won’t be seeing many Kenji’s use this move if they know you know how to punish it.
 qcb.4/5/6: Another move you don’t see often, but Kenji’s will sometimes use it in longer combos with the hope that it’ll stun. On either block or hit, you can punish with qcfqcf.1/2/3 into whatever else you wish.
Combos
- j.6, 4 xx dp.1
Standard jump in and crossup combo.
- j.6, 5, dp.1/2/3
Alternate jump in combo. Does more damage, but can be tricky to space properly.
- sj.d+4, 4 xx dp.1
Conversion off of divekick.
- j.6, land, sj.d+4, 4 xx dp.1
Kenji only combo. Comes up a lot when pressuring Kenji, and some punishes.
- 1, df+5, dp.1
Combo using the launcher. Can substitute dp.1 with qcfqcf.1/2/3.
- hcb.3, 1 xx dp.1
Good meterless punish, usually done after a whiffed UG or a dizzy.
- hcb.3, 1, 1, 1, 1, dashx2, 1, 1, 1, 1, dashx2, 4 xx dp.1
Big boy combo. Corner only, and usually as an extender after a cannon freeze near the corner. There are many different stylish enders you can try, but 4 xx dp.1 is the most consistent.
- qcfqcf.1/2/3, dp.1
Anti-air and general punish combo, can substitute the dp.1 for a second qcfqcf.1/2/3 for a guaranteed dizzy.
Trivia
- Tessa's japanese name is Tabasa, most likely a mispronunciation of Tabitha.
- Tessa’s cat normals change which cat is attacking based on which side of the screen Tessa is facing.

