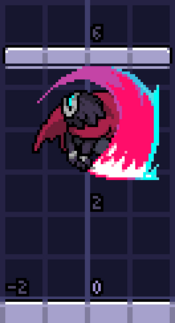
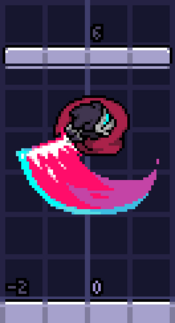
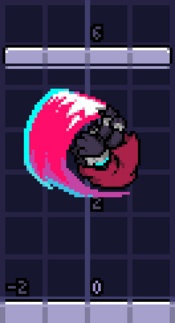
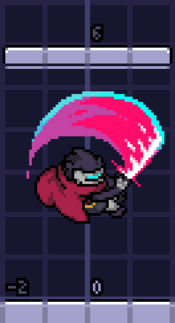
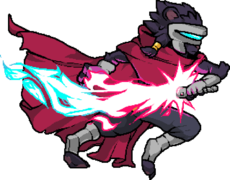
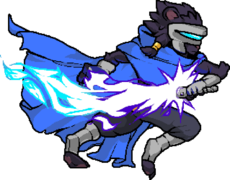
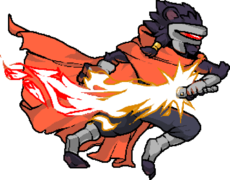
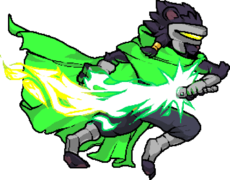
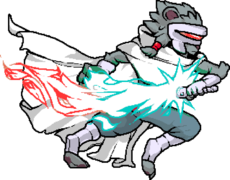
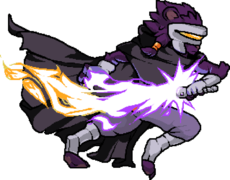
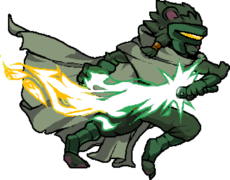
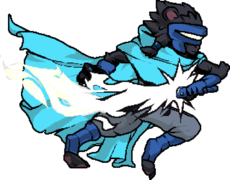
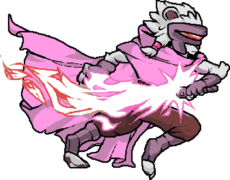
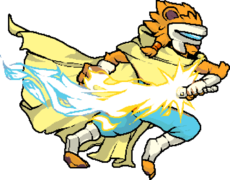
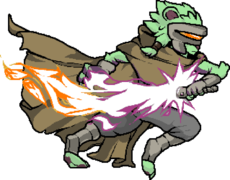
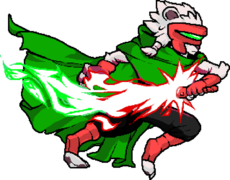
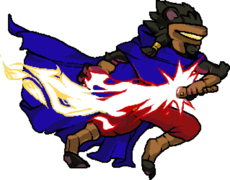
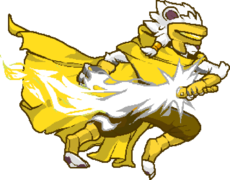
Rivals of Aether/Clairen
Story
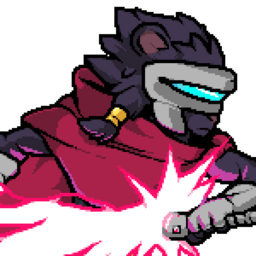
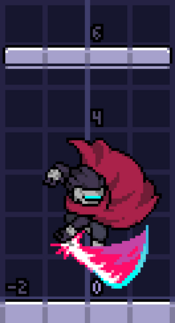
Clairen is a seasoned warrior from a distant future where both Zetterburn and Forsburn have vanished and never return. In her time, Loxodont grew to become a powerful emperor and expanded his domain over nearly all of Aether. Through the years the fire people lost their connection with the flame and could no longer control it. To offset this, their soldiers were issued plasma weapons as the Fire Empire became reliant on technology to retain its power. One young girl realized she could still control the flame and plasma. After enlisting in the Imperial Guard, she hatched a plan to destroy the endless Loxodont hoping that it would return the flame to the people. But Loxodont had grown invincible over time and his corporeal form was replaced with fortified machinery. Clairen was defeated in the throne room and was set to be executed. But there were others who also despised Loxodont, and Clairen’s bravery motivated them. An unlikely ally helped Clairen escape using a machine to go back to a time when Loxodont was still vulnerable.
Now Clairen is on a mission in the past to find the missing heroes that inspired her resistance and to destroy the endless emperor before he becomes invincible.
Clairen is the granddaughter of Claiyen and Forsburn[1] through her mother. Before joining the millitia, she used to live in the Ashenvale reservation with her mother Clairessa, her father Dohren and her two younger siblings, Ren and Issa. She already knew of her heritage through stories, although she has never met her grandparents.
Gameplay
Clairen is the sword character of Rivals, being one of the simplest characters to pick up yet one of the hardest to master.
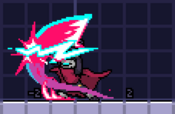
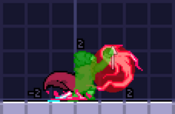
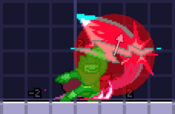
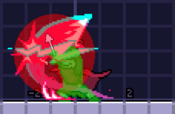
Though she initially seems like a pretty standard take on the swordfighter archetype, what sets Clairen apart is the unique stun she gets from hitting with the tip of her sword. While most characters with tippers just get extra damage and knockback, Clairen also puts opponents into extra hitpause, giving her combo opportunities other characters can only dream of. Consistently hitting tippers allows her to kill at some shockingly low percents, with all of her aerials comboing into just about any strong attack. That being said, any mistake you make with your spacing can result in stocks being drawn out and opponents consistently hitting you out of your own combos. Killing with her requires you to always be paying attention; tippers do give you extra time to react for a kill confirm, but you still need to be ready and on point when it comes to recognizing what move is most likely to seal out the stock.
The same can be said of Clairen's neutral. She has the potential to keep opponents out incredibly well, and boasts one of the best platboosts in the game as a way to approach unpredictably. An impatient opponent will find themselves quickly going nowhere against Clairen, but she's highly susceptible to more bait-and-punish oriented playstyles. Her disadvantage isn't horrible thanks to her low air friction, allowing her to escape combos better than a large portion of the cast, but that also makes her easier to kill off the side, which is especially scary when combined with her lackluster recovery. Clairen also struggles immensely in scramble situations thanks to her poor frame data.
All in all, Clairen is a character with a simple gameplan that rewards good situational awareness and exectuion. She's able to both wall out and outmaneuver opponents better than most of the cast, but needs to be careful not to let anyone get too up close and personal.
| Clairen is a strong mid-range character with unique stun combos and largely average stats | |
| Pros | Cons |
|
|
Unique Mechanics
Tipper Stun
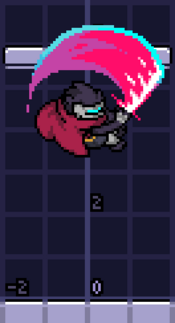
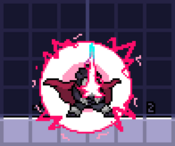
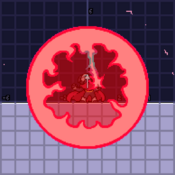
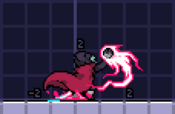
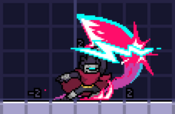
Hitting with the tip of Clairen's sword increases the damage, knockback, and hitpause the opponent recieves. These hitboxes are typically called tippers, and are the key to making the most of Clairen's neutral and advantage. Clairen's tippers leave the opponent stunned for a short time after she's able to move, opening up tons of opportunities for combos. Not only that, it also gives Clairen extra time to react to her combo starters! Always be paying attention to hit effects (and sound effects, if you're able to play with game audio) for when tippers land in order to miss as few punish opportunities as possible. Keep in mind that after hitting a tipper, the opponent can not be put into tipper stun again until they've been in hitstun for at least 20 frames, instead only taking the extra damage and knockback.
While not especially important to memorize, here's a list of the extra stun on each of Clairen's tippers to help you get a better idea of which moves give the most time to act.
| Move | Stun Frames |
|---|---|
| Jab | 12 frames |
| Dash Attack | 20 frames |
| Ftilt | 20 frames |
| Utilt | 20 frames |
| Dtilt | 20 frames |
| Fstong | 24 frames |
| Ustrong | 24 frames |
| Dstrong | 24 frames |
| Nair 1-5 | 10 frames |
| Nair 6 (final hit) | 24 frames |
| Fair | 20 frames |
| Bair | 20 frames |
| Uair | 24 frames |
| Dair | 24 frames |
| Fspecial | 32 frames |
| Uspecial 2 | 20 frames |
| Dspecial | 20 frames |
Notable Players
| Name | Color | Activity | Notes | Contact |
|---|---|---|---|---|
| OoDa | 2019 - Present | Also known as OoDaShadowTheft | https://twitter.com/OoDaShadowTheft | |
| SBS | 2015 - Present | https://twitter.com/SBSarizona | ||
| Plastic Dinos | 2018 - Present | https://twitter.com/Plastic_Dinos | ||
| Guardside | 2018 - Present | Also known as Guard, former best Clairen player | https://twitter.com/GuardSide | |
| ZonyX | 2017 - Present | EU Clairen, Also known as Zozo | https://twitter.com/Zonyx4 |
Moveset
Jab
Jab
| Damage | Active | Endlag | Angle | KB (Base+Scaling) |
|---|---|---|---|---|
| 3 | 2 | 12 [18] | 361 | 8 + 0.20 |
| Startup | Landing Lag | FAF | Angle Flipper | Hitstun |
| 5 | 26 | 0 | 0.6x |
| Hitpause (Base + Scaling) | Parry Stun Type | Priority |
|---|---|---|
| 4 + 0 | None | 6 |
| Hit Lockout | Force Flinch Value | Kills Projectiles? |
| 0 | Y |
Jab Tipper
| Damage | Active | Endlag | Angle | KB (Base+Scaling) |
|---|---|---|---|---|
| 5 | 2 | 12 [18] | 70 | 6 + 0.30 |
| Startup | Landing Lag | FAF | Angle Flipper | Hitstun |
| 5 | 26 | 0 | 1x |
| Hitpause (Base + Scaling) | Parry Stun Type | Priority |
|---|---|---|
| 6 + 0.10 | 6 | |
| Hit Lockout | Force Flinch Value | Kills Projectiles? |
| 0 | Y |
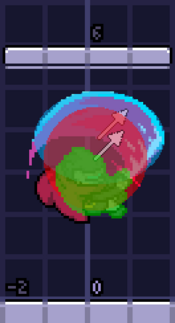
Clairen has an incredibly standard jab. It's a single hit jab, meaning it can't be comboed into tilts quite the same way as most jabs do, but that also means that situations where you'd get put into parry stun by mashing something out of jab are pretty rare. It is still possible if you mash a tilt, but that never really happens in practice. Tipper jab rarely combos into things on DI out, but if the opponent DI's in she can go for fstrong or ustrong to kill and moves such as ftilt or fair to throw the opponent offstage.
Jab's main use is as get-off-me tool. It's the fastest move in her kit, but it doesn't hit inside her hurtbox, making it a bit finnicky at times. It largely serves as her lowest risk and lowest reward button in dangerous close quarters situations, though also has a niche at quickly catching opponents in the air above and in front of her. Outside of those situations, however, it often comes of as a bit of a worse dtilt
- Clairen's jab can be cancelled into tilts 12 frames after the move is over. This is largely useful on whiff to get another attack out a bit faster
- Same FAF as dtilt, causing jab to get used less due to its lower reward and range.
Dash Attack
Dash Attack
| Damage | Active | Endlag | Angle | KB (Base+Scaling) |
|---|---|---|---|---|
| 6 | 4 | 16 [24] | 361 | 7 + 0.35 |
| Startup | Landing Lag | FAF | Angle Flipper | Hitstun |
| 18 | 47 | 6 | 1x |
| Hitpause (Base + Scaling) | Parry Stun Type | Priority |
|---|---|---|
| 6 + 0.25 | Standard | 6 |
| Hit Lockout | Force Flinch Value | Kills Projectiles? |
| 0 | Y |
Dash Attack Tipper
| Damage | Active | Endlag | Angle | KB (Base+Scaling) |
|---|---|---|---|---|
| 9 | 4 | 16 [24] | 110 | 6 + 0.25 |
| Startup | Landing Lag | FAF | Angle Flipper | Hitstun |
| 18 | 47 | 0 | 1x |
| Hitpause (Base + Scaling) | Parry Stun Type | Priority |
|---|---|---|
| Standard | 4 / 3 / 2 / 1 | |
| Hit Lockout | Force Flinch Value | Kills Projectiles? |
| 0 | Y |
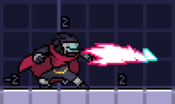
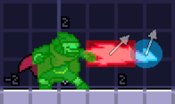
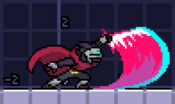
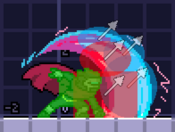
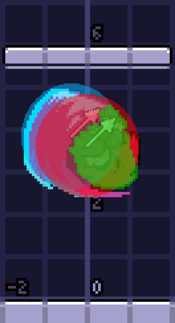
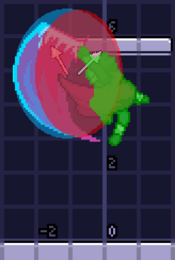
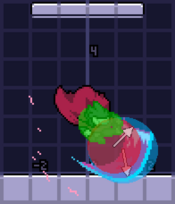
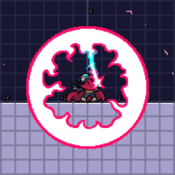
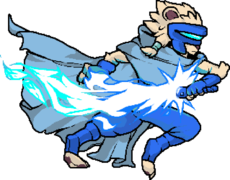
- Blue Clairen = shortened dash attack
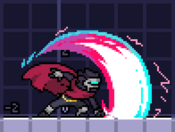
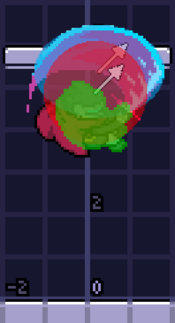
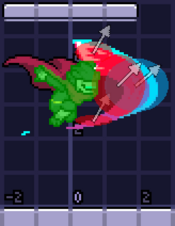
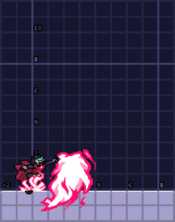
Dash attack is one of Clairen's more high-risk options, being a very slow lunge forward. This move has excellent range as far as dash attacks go, covering a long distance and being heavily disjointed, but it is extremely slow, making it pretty risky to throw it. Dash attack can hit opponents trying to run away from Clairen, but this is always a massive callout and should be used sparingly, as it is very easy to punish Clairen for reckless dash attacks. Also keep in mind that the normal dash attack will sometimes run right past people at close range; her dash attack shorten can help mitigate that issue, however.
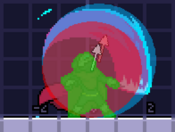
While it may be risky to use in neutral, dash attack does prove to be fairly useful in advantage. Since the tipper pops opponents up with very little knockback, it can serve as a great way to set up kill confirms on stage. The tipper sends in towards Clairen, meaning that if you DI out on this move you get sent straight up, and other DI options will send you on top of or past Clairen. At low percents she can reliably combo off of dash attack with an aerial or tilt, and at higher percents she can comfortably react with a strong attack for the kill. Generally you'll want to use ustrong for DI out and fstrong/dstrong for other DI options. Landing the dash attack tends to be the tricky part; can catch DI out at mid percents, and to catch tech away when none of her other options will reach.Tilts
Forward Tilt
Forward Tilt
| Damage | Active | Endlag | Angle | KB (Base+Scaling) |
|---|---|---|---|---|
| 7 | 4 | 15 / 23 | 361 | 7 |
| Startup | Landing Lag | FAF | Angle Flipper | Hitstun |
| 7 | 35 | 0 |
| Hitpause (Base + Scaling) | Parry Stun Type | Priority |
|---|---|---|
| Hit Lockout | Force Flinch Value | Kills Projectiles? |
Forward Tilt Tipper
| Damage | Active | Endlag | Angle | KB (Base+Scaling) |
|---|---|---|---|---|
| 7 | 8 - 11 | 15 / 23 | 361 | 7 |
| Startup | Landing Lag | FAF | Angle Flipper | Hitstun |
| 7 | 35 | 0 | 1x |
| Hitpause (Base + Scaling) | Parry Stun Type | Priority |
|---|---|---|
| 6 | Standard | 6 |
| Hit Lockout | Force Flinch Value | Kills Projectiles? |
| True |
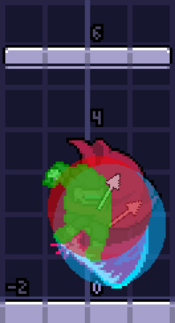
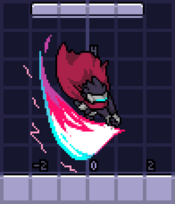
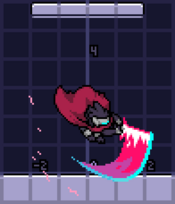
A simple swipe forward, Clairen's ftilt is one of her most straightforward moves.
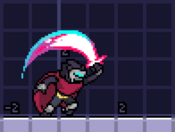
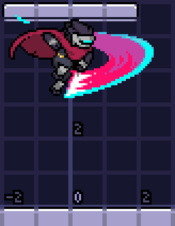
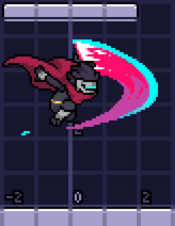
- Serves as a grounded poke. While slower than dtilt and jab, it hits higher up than dtilt and sets up for edgeguards much better than jab does, allowing her to swat people away and get higher reward
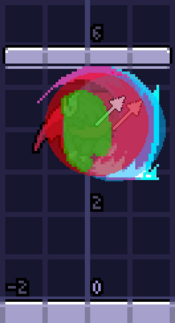
- Tipper ftilt can lead into a dair or fair at ledge for a kill, and on stage usually sets up for a dash attack or more tilts.
Up Tilt
Up Tilt 1
| Damage | Active | Endlag | Angle | KB (Base+Scaling) |
|---|---|---|---|---|
| 7 | 9 - 11 | 105 | 7 | |
| Startup | Landing Lag | FAF | Angle Flipper | Hitstun |
| 8 | 6 | 1x |
| Hitpause (Base + Scaling) | Parry Stun Type | Priority |
|---|---|---|
| 7 | Standard | 6 |
| Hit Lockout | Force Flinch Value | Kills Projectiles? |
| True |
Up Tilt 1 Tipper
| Damage | Active | Endlag | Angle | KB (Base+Scaling) |
|---|---|---|---|---|
| 10 | 9 - 11 | 105 | 7 | |
| Startup | Landing Lag | FAF | Angle Flipper | Hitstun |
| 6 | 1x |
| Hitpause (Base + Scaling) | Parry Stun Type | Priority |
|---|---|---|
| 7 | Standard | 6 |
| Hit Lockout | Force Flinch Value | Kills Projectiles? |
| True |
Up Tilt 2
| Damage | Active | Endlag | Angle | KB (Base+Scaling) |
|---|---|---|---|---|
| 7 | 12 - 14 | 17 / 26 | 75 | 7 |
| Startup | Landing Lag | FAF | Angle Flipper | Hitstun |
| 41 | 6 | 1x |
| Hitpause (Base + Scaling) | Parry Stun Type | Priority |
|---|---|---|
| 7 | Standard | 6 |
| Hit Lockout | Force Flinch Value | Kills Projectiles? |
| True |
Up Tilt 2 Tipper
| Damage | Active | Endlag | Angle | KB (Base+Scaling) |
|---|---|---|---|---|
| 10 | 12 - 14 | 75 | 7 | |
| Startup | Landing Lag | FAF | Angle Flipper | Hitstun |
| 6 | 1x |
| Hitpause (Base + Scaling) | Parry Stun Type | Priority |
|---|---|---|
| 10 | Standard | 6 |
| Hit Lockout | Force Flinch Value | Kills Projectiles? |
| True |
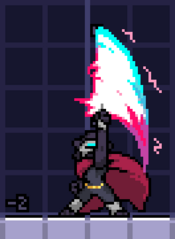
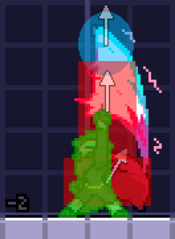
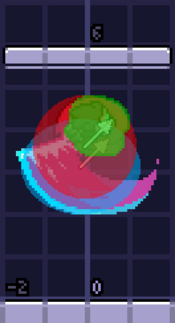
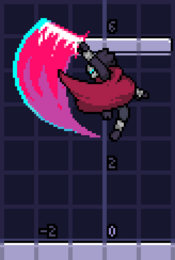
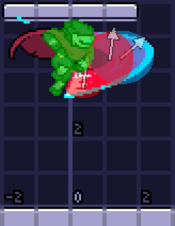
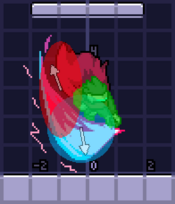
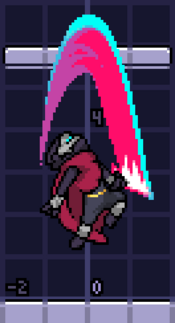
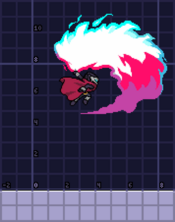
Big, slow anti-air. Her least useful tilt, but still has some uses
- Can combo into up strong on non-tipper and dair on tipper for kills
- Hits pretty high up, allowing her to cover a significant portion of platforms and being her only way to shark Aethereal Gates platforms on the ground
Down Tilt
Down Tilt
| Damage | Active | Endlag | Angle | KB (Base+Scaling) |
|---|---|---|---|---|
| Startup | Landing Lag | FAF | Angle Flipper | Hitstun |
| Hitpause (Base + Scaling) | Parry Stun Type | Priority |
|---|---|---|
| Hit Lockout | Force Flinch Value | Kills Projectiles? |
Down Tilt Tipper
| Damage | Active | Endlag | Angle | KB (Base+Scaling) |
|---|---|---|---|---|
| Startup | Landing Lag | FAF | Angle Flipper | Hitstun |
| Hitpause (Base + Scaling) | Parry Stun Type | Priority |
|---|---|---|
| Hit Lockout | Force Flinch Value | Kills Projectiles? |
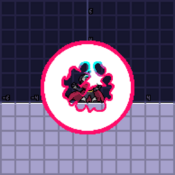
Clairen's go-to grounded poke and a backbone of both her neutral and ledgetrapping
- Same FAF as her jab, though one frame slower to start. Generally has higher reward than jab, but can't hit aerial opponents, leaving her a bit more vulnerable
- Sends opponents fairly low, opening up for techchases and low edgeguards
- Safest option for catching no tech, tech in place, or tech out, though the reward is a bit lower than other options like dair and dash attack
- Tipper dtilt combos into itself garunteed
- At ledge, tipper dtilt can combo into tipper dair for the kill. Additionally, mixing up between tipper and non-tipper can mix up tech timings, making it harder for opponents to ledgedash and make gaps in your pressure
Strong Attacks
Down Strong
Down Strong 1
| Damage | Active | Endlag | Angle | KB (Base+Scaling) |
|---|---|---|---|---|
| Startup | Landing Lag | FAF | Angle Flipper | Hitstun |
| Hitpause (Base + Scaling) | Parry Stun Type | Priority |
|---|---|---|
| Hit Lockout | Force Flinch Value | Kills Projectiles? |
Down Strong 1 Tipper
| Damage | Active | Endlag | Angle | KB (Base+Scaling) |
|---|---|---|---|---|
| Startup | Landing Lag | FAF | Angle Flipper | Hitstun |
| Hitpause (Base + Scaling) | Parry Stun Type | Priority |
|---|---|---|
| Hit Lockout | Force Flinch Value | Kills Projectiles? |
Down Strong 2
| Damage | Active | Endlag | Angle | KB (Base+Scaling) |
|---|---|---|---|---|
| Startup | Landing Lag | FAF | Angle Flipper | Hitstun |
| Hitpause (Base + Scaling) | Parry Stun Type | Priority |
|---|---|---|
| Hit Lockout | Force Flinch Value | Kills Projectiles? |
Down Strong 2 Tipper
| Damage | Active | Endlag | Angle | KB (Base+Scaling) |
|---|---|---|---|---|
| Startup | Landing Lag | FAF | Angle Flipper | Hitstun |
| Hitpause (Base + Scaling) | Parry Stun Type | Priority |
|---|---|---|
| Hit Lockout | Force Flinch Value | Kills Projectiles? |
Her fastest strong attack and a staple kill move for many of her most notable players
- Front hit comes out pretty quick and hits weirdly high. When combined with how short her hurtbox gets, this move is a weirdly good anti air.
- Can confirm out of most of her aerials, most notably dair and nair. Tends to be her most reliable option to combo out of, though won't kill as early as ustrong
- In some situations, you can chase after the opponent after the dstrong with something like uair; even if the move doesn't kill, you get a juggle situation out of it
Forward Strong
Forward Strong 1
| Damage | Active | Endlag | Angle | KB (Base+Scaling) |
|---|---|---|---|---|
| Startup | Landing Lag | FAF | Angle Flipper | Hitstun |
| Hitpause (Base + Scaling) | Parry Stun Type | Priority |
|---|---|---|
| Hit Lockout | Force Flinch Value | Kills Projectiles? |
Forward Strong 1 Tipper
| Damage | Active | Endlag | Angle | KB (Base+Scaling) |
|---|---|---|---|---|
| Startup | Landing Lag | FAF | Angle Flipper | Hitstun |
| Hitpause (Base + Scaling) | Parry Stun Type | Priority |
|---|---|---|
| Hit Lockout | Force Flinch Value | Kills Projectiles? |
Forward Strong 2
| Damage | Active | Endlag | Angle | KB (Base+Scaling) |
|---|---|---|---|---|
| Startup | Landing Lag | FAF | Angle Flipper | Hitstun |
| Hitpause (Base + Scaling) | Parry Stun Type | Priority |
|---|---|---|
| Hit Lockout | Force Flinch Value | Kills Projectiles? |
Forward Strong 2 Tipper
| Damage | Active | Endlag | Angle | KB (Base+Scaling) |
|---|---|---|---|---|
| Startup | Landing Lag | FAF | Angle Flipper | Hitstun |
| Hitpause (Base + Scaling) | Parry Stun Type | Priority |
|---|---|---|
| Hit Lockout | Force Flinch Value | Kills Projectiles? |
Easily her worst strong attack. Not entirely useless, but it lacks the speed of dstrong and rarely gets the same reward ustrong does.
- Will tipper opponents on normal height platforms, which can sometimes be used to catch parries, rolls or techs at high percent, but if it doesn't get the kill it puts them in a situation where you can't really do much afterwards
- Front tipper hit is fairly strong and can be confirmed out of most of her aerials, but the timing is a bit finnicky compared to ustrong. Only use this instead of ustrong if you're confident you can catch them with the tipper, as non-tipper ustrong is far better to hit than non-tipper fstrong
Up Strong
Up Strong
| Damage | Active | Endlag | Angle | KB (Base+Scaling) |
|---|---|---|---|---|
| Startup | Landing Lag | FAF | Angle Flipper | Hitstun |
| Hitpause (Base + Scaling) | Parry Stun Type | Priority |
|---|---|---|
| Hit Lockout | Force Flinch Value | Kills Projectiles? |
No results
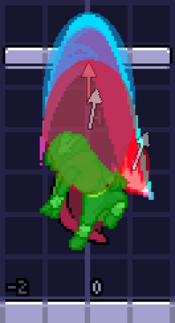
While it takes a bit of precision to start using, ustrong nets her some of her earliest kills while having several consistent setups.
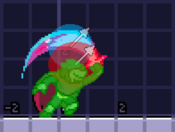
- This move can be DACUS'd. Learning to do that allows Clairen to cover a much wider range of DI options and get confirms at higher percents. Keep in mind that most of her confirms into ustrong can be done with or without DACUS depending on the opponent's percent, positioning, and DI.
- A few of her easiest ustrong confirms include tipper nair ustrong, tipper bair ustrong, tipper fair ustrong, and non-tipper utilt ustrong.
Aerials
Neutral Air
Nair 1 - 5
| Damage | Active | Endlag | Angle | KB (Base+Scaling) |
|---|---|---|---|---|
| Startup | Landing Lag | FAF | Angle Flipper | Hitstun |
| Hitpause (Base + Scaling) | Parry Stun Type | Priority |
|---|---|---|
| Hit Lockout | Force Flinch Value | Kills Projectiles? |
Nair 1 - 5 Tipper
| Damage | Active | Endlag | Angle | KB (Base+Scaling) |
|---|---|---|---|---|
| Startup | Landing Lag | FAF | Angle Flipper | Hitstun |
| Hitpause (Base + Scaling) | Parry Stun Type | Priority |
|---|---|---|
| Hit Lockout | Force Flinch Value | Kills Projectiles? |
Nair 6
| Damage | Active | Endlag | Angle | KB (Base+Scaling) |
|---|---|---|---|---|
| Startup | Landing Lag | FAF | Angle Flipper | Hitstun |
| Hitpause (Base + Scaling) | Parry Stun Type | Priority |
|---|---|---|
| Hit Lockout | Force Flinch Value | Kills Projectiles? |
Nair 6 Tipper
| Damage | Active | Endlag | Angle | KB (Base+Scaling) |
|---|---|---|---|---|
| Startup | Landing Lag | FAF | Angle Flipper | Hitstun |
| Hitpause (Base + Scaling) | Parry Stun Type | Priority |
|---|---|---|
| Hit Lockout | Force Flinch Value | Kills Projectiles? |
Back Air
Back Air
| Damage | Active | Endlag | Angle | KB (Base+Scaling) |
|---|---|---|---|---|
| Startup | Landing Lag | FAF | Angle Flipper | Hitstun |
| Hitpause (Base + Scaling) | Parry Stun Type | Priority |
|---|---|---|
| Hit Lockout | Force Flinch Value | Kills Projectiles? |
Back Air Tipper
| Damage | Active | Endlag | Angle | KB (Base+Scaling) |
|---|---|---|---|---|
| Startup | Landing Lag | FAF | Angle Flipper | Hitstun |
| Hitpause (Base + Scaling) | Parry Stun Type | Priority |
|---|---|---|
| Hit Lockout | Force Flinch Value | Kills Projectiles? |
Forward Air
Forward Air 1
| Damage | Active | Endlag | Angle | KB (Base+Scaling) |
|---|---|---|---|---|
| Startup | Landing Lag | FAF | Angle Flipper | Hitstun |
| Hitpause (Base + Scaling) | Parry Stun Type | Priority |
|---|---|---|
| Hit Lockout | Force Flinch Value | Kills Projectiles? |
Forward Air 1 Tipper
| Damage | Active | Endlag | Angle | KB (Base+Scaling) |
|---|---|---|---|---|
| Startup | Landing Lag | FAF | Angle Flipper | Hitstun |
| Hitpause (Base + Scaling) | Parry Stun Type | Priority |
|---|---|---|
| Hit Lockout | Force Flinch Value | Kills Projectiles? |
Forward Air 2
| Damage | Active | Endlag | Angle | KB (Base+Scaling) |
|---|---|---|---|---|
| Startup | Landing Lag | FAF | Angle Flipper | Hitstun |
| Hitpause (Base + Scaling) | Parry Stun Type | Priority |
|---|---|---|
| Hit Lockout | Force Flinch Value | Kills Projectiles? |
Forward Air 2 Tipper
| Damage | Active | Endlag | Angle | KB (Base+Scaling) |
|---|---|---|---|---|
| Startup | Landing Lag | FAF | Angle Flipper | Hitstun |
| Hitpause (Base + Scaling) | Parry Stun Type | Priority |
|---|---|---|
| Hit Lockout | Force Flinch Value | Kills Projectiles? |
Down Air
Down Air 1
| Damage | Active | Endlag | Angle | KB (Base+Scaling) |
|---|---|---|---|---|
| Startup | Landing Lag | FAF | Angle Flipper | Hitstun |
| Hitpause (Base + Scaling) | Parry Stun Type | Priority |
|---|---|---|
| Hit Lockout | Force Flinch Value | Kills Projectiles? |
Down Air 1 Tipper
| Damage | Active | Endlag | Angle | KB (Base+Scaling) |
|---|---|---|---|---|
| Startup | Landing Lag | FAF | Angle Flipper | Hitstun |
| Hitpause (Base + Scaling) | Parry Stun Type | Priority |
|---|---|---|
| Hit Lockout | Force Flinch Value | Kills Projectiles? |
Down Air 2
| Damage | Active | Endlag | Angle | KB (Base+Scaling) |
|---|---|---|---|---|
| Startup | Landing Lag | FAF | Angle Flipper | Hitstun |
| Hitpause (Base + Scaling) | Parry Stun Type | Priority |
|---|---|---|
| Hit Lockout | Force Flinch Value | Kills Projectiles? |
Down Air 2 Tipper
| Damage | Active | Endlag | Angle | KB (Base+Scaling) |
|---|---|---|---|---|
| Startup | Landing Lag | FAF | Angle Flipper | Hitstun |
| Hitpause (Base + Scaling) | Parry Stun Type | Priority |
|---|---|---|
| Hit Lockout | Force Flinch Value | Kills Projectiles? |
Up Air
Up Air
| Damage | Active | Endlag | Angle | KB (Base+Scaling) |
|---|---|---|---|---|
| Startup | Landing Lag | FAF | Angle Flipper | Hitstun |
| Hitpause (Base + Scaling) | Parry Stun Type | Priority |
|---|---|---|
| Hit Lockout | Force Flinch Value | Kills Projectiles? |
Up Air Tipper
| Damage | Active | Endlag | Angle | KB (Base+Scaling) |
|---|---|---|---|---|
| Startup | Landing Lag | FAF | Angle Flipper | Hitstun |
| Hitpause (Base + Scaling) | Parry Stun Type | Priority |
|---|---|---|
| Hit Lockout | Force Flinch Value | Kills Projectiles? |
Specials
Down Special
Counter
| Damage | Active | Endlag | Angle | KB (Base+Scaling) |
|---|---|---|---|---|
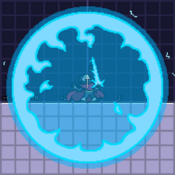
| 10 | 12 - 14 | 39 | 75 | 7 |
| Startup | Landing Lag | FAF | Angle Flipper | Hitstun |
| 6 | 53 | 6 | 1x |
| Hitpause (Base + Scaling) | Parry Stun Type | Priority |
|---|---|---|
| 10 | Standard | 6 |
| Hit Lockout | Force Flinch Value | Kills Projectiles? |
| 600 [20] | True |
Down Special 1
| Damage | Active | Endlag | Angle | KB (Base+Scaling) |
|---|---|---|---|---|
| 3 | 5 - 8 | 90 | 6 | |
| Startup | Landing Lag | FAF | Angle Flipper | Hitstun |
| 1 | 1x |
| Hitpause (Base + Scaling) | Parry Stun Type | Priority |
|---|---|---|
| 6 | None | 1 |
| Hit Lockout | Force Flinch Value | Kills Projectiles? |
| True |
Down Special 2
| Damage | Active | Endlag | Angle | KB (Base+Scaling) |
|---|---|---|---|---|
| 3 | 9 - 12 | 90 | 6 | |
| Startup | Landing Lag | FAF | Angle Flipper | Hitstun |
| 1 | 1x |
| Hitpause (Base + Scaling) | Parry Stun Type | Priority |
|---|---|---|
| 6 | None | 1 |
| Hit Lockout | Force Flinch Value | Kills Projectiles? |
| True |
Down Special 3
| Damage | Active | Endlag | Angle | KB (Base+Scaling) |
|---|---|---|---|---|
| 3 | 13 - 16 | 6 | 90 | 5 |
| Startup | Landing Lag | FAF | Angle Flipper | Hitstun |
| 23 | 1 | 0.9x |
| Hitpause (Base + Scaling) | Parry Stun Type | Priority |
|---|---|---|
| 8 | None | 1 |
| Hit Lockout | Force Flinch Value | Kills Projectiles? |
| True |
Plasma Field
| Damage | Active | Endlag | Angle | KB (Base+Scaling) |
|---|---|---|---|---|
| 607 | ||||
| Startup | Landing Lag | FAF | Angle Flipper | Hitstun |
| Hitpause (Base + Scaling) | Parry Stun Type | Priority |
|---|---|---|
| Hit Lockout | Force Flinch Value | Kills Projectiles? |
Neutral Special
Neutral Special Grab
| Damage | Active | Endlag | Angle | KB (Base+Scaling) |
|---|---|---|---|---|
| 2 | 9 - 11 | [24] | 90 | 4 |
| Startup | Landing Lag | FAF | Angle Flipper | Hitstun |
| 8 | 36 | 0 | 1x |
| Hitpause (Base + Scaling) | Parry Stun Type | Priority |
|---|---|---|
| 8 | None | 1 |
| Hit Lockout | Force Flinch Value | Kills Projectiles? |
| True |
Forward Throw
| Damage | Active | Endlag | Angle | KB (Base+Scaling) |
|---|---|---|---|---|
| Startup | Landing Lag | FAF | Angle Flipper | Hitstun |
| Hitpause (Base + Scaling) | Parry Stun Type | Priority |
|---|---|---|
| Hit Lockout | Force Flinch Value | Kills Projectiles? |
Back Throw
| Damage | Active | Endlag | Angle | KB (Base+Scaling) |
|---|---|---|---|---|
| Startup | Landing Lag | FAF | Angle Flipper | Hitstun |
| Hitpause (Base + Scaling) | Parry Stun Type | Priority |
|---|---|---|
| Hit Lockout | Force Flinch Value | Kills Projectiles? |
Forward Special
Forward Special
| Damage | Active | Endlag | Angle | KB (Base+Scaling) |
|---|---|---|---|---|
| 8 | 24 - 26 | 26 | 90 | 8 |
| Startup | Landing Lag | FAF | Angle Flipper | Hitstun |
| 23 | 53 | 6 | 1x |
| Hitpause (Base + Scaling) | Parry Stun Type | Priority |
|---|---|---|
| 10 | Standard | 3 |
| Hit Lockout | Force Flinch Value | Kills Projectiles? |
| True |
Forward Special Tipper
| Damage | Active | Endlag | Angle | KB (Base+Scaling) |
|---|---|---|---|---|
| 13 | 24 - 26 | 90 | 9 | |
| Startup | Landing Lag | FAF | Angle Flipper | Hitstun |
| 6 | 1x |
| Hitpause (Base + Scaling) | Parry Stun Type | Priority |
|---|---|---|
| 10 | Standard | 6 |
| Hit Lockout | Force Flinch Value | Kills Projectiles? |
| True |
Up Special
Rising Hit 1
| Damage | Active | Endlag | Angle | KB (Base+Scaling) |
|---|---|---|---|---|
| Startup | Landing Lag | FAF | Angle Flipper | Hitstun |
| Hitpause (Base + Scaling) | Parry Stun Type | Priority |
|---|---|---|
| Hit Lockout | Force Flinch Value | Kills Projectiles? |
Rising Hit 2
| Damage | Active | Endlag | Angle | KB (Base+Scaling) |
|---|---|---|---|---|
| Startup | Landing Lag | FAF | Angle Flipper | Hitstun |
| Hitpause (Base + Scaling) | Parry Stun Type | Priority |
|---|---|---|
| Hit Lockout | Force Flinch Value | Kills Projectiles? |
Rising Hit 3
| Damage | Active | Endlag | Angle | KB (Base+Scaling) |
|---|---|---|---|---|
| Startup | Landing Lag | FAF | Angle Flipper | Hitstun |
| Hitpause (Base + Scaling) | Parry Stun Type | Priority |
|---|---|---|
| Hit Lockout | Force Flinch Value | Kills Projectiles? |
Slash
| Damage | Active | Endlag | Angle | KB (Base+Scaling) |
|---|---|---|---|---|
| Startup | Landing Lag | FAF | Angle Flipper | Hitstun |
| Hitpause (Base + Scaling) | Parry Stun Type | Priority |
|---|---|---|
| Hit Lockout | Force Flinch Value | Kills Projectiles? |
Slash Tipper
| Damage | Active | Endlag | Angle | KB (Base+Scaling) |
|---|---|---|---|---|
| Startup | Landing Lag | FAF | Angle Flipper | Hitstun |
| Hitpause (Base + Scaling) | Parry Stun Type | Priority |
|---|---|---|
| Hit Lockout | Force Flinch Value | Kills Projectiles? |
Alternate Palettes
Default Colors
Unlockable Skins
- Custom Color 2: Beat story mode.
- Abyss: Reach Abyss level 10 with Clairen.
- Ranked: Reach Gold rank with Clairen.
Seasonal Colors
Current seasonal skins rotate every 3 months in the following order (hemisphere dependent):
- Valentines (Feb-Apr)/(Aug-Oct)
- Summer (May-Jul)/(Nov-Jan)
- Halloween (Aug-Oct)/(Feb-Apr)
- Christmas (Nov-Jan)/(May-Jul)
Premium Skins
How to Get
- Champion: Obtainable via the developers.
- EA: Purchase a Steam key for RoA via Humble Bundle.
- Arcade: Obtainable via the RCS compendium during RCS seasons.
- Genesis: Obtainable via the RCS compendium during RCS seasons.
- Hero: Obtainable via the developers.
- Heatwave: Obtainable via the RCS or Heatwave compendiums during RCS seasons.
- Golden: Purchase a Clairen plush from Symbiote Studios.
