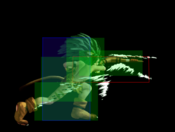
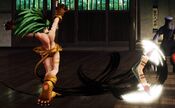
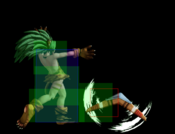
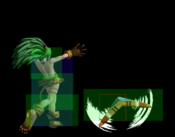
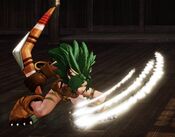
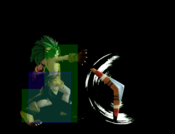
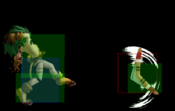
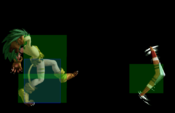
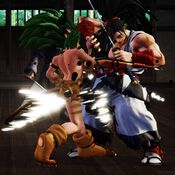
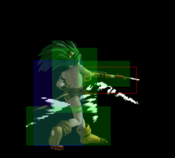
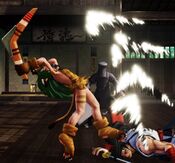
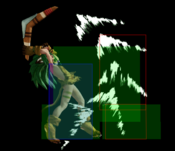
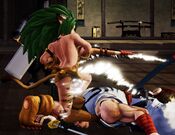
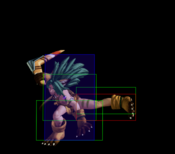
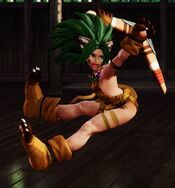
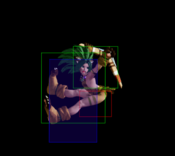
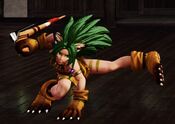
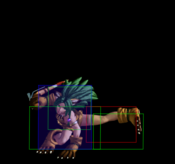
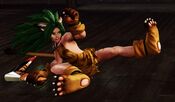
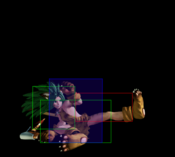
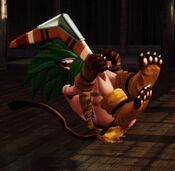
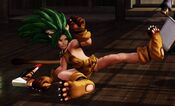
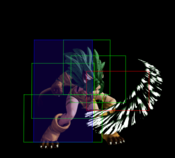
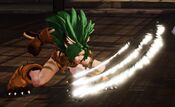
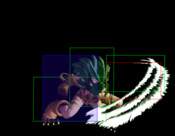
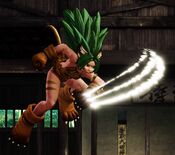
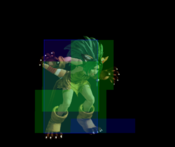
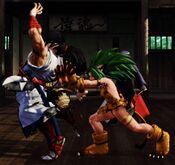
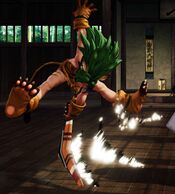
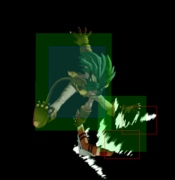
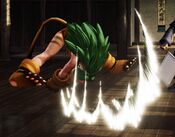
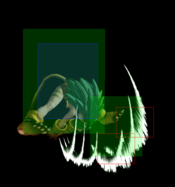
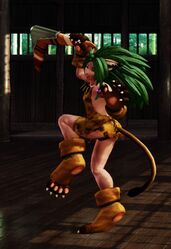
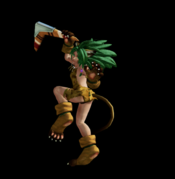
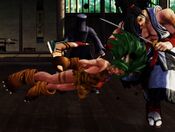
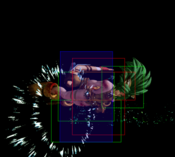
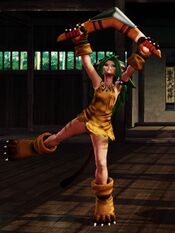
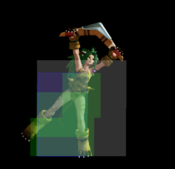
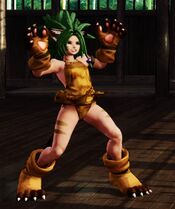
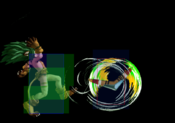
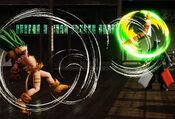
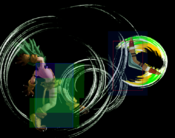
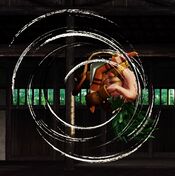
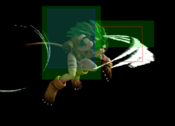
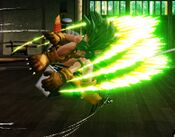
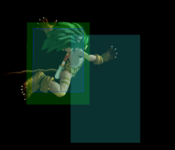
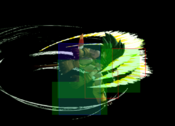
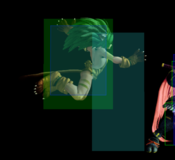
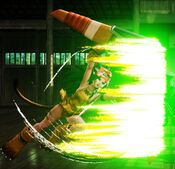
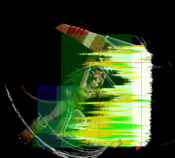
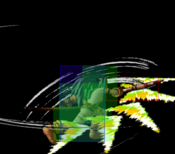
Cham Cham
チャムチャム, Chamu Chamu
|
- Damage Taken: 100%
- Rage Factor: 0.24
- Rage Duration: 10 seconds
- Jump: 46 frames (Average)
- Forward Walk Speed: 0.3 (Average)
- Back Walk Speed: 0.23 (Average)
- Dash Speed: 1.35 (Very Fast)
- Back Dash: 27 frames
- Weapon Pickup / Drop: 51 / 40 frames
|
Introduction
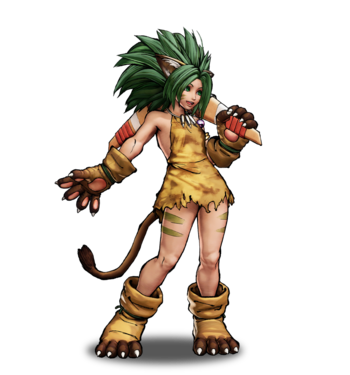
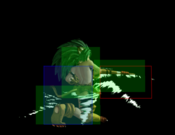
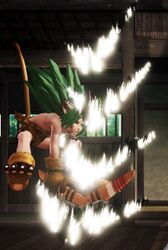
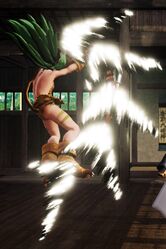
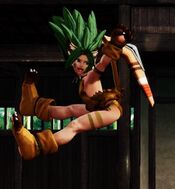
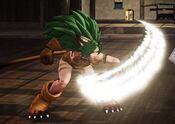
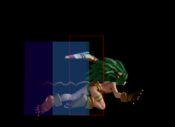
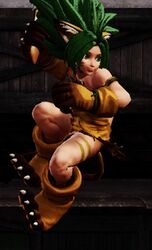
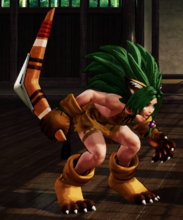
Cham Cham is a cute and rambunctious catgirl who is related to Tam Tam. She is loud, hyper-active and a little obnoxious; personality traits that are obviously represented in her playstyle.
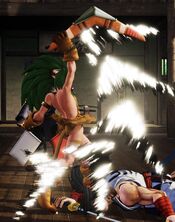
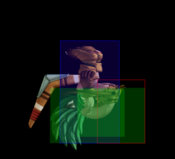
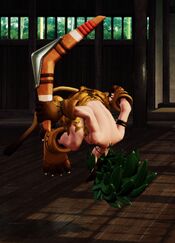
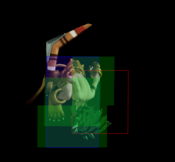
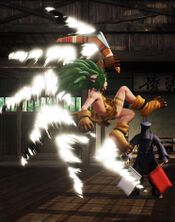
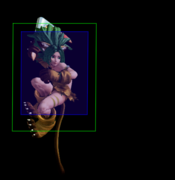
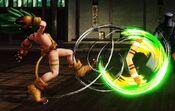
As a wild jungle girl who shares a lot of similarity with Street Fighter's Blanka, Cham Cham is a tricky pixie who specializes in unconventional mix-ups. Two main specials define Cham Cham: her boomerang 236S and 214S projectiles and her 623S "demon flip" jumping move. Boomerang is an unconventional projectile that lacks range and is poor for raw zoning but works well for midrange pressure due to its large hitbox and low recovery. The 214S variation is an upward-travelling anti-air fireball that is easy for hasty opponents to run into and knocks down on hit, letting her start her oki pressure. "Demon flip" is a jumping move that can be used at any range from full screen to point blank and leads into a number of tricky follow-ups including an overhead, command grab and low option.
Cham Cham's ground neutral is defined by her strong close-to-mid-ranged presence via some of the best A normals in the game and solid mid-range B normals that are great for opening up defense. Her slides are also notable for their great hitbox and very low recovery, making them some of her neutral options. Cham can cancel into her safe 236A and 236B boomerangs to mess with anxious approaches or cancel into demon flip for some gimmicky mix-up shenanigans. Cham also has profoundly strong okizeme on the same level as the game's other oki powerhouses such as Ukyo, Hanzo and Amakusa. She has multiple running 50/50 tools that are semi-safe meaties. When opponents are trained to stop rolling she can throw in a close-range demon flip or cross-up 66C to apply a three-way mix-up on neutral getup.
These tools are unfortunately accompanied by some pretty glaring weaknesses. Cham Cham's air presence is uniformly awful, with very short-range and shallow air buttons, forcing her to approach on the ground against many characters with longer range. Her demon flip is very gimmicky as a raw neutral option since it is easily stuffed out in startup and its follow-up options are mostly unrewarding on hit and very unsafe on block. It is also hard to pin down rolling wake-ups with demon flip, reducing its suitability for oki. Her only full-screen grounded fireball is incredibly slow and unsafe and she generally cannot zone viably or compete in fireball wars without taking a massive risk.
Nevertheless, Cham is a fun and quirky character with a unique knack at getting on opponent's nerves. Oonya!
Playstyle
 Cham Cham is a flexible rushdown character who can pester the opponent from afar or up-close. Cham Cham is a flexible rushdown character who can pester the opponent from afar or up-close.
|
| Strengths |
Weaknesses
|
- Good close and midrange presence: Cham Cham has undeflectable A normals with good speed and range, active D buttons that are good for stuffing pokes, and solid B normals that cover the close-to-midscreen space. Her 2B can also be cancelled into her 236D for some extra damage off of pokes and whiff punishes.
- Good anti-air: Thanks to her high-reaching air-to-airs as well as her n.5C, 66C, 214S, and WFT, Cham Cham has a variety of effective anti-air options that all give her a chance to close in and enforce pressure.
- Good anti-fireball options: During Rage, Cham Cham's 236C blows through other projectiles, allowing her to knock down the opposing character in fireball exchanges. Her "demon flip" is useful for bypassing projectiles or calling out predictable specials at long range.
- Funny mix-up: Her 66B, 66C, and 3D work together to create an annoying mix-up situation that loops into itself. All three options can be difficult to defend against if her opponent does a left/right rolling wakeup.
- Very practical SSM: Her SSM isn't lacking for range, and is simple to land in medium or close range, so disrespecting her too much is dangerous.
|
- Bad heavies: Cham Cham's C normals have slow startup and huge recovery. They are also easy to jump over and do not recoil on block, making them unambiguously punishable.
- Can't zone: Cham Cham's projectiles have very high recovery and very specific ranges of effect. She can't beat zoners in fireball wars, and can't rely on them to stall any kind of rushdown for long either.
- Shallow jump normals: Cham Cham's floaty jump arc, combined with the poor depth of her jump normals, makes airborne offense difficult.
- Bad running normals: Cham Cham's running normals are uniformly terrible and make it hard for her to establish a strike/throw game.
- Gimmicky mix-up: Cham Cham's "demon flip" special is easy to react to and hard to set up off of knockdowns, reducing its viability as a true mix-up option. Her 66B and 66C are also less threatening on neutral wakeup.
- Needs to know the game: In many cases, Cham Cham may be forced to rely on her slightly stubby Stance Break or actively trying to catch Deflectable pokes instead of using her own tools, due to some matchups being extremely oppressive in midscreen.
|
Gameplan
Cham Cham, although not lacking for options at a distance, seeks to rush the opponent at the first opportunity she makes or is given.
Neutral
At midscreen distance, Cham Cham should stay aware of her 5/2B and 3D, all buttons with good range for their startup speed. 3D in particular can sometimes be useful as a check against dashing attacks. Her 236D reaches far and can punish distant mistakes with a knockdown, while avoiding a few specific low-profile projectiles or attacks. Her 236S and 214S projectiles have limited and somewhat specific use cases for controlling space; she can anti-air just fine, but she can't zone so much as briefly stall an approach. Her dashing normals have mostly no use in neutral because of their poor range or lack of value outside of run mixups, but 66C can easily catch, or at worst trade against, predictable jumps.
None of her air buttons are lacking for use in air-to-air, but it's difficult to really win in the airspace against most. A rising j.C can menace opponents with high jump heights or who haven't committed to a button yet, j.A is good for a fast response to any jump, and naturally, any of her four blocked jump-ins into 5A can't be interrupted, even by throws, if the attack connects deep enough.
While her 623S should never be used carelessly, they're useful for escaping the corner if the opponent isn't watching for it, and the B followup can be used to air-to-air, if you just feel like it, or more practically to punish distant mistakes or predictable fireballs.
Okizeme
Cham Cham can do a solid Oki with just her two moves: 66B and 3D. Her 66B even though has a short range but it's not too bad on block, serves as a good overhead. Her 3D with the same animation as her 66D but knocks down, makes it one of the best slide out of the ones left that knocks down.
Her flip can help her to do some Oki as well. Especially in corner, you can try to use the A or C follow up for a command grab. Though you need to be pressing the button when you are almost at your opponent for it to work, so requires some practice. But the corner can solve the problem of hard to aim. She can also flip over her opponent and do a quick left and right mix up. Pretty safe on block so she can set up for a deflect sometimes.
Normal Moves
Far Slashes
5A
5A
|
| Damage
|
Guard
|
Startup
|
Active
|
Recovery
|
Total
|
Hit Adv
|
Block Adv
|
Guard Dmg
|
Cancel
|
Recoil
|
Deflectable
|
Unarmed
|
| 30
|
Mid
|
5
|
-
|
-
|
16
|
+1
|
-2
|
5
|
Yes
|
No
|
No
|
No
|
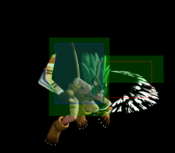
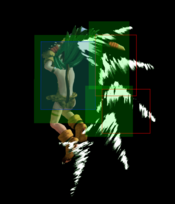
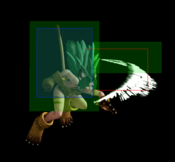
Cham Cham does a quick claw swipe with her paw glove.
- A special cancellable and quick jab that's very important for Cham Cham, though it has no combo potential. 5A is only -2 on block, which can set up a throw or deflect attempt.
- Pushes the opponent just out of throw range at point-blank on hit, and she can just microwalk backward to avoid a throw on block.
|
|
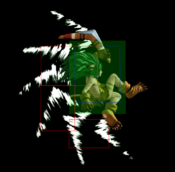
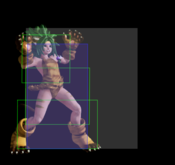
Toggle Hitboxes Toggle Hitboxes
|
5B
5B
|
| Damage
|
Guard
|
Startup
|
Active
|
Recovery
|
Total
|
Hit Adv
|
Block Adv
|
Guard Dmg
|
Cancel
|
Recoil
|
Deflectable
|
Unarmed
|
| 100
|
Mid
|
11
|
-
|
-
|
34
|
-3
|
-12
|
10
|
No
|
Yes
|
Yes
|
No
|
Cham Cham swings out with her boomerang in an awkward icepick grip.
- Poke with adequate range. It doesn't cancel, but it's a serviceable and quick whiff punish.
|
|
Toggle Hitboxes Toggle Hitboxes
|
5C
5C
|
| Damage
|
Guard
|
Startup
|
Active
|
Recovery
|
Total
|
Hit Adv
|
Block Adv
|
Guard Dmg
|
Cancel
|
Recoil
|
Deflectable
|
Unarmed
|
| 240
|
Mid
|
26
|
11
|
-
|
64
|
+1~+11
|
-16~-6
|
25
|
No
|
No
|
Disarm
|
No
|
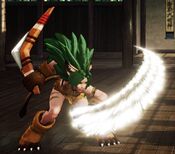
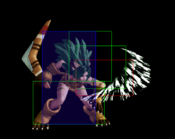
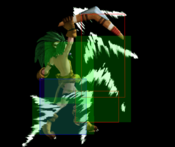
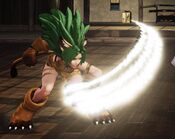
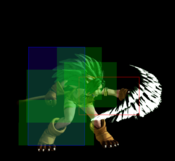
Cham Cham does a full rotational throw with her boomerang.
- While fairly safe on block at long range, it doesn't recoil, and it's dangerous to whiff due to the long recovery.
- Difficult to guard crush with due to its predictable use case and slow, easily deflectable startup, but she can get close enough to combo afterwards by cancelling into 623A if it connects.
- There is a hurtbox following the boomerang until recovery. Be careful about trading hits, although some rare and impractical trade scenarios (mainly against attacks with a vacuum effect) can allow Cham Cham to combo from this attack for fatal damage.
|
|
Toggle Hitboxes Toggle Hitboxes
|
2A
2A
|
| Damage
|
Guard
|
Startup
|
Active
|
Recovery
|
Total
|
Hit Adv
|
Block Adv
|
Guard Dmg
|
Cancel
|
Recoil
|
Deflectable
|
Unarmed
|
| 30
|
Mid
|
5
|
-
|
-
|
18
|
-1
|
-4
|
5
|
Yes
|
No
|
No
|
No
|
Cham Cham swipes with her glove while crouched.
- Less generous frame advantage than her 5A, but a useful poke to check the opponent.
- The slightly longer reach helps push them out without risking or gaining much.
|
|
Toggle Hitboxes Toggle Hitboxes
|
2B
2B
|
| Damage
|
Guard
|
Startup
|
Active
|
Recovery
|
Total
|
Hit Adv
|
Block Adv
|
Guard Dmg
|
Cancel
|
Recoil
|
Deflectable
|
Unarmed
|
| 90
|
Mid
|
13
|
-
|
-
|
32
|
+1
|
-12
|
10
|
Yes
|
Yes
|
Yes
|
No
|
Cham Cham swings her weapon forward while low to the ground.
- Her primary combo starter and throw follow-up at medium to close range. Leads into 236D or WFT.
|
|
Toggle Hitboxes Toggle Hitboxes
|
2C
2C
|
| Damage
|
Guard
|
Startup
|
Active
|
Recovery
|
Total
|
Hit Adv
|
Block Adv
|
Guard Dmg
|
Cancel
|
Recoil
|
Deflectable
|
Unarmed
|
| 150
|
Mid
|
22
|
8
|
-
|
60
|
-11~-4
|
-15~-8
|
25
|
No
|
No
|
Disarm
|
No
|
Cham Cham throws her boomerang low to the ground.
- Not as damaging, but shorter startup than her 5C and the hitbox travels significantly faster within its range.
- An extended hurtbox follows the boomerang and lingers slightly longer than its hitbox. The same caveat and warning about trading with 5C applies here as well.
- The existence of this attack makes Cham Cham's anti-air ability worse than it needs to be.
|
|
Toggle Hitboxes Toggle Hitboxes
|
Near Slashes
n.5B
n.5B
|
| Damage
|
Guard
|
Startup
|
Active
|
Recovery
|
Total
|
Hit Adv
|
Block Adv
|
Guard Dmg
|
Cancel
|
Recoil
|
Deflectable
|
Unarmed
|
| 80
|
Mid
|
8
|
-
|
-
|
29
|
-1
|
-12
|
10
|
Yes
|
Yes
|
Yes
|
No
|
Similar to 5B, but she stays within her immediate reach.
- A close-range punish and combo tool that leads into 214S, 236D, or WFT.
|
|
Toggle Hitboxes Toggle Hitboxes
|
n.5C
n.5C
|
| Damage
|
Guard
|
Startup
|
Active
|
Recovery
|
Total
|
Hit Adv
|
Block Adv
|
Guard Dmg
|
Cancel
|
Recoil
|
Deflectable
|
Unarmed
|
| 220
|
Mid
|
15
|
-
|
-
|
45
|
-3
|
-28
|
25
|
No
|
Yes
|
Disarm
|
No
|
Cham Cham goes for a strong upward strike with her boomerang.
- The vertical hitbox gives it utility as a situational anti-air.
- A much faster guard crush to threaten with compared to 5C.
|
|
Toggle Hitboxes Toggle Hitboxes
|
n.2B
n.2B
|
| Damage
|
Guard
|
Startup
|
Active
|
Recovery
|
Total
|
Hit Adv
|
Block Adv
|
Guard Dmg
|
Cancel
|
Recoil
|
Deflectable
|
Unarmed
|
| 80
|
Mid
|
6
|
-
|
-
|
29
|
0
|
-12
|
10
|
Yes
|
Yes
|
Yes
|
No
|
Similar to 2B, but she stays in her immediate reach.
- It's her fastest close weapon button. In some rare situations, n.5B may just barely fail to combo where this would succeed.
|
|
Toggle Hitboxes Toggle Hitboxes
|
n.2C
n.2C
|
| Damage
|
Guard
|
Startup
|
Active
|
Recovery
|
Total
|
Hit Adv
|
Block Adv
|
Guard Dmg
|
Cancel
|
Recoil
|
Deflectable
|
Unarmed
|
| 150
|
Mid
|
19
|
-
|
-
|
50
|
-4
|
-28
|
25
|
Yes
|
Yes
|
Disarm
|
No
|
Like with n.5C, she goes for a strong upward swing.
- Cham Cham's most damaging cancellable ground normal. Try it in the corner or after jumping a throw.
- Despite the higher vertical hitbox compared to n.5C, it's a much less reliable anti-air. The 19f startup combined with this being a proximity normal makes it very difficult to time correctly or avoid whiffing an accidental 2C, both of which just opens Cham Cham up to free counterhit damage.
|
|
Toggle Hitboxes Toggle Hitboxes
|
Kicks
5D
5D
|
| Damage
|
Guard
|
Startup
|
Active
|
Recovery
|
Total
|
Hit Adv
|
Block Adv
|
Guard Dmg
|
Cancel
|
Recoil
|
Deflectable
|
Unarmed
|
| 50
|
Mid
|
10
|
-
|
-
|
22
|
0
|
-3
|
5
|
No
|
No
|
No
|
Yes
|
Cham Cham does a quick forward kick.
- This attack is generally less useful than 2D due to the higher startup and not being a low, but has slightly more range.
|
|
Toggle Hitboxes Toggle Hitboxes
|
6D
6D
|
| Damage
|
Guard
|
Startup
|
Active
|
Recovery
|
Total
|
Hit Adv
|
Block Adv
|
Guard Dmg
|
Cancel
|
Recoil
|
Deflectable
|
Unarmed
|
| 30
|
Mid
|
10
|
8
|
7~1
|
23
|
-1~+6
|
-6~+1
|
5
|
No
|
No
|
No
|
Yes
|
Cham Cham quickly turns around and performs a hip slam, which is a legally required attack to have in every cute character's arsenal.
- A finnicky attack with few situational uses that can be fairly plus on hit, and more so if it hit meaty for some reason.
- On block, you're usually close enough for any grounded attack you attempt to be interrupted by a forward throw.
|
|
Toggle Hitboxes Toggle Hitboxes
|
2D
2D
|
| Damage
|
Guard
|
Startup
|
Active
|
Recovery
|
Total
|
Hit Adv
|
Block Adv
|
Guard Dmg
|
Cancel
|
Recoil
|
Deflectable
|
Unarmed
|
| 20
|
Low
|
6
|
-
|
-
|
19
|
-1
|
-4
|
5
|
No
|
No
|
No
|
Yes
|
Similar to 5D, Cham Cham kicks out at the opponent's ankles.
- A quick low that may be worth throwing out when already in close range.
- It can bypass some characters' special move parries, which may be worth remembering if her 5As have been triggering them.
|
|
Toggle Hitboxes Toggle Hitboxes
|
3D
3D
|
| Damage
|
Guard
|
Startup
|
Active
|
Recovery
|
Total
|
Hit Adv
|
Block Adv
|
Guard Dmg
|
Cancel
|
Recoil
|
Deflectable
|
Unarmed
|
| 70
|
Low
|
12
|
9
|
16~8
|
35
|
KD
|
-7~+1
|
5
|
No
|
No
|
No
|
Yes
|
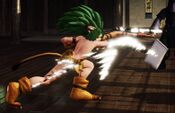
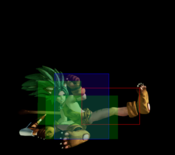
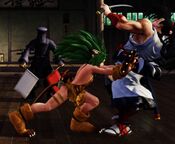
Cham Cham slides along the ground with a leg extended.
- An excellent sliding kick with good reach. Very generous knockdown on hit, and quite safe on block at the right spacing.
- After a knockdown, she can choose between this or 66B for a straightforward high/low mixup.
|
|
Toggle Hitboxes Toggle Hitboxes
|
Dash Normals
66A
66A
|
| Damage
|
Guard
|
Startup
|
Active
|
Recovery
|
Total
|
Hit Adv
|
Block Adv
|
Guard Dmg
|
Cancel
|
Recoil
|
Deflectable
|
Unarmed
|
| 50
|
Mid
|
8
|
3
|
26~24
|
35
|
-5~-3
|
-8~-6
|
5
|
Yes
|
No
|
No
|
No
|
Cham Cham curls up into a ball and rolls into the opponent.
- An otherwise "decent" button that severely lacks range and is a terrible, round-ending blunder for Cham Cham on whiff, but still combos into 236D or WFT.
- Only give 2 less frames of disadvantage on block if it connects meaty, so it's not very useful for setting anything up.
- Can still set up a 623A attempt on contact if the opponent is too lethargic to interrupt her.
|
|
Toggle Hitboxes Toggle Hitboxes
|
66B
66B
|
| Damage
|
Guard
|
Startup
|
Active
|
Recovery
|
Total
|
Hit Adv
|
Block Adv
|
Guard Dmg
|
Cancel
|
Recoil
|
Deflectable
|
Unarmed
|
| 80
|
High
|
22
|
-
|
-
|
43
|
KD(+81)
|
-11
|
10
|
No
|
No
|
No
|
No
|
Cham Cham runs forward with a crushing headbutt.
- A slightly slow overhead that knocks down. Can be used with 3D for a straightforward high/low mixup.
|
|
Toggle Hitboxes Toggle Hitboxes
|
66C
66C
|
| Damage
|
Guard
|
Startup
|
Active
|
Recovery
|
Total
|
Hit Adv
|
Block Adv
|
Guard Dmg
|
Cancel
|
Recoil
|
Deflectable
|
Unarmed
|
| 140
|
Mid
|
28
|
2
|
40~39
|
69
|
KD
|
-25~-24
|
20
|
No
|
No
|
Disarm
|
No
|
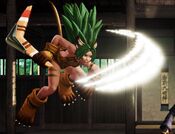
Cham Cham does a forward flip, swinging her boomering behind her in a wide arc.
- While telegraphed, heavily punishable on block, and worst of all a mid, it's a simple to use crossup that knocks down.
- If done at longer spacing, Cham Cham stays on the same side, but it's usually not very ambiguous.
- A situational but fairly reliable anti-air option that creates a great situation for her on hit.
|
|
Toggle Hitboxes Toggle Hitboxes
|
66D
66D
|
| Damage
|
Guard
|
Startup
|
Active
|
Recovery
|
Total
|
Hit Adv
|
Block Adv
|
Guard Dmg
|
Cancel
|
Recoil
|
Deflectable
|
Unarmed
|
| 70
|
Low
|
10
|
11
|
15~5
|
34
|
-8~+2
|
-12~-2
|
5
|
No
|
No
|
No
|
Yes
|
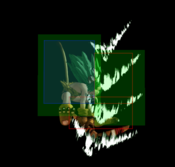
Cham Cham performs a worthless sliding kick that will most likely get her killed.
- Has slightly faster startup, and slightly more reach and active frames than 3D, but moves slower than 3D within its reach.
- This dash normal has no useful properties that give it any kind of utility over 3D, and will get Cham Cham throw punished on both hit and block if this difficult-to-space normal is not correctly spaced.
|
|
Toggle Hitboxes Toggle Hitboxes
|
Air Normals
j.A
j.A
|
| Damage
|
Guard
|
Startup
|
Active
|
Recovery
|
Total
|
Hit Adv
|
Block Adv
|
Guard Dmg
|
Cancel
|
Recoil
|
Deflectable
|
Unarmed
|
| 50
|
High
|
6
|
-
|
-
|
-
|
-
|
-
|
5
|
No
|
No
|
No
|
No
|
Cham Cham takes the time to swipe in front of her while in the air.
- A fast and fairly reliable air to air.
|
|
Toggle Hitboxes Toggle Hitboxes
|
j.B
j.B
|
| Damage
|
Guard
|
Startup
|
Active
|
Recovery
|
Total
|
Hit Adv
|
Block Adv
|
Guard Dmg
|
Cancel
|
Recoil
|
Deflectable
|
Unarmed
|
| 100
|
High
|
11
|
-
|
-
|
-
|
-
|
-
|
10
|
No
|
No
|
No
|
No
|
Cham Cham brings her boomerang down on her target's skull.
- Her most reliable jump-in that hits below her.
- It can cross up, but it's usually not as reliable as j.D for that purpose.
|
|
Toggle Hitboxes Toggle Hitboxes
|
j.C
j.C
|
| Damage
|
Guard
|
Startup
|
Active
|
Recovery
|
Total
|
Hit Adv
|
Block Adv
|
Guard Dmg
|
Cancel
|
Recoil
|
Deflectable
|
Unarmed
|
| 160
|
High
|
14
|
-
|
-
|
-
|
-
|
-
|
20
|
No
|
No
|
No
|
No
|
Cham Cham makes an upward swing with her weapon.
- A punishing early air to air option.
- Her most damaging jump-in, but requires more strict timing in order to follow up.
|
|
Toggle Hitboxes Toggle Hitboxes
|
j.D
j.D
|
| Damage
|
Guard
|
Startup
|
Active
|
Recovery
|
Total
|
Hit Adv
|
Block Adv
|
Guard Dmg
|
Cancel
|
Recoil
|
Deflectable
|
Unarmed
|
| 30
|
High
|
8
|
-
|
-
|
-
|
-
|
-
|
5
|
No
|
No
|
No
|
Yes
|
Cham Cham performs her legally required hip strike from the skies.
- Another quick air button, but generally less useful for air-to-air compared to j.A.
- It's a reliable cross-up, and can start some quick pressure easily if it connects deep enough, but it's difficult to convert into a full combo from this attack.
- Has so little range from a neutral jump that it whiffs against many standing characters.
|
|
Toggle Hitboxes Toggle Hitboxes
|
Unarmed Normals
u.5S
u.5S
|
| Damage
|
Guard
|
Startup
|
Active
|
Recovery
|
Total
|
Hit Adv
|
Block Adv
|
Guard Dmg
|
Cancel
|
Recoil
|
Deflectable
|
Unarmed
|
| 50
|
Mid
|
5
|
-
|
-
|
24
|
+1
|
-4
|
5
|
No
|
No
|
No
|
Only
|
Cham Cham performs a quick claw swipe, but worse.
- Has more frame disadvantage than 5A on block, and can't special cancel while weaponless.
|
|
Toggle Hitboxes Toggle Hitboxes
|
u.2S
u.2S
|
| Damage
|
Guard
|
Startup
|
Active
|
Recovery
|
Total
|
Hit Adv
|
Block Adv
|
Guard Dmg
|
Cancel
|
Recoil
|
Deflectable
|
Unarmed
|
| 50
|
Mid
|
5
|
-
|
-
|
27
|
-2
|
-7
|
5
|
No
|
No
|
No
|
Only
|
Cham Cham scratches at her opponent while low to the ground, but worse.
- Has worse frame data on both block and hit, and still can't special cancel while weaponless.
|
|
Toggle Hitboxes Toggle Hitboxes
|
ju.S
ju.S
|
| Damage
|
Guard
|
Startup
|
Active
|
Recovery
|
Total
|
Hit Adv
|
Block Adv
|
Guard Dmg
|
Cancel
|
Recoil
|
Deflectable
|
Unarmed
|
| 50
|
High
|
6
|
-
|
-
|
-
|
-
|
-
|
5
|
No
|
No
|
No
|
Only
|
|
|
|
Toggle Hitboxes Toggle Hitboxes
|
u.66S
u.66S
|
| Damage
|
Guard
|
Startup
|
Active
|
Recovery
|
Total
|
Hit Adv
|
Block Adv
|
Guard Dmg
|
Cancel
|
Recoil
|
Deflectable
|
Unarmed
|
| 50
|
Mid
|
5
|
-
|
-
|
30
|
KD(+102)
|
-10
|
5
|
No
|
No
|
No
|
Only
|
Cham Cham runs up with a scratch that's identical to her 5A.
- A quick dashing attack that causes knockdown and gives Cham Cham time to collect her weapon.
|
|
Toggle Hitboxes Toggle Hitboxes
|
Universal Mechanics
Guard Break
Guard Break (Throw)
5/6C+D / 4C+D Neutral / Forward Throw Neutral / Forward Throw Back Throw Back Throw
|
| Version
|
Damage
|
Guard
|
Startup
|
Active
|
Recovery
|
Total
|
Hit Adv
|
Block Adv
|
Guard Dmg
|
Cancel
|
Recoil
|
Deflectable
|
Unarmed
|
| Neutral / Forward
|
0
|
Throw
|
3
|
-
|
71
|
74
|
+20
|
N/A
|
-
|
No
|
No
|
No
|
Yes
|
Universal throw. Can be followed up with an attack.
|
| Back
|
0
|
Throw
|
5
|
-
|
69
|
74
|
+25
|
N/A
|
-
|
No
|
No
|
No
|
Yes
|
Universal throw. Can be followed up with an attack.
|
|
Toggle Hitboxes Toggle Hitboxes
|
Surprise Attack
Surprise Attack (Overhead)
5B+C Armed overhead Armed overhead Unarmed overhead Unarmed overhead
|
| Version
|
Damage
|
Guard
|
Startup
|
Active
|
Recovery
|
Total
|
Hit Adv
|
Block Adv
|
Guard Dmg
|
Cancel
|
Recoil
|
Deflectable
|
Unarmed
|
| Armed
|
70
|
High
|
20
|
-
|
-
|
-
|
+2
|
-11
|
10
|
No
|
No
|
No
|
No
|
|
|
| Unarmed
|
70
|
High
|
20
|
-
|
-
|
43
|
KD(+100)
|
-11
|
10
|
No
|
No
|
No
|
Only
|
Universal unarmed overhead.
|
|
Toggle Hitboxes Toggle Hitboxes
|
Dodge
Dodge
5A+B
|
| Damage
|
Guard
|
Startup
|
Active
|
Recovery
|
Total
|
Hit Adv
|
Block Adv
|
Guard Dmg
|
Cancel
|
Recoil
|
Deflectable
|
Unarmed
|
| 0
|
N/A
|
1
|
16
|
22
|
38
|
N/A
|
N/A
|
-
|
N/A
|
-
|
N/A
|
Yes
|
Universal dodge. Avoids all attacks for a brief moment, and is mainly used to avoid throws.
Complete invincibility from frames 1 to 10. Strike invincibility from frames 11 to 16.
|
|
Toggle Hitboxes Toggle Hitboxes
|
Stance Break
Stance Break
A+B during Just Defense
|
| Damage
|
Guard
|
Startup
|
Active
|
Recovery
|
Total
|
Hit Adv
|
Block Adv
|
Guard Dmg
|
Cancel
|
Recoil
|
Deflectable
|
Unarmed
|
| 0
|
Mid
|
5
|
-
|
-
|
52
|
KD
|
-24
|
-
|
-
|
-
|
-
|
Yes
|
|
|
|
Toggle Hitboxes Toggle Hitboxes
|
Counter / Blade Catch
Counter / Blade Catch
236A+B Counter Counter Blade Catch Blade Catch
|
| Version
|
Damage
|
Guard
|
Startup
|
Active
|
Recovery
|
Total
|
Hit Adv
|
Block Adv
|
Guard Dmg
|
Cancel
|
Recoil
|
Deflectable
|
Unarmed
|
| Armed
|
0
|
N/A
|
2
|
11
|
34
|
46
|
+35~+59
|
N/A
|
-
|
N/A
|
-
|
N/A
|
No
|
Universal counter. Allows you to follow up with a guaranteed attack of your own. The amount of time you have to follow up depends on the strength of the attack you counter, with heavy attacks staggering the opponent for the longest amount of time. Additionally, if you counter a heavy slash or a running slash, your opponent will be disarmed.
|
| Disarmed
|
0
|
N/A
|
2
|
12
|
9
|
22
|
KD
|
N/A
|
-
|
N/A
|
-
|
N/A
|
Only
|
Universal counter. While disarmed, your counter will disarm and knock away your opponent regardless of slash level countered.
|
|
Toggle Hitboxes Toggle Hitboxes
|
Rage Explosion
Rage Explosion
5A+B+C
|
| Damage
|
Guard
|
Startup
|
Active
|
Recovery
|
Total
|
Hit Adv
|
Block Adv
|
Guard Dmg
|
Cancel
|
Recoil
|
Deflectable
|
Unarmed
|
| 0
|
Unblockable
|
21
|
1
|
-
|
58
|
0
|
-
|
-
|
-
|
-
|
-
|
No
|
Unblockable pushback attack.
|
|
Toggle Hitboxes Toggle Hitboxes
|
Lightning Blade
Lightning Blade (Issen)
5A+B+C during Rage Explosion
|
| Damage
|
Guard
|
Startup
|
Active
|
Recovery
|
Total
|
Hit Adv
|
Block Adv
|
Guard Dmg
|
Cancel
|
Recoil
|
Deflectable
|
Unarmed
|
| 300~709
|
Mid
|
9
|
-
|
-
|
-
|
KD
|
-44
|
-
|
No
|
No
|
No
|
No
|
Has full invincibility and can anti-air. Damage scales up based on remaining health.
|
|
Toggle Hitboxes Toggle Hitboxes
|
Command Moves
Wall Jump
Wall Jump
9 (near wall) Wall Jump Wall Jump
|
| Damage
|
Guard
|
Startup
|
Active
|
Recovery
|
Total
|
Hit Adv
|
Block Adv
|
Guard Dmg
|
Cancel
|
Recoil
|
Deflectable
|
Unarmed
|
| -
|
-
|
-
|
-
|
-
|
-
|
-
|
-
|
-
|
-
|
-
|
-
|
Yes
|
Cham Cham clings to the wall, then leaps out again.
- Like every other character with a wall jump, if done at the same time you push an attack, and if the opponent was between her and the wall during the time she left the ground, she may leap diagonally down toward the opponent with the button she pressed instead.
|
|
Toggle Hitboxes Toggle Hitboxes
|
Special Moves
Sideway Thrown Out!
Sideway Thrown Out!
236S
|
| Version
|
Damage
|
Guard
|
Startup
|
Active
|
Recovery
|
Total
|
Hit Adv
|
Block Adv
|
Guard Dmg
|
Cancel
|
Recoil
|
Deflectable
|
Unarmed
|
| A
|
60
|
Mid
|
21
|
29
|
-
|
56
|
-15~+13
|
-22~+5
|
5
|
No
|
No
|
No
|
No
|
Cham Cham casts her boomerang a short distance away.
- Has somewhat less recovery (and range) than her 2C. Her hurtbox also doesn't follow her boomerang this time.
- Decent frame advantage at the end of its range, and shows some use as a projectile-property poke.
- On whiff, she's considered disarmed for just enough time to attempt a Blade Catch before the boomerang returns.
|
| B
|
80
|
Mid
|
24
|
30
|
-
|
66
|
-22~+7
|
-29
|
5
|
No
|
No
|
No
|
No
|
Cham Cham throws out her boomerang to slightly past mid-screen distance.
- A longer ranged projectile with extremely limited value due to its higher recovery.
- It can at least catch some characters backjumping, but she has better tools for that.
- It's easy to get punished by a full jump-in conversion if she tries to zone with this.
|
| C
|
150
|
Mid
|
27
|
-
|
-
|
102
|
KD(+49)
|
-52
|
9
|
No
|
No
|
No
|
No
|
Cham Cham tosses her boomerang full screen while leaving herself unusually vulnerable.
- This and the Rage version of 236S are the only ones that knock down on hit.
- Could chip out an opponent on their wakeup, but easily punished harshly if jumped over.
|
| Rage
|
180
|
Mid
|
27
|
29
|
-
|
102
|
KD(+92)
|
-53
|
15
|
No
|
No
|
No
|
No
|
Cham Cham throws out her boomerang with great force.
- Blows through any weaker projectiles it comes into contact with.
- Deals noticeable chip damage on block.
- Otherwise has the same problems as 236C and shouldn't be used carelessly.
|
|
Toggle Hitboxes Toggle Hitboxes
|
Upper Thrown Out!
Upper Thrown Out!
214S
|
| Version
|
Damage
|
Guard
|
Startup
|
Active
|
Recovery
|
Total
|
Hit Adv
|
Block Adv
|
Guard Dmg
|
Cancel
|
Recoil
|
Deflectable
|
Unarmed
|
| A
|
60
|
Mid
|
21
|
-
|
-
|
58
|
KD(+86)
|
-24
|
5
|
No
|
No
|
No
|
No
|
Cham Cham throws her boomerang toward the sky, like a normal person would.
- All versions of 214S knock down on hit, which in this case makes the A version one of her most practical long range tools.
- Covers a long diagonal angle that discourages messing around in the air.
- 214A can even hit some standing characters from mid range.
- Even if blocked, Cham Cham has a decent window of opportunity to attempt a Blade Catch before the boomerang returns.
|
| B
|
80
|
Mid
|
24
|
-
|
-
|
66
|
KD(+81)
|
-29
|
5
|
No
|
No
|
No
|
No
|
Cham Cham throws her boomerang at a higher angle where 214A wouldn't connect.
- Covers a more strict anti-air angle after a longer startup.
- Cham Cham can attempt a Blade Catch just before the boomerang returns, but it's not as useful here.
|
| C
|
150
|
Mid
|
14
|
-
|
-
|
89
|
KD(+49)
|
-52
|
9
|
No
|
No
|
No
|
No
|
Similar to 214B, except trading a quicker startup for extended recovery.
- Covers the same anti-air angle as 214B, but deals more damage and comes out nearly 50% faster.
- Incredibly risky on whiff, so it's better not to be pre-emptive with it.
|
| Rage
|
180
|
Mid
|
14
|
-
|
-
|
89
|
KD(+92)
|
-53
|
15
|
No
|
No
|
No
|
No
|
Cham Cham goes for a more threatening take on 214C.
- A more damaging variant of 214C with a better knockdown.
- Hits ten times, so if it trades at close range, she can follow up with unarmed attacks like u.66S.
- Can deal decent chip damage at close range.
|
|
Toggle Hitboxes Toggle Hitboxes
|
Caught!
Caught!
623S
|
| Version
|
Damage
|
Guard
|
Startup
|
Active
|
Recovery
|
Total
|
Hit Adv
|
Block Adv
|
Guard Dmg
|
Cancel
|
Recoil
|
Deflectable
|
Unarmed
|
| A
|
-
|
-
|
23
|
-
|
10(Landing)
|
52
|
-
|
-
|
-
|
-
|
-
|
-
|
Yes
|
| B
|
-
|
-
|
24
|
-
|
10(Landing)
|
63
|
-
|
-
|
-
|
-
|
-
|
-
|
Yes
|
| C
|
-
|
-
|
28
|
-
|
10(Landing)
|
67
|
-
|
-
|
-
|
-
|
-
|
-
|
Yes
|
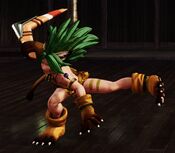
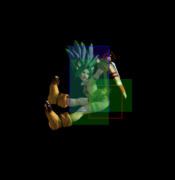
Cham Cham leaps into the air with a front-flip, from which she may decide whether to scratch or bonk her victim.
- For all versions, Cham Cham can't input any of her three followups until she reaches the apex of her leap.
- The B and C versions can be useful for projectile callouts, punishing other things that might have extreme recovery, or occasionally just widening or closing the gap between her and the opponent.
- Although it's interruptible in a string, 623A can nonetheless catch some players off guard after a normal connects or recoils. From a certain distance, it can give her a knockdown if she catches the opponent using pokes that are low to the ground too often.
|
|
Toggle Hitboxes Toggle Hitboxes
|
Scratches Face!
Scratches Face!
During 623S, A/C
|
| Damage
|
Guard
|
Startup
|
Active
|
Recovery
|
Total
|
Hit Adv
|
Block Adv
|
Guard Dmg
|
Cancel
|
Recoil
|
Deflectable
|
Unarmed
|
| 180
|
Throw
|
6
|
2
|
57(Landing)
|
-
|
KD(+36)
|
-
|
-
|
-
|
-
|
-
|
Yes
|
Cham Cham clings onto her opponent and turns their face into modern art.
- A command grab, and the most damaging followup to 623S.
- Unlike certain other characters' command grabs, this is quite easy to SSM punish if it's spotdodged or neutral jumped out of.
|
|
Toggle Hitboxes Toggle Hitboxes
|
Scratches Back!
Scratches Back!
During Caught!, D
|
| Damage
|
Guard
|
Startup
|
Active
|
Recovery
|
Total
|
Hit Adv
|
Block Adv
|
Guard Dmg
|
Cancel
|
Recoil
|
Deflectable
|
Unarmed
|
| 140
|
Low
|
9
|
-
|
45(Landing)
|
-
|
KD(+77)
|
-12~-4
|
5
|
No
|
No
|
No
|
Yes
|
Cham Cham takes her prey by the ankles, kicks them upward, and rakes her claws across their back.
- Her slowest followup from 623S, but hits low.
- If she crossed to the other side of the opponent, she will change direction when she touches the ground.
- Can easily catch attempts at spotdodging her other 623S options.
|
|
Toggle Hitboxes Toggle Hitboxes
|
Surprise Bop!
Surprise Bop!
During Caught!, B Armed Armed Unarmed Unarmed
|
| Version
|
Damage
|
Guard
|
Startup
|
Active
|
Recovery
|
Total
|
Hit Adv
|
Block Adv
|
Guard Dmg
|
Cancel
|
Recoil
|
Deflectable
|
Unarmed
|
| Armed
|
100
|
High
|
11
|
-
|
19(Landing)
|
-
|
KD
|
-9~-2
|
10
|
No
|
No
|
No
|
No
|
Cham Cham comes down with an overhead strike visually similar to j.B.
- An overhead that knocks down on hit. Can also cross up, but it's difficult to space it reliably.
- Relatively safe on block if it connects deep enough, meaning she is able to spotdodge, deflect, or SSM any attempts at punishing her.
- When done from 623B or 623C, could conceivably be used to air-to-air a distant opponent for a knockdown.
|
| Unarmed
|
50
|
High
|
-
|
-
|
-
|
-
|
-
|
-
|
-
|
No
|
No
|
No
|
Only
|
Cham Cham does a j.A instead, because she doesn't have her boomerang.
- This followup is thankfully only possible while weaponless.
- It deals pathetic damage, doesn't knock down, and doesn't create a particularly useful situation.
|
|
Toggle Hitboxes Toggle Hitboxes
|
Paw-erful Pounce!
Paw-erful Pounce!
236D
|
| Damage
|
Guard
|
Startup
|
Active
|
Recovery
|
Total
|
Hit Adv
|
Block Adv
|
Guard Dmg
|
Cancel
|
Recoil
|
Deflectable
|
Unarmed
|
| 120
|
Mid
|
17
|
16
|
-
|
49~64
|
KD(+98)
|
-15
|
13
|
No
|
No
|
No
|
Yes
|
Cham Cham leaps forward for a full-force pouncing scratch.
- Her go-to followup after punishing with a cancellable normal. Knocks down.
- If she gets behind an airborne opponent, she can easily punish with this.
- While the actual hitbox and distance traveled is the same, the activation range of 236D is halved without her weapon.
|
|
Toggle Hitboxes Toggle Hitboxes
|
Supers
Weapon Flipping Technique
No More Forgiveness
236B+C
|
| Damage
|
Guard
|
Startup
|
Active
|
Recovery
|
Total
|
Hit Adv
|
Block Adv
|
Guard Dmg
|
Cancel
|
Recoil
|
Deflectable
|
Unarmed
|
| 420(490)
|
Mid
|
1+15
|
16
|
-
|
102
|
KD
|
-38
|
-
|
No
|
No
|
No
|
No
|
Cham Cham dons a mask not unlike her brother's and grows taller, then rushes across the screen with the mighty big boomerang of (Green) Hell.
- Available only during Max Rage or Rage Explosion, and disarms on hit. Very easy to combo into from any punish.
- Also makes for a devastating anti-air option.
|
|
Toggle Hitboxes Toggle Hitboxes
|
Super Special Move
It's the End, My Fur-end!
641236C+D
|
| Damage
|
Guard
|
Startup
|
Active
|
Recovery
|
Total
|
Hit Adv
|
Block Adv
|
Guard Dmg
|
Cancel
|
Recoil
|
Deflectable
|
Unarmed
|
| 650[100,100,450]
|
Mid
|
10+18
|
26
|
-
|
93~118
|
KD
|
-30
|
-
|
No
|
No
|
No
|
No
|
Cham Cham dashes across the screen to knock her victim away, then charges in for a skull-crushing bonk.
- Travels fullscreen across a long but fixed distance, making it quite useful for massive punishes. She stops about one character length behind the opponent if they jumped over it.
- Available only once per match. Fully invincible frames 1~10.
|
|
Toggle Hitboxes Toggle Hitboxes
|
Combos
List combos, use numpad notation.
Midscreen
- 66A xx 236D / 214C / WFT
Long range punish combo, need to run in quite close for 66A to hit.
- 2B xx 236D / WFT
Mid range punish combo.
- (n.5B / n.2B) xx 236D / 214C / WFT
Close range punish combo, same damage for both medium.
- (5CD/4CD)...
- 2B xx 236D / WFT
Normal throw combo.
Corner
- (5CD/4CD)...
- n.2C xx 236D / 214C / WFT
Corner throw combo for most damage.
Guard Crush
- n.5C / 5C...
After recovery...
- SSM
SSM follow up. (Be careful with opponent bursting to avoid it)
- 2B xx 236D / WFT
Need to run up at far range.
- n.5C / 5C...
Cancel recovery...
- Lighting Blade
Universal Issen combo.
Videos
CHAM CHAM Tutorial and Combos by LegendaryWolf Shirou (2021)
Colors
External Links
Link to docs hosted in other sites.
