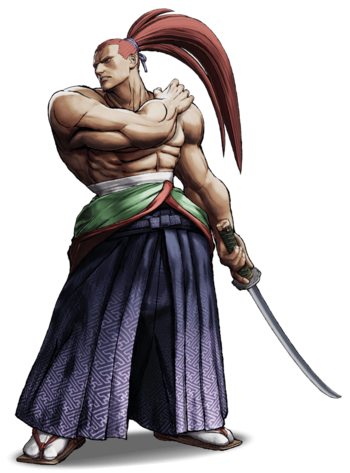
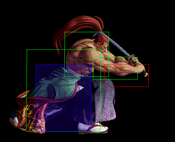
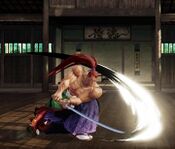
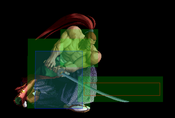
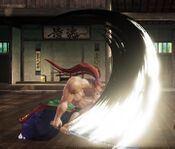
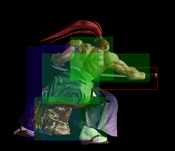
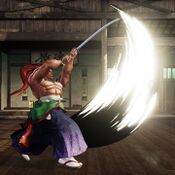
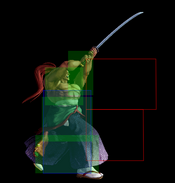
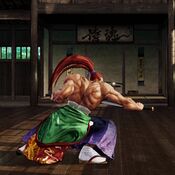
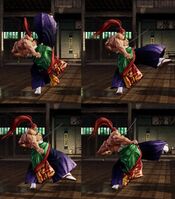
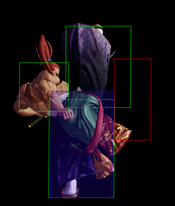
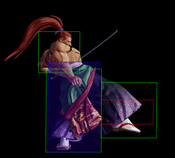
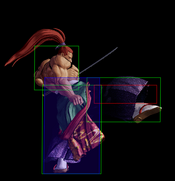
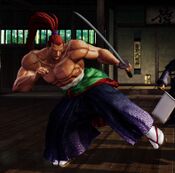
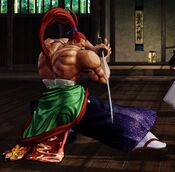
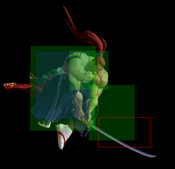
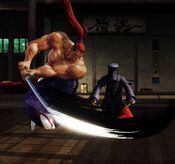
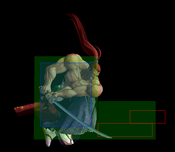
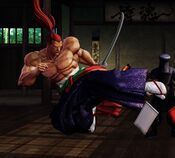
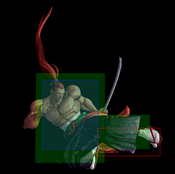
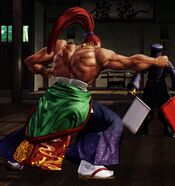
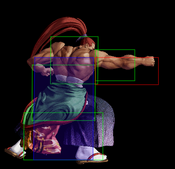
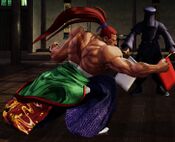
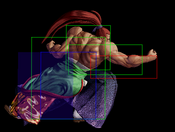
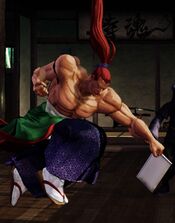
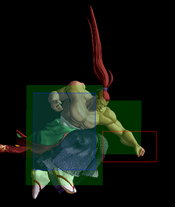
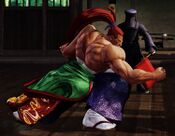
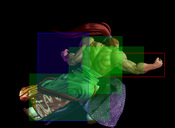
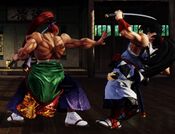
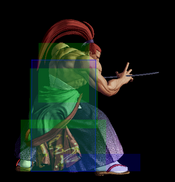
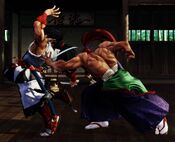
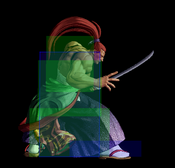
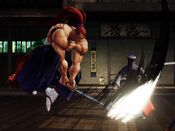
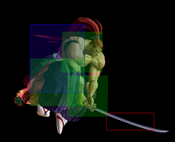
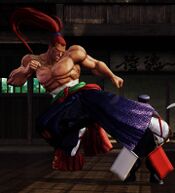
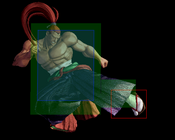
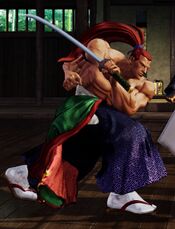
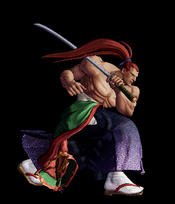
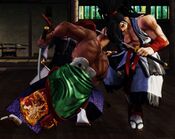
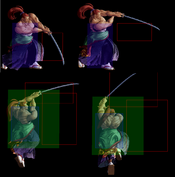
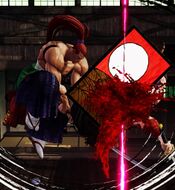
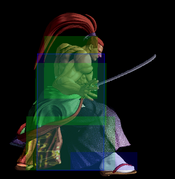
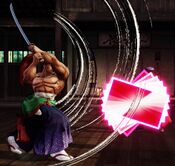
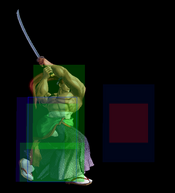
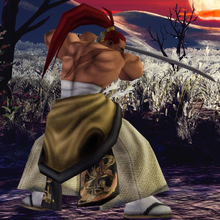
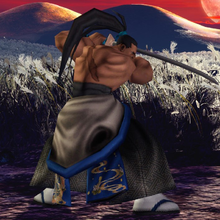
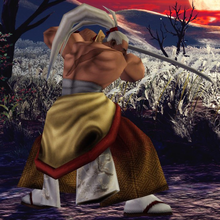
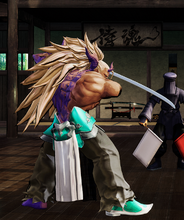
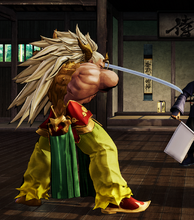
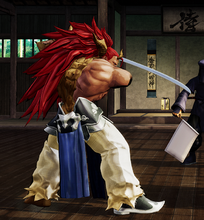
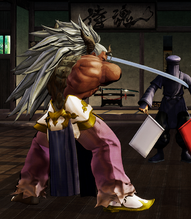
Genjuro Kibagami
牙神 幻十郎, Kibagami Genjūrō
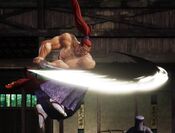
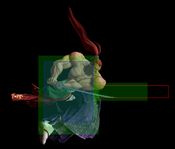
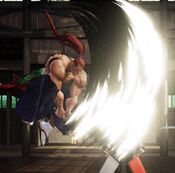
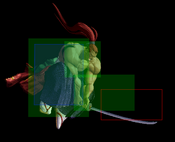
|
- Damage Taken: 100%
- Rage Factor: 0.30
- Rage Duration: 7 seconds
- Jump: 46 frames (Average)
- Forward Walk Speed: 0.3 (Average)
- Back Walk Speed: 0.23 (Average)
- Dash Speed: 1.25 (Average)
- Back Dash: 27 frames
- Weapon Pickup / Drop: 51 / 80 frames
|
Introduction
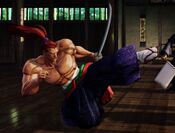
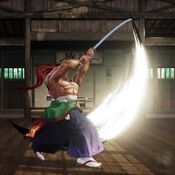
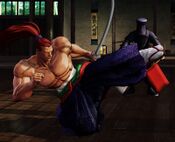
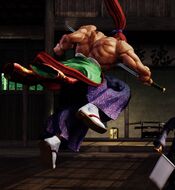
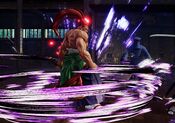
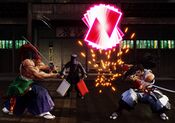
Haohmaru’s eternal rival and fan-favourite redhead Hitokiri, Genjuro is all about getting up-close and personal, forcing you into one of his numerous lethal mixups. While his range might be slightly below average, once he gets in, Genjuro has all the tools he needs to positively ruin your day. His Hanafuda ("Flower Card") projectile can put you in prolonged blockstun, allowing Genjuro to move in for a free mixup. His rekka strings can also hit from the front or from behind. On top of this, he has a command grab which he can use once the opponent freezes up.
Defensively, he is no slouch either, as his DP has pretty good invincibility and a large hitbox to boot. Genjuro players need to establish themselves in the neutral game against overly aggressive opponents since all of Genjuro's mixups require the enemy to more or less stand still. Genjuro also struggles against heavy zoners, as he lacks a good anti-zoning tool. Genjuro is for those who are looking for an equivalent to Street Fighter’s Ken Masters in Samurai Shodown.
Playstyle
 Genjuro is a close-range rushdown character with a large arsenal of powerful mixup tools on the ground. Genjuro is a close-range rushdown character with a large arsenal of powerful mixup tools on the ground.
|
| Strengths |
Weaknesses
|
- Strong mid-range game: Genjuro has an excellent suite of fast and well-ranged close and mid-range pokes, including a rare mid-screen low poke. His neutral jump C also has an enormous hitbox that is difficult to challenge, helping him control mid-screen space well.
- Great C normals: Genjuro has some of the fastest and highest-damage heavy normals, making a poorly timed poke or high-recovery mistake very costly for opponents.
- Strong mix-up game: Genjuro has one of the best B+Cs and numerous excellent lows in addition to a low-recovery command grab. His 236S (Triple Death Hack) rekka also affords him an excellent left-right mix-up game due to its crossup potential, made even scarier by the fact that he can cancel it into more rekkas up to two times on block. Get ready to guess!
- Invincible DP: Genjuro has a rare invincible "dragon punch" move, allowing him a strong reversal against pressure and letting him easily anti-air on the ground.
- Strong corner pressure: 214S (Cherry Blossom Slice) is a unique pressure-based projectile that bounces off opponents on block, making jump outs and counter-poke attempts risky. It is especially effective in the corner where opponents cannot backdash out of the card bounce, allowing Genjuro to apply a threatening and layered mix-up game.
|
- Poor long-range presence: Genjuro lacks any significant long-ranged neutral tools as his normals are suited for close-range engagements and his 214S (Cherry Blossom Slice) is too slow to keep opponents out meaningfully or engage in fireball wars.
- Mediocre air game: Excluding Neutral j.C, Genjuro's air normals are quite shallow and have poor coverage above his head, making jumping offense and air-to-air interactions unfavorable for him and forcing him to rely on grounded options like his DP.
- Short rage timer: Genjuro has one of the shortest rage duration, so he needs to act very quickly in order to make use of his max rage state.
|
Gameplan
Due to the lack of range, Genjuro is an "in-your-face" type of character, and mostly is on the offense. He has good mix-ups to make up his loss of damage on long range. When he gets in, he can easily mix-up with his rekka. When he gets a knockdown, especially in corner, it's time for his card set-ups.
Neutral
On neutral, Genjuro has to be at max range of his 5B. In this range, he can neutral j.C to air to air jump-ins. Or be ready to anti-air with his DP, which is one of the best AA DPs in the game. His A rekka can be confirmed from a normal, pretty easy to confirm the rest of the hits on reaction, if the first one is blocked you may go for a cross up on the second one. His rekka is also good for catching air-borne opponents off guard when they land if he cross up on them. His 66D is also a good button as an approach tool and it still knocks down. When Genjuro gets a knock down, his major damages are on the table.
Okizeme
The most basic mid screen Oki is his rekka cross up (B or C) version. Or he can 5D to beat a dodge, a deflect, and combo into rekka from the second hit. Another way to apply pressure is to neutral jump on wake up if the opponent do not have a DP/Reversal-like attack. If the opponent is in corner it's time for his card set-ups. (Easy to get if the opponent wants to avoid the rekka mix and sit in corner)
Most of the time you will want to use the A version of the card, and always hold it. When the card comes back down from falling it's an overhead. In the process, you may use 2B, 2D, 66B for a low mix-up, or combo from 6D which is now a cancellable low. The opponent has to do well to block the mix, and it's virtually unblockable as both a high and a low. When the card falls on them and has connected, you can hit them with a 5C, A rekkas, or some other option see in the Combo section.
Normal Moves
Far Slashes
5A
5A
|
| Damage
|
Guard
|
Startup
|
Active
|
Recovery
|
Total
|
Hit Adv
|
Block Adv
|
Guard Dmg
|
Cancel
|
Recoil
|
Deflectable
|
Unarmed
|
| 30
|
Mid
|
7
|
-
|
-
|
22
|
-3
|
-5
|
5
|
Yes
|
Yes
|
Yes
|
No
|
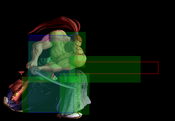
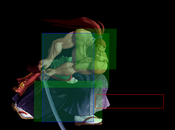
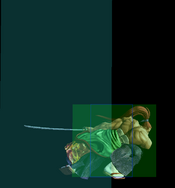
Fast slash to keep out the opponent, can cancel into specials. Combos into Lightning Wings and Triple Death Hack, but it's a bit finicky. Lightning Wings doesn't combo at the tip, and you can only get the full light rekka combo in the corner. At mid screen, you can only connect with the medium and heavy variants of Triple Death Hack: Horn.
|
|
Toggle Hitboxes Toggle Hitboxes
|
5B
5B
|
| Damage
|
Guard
|
Startup
|
Active
|
Recovery
|
Total
|
Hit Adv
|
Block Adv
|
Guard Dmg
|
Cancel
|
Recoil
|
Deflectable
|
Unarmed
|
| 100
|
Mid
|
10
|
-
|
-
|
40
|
-10
|
-12
|
10
|
No
|
Yes
|
Yes
|
No
|
Fast poke with below average range, fast enough to punish a lot of moves. Fairly standard far medium slash poke.
|
|
Toggle Hitboxes Toggle Hitboxes
|
5C
5C
|
| Damage
|
Guard
|
Startup
|
Active
|
Recovery
|
Total
|
Hit Adv
|
Block Adv
|
Guard Dmg
|
Cancel
|
Recoil
|
Deflectable
|
Unarmed
|
| 300
|
Mid
|
22
|
-
|
-
|
71
|
-10
|
-16
|
25
|
No
|
Yes
|
Disarm
|
No
|
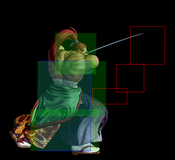
Genjuro's signature quick hard hitting slash, reaches very far and punishes whiff throws exceptional well. It's +11 upon recoil cancel, making it useful to keep up pressure.
|
|
Toggle Hitboxes Toggle Hitboxes
|
2A
2A
|
| Damage
|
Guard
|
Startup
|
Active
|
Recovery
|
Total
|
Hit Adv
|
Block Adv
|
Guard Dmg
|
Cancel
|
Recoil
|
Deflectable
|
Unarmed
|
| 30
|
Mid
|
5
|
-
|
-
|
21
|
-4
|
-5
|
5
|
Yes
|
Yes
|
Yes
|
No
|
Fast 5 frame normal that cancels into specials. Unlike far A, it fairly easily combos into Lightning Wings and the full light combo of Triple Death Hack.
|
|
Toggle Hitboxes Toggle Hitboxes
|
2B
2B
|
| Damage
|
Guard
|
Startup
|
Active
|
Recovery
|
Total
|
Hit Adv
|
Block Adv
|
Guard Dmg
|
Cancel
|
Recoil
|
Deflectable
|
Unarmed
|
| 90
|
Low
|
14
|
-
|
-
|
40
|
-6
|
-12
|
10
|
No
|
Yes
|
No
|
No
|
Low slash with decent range. Important tool of Genjuro for mix-ups, but very risky if the opponents jump attack lands.
|
|
Toggle Hitboxes Toggle Hitboxes
|
2C
2C
|
| Damage
|
Guard
|
Startup
|
Active
|
Recovery
|
Total
|
Hit Adv
|
Block Adv
|
Guard Dmg
|
Cancel
|
Recoil
|
Deflectable
|
Unarmed
|
| 240
|
Mid
|
19
|
-
|
-
|
54
|
-10
|
-28
|
25
|
No
|
Yes
|
Disarm
|
No
|
Almost identical with far 5C, and it's 3 frames faster. It deals less damage, and is -1 upon recoil cancel. A good tool in mid range.
|
|
Toggle Hitboxes Toggle Hitboxes
|
Near Slashes
n.5A
n.5A
|
| Damage
|
Guard
|
Startup
|
Active
|
Recovery
|
Total
|
Hit Adv
|
Block Adv
|
Guard Dmg
|
Cancel
|
Recoil
|
Deflectable
|
Unarmed
|
| 30
|
Mid
|
5
|
-
|
-
|
19
|
-2
|
-5
|
5
|
Yes
|
Yes
|
Yes
|
No
|
Fast 5 frame normal that cancels into specials. Can combo into Lightning Wings and Triple Death Hack.
|
|
Toggle Hitboxes Toggle Hitboxes
|
n.5B
n.5B
|
| Damage
|
Guard
|
Startup
|
Active
|
Recovery
|
Total
|
Hit Adv
|
Block Adv
|
Guard Dmg
|
Cancel
|
Recoil
|
Deflectable
|
Unarmed
|
| 80
|
Mid
|
7
|
-
|
-
|
26
|
+1
|
-12
|
10
|
Yes
|
Yes
|
Yes
|
No
|
Standard near medium slash that cancels into specials.
|
|
Toggle Hitboxes Toggle Hitboxes
|
n.5C
n.5C
|
| Damage
|
Guard
|
Startup
|
Active
|
Recovery
|
Total
|
Hit Adv
|
Block Adv
|
Guard Dmg
|
Cancel
|
Recoil
|
Deflectable
|
Unarmed
|
| 200
|
Mid
|
16
|
-
|
-
|
44
|
-1
|
-28
|
25
|
No
|
Yes
|
Disarm
|
No
|
Standard near heavy slash. Despite the similarities to n.2C, the primary use case for this normal would be to get damage up front in a situation where the opponent is expected to rage explode to escape a combo and there's no frame advantage or resources for a bigger punishment such as SSM or WFT.
|
|
Toggle Hitboxes Toggle Hitboxes
|
n.2B
n.2B
|
| Damage
|
Guard
|
Startup
|
Active
|
Recovery
|
Total
|
Hit Adv
|
Block Adv
|
Guard Dmg
|
Cancel
|
Recoil
|
Deflectable
|
Unarmed
|
| 80
|
Mid
|
9
|
-
|
-
|
30
|
-1
|
-12
|
10
|
Yes
|
Yes
|
Yes
|
No
|
Similar to Near 5B but it's 2 frames slower.
|
|
Toggle Hitboxes Toggle Hitboxes
|
n.2C
n.2C
|
| Damage
|
Guard
|
Startup
|
Active
|
Recovery
|
Total
|
Hit Adv
|
Block Adv
|
Guard Dmg
|
Cancel
|
Recoil
|
Deflectable
|
Unarmed
|
| 160
|
Mid
|
18
|
-
|
-
|
43
|
-8
|
-28
|
25
|
No
|
Yes
|
Disarm
|
No
|
Similar to Near 5C but has better hitbox above the head. Slow but effective anti-air if you can see the jump-in coming but can't manage a DP motion.
|
|
Toggle Hitboxes Toggle Hitboxes
|
Kicks
5D
5D
|
| Damage
|
Guard
|
Startup
|
Active
|
Recovery
|
Total
|
Hit Adv
|
Block Adv
|
Guard Dmg
|
Cancel
|
Recoil
|
Deflectable
|
Unarmed
|
| 50 [15,15,20]
|
Mid,Mid,Mid
|
5,16,39
|
-
|
-
|
54
|
-2
|
-6
|
5
|
Yes,Yes,No
|
No
|
No
|
Yes
|
Fast kick that can cancel into specials on the second hit. Has 2 frame gap between the first and second hit on block. If someone jumps out during this time and gets hit, the final hit will whiff which leaves Genjuro on a +9 advantage.
|
|
Toggle Hitboxes Toggle Hitboxes
|
6D
6D
|
| Damage
|
Guard
|
Startup
|
Active
|
Recovery
|
Total
|
Hit Adv
|
Block Adv
|
Guard Dmg
|
Cancel
|
Recoil
|
Deflectable
|
Unarmed
|
| 40
|
Low
|
16
|
7
|
19~13
|
41
|
-5~+1
|
-10~-4
|
5
|
Yes
|
No
|
No
|
Yes
|
Low kick with long active frames. 6D can be used as a short ranged low poke or pressure tool that combos into 236A series or DP. The follow-ups to 236A may whiff if done from too far out.
|
|
Toggle Hitboxes Toggle Hitboxes
|
2D
2D
|
| Damage
|
Guard
|
Startup
|
Active
|
Recovery
|
Total
|
Hit Adv
|
Block Adv
|
Guard Dmg
|
Cancel
|
Recoil
|
Deflectable
|
Unarmed
|
| 20
|
Low
|
5
|
-
|
-
|
17
|
0
|
-3
|
5
|
Yes
|
No
|
No
|
Yes
|
Fast low kick that cancels into specials. A fast low to check your opponent's movement with as well as a low commit way to pressure. 2D can combo into 623A if canceled at the fastest timing but 2A covers fast special cancelable punish button better than 2D.
|
|
Toggle Hitboxes Toggle Hitboxes
|
3D
3D
|
| Damage
|
Guard
|
Startup
|
Active
|
Recovery
|
Total
|
Hit Adv
|
Block Adv
|
Guard Dmg
|
Cancel
|
Recoil
|
Deflectable
|
Unarmed
|
| 70
|
Low
|
9
|
7
|
17~11
|
32
|
KD
|
-6~0
|
5
|
Yes
|
No
|
No
|
Yes
|
Low kick with long active frames and knockdown, even catches jumping and back dashing opponents, making it very useful for wake up pressure. It's +9 on block cancelled into specials, so it's useful for keeping up pressure.
|
|
Toggle Hitboxes Toggle Hitboxes
|
Dash Normals
66A
66A
|
| Damage
|
Guard
|
Startup
|
Active
|
Recovery
|
Total
|
Hit Adv
|
Block Adv
|
Guard Dmg
|
Cancel
|
Recoil
|
Deflectable
|
Unarmed
|
| 30
|
Mid
|
5
|
-
|
-
|
24
|
-6
|
-19
|
5
|
Yes
|
Yes
|
Yes
|
No
|
A dashing poke with fast startup. The fast startup allows Genjuro to pester his opponents a bit from mid range which will often interrupt slower pokes or opponent movement preemptively. This move combos into DP and WFT, but can be difficult to land consistently due to minimal hitstun as well as the lack of range for WFT which forces Genjuro to hit 66A very deep for the combo.
|
|
Toggle Hitboxes Toggle Hitboxes
|
66B
66B
|
| Damage
|
Guard
|
Startup
|
Active
|
Recovery
|
Total
|
Hit Adv
|
Block Adv
|
Guard Dmg
|
Cancel
|
Recoil
|
Deflectable
|
Unarmed
|
| 100[50,50]
|
Low,Mid
|
13
|
-
|
-
|
45
|
KD
|
-35
|
10
|
No
|
Yes
|
No,Disarm
|
No
|
Dash slashes hit low then mid. On hit, your opponent bounces off the edge of the screen, even away from the corner, and lands very close to you, which gives you some good okizeme opportunities. Very punishable on block, and -8 on recoil cancel. The 2nd hit whiffs at max distance. It doesn't recoil when unarmed opponent blocks it, and it deals quite a bit of chip damage, making it a very good tool against disarmed opponents. Only the 2nd hit can be deflected, but it's very unlikely.
|
|
Toggle Hitboxes Toggle Hitboxes
|
66C
66C
|
| Damage
|
Guard
|
Startup
|
Active
|
Recovery
|
Total
|
Hit Adv
|
Block Adv
|
Guard Dmg
|
Cancel
|
Recoil
|
Deflectable
|
Unarmed
|
| 140
|
Mid
|
14
|
-
|
-
|
52
|
KD
|
-16
|
20
|
No
|
No
|
Disarm
|
No
|
Standard dash heavy slash with some anti air capability, does a decent job catching back jumping opponents.
|
|
Toggle Hitboxes Toggle Hitboxes
|
66D
66D
|
| Damage
|
Guard
|
Startup
|
Active
|
Recovery
|
Total
|
Hit Adv
|
Block Adv
|
Guard Dmg
|
Cancel
|
Recoil
|
Deflectable
|
Unarmed
|
| 70
|
Low
|
9
|
-
|
-
|
36
|
KD
|
-11
|
5
|
No
|
No
|
No
|
Yes
|
Very good running kick that can hit aerial opponents. It's relatively safe if spaced correctly.
|
|
Toggle Hitboxes Toggle Hitboxes
|
Air Normals
j.A
j.A
|
| Damage
|
Guard
|
Startup
|
Active
|
Recovery
|
Total
|
Hit Adv
|
Block Adv
|
Guard Dmg
|
Cancel
|
Recoil
|
Deflectable
|
Unarmed
|
| 30
|
High
|
8
|
-
|
-
|
-
|
-
|
-
|
5
|
No
|
No
|
No
|
No
|
Quick air normal, useful for air to air.
|
|
Toggle Hitboxes Toggle Hitboxes
|
j.B
j.B
|
| Damage
|
Guard
|
Startup
|
Active
|
Recovery
|
Total
|
Hit Adv
|
Block Adv
|
Guard Dmg
|
Cancel
|
Recoil
|
Deflectable
|
Unarmed
|
| 100
|
High
|
15
|
-
|
-
|
-
|
-
|
-
|
10
|
No
|
No
|
No
|
No
|
Decent air to air normal, covers more horizontal space than forward Jump C.
|
|
Toggle Hitboxes Toggle Hitboxes
|
j.C
8j.C
|
| Damage
|
Guard
|
Startup
|
Active
|
Recovery
|
Total
|
Hit Adv
|
Block Adv
|
Guard Dmg
|
Cancel
|
Recoil
|
Deflectable
|
Unarmed
|
| 160
|
High
|
15
|
-
|
-
|
-
|
-
|
-
|
20
|
No
|
No
|
No
|
No
|
Long reaching heavy air slash, useful for keeping out your opponent. Hits deeper and harder than 7/9C.
|
|
Toggle Hitboxes Toggle Hitboxes
|
j.C
7 or 9j.C
|
| Damage
|
Guard
|
Startup
|
Active
|
Recovery
|
Total
|
Hit Adv
|
Block Adv
|
Guard Dmg
|
Cancel
|
Recoil
|
Deflectable
|
Unarmed
|
| 150
|
High
|
13
|
-
|
-
|
-
|
-
|
-
|
20
|
No
|
No
|
No
|
No
|
Standard jump heavy slash. Your best jump in option.
|
|
Toggle Hitboxes Toggle Hitboxes
|
j.D
j.D
|
| Damage
|
Guard
|
Startup
|
Active
|
Recovery
|
Total
|
Hit Adv
|
Block Adv
|
Guard Dmg
|
Cancel
|
Recoil
|
Deflectable
|
Unarmed
|
| 30
|
High
|
7
|
-
|
-
|
-
|
-
|
-
|
5
|
No
|
No
|
No
|
Yes
|
|
|
|
Toggle Hitboxes Toggle Hitboxes
|
Unarmed Normals
u.5S
u.5S
|
| Damage
|
Guard
|
Startup
|
Active
|
Recovery
|
Total
|
Hit Adv
|
Block Adv
|
Guard Dmg
|
Cancel
|
Recoil
|
Deflectable
|
Unarmed
|
| 50
|
Mid
|
6
|
-
|
-
|
31
|
-5
|
-10
|
5
|
No
|
No
|
No
|
Only
|
|
|
|
Toggle Hitboxes Toggle Hitboxes
|
u.2S
u.2S
|
| Damage
|
Guard
|
Startup
|
Active
|
Recovery
|
Total
|
Hit Adv
|
Block Adv
|
Guard Dmg
|
Cancel
|
Recoil
|
Deflectable
|
Unarmed
|
| 50
|
Mid
|
8
|
-
|
-
|
26
|
+2
|
-3
|
5
|
No
|
No
|
No
|
Only
|
Slower than unarmed 5S but it has better frame data.
|
|
Toggle Hitboxes Toggle Hitboxes
|
ju.S
uj.S
|
| Damage
|
Guard
|
Startup
|
Active
|
Recovery
|
Total
|
Hit Adv
|
Block Adv
|
Guard Dmg
|
Cancel
|
Recoil
|
Deflectable
|
Unarmed
|
| 50
|
High
|
6
|
-
|
-
|
-
|
-
|
-
|
5
|
No
|
No
|
No
|
Only
|
|
|
|
Toggle Hitboxes Toggle Hitboxes
|
u.66S
u.66S
|
| Damage
|
Guard
|
Startup
|
Active
|
Recovery
|
Total
|
Hit Adv
|
Block Adv
|
Guard Dmg
|
Cancel
|
Recoil
|
Deflectable
|
Unarmed
|
| 50
|
Mid
|
6
|
-
|
-
|
30
|
KD
|
-9
|
5
|
No
|
No
|
No
|
Only
|
Fast back fist that knocks down the opponent. Long reach.
|
|
Toggle Hitboxes Toggle Hitboxes
|
Universal Mechanics
Guard Break
Guard Break (Throw)
4/5/6C+D Forward Throw Forward Throw Back Throw Back Throw
|
| Version
|
Damage
|
Guard
|
Startup
|
Active
|
Recovery
|
Total
|
Hit Adv
|
Block Adv
|
Guard Dmg
|
Cancel
|
Recoil
|
Deflectable
|
Unarmed
|
| Forward
|
0
|
Throw
|
3
|
-
|
71
|
74
|
+20
|
-
|
-
|
-
|
-
|
-
|
Yes
|
Universal throw. Can be followed up with an attack.
|
| Back
|
0
|
Throw
|
5
|
-
|
69
|
74
|
+25
|
-
|
-
|
-
|
-
|
No
|
Yes
|
Universal throw. Can be followed up with an attack.
|
|
Toggle Hitboxes Toggle Hitboxes
|
Surprise Attack
Surprise Attack (Overhead)
5B+C
|
| Damage
|
Guard
|
Startup
|
Active
|
Recovery
|
Total
|
Hit Adv
|
Block Adv
|
Guard Dmg
|
Cancel
|
Recoil
|
Deflectable
|
Unarmed
|
| 70
|
High
|
20
|
-
|
-
|
42
|
+2
|
-10
|
10
|
No
|
No
|
No
|
No
|
Very strong universal overhead. Good range, and the hop start up makes it ambiguous. Doesn't knock down since 1.70 version.
|
|
Toggle Hitboxes Toggle Hitboxes
|
Unarmed Surprise Attack (Overhead)
u.5B+C
|
| Damage
|
Guard
|
Startup
|
Active
|
Recovery
|
Total
|
Hit Adv
|
Block Adv
|
Guard Dmg
|
Cancel
|
Recoil
|
Deflectable
|
Unarmed
|
| 60
|
High
|
20
|
-
|
-
|
44
|
+1
|
-12
|
10
|
No
|
No
|
No
|
Only
|
Universal unarmed overhead. Hop-kick that doesn't cause knockdown.
|
|
Toggle Hitboxes Toggle Hitboxes
|
Dodge
Dodge
5A+B
|
| Damage
|
Guard
|
Startup
|
Active
|
Recovery
|
Total
|
Hit Adv
|
Block Adv
|
Guard Dmg
|
Cancel
|
Recoil
|
Deflectable
|
Unarmed
|
| -
|
-
|
1
|
16
|
22
|
38
|
-
|
-
|
-
|
-
|
-
|
-
|
Yes
|
Universal dodge.
Complete invincibility from frames 1 to 10. Strike invincibility from frames 11 to 16.
|
|
Toggle Hitboxes Toggle Hitboxes
|
Stance Break
Stance Break
A+B during Just Defense
|
| Damage
|
Guard
|
Startup
|
Active
|
Recovery
|
Total
|
Hit Adv
|
Block Adv
|
Guard Dmg
|
Cancel
|
Recoil
|
Deflectable
|
Unarmed
|
| 0
|
Mid
|
5
|
-
|
-
|
52
|
KD
|
-24
|
-
|
No
|
-
|
-
|
Yes
|
|
|
|
Toggle Hitboxes Toggle Hitboxes
|
Counter (Deflect) / Blade Catch
Counter (Deflect) / Blade Catch
236A+B Weapon Deflect Weapon Deflect Blade Catch Blade Catch
|
| Version
|
Damage
|
Guard
|
Startup
|
Active
|
Recovery
|
Total
|
Hit Adv
|
Block Adv
|
Guard Dmg
|
Cancel
|
Recoil
|
Deflectable
|
Unarmed
|
| Armed
|
0
|
N/A
|
2
|
11
|
34
|
46
|
+35~+59
|
N/A
|
-
|
N/A
|
N/A
|
N/A
|
No
|
Universal counter. Allows you to follow up with a guaranteed attack of your own. The amount of time you have to followup depends on the strength of the attack you counter, with heavy attacks staggering the opponent for the longest amount of time. Additionally if you counter a heavy slash or a running slash, your opponent will be disarmed.
|
| Unarmed
|
0
|
N/A
|
2
|
12
|
9
|
22
|
KD
|
N/A
|
-
|
N/A
|
N/A
|
N/A
|
Only
|
Universal counter. While disarmed, your counter will disarm and knock away your opponent regardless of slash level countered.
|
|
Toggle Hitboxes Toggle Hitboxes
|
Rage Explosion
Rage Explosion
5A+B+C
|
| Damage
|
Guard
|
Startup
|
Active
|
Recovery
|
Total
|
Hit Adv
|
Block Adv
|
Guard Dmg
|
Cancel
|
Recoil
|
Deflectable
|
Unarmed
|
| 0
|
No
|
21
|
1
|
-
|
58
|
0
|
-
|
-
|
-
|
No
|
No
|
No
|
Unblockable pushback attack.
|
|
Toggle Hitboxes Toggle Hitboxes
|
Lightning Blade
Lightning Blade (Issen)
5A+B+C during Rage Explosion
|
| Damage
|
Guard
|
Startup
|
Active
|
Recovery
|
Total
|
Hit Adv
|
Block Adv
|
Guard Dmg
|
Cancel
|
Recoil
|
Deflectable
|
Unarmed
|
| 300~709
|
Mid
|
9
|
-
|
-
|
-
|
KD
|
-44
|
-
|
-
|
No
|
No
|
No
|
Has full invulnerability all the way through. Can be used as an anti-air. Damage scales based on remaining Rage Explosion Gauge.
|
|
Toggle Hitboxes Toggle Hitboxes
|
Special Moves
Triple Death Hack: Fang
Triple Death Hack: Fang
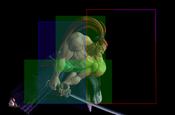
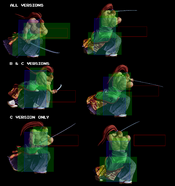
236S B and C versions have back proximity box B and C versions have back proximity box
|
| Version
|
Damage
|
Guard
|
Startup
|
Active
|
Recovery
|
Total
|
Hit Adv
|
Block Adv
|
Guard Dmg
|
Cancel
|
Recoil
|
Deflectable
|
Unarmed
|
| A
|
20
|
Mid
|
11
|
-
|
-
|
43
|
-12
|
-17
|
4
|
-
|
-
|
-
|
No
|
| B
|
20
|
Mid
|
24
|
-
|
-
|
53
|
-9
|
-14
|
4
|
-
|
-
|
-
|
No
|
| C
|
20
|
Mid
|
25
|
-
|
-
|
73
|
-12
|
-17
|
4
|
-
|
-
|
-
|
No
|
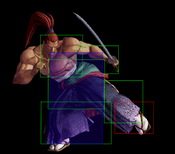
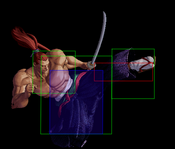
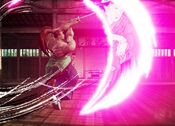
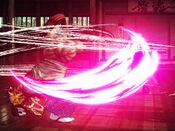
Genjuro's Rekka type move. The light version has fast start up and long reach. The medium version covers almost full screen and will cross up the opponent within the range of far light slash. The heavy version hits cross up unless from very far distance. All rekkas doesn't cross up opponent at the corner. All rekkas doesn't hit airborne opponent, so they can back dash or jump to avoid mixups.
|
|
Toggle Hitboxes Toggle Hitboxes
|
Triple Death Hack: Horn
Triple Death Hack: Horn
236S (the 2nd time)
|
| Version
|
Damage
|
Guard
|
Startup
|
Active
|
Recovery
|
Total
|
Hit Adv
|
Block Adv
|
Guard Dmg
|
Cancel
|
Recoil
|
Deflectable
|
Unarmed
|
| A
|
30
|
Mid
|
16
|
-
|
-
|
-
|
-23
|
-28
|
6
|
-
|
-
|
-
|
No
|
The 2nd rekka after the 1st one hits or blocked, input can be delayed a lot, and input 214S is also accepted. The light version hits the same side as the 1st rekka, and it does combo if not delay. However it whiffs if the 1st rekka hits from mid screen far range, while at the corner the 2nd light rekka almost guarantees a combo. (Extra Note: If the 1st rekka is medium version from point-blank range, the 2nd light rekka whiffs. If the 1st rekka is heavy version, the 2nd light rekka does combo.)
|
| B
|
60
|
Mid
|
23
|
-
|
-
|
-
|
-15
|
-20
|
6
|
-
|
-
|
-
|
No
|
The medium version also hits the same side but it doesn't combo from 1st rekka. It covers more distance so it won't whiff after the 1st rekka. Mix it up with the heavy version to confuse the opponent. Deals 30 more damage than the light version 2nd rekka.
|
| C
|
70
|
Mid
|
19
|
-
|
-
|
-
|
-23
|
-28
|
6
|
-
|
-
|
-
|
No
|
The heavy version always hits different side of the 1st rekka (except opponent at the corner), and it doesn't combo from 1st rekka. Deals 10 more damage than the medium version 2nd rekka.
|
|
Toggle Hitboxes Toggle Hitboxes
|
Triple Death Hack: Element
Triple Death Hack: Element
236S (the 3rd time)
|
| Damage
|
Guard
|
Startup
|
Active
|
Recovery
|
Total
|
Hit Adv
|
Block Adv
|
Guard Dmg
|
Cancel
|
Recoil
|
Deflectable
|
Unarmed
|
| 100
|
Mid
|
17
|
-
|
-
|
-
|
KD
|
-48
|
12
|
-
|
-
|
-
|
No
|
The final rekka hits the same side as the 2nd one, and it always combo from the 2nd rekka if not delay. It has only one version for all 3 slash buttons. Please note that it's SSM punishable on block so use it wisely.
|
|
Toggle Hitboxes Toggle Hitboxes
|
Lightning Wings
Lightning Wings
623S A version A version B version (hitbox) B version (hitbox) C version (hitbox) C version (hitbox)
|
| Version
|
Damage
|
Guard
|
Startup
|
Active
|
Recovery
|
Total
|
Hit Adv
|
Block Adv
|
Guard Dmg
|
Cancel
|
Recoil
|
Deflectable
|
Unarmed
|
| A
|
100
|
Mid
|
7
|
-
|
-
|
58
|
KD (+85)
|
-36
|
12
|
-
|
-
|
-
|
No
|
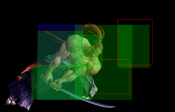
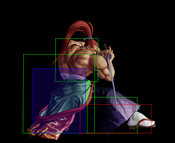
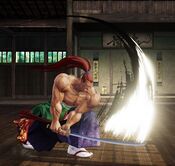
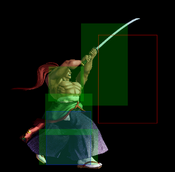
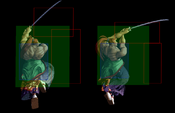
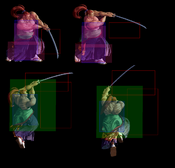
The hitbox is smaller than it looks like. It covers large space above his head and deals full damage on hit.
|
| B
|
140[110,30]
|
Mid
|
9
|
-
|
-
|
79
|
KD (+79)
|
-52
|
30
|
-
|
-
|
-
|
No
|
Invincibility against air attacks frame 1~10. It covers more space than the light version. Does very little damage if the 1st hit doesn't connect. SSM punishable on block.
|
| C
|
180[120,30,30]
|
Mid
|
11
|
-
|
-
|
87
|
KD (+99)
|
-59
|
38
|
-
|
-
|
-
|
No
|
Full invincibility frames 1~14. Genjuro's main combo part and wake up reversal. Covers more distance than medium version. Does small damage if the 1st hit doesn't connect. If it's blocked, it lands behind the opponent from close range, which makes it difficult to punish by SSM.
|
| Rage
|
216 [24x5,12x3,60]
|
Mid
|
8
|
-
|
-
|
75
|
KD (+78)
|
-48
|
40
|
-
|
-
|
-
|
No
|
Full invincibility frames 1~9. Faster than medium version and covers more distance than heavy version (even hits from round start location). Very likely to deal a lot more damage than the heavy version even if it doesn't land the 1st hit, since the last 2 hits damage is one third of total 9 hits. Also difficult to punish by SSM.
|
|
Toggle Hitboxes Toggle Hitboxes
|
Zen Blade
Zen Blade
(close)623D
|
| Damage
|
Guard
|
Startup
|
Active
|
Recovery
|
Total
|
Hit Adv
|
Block Adv
|
Guard Dmg
|
Cancel
|
Recoil
|
Deflectable
|
Unarmed
|
| 150
|
Throw
|
5
|
-
|
-
|
53
|
KD (+61)
|
-
|
-
|
-
|
-
|
-
|
No
|
Standard command grab. It has less range than normal throw and less punishable, using it is important in keeping your mix-up game from becoming stale. It's also a very good alternative of forward throw DP combo (only 18 damage short but much less risky). It's also useful to finish low health opponent, since the opponent cannot rage explosion to burst out, it finishes opponents at 135/162/189 health during normal/max rage/rage explosion respectively (based on the standard defense level).
|
|
Toggle Hitboxes Toggle Hitboxes
|
Cherry Blossom Slice
Cherry Blossom Slice
214S
|
| Version
|
Damage
|
Guard
|
Startup
|
Active
|
Recovery
|
Total
|
Hit Adv
|
Block Adv
|
Guard Dmg
|
Cancel
|
Recoil
|
Deflectable
|
Unarmed
|
| A
|
40
|
Mid
|
30
|
-
|
-
|
56
|
+2
|
-11
|
5
|
-
|
-
|
-
|
No
|
| B
|
40
|
Mid
|
30
|
-
|
-
|
61
|
-3
|
-16
|
5
|
-
|
-
|
-
|
No
|
| C
|
40
|
Mid
|
30
|
-
|
-
|
66
|
-8
|
-21
|
5
|
-
|
-
|
-
|
No
|
A mid air projectile with slow start up and doesn't cover full screen. It's very minus on block at close range, making it much less useful for close range pressure. (Extra note: it cancels out with most projectiles except Rimururu's rolling ice ball and Wu Ruixiang's spike trap.)
|
|
Toggle Hitboxes Toggle Hitboxes
|
Cherry Blossom Slice (Hold)
Cherry Blossom Slice (Hold)
214[S]
|
| Damage
|
Guard
|
Startup
|
Active
|
Recovery
|
Total
|
Hit Adv
|
Block Adv
|
Guard Dmg
|
Cancel
|
Recoil
|
Deflectable
|
Unarmed
|
| 40
|
High
|
-
|
-
|
-
|
-
|
-
|
-
|
2
|
-
|
-
|
-
|
No
|
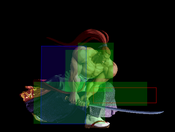
Keep holding the button until the opponent blocks it, and then it will bounce up and fall down as an overhead attack, which leads to mixup combo. The light version falls slowly and the medium version falls quickly, and the heavy version falls behind the opponent. The opponent can back jump or back dash to avoid getting hit by the light and medium version unless he is at the corner, and the hard version catches back jump and back dash. It received big nerf from version 1.11, now it takes much longer to recover and it's not able to follow up after mid-air hit, therefore the opponent can always choose to take small damage to avoid mixup situation. The frame data is the same regardless of holding down the button or not, so always holding the button after 214S is recommended.
|
|
Toggle Hitboxes Toggle Hitboxes
|
Slash of a Hundred Demons
Slash of a Hundred Demons
421S
|
| Version
|
Damage
|
Guard
|
Startup
|
Active
|
Recovery
|
Total
|
Hit Adv
|
Block Adv
|
Guard Dmg
|
Cancel
|
Recoil
|
Deflectable
|
Unarmed
|
| A
|
140[10,40,40,50]
|
Mid
|
17
|
-
|
-
|
64
|
KD
|
-14
|
5*2
|
-
|
-
|
-
|
No
|
| B
|
140[10,40,40,50]
|
Mid
|
17
|
-
|
-
|
82
|
KD
|
-15
|
5*4
|
-
|
-
|
-
|
No
|
| C
|
140[10,40,40,50]
|
Mid
|
17
|
-
|
-
|
101
|
KD
|
-16
|
5*6
|
-
|
-
|
-
|
No
|
A hit grab type move, the light / medium / heavy version slashes 2 / 4 / 6 times, if any one slash hits, it grabs the opponent and deals the full damage. It doesn't hit airborne opponent. It's now more useful to chip out the opponent since version 2.10. Also it's very easy to mix the input by mistake while holding back and input 214S. The trick is to use empty normal cancel into 214S or input 63214S instead.
|
|
Toggle Hitboxes Toggle Hitboxes
|
Supers
Weapon Flipping Technique
Five Flash Rip
236B+C
|
| Damage
|
Guard
|
Startup
|
Active
|
Recovery
|
Total
|
Hit Adv
|
Block Adv
|
Guard Dmg
|
Cancel
|
Recoil
|
Deflectable
|
Unarmed
|
| 420(490)
|
Mid
|
1+10
|
-
|
-
|
-
|
KD
|
-48
|
-
|
-
|
-
|
-
|
No
|
Fast WFT with limited range, it's one of the few WFT which combo after 5 frame attacks. Available during Max Rage or Rage Explosion. Disarms opponent on hit.
|
|
Toggle Hitboxes Toggle Hitboxes
|
Super Special Move
Reverse Five Flash Rip
641236C+D
|
| Damage
|
Guard
|
Startup
|
Active
|
Recovery
|
Total
|
Hit Adv
|
Block Adv
|
Guard Dmg
|
Cancel
|
Recoil
|
Deflectable
|
Unarmed
|
| 700
|
Mid
|
10+19
|
-
|
-
|
-
|
KD
|
-41
|
-
|
-
|
-
|
-
|
No
|
SSM with very limited range, available only once per match. Full invincibility frames 1~10.
|
|
Toggle Hitboxes Toggle Hitboxes
|
Combos
Combos as of version 2.10 (added 6D combos), use Numpad notation.
Midscreen
- n.5A...
- 623C
The most damaging light basic punish combo.
- WFT
The most damaging light WFT punish combo.
- 236A x 3
Quick punish combo.
- 5A / 2A...
- 623C
Would be blocked at far range.
- WFT
Whiffs at far range.
- 236A x 3
The 2nd & 3rd rekka whiffs at far range.
- 66A...
- 623C / WFT
The most damaging chasing down punish combo.
- n.5B / n.2B...
- 623C / WFT
The most damaging basic / WFT punish combo.
- 421S
Light version whiffs at far range, medium version is preferred.
- 236A x 3
Easier to confirm than above combos.
- 6D xx 236A x 3 / 421S / 623C / WFT
Preferred over 5D, decent range and damage, confirm from a low, new combo from version 2.10.
- 5D xx 236A x 3 / 421S / 623C / WFT
Quick combo starter that beats weapon deflect. The 1st hit of 5D can cancel into special move but 2nd hit cancel is preferred.
- 8C / 9C (Deep hit)...
- 5C/2C
Far 5C is the most damaging basic follow up if opponent is far. Near 5C whiffs beyond point-blank range, Near/Far 2C connects at all ranges.
- 5B / 2B / 3D / (5D combos)
Less risky follow up, Far 2B and kicks beats weapon deflect.
- 6D xx 236A x 3 / 421S / 623C / WFT
New combo from 2.10.
- n.5B/n.2B xx 623C
The most damaging basic combo, but 623C sometimes whiff at further range because deep hit has extra push back.
- n.5B/n.2B xx WFT
The most damaging WTF combo, but 5B only connects WFT at point-blank range.
- n.5B/n.2B xx 421B/C
421B doesn't whiff at further range.
- 66A xx 623C / WFT
More consistent than Near 5B and works at all range. 66A needs to hit at point-blank range.
- 2D xx 623A
One of the few low attack combos. Simple input by 632D 3A
- CD...
- 6D xx 236A x 3 / 421S / 623C / WFT
Combo into DP from both grab, a little less damage than 2C but knocks down. New combo from version 2.10.
- 2C
The most damaging basic follow up after forward throw, but the input timing is tight (only 2 frames).
- 4CD...
- n.5B xx 623C / WFT
The best basic / WFT combo after back throw. Walk forward a little and then press 5B.
- (walk backward) 5C
Far 5C is the most damaging follow up after back throw. Micro walk backward then input Far 5C, but the timing is very precise.
- (CD follow up combos above)
- (Light falling card hits) 5C / 66A xx 623C / WFT
Hit trade combo. Run towards the opponent after a light card is blocked, if opponent pokes with a medium slash he will get hit by the card, and Genjuro can follow up with Far 5C or 66A combo. Genjuro can also deflect the poke and perform the same combo.
- (Light falling card hits) 6D xx 236A x 3 / 421S / 623C / WFT
Virtually unblockable as both high and low.
- (Medium falling card hits) j.C
Can follow up with deep hit combos if Jump C hits low enough. Weapon deflect is not recommended because no follow up combo.
- j.C (Light falling card hits) (n.5B Combos)
Jump C doesn't need to be deep hit because the falling card has extra hit stun.
- Rage Explosion (Light falling card hits)
Unblockable hit or counter attack during hit stun. (Only follow up with lighting blade in very rare cases.)
- uj.S ...
- 66S
Unarmed combo, knocks down the opponent.
- 3D
Hits low and knocks down the opponent.
Corner
- 236A (Light falling card hits) 236A/B/C x 2
Rekka is quick enough to beat most pokes. The falling card needs to connect before the 2nd rekka because the card's hit stun is short. The C version of 2nd rekka deals the most damage.
- 236A (Light falling card hits) 66A xx 623C / WFT
Power up version of the above combo, 66A needs good timing to connect.
- 2B > (Light falling card hits) 236A x 3
If the opponent is afraid of the rekka combo and blocks high, far 2B become dangerous.
- (Light falling card hits) 6D xx 236A x 3 / 421S / 623C / WFT
Virtually unblockable as both high and low.
- BC (Light falling card hits) 5A xx 236A x 3
If the opponent is afraid of the rekka combo and blocks low. Far 5A is optional to deal a little more damage.
- BC (Light falling card hits) 66A xx 623C / WFT
Power up version of the above combo.
- CD / 4CD...
- n.5B xx 623C / WFT
The most damaging basic / WFT combo after throw into the corner.
Guard Crush
- n.5C...
After recovery...
- n.5B/n.2B xx 623C / WFT
Standard follow up.
- SSM
SSM follow up. (Be careful with opponent bursting to avoid it)
- 5C...
After recovery...
- 66A xx 623C / WFT
Standard follow up.
- n.5C / 5C...
Cancel recovery...
- Lighting Blade
Universal Issen combo.
Videos
Colors
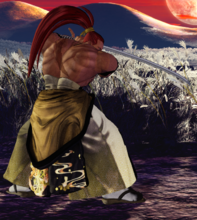
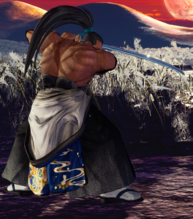
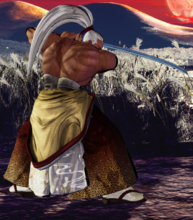
Default
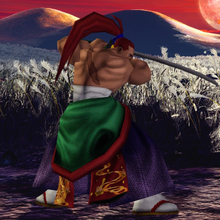
3D Retro Costume
Puzzle & Dragons Costume (Japan Only)
External Links
