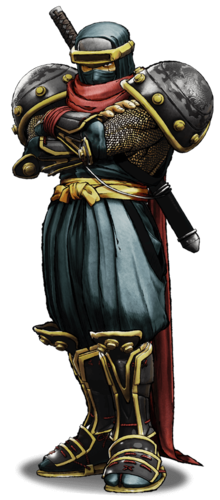
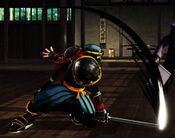
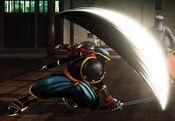
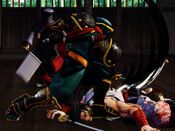
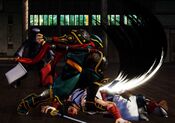
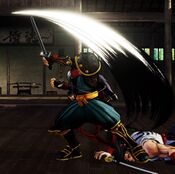
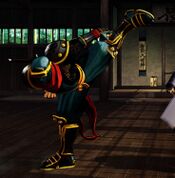
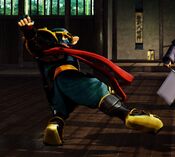
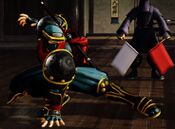
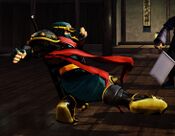
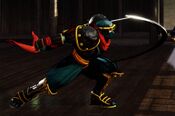
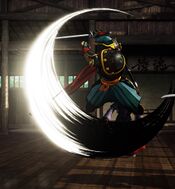
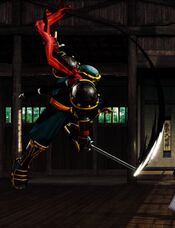
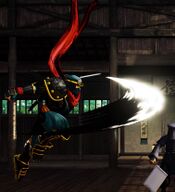
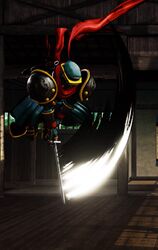
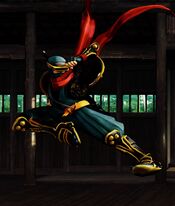
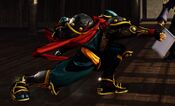
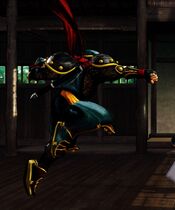
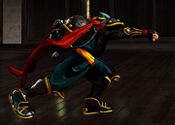
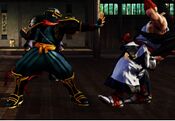
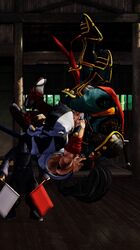
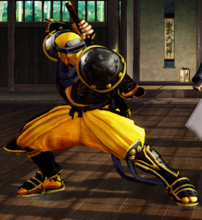
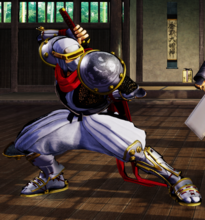
Hanzo Hattori
服部 半蔵, Hattori Hanzō
|
- Damage Taken: 100%
- Rage Factor: 0.14
- Rage Duration: 18 seconds
- Jump: 49 frames (Slow)
- Forward Walk Speed: 0.35 (Fast)
- Back Walk Speed: 0.3 (Fast)
- Dash Speed: 1.4 (Extremely Fast)
- Back Dash: 40 frames (Cancelable from frame 13)
- Weapon Pickup / Drop: 40 / 55 frames
|
Introduction
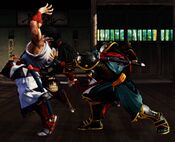
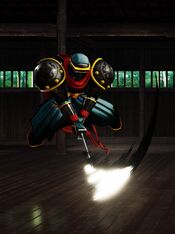
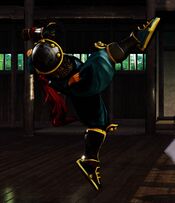
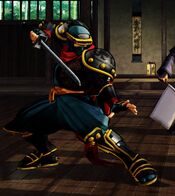
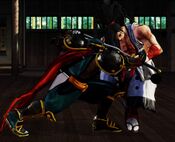
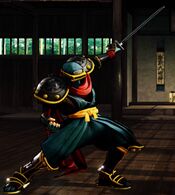
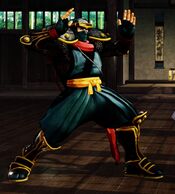
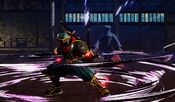
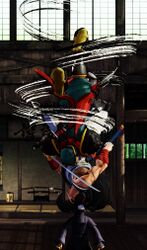
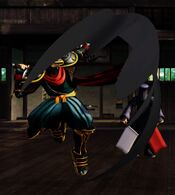
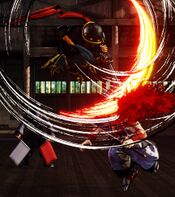
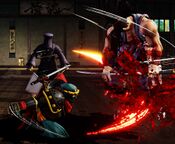
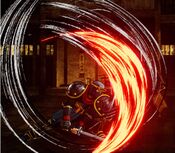
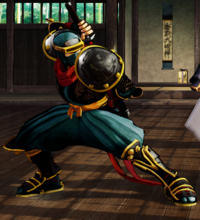
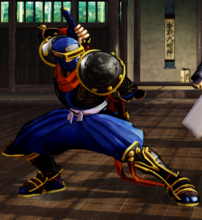
Hanzo is an extremely offensive character who comes equipped with some of the best mixup- and setplay-tools in the entire game.
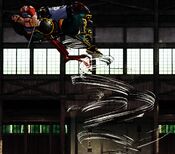
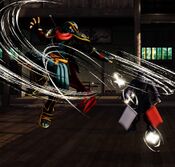
While his normal slashes are mostly built for close-quarters combat, he can pester the opponent from full screen with his Baku'en Ryuu or throwing star projectiles. Fortunately, Hanzo has nearly unrivaled mobility options which include multiple teleports, blisteringly fast run speed, a wall-jump and a great backdash. His running 66C overhead can cross up which, when coupled with his running slide or 66B and his running command grab, makes his approach extraordinarily powerful.
Once Hanzo has scored that crucial knockdown, things really go from bad to worse for the opponent as he can mix you up between his high- or low-hitting teleport slashes, his aforementioned running crossup or powerful command grabs. Hanzo struggles in the mid range since his anti-airs are rather mediocre and he lacks a good long-range 5C to control space with, so it is recommended you set up your vortex game quickly before falling behind on life.
Playstyle
 Hanzo Hattori is a mix-up emphasis zoner with very good mobility and powerful okizeme. Hanzo Hattori is a mix-up emphasis zoner with very good mobility and powerful okizeme.
|
| Strengths |
Weaknesses
|
- Excellent mobility: Hanzo has the fastest run in the game, along with a total of 7 different teleporting moves, allowing him to reposition himself easily.
- Strong grabs: Hanzo's command grabs are best-in-class. Not only are they quick and damaging, but their low recovery makes them far less punishable on whiff than a regular throw.
- Rage slinky: Hanzo's enhanced 214C "Slinky" fireball is an insanely powerful Oki tool, granting him an almost guaranteed mixup on the opponent's wakeup for as long as he has Rage.
- Mix-ups galore: With multiple high- and low-hitting options, crossups, teleports and the afforementioned suite of command grabs Hanzo can keep the opponent guessing for days.
|
- Bad air game: Hanzo lacks powerful jumping normals to control the airspace with. His jump is also very high and floaty and his anti-airs are below average.
- Risky: While Hanzo has a plethora of strong mixups, they are heavily punishable on block.
- Weak cancels: Hanzo has no special moves he can combo into on hit, severely limiting his damage potential from close punishes. His WFT also suffers from short range and and must be comboed from throws without a cancel.
- Rage reliant: Hanzo is extremely reliant on his enraged state to make the enemy respect his vortex game. While Rage lasts very long for Hanzo, he needs to take a lot of damage (or get frequent instant blocks) to go into it.
|
Gameplan
Hanzo has a fairly open-ended playstyle. While his strong offensive arsenal lends itself well to a rushdown-mixup kind of style, he can also be played as a hit-and-run type character, or even as a more traditional grappler. You can mix-and-match these playstyles as you see fit, alowing for some great flexibility during matches.
Neutral
Neutral with Hanzo can be challenging since you have only a few key pokes to control space with. Far 5B is a great button as it's fast and goes very far. You should frequently check the opponent walking into its range until you see them trying to predict it by deflecting or jumping. Your A or B slinky (214S) can be used as a longer range option to force a reaction from the enemy. Slide (66D) is safe if spaced well and knocks down on hit.
If you feel like you get too close to the corner, you can try to escape with 421B/D. Be careful, as your opponent can intercept both the startup and/or the recovery of your teleports if you are too predictable.
Hanzo has strong, undeflectable options for challenging a recoil on block, such as 2C, 5C, 66B or 66D. On your own recoils you can cancel into 214A or one of your various command teleports, such as 22S. Note that 22S will lose to quick block punishes such as 5B, but will generally win against slower answers such as a run-throw attempt, or a retalliatory 5C.
Once you get into Rage it's time to throw caution to the wind and get 214C out as quickly and as frequently as possible. Hanzo can follow up after the slinky and make dealing with it his opponent's problem. Cancelling your backdash into 214C is a great safe way to get a slinky out while giving you enough time to prepare your next mixup. Do it as long as your opponent lets you get away with it.
Okizeme
Without Rage, you will need to convince the opponent to respect your wakeup game by intercepting their escape attempts frequently and meaningfully. Get ready to airthrow (j.6D) a lot of people trying to neutraljump on your wakeup. Once they block, you can start to enforce your running mixup or threaten with your command grabs. Microwalk back -> 214A after a command grab will make the slinky whiff on purpose. You can use this to follow up with another running grab immediately afterwards.
With Rage, don't hesitate, drop a Slinky on their head and make them guess on your next mixup. Remember that your mixups become dramatically more safe if you mix them with the blockstun on Rage 214C, so go nuts! if 214C hits, you can usually follow up with j.C or Airthrow for additional damage and start the blender all over again.
Normal Moves
Far Slashes
5A
5A
|
| Damage
|
Guard
|
Startup
|
Active
|
Recovery
|
Total
|
Hit Adv
|
Block Adv
|
Guard Dmg
|
Cancel
|
Recoil
|
Deflectable
|
Unarmed
|
| 40
|
Mid
|
9
|
-
|
-
|
25
|
-4
|
-5 [-7]
|
5
|
Yes
|
Yes
|
Yes
|
No
|
Hanzo does a horizontal sword swipe in front of him
- Far reaching, cancellable light
- Quite slow for what it is
|
|
5B
5B
|
| Damage
|
Guard
|
Startup
|
Active
|
Recovery
|
Total
|
Hit Adv
|
Block Adv
|
Guard Dmg
|
Cancel
|
Recoil
|
Deflectable
|
Unarmed
|
| 100
|
Mid
|
11
|
-
|
-
|
39
|
-8
|
-12 [-10]
|
10
|
No
|
Yes
|
Yes
|
No
|
Hanzo takes a large step forward and strikes with his sword
- 11f Startup and long reach make 5B one of the better pokes in the game, capable of easily punishing a lot of buttons not intended to be punished if spaced
- Be mindful of deflect and the fact that Hanzo's own recoil options are sub-par
- Naturally pushes you forward on hit and block
|
|
5C
5C
|
| Damage
|
Guard
|
Startup
|
Active
|
Recovery
|
Total
|
Hit Adv
|
Block Adv
|
Guard Dmg
|
Cancel
|
Recoil
|
Deflectable
|
Unarmed
|
| 260 (180,80)
|
Mid
|
29
|
-
|
-
|
62
|
-5
|
-29 [-5]
|
25
|
No
|
Yes
|
No, Disarm
|
No
|
Hanzo jumps off the ground in a shallow arc before coming down with his sword
- 5C has been vastly improved since 5sp, so now you can actually use it sometimes!
- Far reaching, albeit slow heavy.
- It's airborne from frame 10 to 29, allowing you to jump over low hitboxes like Jubei's fireball or some low sweeps
- Since you are still considered airbourne on the first hit, it also blows deflects up for free
- At tip range, only the second hit will connect
- Surprisingly safe on block against unarmed opponents
- -2 on recoil cancel
|
|
2A
2A
|
| Damage
|
Guard
|
Startup
|
Active
|
Recovery
|
Total
|
Hit Adv
|
Block Adv
|
Guard Dmg
|
Cancel
|
Recoil
|
Deflectable
|
Unarmed
|
| 30
|
Mid
|
8
|
-
|
-
|
23
|
-3
|
-5 [-6]
|
5
|
Yes
|
Yes
|
Yes
|
No
|
Hanzo slashes from a crouching position
- Long range crouching jab
- Similar to 5A (but one frame faster)
- Slightly shorter range
|
|
2B
2B
|
| Damage
|
Guard
|
Startup
|
Active
|
Recovery
|
Total
|
Hit Adv
|
Block Adv
|
Guard Dmg
|
Cancel
|
Recoil
|
Deflectable
|
Unarmed
|
| 100
|
Mid
|
12
|
-
|
-
|
37
|
-5
|
-12 [-9]
|
10
|
Yes
|
Yes
|
Yes
|
No
|
Hanzo does a powerful downwards slash
- Standard-issue cancellable 2B
- Not really all that useful in throw combos, since it pushes the opponent out of Hanzo's WFT range
- Does more Damage than n.5B
|
|
2C
2C
|
| Damage
|
Guard
|
Startup
|
Active
|
Recovery
|
Total
|
Hit Adv
|
Block Adv
|
Guard Dmg
|
Cancel
|
Recoil
|
Deflectable
|
Unarmed
|
| 200
|
Low
|
18
|
-
|
-
|
54
|
KD
|
-28 [-13]
|
25
|
No
|
Yes
|
No
|
No
|
Hanzo does a powerful sword strike directly at the opponent's feet
- Damaging low sweep with decent range
- Preferred meterless ender after throw
|
|
Near Slashes
n.5A
n.5A
|
| Damage
|
Guard
|
Startup
|
Active
|
Recovery
|
Total
|
Hit Adv
|
Block Adv
|
Guard Dmg
|
Cancel
|
Recoil
|
Deflectable
|
Unarmed
|
| 30
|
Mid
|
5
|
-
|
-
|
16
|
+1
|
-5 [-5]
|
5
|
Yes
|
Yes
|
Yes
|
No
|
Hanzo does a quick strike with this sword
- Your 5 frame close normal
- Possible recoil cancel into 623C command grab for a nasty tick throw
|
|
n.5B
n.5B
|
| Damage
|
Guard
|
Startup
|
Active
|
Recovery
|
Total
|
Hit Adv
|
Block Adv
|
Guard Dmg
|
Cancel
|
Recoil
|
Deflectable
|
Unarmed
|
| 90
|
Mid
|
8
|
-
|
-
|
29
|
-1
|
-12 [-5]
|
10
|
Yes
|
Yes
|
Yes
|
No
|
Hanzo does a downwards sword strike close to his body
- Fast punish starter
- Combos into WFT
- Less pushback than 2B makes this your preferred followup after a deep crossup j.D
|
|
n.5C
n.5C
|
| Damage
|
Guard
|
Startup
|
Active
|
Recovery
|
Total
|
Hit Adv
|
Block Adv
|
Guard Dmg
|
Cancel
|
Recoil
|
Deflectable
|
Unarmed
|
| 220 (150,70)
|
Mid
|
12
|
-
|
-
|
63
|
-4
|
-28 [-8]
|
25
|
No
|
Yes
|
Disarm
|
No
|
Hanzo does a quick 2-hit sword attack from close range
- Near heavy slash with slightly above average speed and damage
- Gives Hanzo a threatening Guard Crush game
- Make sure to cancel the first hit into 623S on GC, or all you get is the weak second hit
|
|
Kicks
5D
5D
|
| Damage
|
Guard
|
Startup
|
Active
|
Recovery
|
Total
|
Hit Adv
|
Block Adv
|
Guard Dmg
|
Cancel
|
Recoil
|
Deflectable
|
Unarmed
|
| 50
|
Mid
|
13
|
-
|
-
|
28
|
-3
|
-6
|
5
|
Yes
|
No
|
No
|
Yes
|
Hanzo does an upwards kick attack
- Low-commitment, low-reward anti-air
- Has a recessed hurtbox, yet still loses to some deep jump-ins
- Will hit Earthquake standing
|
|
6D
6D
|
| Damage
|
Guard
|
Startup
|
Active
|
Recovery
|
Total
|
Hit Adv
|
Block Adv
|
Guard Dmg
|
Cancel
|
Recoil
|
Deflectable
|
Unarmed
|
| 40
|
Low
|
9
|
4
|
17~14
|
29
|
KD
|
-11~-8
|
5
|
No
|
No
|
No
|
Yes
|
Hanzo spins and sweeps the opponent's leg
- Fast knockdown low
- Safe-ish on block
- Good in scrambles
|
|
2D
2D
|
| Damage
|
Guard
|
Startup
|
Active
|
Recovery
|
Total
|
Hit Adv
|
Block Adv
|
Guard Dmg
|
Cancel
|
Recoil
|
Deflectable
|
Unarmed
|
| 20
|
Low
|
5
|
4
|
9~6
|
17
|
0~+3
|
-3~0
|
5
|
No
|
No
|
No
|
Yes
|
Hanzo does a quick low kick
- Your other 5f option, and generally your preferred one
- Decent get off me-button, as it's fast and fairly low-risk
- Very low damage
|
|
3D
3D
|
| Damage
|
Guard
|
Startup
|
Active
|
Recovery
|
Total
|
Hit Adv
|
Block Adv
|
Guard Dmg
|
Cancel
|
Recoil
|
Deflectable
|
Unarmed
|
| 70
|
Low
|
12
|
2
|
29~28
|
42
|
KD
|
-15~-14
|
5
|
No
|
No
|
No
|
Yes
|
Hanzo crouches down and does a far-reaching sweep
- Slightly more range than 6D, but also worse on block
- Pretty underwhelming button all-around
|
|
Dash Normals
66A
66A
|
| Damage
|
Guard
|
Startup
|
Active
|
Recovery
|
Total
|
Hit Adv
|
Block Adv
|
Guard Dmg
|
Cancel
|
Recoil
|
Deflectable
|
Unarmed
|
| 30
|
Mid
|
6
|
-
|
-
|
20
|
-2
|
-19 [-5]
|
5
|
Yes
|
Yes
|
Yes
|
No
|
Hanzo does a close range slash from his run
- Fast, cancellable running light
- Unfortunately terrible on block and deflectable
- Becomes -8 on recoil cancel
|
|
66B
66B
|
| Damage
|
Guard
|
Startup
|
Active
|
Recovery
|
Total
|
Hit Adv
|
Block Adv
|
Guard Dmg
|
Cancel
|
Recoil
|
Deflectable
|
Unarmed
|
| 150
|
Low
|
15
|
-
|
-
|
36
|
KD(+103)
|
-35 [-5]
|
10
|
No
|
Yes
|
No
|
No
|
Hanzo crouches down and slashes the opponent's feet
- Running Version of Hanzo's 2C
- Knocks down on hit
- Forms one part of Hanzos running mixup
- Also -8 on recoil cancel
|
|
66C
66C
|
| Damage
|
Guard
|
Startup
|
Active
|
Recovery
|
Total
|
Hit Adv
|
Block Adv
|
Guard Dmg
|
Cancel
|
Recoil
|
Deflectable
|
Unarmed
|
| 160
|
High
|
25
|
2
|
-
|
82
|
KD(+46)
|
-26~-27
|
20
|
No
|
No
|
No
|
No
|
Hanzo jumps and does a powerful slash around his body
- Overhead move that can crossup or stay same side
- Great mixup tool, becomes incredibly ambiguous when spaced correctly.
- Very punishable on block
|
|
66D
66D
|
| Damage
|
Guard
|
Startup
|
Active
|
Recovery
|
Total
|
Hit Adv
|
Block Adv
|
Guard Dmg
|
Cancel
|
Recoil
|
Deflectable
|
Unarmed
|
| 70
|
Low
|
9
|
12
|
24~13
|
44
|
KD
|
-20~-9
|
5
|
No
|
No
|
No
|
Yes
|
Hanzo does a running slide kick
- Can low profile some attacks
- Fairly safe, if you can make it hit at the tip
|
|
Air Normals
j.A
j.A
|
| Damage
|
Guard
|
Startup
|
Active
|
Recovery
|
Total
|
Hit Adv
|
Block Adv
|
Guard Dmg
|
Cancel
|
Recoil
|
Deflectable
|
Unarmed
|
| 40
|
High
|
9
|
-
|
-
|
-
|
-
|
-
|
5
|
No
|
No
|
No
|
No
|
Hanzo does a quick jumping slash directly in front of him
- Standard jumping light
- Decent hitbox
|
|
j.B
j.B
|
| Damage
|
Guard
|
Startup
|
Active
|
Recovery
|
Total
|
Hit Adv
|
Block Adv
|
Guard Dmg
|
Cancel
|
Recoil
|
Deflectable
|
Unarmed
|
| 100
|
High
|
11
|
-
|
-
|
-
|
-
|
-
|
10
|
No
|
No
|
No
|
No
|
Hanzo does a Strider Hiryū-looking jumping slash
- Actually a pretty good air-to-air because of its generous reach and speed
- Gives Hanzo a restand on air hit, which he enjoys greatly
|
|
j.C
j.C
|
| Damage
|
Guard
|
Startup
|
Active
|
Recovery
|
Total
|
Hit Adv
|
Block Adv
|
Guard Dmg
|
Cancel
|
Recoil
|
Deflectable
|
Unarmed
|
| 150
|
High
|
13
|
-
|
-
|
-
|
-
|
-
|
20
|
No
|
No
|
No
|
No
|
Hanzo does a powerful slash directly below him
- Strong jump-in with a low hitbox
- Can connect n.5C on a deep hit
|
|
j.D
j.D
|
| Damage
|
Guard
|
Startup
|
Active
|
Recovery
|
Total
|
Hit Adv
|
Block Adv
|
Guard Dmg
|
Cancel
|
Recoil
|
Deflectable
|
Unarmed
|
| 30
|
High
|
7
|
-
|
-
|
-
|
-
|
-
|
5
|
No
|
No
|
No
|
Yes
|
Hanzo does a jumping kick
- Decent cross-up
- Can go into n.5B xx WFT on a deep hit
|
|
Unarmed Normals
u.5S
u.5S
|
| Damage
|
Guard
|
Startup
|
Active
|
Recovery
|
Total
|
Hit Adv
|
Block Adv
|
Guard Dmg
|
Cancel
|
Recoil
|
Deflectable
|
Unarmed
|
| 50
|
Mid
|
8
|
-
|
-
|
26
|
+2
|
-3
|
5
|
No
|
No
|
No
|
Only
|
Hanzo punches forward
- Only slightly faster than his armed 5A but without the range or cancellability
- Safe on block, at least
|
|
u.2S
u.2S
|
| Damage
|
Guard
|
Startup
|
Active
|
Recovery
|
Total
|
Hit Adv
|
Block Adv
|
Guard Dmg
|
Cancel
|
Recoil
|
Deflectable
|
Unarmed
|
| 50
|
Mid
|
9
|
-
|
-
|
31
|
-2
|
-7
|
5
|
No
|
No
|
No
|
Only
|
Hanzo punches from a crouching position
- Like u.5S but somehow worse?
- Slower startup and worse on hit/block
|
|
ju.S
ju.S
|
| Damage
|
Guard
|
Startup
|
Active
|
Recovery
|
Total
|
Hit Adv
|
Block Adv
|
Guard Dmg
|
Cancel
|
Recoil
|
Deflectable
|
Unarmed
|
| 50
|
High
|
8
|
-
|
-
|
-
|
-
|
-
|
5
|
No
|
No
|
No
|
Only
|
Hanzo punches the air in front of him
- Decent air-to-air that wins more often than it should
- Somewhat outclassed by j.6D
|
|
u.66S
u.66S
|
| Damage
|
Guard
|
Startup
|
Active
|
Recovery
|
Total
|
Hit Adv
|
Block Adv
|
Guard Dmg
|
Cancel
|
Recoil
|
Deflectable
|
Unarmed
|
| 50
|
Mid
|
7
|
-
|
-
|
30
|
KD
|
-8
|
5
|
No
|
No
|
No
|
Only
|
Hanzo does a dashing punch.
- Knocks down on hit
- Actually a good normal!
- Try to get your weapon back please
|
|
Universal Mechanics
Guard Break
Guard Break (Throw) 5C+D / 6C+D 5C+D / 6C+D 4C+D 4C+D
|
| Version
|
Damage
|
Guard
|
Startup
|
Active
|
Recovery
|
Total
|
Hit Adv
|
Block Adv
|
Guard Dmg
|
Cancel
|
Recoil
|
Deflectable
|
Unarmed
|
| Neutral / Forward
|
0
|
No
|
3
|
-
|
71
|
74
|
+20
|
-
|
-
|
-
|
-
|
-
|
Yes
|
| Back
|
0
|
No
|
5
|
-
|
69
|
74
|
+25
|
-
|
-
|
-
|
-
|
-
|
Yes
|
Universal throw.
- Can combo into 2C or n.5C in the corner
- Can combo into 2B as well, but WFT won't connect afterwards.
|
|
Surprise Attack
Surprise Attack (Overhead)
5B+C Armed Overhead Armed Overhead Unarmed Overhead Unarmed Overhead
|
| Version
|
Damage
|
Guard
|
Startup
|
Active
|
Recovery
|
Total
|
Hit Adv
|
Block Adv
|
Guard Dmg
|
Cancel
|
Recoil
|
Deflectable
|
Unarmed
|
| Armed
|
80
|
High
|
21
|
-
|
-
|
59
|
+2
|
-12
|
10
|
No
|
No
|
No
|
No
|
Universal overhead.
- Generally Hanzo's least rewarding Mixup option.
- -12 on block but very short range, so you can't space it.
|
| Unarmed
|
60
|
High
|
17
|
-
|
-
|
62
|
KD
|
-23
|
10
|
No
|
No
|
No
|
Only
|
Universal unarmed overhead
- Knocks down the opponent.
|
|
Dodge
Dodge
5A+B
|
| Damage
|
Guard
|
Startup
|
Active
|
Recovery
|
Total
|
Hit Adv
|
Block Adv
|
Guard Dmg
|
Cancel
|
Recoil
|
Deflectable
|
Unarmed
|
| N/A
|
-
|
1
|
16
|
22
|
38
|
-
|
-
|
-
|
-
|
-
|
-
|
Yes
|
Universal dodge.
- Avoids all attacks for a brief moment
- Mainly used to avoid throws
Complete invincibility from frames 1 to 10. Strike invincibility from frames 11 to 16.
|
|
Stance Break
Stance Break
A+B during Just Defense
|
| Damage
|
Guard
|
Startup
|
Active
|
Recovery
|
Total
|
Hit Adv
|
Block Adv
|
Guard Dmg
|
Cancel
|
Recoil
|
Deflectable
|
Unarmed
|
| 0
|
Mid
|
5
|
-
|
-
|
55
|
KD
|
-24
|
-
|
No
|
-
|
-
|
Yes
|
Universal Stance Break.
- Actually a decent get-off-me option for Hanzo, as his defense is otherwise lacking
- Learn to use this on your wakeup against meaties
|
|
Counter / Blade Catch
Counter / Blade Catch
236A+B Counter Counter Blade Catch Blade Catch
|
| Version
|
Damage
|
Guard
|
Startup
|
Active
|
Recovery
|
Total
|
Hit Adv
|
Block Adv
|
Guard Dmg
|
Cancel
|
Recoil
|
Deflectable
|
Unarmed
|
| Armed
|
0
|
N/A
|
2
|
11
|
34
|
46
|
+35~+59
|
-
|
-
|
-
|
-
|
-
|
No
|
Universal counter.
- You generally wanna go into 5C or SSM on connect
- Dash 2B xx WFT works as well if you're quick
|
| Unarmed
|
0
|
N/A
|
2
|
12
|
9
|
22
|
KD
|
-
|
-
|
-
|
-
|
-
|
Only
|
Universal unarmed counter
- Will disarm and knock away your opponent regardless of slash level countered
|
|
Rage Explosion
Rage Explosion
5A+B+C
|
| Damage
|
Guard
|
Startup
|
Active
|
Recovery
|
Total
|
Hit Adv
|
Block Adv
|
Guard Dmg
|
Cancel
|
Recoil
|
Deflectable
|
Unarmed
|
| 0
|
No
|
21
|
1
|
-
|
58
|
0
|
-
|
-
|
-
|
-
|
-
|
No
|
Universal Rage Explosion.
|
|
Lightning Blade
Lightning Blade (Issen)
5A+B+C during Rage Explosion
|
| Damage
|
Guard
|
Startup
|
Active
|
Recovery
|
Total
|
Hit Adv
|
Block Adv
|
Guard Dmg
|
Cancel
|
Recoil
|
Deflectable
|
Unarmed
|
| 300~709
|
Mid
|
9
|
-
|
-
|
-
|
KD
|
-44
|
-
|
-
|
-
|
No
|
No
|
Universal reversal super while in Rage Explosion. Has full invincibility on frame 2. Damage scales based on remaining rage and health.
|
|
Command Moves
Rolling Aerial Attack
Rolling Aerial Attack
(close)j.6D STOP JUMPING OUT OF MY OKI STOP JUMPING OUT OF MY OKI
|
| Damage
|
Guard
|
Startup
|
Active
|
Recovery
|
Total
|
Hit Adv
|
Block Adv
|
Guard Dmg
|
Cancel
|
Recoil
|
Deflectable
|
Unarmed
|
| 112
|
No
|
4
|
-
|
-
|
-
|
KD
|
-
|
-
|
-
|
-
|
-
|
Yes
|
Hanzo's unique air throw
- An excellent air to air option
- Very fast, so it usually wins out against even preemptive jump buttons
|
|
Wall Jump
Wall Jump
(near wall)9 Wall Jump Wall Jump
|
| Damage
|
Guard
|
Startup
|
Active
|
Recovery
|
Total
|
Hit Adv
|
Block Adv
|
Guard Dmg
|
Cancel
|
Recoil
|
Deflectable
|
Unarmed
|
| -
|
-
|
-
|
-
|
-
|
-
|
-
|
-
|
-
|
-
|
-
|
-
|
Yes
|
Hanzo can jump near walls.
|
|
Backdash
Backdash
44 Do a flip! Do a flip!
|
| Damage
|
Guard
|
Startup
|
Active
|
Recovery
|
Total
|
Hit Adv
|
Block Adv
|
Guard Dmg
|
Cancel
|
Recoil
|
Deflectable
|
Unarmed
|
| -
|
-
|
-
|
-
|
-
|
40
|
-
|
-
|
-
|
-
|
-
|
-
|
Yes
|
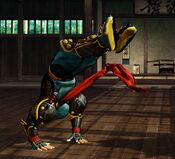
Although not a "real" command move, Hanzo's backdash deserves special mention, since it functions differently from almost any other backdash in the game. On its own, it takes 40 frames to complete and moves you backwards a little more than half screen. This makes proper repositioning with backdash almost impossible. However, the middle of the animation (pretty much the entire part where Hanzo's hands touch the ground) is special cancellable, and Hanzo has some great ways to abuse this:
The most obvious cancel here is backdash into slinky (214S), this allows you to set up a slinky in neutral with very little risk, as it's surprisingly hard to chase after Hanzo. You can also chain your backdash into any of your teleports for some very tricky movement. For 22S, simply input 44~1(5)2S and for 421S input 4421S. If you wanna be cheeky, cancel your backdash into 421D (On player 1 side) or 421B (On player 2 side) to show up directly behind your opponent, setting them up for a command grab.
The second part of the animation is airbourne - as all other backdashes in the game are - and can be cancelled with aerial special moves (In Hanzo's case j.236S). This isn't terribly useful since Hanzo is too far away to hit the opponent unless they gave chase right away.
|
|
Special Moves
Ninja Exploding Dragon Blast
Ninja Exploding Dragon Blast
214S
|
| Version
|
Damage
|
Guard
|
Startup
|
Active
|
Recovery
|
Total
|
Hit Adv
|
Block Adv
|
Guard Dmg
|
Cancel
|
Recoil
|
Deflectable
|
Unarmed
|
| A
|
60
|
Mid
|
24
|
-
|
-
|
54
|
KD
|
-5
|
5
|
-
|
-
|
-
|
Yes
|
Also referred to as "Fire Slinky" or just "Slinky". Hanzo summons a fireball that travels along the ground
- Slow grounded fireball that shines as an okizeme tool
- Bad in fireball wars, if you were wondering
- Your main goal after a knockdown will be to make your opponent respect it, so you can apply your vortex game
- A version will just about reach after 623S, which means you can make it whiff on purpose by doing microwalk back 214A
|
| B
|
60
|
Mid
|
28
|
-
|
-
|
59
|
KD
|
-6
|
5
|
-
|
-
|
-
|
Yes
|
- Reaches about 3/4 screen.
- Has a little bit more startup and recovery than the A version
|
| C
|
60
|
Mid
|
32
|
-
|
-
|
64
|
KD
|
-7
|
5
|
-
|
-
|
-
|
Yes
|
- Reaches full screen.
- Longest startup and recovery.
|
| Rage
|
120 (12,18x6)
|
Mid
|
20
|
-
|
-
|
54
|
KD
|
+23
|
7
|
-
|
-
|
-
|
Yes
|
- The cornerstone of Hanzo's offense and one of the best Rage Specials in the game
- Comes out even faster than the A version and has seven hits, putting the opponent in prolonged blockstun if done meaty
- Can not be reflected and eats through stance break
- On Hit, it allows powerful followups such as j.C or Airthrow
- Try to get it out it as much as possible while you have access to it
|
|
Ninja Shrike Dash
Ninja Shrike Dash
(close)623S
|
| Version
|
Damage
|
Guard
|
Startup
|
Active
|
Recovery
|
Total
|
Hit Adv
|
Block Adv
|
Guard Dmg
|
Cancel
|
Recoil
|
Deflectable
|
Unarmed
|
| A
|
180
|
No
|
5
|
-
|
-
|
53
|
KD
|
-
|
-
|
-
|
-
|
-
|
Yes
|
Hanzo's izuna drop style command grab
- Arguably the best command grab in the game
- Almost half the recovery of a regular throw, while doing generally more damage, having more range and leaving you with better Okizeme
- A version is the fastest, but has the least range and damage, and recovers the slowest
|
| B
|
200
|
No
|
8
|
-
|
-
|
49
|
KD
|
-
|
-
|
-
|
-
|
-
|
Yes
|
- A little bit slower than your A grab, but more range, less recovery and better damage
- Becomes your Max Damage Grab immediately out of a run
|
| C
|
230
|
No
|
12
|
-
|
-
|
45
|
KD
|
-
|
-
|
-
|
-
|
-
|
Yes
|
- Has the longest startup
- Most Damaging, least recovery, longest range
- Actually outdamages most regular throw combos in the game
- Invaluable mixup tool
|
|
Whistling Shrike Drop
Whistling Shrike Drop
(close)6623C
|
| Damage
|
Guard
|
Startup
|
Active
|
Recovery
|
Total
|
Hit Adv
|
Block Adv
|
Guard Dmg
|
Cancel
|
Recoil
|
Deflectable
|
Unarmed
|
| 180
|
No
|
5
|
-
|
-
|
41
|
KD
|
-
|
-
|
-
|
-
|
-
|
Yes
|
Hanzo's command grab while dashing
- Has even less recovery than his 623S series
- Similar range, damage and speed as 623A
- To compensate, you throw yourself towards the corner during it
- While the enemy is knocked down, you can attempt to corpse hop 66C, crossup Teleport or simply jump over, but you'll give up your Oki in the process
- Only comes out with the heavy slash button, so you still have access to 623B as a more damaging, albeit slower option
|
|
Ninja Silencer
Ninja Silencer
22S
|
| Damage
|
Guard
|
Startup
|
Active
|
Recovery
|
Total
|
Hit Adv
|
Block Adv
|
Guard Dmg
|
Cancel
|
Recoil
|
Deflectable
|
Unarmed
|
| -
|
-
|
16
|
-
|
-
|
44
|
-
|
-
|
-
|
-
|
-
|
-
|
Yes
|
Hanzo does a teleport animation then phases out briefly before reappearing at the same position.
- Fast and difficult to react to
- Good as a fake out that leaves you with most of your options intact when done on Oki
- Decently useful as a recoil cancel
|
|
Ninja Mon Dance
Ninja Mon Dance
421A/B/C/D
|
| Version
|
Damage
|
Guard
|
Startup
|
Active
|
Recovery
|
Total
|
Hit Adv
|
Block Adv
|
Guard Dmg
|
Cancel
|
Recoil
|
Deflectable
|
Unarmed
|
| A / C
|
N/A
|
-
|
16
|
-
|
-
|
70
|
-
|
-
|
-
|
-
|
-
|
-
|
Yes
|
| B / D
|
N/A
|
-
|
16
|
-
|
-
|
70
|
-
|
-
|
-
|
-
|
-
|
-
|
Yes
|
Hanzo does a teleport animation then goes to one of the 4 positions (It's the same regardless of P1 or P2 side)
- A version: Places Hanzo in the air towards the left side of screen. You can hold left during this version to fall at a slightly different angle.
- B version: Places Hanzo near the ground on the left side of the screen.
- C version: Places Hanzo in air on the right side of the screen. You can hold right during this version to fall at a slightly different angle.
- D version: Places Hanzo near the ground on the right side of the screen.
It has full invincibility from frame 21 until he shows up.
|
|
Falling Ninja Cicada Larva
Falling Ninja Cicada Larva
63214A+D
|
| Damage
|
Guard
|
Startup
|
Active
|
Recovery
|
Total
|
Hit Adv
|
Block Adv
|
Guard Dmg
|
Cancel
|
Recoil
|
Deflectable
|
Unarmed
|
| 110
|
High
|
57
|
-
|
-
|
-
|
KD
|
-46
|
12
|
-
|
-
|
-
|
Yes
|
Hanzo teleports, then waits for the opponent to be on the ground (if they aren't already) before showing up above with an overhead attack. (If the opponent is in the air while he disappears, the attack will be delayed.)
- Hanzo attacks 21 frames after he shows up against grounded opponents.
- Unfortunately, both fairly reactable and also absolutely terrible on block, so think twice before throwing it out!
- Its damage becomes 90 while disarmed.
|
|
Gashing Ninja Cicada Larva
Gashing Ninja Cicada Larva
63214B+D
|
| Damage
|
Guard
|
Startup
|
Active
|
Recovery
|
Total
|
Hit Adv
|
Block Adv
|
Guard Dmg
|
Cancel
|
Recoil
|
Deflectable
|
Unarmed
|
| 90
|
Low
|
50
|
-
|
-
|
-
|
KD
|
-28
|
12
|
-
|
-
|
-
|
Yes
|
Hanzo teleports, then waits for the opponent to be on the ground (if they aren't already) before showing up from below with a sweeping attack. (If the opponent is in the air while he disappears, the attack will be delayed.)
- Hanzo attacks 13 frames after he shows up.
- Generally the more useful of the two feints, since it's faster and doesn't leave you outright SSM punishable on block
- If done just before the opponent ukemi-rolls through you, Hanzo will re-allign to the side he was on when starting the animation, resulting in a crossup low.
- Its damage becomes 70 while disarmed.
|
|
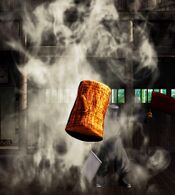
Self-Sacrifice Stratagem of Buddha
Self-Sacrifice Stratagem of Buddha
(During hitstun)624624A+D
|
| Damage
|
Guard
|
Startup
|
Active
|
Recovery
|
Total
|
Hit Adv
|
Block Adv
|
Guard Dmg
|
Cancel
|
Recoil
|
Deflectable
|
Unarmed
|
| 110/70
|
High
|
57
|
-
|
-
|
-
|
KD
|
-46
|
12
|
-
|
-
|
-
|
Yes
|
Hanzo leaves behind a log and appears from the air to counterattack his enemy.
- Can only be done during grounded hitstun.
- Damage becomes 70 while disarmed.
|
|
Demonic Self-Sacrifice Stratagem
Demonic Self-Sacrifice Stratagem
(During hitstun)624624B+D
|
| Damage
|
Guard
|
Startup
|
Active
|
Recovery
|
Total
|
Hit Adv
|
Block Adv
|
Guard Dmg
|
Cancel
|
Recoil
|
Deflectable
|
Unarmed
|
| 90/70
|
Low
|
50
|
-
|
-
|
-
|
KD
|
-28
|
12
|
-
|
-
|
-
|
Yes
|
Hanzo leaves behind a log and appears from the ground to counterattack his enemy
- Can only be done during grounded hitstun.
- Does 70 damage when disarmed.
|
|
Ninja Windsplitter
Ninja Windsplitter
j.236S
|
| Version
|
Damage
|
Guard
|
Startup
|
Active
|
Recovery
|
Total
|
Hit Adv
|
Block Adv
|
Guard Dmg
|
Cancel
|
Recoil
|
Deflectable
|
Unarmed
|
| A
|
60
|
High
|
21
|
-
|
-
|
-
|
-26
|
-31
|
5
|
-
|
-
|
-
|
Yes
|
| B
|
80 [60,20]
|
High
|
23
|
-
|
-
|
-
|
-26
|
-31
|
10
|
-
|
-
|
-
|
Yes
|
| C
|
100 [60,20,20]
|
High
|
25
|
-
|
-
|
-
|
-26
|
-31
|
15
|
-
|
-
|
-
|
Yes
|
Hanzo throws shuriken at the opponent.
- Can be performed during backdash and air teleports.
- Reliably nullifies/punishes diagonal projectiles like Mina's anti-air arrow or Iroha's D petal
- Usually safe if spaced well, though don't plan on using this move for full-on zoning anytime soon.
- Hanzo stops his jump arc while doing this move, so you can try to bait anti-air Issen with it, if you're really feeling yourself.
|
|
Supers
Weapon Flipping Technique
Sealed Scroll: Shadow Particle
236B+C
|
| Damage
|
Guard
|
Startup
|
Active
|
Recovery
|
Total
|
Hit Adv
|
Block Adv
|
Guard Dmg
|
Cancel
|
Recoil
|
Deflectable
|
Unarmed
|
| 384(448)
|
Mid
|
1+19
|
-
|
-
|
-
|
KD
|
-51
|
-
|
-
|
-
|
-
|
No
|
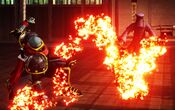
Hanzo Summons a large fire pillar around him
- Available only during Max Rage or Rage Explosion
- Disarms on hit
- Large hitbox for anti-air but slow start up
- Will always combo from both normal throws if done immediately afterwards
Will whiff only on Wu Ruixiang after a backthrow
|
|
Super Special Move
True Whistling Shrike Drop -Ruin Embers-
641236C+D
|
| Damage
|
Guard
|
Startup
|
Active
|
Recovery
|
Total
|
Hit Adv
|
Block Adv
|
Guard Dmg
|
Cancel
|
Recoil
|
Deflectable
|
Unarmed
|
| 690
|
Mid
|
10+20
|
-
|
-
|
-
|
KD
|
-45
|
-
|
-
|
-
|
-
|
No
|
Hanzo slashes the opponent, grabbing them from behind, before throwing a pile of bombs around them
- Standard SSM with short reach
- Available only once per match
|
|
Combos
Midscreen
- (n.5B/2B) xx WFT
Punish combo at close range.
- (5CD/4CD)...
- 2C
Optimal follow up after throw, but command throws have better risk reward ratio.
- WFT
Disarm the opponent, but sometimes it's better to keep the rage. Back throw WFT whiffs against Ruixiang.
- Lightning Blade
Issen only deals more damage than WFT at almost full gauge.
- Rage 214C...
- j.C
Signature high damage combo, keeps the opponent standing for more pressure. If the fireball hits at close range, the timing for jump C is tight .
- j.6D
Easier to connect than jump C at close range, but knocks down the opponent.
- 66C / 66B / n.5C
Cross up mixup. Doesn't combo if the opponent doesn't block the fireball. (66B doesn't combo)
- 2D
If the opponent stand blocks, 2D combos with the last hit of rage fireball, and it connects at any range.
- Lightning Blade
Issen combo.
- j.D n.5B / 2B xx WFT
Jump D must deep hit at point-blank range or cross up. 2B only connects WFT while cross up.
- j.C n.5C / 2C / WFT / Lightning Blade
Deep hit combos.
Corner
- (4CD/5CD) n.5C
More damage than 2C at the corner.
- (4CD/5CD) n.5B / 2B xx WFT
More damage for WFT combo at the corner.
- Rage 214C WFT...
Connects at the distance outside of the range of 623B, or when the rage fireball hits meaty.
Guard Crush
- n.5C...
Combo from second hit...
- Lightning Blade
Universal Issen combo, combo from second hit.
- 5C...
Combo from second hit...(He can't cancel the first hit so all he can do is to combo the second hit)
- WFT
More damage than just WFT.
- Lightning Blade
Universal Issen combo, combo from second hit.
- n.5C...
Cancel second hit...
- 623C...
Whiff grab...
- 5C
Best damage out of GC without rage.
- (n.5B/2B) xx WFT
WFT combo up close.
- 2C
Knocks down.
- Rage 214C...
See follow up from above, it works so why not look cool?
Videos
Colors
External Links
