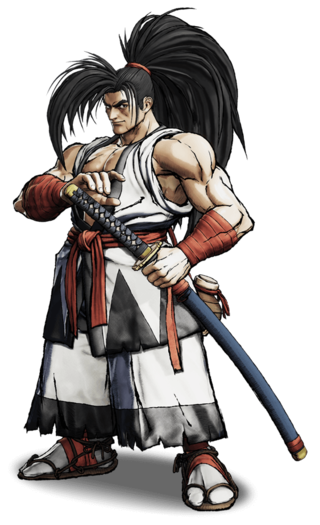
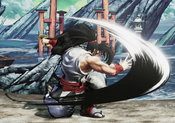
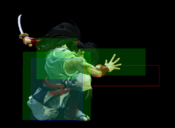
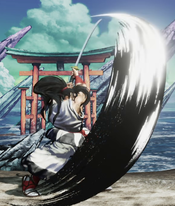
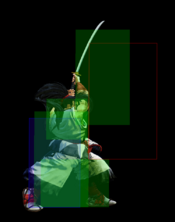
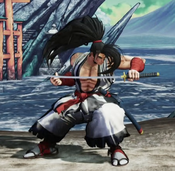
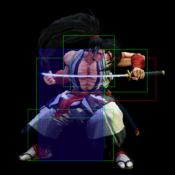
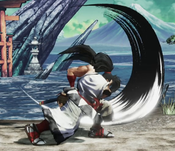
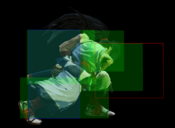
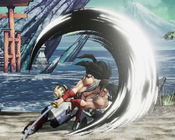
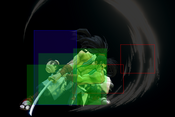
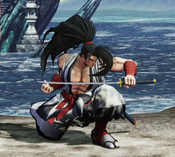
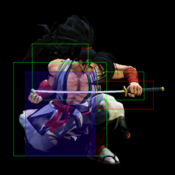
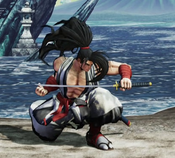
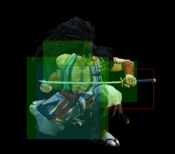
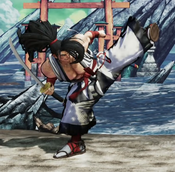
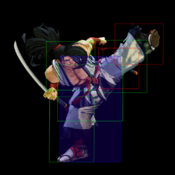
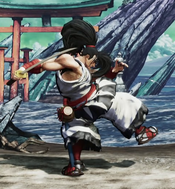
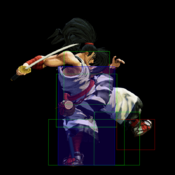
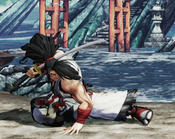
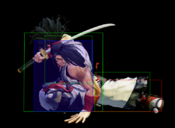
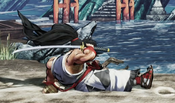
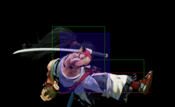
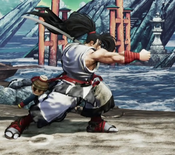
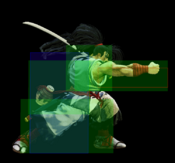
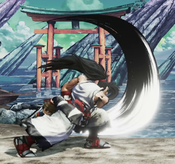
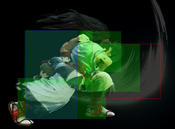
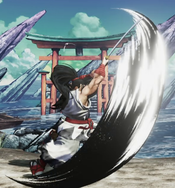
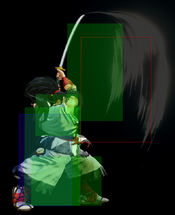
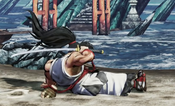
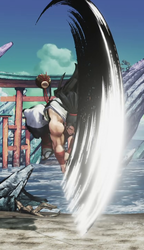
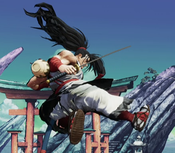
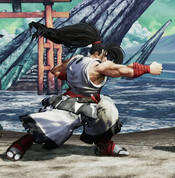
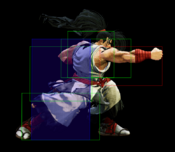
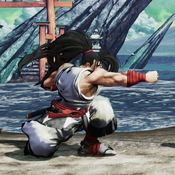
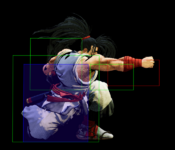
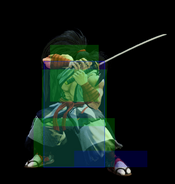
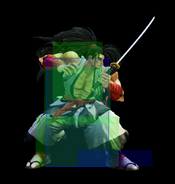
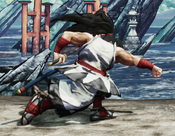
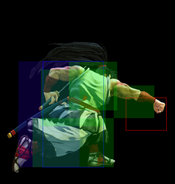
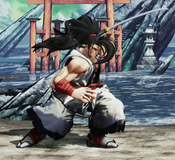
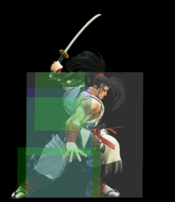
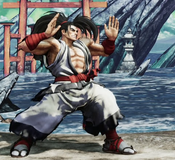
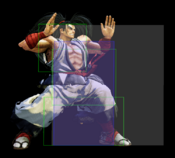
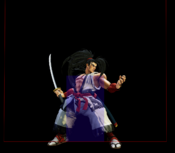
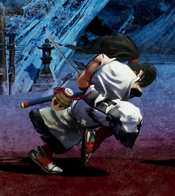
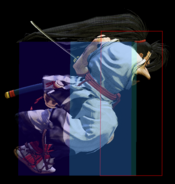
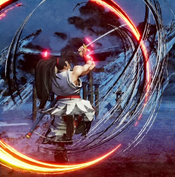
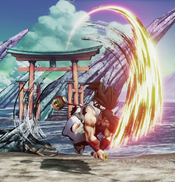
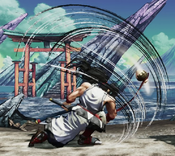
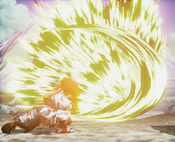
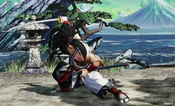
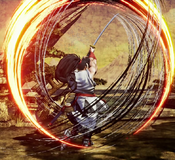
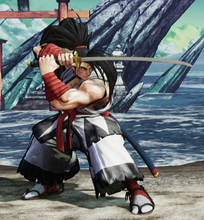
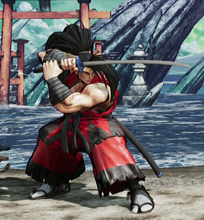
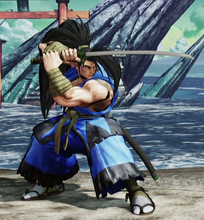
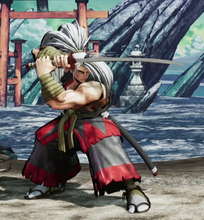
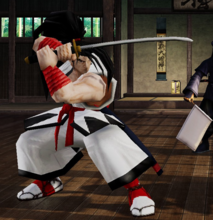
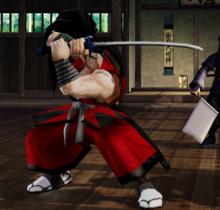
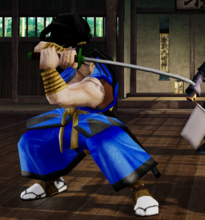
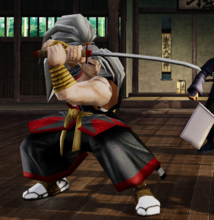
Haohmaru
覇王丸, Haōmaru
|
- Damage Taken: 100%
- Rage Factor: 0.24
- Rage Duration: 10 seconds
- Jump: 46 frames (Average)
- Forward Walk Speed: 0.3 (Average)
- Back Walk Speed: 0.23 (Average)
- Dash Speed: 1.25 (Average)
- Back Dash: 27 frames
- Weapon Pickup / Drop: 40 / 31 frames
|
Introduction
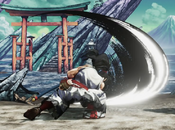
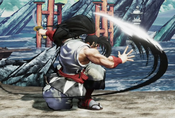
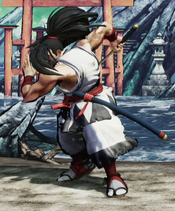
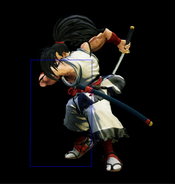
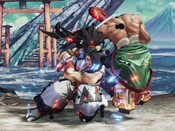
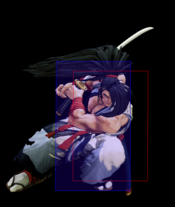
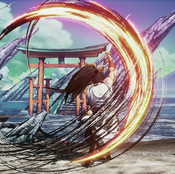
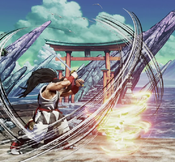
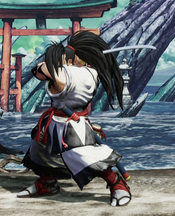
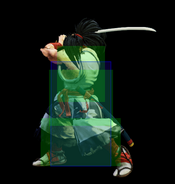
A ronin with a samurai spirit, Haohmaru fights with traditional samurai swordplay. He is a balanced warrior that excels in multiple gameplay styles. He lacks mixup tools, but he makes up for it with high damage output.
Haohmaru can play a strong mid-range zoning game that controls the space around him. Opponents must respect this control to avoid damage from his powerful attacks. Moves like 5B, Cyclone Slash, and Crescent Moon Slash can keep out rushdown oriented opponents. Using these moves and advancing forward allows Haohmaru to play a slow, methodical offense.
Haohmaru also has strong tools for a rushdown offense. His 66A is fast and can be used to pressure opponents. 66B can be used in whiff punish and hit confirm scenarios to combo to his high damage Crescent Moon Slash. He can also fight well in the air with j.B which has good horizontal range. For jump-ins, j.C is a powerful attack with good hitboxes.
Haohmaru's WFT is especially strong. It starts up fast and covers a large amount of screen area. This allows it to be used as a combo ender, an anti-air, and a punish. Haohmaru with rage is extremely dangerous. Many opponents will opt to retreat and defend to try to avoid getting hit by WFT.
Haohmaru has a few weaknesses. He relies greatly on his deflectable normals. His low and unarmed options are poor. This makes him susceptible to weapon deflects. Haohmaru also has poor mixup options, so he may have difficulty opening up especially defensive opponents.
With his versatile moveset and high damage, Haohmaru is well equipped to fight the rest of the cast.
Playstyle
 Haohmaru is a well-rounded "shoto"-style character with strong neutral and high damage. Haohmaru is a well-rounded "shoto"-style character with strong neutral and high damage.
|
| Strengths |
Weaknesses
|
- Good normals: Haohmaru has a strong selection of grounded and airborne normals that cover a wide area of space.
- Good throw pressure: Haohmaru has an excellent running strike/throw game. This is due to the large active hitbox of his 66A that allows him to pressure blocking opponents as well as his numerous options for punishing throw escapes, such as his 66C and WFT.
- Invincible DP: Haohmaru's 623C is a strong invincible reversal that he can use to get out of pressure situations and that also works well as a reaction anti-air.
- Great WFT: Haohmaru's WFT is a huge projectile with great startup that works well as a long-range punish and anti-air. It can also be combo'd into from cancels at long range.
- Good recoil game: Haohmaru's DP is a good all-purpose recoil reversal option thanks to its invincibility, but he also has safer options such as his fireball that allow him to keep his recoil game ambiguous.
- Good damage conversion: Haohmaru has many cancellable normals that allow him to combo into his specials and WFT, allowing him to capitalize well off of pokes and punish opportunities.
|
- Poor long-range presence: Haohmaru does not have many strong far-ranged options in neutral and needs to work his way in against more defensive characters.
- Bad 50/50: Haohmaru's high-low options all do low damage or are enormously unsafe. This reduces his ability to use 50/50 tools to open up opponents.
- Mediocre fireball: Due to the long startup and mediocre range, it is harder for Haohmaru to zone from afar or win fireball wars than the more dedicated zoners.
|
Gameplan
Haoh will mostly rely on his running normals, his solid recoil cancel options and his WFT to force his opponent to respect him, since he cannot run a very meaningful strike-throw game due to no real way to enforce it.
Neutral
Haohmaru tends to run standard shoto style neutral - zone with fireballs, poke and pressure with your normals, DP when threatened, etc. In matchups where his fireball is outclassed though, he's forced to move forward and rely on his running normals and longer range pokes to establish his presence. Thankfully, he has one of the larger far 5Cs in the game and his running normals are very threatening in neutral, due to their range and frame advantage, forcing opponent's to respect Haoh's approach. With Rage, however, Haoh becomes a menace at almost every position , due to his long-reaching, absurdly fast Swiss army knife of a WFT, which works as a long range punish, a fireball punish, an anti-air and as a confirm. All of this, coupled with good recoil cancel options from most of his normals, give Haoh enough tools to demand respect from his opponent at any position on the screen.
Okizeme
Haoh doesn't get much in the way of okizeme, due to no threatening low option. His best non-standard meaty option is attempting to catch rolls with fireballs.
Normal Moves
Far Slashes
5A
5A
|
| Damage
|
Guard
|
Startup
|
Active
|
Recovery
|
Total
|
Hit Adv
|
Block Adv
|
Guard Dmg
|
Cancel
|
Recoil
|
Deflectable
|
Unarmed
|
| 30
|
Mid
|
7
|
2
|
16
|
24
|
-5
|
-5
|
5
|
Yes
|
Yes
|
Yes
|
No
|
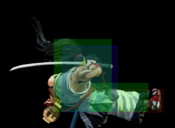
Haohmaru does a quick slash.
- Special cancellable.
- Fast with solid reach for a light normal.
- Combos into his DP and not much else, due to hitstun being too low to combo into his WFT.
|
|
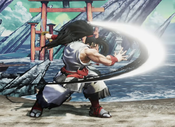
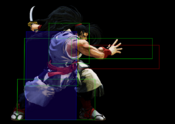
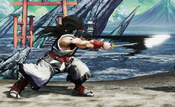
Toggle Hitboxes Toggle Hitboxes
|
5B
5B
|
| Damage
|
Guard
|
Startup
|
Active
|
Recovery
|
Total
|
Hit Adv
|
Block Adv
|
Guard Dmg
|
Cancel
|
Recoil
|
Deflectable
|
Unarmed
|
| 100
|
Mid
|
14
|
6
|
19
|
38
|
-4
|
-12
|
10
|
No
|
Yes
|
Yes
|
No
|
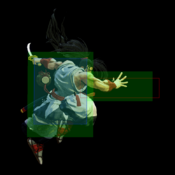
Haohmaru does a forward thrust with his sword.
- Solid poke with long reach, but rather slow.
- Hard to punish on block due to its reach, but vulnerable to whiff punish since it has extended hurt box for 16 frames.
|
|
Toggle Hitboxes Toggle Hitboxes
|
5C
5C
|
| Damage
|
Guard
|
Startup
|
Active
|
Recovery
|
Total
|
Hit Adv
|
Block Adv
|
Guard Dmg
|
Cancel
|
Recoil
|
Deflectable
|
Unarmed
|
| 300
|
Mid
|
24
|
2
|
45
|
70
|
-7
|
-16
|
25
|
No
|
Yes
|
Disarm
|
No
|
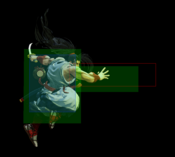
Haoh does his signature heavy slash.
- Button with above average damage and reach for a heavy slash with guard crush ability.
- It's +11 frames upon recoil cancel.
- Forces opponents to play carefully when attempting to pressure Haohmaru, due to its reach and damage.
|
|
Toggle Hitboxes Toggle Hitboxes
|
2A
2A
|
| Damage
|
Guard
|
Startup
|
Active
|
Recovery
|
Total
|
Hit Adv
|
Block Adv
|
Guard Dmg
|
Cancel
|
Recoil
|
Deflectable
|
Unarmed
|
| 30
|
Mid
|
8
|
2
|
15
|
24
|
-4
|
-5
|
5
|
Yes
|
Yes
|
Yes
|
No
|
Haohmaru does a quick crouching slash.
- Similar to 5A in function.
|
|
Toggle Hitboxes Toggle Hitboxes
|
2B
2B
|
| Damage
|
Guard
|
Startup
|
Active
|
Recovery
|
Total
|
Hit Adv
|
Block Adv
|
Guard Dmg
|
Cancel
|
Recoil
|
Deflectable
|
Unarmed
|
| 90
|
Mid
|
11
|
2
|
18
|
30
|
+1
|
-12
|
10
|
Yes
|
Yes
|
Yes
|
No
|
Haohmaru does a crouching slash.
- Much less reach than his 5B, but is special cancellable as a trade-off.
- His main confirm into WFT after throw.
- Useful in situations where you want to poke your opponent when 5B is too slow.
|
|
Toggle Hitboxes Toggle Hitboxes
|
2C
2C
|
| Damage
|
Guard
|
Startup
|
Active
|
Recovery
|
Total
|
Hit Adv
|
Block Adv
|
Guard Dmg
|
Cancel
|
Recoil
|
Deflectable
|
Unarmed
|
| 150
|
Mid
|
19
|
4
|
31
|
53
|
-7
|
-28
|
25
|
Yes
|
Yes
|
Disarm
|
No
|
Haohmaru does a big, upwards slash.
- Special cancellable on the later frames, giving solid damage on hit, especially with WFT up.
- Combo into DP at point blank range, but only combo WFT at tip range.
- Situational anti-air, resets opponents on air hit.
|
|
Toggle Hitboxes Toggle Hitboxes
|
Near Slashes
n.5A
n.5A
|
| Damage
|
Guard
|
Startup
|
Active
|
Recovery
|
Total
|
Hit Adv
|
Block Adv
|
Guard Dmg
|
Cancel
|
Recoil
|
Deflectable
|
Unarmed
|
| 30
|
Mid
|
5
|
5
|
10
|
19
|
-2
|
-5
|
5
|
Yes
|
Yes
|
Yes
|
No
|
Haoh does a quick jab with the hilt of his blade.
- His fastest normal with long active frames and combo into DPs.
|
|
Toggle Hitboxes Toggle Hitboxes
|
n.5B
n.5B
|
| Damage
|
Guard
|
Startup
|
Active
|
Recovery
|
Total
|
Hit Adv
|
Block Adv
|
Guard Dmg
|
Cancel
|
Recoil
|
Deflectable
|
Unarmed
|
| 80
|
Mid
|
8
|
2
|
20
|
29
|
-1
|
-12
|
10
|
Yes
|
Yes
|
Yes
|
No
|
Haohmaru does a quick downward slash.
- His main confirm after a deep jC.
- Combos into his DP and WFT, giving decent damage without a jump-in and a knockdown.
|
|
Toggle Hitboxes Toggle Hitboxes
|
n.5C
n.5C
|
| Damage
|
Guard
|
Startup
|
Active
|
Recovery
|
Total
|
Hit Adv
|
Block Adv
|
Guard Dmg
|
Cancel
|
Recoil
|
Deflectable
|
Unarmed
|
| 220
|
Mid
|
13
|
3
|
28
|
43
|
-3
|
-28
|
25
|
No
|
Yes
|
Disarm
|
No
|
Haoh does a crescent downward slash.
- Standard close heavy slash with guard crush ability.
|
|
Toggle Hitboxes Toggle Hitboxes
|
n.2A
n.2A
|
| Damage
|
Guard
|
Startup
|
Active
|
Recovery
|
Total
|
Hit Adv
|
Block Adv
|
Guard Dmg
|
Cancel
|
Recoil
|
Deflectable
|
Unarmed
|
| 30
|
Mid
|
5
|
4
|
10
|
18
|
-1
|
-5
|
5
|
Yes
|
Yes
|
Yes
|
No
|
Haohmaru does a quick crouching strike with the hilt of his blade.
- Functionally the same as n5A.
|
|
Toggle Hitboxes Toggle Hitboxes
|
n.2B
n.2B
|
| Damage
|
Guard
|
Startup
|
Active
|
Recovery
|
Total
|
Hit Adv
|
Block Adv
|
Guard Dmg
|
Cancel
|
Recoil
|
Deflectable
|
Unarmed
|
| 80
|
Mid
|
6
|
6
|
12
|
23
|
+3
|
-12
|
10
|
Yes
|
Yes
|
Yes
|
No
|
Haoh does a crouching hilt strike.
- Visually similar to his n2A, but does 60 more damage and has more hit stun, allowing for more combo variety. It has long active frames, and also catches backdash and pre-jump, making it a good meaty button.
|
|
Toggle Hitboxes Toggle Hitboxes
|
Kicks
5D
5D
|
| Damage
|
Guard
|
Startup
|
Active
|
Recovery
|
Total
|
Hit Adv
|
Block Adv
|
Guard Dmg
|
Cancel
|
Recoil
|
Deflectable
|
Unarmed
|
| 50
|
Mid
|
12
|
4
|
12
|
27
|
-3
|
-6
|
5
|
No*
|
No
|
No
|
Yes
|
Haoh does a forward-moving high kick.
- Can be used as a panic anti-air, but you have better options.
- If input throw (CD/4CD) exactly at the 2nd frame of 5D, Haohmaru will perform a kara throw such that the throw range will increase by a lot.
- Whiff on some crouchers at tip range.
|
|
Toggle Hitboxes Toggle Hitboxes
|
6D
6D
|
| Damage
|
Guard
|
Startup
|
Active
|
Recovery
|
Total
|
Hit Adv
|
Block Adv
|
Guard Dmg
|
Cancel
|
Recoil
|
Deflectable
|
Unarmed
|
| 30
|
Low
|
7
|
5
|
12
|
23
|
-4
|
-7
|
5
|
No
|
No
|
No
|
Yes
|
Haoh does a quick kick at the opponent's ankles.
- Standing low.
- Quick poke with solid range that hits low.
- Goes slightly further than 2D while being slightly slower.
- Could catch backdash and pre-jump.
|
|
Toggle Hitboxes Toggle Hitboxes
|
2D
2D
|
| Damage
|
Guard
|
Startup
|
Active
|
Recovery
|
Total
|
Hit Adv
|
Block Adv
|
Guard Dmg
|
Cancel
|
Recoil
|
Deflectable
|
Unarmed
|
| 20
|
Low
|
5
|
4
|
9
|
17
|
±0
|
-3
|
5
|
No
|
No
|
No
|
Yes
|
Haoh does a quick, low kick.
|
|
Toggle Hitboxes Toggle Hitboxes
|
3D
3D
|
| Damage
|
Guard
|
Startup
|
Active
|
Recovery
|
Total
|
Hit Adv
|
Block Adv
|
Guard Dmg
|
Cancel
|
Recoil
|
Deflectable
|
Unarmed
|
| 70
|
Low
|
12
|
9
|
37
|
57
|
KD(+79~+87)
|
-29~-21
|
5
|
No
|
No
|
No
|
Yes
|
Haoh does a sliding low kick.
- Knocks down on hit.
- More punishable than other 3Ds as a trade-off.
|
|
Toggle Hitboxes Toggle Hitboxes
|
Dash Normals
66A
66A 🤜 YEEEEEAAAAAAAAAAAAA 🤜 YEEEEEAAAAAAAAAAAAA
|
| Damage
|
Guard
|
Startup
|
Active
|
Recovery
|
Total
|
Hit Adv
|
Block Adv
|
Guard Dmg
|
Cancel
|
Recoil
|
Deflectable
|
Unarmed
|
| 50
|
Mid
|
5
|
7
|
21
|
32
|
-5~±1
|
-12~-6
|
5
|
No
|
No
|
No
|
No
|
Haoh does a running punch.
- Haoh's infamous "respect me" button.
- Has good range and quick startup for a running light while being relatively safe on block and not deflectable, which makes it very hard to contest for most characters.
- One of the main ways for Haohmaru to assert himself in neutral, as the opponent is usually forced to respect it.
|
|
Toggle Hitboxes Toggle Hitboxes
|
66B
66B
|
| Damage
|
Guard
|
Startup
|
Active
|
Recovery
|
Total
|
Hit Adv
|
Block Adv
|
Guard Dmg
|
Cancel
|
Recoil
|
Deflectable
|
Unarmed
|
| 80
|
Mid
|
8
|
2
|
20
|
29
|
-1
|
-35
|
10
|
Yes
|
Yes
|
Disarm
|
No
|
Haoh does a running downwards slash.
- Goes slightly further than 66A.
- It's cancellable, allowing Haohmaru to option select auto hit confirm into his DP/WFT (it takes practice to get the timing right, if input special too early it will whiff cancel, and make sure you don't hold the attack button such that special comes out after recovery), but the opponent could jump / backdash to beat it.
- Due to its recoil and special cancel properties, it's a decent, relatively risk-free option to call out opponents who would try to stuff his approach/66A attempt preemptively with a punish.
|
|
Toggle Hitboxes Toggle Hitboxes
|
66C
66C
|
| Damage
|
Guard
|
Startup
|
Active
|
Recovery
|
Total
|
Hit Adv
|
Block Adv
|
Guard Dmg
|
Cancel
|
Recoil
|
Deflectable
|
Unarmed
|
| 140
|
Mid
|
12
|
4
|
36
|
51
|
KD(+97)
|
-17
|
20
|
No
|
No
|
Disarm
|
No
|
Haoh does a running version of his 2C: a rising upwards slash.
- Like his 2C, it can anti-air, allowing you to stuff jumps preemptively while approaching.
- Unlike his 2C however, it grants a knockdown even on air hit, rather than an air reset.
- Does not recoil on block, making it a rather risky punish attempt.
|
|
Toggle Hitboxes Toggle Hitboxes
|
66D
66D
|
| Damage
|
Guard
|
Startup
|
Active
|
Recovery
|
Total
|
Hit Adv
|
Block Adv
|
Guard Dmg
|
Cancel
|
Recoil
|
Deflectable
|
Unarmed
|
| 70
|
Low
|
10
|
11
|
37
|
57
|
KD (+77~+87)
|
-31~-21
|
5
|
No
|
No
|
No
|
Yes
|
Haoh slides forward with a low kick.
- Similar to his 3D, but with the forward momentum from his run.
|
|
Toggle Hitboxes Toggle Hitboxes
|
Air Normals
j.A
j.A
|
| Damage
|
Guard
|
Startup
|
Active
|
Recovery
|
Total
|
Hit Adv
|
Block Adv
|
Guard Dmg
|
Cancel
|
Recoil
|
Deflectable
|
Unarmed
|
| 50
|
High
|
9
|
3
|
-
|
-
|
-
|
-
|
5
|
No
|
No
|
No
|
No
|
Haoh does a quick forward air slash.
- Decent air-to-air.
- Slightly faster than j.B, therefore it's mostly used in situations where j.B is too slow.
|
|
Toggle Hitboxes Toggle Hitboxes
|
j.B
j.B
|
| Damage
|
Guard
|
Startup
|
Active
|
Recovery
|
Total
|
Hit Adv
|
Block Adv
|
Guard Dmg
|
Cancel
|
Recoil
|
Deflectable
|
Unarmed
|
| 100
|
High
|
11
|
4
|
-
|
-
|
-
|
-
|
10
|
No
|
No
|
No
|
No
|
Haoh does a quick forwards air slash.
- Similar to j.A, but goes further while being slightly slower.
- Your main air-to-air option.
- Can be used as a jump-in in situations where j.C wouldn't reach.
|
|
Toggle Hitboxes Toggle Hitboxes
|
j.C
j.C
|
| Damage
|
Guard
|
Startup
|
Active
|
Recovery
|
Total
|
Hit Adv
|
Block Adv
|
Guard Dmg
|
Cancel
|
Recoil
|
Deflectable
|
Unarmed
|
| 160
|
High
|
14
|
2
|
-
|
-
|
-
|
-
|
20
|
No
|
No
|
No
|
No
|
Haoh does a downward air slash.
- It has a very good downward hit box but not as active as it looks, can whiff and phase through your opponent if done after falling from peak jump height.
|
|
Toggle Hitboxes Toggle Hitboxes
|
j.D
j.D
|
| Damage
|
Guard
|
Startup
|
Active
|
Recovery
|
Total
|
Hit Adv
|
Block Adv
|
Guard Dmg
|
Cancel
|
Recoil
|
Deflectable
|
Unarmed
|
| 30
|
High
|
8
|
7
|
-
|
-
|
-
|
-
|
5
|
No
|
No
|
No
|
Yes
|
Haoh does a jumping kick.
- Standard jumping kick, used as a quick air-to-air option when unarmed or very close to your opponent.
|
|
Toggle Hitboxes Toggle Hitboxes
|
Unarmed Normals
u.5S
u.5S
|
| Damage
|
Guard
|
Startup
|
Active
|
Recovery
|
Total
|
Hit Adv
|
Block Adv
|
Guard Dmg
|
Cancel
|
Recoil
|
Deflectable
|
Unarmed
|
| 50
|
Mid
|
6
|
7
|
19
|
31
|
-5
|
-10
|
5
|
No
|
No
|
No
|
Only
|
|
|
|
Toggle Hitboxes Toggle Hitboxes
|
u.2S
u.2S
|
| Damage
|
Guard
|
Startup
|
Active
|
Recovery
|
Total
|
Hit Adv
|
Block Adv
|
Guard Dmg
|
Cancel
|
Recoil
|
Deflectable
|
Unarmed
|
| 50
|
Mid
|
6
|
7
|
18
|
30
|
-4
|
-9
|
5
|
No
|
No
|
No
|
Only
|
Standard crouching unarmed punch.
|
|
Toggle Hitboxes Toggle Hitboxes
|
ju.S
ju.S
|
| Damage
|
Guard
|
Startup
|
Active
|
Recovery
|
Total
|
Hit Adv
|
Block Adv
|
Guard Dmg
|
Cancel
|
Recoil
|
Deflectable
|
Unarmed
|
| 50
|
High
|
6
|
8
|
-
|
-
|
-
|
-
|
5
|
No
|
No
|
No
|
Only
|
Standard jumping unarmed punch.
|
|
Toggle Hitboxes Toggle Hitboxes
|
u.66S
u.66S
|
| Damage
|
Guard
|
Startup
|
Active
|
Recovery
|
Total
|
Hit Adv
|
Block Adv
|
Guard Dmg
|
Cancel
|
Recoil
|
Deflectable
|
Unarmed
|
| 50
|
Mid
|
5
|
7
|
19
|
30
|
KD
|
-10
|
5
|
No
|
No
|
No
|
Only
|
Haoh does a running punch.
- Similar to his 66A, but knocks down on hit.
|
|
Toggle Hitboxes Toggle Hitboxes
|
Universal Mechanics
Guard Break
Guard Break (Throw)
4/5/6C+D Neutral / Forward Throw Neutral / Forward Throw Back Throw Back Throw
|
| Version
|
Damage
|
Guard
|
Startup
|
Active
|
Recovery
|
Total
|
Hit Adv
|
Block Adv
|
Guard Dmg
|
Cancel
|
Recoil
|
Deflectable
|
Unarmed
|
| Neutral / Forward
|
0
|
No
|
3
|
1
|
71
|
74
|
20
|
-
|
-
|
-
|
-
|
-
|
Yes
|
| Back
|
0
|
No
|
5
|
1
|
69
|
74
|
25
|
-
|
-
|
-
|
-
|
-
|
Yes
|
Universal throw. Backthrow has slower start up but better frame advantage.
- Can combo into 66B after forward or backthrow for good damage.
|
|
Toggle Hitboxes Toggle Hitboxes
|
Surprise Attack
Surprise Attack (Overhead)
5B+C
|
| Damage
|
Guard
|
Startup
|
Active
|
Recovery
|
Total
|
Hit Adv
|
Block Adv
|
Guard Dmg
|
Cancel
|
Recoil
|
Deflectable
|
Unarmed
|
| 70
|
High
|
20
|
2
|
22
|
43
|
+2
|
-11
|
10
|
No
|
No
|
No
|
Yes
|
Universal overhead.
- Armed and unarmed versions are the same.
- One of the few standing overheads.
- Doesn't knock down on hit when unarmed.
|
|
Toggle Hitboxes Toggle Hitboxes
|
Dodge
Dodge
5A+B
|
| Damage
|
Guard
|
Startup
|
Active
|
Recovery
|
Total
|
Hit Adv
|
Block Adv
|
Guard Dmg
|
Cancel
|
Recoil
|
Deflectable
|
Unarmed
|
| -
|
-
|
1
|
16
|
22
|
38
|
-
|
-
|
-
|
-
|
-
|
-
|
Yes
|
Universal dodge.
Complete invincibility from frames 1 to 10. Strike invincibility from frames 11 to 16.
|
|
Toggle Hitboxes Toggle Hitboxes
|
Stance Break
Stance Break
A+B during Just Defense
|
| Damage
|
Guard
|
Startup
|
Active
|
Recovery
|
Total
|
Hit Adv
|
Block Adv
|
Guard Dmg
|
Cancel
|
Recoil
|
Deflectable
|
Unarmed
|
| 0
|
Mid
|
5
|
-
|
-
|
52
|
KD
|
-24
|
-
|
No
|
-
|
-
|
Yes
|
|
|
|
Toggle Hitboxes Toggle Hitboxes
|
Counter (Deflect) / Blade Catch
Counter (Deflect) / Blade Catch
236A+B Weapon Deflect Weapon Deflect Blade Catch Blade Catch
|
| Version
|
Damage
|
Guard
|
Startup
|
Active
|
Recovery
|
Total
|
Hit Adv
|
Block Adv
|
Guard Dmg
|
Cancel
|
Recoil
|
Deflectable
|
Unarmed
|
| Armed
|
0
|
N/A
|
2
|
11
|
34
|
46
|
+35~+59
|
-
|
-
|
-
|
-
|
-
|
No
|
Universal counter. Allows you to follow up with a guaranteed attack of your own. The amount of time you have to followup depends on the strength of the attack you counter, with heavy attacks staggering the opponent for the longest amount of time. Additionally you counter a heavy slash or a running slash, your opponent will be disarmed.
|
| Version
|
Damage
|
Guard
|
Startup
|
Active
|
Recovery
|
Total
|
Hit Adv
|
Block Adv
|
Guard Dmg
|
Cancel
|
Recoil
|
Deflectable
|
Unarmed
|
| Unarmed
|
0
|
N/A
|
2
|
12
|
9
|
22
|
KD
|
-
|
-
|
-
|
-
|
-
|
Only
|
Universal counter. While disarmed, your counter will disarm and knock away your opponent regardless of slash level countered.
|
|
Toggle Hitboxes Toggle Hitboxes
|
Rage Explosion
Rage Explosion
5A+B+C
|
| Damage
|
Guard
|
Startup
|
Active
|
Recovery
|
Total
|
Hit Adv
|
Block Adv
|
Guard Dmg
|
Cancel
|
Recoil
|
Deflectable
|
Unarmed
|
| 0
|
No
|
21
|
3
|
35
|
58
|
0
|
-
|
-
|
-
|
-
|
-
|
No
|
Unblockable pushback attack.
- Universal Rage Explosion. See Mechanics page for an explanation.
|
|
Toggle Hitboxes Toggle Hitboxes
|
Lightning Blade
Lightning Blade (Issen)
5A+B+C during Rage Explosion
|
| Damage
|
Guard
|
Startup
|
Active
|
Recovery
|
Total
|
Hit Adv
|
Block Adv
|
Guard Dmg
|
Cancel
|
Recoil
|
Deflectable
|
Unarmed
|
| 300~709
|
Mid
|
9
|
8
|
65
|
81
|
KD
|
-44
|
-
|
-
|
No
|
No
|
No
|
Has full invincibility 1~16 and can anti-air. Damage scales up based on remaining health.
- Universal Lightning Blade/Issen. See Mechanics page for an explanation.
|
|
Toggle Hitboxes Toggle Hitboxes
|
Special Moves
Crescent Moon Slash
Crescent Moon Slash
623S
|
| Version
|
Damage
|
Guard
|
Startup
|
Active
|
Recovery
|
Total
|
Hit Adv
|
Block Adv
|
Guard Dmg
|
Cancel
|
Recoil
|
Deflectable
|
Unarmed
|
| A
|
100
|
Mid
|
7,13
|
2,8
|
-
|
58
|
KD(+91)
|
-30
|
22
|
-
|
-
|
-
|
No
|
| B
|
120
|
Mid
|
7,13,17
|
2,2,9
|
-
|
78
|
KD(+86)
|
-50
|
22
|
-
|
-
|
-
|
No
|
| C
|
180
|
Mid
|
7,13,14,17
|
2,1,2,14
|
-
|
100
|
KD(+84)
|
-71
|
39
|
-
|
-
|
-
|
No
|
| Rage
|
210
|
Mid
|
7,13,14,17
|
2,1,2,14
|
-
|
100
|
KD(+98)
|
-71
|
43
|
-
|
-
|
-
|
No
|
Haoh does a rising crescent uppercut.
- First hit does the most damage.
- Medium version is air invincible from frames 1-8.
- Heavy and Rage versions are fully invincible from frames 1-8, and it's very punishable by SSM.
Detail damage break down:
A version 100 = 60 + 40
B version 120 = 60 + 20 + 40
C version 180 = 80 + 40 + 30 + 30
R version 210 = 84 + 36 + 24 + 12 x 2 + 6 x 7
|
|
Toggle Hitboxes Toggle Hitboxes
|
Renting Tremor Slash
Renting Tremor Slash
6623S
|
| Version
|
Damage
|
Guard
|
Startup
|
Active
|
Recovery
|
Total
|
Hit Adv
|
Block Adv
|
Guard Dmg
|
Cancel
|
Recoil
|
Deflectable
|
Unarmed
|
| A
|
100
|
Mid
|
7,13
|
2,8
|
-
|
58
|
KD(+91)
|
-30
|
22
|
-
|
-
|
-
|
No
|
| B
|
120
|
Mid
|
7,13,17
|
2,2,9
|
-
|
78
|
KD(+86)
|
-50
|
22
|
-
|
-
|
-
|
No
|
| C
|
180
|
Mid
|
7,13,14,17
|
2,1,2,14
|
-
|
100
|
KD(+84)
|
-71
|
39
|
-
|
-
|
-
|
No
|
| Rage
|
210
|
Mid
|
7,13,14,17
|
2,1,2,14
|
-
|
100
|
KD(+98)
|
-71
|
43
|
-
|
-
|
-
|
No
|
Haoh does a forward moving, rising crescent uppercut.
- Same as his regular DP series, but carries the forward momentum of the dash, allowing Haoh to anti air further.
|
|
Toggle Hitboxes Toggle Hitboxes
|
Cyclone Slash
Cyclone Slash
236S
|
| Version
|
Damage
|
Guard
|
Startup
|
Active
|
Recovery
|
Total
|
Hit Adv
|
Block Adv
|
Guard Dmg
|
Cancel
|
Recoil
|
Deflectable
|
Unarmed
|
| A
|
80 [30,50]
|
Mid
|
33
|
28
|
-
|
57
|
KD
|
-5
|
5
|
-
|
-
|
-
|
No
|
| B
|
100 [30,70]
|
Mid
|
35
|
30
|
-
|
68
|
KD
|
-14
|
5
|
-
|
-
|
-
|
No
|
| C
|
110 [30,80]
|
Mid
|
37
|
-
|
-
|
80
|
KD
|
-24
|
5
|
-
|
-
|
-
|
No
|
Haoh sends out a whirlwind that puts his opponent into a cyclone, tossing them into the air.
- Projectile increases in distance from light to heavy, light and medium version doesn't travel full screen.
- One of Haoh's key neutral tools.
- The light version is most commonly used because it has the fewest total frames and the fireball's range can zone the opponent out while minimizing their ability to Just Defend and build meter.
|
|
Toggle Hitboxes Toggle Hitboxes
|
Fake Cyclone Slash
Fake Cyclone Slash
236D
|
| Damage
|
Guard
|
Startup
|
Active
|
Recovery
|
Total
|
Hit Adv
|
Block Adv
|
Guard Dmg
|
Cancel
|
Recoil
|
Deflectable
|
Unarmed
|
| N/A
|
-
|
-
|
-
|
-
|
41
|
-
|
-
|
-
|
-
|
-
|
-
|
No
|
Haoh winds up his projectile, then goes back to neutral.
- Adds another layer of mind games to Haoh's neutral by baiting jumps.
- Also useful for 5C guard crush cancel combo.
|
|
Toggle Hitboxes Toggle Hitboxes
|
Earthquake Slice
Earthquake Slice
421S
|
| Version
|
Damage
|
Guard
|
Startup
|
Active
|
Recovery
|
Total
|
Hit Adv
|
Block Adv
|
Guard Dmg
|
Cancel
|
Recoil
|
Deflectable
|
Unarmed
|
| A
|
100
|
High
|
25
|
3
|
46
|
73
|
KD(+53)
|
-17
|
15
|
-
|
-
|
-
|
No
|
| B
|
120
|
High
|
26,27,29
|
1,1,3
|
46
|
77
|
KD(+53)
|
-17
|
20
|
-
|
-
|
-
|
No
|
| C
|
180
|
High
|
33,34,36
|
1,1,3
|
46
|
84
|
KD(+53)
|
-17
|
25
|
-
|
-
|
-
|
No
|
Haoh does a somersault slam.
- Distance traveled depends on button strength.
- Hits overhead
- Very unsafe since it leaves Haohmaru close to the opponent and is very negative on block.
- Airborne from frame 7 until landing, goes over lows including projectiles low to the ground.
|
|
Toggle Hitboxes Toggle Hitboxes
|
Rice Wine Whack
Rice Wine Whack
214D
|
| Damage
|
Guard
|
Startup
|
Active
|
Recovery
|
Total
|
Hit Adv
|
Block Adv
|
Guard Dmg
|
Cancel
|
Recoil
|
Deflectable
|
Unarmed
|
| 80
|
Mid
|
15
|
4
|
25
|
43
|
KD(+95)
|
-16
|
10
|
-
|
-
|
-
|
Yes
|
Haoh swings his sake bottle.
- Available while disarmed.
- Reflects projectiles including Ruixiang's low fireball and Rimururu's ice ball.
- Knocks down on hit.
- Good as a recoil cancel especially far reaching normals like 5B and 5C due to it's reach.
- Useful hit confirm situations where you may not want to risk a more unsafe 623S ender.
|
|
Toggle Hitboxes Toggle Hitboxes
|
Supers
Weapon Flipping Technique
Flame of the Conqueror
236B+C
|
| Damage
|
Guard
|
Startup
|
Active
|
Recovery
|
Total
|
Hit Adv
|
Block Adv
|
Guard Dmg
|
Cancel
|
Recoil
|
Deflectable
|
Unarmed
|
| 420 (490)
|
Mid
|
1+14
|
4
|
-
|
88
|
KD(+68)
|
-41
|
-
|
-
|
-
|
-
|
No
|
Haohmaru winds up a big, heavy-hitting downwards slash.
- One of the best WFTs in the game due to its fast startup, range and damage.
- Can be used as an on-reaction punish against most moves from almost anywhere on the screen. It can be used to hit the start up of slow moves like some fireballs.
- Can easily be confirmed into from throw > 2B.
- Combos from all of his cancellable, non-A normals.
- Even though they're safe in most scenarios, Haoh WFT is fast enough to punish the following moves:
- Amakusa's 2C and 214C. Does not work against a max range 2C.
- Basara's 2B and 5C. Does not work against a max range 5C.
- Charlotte's 214X.
- Darli's 236K.
- Sogetsu's 623X. Does not work against the rage enhanced versions.
|
|
Toggle Hitboxes Toggle Hitboxes
|
Super Special Move
Judgement Blast Slash
641236C+D
|
| Damage
|
Guard
|
Startup
|
Active
|
Recovery
|
Total
|
Hit Adv
|
Block Adv
|
Guard Dmg
|
Cancel
|
Recoil
|
Deflectable
|
Unarmed
|
| 700
|
Mid
|
10+20
|
3
|
-
|
-
|
KD(+54)
|
-45
|
-
|
-
|
-
|
-
|
No
|
Available only once per match.
- Standard SSM with short range.
|
|
Toggle Hitboxes Toggle Hitboxes
|
Combos
List combos, use numpad notation.
Midscreen
- (5A / n.5A / 2A / n.2A)...
- 623S
Fast punish combo. All 3 version DP have same start up, and the stronger version has better range. Only combos from the far light slashes at the shortest distances at which those normals come out.
- (n.5B / n.2B / 2B)...
- 623S / 214D / WFT
Dash stopper & punish combo.
- 66B xx 623S / 214D / WFT
Dash combo. In version 1.70, 623C rarely whiffs after 66B.
- 2C xx 623C / 214D / WFT
Slow but heavy punish combo. 623C only connects all hits at point-blank range.
- 2C xx 421A
Only connect when 2C hits meaty, not useful in real match.
- 4/5CD...
- 66B xx 623C
The most damaging basic confirm you can get off throw. If the opponent rage explodes at perfect timing, they will escape the combo and the 623C invincibility will avoid the RE burst. So the opponent will have an opportunity to punish 623C. When a RE burst is expected, a throw follow up without 623C is recommended.
- (66B / 2B) xx WFT
Standard WFT combo. Far 2B has a tiny bit more damage than 66B.
- 214D
Highest damage option after an unarmed throw.
- 5CD...
- 2C xx WFT
Timing is tight, but does more damage than other throw into WFT combos.
- 2C xx 623C
Corner only. More damage than other throw into 623C combos.
- 4CD...
- 5C
Timing is tight, most damaging without rage after back throw, but no knock down.
- j.C / j.B (Deep hit)...
- 5B / n.5C / Lighting Blade
Jumping deep hit combo, n.5C whiff at far range.
- (66B / n.5B) xx 623S / 214D / WFT
Optimal combo, 66B combo covers lot of space and easy to apply auto hit confirm. Far and near 2B often whiffs so not recommended.
- j.B (Deepest hit) xx 2C xx WFT
WFT combo with most damage, 2C only connects at close range.
- j.B (Regular hit) xx n.5A/n.2A xx 623C
j.B has horizontal hitbox and decent active frames, make it guaranteed to combo into n.5A upon hit (except extra tall characters: Earthquake, Jubei, Ruixiang, Shiki, Iroha, Gongsun Li).
- j.B (Regular hit) xx n.5B xx 623C/WFT
Advantage on short characters only (Ukyo, Cham Cham, Baiken), doesn't need to time j.B deep hit precisely, n.5C also combos but not 2C.
- ju.S xx u.66S
Unarmed combo that knocks down.
- 214D (Reflected projectile hits) WFT
Only connects against Rimururu's rolling ice ball.
Corner
- 4CD...
- 2C xx WFT
Easy to connect when back throw the opponent into corner.
Guard Crush
- n.5C...
After recovery...
- 2C / 66B xx 623C / WFT
Standard follow up.
- SSM
SSM follow up. (Be careful with opponent bursting to avoid it)
- 5C...
After recovery...
- 66B xx 623C / WFT
Standard follow up, it's much better to cancel recovery.
- n.5C...
Cancel recovery...
- Lighting Blade
Universal Issen combo.
- 5C...
Cancel recovery...
- Lighting Blade
Universal Issen combo.
- 236D , 2C xx WFT
Let Haoh stands a lot closer with more plus frames, works for most range.
- 236D , 5C
Works from far range 5C GC
- 236D , 66B xx 623C
Works from near range 5C GC without max rage.
Safe Jumps
Unless specified otherwise, these setups assume that you are buffering every whiffed normal/special so that it comes out on the earliest possible frame. Also every j.c safe jump setup doubles as a stance-break bait on their wakeup. Each setup has 2 stages after the Knockdown(KD). First stage is doing certain normals/specials to get close to the knockdowned opponent, and the second stage is the actual safe jump, where you have to read/guess which direction the opponent will roll(forward/back/no roll).
- Midscreen 623C (KD) ~ Dodge...
- forward jump C (forward roll)
Videos
Colors
Default
3D Retro Costume
External Links
