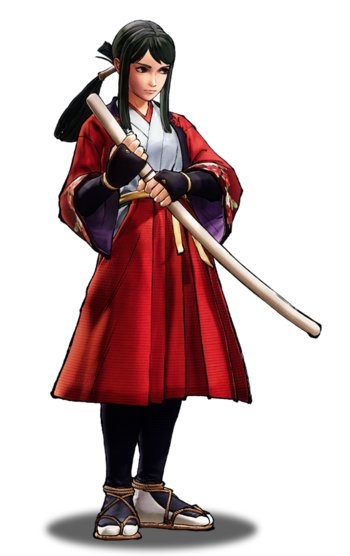
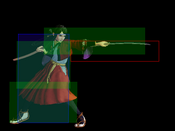
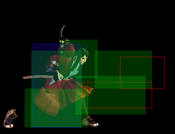
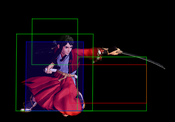
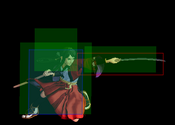
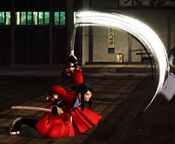
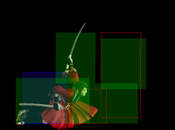
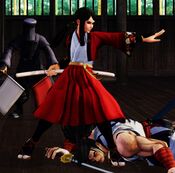
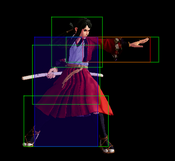
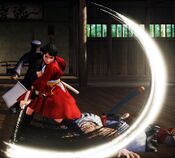
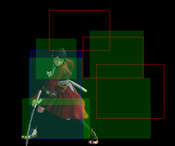
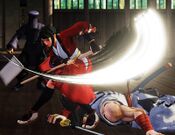
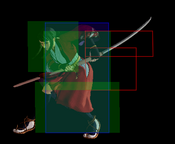
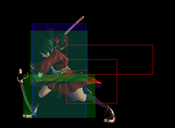
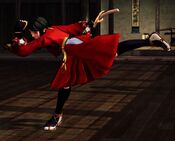
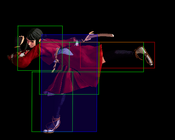
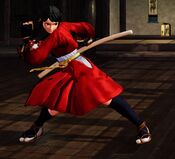
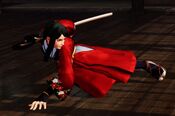
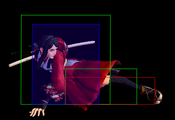
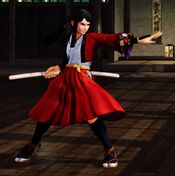
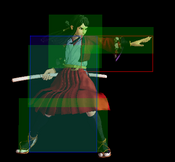
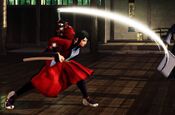
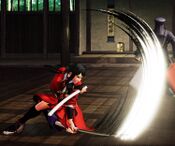
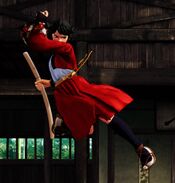
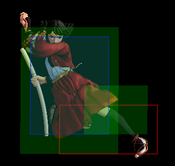
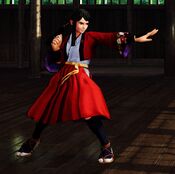
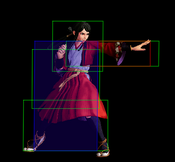
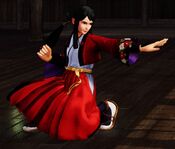
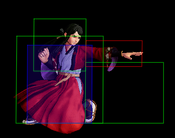
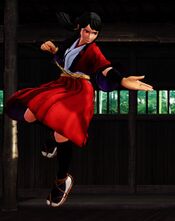
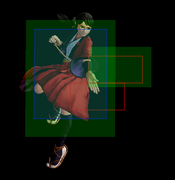
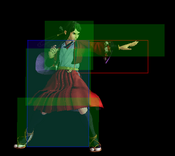
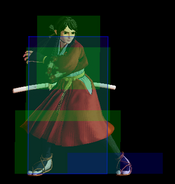
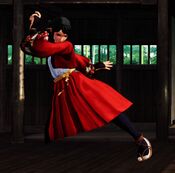
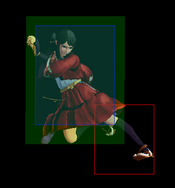
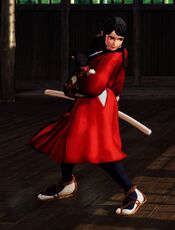
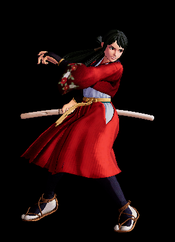
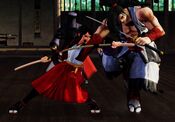
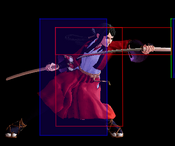
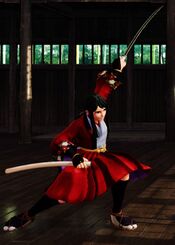
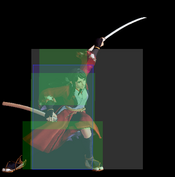
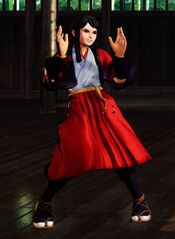
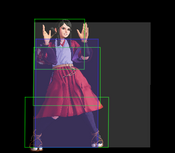
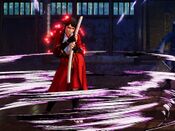
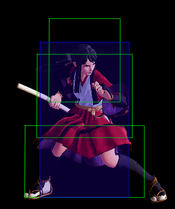
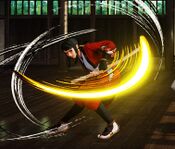
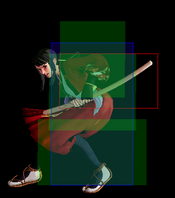
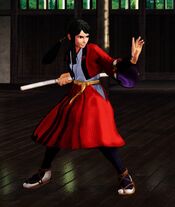
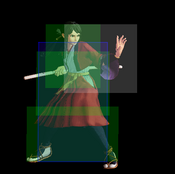
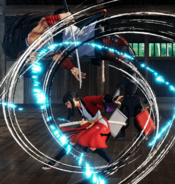
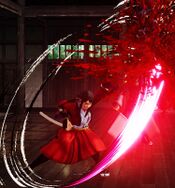
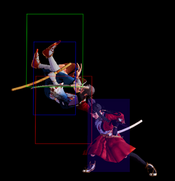
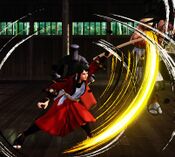
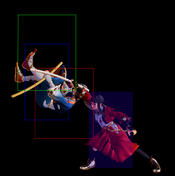
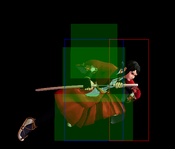
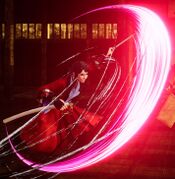
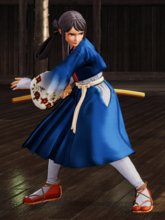
Hibiki Takane
高嶺響, Takane Hibiki
|
- Damage Taken: 105%
- Rage Factor: 0.24
- Rage Duration: 10 seconds
- Jump: 46 frames (Average)
- Forward Walk Speed: 0.3 (Average)
- Back Walk Speed: 0.23 (Average)
- Dash Speed: 1.25 (Average)
- Back Dash: 27 frames
- Weapon Pickup / Drop: 40 / 47 frames
|
Introduction
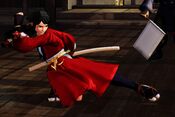
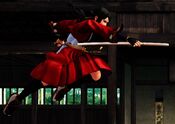
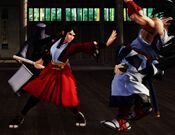
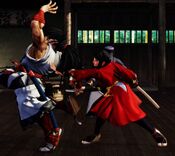
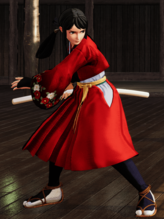
Hibiki joins the cast as a crossover character from The Last Blade 2, another weapon-based series developed by SNK. She retains the majority of her special moves from that game as well as her signature playstyle, which focuses on midrange control and bursts of damage.
Generally speaking, Hibiki functions as a technical, well-rounded character that leans slightly more toward offensive action. She has solid pokes and space control with 5A, 5B, 2B, 66B, and her Distance Slash special move, all of which either have fairly decent reach, can be special canceled relatively easily, or (in the case of Distance Slash) cannot be deflected. She can also use her Beckoning Slash as both a combo tool and a gap-closer, and she has a fairly high damage output, especially during Rage, thanks to the power of her Rage Distance Slash and the power, speed, and range of her WFT. This is rounded out with her Heavenly Being Blade parry, which can let her call out carelessly placed high and mid attacks and convert into followups that either favor her positionally or let her cancel into other moves. These traits all work together to give Hibiki a really strong countering and punishing game at both close-range and mid-range.
This is all offset by her slightly lower defense and heavy technical aspects to using her with maximum effectiveness, such as correctly using her parry followups and measuring the distance of her Beckoning Slash for proper pass-through combos. Aside from that, Hibiki struggles at long range due to the long recovery windows on Distance Slash and some of her other moves, and the short range of her jumping buttons plus the slight floatiness of her jump can make it difficult to work around longer normals or projectiles. She also has a lackluster high/low game due to lacking safe low options and overheads that knock down, and as threatening as her WFT is, many of the cancels into it can be stuffed out with a well-timed Rage Explosion.
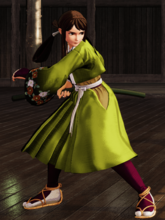
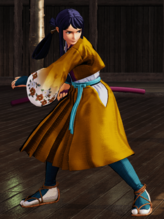
As a nod to her branching storyline in The Last Blade 2, you can access an "alternate" form of Hibiki by highlighting her on the character select screen and pressing the default Light Slash button (Square on PS4, X on Xbox); you can toggle between normal and Alternate Hibiki by pressing the button again. Alternate Hibiki is much more aggressive and actively enjoys fighting and killing people; to reflect this, she will have a different set of selection screen quotes, a different theme, a slightly altered version of her SSM, and a different win screen with different winquotes.
If a mid-range poking and punishing game with technical aspects and high damage payouts sounds appealing, Hibiki is a strong contender and good choice.
Playstyle
 Hibiki Takane is a footsies monster with high damage and some of the best midrange normals in the game. Hibiki Takane is a footsies monster with high damage and some of the best midrange normals in the game.
|
| Strengths |
Weaknesses
|
- Strong midrange: Hibiki has fast, low-recovery midrange normals with multiple cancel options into her 236S specials and WFT.
- Great with rage: Hibiki has one of the best WFTs in the game; the range is enormous and at 10 frame startup it can even raw punish far 5B recoil windows. It also works well as an anti-air. Her Max Rage 236C is very block safe, adds huge damage to her cancels and is good at catching jump outs and backdashes.
- 236S space control: 236A and 236B have great range and startup and can punish many blocked moves and recoils that other characters cannot. She can mix these with her safer 236C to run a strong midscreen zoning game.
- Good anti-air: Using n.5B, her counter special, her WFT and excellent running normals for cross-under, Hibiki is good at keeping opponents grounded so she can force her strong poking game.
- Very high damage: Thanks to her ease in converting from reliable pokes and the reach of her moves, Hibiki can deal a fair bit of damage, especially in Max Rage.
|
- Lacks long-ranged options: With no long-range tools to speak of and short jumping normals, Hibiki needs to put in a fair amount of work to get around longer grounded and airborne normals and strong fireball games.
- Unsafe specials: 236A and 236B are enormously unsafe both on block and especially if whiffed or jumped over.
- Unsafe WFT cancel: Cancels into WFT can be RE'd on hit to make the WFT whiff and punish. If Hibiki is down a round, she must cancel into other follow-ups to be safe, even off of a throw.
- Bad 50/50: Hibiki's overheads are very short and don't knock down and her low options are very unsafe.
|
Gameplan
Hibiki's pokes and solid, flexible combos with great damage lends well to a style where she can can push her advantages at midrange or otherwise irritate people that try to approach her carelessly, get a knockdown, then move closer or maintain her distance.
Neutral
As far as her normals go, 5B and 2B are her most flexible mid-range pokes; 2B in particular is especially useful since it can be canceled with 236A/B or Rage 236C.
On its own, her 236A makes a great poke too; it has the same start-up as her mediums but has the range of almost half screen, and unlike 5B or 2B, it’s not deflectable.
Her dashing moves are also fairly solid: 66B is a great punish tool that you can cancel with 236A/B/Rage C or WFT at any range. 66B can also combo into 623A then 236S for a full zig-zag combo, though the 623A might not crossover at max range 66B. Once you get a crossover with 623S, you can use use 236A if you don’t want a knockdown, 236B for a knockdown, or 236C during Rage to get both. Her 66D is one of the best slides in the game, as it’s hard to punish if spaced right and it has a great range.
Her air normals are also generally decent with good hitboxes. Her j.B can hit as a cross-up, and her j.C covers space below, in front, and slightly above her, making both a good air to air and jump in. They do, however, lack in range, so be careful about trying to use them as an option against bigger buttons.
Anti-airing with Hibiki has a few options. Her n.5B is her best option as it is super fast and it has a great hitbox above her head. Her 2C can also do the job, but has to be spaced carefully and timed correctly. Her WFT is also an anti-air option, as is her 214S parry, but the timing for either is a bit tricky and the recovery time of either is not ideal if you whiff. Generally speaking, against a jumping opponent that is coming in relatively close to you, the best option is to try either contesting with air-to-air via j.B or j.C, going for n.5B, or blocking the hit.
Okizeme
Hibiki doesn’t have good high/low oki per se. Her parry can counter any wake-up DPs and other high or mid attacks if opponents are reckless with those. Additionally, her 623D hits as overhead and can be charged up; you can directly cancel into 236S, 623A, or WFT on a fully charged hit, but it’s easy to react to so the best setup for this move is still under-discovered.
When Hibiki has Rage, she has the option of trying to use her WFT as a cross-up on wake-up, no matter which way the opponent rolls to avoid it. With perfect timing, she will dash to the opponent's other side and leave a hitbox behind her when the opponent gets up, leaving them to be hit by it as a cross-up. A common setup for this is after Rage 236C knocks down: buffer 5B, jump forward, and buffer WFT on a forward roll.
Heavenly Being Blade (214S)
Heavenly Being Blade is a parry that will check high and mid normal moves and special moves, including kicks and unarmed punches, as well as most WFTs. However, there are a few things can't be parried due to move properties or hitbox size; these are listed in the frame data for the move in the Special Moves section.
Without Rage, it's best to use the D followup after a successful 214S, and then use 236A/C to strike after that. When in Rage, use the A/B/C follow-up instead and directly cancel into WFT.
If you're certain that your opponent is going to be pressing buttons to try and catch you out, 214S can be used as a recoil cancel, or after 66D is blocked at max distance. You can use it after 66A on hit or block, or after anything that has short recovery.
Normal Moves
Far Slashes
5A
5A
|
| Damage
|
Guard
|
Startup
|
Active
|
Recovery
|
Total
|
Hit Adv
|
Block Adv
|
Guard Dmg
|
Cancel
|
Recoil
|
Deflectable
|
Unarmed
|
| 30
|
Mid
|
7
|
-
|
-
|
23
|
-4
|
-5
|
5
|
Yes
|
Yes
|
Yes
|
No
|
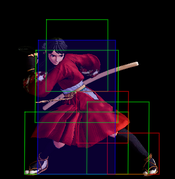
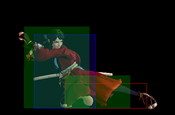
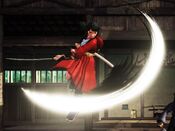
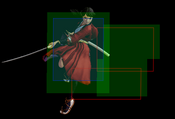
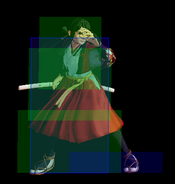
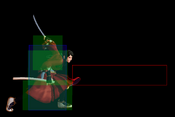
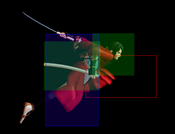
Hibiki does a quick slash with her leading hand.
- Fast poke that can cancel into 236S and WFT.
|
|
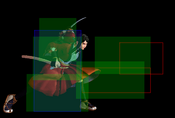
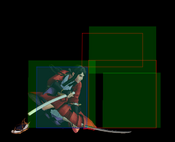
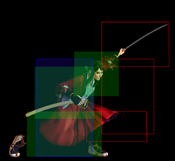
Toggle Hitboxes Toggle Hitboxes
|
5B
5B
|
| Damage
|
Guard
|
Startup
|
Active
|
Recovery
|
Total
|
Hit Adv
|
Block Adv
|
Guard Dmg
|
Cancel
|
Recoil
|
Deflectable
|
Unarmed
|
| 100
|
Mid
|
11
|
-
|
-
|
31
|
0
|
-12
|
10
|
No
|
Yes
|
Yes
|
No
|
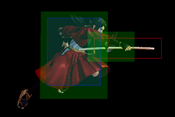
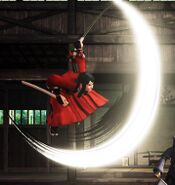
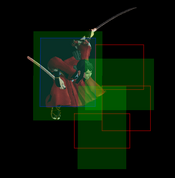
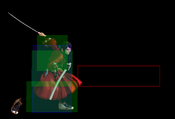
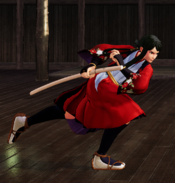
A farther reaching front-hand slash.
- Decent poke with decent range but can't be canceled on hit. 2B is more useful for trying to convert into a combo from a poke.
|
|
Toggle Hitboxes Toggle Hitboxes
|
5C
5C
|
| Damage
|
Guard
|
Startup
|
Active
|
Recovery
|
Total
|
Hit Adv
|
Block Adv
|
Guard Dmg
|
Cancel
|
Recoil
|
Deflectable
|
Unarmed
|
| 260
|
Mid
|
20
|
-
|
-
|
66
|
-7
|
-16
|
25
|
No
|
Yes
|
Disarm
|
No
|
Hibiki swings her sword in a wide horizontal arc.
- One of the most damaging 5Cs in the game, but has limited reach.
|
|
Toggle Hitboxes Toggle Hitboxes
|
2A
2A
|
| Damage
|
Guard
|
Startup
|
Active
|
Recovery
|
Total
|
Hit Adv
|
Block Adv
|
Guard Dmg
|
Cancel
|
Recoil
|
Deflectable
|
Unarmed
|
| 30
|
Low
|
6
|
-
|
-
|
18
|
0
|
-5
|
5
|
No
|
Yes
|
No
|
No
|
A crouching slash similar in animation to her 5A.
- Her only low slash, a great poke.
|
|
Toggle Hitboxes Toggle Hitboxes
|
2B
2B
|
| Damage
|
Guard
|
Startup
|
Active
|
Recovery
|
Total
|
Hit Adv
|
Block Adv
|
Guard Dmg
|
Cancel
|
Recoil
|
Deflectable
|
Unarmed
|
| 80
|
Mid
|
8
|
-
|
-
|
30
|
-2
|
-12
|
10
|
Yes
|
Yes
|
Yes
|
No
|
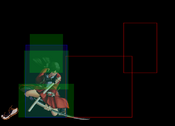
A crouching slash similar to her 5B.
- Similar reach to 5B, but can be canceled, allowing for combos into 236B or 623A. One of her main combo tools.
|
|
Toggle Hitboxes Toggle Hitboxes
|
2C
2C
|
| Damage
|
Guard
|
Startup
|
Active
|
Recovery
|
Total
|
Hit Adv
|
Block Adv
|
Guard Dmg
|
Cancel
|
Recoil
|
Deflectable
|
Unarmed
|
| 150
|
Mid
|
17
|
-
|
-
|
47
|
-3
|
-28
|
25
|
No
|
Yes
|
Disarm
|
No
|
Hibiki lunges forward a bit as she cuts outward and upward.
- Has some anti-air potential against far-out jumps due to its horizontal and upward hitboxes.
|
|
Toggle Hitboxes Toggle Hitboxes
|
Near Slashes
n.5A
n.5A
|
| Damage
|
Guard
|
Startup
|
Active
|
Recovery
|
Total
|
Hit Adv
|
Block Adv
|
Guard Dmg
|
Cancel
|
Recoil
|
Deflectable
|
Unarmed
|
| 30
|
Mid
|
5
|
-
|
-
|
19
|
-2
|
-5
|
5
|
Yes
|
No
|
No
|
No
|
Hibiki reaches out with a quick finger-poking strike.
- Cancels into 236S and WFT. Can be hard to confirm, but useful to punish guaranteed short recovery windows along with 5A.
|
|
Toggle Hitboxes Toggle Hitboxes
|
n.5B
n.5B
|
| Damage
|
Guard
|
Startup
|
Active
|
Recovery
|
Total
|
Hit Adv
|
Block Adv
|
Guard Dmg
|
Cancel
|
Recoil
|
Deflectable
|
Unarmed
|
| 80
|
Mid
|
8
|
-
|
-
|
29
|
-1
|
-12
|
10
|
Yes
|
Yes
|
Yes
|
No
|
Hibiki swings her sword inward in a quick circular cut.
- Another main combo tool up close, and her best grounded anti-air due to its hitbox above her. The damage is relatively low, though.
|
|
Toggle Hitboxes Toggle Hitboxes
|
n.5C
n.5C
|
| Damage
|
Guard
|
Startup
|
Active
|
Recovery
|
Total
|
Hit Adv
|
Block Adv
|
Guard Dmg
|
Cancel
|
Recoil
|
Deflectable
|
Unarmed
|
| 200 (100,100)
|
Mid
|
13, 35
|
-
|
-
|
67
|
-5
|
-28
|
25
|
Yes (1st)
|
Yes
|
Disarm
|
No
|
Hibiki stabs her sword into her opponent, then draws it back in for a second reverse-grip cut.
- Cancels on the first hit, but not the second.
|
|
Toggle Hitboxes Toggle Hitboxes
|
Kicks
5D
5D
|
| Damage
|
Guard
|
Startup
|
Active
|
Recovery
|
Total
|
Hit Adv
|
Block Adv
|
Guard Dmg
|
Cancel
|
Recoil
|
Deflectable
|
Unarmed
|
| 50
|
Mid
|
11
|
-
|
-
|
27
|
-4
|
-7
|
5
|
No
|
-
|
-
|
Yes
|
Hibiki kicks at about chest height.
- Slow, with a bit of range, but not very useful compared to other buttons.
|
|
Toggle Hitboxes Toggle Hitboxes
|
6D
6D
|
| Damage
|
Guard
|
Startup
|
Active
|
Recovery
|
Total
|
Hit Adv
|
Block Adv
|
Guard Dmg
|
Cancel
|
Recoil
|
Deflectable
|
Unarmed
|
| 30
|
Low
|
12
|
-
|
-
|
33
|
-6
|
-9
|
5
|
Yes
|
-
|
-
|
Yes
|
Hibiki does a stepping kick with her lead leg.
- Hits low.
- Combos into 236A, WFT, and Rage 236C.
|
|
Toggle Hitboxes Toggle Hitboxes
|
2D
2D
|
| Damage
|
Guard
|
Startup
|
Active
|
Recovery
|
Total
|
Hit Adv
|
Block Adv
|
Guard Dmg
|
Cancel
|
Recoil
|
Deflectable
|
Unarmed
|
| 20
|
Low
|
5
|
-
|
-
|
17
|
0
|
-3
|
5
|
No
|
-
|
-
|
Yes
|
Hibiki kicks out with her lead leg.
|
|
Toggle Hitboxes Toggle Hitboxes
|
3D
3D
|
| Damage
|
Guard
|
Startup
|
Active
|
Recovery
|
Total
|
Hit Adv
|
Block Adv
|
Guard Dmg
|
Cancel
|
Recoil
|
Deflectable
|
Unarmed
|
| 70
|
Low
|
9
|
-
|
-
|
34
|
KD (+99)
|
-9
|
5
|
No
|
-
|
-
|
Yes
|
Hibiki uses both legs for a sweeping kick.
|
|
Toggle Hitboxes Toggle Hitboxes
|
Dash Normals
66A
66A
|
| Damage
|
Guard
|
Startup
|
Active
|
Recovery
|
Total
|
Hit Adv
|
Block Adv
|
Guard Dmg
|
Cancel
|
Recoil
|
Deflectable
|
Unarmed
|
| 50
|
Mid
|
5
|
5
|
-
|
29
|
-2
|
-9~-5
|
5
|
No
|
No
|
No
|
No
|
Hibiki does a dashing version of her n.5A.
- Good as a fast approach tool, but isn't cancelable.
|
|
Toggle Hitboxes Toggle Hitboxes
|
66B
66B
|
| Damage
|
Guard
|
Startup
|
Active
|
Recovery
|
Total
|
Hit Adv
|
Block Adv
|
Guard Dmg
|
Cancel
|
Recoil
|
Deflectable
|
Unarmed
|
| 80
|
Mid
|
8
|
-
|
-
|
34
|
-6
|
-35
|
10
|
Yes
|
Yes
|
Disarm
|
No
|
Hibiki does an outward-cutting slash with a bit of her dash momentum.
- Her main combo tool at any range.
|
|
Toggle Hitboxes Toggle Hitboxes
|
66C
66C
|
| Damage
|
Guard
|
Startup
|
Active
|
Recovery
|
Total
|
Hit Adv
|
Block Adv
|
Guard Dmg
|
Cancel
|
Recoil
|
Deflectable
|
Unarmed
|
| 140
|
Mid
|
14
|
-
|
-
|
50
|
KD (+87)
|
-14
|
20
|
No
|
No
|
Disarm
|
No
|
Hibiki does a dashing downward cut with her sword.
- Has okay anti-air potential if spaced correctly, but needs to be timed well.
|
|
Toggle Hitboxes Toggle Hitboxes
|
66D
66D
|
| Damage
|
Guard
|
Startup
|
Active
|
Recovery
|
Total
|
Hit Adv
|
Block Adv
|
Guard Dmg
|
Cancel
|
Recoil
|
Deflectable
|
Unarmed
|
| 70
|
Low
|
10
|
11
|
-
|
41
|
KD (+93)
|
-15~-5
|
5
|
No
|
-
|
-
|
Yes
|
Hibiki does a sliding kick with the front leg.
- Good slide, if spaced correctly.
- Knocks down on hit.
|
|
Toggle Hitboxes Toggle Hitboxes
|
Air Normals
j.A
j.A
|
| Damage
|
Guard
|
Startup
|
Active
|
Recovery
|
Total
|
Hit Adv
|
Block Adv
|
Guard Dmg
|
Cancel
|
Recoil
|
Deflectable
|
Unarmed
|
| 50
|
High
|
9
|
-
|
-
|
-
|
-
|
-
|
5
|
-
|
-
|
-
|
No
|
Hibiki thrusts her sheathed sword forward, pommel-first.
|
|
Toggle Hitboxes Toggle Hitboxes
|
j.B
j.B
|
| Damage
|
Guard
|
Startup
|
Active
|
Recovery
|
Total
|
Hit Adv
|
Block Adv
|
Guard Dmg
|
Cancel
|
Recoil
|
Deflectable
|
Unarmed
|
| 100
|
High
|
12
|
-
|
-
|
-
|
-
|
-
|
10
|
-
|
-
|
-
|
No
|
Hibiki does a downward slash toward her body.
|
|
Toggle Hitboxes Toggle Hitboxes
|
j.C
j.C
|
| Damage
|
Guard
|
Startup
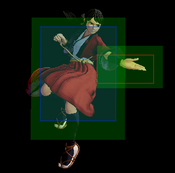
|
Active
|
Recovery
|
Total
|
Hit Adv
|
Block Adv
|
Guard Dmg
|
Cancel
|
Recoil
|
Deflectable
|
Unarmed
|
| 160
|
High
|
14
|
-
|
-
|
-
|
-
|
-
|
20
|
-
|
-
|
-
|
No
|
Hibiki slashes in an upward and outward arc.
- Her best aerial for air to air or jump-in.
|
|
Toggle Hitboxes Toggle Hitboxes
|
j.D
j.D
|
| Damage
|
Guard
|
Startup
|
Active
|
Recovery
|
Total
|
Hit Adv
|
Block Adv
|
Guard Dmg
|
Cancel
|
Recoil
|
Deflectable
|
Unarmed
|
| 30
|
High
|
8
|
-
|
-
|
-
|
-
|
-
|
5
|
-
|
-
|
-
|
Yes
|
Hibiki kicks downward with her lead leg.
|
|
Toggle Hitboxes Toggle Hitboxes
|
Unarmed Normals
u.5S
u.5S
|
| Damage
|
Guard
|
Startup
|
Active
|
Recovery
|
Total
|
Hit Adv
|
Block Adv
|
Guard Dmg
|
Cancel
|
Recoil
|
Deflectable
|
Unarmed
|
| 50
|
Mid
|
6
|
-
|
-
|
31
|
-5
|
-10
|
5
|
No
|
-
|
-
|
Only
|
|
|
|
Toggle Hitboxes Toggle Hitboxes
|
u.2S
u.2S
|
| Damage
|
Guard
|
Startup
|
Active
|
Recovery
|
Total
|
Hit Adv
|
Block Adv
|
Guard Dmg
|
Cancel
|
Recoil
|
Deflectable
|
Unarmed
|
| 50
|
Mid
|
6
|
-
|
-
|
30
|
-4
|
-9
|
5
|
No
|
-
|
-
|
Only
|
A crouching version of u.5S.
- Slightly weaker than u.5S.
|
|
Toggle Hitboxes Toggle Hitboxes
|
ju.S
ju.S
|
| Damage
|
Guard
|
Startup
|
Active
|
Recovery
|
Total
|
Hit Adv
|
Block Adv
|
Guard Dmg
|
Cancel
|
Recoil
|
Deflectable
|
Unarmed
|
| 50
|
High
|
6
|
-
|
-
|
-
|
-
|
-
|
5
|
-
|
-
|
-
|
Only
|
Hibiki sticks her hand out to jab at the opponent.
|
|
Toggle Hitboxes Toggle Hitboxes
|
u.66S
u.66S
|
| Damage
|
Guard
|
Startup
|
Active
|
Recovery
|
Total
|
Hit Adv
|
Block Adv
|
Guard Dmg
|
Cancel
|
Recoil
|
Deflectable
|
Unarmed
|
| 50
|
Mid
|
5
|
-
|
-
|
30
|
KD (+102)
|
-10
|
5
|
No
|
-
|
-
|
Only
|
A dashing version of u.5A for weapon retrieval.
|
|
Toggle Hitboxes Toggle Hitboxes
|
Universal Mechanics
Guard Break
Guard Break (Throw)
5/6C+D / 4C+D Neutral / Forward Throw Neutral / Forward Throw Back Throw Back Throw
|
| Version
|
Damage
|
Guard
|
Startup
|
Active
|
Recovery
|
Total
|
Hit Adv
|
Block Adv
|
Guard Dmg
|
Cancel
|
Recoil
|
Deflectable
|
Unarmed
|
| Neutral / Forward
|
0
|
Throw
|
3
|
-
|
71
|
74
|
+20
|
N/A
|
-
|
No
|
No
|
No
|
Yes
|
Universal throw. Can be followed up with an attack.
|
| Back
|
0
|
Throw
|
5
|
-
|
69
|
74
|
+25
|
N/A
|
-
|
No
|
No
|
No
|
Yes
|
Universal throw. Can be followed up with an attack.
|
|
Toggle Hitboxes Toggle Hitboxes
|
Surprise Attack
Surprise Attack (Overhead)
5B+C
|
| Version
|
Damage
|
Guard
|
Startup
|
Active
|
Recovery
|
Total
|
Hit Adv
|
Block Adv
|
Guard Dmg
|
Cancel
|
Recoil
|
Deflectable
|
Unarmed
|
| Armed
|
70
|
High
|
21
|
-
|
-
|
45
|
+1
|
-12
|
10
|
No
|
-
|
-
|
No
|
|
|
| Unarmed
|
70
|
High
|
21
|
-
|
-
|
45
|
KD
|
-16
|
10
|
No
|
-
|
-
|
Only
|
Unarmed universal overhead. Knocks down on hit.
|
|
Toggle Hitboxes Toggle Hitboxes
|
Dodge
Dodge
5A+B
|
| Damage
|
Guard
|
Startup
|
Active
|
Recovery
|
Total
|
Hit Adv
|
Block Adv
|
Guard Dmg
|
Cancel
|
Recoil
|
Deflectable
|
Unarmed
|
| 0
|
N/A
|
1
|
16
|
22
|
38
|
N/A
|
N/A
|
-
|
N/A
|
-
|
N/A
|
Yes
|
Universal dodge. Avoids all attacks for a brief moment, and is mainly used to avoid throws.
Complete invincibility from frames 1 to 10. Strike invincibility from frames 11 to 16.
|
|
Toggle Hitboxes Toggle Hitboxes
|
Stance Break
Stance Break
A+B during Just Defense
|
| Damage
|
Guard
|
Startup
|
Active
|
Recovery
|
Total
|
Hit Adv
|
Block Adv
|
Guard Dmg
|
Cancel
|
Recoil
|
Deflectable
|
Unarmed
|
| 0
|
Mid
|
5
|
-
|
-
|
52
|
KD
|
-24
|
0
|
No
|
-
|
-
|
Yes
|
|
|
|
Toggle Hitboxes Toggle Hitboxes
|
Counter / Blade Catch
Counter / Blade Catch
236A+B Counter Counter Blade Catch Blade Catch
|
| Version
|
Damage
|
Guard
|
Startup
|
Active
|
Recovery
|
Total
|
Hit Adv
|
Block Adv
|
Guard Dmg
|
Cancel
|
Recoil
|
Deflectable
|
Unarmed
|
| Armed
|
0
|
N/A
|
2
|
11
|
34
|
46
|
+35~+59
|
N/A
|
N/A
|
N/A
|
N/A
|
N/A
|
No
|
Universal counter. Allows you to follow up with a guaranteed attack of your own. The amount of time you have to followup depends on the strength of the attack you counter, with heavy attacks staggering the opponent for the longest amount of time. Additionally, if you counter a heavy slash or a running slash, your opponent will be disarmed.
|
| Disarmed
|
0
|
N/A
|
2
|
12
|
9
|
22
|
KD
|
N/A
|
N/A
|
N/A
|
N/A
|
N/A
|
Yes
|
Universal counter. While disarmed, your counter will disarm and knock away your opponent regardless of slash level countered.
|
|
Toggle Hitboxes Toggle Hitboxes
|
Rage Explosion
Rage Explosion
5A+B+C
|
| Damage
|
Guard
|
Startup
|
Active
|
Recovery
|
Total
|
Hit Adv
|
Block Adv
|
Guard Dmg
|
Cancel
|
Recoil
|
Deflectable
|
Unarmed
|
| 0
|
Unblockable
|
21
|
1
|
-
|
58
|
0
|
-
|
-
|
-
|
-
|
-
|
No
|
Universal Rage Explosion. Check the Mechanics page for more info.
|
|
Toggle Hitboxes Toggle Hitboxes
|
Lightning Blade
Lightning Blade (Issen)
5A+B+C during Rage Explosion
|
| Damage
|
Guard
|
Startup
|
Active
|
Recovery
|
Total
|
Hit Adv
|
Block Adv
|
Guard Dmg
|
Cancel
|
Recoil
|
Deflectable
|
Unarmed
|
| 300~709
|
Mid
|
9
|
-
|
-
|
-
|
KD
|
-44
|
-
|
No
|
No
|
No
|
No
|
Universal Lightning Blade. Check the Mechanics page for more info.
|
|
Toggle Hitboxes Toggle Hitboxes
|
Special Moves
Distance Slash
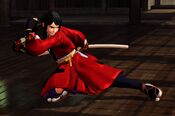
Distance Slash
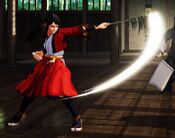
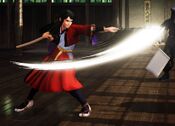
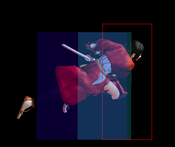
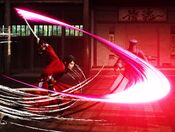
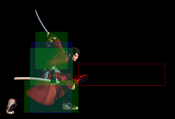
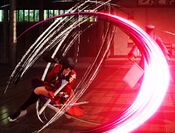
236S A and C version have the same animation without rage. A and C version have the same animation without rage. B hits low. B hits low. C version hits twice in rage. C version hits twice in rage.
|
| Version
|
Damage
|
Guard
|
Startup
|
Active
|
Recovery
|
Total
|
Hit Adv
|
Block Adv
|
Guard Dmg
|
Cancel
|
Recoil
|
Deflectable
|
Unarmed
|
| A
|
100
|
Mid
|
8
|
-
|
-
|
72
|
-5
|
-17
|
5
|
-
|
-
|
-
|
No
|
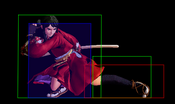
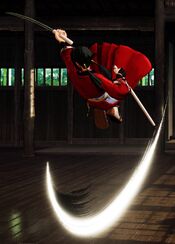
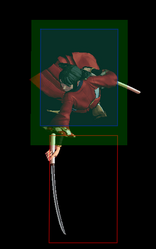
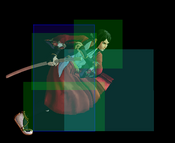
Hibiki draws her sword and slashes straight forward.
- All versions don't seem to extend her hurtbox, so in general this move is great for whiff punishing many attacks, especially 236A.
- All versions have huge recovery times, which makes you very vulnerable to jump-ins if you whiff.
|
| B
|
120
|
Low
|
14
|
-
|
-
|
69
|
KD (+81)
|
-21
|
5
|
-
|
-
|
-
|
No
|
Hibiki draws her sword and slashes at the opponent's feet.
- Slightly more startup than 236A but still combos in many of the same situations; ideal for getting a knockdown when punishing an opponent.
|
| C
|
120
|
Mid
|
22
|
-
|
-
|
55
|
-6
|
-5
|
10
|
-
|
-
|
-
|
No
|
A slower variant of the A version with more range and more safety on block.
- Only really useful as combo material; it can be used for pokes but carefully, as whiffing is super dangerous and its slower startup makes it easier to preempt at close or mid range.
|
| Rage
|
200 [120,80]
|
Mid
|
12
|
-
|
-
|
61
|
KD (+95)
|
-13(-27)
|
20[10,10]
|
-
|
-
|
-
|
No
|
Hibiki does the A version and then adds an additional slash to it.
- While the second hit is -13 on block and can be punished, the pushback is so high that Hibiki is generally spaced away into safety.
|
|
Toggle Hitboxes Toggle Hitboxes
|
Beckoning Slash
Beckoning Slash
623S HAKKEN! HAKKEN!
|
| Version
|
Damage
|
Guard
|
Startup
|
Active
|
Recovery
|
Total
|
Hit Adv
|
Block Adv
|
Guard Dmg
|
Cancel
|
Recoil
|
Deflectable
|
Unarmed
|
| A
|
100 / 60 (Close)
|
Mid
|
18
|
6
|
-
|
51
|
KD (+90) / -10 (Sideswitch)
|
-13~-8 (-21 Sideswitch)
|
12
|
No/Yes
|
-
|
-
|
No
|
Hibiki runs forward and slashes out after a short delay.
- Hitting with this move from afar does more damage and knocks the opponent down; if she's close enough to the opponent when she draws her sword to slash out, she'll pass through them, leaving them standing but doing less damage.
- The pass-through version can be followed up with any version of 236S, just don't reverse the input.
|
| B
|
100 / 60 (Close)
|
Mid
|
21
|
6
|
-
|
54
|
KD (+90) / -10 (Sideswitch)
|
-13~-8 (-21 Sideswitch)
|
12
|
No
|
-
|
-
|
No
|
Similar to the A version with slightly more startup on the time before she slashes. You must use the hold variant (see below) to get the pass-through slash.
|
| C
|
100 / 60 (Close)
|
Mid
|
24
|
-
|
-
|
57
|
KD (+90) / -10 (Sideswitch)
|
-13~-8 (-21 Sideswitch)
|
12
|
No
|
-
|
-
|
No
|
Similar to the A version with more startup than the B version on the time before she slashes. You must use the hold variant (see below) to get the pass-through slash.
|
|
Toggle Hitboxes Toggle Hitboxes
|
Beckoning Slash (Hold)
Beckoning Slash (Hold)
623[S] It looks exactly like her dash. It looks exactly like her dash.
|
| Version
|
Damage
|
Guard
|
Startup
|
Active
|
Recovery
|
Total
|
Hit Adv
|
Block Adv
|
Guard Dmg
|
Cancel
|
Recoil
|
Deflectable
|
Unarmed
|
| A
|
60
|
Mid
|
18~
|
-
|
-
|
51~74
|
KD (+90) / -10 (Sideswitch)
|
-13~-8 (-21 Sideswitch)
|
12
|
Yes
|
-
|
-
|
No
|
Hibiki will continue running as long as the button is held, up to a point.
- If the button is released, Hibiki will slash, and will pass through if close enough to the opponent just like the non-charged version.
- If the button is held to its limit, Hibiki will stop without attacking.
|
| B
|
60
|
Mid
|
25~
|
-
|
-
|
54~102
|
KD (+90) / -10 (Sideswitch)
|
-13~-8 (-21 Sideswitch)
|
12
|
Yes
|
-
|
-
|
No
|
Similar to 623[A], with more hold time allowed.
- To get a pass-through slash, you need to hold the button for about 3 steps (a little longer than a second).
- Cancelable into WFT, and combos off a n.5C cancel if you charge it just right.
|
| C
|
60
|
Mid
|
43~
|
-
|
-
|
57~130
|
KD (+90) / -10 (Sideswitch)
|
-13~-8 (-21 Sideswitch)
|
12
|
Yes
|
-
|
-
|
No
|
Similar to 623[A], with a longer hold time allowed than 623[B].
- The pass-through slash hold timing is approximately the same as 623[B].
- Like the medium version it can cancel into WFT on hit, but she can also use WFT or other special moves (except her parry) on block, effectively creating a mixup between the run cancel, her 236B hitting low and 623D hitting high.
- Canceling on block has no gaps, so the opponent can't press buttons to interrupt whatever comes next.
|
|
Toggle Hitboxes Toggle Hitboxes
|
Beckoning Slash (Stop)
Beckoning Slash (Stop)
During 623[S], 44/D Put the brakes on. Put the brakes on.
|
| Damage
|
Guard
|
Startup
|
Active
|
Recovery
|
Total
|
Hit Adv
|
Block Adv
|
Guard Dmg
|
Cancel
|
Recoil
|
Deflectable
|
Unarmed
|
| N/A
|
-
|
-
|
-
|
13
|
24~/27~/35~
|
-
|
-
|
-
|
-
|
-
|
-
|
No
|
Cancels Beckoning Slash.
- The three versions can be cancelled after frame 11/14/22 for the A, B, and C versions respectively, making them 24/27/35 as minimum total frame.
|
|
Toggle Hitboxes Toggle Hitboxes
|
Piercing Moon Pounce
Piercing Moon Pounce
623D
|
| Damage
|
Guard
|
Startup
|
Active
|
Recovery
|
Total
|
Hit Adv
|
Block Adv
|
Guard Dmg
|
Cancel
|
Recoil
|
Deflectable
|
Unarmed
|
| 60 (65)
|
High
|
18 (35)
|
-
|
-
|
45 (62)
|
-2 (-7)
|
-13
|
15 (15)
|
No(Yes)
|
-
|
-
|
No
|
Hibiki jabs the opponent with the butt of her sheathed sword.
- Hits overhead.
- Hold D to charge it up. When partially charged (at around the point where she raises her sword to thrust it forward) or fully charged, it can be canceled into 236S, 623S, or WFT on hit.
- At full charge, it deals slightly more damage.
|
|
Toggle Hitboxes Toggle Hitboxes
|
Heavenly Being Blade
Heavenly Being Blade
214S
|
| Damage
|
Guard
|
Startup
|
Active
|
Recovery
|
Total
|
Hit Adv
|
Block Adv
|
Guard Dmg
|
Cancel
|
Recoil
|
Deflectable
|
Unarmed
|
| 50
|
N/A
|
6
|
6
|
-
|
50
|
KD (+91)
|
-
|
N/A
|
-
|
-
|
-
|
No
|
Hibiki sticks her hand out to catch an incoming attack. On a successful parry, she'll throw the opponent behind her.
- 214S will parry high and mid normal moves and special moves, including kicks and unarmed punches, as well as most WFTs.
- 214S cannot parry lows (or mid moves that go under its hitbox), projectiles, SSMs, Rage Explosions or Issens.
- WFTs that can't be parried include: Yashamaru, Galford, Jubei, Tam, Hanzo, Yoshi, Shiki (the hitbox is too low), Wu, Rimururu, and Wanfu.
|
|
Toggle Hitboxes Toggle Hitboxes
|
Draw and Die
Draw and Die
After 214S, S
|
| Damage
|
Guard
|
Startup
|
Active
|
Recovery
|
Total
|
Hit Adv
|
Block Adv
|
Guard Dmg
|
Cancel
|
Recoil
|
Deflectable
|
Unarmed
|
| 80
|
N/A
|
-
|
-
|
-
|
-
|
KD (+65)
|
-
|
N/A
|
Yes
|
-
|
-
|
No
|
Hibiki slashes the opponent with her drawn blade after throwing them from Heavenly Being Blade.
- Does more damage than the other follow up, Draw and Hit, and can be canceled into WFT or Issen with the proper timing.
- Has full invulnerability.
|
|
Toggle Hitboxes Toggle Hitboxes
|
Draw and Hit
Draw and Hit
After 214S, D
|
| Damage
|
Guard
|
Startup
|
Active
|
Recovery
|
Total
|
Hit Adv
|
Block Adv
|
Guard Dmg
|
Cancel
|
Recoil
|
Deflectable
|
Unarmed
|
| 50
|
N/A
|
-
|
-
|
-
|
-
|
KD (+77)
|
-
|
N/A
|
Yes
|
-
|
-
|
No
|
Hibiki slashes the opponent with her sheathed blade after throwing them from Heavenly Being Blade.
- Does less damage than Draw and Die but can be canceled into 236S; 236A/C will hit with suitable adjustments to match the timing of the move.
- Has full invulnerability.
|
|
Toggle Hitboxes Toggle Hitboxes
|
Supers
Weapon Flipping Technique
Heavenly Spirit of Victory
236B+C
|
| Damage
|
Guard
|
Startup
|
Active
|
Recovery
|
Total
|
Hit Adv
|
Block Adv
|
Guard Dmg
|
Cancel
|
Recoil
|
Deflectable
|
Unarmed
|
| 420(490)
|
Mid
|
1+9
|
-
|
-
|
-
|
KD (+89)
|
-37~-21
|
0
|
-
|
-
|
-
|
No
|
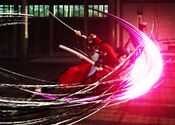
Hibiki dashes forward to slash the opponent. On hit, she passes through them, and does immense damage once she sheathes her sword.
- Available only during Max Rage or Rage Explosion. Disarms on hit.
- Moves incredibly fast and has extremely low startup, making it a strong punish option and a powerful WFT.
|
|
Toggle Hitboxes Toggle Hitboxes
|
Super Special Move
No Fear Feint
641236C+D
|
| Damage
|
Guard
|
Startup
|
Active
|
Recovery
|
Total
|
Hit Adv
|
Block Adv
|
Guard Dmg
|
Cancel
|
Recoil
|
Deflectable
|
Unarmed
|
| 650[100,550]
|
Mid
|
10+22
|
-
|
-
|
-
|
KD (+61)
|
-41
|
0
|
-
|
-
|
-
|
No
|
Hibiki slashes upward and outward. On hit, she dashes forward and slashes the opponent once more, damaging them severely once she sheathes her sword.
- Available only once per match. Short ranged SSM.
|
|
Toggle Hitboxes Toggle Hitboxes
|
Combos
List combos, use numpad notation.
Midscreen
- 66B xx 623A xx 236B
Long range punish combo without rage. Don't reverse the 236S input after the 623S.
- n.5C xx 623D (charged) xx 623A xx 236A/B/C
623D has to be released as soon as its charged, which is when she raises the scabbard a second time.
- n.5C xx 623B (charged) xx WFT
WFT combo from 623B. 623B has to be charged for a short time.
- (n.5B/2B) xx 623A xx 236B
Close range punish combo, same damage as 66B. 623A won't go through to the other side on the tip of 2B.
- 2B xx 236B
Mid to close range quick punish combo, always connects after 2B.
- 6D xx 236B
Quick combo from a low kick.
- (66B/n.5B/2B) xx 623A xx 236C
Rage punish combo.
- (66B/n.5B/2B) xx WFT
WFT combo.
- (n.5A/5A) xx (236A/B/Rage) / WFT
Combos from lights.
- 5CD/4CD...
- 66B xx 623A xx 236B
Grab combo with knock down.
- 5C...
Most damage without rage but no knock down.
- 66B xx 623A xx 236C
Rage combo.
- 66B xx WFT
WFT combo.
- j.C...
- n.5C/5C...
Universal j.C deep hit combo. Follow with whatever combos from n.5C or 5C.
- (66B/n.5B/2B) xx 623A xx 236B
Without rage.
- (66B/n.5B/2B) xx 623A xx 236C
Rage combo.
- (66B/n.5B/2B) xx WFT
WFT combo.
- Lightning Blade
Universal issen combo.
- 214S...
Parry...
- D...
- 236A / C
Without rage, same damage.
- S...
- WFT
- Lightning Blade
A small delay is required for issen to connect.
Corner
All of Hibiki's combos from above work in or near the corner too, but you should avoid the 623A combos as they side switch and will put you in the corner instead unless you space the 623A correctly. Use the ones below instead; the first three in particular can double as throw or punish combos with the proper spacing.
- (66B/n.5B/2B) xx 236B
Without rage.
- (66B/n.5B/2B) xx 236C
Rage.
- (66B/n.5B/2B) xx WFT
WFT combo.
- (5CD/4CD) xx n.5C(1) xx 236B
Better throw damage if you throw them into the corner.
- (5CD/4CD) xx n.5C(1) xx 623A xx 236C
Rage combo off of a throw into the corner. Swaps sides.
- (5CD/4CD) xx n.5C(1) xx WFT
Rage combo off a throw into the corner. Again, swaps sides.
- 214S...
Parry...
- D...
- 236A
Delay a little to connect. (Go for WFT when in Rage)
- S...
- 623D (charged)...
Fully charged...
- 623A xx 236B
Without rage.
- 623A xx 236C
Rage combo.
- WFT
Combo into WFT.
Guard Crush
- n.5C...
Combo from second hit...
- 623A xx 236B
Without rage.
- 623A xx 236C
Rage combo.
- WFT
Combo into WFT.
- Lightning Blade
Universal Issen combo, combo from second hit.
- 5C...
After recovery...
- 66B xx 623A xx 236B
Without rage.
- 66B xx (623A xx 236C) / WFT
Rage combo or WFT combo.
- n.5C...
Cancel second hit...
- 623[S] xx 44 / D...
Hold her 623 and cancel it with back dash motion or kick (D)...
- SSM
SSM.
An easy way to input this is to start with 623[S], then do 6(C+D) 41236 (C+D) if you have the C and D macro; the 623 hold will be canceled by the macro. There's many ways to input this, so find something you prefer.
- Deep j.C xx 66B xx 623A xx 236B
Without rage, use the one that combo from second hit if you do not want the deep j.C.
- Deep j.C xx 66B xx (623A xx 236C) / WFT
Rage combo or WFT combo, use the one that combo from second hit if you do not want the deep j.C.
- 5C...
Cancel recovery...
- Lightning Blade
Universal Issen combo.
- 623A xx 44/D xx SSM
Hold her 623A and cancel the run, then SSM. You can also go for the ones for n.5C with j.C but don't have to, can just wait after the recovery and do the combos in the "After recovery" section.
Videos
Hibiki Tutorial and Combos By LegendaryWolf Shirou (2021)
Hibiki's English textbook By 伝説のオタク(Den-taku)/PGW (2021)
ViolentKain vs Sinisterx at WNF Online Edition
Colors
External Links
Link to docs hosted in other sites.
