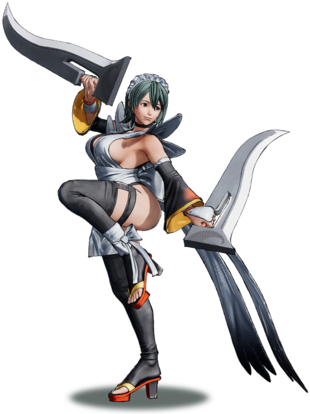
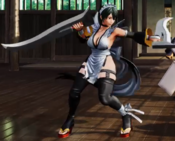
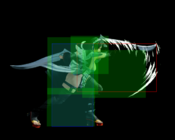
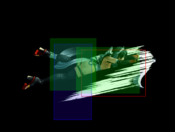
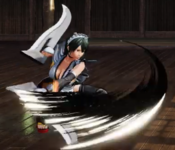
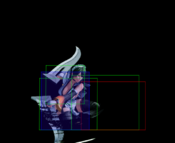
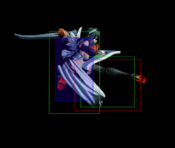
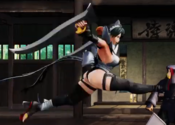
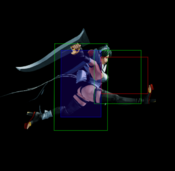
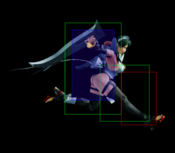
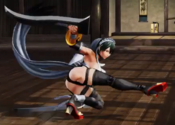
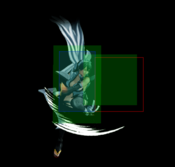
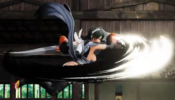
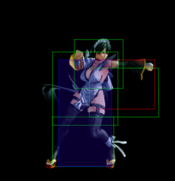
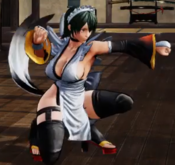
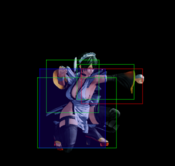
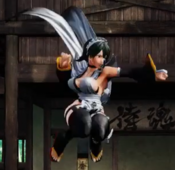
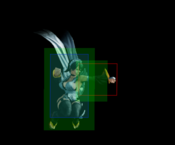
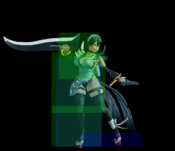
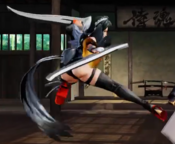
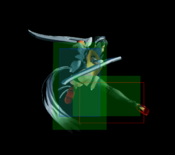
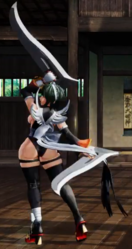
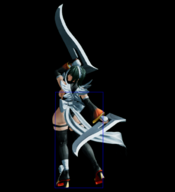
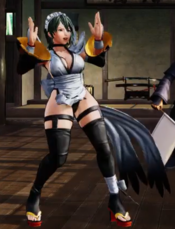
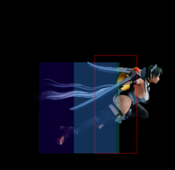
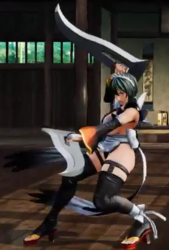
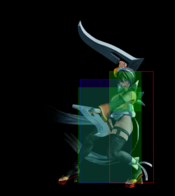
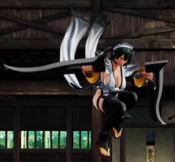
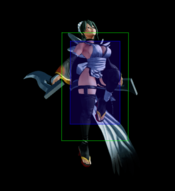
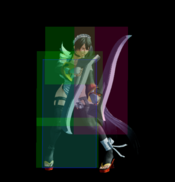
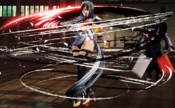
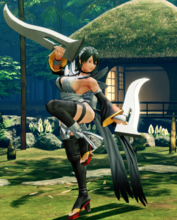
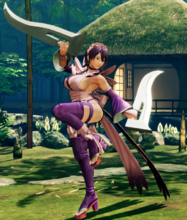
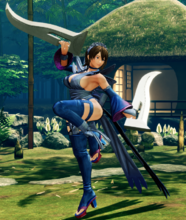
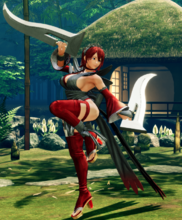
Iroha
いろは, Iroha
|
- Damage Taken: 105%
- Rage Factor: 0.26
- Rage Duration: 10 seconds
- Jump: 46 frames (Average. Has a Double Jump)
- Forward Walk Speed: 0.3 (Average)
- Back Walk Speed: 0.23 (Average)
- Forward Step: 23 frames (Feet Invul 6F)
- Back Dash: 27 frames (Cancelable 12-14F)
- Weapon Pickup / Drop: 40 / 60 frames
|
Introduction
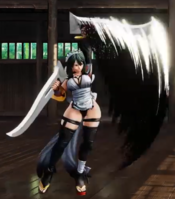
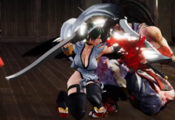
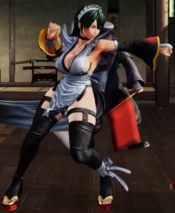
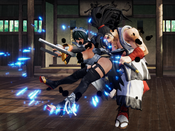
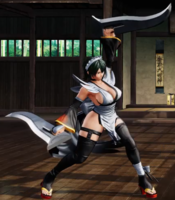
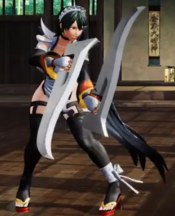
Iroha is a high mobility character with a plethora of options to move around the screen and control space. She can use her fireball and various air specials to keep the opponent at bay, move closer, or just control space around her. She also sports good mixup options once she’s up close, which all dovetails into a style that centers around shutting opponents down.
However, she cannot cancel her dash early, and lacks dashing normals, making it a little more difficult to play a normal grounded game. Additionally, her flexibility in the air is offset by how vulnerable she is when landing from special moves, and she gets less damage out of most interactions than most other characters do.
Playstyle
 Iroha is an oppressive zoner with great aerial mobility and strong high-low mixups. Iroha is an oppressive zoner with great aerial mobility and strong high-low mixups.
|
| Strengths |
Weaknesses
|
- Unique Movement: Iroha's step dash makes it easy for her to hop over low fireballs and low normals, and her double jump allows her to reposition herself at will in the air.
- Great Aerial Options: Iroha has a number of tricks to utilize once she's in the air, including cancelable normals, fireball stalling, and adjusting her trajectory with special moves.
- Strong Zoning: Iroha's fireball is extremely flexible in its applications; it can get her plus frames, allow her to cover multiple angles on the ground and in the air, and even set up for combos with meaty setups.
- Powerful Mixups: After a knockdown, Iroha can create a powerful high-low mixup situation by utilizing kara cancels with her 6D and 3D.
- Parry: Iroha's parry has relatively long active frames and generally gives her initiative on success, allowing her to shut down careless approaches and prevent immediate Rage Explosions.
|
- Low Damage from Mixups: While her mixup game is very strong, it is generally low damage, meaning that opponents who are willing to guess wrong a few times can work around them.
- Risky Air Specials: Her air specials have a fair amount of landing recovery, which makes her especially susceptible to getting punished if they're baited out.
|
Gameplan
Iroha can play both a keep out game or a rushdown pressure game style. Her double jump gives her good air mobility. Her fireball is one of the best projectiles in the game. It can virtually reach anywhere on the screen as it can be used in air. It also allows a follow up attack on hit. All of Iroha's attack specials can be used in the air, making her an unique air specialist as her air normals can combo into her air specials.
Neutral
Iroha has strong neutral buttons. All of her far lights and mediums are great pokes. Her low kick is fast and has great reach. Her fireball is good for zoning, and also great for pressure due to the plus frames and the ability to combo from it on hit. Her DP makes a great anti-air. FB and DP great for sitting out on a life lead.
Her double jump and air specials gives her great aerial fight options. It's hard to for the opponent to AA Iroha or to contest her air game due to how high she jumps. It's something that can be exploited to challenge the opponents' ability to work against it. Her double jump allows her to face the other side in the air, which is extremely useful as the game doesn't auto correct air normals or specials.
She doesn't have a dash making her one of the most unique characters of the cast, which can make her hard to get used to at first. She can TK her air specials with Kara cancels through back dash and 6D, it's great for pressure on the ground. She's airborne very close to the ground, making combos from the opponent being impossible to connect.
Okizeme
With her air specials she got a great High/Low mix-up with 6D into 214S (which also crossed up when used up close), and her 3D as a low slide. Her back dash into 214S is a great meaty tool on forward roll, as it can also catch the opponent off guard. She can also use her FB for Oki, the light one gives a lot of pressure with plus frames on both block and hit. 6D into 236A can allow for meaty FB combo, see combo section.
She may use her jumps to deceive the opponent by changing her jump angles by double jumping and by using an air special. Her unique moveset makes her a good pressure keeper, so try her moves in different combinations to mix with the opponent's head. Here are some video references of the setups possible: Iroha setplay concepts by SonicSol and Iroha's skills by Densetsu no Otaku.
Rain Hollyhock (2146D)
Iroha's Parry is a unique one, since it allows the move's animation to go through, the opponent usually whiffs their move completely. This is particularly useful as the opponent can't rage explode out of their recovery frames, so the follow up attack is guaranteed. It's available while unarmed, which helps with retrieving her weapon more easily. It has a long active frame with short recovery making it a good parry to be used in this game.
Normal Moves
Far Slashes
5A
5A
|
| Damage
|
Guard
|
Startup
|
Active
|
Recovery
|
Total
|
Hit Adv
|
Block Adv
|
Guard Dmg
|
Cancel
|
Recoil
|
Deflectable
|
Unarmed
|
| 30
|
Mid
|
6
|
-
|
-
|
21
|
-3
|
-5 [-6]
|
5
|
No
|
Yes
|
Yes
|
No
|
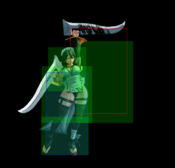
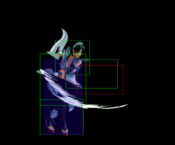
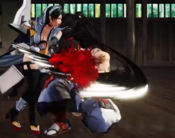
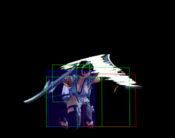
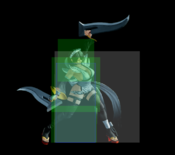
Pretty standard far light slash, but not special cancelable, making it a pretty low-reward poke.
|
|
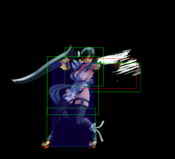
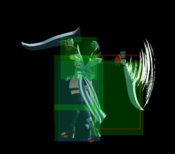
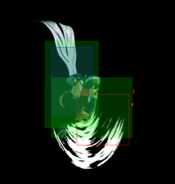
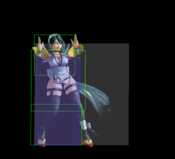
Toggle Hitboxes Toggle Hitboxes
|
5B
5B
|
| Damage
|
Guard
|
Startup
|
Active
|
Recovery
|
Total
|
Hit Adv
|
Block Adv
|
Guard Dmg
|
Cancel
|
Recoil
|
Deflectable
|
Unarmed
|
| 100
|
Mid
|
11
|
-
|
-
|
31
|
±0
|
-12 [-4]
|
10
|
No
|
Yes
|
Yes
|
No
|
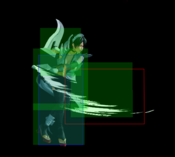
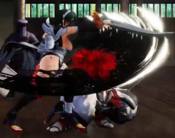
Somewhat stubby medium slash. Also not special cancelable, so your damage ends here.
|
|
Toggle Hitboxes Toggle Hitboxes
|
5C
5C Yeet Yeet
|
| Damage
|
Guard
|
Startup
|
Active
|
Recovery
|
Total
|
Hit Adv
|
Block Adv
|
Guard Dmg
|
Cancel
|
Recoil
|
Deflectable
|
Unarmed
|
| 250
|
Mid
|
16
|
10
|
-
|
57
|
KD(+82)
|
-19~-10
|
25
|
No
|
No
|
No
|
No
|
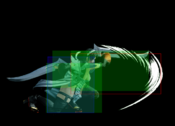
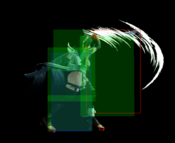
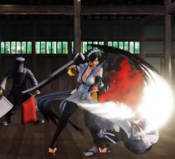
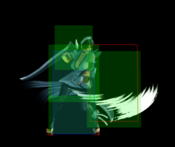
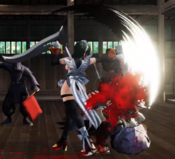
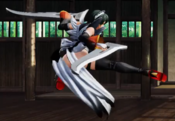
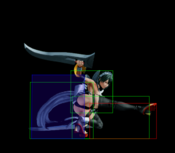
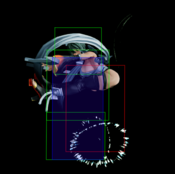
One of Iroha's 2 replacements for running normals. This normal goes a bit over half screen at max range and is an excellent option for punishing far whiffs or other distant mistakes from your opponent. Also happens to be Iroha's highest damage normal, and the knockdown allows her to set up her high/low vortex. It's airborne and can jump over some very low profile projectiles (including Kyoshiro's wave, Rimururu's rolling iceball and ice trap, Ruixiang's trap, etc). It's not an overhead despite how it looks, and it's non-deflectable.
|
|
Toggle Hitboxes Toggle Hitboxes
|
2A
2A
|
| Damage
|
Guard
|
Startup
|
Active
|
Recovery
|
Total
|
Hit Adv
|
Block Adv
|
Guard Dmg
|
Cancel
|
Recoil
|
Deflectable
|
Unarmed
|
| 30
|
Mid
|
6
|
-
|
-
|
21
|
-3
|
-5 [-6]
|
5
|
No
|
Yes
|
Yes
|
No
|
Crouching alternative to f.5A. Again, no special cancel here.
|
|
Toggle Hitboxes Toggle Hitboxes
|
2B
2B
|
| Damage
|
Guard
|
Startup
|
Active
|
Recovery
|
Total
|
Hit Adv
|
Block Adv
|
Guard Dmg
|
Cancel
|
Recoil
|
Deflectable
|
Unarmed
|
| 90
|
Mid
|
10
|
-
|
-
|
33
|
-3
|
-12 [-7]
|
10
|
No
|
Yes
|
Yes
|
No
|
Effectively identical to f.5B, but crouching, again. Still no special cancel.
|
|
Toggle Hitboxes Toggle Hitboxes
|
2C
2C
|
| Damage
|
Guard
|
Startup
|
Active
|
Recovery
|
Total
|
Hit Adv
|
Block Adv
|
Guard Dmg
|
Cancel
|
Recoil
|
Deflectable
|
Unarmed
|
| 150
|
Mid
|
18
|
-
|
-
|
49
|
-4
|
-28 [-8]
|
25
|
Yes
|
Yes
|
Disarm
|
No
|
Very slow anti-air normal. For some reason, this button is special cancelable, though this is generally only relevant in the corner after a forward throw. Does have a pretty strong anti-air hitbox if done pre-emptively enough.
|
|
Toggle Hitboxes Toggle Hitboxes
|
Near Slashes
n.5A
n.5A
|
| Damage
|
Guard
|
Startup
|
Active
|
Recovery
|
Total
|
Hit Adv
|
Block Adv
|
Guard Dmg
|
Cancel
|
Recoil
|
Deflectable
|
Unarmed
|
| 30
|
Mid
|
5
|
-
|
-
|
19
|
-2
|
-5 [-5]
|
5
|
Yes
|
Yes
|
Yes
|
No
|
Standard close light. Combos into 623B or 214C. Good for punishes on safer things. In general, Iroha's only cancelable normals are close normals such as this one, which limits her damage from grounded neutral somewhat.
|
|
Toggle Hitboxes Toggle Hitboxes
|
n.5B
n.5B
|
| Damage
|
Guard
|
Startup
|
Active
|
Recovery
|
Total
|
Hit Adv
|
Block Adv
|
Guard Dmg
|
Cancel
|
Recoil
|
Deflectable
|
Unarmed
|
| 80 (40 + 40)
|
Mid
|
8, 24
|
-
|
-
|
45
|
-1
|
-12 [-5]
|
10
|
Yes
|
Yes
|
Yes
|
No
|
Close medium slash with 2 hits. Both hits are special cancelable, making this very easy to confirm. Combos into most versions of 214S or 623S, as well as WFT. Good for punishes, mainly.
|
|
Toggle Hitboxes Toggle Hitboxes
|
n.5C
n.5C
|
| Damage
|
Guard
|
Startup
|
Active
|
Recovery
|
Total
|
Hit Adv
|
Block Adv
|
Guard Dmg
|
Cancel
|
Recoil
|
Deflectable
|
Unarmed
|
| 220 (160 + 60)
|
Mid
|
14
|
-
|
-
|
59
|
-1
|
-28 [-5]
|
25
|
Yes
|
Yes
|
Disarm
|
No
|
Standard close heavy slash, with 2 hits. Good for close punishes or recoil mindgames.
|
|
Toggle Hitboxes Toggle Hitboxes
|
n.2A
n.2A
|
| Damage
|
Guard
|
Startup
|
Active
|
Recovery
|
Total
|
Hit Adv
|
Block Adv
|
Guard Dmg
|
Cancel
|
Recoil
|
Deflectable
|
Unarmed
|
| 30
|
Mid
|
5
|
-
|
-
|
17
|
±0
|
-5 [-3]
|
5
|
Yes
|
Yes
|
Yes
|
No
|
Standard close light. Combos into 623B or 214C.
|
|
Toggle Hitboxes Toggle Hitboxes
|
Kicks
5D
5D
|
| Damage
|
Guard
|
Startup
|
Active
|
Recovery
|
Total
|
Hit Adv
|
Block Adv
|
Guard Dmg
|
Cancel
|
Recoil
|
Deflectable
|
Unarmed
|
| 50
|
Mid
|
12
|
-
|
-
|
27
|
-3
|
-6
|
5
|
Yes
|
No
|
No
|
Yes
|
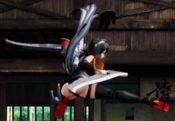
Iroha hops and kicks. Like her dash, this move has high-profile and can go over low hitting moves and grounded projectiles. This normal is also kara cancelable into air specials like her 6D, though it does not provide any initial forward momentum. See 6D's entry below for more info on kara canceling.
Foot invincibility from frames 7 to 21.
|
|
Toggle Hitboxes Toggle Hitboxes
|
6D
6D
|
| Damage
|
Guard
|
Startup
|
Active
|
Recovery
|
Total
|
Hit Adv
|
Block Adv
|
Guard Dmg
|
Cancel
|
Recoil
|
Deflectable
|
Unarmed
|
| 40 (20 + 20)
|
High
|
25, 27
|
1, 2
|
19
|
47
|
-2
|
-9~-8
|
5
|
Yes
|
No
|
No
|
Yes
|
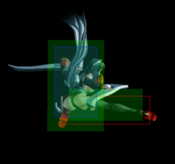
Iroha does a hop forward and kicks. This normal helps to define the core of Iroha's mixup, as it can be kara cancelled into any of her air specials during the startup. 6D kara'd into 214S is a very fast, far-range overhead that knocks down, and can also cross up on a crouching opponent at closer ranges. When used in tandem with her 2D and 3D Iroha has a low damage but very annoying high/low vortex that can loop continuously as long as your opponent continues guessing wrong. The normal itself is also an overhead, and more rewarding combos can be done on bigger bodies by canceling into 623L after the first hit.
|
|
Toggle Hitboxes Toggle Hitboxes
|
2D
2D
|
| Damage
|
Guard
|
Startup
|
Active
|
Recovery
|
Total
|
Hit Adv
|
Block Adv
|
Guard Dmg
|
Cancel
|
Recoil
|
Deflectable
|
Unarmed
|
| 20
|
Low
|
6
|
-
|
-
|
19
|
-1
|
-4
|
5
|
Yes
|
No
|
No
|
Yes
|
Short ranged, cancelable low kick. At closer ranges, this can be buffered into 214H to catch an opponent who is standing up in anticipation of a kara 214S, though this is not confirmable.
|
|
Toggle Hitboxes Toggle Hitboxes
|
3D
3D
|
| Damage
|
Guard
|
Startup
|
Active
|
Recovery
|
Total
|
Hit Adv
|
Block Adv
|
Guard Dmg
|
Cancel
|
Recoil
|
Deflectable
|
Unarmed
|
| 70
|
Low
|
12
|
9
|
-
|
42
|
KD(+94)
|
-14~-6
|
5
|
No
|
No
|
No
|
Yes
|
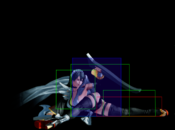
Iroha slides with her uninjured leg. While it's no Ukyo slide, this slide can be spaced to be safer (though not entirely unsafe), and is your low complement to your kara 214S mixup from further, making this mixup something that your opponent needs to be concerned about even from mid-range.
|
|
Toggle Hitboxes Toggle Hitboxes
|
Air Normals
j.A
j.A
|
| Damage
|
Guard
|
Startup
|
Active
|
Recovery
|
Total
|
Hit Adv
|
Block Adv
|
Guard Dmg
|
Cancel
|
Recoil
|
Deflectable
|
Unarmed
|
| 50
|
High
|
8
|
-
|
-
|
-
|
-
|
-
|
5
|
Yes
|
No
|
No
|
No
|
Standard jumping light. Good twitch reaction air-to-air if you're not prepared for 214S. It's cancellable into air speicials.
|
|
Toggle Hitboxes Toggle Hitboxes
|
j.B
j.B
|
| Damage
|
Guard
|
Startup
|
Active
|
Recovery
|
Total
|
Hit Adv
|
Block Adv
|
Guard Dmg
|
Cancel
|
Recoil
|
Deflectable
|
Unarmed
|
| 100
|
High
|
10
|
-
|
-
|
-
|
-
|
-
|
10
|
No
|
No
|
No
|
No
|
Standard jumping medium, and another decent twitch reaction air-to-air.
|
|
Toggle Hitboxes Toggle Hitboxes
|
j.C
j.C
|
| Damage
|
Guard
|
Startup
|
Active
|
Recovery
|
Total
|
Hit Adv
|
Block Adv
|
Guard Dmg
|
Cancel
|
Recoil
|
Deflectable
|
Unarmed
|
| 140
|
High
|
14
|
-
|
-
|
-
|
-
|
-
|
20
|
No
|
No
|
No
|
No
|
Iroha's best jumping normal for jump-ins, and also a relatively decent air-to-air. Despite how it looks, this button can cross-up at specific angles as well.
|
|
Toggle Hitboxes Toggle Hitboxes
|
j.D
j.D
|
| Damage
|
Guard
|
Startup
|
Active
|
Recovery
|
Total
|
Hit Adv
|
Block Adv
|
Guard Dmg
|
Cancel
|
Recoil
|
Deflectable
|
Unarmed
|
| 30
|
High
|
9
|
-
|
-
|
-
|
-
|
-
|
5
|
Yes
|
No
|
No
|
Yes
|
Iroha's jumping kick, which has the special property of being cancelable into her airborne specials. While this button does not grant any air-to-air juggles, canceling jD into 214S at specific angles can create very nasty ambiguous cross-ups, where the opponent blocks her jD one way and is forced to block the Pin Wheel in the opposite direction. This normal itself can also cross-up, which can make these scenarios even worse to deal with.
|
|
Toggle Hitboxes Toggle Hitboxes
|
Unarmed Normals
While Iroha keeps her double jump, she is relatively limited without her weapons as she loses all of her specials (aside from parry). So try to get your blades back as soon as possible!
u.5S
u.5S
|
| Damage
|
Guard
|
Startup
|
Active
|
Recovery
|
Total
|
Hit Adv
|
Block Adv
|
Guard Dmg
|
Cancel
|
Recoil
|
Deflectable
|
Unarmed
|
| 50
|
Mid
|
6
|
-
|
-
|
25
|
+1
|
-4
|
5
|
No
|
No
|
No
|
Only
|
Somewhat weak-looking jab.
|
|
Toggle Hitboxes Toggle Hitboxes
|
u.2S
u.2S
|
| Damage
|
Guard
|
Startup
|
Active
|
Recovery
|
Total
|
Hit Adv
|
Block Adv
|
Guard Dmg
|
Cancel
|
Recoil
|
Deflectable
|
Unarmed
|
| 50
|
Mid
|
5
|
-
|
-
|
25
|
±0
|
-5
|
5
|
No
|
No
|
No
|
Only
|
Same as u.5S, but crouching instead.
|
|
Toggle Hitboxes Toggle Hitboxes
|
ju.S
ju.S
|
| Damage
|
Guard
|
Startup
|
Active
|
Recovery
|
Total
|
Hit Adv
|
Block Adv
|
Guard Dmg
|
Cancel
|
Recoil
|
Deflectable
|
Unarmed
|
| 50
|
High
|
6
|
-
|
-
|
-
|
-
|
-
|
5
|
No
|
No
|
No
|
Only
|
Same as u.5S, but in the air instead.
|
|
Toggle Hitboxes Toggle Hitboxes
|
Universal Mechanics
Guard Break
Guard Break (Throw)
5C+D / 6C+D
(Forward Throw) 4C+D
(Back Throw) 4C+D
(Back Throw)
|
| Version
|
Damage
|
Guard
|
Startup
|
Active
|
Recovery
|
Total
|
Hit Adv
|
Block Adv
|
Guard Dmg
|
Cancel
|
Recoil
|
Deflectable
|
Unarmed
|
| Forward
|
0
|
Throw
|
3
|
-
|
71
|
74
|
+20
|
-
|
-
|
No
|
No
|
No
|
Yes
|
| Back
|
0
|
Throw
|
5
|
-
|
69
|
74
|
+25
|
-
|
-
|
No
|
No
|
No
|
Yes
|
Universal throw, that can be followed up with combos. Back throw has slower start up but better frame advantage. There is no throw tech, but throws are very punishable on whiff.
|
|
Toggle Hitboxes Toggle Hitboxes
|
Surprise Attack
Surprise Attack (Overhead)
5B+C
|
| Version
|
Damage
|
Guard
|
Startup
|
Active
|
Recovery
|
Total
|
Hit Adv
|
Block Adv
|
Guard Dmg
|
Cancel
|
Recoil
|
Deflectable
|
Unarmed
|
| Armed
|
70
|
High
|
20
|
-
|
-
|
44
|
+1
|
-12
|
10
|
No
|
No
|
No
|
No
|
Universal overhead. Moves forward a bit, but it's not cancellable like 6D. She also has better overhead options than this.
|
| Unarmed
|
70
|
High
|
20
|
-
|
-
|
44
|
KD(+99)
|
-12
|
10
|
No
|
No
|
No
|
Only
|
Unarmed overhead. Identical animation, but now knocks down, giving you a chance to retrieve your weapon.
|
|
Toggle Hitboxes Toggle Hitboxes
|
Dodge
Dodge
5A+B
|
| Damage
|
Guard
|
Startup
|
Active
|
Recovery
|
Total
|
Hit Adv
|
Block Adv
|
Guard Dmg
|
Cancel
|
Recoil
|
Deflectable
|
Unarmed
|
| N/A
|
-
|
1
|
16
|
22
|
38
|
-
|
-
|
-
|
-
|
-
|
-
|
Yes
|
Universal dodge. Avoids all attacks for a brief moment, and is mainly used to avoid throws.
Complete invincibility from frames 1 to 10.
Strike invincibility from frames 11 to 16.
|
|
Toggle Hitboxes Toggle Hitboxes
|
Stance Break
Stance Break
A+B during Just Defense
|
| Damage
|
Guard
|
Startup
|
Active
|
Recovery
|
Total
|
Hit Adv
|
Block Adv
|
Guard Dmg
|
Cancel
|
Recoil
|
Deflectable
|
Unarmed
|
| 0
|
Mid
|
5
|
-
|
-
|
52
|
KD
|
-24
|
-
|
-
|
-
|
-
|
Yes
|
Universal Stance Break, push away and knocks down the opponent. It's a very useful tool while unarmed, but a deep jumping hit can recover fast enough to block it, which means you can get punished you with a strong combo.
Invincibility from frames 1 to 5.
|
|
Toggle Hitboxes Toggle Hitboxes
|
Counter / Blade Catch
Counter / Blade Catch
236A+B Counter Counter Blade Catch Blade Catch
|
| Version
|
Damage
|
Guard
|
Startup
|
Active
|
Recovery
|
Total
|
Hit Adv
|
Block Adv
|
Guard Dmg
|
Cancel
|
Recoil
|
Deflectable
|
Unarmed
|
| Armed
|
0
|
N/A
|
2
|
11
|
34
|
46
|
+35~+59
|
-
|
-
|
-
|
-
|
-
|
No
|
Universal counter that works against mid-guard normal slashes. Upon successful counter, you can follow up with any attack except throws.
The amount of time you have to follow up depends on timing and strength of the slash. Deflecting medium slashes staggering the opponent for longest amount of time.
Additionally, if you deflect a heavy slash or running medium slash, the opponent will be disarmed.
|
| Unarmed
|
0
|
N/A
|
2
|
12
|
9
|
22
|
KD
|
-
|
-
|
-
|
-
|
-
|
Only
|
Universal unarmed counter, works against the same slashes as counter.
Upon successful blade catch, your will disarm your opponent and knock down the opponent to the corner, regardless of the strength of slash.
|
|
Toggle Hitboxes Toggle Hitboxes
|
Rage Explosion
Rage Explosion
5A+B+C
|
| Damage
|
Guard
|
Startup
|
Active
|
Recovery
|
Total
|
Hit Adv
|
Block Adv
|
Guard Dmg
|
Cancel
|
Recoil
|
Deflectable
|
Unarmed
|
| 0
|
Unblockable
|
21
|
1
|
-
|
58
|
0
|
-
|
-
|
-
|
-
|
-
|
No
|
Activate the rage explosion gauge and push back the opponent, available once per match. In order to activate, the character must be on the ground with the weapon on hand.
It can be activated during hit stun / throw staggering / weapon deflected / recoil cancel / normal cancel / blocking, but not during action recovery.
It's nearly the same as max rage with extra damage buff (140% vs 120%), and it pauses the timer count down, also allows access to Lighting Blade.
The less amount of health remaining when activates, the more amount of rage explosion gauge it begins with.
Rage explosion ends if the gauge runs out, WFT connects, Lighting Blade used, or the round ended. Then the rage gauge disappears for the rest of match.
The activation push back is unblockable, and its hit-box extends all the way up to top of the screen.
|
|
Toggle Hitboxes Toggle Hitboxes
|
Lightning Blade
Lightning Blade (Issen)
5A+B+C during Rage Explosion
|
| Damage
|
Guard
|
Startup
|
Active
|
Recovery
|
Total
|
Hit Adv
|
Block Adv
|
Guard Dmg
|
Cancel
|
Recoil
|
Deflectable
|
Unarmed
|
| 300~709
|
Mid
|
9
|
-
|
-
|
-
|
KD
|
-44
|
-
|
-
|
-
|
-
|
No
|
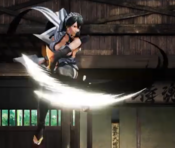
Dashes full screen and slashes across the opponent in classic style. It has full invincibility and can anti-air. Damage scales based on remaining rage explosion gauge.
|
|
Toggle Hitboxes Toggle Hitboxes
|
Command Moves
Iron Feather Ridge
Iron Feather Ridge
4D
|
| Damage
|
Guard
|
Startup
|
Active
|
Recovery
|
Total
|
Hit Adv
|
Block Adv
|
Guard Dmg
|
Cancel
|
Recoil
|
Deflectable
|
Unarmed
|
| 80
|
Mid
|
18
|
-
|
-
|
43
|
KD(+112)
|
-12
|
8
|
Yes
|
No
|
No
|
Yes
|
A shoulder tackle that carries Iroha about a third of the screen forward. This normal is a launcher and will allow juggles into normals or specials afterwards. One of Iroha's best normals, and her other replacement for a dash normal, this button can be cancelled into 214A on block which keeps it much safer. While this cancel can be interrupted for a trade, cancels into the stronger versions of 214S will frametrap, which can condition the opponent for cancels into 236A, which is even on block, or other offense such as a surprise throw.
|
|
Toggle Hitboxes Toggle Hitboxes
|
Double Jump
Double Jump
j.7/8/9
|
| Damage
|
Guard
|
Startup
|
Active
|
Recovery
|
Total
|
Hit Adv
|
Block Adv
|
Guard Dmg
|
Cancel
|
Recoil
|
Deflectable
|
Unarmed
|
| -
|
-
|
-
|
-
|
-
|
-
|
-
|
-
|
-
|
-
|
-
|
-
|
Yes
|
Iroha can jump a second time in the air. She cannot double jump after already committing to a move in the air, such as a normal or a special, but she can double jump at almost any point in her jump arc.
|
|
Toggle Hitboxes Toggle Hitboxes
|
Special Moves
236X
Wind Slash
236X or j.236X 236S 236S 236D 236D j.236S j.236S j.236D j.236D
|
| Version
|
Damage
|
Guard
|
Startup
|
Active
|
Recovery
|
Total
|
Hit Adv
|
Block Adv
|
Guard Dmg
|
Cancel
|
Recoil
|
Deflectable
|
Unarmed
|
| A
|
60
|
Mid
|
36
|
-
|
-
|
55
|
+8
|
+8
|
5
|
No
|
No
|
No
|
No
|
| B
|
60
|
Mid
|
26
|
-
|
-
|
50
|
+3
|
+3
|
5
|
No
|
No
|
No
|
No
|
| C
|
60
|
Mid
|
26
|
-
|
-
|
55
|
-2
|
-2
|
5
|
No
|
No
|
No
|
No
|
| D
|
60
|
Mid
|
26
|
-
|
-
|
55
|
-2
|
-2
|
5
|
No
|
No
|
No
|
No
|
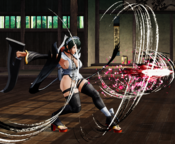
Iroha's fireball. The slash versions each travel at progressively faster speeds, and the kick version travels upwards at an anti-air trajectory. The grounded version is mainly used for meaties or cancels once your opponent has been conditioned to respect other options (such as Pin Wheel). The light version, while slow on startup, can be plus enough to link out of point blank, making it a strong meaty tool, especially in the corner. If you're trying to use fireballs for neutral, air fireballs are generally preferable as they have lower recovery.
|
| Air (X)
|
60
|
Mid
|
26
|
-
|
[13]
|
-
|
+3
|
+3
|
5
|
No
|
No
|
No
|
No
|
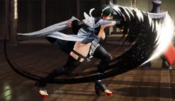
Air version of Iroha's fireball. The slash versions each travel at progressively faster speeds, while the kick version travels at a downwards angle. This fireball can be tiger knee'd (2369S), or cancelled into from backdash or 6D startup to get a very low version which can be used for grounded zoning, with faster recovery than the normal ground fireball. During a full jump, the kick version of the fireball can be used as a way to cover a retreat from the opponent or as a read on a bad advance, and the slash versions can be used as pre-emptive, but far-ranged air to airs. Iroha also cancels her jump momentum when throwing a fireball, so they can also be used to alter your jump arc significantly.
Value in [] is recovery after landing.
|
|
Toggle Hitboxes Toggle Hitboxes
|
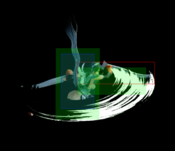
623S
Dew Drizzle
623S or j.623S
|
| Version
|
Damage
|
Guard
|
Startup
|
Active
|
Recovery
|
Total
|
Hit Adv
|
Block Adv
|
Guard Dmg
|
Cancel
|
Recoil
|
Deflectable
|
Unarmed
|
| A
|
100 (30x2 + 40)
|
Mid
|
19
|
-
|
-
|
70
|
KD
|
-10
|
5*3
|
No
|
No
|
No
|
No
|
| B
|
120 (20x4 + 40)
|
Mid
|
8
|
-
|
-
|
88
|
KD
|
-60~-52
|
5*4
|
No
|
No
|
No
|
No
|
| C
|
148 (18x6 + 40)
|
Mid
|
10
|
-
|
-
|
86
|
KD
|
-51~-47
|
5*6
|
No
|
No
|
No
|
No
|
| Rage (C)
|
184 (12x12 + 40)
|
Mid
|
10
|
-
|
-
|
86
|
KD
|
-49
|
5*n
|
No
|
No
|
No
|
No
|
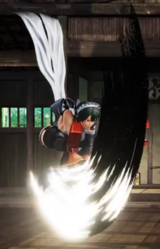
Iroha's DP. The A version travels completely horizontally, while the B and C versions both anti-air at different angles. Her DP follows the current rules of the game, with the B version having anti-air invincibility and the C version having complete invincibility. The C version is your optimal combo ender when you can combo into it, as well as being a very strong reversal and anti-air option. When in rage, Iroha's C DP gains extra hits and damage.
B version has anti-air invincibility from frame 1.
C version has complete invincibility from frame 1.
|
| A (air)
|
100 (30x2 + 40)
|
Mid
|
12
|
-
|
[14]
|
-
|
+5~+7
|
-5~-7
|
5*3
|
No
|
No
|
No
|
No
|
| B (air)
|
140 (25x4 + 40)
|
Mid
|
10
|
-
|
[14]
|
-
|
+5~+7
|
-5~-7
|
5*4
|
No
|
No
|
No
|
No
|
| C (air)
|
160 (20x6 + 40)
|
Mid
|
8
|
-
|
[14]
|
-
|
KD
|
-15~-19
|
2*6 + 3
|
No
|
No
|
No
|
No
|
| Rage C (air)
|
216 (14x12 + 48)
|
Mid
|
8
|
-
|
[14]
|
-
|
KD
|
-15~-19
|
12*2 + 3
|
No
|
No
|
No
|
No
|
The air version of Iroha's DP. Unfortunately, no version has any invincibilty, nor do they hit overhead. The A and B versions both travel downwards, they could recover before landing if done high enough. Both of them have 3 hits, but usually 1 hit is connected before landing, and only the 3rd hit knocks down. The C version travels horizontally, similarly to the grounded A version. The A and B versions can be used to quickly fall to the ground and change Iroha's jump arc, and the C version can be used as a pre-emptive air to air, but air Pin Wheel will be better for most air-to-air encounters due to having a much stronger hitbox. 6D canceled into the medium version will combo on most standing opponents, and Iroha can get a longer combo on a crouching Earthquake by canceling into the light version instead. Like the grounded version, the C version of her DP gains extra hits and damage while Iroha is in rage.
Hit / Block Frames varies depending if you Kara Cancel with 5D or 6D:
(Hit/ Block)
j.623A/B
- 5D = +5 / -5
- 6D = +7 / -7
j.623C (Normal and Rage Versions)
- 5D = KD / -15
- 6D = KD / -19
Value in [] is recovery after landing.
|
|
Toggle Hitboxes Toggle Hitboxes
|
214S
Pinwheel
214S or j.214S 214S 214S j.214S j.214S
|
| Version
|
Damage
|
Guard
|
Startup
|
Active
|
Recovery
|
Total
|
Hit Adv
|
Block Adv
|
Guard Dmg
|
Cancel
|
Recoil
|
Deflectable
|
Unarmed
|
| A
|
80 (20x4)
|
Mid
|
19
|
16
|
20
|
54
|
KD
|
-3~±0
|
2.5*4
|
No
|
No
|
No
|
No
|
| B
|
120 (20x6)
|
Mid
|
15
|
-
|
[29]
|
67
|
KD
|
-12
|
2.5*6
|
No
|
No
|
No
|
No
|
| C
|
160 (20x8)
|
Mid
|
11
|
-
|
[39]
|
81
|
KD
|
-22
|
2.5*8
|
No
|
No
|
No
|
No
|
Iroha's main confirm special. The light version is the slowest version, but is only punishable to forward throw when blocked, and is entirely safe if spaced to be blocked outside of throw range. The medium and heavy versions are faster and do more damage, but are always properly punishable on block. When cancelled into from 4D, light pinwheel trades with most reversal light/kick normals, while the other two versions frametrap, giving Iroha some cancel pressure from a forward moving normal.
214A = Feet Invincibility from frame 5.
214B = Feet Invincibility from frame 15.
214C = Feet Invincibility from frame 11.
Value in [] is recovery after landing.
|
| Air (S)
|
60
|
High
|
5
|
-
|
[34]
|
-
|
KD
|
-7~-10
|
5
|
No
|
No
|
No
|
No
|
Air version of Pin Wheel. This move is amazing. This can be kara canceled into from 6D for a very fast overhead that knocks down. If done from a normal jump, it will be active for the entirety of Iroha's jump arc, making it an excellent air-to-air option combined with its strong hitbox priority.
* Occasionally, this version of the move will hit twice, generally against airborne opponents high in their jump arc.
|
| Air S (deep hit)
|
120 (20x6)
|
Mid
|
-
|
-
|
[34]
|
-
|
KD
|
-7
|
5*6
|
No
|
No
|
No
|
No
|
When using this move as low to the ground as possible, it triggers a unique deep hit animation where it becomes a mid instead of an overhead. It will behave like the ground version on hit, dealing more damage and being safer on block. Canceling a backdash or 5D startup into air Pin Wheel can achieve the correct height easily. Additionally, canceling into this move at the correct height after j.D can create rather nasty crossups.
|
|
Toggle Hitboxes Toggle Hitboxes
|
2146D
Rain Hollyhock
2146D
|
| Damage
|
Guard
|
Startup
|
Active
|
Recovery
|
Total
|
Hit Adv
|
Block Adv
|
Guard Dmg
|
Cancel
|
Recoil
|
Deflectable
|
Unarmed
|
| 0
|
N/A
|
4
|
15
|
12
|
30
|
Varies
|
N/A
|
-
|
N/A
|
No
|
No
|
Yes
|
Iroha's parry. This parry will only work against mid and high hitting normals and specials, and won't parry lows, WFT, SSM, Lighting Blade, or unblockable attacks like throws. Iroha must perform her own followup after the parry, though she can act immediately after parrying, and she can also repeatedly input the parry to parry multi-hitting moves. Additionally, your opponent cannot rage explode after being parried; they can only attempt to burst out of the potential followup punish. It's available while disarmed as well.
|
|
Toggle Hitboxes Toggle Hitboxes
|
Supers
Weapon Flipping Technique
Gale-force Drop
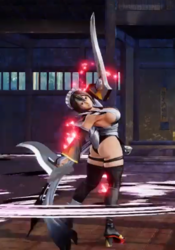
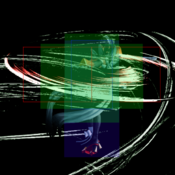
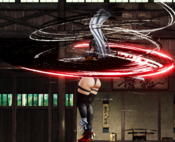
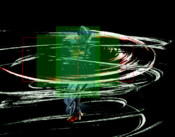
236B+C And.... And.... LET'S BEYBLADE! LET'S BEYBLADE!
|
| Damage
|
Guard
|
Startup
|
Active
|
Recovery
|
Total
|
Hit Adv
|
Block Adv
|
Guard Dmg
|
Cancel
|
Recoil
|
Deflectable
|
Unarmed
|
| 378 (441)
|
Mid
|
1+13
|
-
|
-
|
125
|
KD
|
-41~-39
|
-
|
No
|
No
|
No
|
No
|
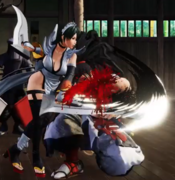
Iroha's WFT. Holding left or right during the motion will allow you to steer it, which is required for some specific combos. Most of the damage (312 out of 378) occurs in the last hit. This WFT can be easily comboed into from 4D or n.5B, or 2C in the corner on specific* characters.
(See Combos section for specifics)
|
|
Toggle Hitboxes Toggle Hitboxes
|
Super Special Move
Crane's Dance
641236C+D
|
| Damage
|
Guard
|
Startup
|
Active
|
Recovery
|
Total
|
Hit Adv
|
Block Adv
|
Guard Dmg
|
Cancel
|
Recoil
|
Deflectable
|
Unarmed
|
| 680
|
Throw
|
10+20
|
-
|
-
|
106
|
KD
|
N/A
|
-
|
No
|
No
|
No
|
No
|
Iroha's SSM, complete with the "classic" animation. This SSM is a command grab, though it can be avoided after the flash on reaction by holding up. It will still combo after a deflect, and has a surprising amount of range in that situation. Due to being able to avoid it on reaction, it's unlikely you'll land this outside of a deflect, punish, or a specific setup.
|
|
Toggle Hitboxes Toggle Hitboxes
|
Combos
Midscreen
- (n.5A/n.2A/2D) xx 214C
Optimal combo from lights/kicks.
- (n.5A/2D) xx 623C
More damage than the combo above, but only connects in point-blank range or corner.
- n.5B xx 214C / 623B/C / WFT
Medium punish combo.
- 2C xx 214C / WFT
Heavy punish combo.
- (6CD/j.C deep hit)...
- 5C / n.5C
- 4D xx 623C / WFT
Optimal damage from a jump-in or throw midscreen. n.5B combos deal the same damage but cover shorter distance.
- j.B (deep hit) 2C xx 214C
Decent damage but not useful.
- (j.A/j.D/6D/5D) xx 623C
Decent damage but fairly punishable on block.
- 5D xx 214A/B/C
Hits cross up against forward roll and dodges throws.
- j.D xx 214A/B/C
Air cross up combo, late cancel 214S to connect all 7 hits.
- 236A n.5B xx 214C
Meaty fireball combo, only connects at point-blank range.
- 236A/B Lightning Blade
Issen Combo.
Corner
- 6CD 2C xx 214C
Optimal damage from a throw in the corner.
- 6CD 2C xx WFT
Character-specific combo. Hold forward during WFT for it to connect after 2C.
DOES NOT WORK ON: Charlotte, Darli, Galford, Hanzo, Mina, Shiki, Wan-Fu, Yashamaru, Yoshitora
- j.C (deep hit) 6D xx 623A/B 5A/2A xx 214C
Fancy combo, deals same damage as n.5B xx 214C and doesn't work against crouching opponent except Earthquake (Hold forward after air DP to make sure you always get close 5A.)
- 5D xx 623A/B 5A/2A xx 214C
Fancy combo 2.
- 236A 5C
Connects at mid screen away from corner or when 236A hits meaty.
- 236A 4D xx 623C / WFT
Connects only at the distance of one back dash away from corner.
- 236A 2D xx 214C / 623C
Meaty fireball combo.
- 236A n.5B xx 623B/C / WFT
Meaty fireball combo 2.
- (n.5B/2C) xx 214B n.5A/n.2A xx 236A / 236B
Air reset fireball combo, the opponent can interrupt 236A, but 236B beats 5 framers and forward throw.
- 4D n.5A xx 236A xx (n.5B combos)
Air reset fireball combo, 236A beats 5 framers but lose to forward throw.
Guard Crush
- n5C...
Combo second hit...
- Lighting Blade
Universal Issen combo, combo from second hit.
- 5C...
After recovery...
- 2C xx 214C / WFT
Follow up with 2C, massive damage.
- SSM
SSM follow up. (Be careful with opponent bursting to avoid it)
- n5C...
Cancel second hit...
- 2146D
Parry so the second hit wouldn't come out.
- 2C xx 214C / WFT
Follow up with 2C, massive damage.
- SSM
SSM follow up. (Be careful with opponent bursting to avoid it)
- 5C...
Cancel recovery...
- Lighting Blade
Universal Issen combo.
Videos
Colors
External Links
