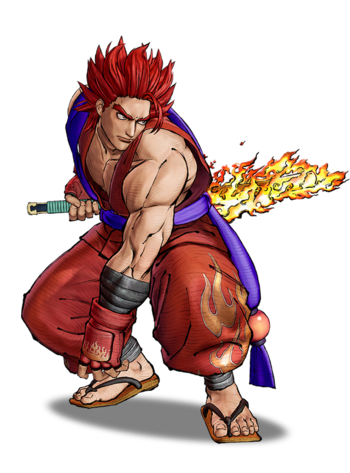
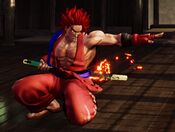
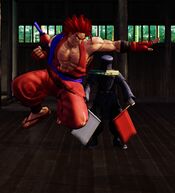
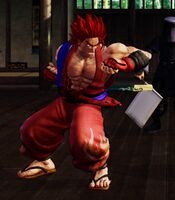
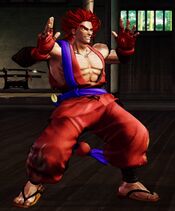
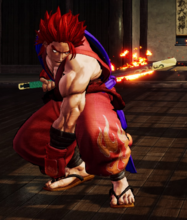
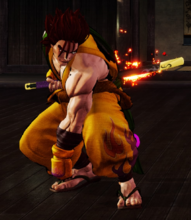
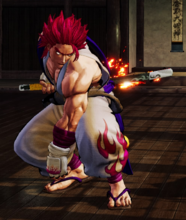
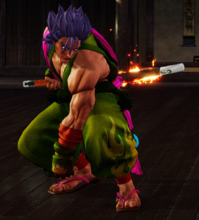
Kazuki Kazama
風間 火月, Kazama Kazuki
|
- Damage Taken: 100%
- Rage Factor: 0.36 (Fastest Rage Gain)
- Rage Duration: 6 seconds (Shortest Duration)
- Jump: 46 frames (Average)
- Forward Walk Speed: 0.35 (Fast)
- Back Walk Speed: 0.3 (Fast)
- Dash Speed: 1.4 (Extremely Fast)
- Back Dash: 28 frames
- Weapon Pickup / Drop: 40 / 56 frames
|
Introduction
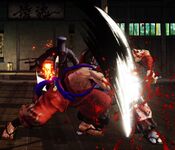
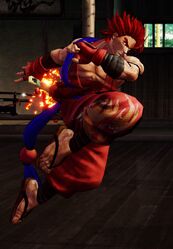
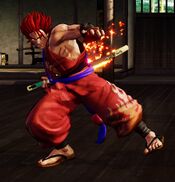
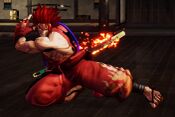
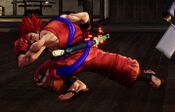
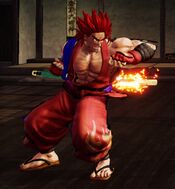
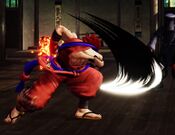
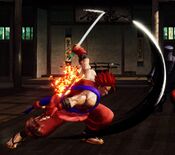
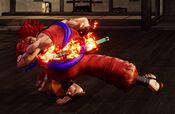
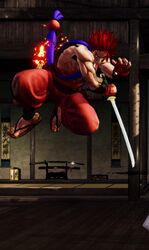
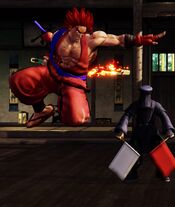
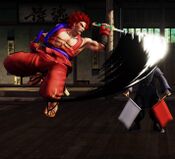
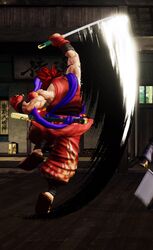
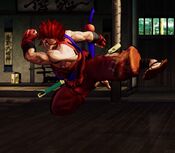
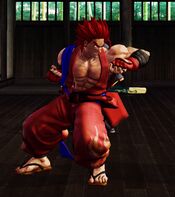
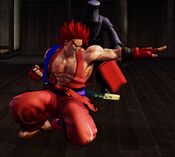
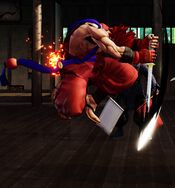
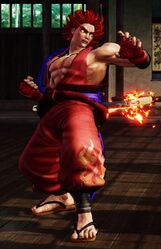
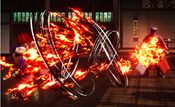
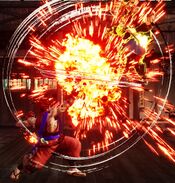
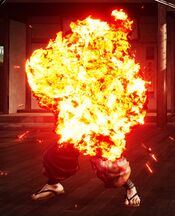
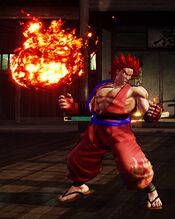
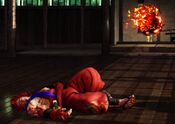
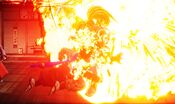
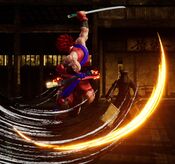
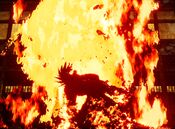
Kazuki is a hot-headed ninja that wields fire techniques and aggressively quick swordplay to create an explosively powerful bullying playstyle.
Kazuki is a blend of a resource-building and rushdown character. His main strengths lie in his movement speed and his walljump, and a fairly decent poking game with his normals, many of which cover a relatively good amount of space and also come out relatively fast. His 2C is a great tool for stuffing air approaches, while his 5B and 2B work as excellent neutral checks, and his 66B helps him punish and convert into combos; his air normals generally cover a lot of space, contributing to the strength of his air game. He also has high damage with the right resources, specifically the use of Flames of Disaster to build up stocks that can be used to enhance the power of many of his special moves; with it, his Soul Burner can become a potent projectile that either stuffs enemy approaches cold or acts as a combo extender, and his Exploding Death hitgrab becomes a powerful combo ender that lets him set up more charges. The boosts from his empowered moves only get stronger when he's in Max Rage, and the speed and power of his WFT are extremely threatening when he can get setups for it, making him a great character for fighting up close and cranking out damage.
However, Kazuki's aggressive gameplay style is offset by his lack of range; as good as his buttons are, he will still struggle against characters who are exceptionally good at keeping him spaced out. If Kazuki doesn't get time to charge fireball stocks, his damage and what zoning presence he does have become much less effective, and his flexibility suffers for it. Additionally, all his special moves, while powerful, tend to be unsafe on block, and using some of them in combos requires a good understanding of how and when to space them, or they'll whiff; using them carelessly or mismanaging his charges will result in getting punished a lot.
For those that favor offensive approaches, lots of movement speed, and a few funny tricks to pull out every now and again, Kazuki's strengths are well-suited to you.
Playstyle
 Kazuki Kazama is an aggressive, resource-based "power-up" character with explosive damage potential and flexible neutral. Kazuki Kazama is an aggressive, resource-based "power-up" character with explosive damage potential and flexible neutral.
|
| Strengths |
Weaknesses
|
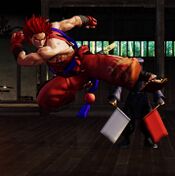
- Good mobility: One of Kazuki's strongest points as a character is his high movement speed as well as his walljump--he can close distance incredibly quickly and change his jump arc whenever he's near the wall.
- Good pokes, counterpokes, and air normals: Paired with his great movement options, Kazuki's buttons are quick and cover a variety of attack angles, allowing him to skitter in and hit his opponents or control the air space with aggressive, powerful swings.
- High damage: With stocks for combos, a full Rage meter, or both, Kazuki's damage is highly explosive, as many of his normals are cancelable into clean special move enders.
- Strong WFT: Kazuki's WFT does a ton of damage, has decent range, and is fairly fast for its range and reach. Many of his cancelable normals will let you combo into it, and it even has some invulnerability to lows if timed well.
|
- Extremely short range: While his normals can cover a variety of angles, they're still relatively short in comparison to most other characters, so Kazuki often struggles to get in against characters with better buttons.
- Punishable specials: Many of Kazuki's special moves either have a fair bit of recovery time or aren't super safe when blocked; misusing them can result in getting punished very badly if called out.
- Resource-intensive: Kazuki loses out on some of his best damage if he doesn't have resources. In particular, Soul Burner isn't too useful as a combo or zoning tool without having charges on hand, and Exploding Death's damage cashout suffers greatly without having charges to burn.
- Tricky spacing for combo stability: As a result of how short some of his buttons are, Kazuki needs to be at the right distance when attacking to combo into certain special moves (and sometimes even his WFT). Misreading the range of certain normals or specials will cause his combos to drop.
|
Gameplan
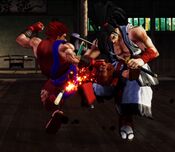
Kazuki tends to play a sort of in-and-out game, but mostly prefers close range. When he's up close, n.5A, n.2A, and n.5B are all relatively oppressive tools that convert into 623S on hit, giving him a knockdown and time to charge a fireball with 214D. Since it moves him forward, his 5D can be used to annoy people much like Charlotte's can, but can also be canceled into special moves; a classic Kazuki gimmick is going into 421S after 5D in order to catch an opponent trying to mash out on you. He can also get a charge off of his 6D, though it being a bit slower makes this somewhat rare.
Kazuki also has excellent conversion options from throw; when at midscreen or even if he pushes the opponent to the corner, he can get a 66B and convert into 623S, or even into a longer combo provided he has two meatballs.
Neutral
His 5B and 2B are excellent poking tools and good checks for opponents that are trying to dash in, though against longer ranged opponents he'll have to be careful. His 66C is probably the next best move for distance closing and punishes if you don't need a combo from it, due to its reach, and it has some use as an anti-air if used carefully, albeit a risky one. He can also use fireballs as a zoning tool, though this is generally less helpful unless he has at least 1 meatball to boost his fireball with. For anti-airing, he can use 2C, 623S, or more rarely 421S if you need to force distance from the opponent.
Okizeme
Generally speaking, when Kazuki gets a knockdown he wants to charge up a fireball, so oftentimes his oki focuses on that. When opponents roll, though, he can use his run speed for crossups or ambiguous side swaps, as his normals have great speeds and his dash is extremely fast.
Normal Moves
Far Slashes
5A
5A
|
| Damage
|
Guard
|
Startup
|
Active
|
Recovery
|
Total
|
Hit Adv
|
Block Adv
|
Guard Dmg
|
Cancel
|
Recoil
|
Deflectable
|
Unarmed
|
| 30
|
Mid
|
5
|
-
|
-
|
16
|
+1
|
-2
|
5
|
Yes
|
No
|
No
|
No
|
Kazuki does a quick elbow jab.
|
|
5B
5B
|
| Damage
|
Guard
|
Startup
|
Active
|
Recovery
|
Total
|
Hit Adv
|
Block Adv
|
Guard Dmg
|
Cancel
|
Recoil
|
Deflectable
|
Unarmed
|
| 100
|
Mid
|
11
|
-
|
-
|
34
|
-3
|
-12
|
10
|
Yes
|
Yes
|
Yes
|
No
|
Kazuki does an outward reverse-grip slash.
- Serves as a quick, cancelable poke with better range than 5A.
|
|
5C
5C
|
| Damage
|
Guard
|
Startup
|
Active
|
Recovery
|
Total
|
Hit Adv
|
Block Adv
|
Guard Dmg
|
Cancel
|
Recoil
|
Deflectable
|
Unarmed
|
| 260
|
Mid
|
18
|
-
|
-
|
60
|
-3
|
-16
|
25
|
No
|
Yes(+11)
|
Disarm
|
No
|
Kazuki does a strong slash forward.
- Fast, but has relatively short reach for a C button.
|
|
2A
2A
|
| Damage
|
Guard
|
Startup
|
Active
|
Recovery
|
Total
|
Hit Adv
|
Block Adv
|
Guard Dmg
|
Cancel
|
Recoil
|
Deflectable
|
Unarmed
|
| 30
|
Mid
|
7
|
-
|
-
|
18
|
+1
|
-2
|
5
|
Yes
|
No
|
No
|
No
|
Kazuki chops out with his leading hand.
|
|
2B
2B
|
| Damage
|
Guard
|
Startup
|
Active
|
Recovery
|
Total
|
Hit Adv
|
Block Adv
|
Guard Dmg
|
Cancel
|
Recoil
|
Deflectable
|
Unarmed
|
| 90
|
Mid
|
13
|
-
|
-
|
36
|
-3
|
-12
|
10
|
Yes
|
Yes
|
Yes
|
No
|
An outward slash similar to 5B.
- Has a bit of extra range since Kazuki leans a little farther forward.
|
|
2C
2C
|
| Damage
|
Guard
|
Startup
|
Active
|
Recovery
|
Total
|
Hit Adv
|
Block Adv
|
Guard Dmg
|
Cancel
|
Recoil
|
Deflectable
|
Unarmed
|
| 160
|
Mid
|
12
|
-
|
-
|
43
|
-4
|
-28
|
25
|
No
|
Yes
|
Disarm
|
No
|
Kazuki does an upward leaping slash from a crouching position.
- Acts as a powerful anti-air technique due to its fast startup and hitbox.
|
|
Near Slashes
n.5B
n.5B
|
| Damage
|
Guard
|
Startup
|
Active
|
Recovery
|
Total
|
Hit Adv
|
Block Adv
|
Guard Dmg
|
Cancel
|
Recoil
|
Deflectable
|
Unarmed
|
| 80
|
Mid
|
8
|
-
|
-
|
31
|
-3
|
-12
|
10
|
Yes
|
Yes
|
Yes
|
No
|
Kazuki slices inward with his sword.
- Cancelable.
- Works great as a punish combo starter.
|
|
n.5C
n.5C
|
| Damage
|
Guard
|
Startup
|
Active
|
Recovery
|
Total
|
Hit Adv
|
Block Adv
|
Guard Dmg
|
Cancel
|
Recoil
|
Deflectable
|
Unarmed
|
| 220
|
Mid
|
15
|
-
|
-
|
45
|
-3
|
-28
|
25
|
No
|
Yes
|
Disarm
|
No
|
Kazuki reaches forward and stabs downward with his sword.
- Very fast, and does above-average damage.
|
|
Kicks
5D
5D
|
| Damage
|
Guard
|
Startup
|
Active
|
Recovery
|
Total
|
Hit Adv
|
Block Adv
|
Guard Dmg
|
Cancel
|
Recoil
|
Deflectable
|
Unarmed
|
| 30
|
Mid
|
9
|
5
|
-
|
26
|
-2~+2
|
-5~-1
|
5
|
Yes
|
No
|
No
|
Yes
|
Kazuki does a dashing knee attack.
- Cancelable.
- Frames 9 - 17 are invulnerable to low attacks, but it's not airborne.
|
|
6D
6D
|
| Damage
|
Guard
|
Startup
|
Active
|
Recovery
|
Total
|
Hit Adv
|
Block Adv
|
Guard Dmg
|
Cancel
|
Recoil
|
Deflectable
|
Unarmed
|
| 50
|
Low
|
13
|
-
|
-
|
36
|
+1
|
-8
|
5
|
Yes
|
No
|
No
|
Yes
|
Kazuki does a low kick with his leading leg.
|
|
2D
2D
|
| Damage
|
Guard
|
Startup
|
Active
|
Recovery
|
Total
|
Hit Adv
|
Block Adv
|
Guard Dmg
|
Cancel
|
Recoil
|
Deflectable
|
Unarmed
|
| 20
|
Low
|
5
|
-
|
-
|
19
|
-2
|
-5
|
5
|
No
|
No
|
No
|
Yes
|
Kazuki kicks out with his leading leg.
|
|
3D
3D
|
| Damage
|
Guard
|
Startup
|
Active
|
Recovery
|
Total
|
Hit Adv
|
Block Adv
|
Guard Dmg
|
Cancel
|
Recoil
|
Deflectable
|
Unarmed
|
| 70
|
Low
|
12
|
-
|
-
|
41
|
KD(+95)
|
-13
|
5
|
No
|
No
|
No
|
Yes
|
Kazuki sweeps his front leg to trip the opponent.
|
|
Dash Normals
66A
66A
|
| Damage
|
Guard
|
Startup
|
Active
|
Recovery
|
Total
|
Hit Adv
|
Block Adv
|
Guard Dmg
|
Cancel
|
Recoil
|
Deflectable
|
Unarmed
|
| 40
|
Mid
|
7
|
-
|
-
|
30
|
-3
|
-8
|
5
|
No
|
No
|
No
|
No
|
|
|
|
66B
66B
|
| Damage
|
Guard
|
Startup
|
Active
|
Recovery
|
Total
|
Hit Adv
|
Block Adv
|
Guard Dmg
|
Cancel
|
Recoil
|
Deflectable
|
Unarmed
|
| 80
|
Mid
|
9
|
-
|
-
|
32
|
-3
|
-35
|
10
|
Yes
|
Yes
|
Disarm
|
No
|
A dashing version of n.5B.
- Great for punishing whiffed buttons or as a followup to a throw.
|
|
66C
66C
|
| Damage
|
Guard
|
Startup
|
Active
|
Recovery
|
Total
|
Hit Adv
|
Block Adv
|
Guard Dmg
|
Cancel
|
Recoil
|
Deflectable
|
Unarmed
|
| 140
|
Mid
|
9
|
-
|
-
|
49
|
KD(+95)
|
-18
|
20
|
No
|
No
|
Disarm
|
No
|
|
|
|
66D
66D
|
| Damage
|
Guard
|
Startup
|
Active
|
Recovery
|
Total
|
Hit Adv
|
Block Adv
|
Guard Dmg
|
Cancel
|
Recoil
|
Deflectable
|
Unarmed
|
| 70
|
Low
|
11
|
4
|
-
|
40
|
KD(+95)
|
-11~-8
|
5
|
No
|
No
|
No
|
Yes
|
Kazuki does a sliding kick.
|
|
Air Normals
j8.A
j8.A
|
| Damage
|
Guard
|
Startup
|
Active
|
Recovery
|
Total
|
Hit Adv
|
Block Adv
|
Guard Dmg
|
Cancel
|
Recoil
|
Deflectable
|
Unarmed
|
| 40
|
High
|
5
|
-
|
-
|
-
|
-
|
-
|
5
|
No
|
No
|
No
|
No
|
Kazuki sticks his sword straight downward.
- Only comes out from a neutral jump.
|
|
j7/9.A
j7/9.A
|
| Damage
|
Guard
|
Startup
|
Active
|
Recovery
|
Total
|
Hit Adv
|
Block Adv
|
Guard Dmg
|
Cancel
|
Recoil
|
Deflectable
|
Unarmed
|
| 30
|
High
|
5
|
-
|
-
|
-
|
-
|
-
|
5
|
No
|
No
|
No
|
No
|
Kazuki does a jumping version of his 2A.
- Primarily a quick air-to-air tool.
|
|
j.B
j.B
|
| Damage
|
Guard
|
Startup
|
Active
|
Recovery
|
Total
|
Hit Adv
|
Block Adv
|
Guard Dmg
|
Cancel
|
Recoil
|
Deflectable
|
Unarmed
|
| 100
|
High
|
8
|
-
|
-
|
-
|
-
|
-
|
10
|
No
|
No
|
No
|
No
|
Kazuki does an outward slash with his leading hand.
- Works great as an alternative to j.A air-to-air if you need a bit more reach.
|
|
j.C
j.C
|
| Damage
|
Guard
|
Startup
|
Active
|
Recovery
|
Total
|
Hit Adv
|
Block Adv
|
Guard Dmg
|
Cancel
|
Recoil
|
Deflectable
|
Unarmed
|
| 150
|
High
|
9
|
-
|
-
|
-
|
-
|
-
|
20
|
No
|
No
|
No
|
No
|
Kazuki slashes upward with his sword.
- Limited horizontal range, but still reaches up fairly high.
|
|
j.D
j.D
|
| Damage
|
Guard
|
Startup
|
Active
|
Recovery
|
Total
|
Hit Adv
|
Block Adv
|
Guard Dmg
|
Cancel
|
Recoil
|
Deflectable
|
Unarmed
|
| 30
|
High
|
8
|
-
|
-
|
-
|
-
|
-
|
5
|
No
|
No
|
No
|
Yes
|
Kazuki does a straight horizontal kick.
|
|
Unarmed Normals
u.5S
u.5S
|
| Damage
|
Guard
|
Startup
|
Active
|
Recovery
|
Total
|
Hit Adv
|
Block Adv
|
Guard Dmg
|
Cancel
|
Recoil
|
Deflectable
|
Unarmed
|
| 50
|
Mid
|
5
|
-
|
-
|
16
|
+1
|
-1
|
5
|
No
|
No
|
No
|
Only
|
An elbow attack similar to 5A.
|
|
u.2S
u.2S
|
| Damage
|
Guard
|
Startup
|
Active
|
Recovery
|
Total
|
Hit Adv
|
Block Adv
|
Guard Dmg
|
Cancel
|
Recoil
|
Deflectable
|
Unarmed
|
| 50
|
Mid
|
7
|
-
|
-
|
18
|
+1
|
-1
|
5
|
No
|
No
|
No
|
Only
|
|
|
|
ju.S
ju.S
|
| Damage
|
Guard
|
Startup
|
Active
|
Recovery
|
Total
|
Hit Adv
|
Block Adv
|
Guard Dmg
|
Cancel
|
Recoil
|
Deflectable
|
Unarmed
|
| 50
|
High
|
5
|
-
|
-
|
-
|
-
|
-
|
5
|
No
|
No
|
No
|
Only
|
|
|
|
u.66S
u.66S
|
| Damage
|
Guard
|
Startup
|
Active
|
Recovery
|
Total
|
Hit Adv
|
Block Adv
|
Guard Dmg
|
Cancel
|
Recoil
|
Deflectable
|
Unarmed
|
| 50
|
Mid
|
7
|
-
|
-
|
29
|
KD
|
-7
|
5
|
No
|
No
|
No
|
Only
|
A dashing version of u.5S that knocks down.
|
|
Universal Mechanics
Guard Break
Guard Break (Throw) 5C+D / 6C+D 5C+D / 6C+D 4C+D 4C+D
|
| Version
|
Damage
|
Guard
|
Startup
|
Active
|
Recovery
|
Total
|
Hit Adv
|
Block Adv
|
Guard Dmg
|
Cancel
|
Recoil
|
Deflectable
|
Unarmed
|
| Neutral / Forward
|
0
|
Throw
|
3
|
-
|
71
|
74
|
+20
|
-
|
-
|
-
|
-
|
-
|
Yes
|
| Back
|
0
|
Throw
|
5
|
-
|
69
|
74
|
+25
|
-
|
-
|
-
|
-
|
-
|
Yes
|
Universal throw, can follow up with combos. Back throw has slower start up but better frame advantage. There is no throw tech, but throws are very punishable on whiff.
|
|
Surprise Attack
Surprise Attack (Overhead)
5B+C Armed Armed Unarmed Unarmed
|
| Version
|
Damage
|
Guard
|
Startup
|
Active
|
Recovery
|
Total
|
Hit Adv
|
Block Adv
|
Guard Dmg
|
Cancel
|
Recoil
|
Deflectable
|
Unarmed
|
| Armed
|
60
|
High
|
21
|
-
|
-
|
45
|
+1
|
-12
|
10
|
No
|
No
|
No
|
No
|
Universal overhead, dodges low attacks and throws. No longer knocks down the opponent since version 1.70.
|
| Unarmed
|
60
|
High
|
21
|
-
|
-
|
45
|
KD
|
-12
|
10
|
No
|
No
|
No
|
Only
|
Universal unarmed overhead. Knocks down the opponent.
|
|
Dodge
Dodge
5A+B
|
| Damage
|
Guard
|
Startup
|
Active
|
Recovery
|
Total
|
Hit Adv
|
Block Adv
|
Guard Dmg
|
Cancel
|
Recoil
|
Deflectable
|
Unarmed
|
| N/A
|
-
|
1
|
16
|
22
|
38
|
-
|
-
|
-
|
-
|
-
|
-
|
Yes
|
Universal dodge. Avoids all attacks for a brief moment, and is mainly used to avoid throws.
Complete invincibility from frames 1 to 10. Strike invincibility from frames 11 to 16.
|
|
Stance Break
Stance Break
A+B during Just Defense
|
| Damage
|
Guard
|
Startup
|
Active
|
Recovery
|
Total
|
Hit Adv
|
Block Adv
|
Guard Dmg
|
Cancel
|
Recoil
|
Deflectable
|
Unarmed
|
| 0
|
Mid
|
5
|
-
|
-
|
52
|
KD
|
-24
|
-
|
-
|
-
|
-
|
Yes
|
|
|
|
Counter (Deflect) / Blade Catch
Counter (Deflect) / Blade Catch
236A+B Weapon Deflect Weapon Deflect Blade Catch Blade Catch
|
| Version
|
Damage
|
Guard
|
Startup
|
Active
|
Recovery
|
Total
|
Hit Adv
|
Block Adv
|
Guard Dmg
|
Cancel
|
Recoil
|
Deflectable
|
Unarmed
|
| Armed
|
0
|
N/A
|
2
|
11
|
34
|
46
|
+35~+59
|
-
|
-
|
-
|
-
|
-
|
No
|
Universal counter that works against mid-guard normal slashes. Upon successful counter, you can follow up with any attack except throws.
The amount of time to follow up depends on timing and the strength of slash, and deflecting medium slashes staggering the opponent for longest amount of time.
Additionally, if you deflect a heavy slash or running medium slash, the opponent will be disarmed.
|
| Unarmed
|
0
|
N/A
|
2
|
12
|
9
|
22
|
KD
|
-
|
-
|
-
|
-
|
-
|
Only
|
Universal unarmed counter, works against the same slashes as counter.
Upon successful blade catch, your will disarm your opponent and knock down the opponent to the corner, regardless of the strength of slash.
|
|
Rage Explosion
Rage Explosion
5A+B+C
|
| Damage
|
Guard
|
Startup
|
Active
|
Recovery
|
Total
|
Hit Adv
|
Block Adv
|
Guard Dmg
|
Cancel
|
Recoil
|
Deflectable
|
Unarmed
|
| 0
|
Unblockable
|
21
|
1
|
-
|
58
|
0
|
-
|
-
|
-
|
-
|
-
|
No
|
Universal Rage Explosion. Check the Mechanics page for more info.
|
|
Lightning Blade
Lightning Blade (Issen)
5A+B+C during Rage Explosion
|
| Damage
|
Guard
|
Startup
|
Active
|
Recovery
|
Total
|
Hit Adv
|
Block Adv
|
Guard Dmg
|
Cancel
|
Recoil
|
Deflectable
|
Unarmed
|
| 300~709
|
Mid
|
9
|
-
|
-
|
-
|
KD
|
-44
|
-
|
-
|
-
|
-
|
No
|
Universal Lightning Blade. Check the Mechanics page for more info.
|
|
Command Moves
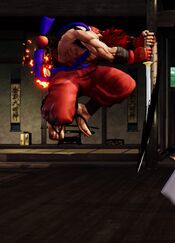
Wall Jump
Wall Jump
9 (near a wall) Burning Ninja Training Burning Ninja Training
|
| Damage
|
Guard
|
Startup
|
Active
|
Recovery
|
Total
|
Hit Adv
|
Block Adv
|
Guard Dmg
|
Cancel
|
Recoil
|
Deflectable
|
Unarmed
|
| -
|
-
|
-
|
-
|
-
|
-
|
-
|
-
|
-
|
-
|
-
|
-
|
Yes
|
Causes Kazuki to jump off of the back wall and go forward.
- Using walljump will increase your jump height and change your landing trajectory, making it difficult for the opponent to position and time an anti-air.
|
|
Blazing Fang
Blazing Fang
j.2B Blazing Fang Blazing Fang
|
| Damage
|
Guard
|
Startup
|
Active
|
Recovery
|
Total
|
Hit Adv
|
Block Adv
|
Guard Dmg
|
Cancel
|
Recoil
|
Deflectable
|
Unarmed
|
| 120
|
High
|
13
|
-
|
-
|
-
|
-
|
-
|
10
|
No
|
No
|
No
|
No
|
Kazuki thrusts his sword straight downward and holds it in position.
- Extremely active and reaches fairly far down, making it a great jump-in attack.
|
|
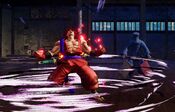
Special Moves
As a general note: all of Kazuki's special moves, aside from 421S/D, 214D, and A+D, consume different amounts of charges, colloquially referred to as meatballs.
He gains one charge/meatball for every use of 214D, up to a maximum of 3.
The breakdown for how his other special moves consume charge is as follows:
- A: Level 0 (no charges consumed)
- B: Level 1 (1 charge consumed)
- D: Level 2 (2 charges consumed)
- C: Level 3 (3 charges consumed)
If Kazuki uses a move stronger than the number of charges he has available (e.g., 236D with a level 1 charge), the move used will go downward to the next closest level.
Moves as listed below assume that for the matching level you have the correct number of charges.
Soul Burner
Soul Burner
236X
|
| Version
|
Damage
|
Guard
|
Startup
|
Active
|
Recovery
|
Total
|
Hit Adv
|
Block Adv
|
Guard Dmg
|
Cancel
|
Recoil
|
Deflectable
|
Unarmed
|
| A
|
40
|
Mid
|
18
|
-
|
-
|
57
|
-7
|
-23
|
5
|
No
|
No
|
No
|
No
|
Kazuki shoots a fireball.
- The worst version in terms of speed and damage, but has some use for zoning.
|
| B
|
50 (40, 10)
|
Mid
|
18
|
-
|
-
|
50
|
+12
|
-12
|
6
|
No
|
No
|
No
|
No
|
Hits twice and is the chunkier version of his fireball.
- B fireball moves relatively fast and strikes a decent balance between doing damage and spending fireball charges.
- It's also really good in the corner for combos due to the increased hitstun.
|
| C
|
220
|
Mid
|
16
|
-
|
-
|
128
|
KD(+27)
|
KD(-95)
|
15
|
No
|
No
|
No
|
No
|
Kazuki fires a huge fireball and is knocked back from the recoil.
- C fireball knocks down on hit and is exceedingly powerful, but has no real followups after it's used.
|
| D
|
70 (40, 20, 10)
|
Mid
|
18
|
-
|
-
|
46
|
+24
|
±0
|
9
|
No
|
No
|
No
|
No
|
Is similar to A and B fireballs, but hits three times.
- D fireball's further increase in hitstun makes it a potent tool for midscreen combos, allowing for links into 66B.
|
|
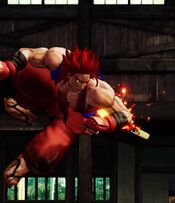
Exploding Death
Exploding Death
623X
|
| Version
|
Damage
|
Guard
|
Startup
|
Active
|
Recovery
|
Total
|
Hit Adv
|
Block Adv
|
Guard Dmg
|
Cancel
|
Recoil
|
Deflectable
|
Unarmed
|
| A
|
110 (10, 100)
|
Mid
|
10
|
-
|
-
|
57
|
KD(+82)
|
32
|
0
|
No
|
No
|
No
|
No
|
A hitgrab and Kazuki's standard combo ender.
- Blockable, so be careful when using it.
- Gives enough knockdown time to get a charge with 214D.
|
| B
|
150 (10,50,90)
|
Mid
|
10
|
-
|
-
|
57
|
KD(+86)
|
32
|
0
|
No
|
No
|
No
|
No
|
Adds another explosion for extra damage.
- Much like 236B, it's a decent economy ender for most of Kazuki's combos if you don't want to spend too many charges.
|
| C
|
260 (10, 50x5)
|
Mid
|
10
|
-
|
-
|
57
|
KD(+110)
|
32
|
0
|
No
|
No
|
No
|
No
|
Adds even more explosions for extra damage, ending with a big one that blasts the enemy far away.
- Good to cash in during shorter combos so that scaling doesn't kick in too hard.
|
| D
|
200 (10, 50, 70x2)
|
Mid
|
10
|
-
|
-
|
57
|
KD(+94)
|
32
|
0
|
No
|
No
|
No
|
No
|
Adds two explosions to the initial grab for extra damage.
|
| Rage
|
168 (A), 216 (B), 264 (D), 336 (C)
|
Mid
|
10
|
-
|
-
|
57
|
KD(+77)
|
32
|
0
|
No
|
No
|
No
|
No
|
A super-charged version of whichever version of 623X you choose to use.
- When in doubt, use this to end your combos in Rage mode; even at level 0, its damage output is significantly higher than the normal version.
|
|
Annihilating Flames
Annihilating Flames
421X
|
| Damage
|
Guard
|
Startup
|
Active
|
Recovery
|
Total
|
Hit Adv
|
Block Adv
|
Guard Dmg
|
Cancel
|
Recoil
|
Deflectable
|
Unarmed
|
| 150
|
Mid
|
27
|
-
|
-
|
70
|
KD
|
-30
|
10
|
No
|
No
|
No
|
No
|
Kazuki creates an exploding doppelganger and leaves his pants behind.
- It has strike invincibility from frame 9 to 47, making it a great anti-air and recoil cancel tool.
- The startup is slow enough for Kazuki to get grabbed out of it by an alert opponent.
- Difficult to punish, but is less safe when Kazuki explodes in a position where he doesn't have the space to maneuver away (e.g., at midscreen, when he's in the corner, or if the opponent blocks a cross-up explosion).
|
|
Flames of Disaster
Flames of Disaster
214D
|
| Damage
|
Guard
|
Startup
|
Active
|
Recovery
|
Total
|
Hit Adv
|
Block Adv
|
Guard Dmg
|
Cancel
|
Recoil
|
Deflectable
|
Unarmed
|
| N/A
|
-
|
-
|
-
|
-
|
51 / 108
|
-
|
-
|
0
|
No
|
No
|
No
|
No
|
Kazuki takes a pose and summons a small fireball (if he has no charges) or makes his existing fireball bigger (if he has at least one charge already but isn't at max charge). The max charge is up to 3 stocks.
- This move gives Kazuki a charge stock for his special moves, and charged fireball levels carry over between rounds.
- If Kazuki's already at 3 meatballs, he'll do the pose, but get puzzled for a second instead of increasing his stocks, increasing the recovery time.
- This move is very important to Kazuki's gameplan, but it's only safe to charge when the opponent is knocked down or far away.
|
|
Flaming Backdraft
Flaming Backdraft
A+D when knocked down
|
| Version
|
Damage
|
Guard
|
Startup
|
Active
|
Recovery
|
Total
|
Hit Adv
|
Block Adv
|
Guard Dmg
|
Cancel
|
Recoil
|
Deflectable
|
Unarmed
|
| Level 1
|
20
|
Mid
|
-
|
-
|
-
|
-
|
+15
|
+9
|
0
|
No
|
No
|
No
|
Yes
|
The stocked-up fireball from Flames of Disaster floats toward the opponent and explodes.
- This move can be done at any time from when he touches the ground until he wakes up or tech rolls.
- Although the fireball is slow and easy to block, its primary purpose is to interrupt meaty attacks.
|
| Level 2
|
40
|
Mid
|
-
|
-
|
-
|
-
|
+15
|
+9
|
0
|
No
|
No
|
No
|
Yes
|
| Level 3
|
60
|
Mid
|
-
|
-
|
-
|
-
|
KD
|
+15
|
0
|
No
|
No
|
No
|
Yes
|
The Level 3 fireball knocks down the opponent and allows follow up attack for a brief moment.
|
|
Supers
Weapon Flipping Technique
Exploding Flames
236B+C
|
| Damage
|
Guard
|
Startup
|
Active
|
Recovery
|
Total
|
Hit Adv
|
Block Adv
|
Guard Dmg
|
Cancel
|
Recoil
|
Deflectable
|
Unarmed
|
| 396 (462)
|
Mid
|
1+19
|
-
|
-
|
-
|
KD
|
-43
|
-
|
No
|
No
|
No
|
No
|
Kazuki dashes full screen until he hits the opponent or reaches the corner, and hits the opponent with a huge explosion if the move connects.
- Available only during Max Rage or Rage Explosion. Disarms on hit.
- Although he falls down like level 3 fireball, it's super unsafe and can be punished by an SSM on block or whiff.
- It dodges lows during the dash (starting from frame 10), but is not airborne.
|
|
Super Special Move
Eternal Inferno
641236C+D
|
| Damage
|
Guard
|
Startup
|
Active
|
Recovery
|
Total
|
Hit Adv
|
Block Adv
|
Guard Dmg
|
Cancel
|
Recoil
|
Deflectable
|
Unarmed
|
| 690
|
Mid
|
10+20
|
-
|
-
|
-
|
KD
|
-46
|
-
|
No
|
No
|
No
|
No
|
Available only once per match.
- Fully invincible during frames 1~10.
- Standard SSM with decent reach.
|
|
Combos
General
- 5A / 2A xx 623S
Fastest close range punish combo.
- 5B / n.5B / 2B / 66B xx 623S / 236S / WFT
Will mostly combo in close range. All the meatball specific combos can work with a 2B starter instead of 5B, n.5B, or 66B, but only at close range (and not from a midscreen throw).
No Meatball
- 66C
Long range punish for a knock down.
- 66B xx 623A
Long range max damage punish for a knock down.
- 5C / n.5C
Short to mid range punish with more damage but no knock down.
- 5CD / 4CD...
Throw...
- 66B xx 623A / WFT
Standard throw combo.
- 5B xx 623A / WFT
Microwalk to connect, a little more damage than 66B.
- n.5B xx 623A / WFT
Same as 66B, you will get this in corner.
- 66C
Less damage but can get a knockdown.
- 5C
Max damage but no knockdown.
1 Meatball
- 5B / n.5B / 2B / 66B xx 623B
Short, basic combo to burn 1 meatball.
- 66B / n.5B xx 236B xx 66C / Issen
Works only in the corner.
2 Meatballs
- 5B / n.5B / 2B / 66B xx 623D
Basic 2 meatball combo.
- 66B / n.5B xx 236D xx 66C / Issen
Easier with level two fireball than one. Can be done midscreen.
- 66B / n.5B xx 236B xx 66B xx 236B xx 66C / Issen
Advanced corner only combo.
3 Meatballs
- 5B / n.5B / 2B / 66B xx 236C/623C
Basic 3 meatball combo, ending in either level 3 fireball or level 3 grab.
- 66B / n.5B xx 236D xx 66B xx 623A / 623B / WFT / Issen
Works after throw; the 66B has to be in range for 623S or WFT to connect.
- 66B / n.5B xx 236D xx 66B xx 236B xx 66C / Issen
Corner only combo with extreme damage damage.
Universal
- j.C...
- Many of the 66B / n.5B combos from above can be used here.
- 5C / n.5C
Universal combo after jump C deep hit.
- Lightning Blade
Issen combo.
Guard Crush
- n.5C / 5C...
After recovery...
- SSM
SSM follow up. Can be Rage Exploded by the opponent, so be careful.
- n.5C / 5C...
Cancel recovery...
- Lightning Blade
Universal Issen combo.
Videos
Colors
External Links
