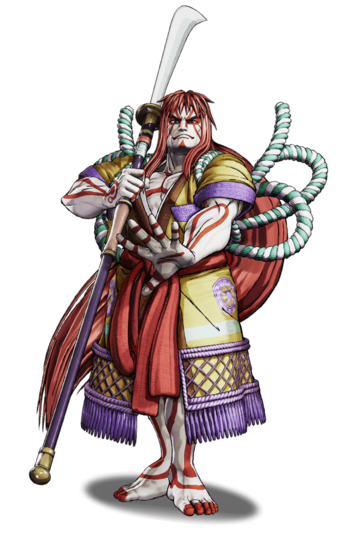
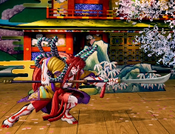
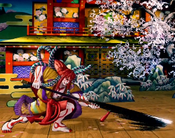
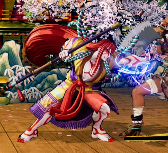
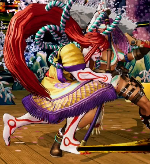
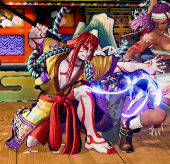
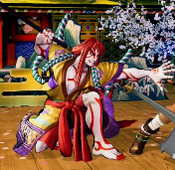
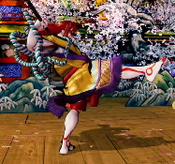
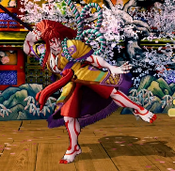
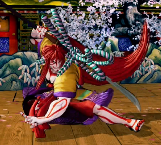
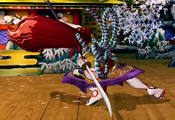
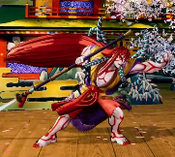
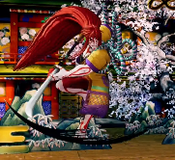
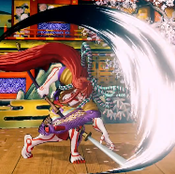
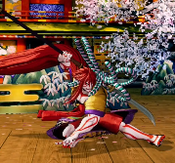
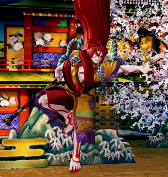
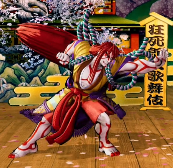
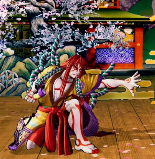
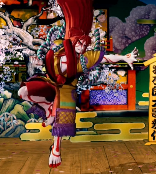
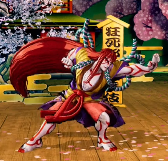
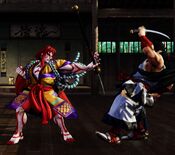
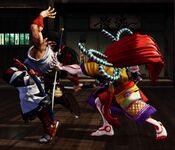
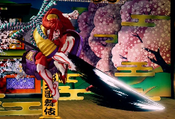
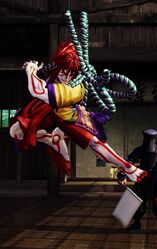
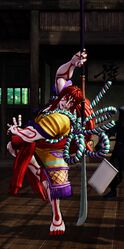
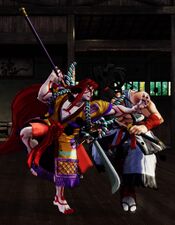
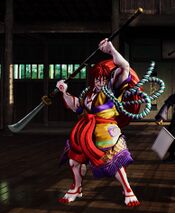
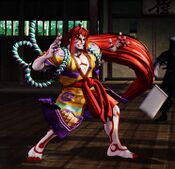
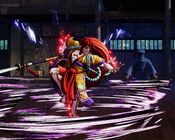
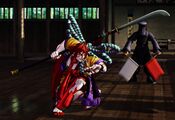
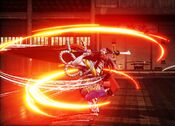
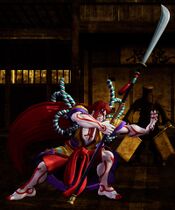
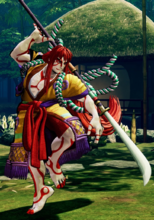
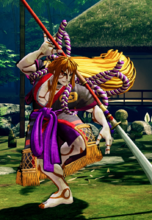
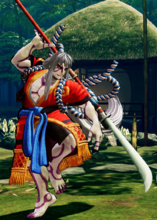
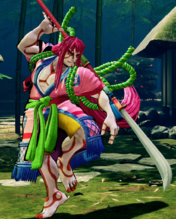
Kyoshiro Senryo
千両 狂死郎, Senryō Kyōshirō
|
- Damage Taken: 100%
- Rage Factor: 0.32
- Rage Duration: 10 seconds
- Jump: 62 frames (Extremely Slow)
- Forward Walk Speed: 0.3 (Average)
- Back Walk Speed: 0.23 (Average)
- Dash Speed: 1.25 (Average)
- Back Dash: 34 frames (Cancelable from frame 13)
- Weapon Pickup / Drop: 57 / 83 frames
|
Introduction
Kyoshiro is a surprisingly traditional zoner with a variety of keepout tools and long-range normals that make it difficult for the opponent to approach him. His gameplay is generally more commital than the other zoners, which gives him a somewhat offensive feel.
His grounded Tsunami Crunch fireballs are very good at making the opponent want to jump, which is a bad idea, since Kyoshiro has some excellent anti-airs that can catch people from basically anywhere. Once the enemy respects Kyoshiro, he can employ his high/low mixups from a distance with 66B and 2B. If they are low on life, he can also chip them out with his Dance of Fire or EX Ragion special moves.
Unfortunately, Kyoshiro’s sluggish movement and abysmally floaty jump make it hard for him to escape being pressured. His DP also lacks proper invincibility. Kyoshiro needs to bide his time until the right situation arises and never let the opponent get the upper hand on him or the round might be over before it really started.
Playstyle
 Kyoshiro Senryo is a mid-range zoner with powerful anti-airs and unconventional mixups. Kyoshiro Senryo is a mid-range zoner with powerful anti-airs and unconventional mixups.
|
| Strengths |
Weaknesses
|
- Strong ground game: Kyoshiro has a suite of great normals from many ranges and can leverage a strong poking game.
- Good anti-air: Between 2C and 623S, Kyoshiro has good options for punishing those who try to jump over his zoning game.
- Good 50/50: Kyoshiro's 2B is a great midscreen low that can be mixed in with his 66B and B+C to keep blocking opponents on their toes.
- Solid pressure: Kyoshiro has solid running pressure and his kicks and proximity normals make him surprisingly adept at keeping up an up-close pressure game.
- Crouch Walk:: Crouch walk allows some nifty low-profile options in neutral.
|
- Mediocre fireball: While fast, Kyoshiro's fireball has significant recovery and can be easily high-profiled, making his zoning game less threatening.
- Extremely floaty: As one of the floatiest characters in the game with poor air normals to boot, Kyoshiro has no air game to speak of.
- High recovery DP: 623C is the most punishable DP in the game on block. On hit, it forces a side swap every time and puts Kyoshiro at frame disadvantage due to the massive recovery.
- Gimmicky specials: Many of Kyoshiro's special moves have poor practical use or are superseded by better recoil options. The toad can only take you so far.
- No Stationary Crouch Guard: He can't guard lows without crouch walking backwards, which forces him to give up space while defending.
- Poor SSM with short range
|
Gameplan
Kyoshiro is a neutral heavy character, a decent keep out game with his far reaching normals. He wants to keep the opponent around half screen range. In general, he wants to prompt the opponent into jumping and anti-air them.
Neutral
All of his lights and mediums are great pokes to keep out the opponent (2B is a good one as it hits low). Use them along with his projectile to keep the opponent out.
When the opponent decides to jump-in, he may choose from a variety of AA options. 2C is the most basic one, it covers his back to catch any cross-up jump-in attempts. It is a little slow on start up so use it when the opponent already whiffed an air special or the opponent doesn't have a good jump-in normal with downward hitbox. It is considered hit crouching if failed to contest with an air normal, so use it with caution.
DP is the most universal one. His DP has a great forward and upward hitbox, making it one of the best DP for AA in the game. The B version has air-invul good for AA, but it's a little slow with a 13F start-up so it's not useful in some match ups. If the opponent jumps over him, use 621 (6621 if dashing) to do a reversal DP to catch the opponent.
Another option is to back-dash 2S, this comes out very fast, can beat out many air normals on start-up due to its wide hitbox. But this move is very punishable if whiffed or blocked. Last but not least, his WFT also makes a great AA. Again it has an amazing hitbox that will catch any opponents in the air (front or back).
Other notable neutral tools: His UOH has an amazing range that can be difficult to be punished on block, it also jumps over many projectiles, a good pressure keeping tool. His 214D is an unique command grab with amazing reach (Can't help myself but to mention the range of him over and over again, gosh just abuse on that please), it is used as a mix-up tool, for example after all the pokes, the opponent might attempt a deflect, the toad will punish that.
Okizeme
Kyoshiro got unique Oki options with his near lights and mediums as undeflectable, they are generally plus on block compared to other normals. His n.2B can be positive on block if spaced correctly. These are good pressure keeping tools as they are frame traps on block for punish attempts. They can combo on hit, if it hits the opponent as airborne, follow up with toad is a good mix-up option.
He can also do High/Low mix-ups for Oki, 66B hits as overhead and catches any jumping attempts, 66D is for low. If the opponent is conditioned to block on wake-up, surprise the opponent occasionally with toad (especially in corner) is good, but it's very punishable on whiff so do not abuse it. Other moves such as his UOH are also good to keep pressure on wake up.
Side Notes
- Playing Kyoshiro requires good reaction and prediction to keep a good neutral distance.
- His SSM is very short ranged, upon successful deflect, a short run is required mostly for it to connect.
- A cool character with a cool design, definitely give him a try! (He has great range!)
Normal Moves
Far Slashes
5A
5A
|
| Damage
|
Guard
|
Startup
|
Active
|
Recovery
|
Total
|
Hit Adv
|
Block Adv
|
Guard Dmg
|
Cancel
|
Recoil
|
Deflectable
|
Unarmed
|
| 40
|
Mid
|
9
|
-
|
-
|
25
|
-4
|
-5
|
5
|
Yes
|
-
|
Yes
|
No
|
Kyoshiro flicks the blunt end of his naginata in an arc.
- It is a primarily used to premptively catch approaches when the opponent is close enough that 5B and 2B are at risk of being jumped in on.
- Can be kara canceled into specials. Mainly useful for kara canceling into tsunami with hopes of later baiting jump attempts.
- Combos into 623A but the range is very specific and odds are you have much better punish tools available.
- Slow for what it is.
- Low damage.
|
|
5B
5B
|
| Damage
|
Guard
|
Startup
|
Active
|
Recovery
|
Total
|
Hit Adv
|
Block Adv
|
Guard Dmg
|
Cancel
|
Recoil
|
Deflectable
|
Unarmed
|
| 100
|
Mid
|
15
|
-
|
-
|
45
|
-10
|
-12
|
10
|
No
|
-
|
Yes
|
No
|
Kyoshiro thrusts his naginata forward horizontally.
- One of Kyoshiros best normals and his longest ranged poke. Allows him to punish things that other characters may struggle with for respectable damage.
- You will want to use this move often to harass your opponent and stuff grounded approaches. However, bare in mind that it is deflectable and has a lot of recovery. Try to only use it at max distance to mitigate the risk of getting jumped in on and try not to overdo it to avoid being deflected.
|
|
5C
5C
|
| Damage
|
Guard
|
Startup
|
Active
|
Recovery
|
Total
|
Hit Adv
|
Block Adv
|
Guard Dmg
|
Cancel
|
Recoil
|
Deflectable
|
Unarmed
|
| 280 [100,180]
|
Mid
|
20
|
3
|
-
|
77
|
KD
|
-16
|
25
|
No
|
-
|
Yes (Disarm)
|
No
|
Kyoshiro winds up and then swings his naginata forward
- Big damage. When your opponent screws up at range, this is what you use to punish them.
- Can combo from both forward and back throw giving Kyoshiro access to above average throw damage at all times. If you are going to play Kyoshiro you need to practice landing 5C on forward and back throw.
- Fairly fast startup for a 5C so if you are confident an opponent is going to approach from the ground you can throw this out. Just bare in mind the consequences if you are wrong.
- Has slightly less range than 5B. First hit will whiff at max distance leaving a lot of damage on the table. Get comfortable with its ranges. Sometimes you may need to microwalk forward during a punish to get both hits to connect.
|
|
2A
2A
|
| Damage
|
Guard
|
Startup
|
Active
|
Recovery
|
Total
|
Hit Adv
|
Block Adv
|
Guard Dmg
|
Cancel
|
Recoil
|
Deflectable
|
Unarmed
|
| 50
|
Mid
|
10
|
-
|
-
|
29
|
-7
|
-5
|
5
|
Yes
|
-
|
Yes
|
No
|
Kyoshiro crouches and then stabs his nagitata forwards.
- Essentially the same as Far 5A but it's a little bit slower, does a little bit more damage, and has a little bit more range. What makes it inferior to Far 5A in my eyes is the recovery. -7 on hit. Yes, all of Kyoshiros moves have terrible recovery on hit and whiff but if you are using this move it is because they are starting to get too close. At this range, speed is of the essence. Just use Far 5A unless they are slightly outside Far 5As range. In that case, by all means use Far 2A.
- It is special cancelable into 623A but it is pretty selective when it comes to distances and I believe you will always have better options.
|
|
2B
2B
|
| Damage
|
Guard
|
Startup
|
Active
|
Recovery
|
Total
|
Hit Adv
|
Block Adv
|
Guard Dmg
|
Cancel
|
Recoil
|
Deflectable
|
Unarmed
|
| 90
|
Low
|
16
|
-
|
-
|
45
|
-9
|
-12
|
10
|
No
|
No
|
No
|
No
|
Kyoshiro winds up and stabs his naginata downwards.
- Kyoshiro might be a middling character but he has some good pokes and this is arguably the best of the bunch.
- Hits low, does respectable damage, great range for a low, and it is not deflectable. Combining these three aspects together makes it very strong. Especially in recoil scenarios. Almost any blocked heavy or slash move with "heavy recoil" is a free Far 2B punish if you are within range. Because it is a low, it bypasses deflect attempts. It is fast enough where it can beat the startup of a lot of recoil cancels (matchup dependent). Sure, it will lose to Recoil Cancel DP or something like that but that puts all the risk in their court. You can just sit back knowing that almost any heavy recoil situation is a free 2B unless they are willing to commit to something crazy and put their lives on the line. Call them out on it and it's very big reward for you.
- It's essentially the working man's toad. When they are in range of your Far 2B (and it reaches quite far) they have to watch their toes. Instill this fear in them, wait, and be on the lookout for jumps.
- However, as you would expect, this move is not without it's downsides. A little bit shorter range than 5B. Keeping your opponent at the tip of 5B means you have some protection from jump-ins. If they are in 2B range, that means you are vulnerable to jump-ins. Couple this with the fact that it has more recovery than Far 5B and that it is a crouching normal (free deep jump-in) and you have to be very careful about using this in neutral. If you are going to use this in neutral, use it at or slightly outside of max range.
|
|
2C
2C
|
| Damage
|
Guard
|
Startup
|
Active
|
Recovery
|
Total
|
Hit Adv
|
Block Adv
|
Guard Dmg
|
Cancel
|
Recoil
|
Deflectable
|
Unarmed
|
| 180
|
Mid
|
15
|
-
|
-
|
47
|
-5
|
-28
|
25
|
No
|
-
|
Yes (Disarm)
|
No
|
Kyoshiro spins in place while swinging his naginata around his head.
- Another solid normal for Kyoshiro but not without its flaws. Designed to be used as an anti air but it has a tendency to trade and, because it is a crouching normal, it will grant deep jump-in properties; even during trades. Definitely, use it as an anti-air but it is ultimately matchup dependent.
- Can also be used as a hard call out on ground approaches with slightly less risk than Far 5C.
- Can be useful as a call out against opponents that abuse Combo Jump.
|
|
Near Slashes
n.5A
n.5A
|
| Damage
|
Guard
|
Startup
|
Active
|
Recovery
|
Total
|
Hit Adv
|
Block Adv
|
Guard Dmg
|
Cancel
|
Recoil
|
Deflectable
|
Unarmed
|
| 30
|
Mid
|
5
|
-
|
-
|
19
|
-2
|
-5
|
5
|
Yes
|
No
|
No
|
No
|
Kyoshiro awkwardly reaches forwards
- Kyoshiro has some decent near normals. This one is pretty uninteresting but has it's uses.
- Can be used as an anti-air but it's not worth the potential for trading or being outright stuffed. It's much better as a walk under. Can either 5a for some free damage and then create space. Or be cheeky and cancel it into a toad or tsunami.
- It's a gimmick but you can whiff it right as an opponent wakes up and then sneak in a grab. It's safer than going for toad; believe it or not.
|
|
n.5B
n.5B
|
| Damage
|
Guard
|
Startup
|
Active
|
Recovery
|
Total
|
Hit Adv
|
Block Adv
|
Guard Dmg
|
Cancel
|
Recoil
|
Deflectable
|
Unarmed
|
| 90
|
Mid
|
8
|
-
|
-
|
31
|
-3
|
-8
|
10
|
Yes
|
No
|
No
|
No
|
Kyoshiro leans forward for a palm strike
- Kyo's best near normal. This is mainly because it is incredibly active. Typically it can be tricky landing meaties in SS7. Not with this bad boy. You can easily eyeball it and regardless of how they tech you will stuff anything they try to do that isn't a reversal. It's too easy, it does 90 damage (same as Far 2B) and there's not much risk involved.
- Often times just checking the opponent on wakeup with this is enough. You can then backdash and return to neutral. If you want to put your life on the line, you try canceling this into toad or 214A to catch those trying to jump away. If they respect the power of meaty n.5B you can whiff a n.5A right before they wake up and then grab them. Just bare in mind these options carry a lot of risk.
- But that's not all. This is also your main combo starter. 5B>214A, 5B>236AB, 5B>623C are all great options.
|
|
n.5C
n.5C
|
| Damage
|
Guard
|
Startup
|
Active
|
Recovery
|
Total
|
Hit Adv
|
Block Adv
|
Guard Dmg
|
Cancel
|
Recoil
|
Deflectable
|
Unarmed
|
| 210
|
Mid
|
13
|
-
|
-
|
43
|
-3
|
-28
|
25
|
-
|
Yes
|
Disarm
|
No
|
Kyoshiro winds up and then swing downward with the blade of his naginata
- Quick but for every situation you could think to use this, there are better options. Only really use this to engage guard crush.
|
|
n.2A
n.2A
|
| Damage
|
Guard
|
Startup
|
Active
|
Recovery
|
Total
|
Hit Adv
|
Block Adv
|
Guard Dmg
|
Cancel
|
Recoil
|
Deflectable
|
Unarmed
|
| 30
|
Mid
|
5
|
-
|
-
|
18
|
-1
|
-4
|
5
|
Yes
|
No
|
No
|
No
|
Kyoshiro crouches and then reaches forward awkwardly
- Not really much to say about this one.
|
|
n.2B
n.2B
|
| Damage
|
Guard
|
Startup
|
Active
|
Recovery
|
Total
|
Hit Adv
|
Block Adv
|
Guard Dmg
|
Cancel
|
Recoil
|
Deflectable
|
Unarmed
|
| 70
|
Mid
|
7
|
5
|
-
|
23
|
+4~+8
|
-1~+3
|
10
|
Yes
|
No
|
No
|
No
|
Kyoshiro crouches and then reaches forward awkwardly but with considerably more force this time
- I want to really like this normal. If it was more active it would be great. However, it doesn't catch opponents on wakeup like n.5B does. Which is unfortunate because it is great on block and probably your best button for tick grabbing.
- If you are in range and want to apply some safe pressure, feel free. However, I rarely found myself in a good position to use this where it wasn't ultimately outclassed by other tools.
|
|
Kicks
5D
5D
|
| Damage
|
Guard
|
Startup
|
Active
|
Recovery
|
Total
|
Hit Adv
|
Block Adv
|
Guard Dmg
|
Cancel
|
Recoil
|
Deflectable
|
Unarmed
|
| 50
|
Mid
|
6
|
-
|
-
|
23
|
-2
|
-4
|
5
|
-
|
-
|
-
|
Yes
|
Kyohrio thrusts his foot forward for a quick kick
- Excellent pressure tool. Great for stealing turns. Non-committal as it can not be deflected. Excellent all-around harassment tool up close.
- 66A>5D is a solid pressure sequence.
- Feel free to slip in one of these at close range whenever you predict an incoming approach.
- Surprisingly good whiff punish tool at range.
|
|
6D
6D
|
| Damage
|
Guard
|
Startup
|
Active
|
Recovery
|
Total
|
Hit Adv
|
Block Adv
|
Guard Dmg
|
Cancel
|
Recoil
|
Deflectable
|
Unarmed
|
| 40
|
Low
|
12~15
|
4
|
15~10
|
28
|
-4~-1
|
-7~-4
|
5
|
No
|
-
|
-
|
Yes
|
Kyoshiro twists to the side and delivers a tow kick
- Interesting move with some odd utility but it is ultimately underwhelming.
- Hits low for what it's worth.
- Can be used to pre-emptively stuff pokes with surprisingly good results.
- You can use 236D which, when done properly results in this move. It can be a decent way to bait jumps after heavily using tsunami.
|
|
2D
2D
|
| Damage
|
Guard
|
Startup
|
Active
|
Recovery
|
Total
|
Hit Adv
|
Block Adv
|
Guard Dmg
|
Cancel
|
Recoil
|
Deflectable
|
Unarmed
|
| 20
|
Low
|
6
|
-
|
-
|
20
|
-2
|
-5
|
5
|
-
|
-
|
-
|
Yes
|
Kyoshiro delivers a low crouching kick
- Pretty by the numbers up close low option.
- n.2A or n.2B into 5d is the better safe pressure option up close but if you notice your opponent not respecting a low option up close you can use this.
|
|
3D
3D
|
| Damage
|
Guard
|
Startup
|
Active
|
Recovery
|
Total
|
Hit Adv
|
Block Adv
|
Guard Dmg
|
Cancel
|
Recoil
|
Deflectable
|
Unarmed
|
| 70
|
Low
|
14
|
-
|
-
|
50
|
KD(+88)
|
-18
|
5
|
-
|
-
|
-
|
Yes
|
Kyoshiro delivers a low spinning sweep
- Too slow and punishable to have any genuine use except for when unarmed. When unarmed, this is your highest damage throw "combo".
|
|
Dash Normals
66A
66A
|
| Damage
|
Guard
|
Startup
|
Active
|
Recovery
|
Total
|
Hit Adv
|
Block Adv
|
Guard Dmg
|
Cancel
|
Recoil
|
Deflectable
|
Unarmed
|
| 40
|
Mid
|
8
|
-
|
-
|
24
|
-4
|
-7
|
5
|
Yes
|
-
|
-
|
No
|
Kyoshiro thrusts his palm forward for a running attack
- The last of Kyoshiro's truly great normals; and what a normal to go out on.
- Though it's startup is ho-hum this is a surprisingly good pressure and all around harassment tool. It's also not deflectable and can be spaced to hit on later active frames to be a little bit safer.
- When applying pressure with this, you can often spam it up close while mixing in 5Ds to get the opponent to respect sit still and respect you. Once they have learned to sit still, you can then either go for a throw, 66B or do one more 66A>Toad. You'd be surprised how effective this can be against some opponents.
- It is also cancelable. This opens up many new options for Kyo. 66A>623A is notable as it allows Kyo to get solid damage in a tricky range for him. When Far 5C is too slow, use this.
- 66A is also a great run under button.
|
|
66B
66B
|
| Damage
|
Guard
|
Startup
|
Active
|
Recovery
|
Total
|
Hit Adv
|
Block Adv
|
Guard Dmg
|
Cancel
|
Recoil
|
Deflectable
|
Unarmed
|
| 100
|
High
|
23
|
-
|
-
|
57
|
KD
|
-18
|
10
|
-
|
-
|
-
|
No
|
Kyoshiro winds up then hops into the air swinging downward with his naginata.
- A running overhead for decent damage. However, it is slow and very punishable.
- Despite it's flaws, Kyoshiro needs to take some risks when playing from a deficit. This is one of his options.
|
|
66C
66C
|
| Damage
|
Guard
|
Startup
|
Active
|
Recovery
|
Total
|
Hit Adv
|
Block Adv
|
Guard Dmg
|
Cancel
|
Recoil
|
Deflectable
|
Unarmed
|
| 160
|
Mid
|
17
|
-
|
-
|
63
|
KD
|
-24
|
25
|
-
|
-
|
-
|
No
|
Kyoshiro winds up and then swings his naginata downwards
- Situational punish
- You'll have better options.
|
|
66D
66D
|
| Damage
|
Guard
|
Startup
|
Active
|
Recovery
|
Total
|
Hit Adv
|
Block Adv
|
Guard Dmg
|
Cancel
|
Recoil
|
Deflectable
|
Unarmed
|
| 70
|
Low
|
11
|
7
|
-
|
44
|
KD
|
-17~-13
|
5
|
-
|
-
|
-
|
Yes
|
Kyoshiro does a running slide
- Essentially the low hitting version of 66B.
- Ok damage and fairly quick but incredibly punishable on block.
- Despite it's flaws, Kyoshiro needs to take some risks when playing from a deficit. This is one of his options.
|
|
Air Normals
j.A
j.A
|
| Damage
|
Guard
|
Startup
|
Active
|
Recovery
|
Total
|
Hit Adv
|
Block Adv
|
Guard Dmg
|
Cancel
|
Recoil
|
Deflectable
|
Unarmed
|
| 30
|
High
|
6
|
-
|
-
|
-
|
-
|
-
|
5
|
-
|
-
|
-
|
No
|
Kyoshiro awkwardly reaches forward but from the air this time
- Very niche air normal.
- Can be used as a quick up close air to air. Just don't use the 9 version or your opponent may recover before you do and in very close proximity.
- Useful protecting the air against double jumpers.
- If your opponent is respecting your supremely floaty jump, you can whiff this and then go for a throw.
|
|
j.B
j.B
|
| Damage
|
Guard
|
Startup
|
Active
|
Recovery
|
Total
|
Hit Adv
|
Block Adv
|
Guard Dmg
|
Cancel
|
Recoil
|
Deflectable
|
Unarmed
|
| 90
|
High
|
12
|
-
|
-
|
-
|
-
|
-
|
10
|
-
|
-
|
-
|
No
|
Kyoshiro stabs his naginata at a 45° angle
- Kyos best air to air in this game. Get used to it's most effective ranges.
- Ranges from good (characters who have very downwards reaching air normals) to absolutely essential (Charlotte) for controlling the air in certain matchups.
|
|
j.C
j.C
|
| Damage
|
Guard
|
Startup
|
Active
|
Recovery
|
Total
|
Hit Adv
|
Block Adv
|
Guard Dmg
|
Cancel
|
Recoil
|
Deflectable
|
Unarmed
|
| 160
|
High
|
17
|
-
|
-
|
-
|
-
|
-
|
20
|
-
|
-
|
-
|
No
|
Kyoshiro does a crescent slash directly below him
- Your go to jump-in.
- Too slow to air-to-air with in most situations unless you have a good read or your opponent is telegraphing their double jumps. However, if you can make it work as an air-to-air, do so.
|
|
j.D
j.D
|
| Damage
|
Guard
|
Startup
|
Active
|
Recovery
|
Total
|
Hit Adv
|
Block Adv
|
Guard Dmg
|
Cancel
|
Recoil
|
Deflectable
|
Unarmed
|
| 30
|
High
|
12
|
-
|
-
|
-
|
-
|
-
|
5
|
-
|
-
|
-
|
Yes
|
Kyoshiro performs a very horizontal jumping kick
- The slow startup of this move limits it's usefulness.
|
|
Unarmed Normals
u.5S
u.5S
|
| Damage
|
Guard
|
Startup
|
Active
|
Recovery
|
Total
|
Hit Adv
|
Block Adv
|
Guard Dmg
|
Cancel
|
Recoil
|
Deflectable
|
Unarmed
|
| 50
|
Mid
|
8
|
-
|
-
|
31
|
-3
|
-8
|
5
|
-
|
-
|
-
|
Only
|
Kyoshiro leans forward for a palm strike
- Looks like his awesome n.5B but it is no longer cancelable. Combine that with his long recovery and you are better off using 5D when unarmed.
|
|
u.2S
u.2S
|
| Damage
|
Guard
|
Startup
|
Active
|
Recovery
|
Total
|
Hit Adv
|
Block Adv
|
Guard Dmg
|
Cancel
|
Recoil
|
Deflectable
|
Unarmed
|
| 50
|
Mid
|
6
|
-
|
-
|
26
|
0
|
-5
|
5
|
-
|
-
|
-
|
Only
|
Kyoshiro crouches and then reaches forward awkwardly
- Again, nothing great about this. Probably want to just use 5D when unarmed.
|
|
ju.S
ju.S
|
| Damage
|
Guard
|
Startup
|
Active
|
Recovery
|
Total
|
Hit Adv
|
Block Adv
|
Guard Dmg
|
Cancel
|
Recoil
|
Deflectable
|
Unarmed
|
| 50
|
High
|
6
|
-
|
-
|
-
|
-
|
-
|
5
|
-
|
-
|
-
|
Only
|
Kyoshiro awkwardly reaches forward but from the air this time
- Same as his j.A. Becomes one of your primary ways of controlling the air when unarmed. Just don't use the 9 version.
|
|
u.66S
u.66S
|
| Damage
|
Guard
|
Startup
|
Active
|
Recovery
|
Total
|
Hit Adv
|
Block Adv
|
Guard Dmg
|
Cancel
|
Recoil
|
Deflectable
|
Unarmed
|
| 50
|
Mid
|
8
|
-
|
-
|
24
|
KD
|
-1
|
5
|
-
|
-
|
-
|
Only
|
Kyoshiro thrusts his palm forward for a running attack
- Like 66A. No longer cancelable but now knocks down.
- Quick.
- Good for run unders
- Use this to get your weapon back.
|
|
Universal Mechanics
Guard Break
Guard Break (Throw)
4/5/6C+D Forward Throw Forward Throw Back Throw Back Throw
|
| Version
|
Damage
|
Guard
|
Startup
|
Active
|
Recovery
|
Total
|
Hit Adv
|
Block Adv
|
Guard Dmg
|
Cancel
|
Recoil
|
Deflectable
|
Unarmed
|
| Neutral/Forward
|
0
|
No
|
3
|
-
|
71
|
74
|
+20
|
-
|
-
|
-
|
-
|
-
|
Yes
|
Universal throw. Can be followed up with an attack.
- Always use 5C off of forward or back throw unless WFT is available. Forward throw into 5C is somewhat tight. Practice this.
|
| Back
|
0
|
No
|
5
|
-
|
69
|
74
|
+25
|
-
|
-
|
-
|
-
|
-
|
Yes
|
Universal throw. Can be followed up with an attack.
- Always use 5C off of forward or back throw unless WFT is available.
|
|
Surprise Attack
Surprise Attack (Overhead)
5B+C Armed Armed Unarmed Unarmed
|
| Version
|
Damage
|
Guard
|
Startup
|
Active
|
Recovery
|
Total
|
Hit Adv
|
Block Adv
|
Guard Dmg
|
Cancel
|
Recoil
|
Deflectable
|
Unarmed
|
| Armed
|
80
|
High
|
24
|
-
|
-
|
49
|
0
|
-13
|
10
|
-
|
-
|
-
|
No
|
Universal overhead.
- Gives Kyo an overhead attack option with decent range. Between this and 2B, he can be very annoying when in range. Bare in mind that it is not the safest thing in the world when blocked. Spacing it makes it safer but it is never truly safe on block. Space and at least make your opponent prove that they are prepared to punish it from range.
- Can be used as a movement tool to get over grounded projectiles. Can get over some normal projectiles but it is tight and often not worth the risk.
|
| Unarmed
|
70
|
High
|
24
|
-
|
-
|
45
|
0
|
-13
|
10
|
No
|
-
|
No
|
Only
|
Universal unarmed overhead
- When unarmed it is ok and ultimately worth using,
|
|
Dodge
Dodge
5A+B
|
| Damage
|
Guard
|
Startup
|
Active
|
Recovery
|
Total
|
Hit Adv
|
Block Adv
|
Guard Dmg
|
Cancel
|
Recoil
|
Deflectable
|
Unarmed
|
| -
|
-
|
1
|
16
|
22
|
38
|
-
|
-
|
-
|
-
|
-
|
-
|
Yes
|
|
|
|
Stance Break
Stance Break
A+B during Just Defense
|
| Damage
|
Guard
|
Startup
|
Active
|
Recovery
|
Total
|
Hit Adv
|
Block Adv
|
Guard Dmg
|
Cancel
|
Recoil
|
Deflectable
|
Unarmed
|
| 0
|
Mid
|
5
|
-
|
-
|
52
|
KD
|
-24
|
-
|
No
|
-
|
-
|
Yes
|
|
|
|
Counter / Blade Catch
Counter / Blade Catch
236A+B Counter Counter Blade Catch Blade Catch
|
| Version
|
Damage
|
Guard
|
Startup
|
Active
|
Recovery
|
Total
|
Hit Adv
|
Block Adv
|
Guard Dmg
|
Cancel
|
Recoil
|
Deflectable
|
Unarmed
|
| Armed
|
0
|
N/A
|
2
|
11
|
34
|
46
|
+35~+59
|
N/A
|
-
|
N/A
|
N/A
|
N/A
|
No
|
Universal counter. Allows you to follow up with a guaranteed attack of your own. The amount of time you have to followup depends on the strength of the attack you counter, with heavy attacks staggering the opponent for the longest amount of time. Additionally you counter a heavy slash or a running slash, your opponent will be disarmed.
|
| Disarmed
|
0
|
N/A
|
2
|
12
|
9
|
22
|
KD
|
N/A
|
-
|
N/A
|
N/A
|
N/A
|
Only
|
Universal counter. While disarmed, your counter will disarm and knock away your opponent regardless of slash level countered.
|
|
Rage Explosion
Rage Explosion
5A+B+C
|
| Damage
|
Guard
|
Startup
|
Active
|
Recovery
|
Total
|
Hit Adv
|
Block Adv
|
Guard Dmg
|
Cancel
|
Recoil
|
Deflectable
|
Unarmed
|
| 0
|
Unblockable
|
21
|
1
|
-
|
58
|
0
|
-
|
-
|
-
|
-
|
-
|
No
|
Unblockable pushback attack.
|
|
Lightning Blade
Lightning Blade (Issen)
5A+B+C during Rage Explosion
|
| Damage
|
Guard
|
Startup
|
Active
|
Recovery
|
Total
|
Hit Adv
|
Block Adv
|
Guard Dmg
|
Cancel
|
Recoil
|
Deflectable
|
Unarmed
|
| 300~709
|
Mid
|
9
|
-
|
-
|
-
|
KD
|
-44
|
-
|
-
|
-
|
No
|
No
|
Has projectile invulnerability and anti-airs. Damage scales up based on remaining health.
|
|
Command Moves
Crouch Walk
Crouch Walk
1 or 3 Crouch Walk Crouch Walk
|
| Damage
|
Guard
|
Startup
|
Active
|
Recovery
|
Total
|
Hit Adv
|
Block Adv
|
Guard Dmg
|
Cancel
|
Recoil
|
Deflectable
|
Unarmed
|
| -
|
-
|
-
|
-
|
-
|
-
|
-
|
-
|
-
|
-
|
-
|
-
|
Yes
|
Kyoshiro walks while crouching.
- Interesting tool but it's ultimately a big detriment to Kyos game. Backwards couch walk in particular really hurts Kyo. Playing patient and holding your position is the most efficient way to play Kyo. Backwards crouchwalk forces him to give up screen space for free making it incredibly difficult to hold your ground without continuously compensating for the space you lost.
- Forwards crouch walk is a decent idea but is ultimately niche. Does not move him forward fast enough to be evasive. Useful against certain attacks like level 0 Mina arrow but still not that useful in the end.
|
|
Special Moves
Tsunami Crunch
Tsunami Crunch
236S
|
| Version
|
Damage
|
Guard
|
Startup
|
Active
|
Recovery
|
Total
|
Hit Adv
|
Block Adv
|
Guard Dmg
|
Cancel
|
Recoil
|
Deflectable
|
Unarmed
|
| A
|
60
|
Mid
|
18
|
-
|
-
|
61
|
-16
|
-16
|
5
|
-
|
-
|
-
|
Yes
|
| B
|
60
|
Mid
|
20
|
-
|
-
|
70
|
-23
|
-23
|
5
|
-
|
-
|
-
|
Yes
|
| C
|
60
|
Mid
|
23
|
-
|
-
|
75
|
-25
|
-25
|
5
|
-
|
-
|
-
|
Yes
|
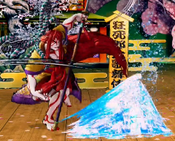
Kyoshiro winds up and summons a small tsunami
- A decent but ultimately flawed projectile.
- Strength of slash determines speed of the tsunami.
- Gives Kyo a fullscreen presence.
- Can be used to coax opponents to jump. Kara cancels from 5A which can be used to help with this.
- Doesn't do a lot of damage.
- Has huge recovery.
- At it's best against floaty jumpers.
|
|
Dance of Fire
Dance of Fire
421S
|
| Version
|
Damage
|
Guard
|
Startup
|
Active
|
Recovery
|
Total
|
Hit Adv
|
Block Adv
|
Guard Dmg
|
Cancel
|
Recoil
|
Deflectable
|
Unarmed
|
| A
|
80
|
Mid
|
34
|
-
|
-
|
84
|
KD
|
-8
|
12
|
-
|
-
|
-
|
Yes
|
| B
|
90
|
Mid
|
36
|
-
|
-
|
111
|
KD
|
-10
|
20
|
-
|
-
|
-
|
Yes
|
| C
|
100
|
Mid
|
41
|
-
|
-
|
152
|
KD
|
-12
|
28
|
-
|
-
|
-
|
Yes
|
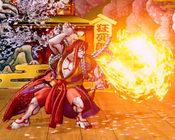
Kyoshiro leans back and the breaths out a continuous ball of flame
- Strength used determines the duration.
- Very good meaty that leads to great chip damage. Very effective at cranking guard gauge.
- Can leave you very plus if the opponents wakes up into it. This can allow you to go for a high low mixup afterwards.
- Has a very prominent hitbox and will beat most normals when active. Can mixup the strength to bait someone trying to punish too early.
- Long recovery. Patient players will get a very good punish on whiff.
- Only A version is truly safe on block when not used as a meaty.
- Disjointed specials will go right through it. Be mindful of who you are playing against when using this and don't autopilot on wakeup if the opponent has an easy counter.
|
|
Lion's Tail Blast
Lion's Tail Blast
214S
|
| Version
|
Damage
|
Guard
|
Startup
|
Active
|
Recovery
|
Total
|
Hit Adv
|
Block Adv
|
Guard Dmg
|
Cancel
|
Recoil
|
Deflectable
|
Unarmed
|
| A
|
140
|
Mid
|
20
|
-
|
-
|
80
|
KD
|
-15
|
22
|
-
|
-
|
-
|
No
|
| B
|
160
|
Mid
|
25
|
-
|
-
|
106
|
KD
|
-21
|
28
|
-
|
-
|
-
|
No
|
| C
|
180
|
Mid
|
43
|
-
|
-
|
98
|
KD
|
-36
|
24
|
-
|
-
|
-
|
No
|
Kyoshiro plunges his naginata into the ground and delivers a flaming horizontal kick
- 214A is your ideal close combo ender. 5B>214A.
- 5B>214A can be used to catch people who are preemptively jumping to avoid toad.
- 214A is surprisingly safe on block. Can lead to deflect opportunities if the opponent is unprepared. Ultimately, a gimmick.
- 214A can low crush certain normals and projectiles. You have safer options to do this but it's there.
- 214C can be used to chip out an inexperienced opponent. However, it's start up is very slow making it easy for experienced players to avoid.
- 214C is SSM punishable on block.
|
|
Lion's Tail Blast
Ragion Lion's Tail Blast
214C
|
| Version
|
Damage
|
Guard
|
Startup
|
Active
|
Recovery
|
Total
|
Hit Adv
|
Block Adv
|
Guard Dmg
|
Cancel
|
Recoil
|
Deflectable
|
Unarmed
|
| Rage
|
200 [20*6,80]
|
Mid
|
43
|
-
|
-
|
98
|
KD
|
-32
|
28
|
-
|
-
|
-
|
No
|
Kyoshiro plunges his naginata into the ground and delivers a Rage Enhanced flame kick.
- Pretty much the same as 214C.
- Can catch someone unprepared for a chip out.
- SSM punishable on block.
- Very risky. Do not use often.
|
|
Twisting Heavens
Twisting Heavens
623S
|
| Version
|
Damage
|
Guard
|
Startup
|
Active
|
Recovery
|
Total
|
Hit Adv
|
Block Adv
|
Guard Dmg
|
Cancel
|
Recoil
|
Deflectable
|
Unarmed
|
| A
|
110
|
Mid
|
11
|
-
|
-
|
68
|
KD
|
-24
|
12
|
-
|
-
|
-
|
No
|
- No invul. Fastest of the bunch. Despite it having no invulnerability, it can be a decent anti-air in certain matchups when spaced properly. Specifically Darli, Shiki, and a float happy Shizu.
|
| B
|
130
|
Mid
|
13
|
-
|
-
|
87
|
KD
|
-51
|
15
|
-
|
-
|
-
|
No
|
- Very slow startup for a DP. Does have invulnerability. If you are confident in getting this move out in time then, by all means, use it as a dp. But, it has a tendency of coming out after your opponent has already landed. Best used against characters with normal and floaty jumps.
|
| C
|
160
|
Mid
|
14
|
-
|
-
|
128
|
KD
|
-92
|
20
|
-
|
-
|
-
|
No
|
- Full invulnerability. Slowest of the bunch. Travels horizontally almost the entire length of the screen. Can be used as a very risky reversal or against characters with very floaty jumps. Can be used against double jumpers but you may find it sailing over them. Be aware that if you whiff this or it gets blocked then the majority of the cast can SSM punish you.
|
|
Smoldering Blood Pounce
Smoldering Blood Pounce
j.2S
|
| Damage
|
Guard
|
Startup
|
Active
|
Recovery
|
Total
|
Hit Adv
|
Block Adv
|
Guard Dmg
|
Cancel
|
Recoil
|
Deflectable
|
Unarmed
|
| 180
|
High
|
10 [4]
|
-
|
88(landing)
|
-
|
KD
|
-102~-74
|
18
|
-
|
-
|
-
|
No
|
Kyoshiro holds his Naginata over his head and spins as he decends towards the ground and then strikes a pose
- Interesting move. Can be used both from a jump and out of backdashes.
- It is typically too slow to use on reaction from a jump. If you are using it out of a jump it is typically a hard read. Considering that this move is SSM punishable, this application is not recommended.
- It is best used out of a backdash as an anti-air or an overhead.
- As an anti-air it is is good against most of the cast and absolutely essential in some matchups (Yoshi and Darli). The common tactic when using it as an anti-air is to read when an opponent might jump, back dash, visually confirm whether the opponent jumped or not, then act accordingly. The hitbox is surpsisinglyy large so it will hit from further out than you may expect but it's range is not infinite. Spacing if something you will have to get a hang of.
- As an overhead it is best used in the corner. If an opponent attempts to run up throw or is not respecting your space in general, you can backdash and let it rip. Seems powerful at first but an experienced opponent will catch on and bait you. Don't over use this.
|
|
Toad Plague
Toad Plague
214D
|
| Damage
|
Guard
|
Startup
|
Active
|
Recovery
|
Total
|
Hit Adv
|
Block Adv
|
Guard Dmg
|
Cancel
|
Recoil
|
Deflectable
|
Unarmed
|
| 200
|
Unblockable
|
35
|
15
|
-
|
130
|
KD
|
-96~-82(whiff)
|
-
|
No
|
-
|
-
|
Yes
|
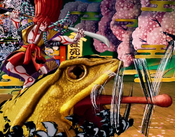
Kyoshiro strikes a pose as a giant toad emerges from the ground and shoots his tongue outward in an attempt to catch an unwitting opponent.
- The Toad.
- Stylish. Crowd pleasing. Character defining. Gimmick.
- Toad is essentially a command grab/unblockable. If the opponent is grounded when the tounge makes contact with them, it will catch them. The issue is it is painfully slow. There are "setups". 66A>214D. Meaty 5B>214D. But the fact remains that toad is just not very good in a genuine competitive environment. It all comes down to the experience of your opponent. If your opponent is not experienced against toad then the "setups" will work. Abuse it. Just understand that they will eventually figure it out. If your opponent is experienced against toad then do not use it. They will react and you will die. Does not matter how crafty you are.
- However, there is a minor caveat worth mentioning. Toad can be useful against any opponent in some recoil cancel situations. For example, if your opponent is a Jubei and they love to do 66B>Recoil cancel projectile, you can blow this up with toad. However, it is always incredibly risky and almost never worth it against an experienced opponent.
|
|
Supers
Weapon Flipping Technique
Flesh and Blood Fandango
236B+C
|
| Damage
|
Guard
|
Startup
|
Active
|
Recovery
|
Total
|
Hit Adv
|
Block Adv
|
Guard Dmg
|
Cancel
|
Recoil
|
Deflectable
|
Unarmed
|
| 396(462)
|
Mid
|
1+14
|
-
|
-
|
-
|
KD
|
-55
|
-
|
-
|
-
|
-
|
No
|
Kyoshiro strikes a pose and raises his naginata above his head and then begins to spin gliding horizontally across the stage.
- Can be used off of throw or comboed into from n.5B and n.2B.
- Can be used as an anti-air. If you have the reactions for it then definitely try to use it as an anti-air. But, bare in mind, opponents sometimes have a tendency to pass through unscathed.
- Can also be used to chip kill if the opponent is not prepared to stance break. n.5B an n.2B>WFT is a true string. Unless they stance break they have to hold the chip.
|
|
Super Special Move
Eighteen Best Kabuki Plays "Revolving Stage"
641236C+D
|
| Damage
|
Guard
|
Startup
|
Active
|
Recovery
|
Total
|
Hit Adv
|
Block Adv
|
Guard Dmg
|
Cancel
|
Recoil
|
Deflectable
|
Unarmed
|
| 670
|
Mid
|
10+17
|
-
|
-
|
-
|
KD
|
-68
|
-
|
-
|
-
|
-
|
No
|
Kyoshiro winds up and then delivers a palm strike. If it connects, he unleashes a barrage of devastating strikes with his naginata.
- Incredibly short range.
- Will often require you to do a microdash forward to get in proper range before using it. If you are going to play Kyoshiro, you need to understand the effective ranges and practice microdash into SSM.
|
|
Combos
List combos, use numpad notation.
Midscreen
- (n.5B / n.2B) xx 214A / 623C / WFT
Standard punish combo, can run-up stop to do 5B for long range, 214A recovers faster leave you positive for Oki.
- 66A xx 623A
Dash-in combo.
- n.5A/5A xx 623A
Fast combo from a light.
- 2A xx 623A
It will combo if it's less than full range of 2A.
- Deep j.C...
- n.5B / n.2B xx 214A / 623C / WFT
Might get far version of mediums if a little too far. That case go for a 5C instead. Or go straight into the special.
- n.5C / 5C
Universal deep j.C combo.
- Lightning Blade
Universal Issen combo.
- 5CD/4CD...
- 5C
Both throw work, forward throw is 1 frame link.
- WFT
Go straight into WFT after forward throw.
- Run-up(n.5B / n.2B) xx WFT
Only after back throw, run-up stop (input 4 or 1) WFT.
Corner
- 5CD/4CD...
- (n.5B / n.2B) xx 214A / 623C / WFT
Can't go for a 5C so go for medium combo for knock down. Again 214A leaves you better frame for Oki.
Guard Crush
- n.5C...
After recovery...
- (n.5B / n.2B) xx 214A / 623C / WFT
Standard follow up.
- SSM
SSM follow up. (Be careful with opponent bursting to avoid it)
- 5C...
Combo from second hit...
- 214A / 623C / WFT
421A will not reach at far range, but it leaves you plus for Oki if you connect it at closer range.
- 214D
Corner only combo, does the most damage other than WFT.
- Lightning Blade
Universal Issen combo, combo from second hit.
- 5C...
If only the second hit triggered GC...
- 5C / 623C/ WFT / Lightning Blade
Go for another 5C, special, WFT or Issen.
- n.5C...
Cancel recovery...
- Lightning Blade
Universal Issen combo
Videos
Colors
External Links
