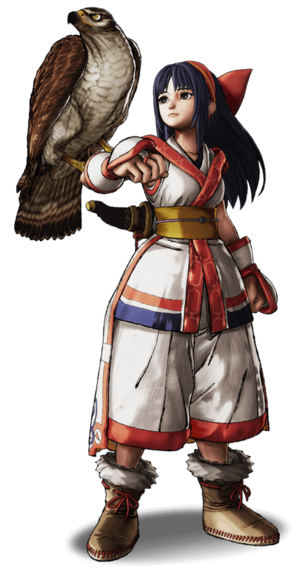
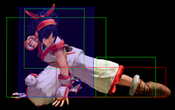
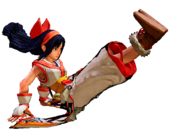
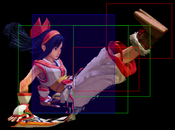
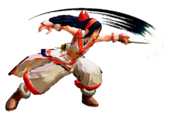
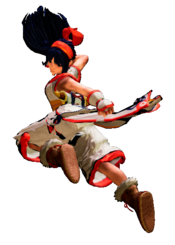
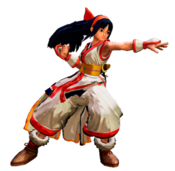
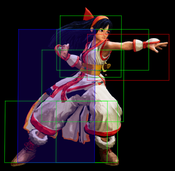
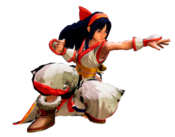
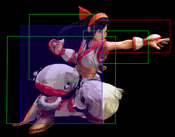
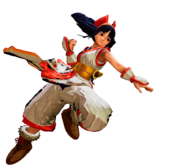
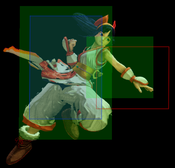
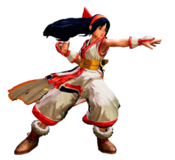
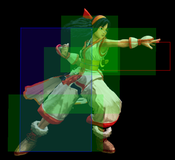
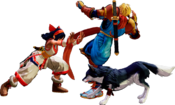
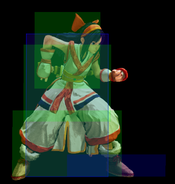
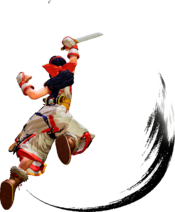
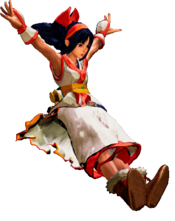
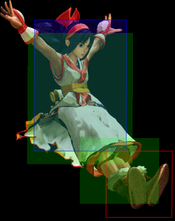
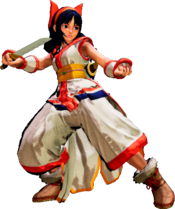
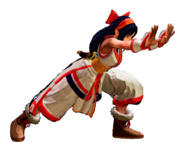
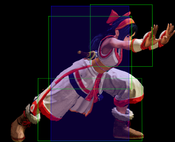
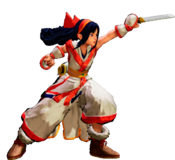
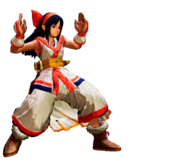
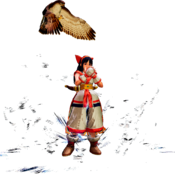
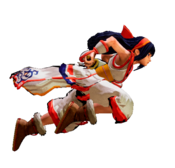
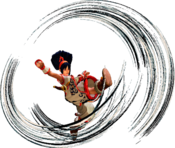
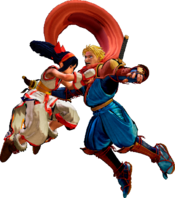
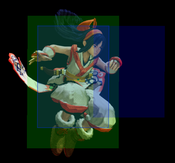
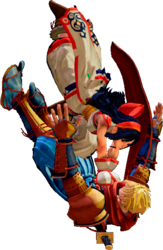
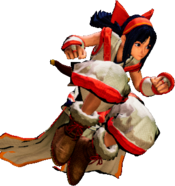
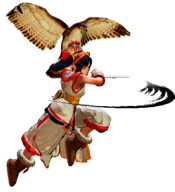
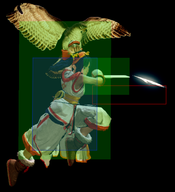
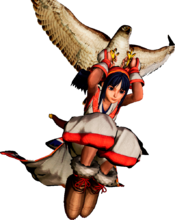
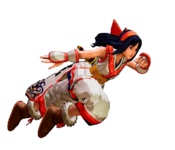
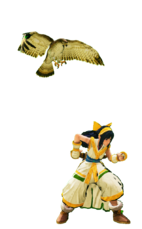
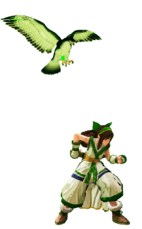
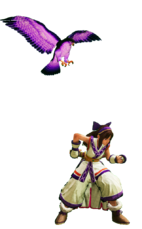
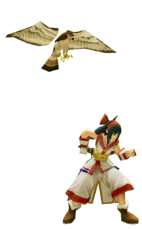
Nakoruru
ナコルル, Nakoruru
|
- Damage Taken: 105%
- Rage Factor: 0.22
- Rage Duration: 10 seconds
- Jump: 46 frames (Average)
- Forward Walk Speed: 0.35 (Fast)
- Back Walk Speed: 0.3 (Fast)
- Dash Speed: 1.35 (Very Fast)
- Back Dash: 28 frames
- Weapon Pickup / Drop: 50 / 79 frames
|
Introduction
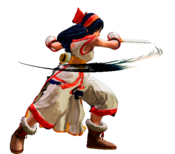
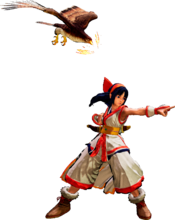
Nakoruru has adjusted well to the new system, and with walkspeeds being universally slowed down across the cast in SamSho7, Nako’s focus on movement, paired with her hit-and-run playstyle and strong whiff punishment tools from a range make her positively stand out in the neutral game.
Nakoruru mainly plays a passive-aggressive game from just outside footsies range, where she has a variety of tools to react to her enemy’s movements. She has great anti-airs and a very annoying “projectile” in Mamahaha, that can lock down the enemy from a distance. Her short stature also makes her very hard to instant-overhead for some characters.
On the other hand, Nakoruru’s normals are quite stubby, meaning she needs to create opportunities for herself to move in and deal damage. Her approach - while powerful - is also highly unsafe on block and requires the player to carefully gauge the opponent’s tendencies or else risk eating a huge punish.
Playstyle
 Nakoruru is a pixie character who can easily dominate the neutral game in the air or on the ground. Nakoruru is a pixie character who can easily dominate the neutral game in the air or on the ground.
|
| Strengths |
Weaknesses
|
- Tricky movement: Nako is very hard to pin down due to her excellent run speed and Cling to Mamahaha special.
- Strong close-range pressure: Nako has one of the best sets of close range normals for pressure and it's hard to get her off of you when she gets up close and personal.
- Good anti-air: Nako has excellent grounded and running AA options in the form of 2C and 66C and has fast jump normals that are good for air-to-air exchanges.
- Strong mixup tools: Due to her excellent B+C, slide and Nakocar, Nako punishes blocking with ease and conditions the opponent into blocking low regularly.
- Anti-fireballs: Nako has various specials that allow her to low-profile, maneuver above or reflect fireballs.
- Excellent WFT: Nako's weapon flipping technique is among the fastest in the game, allowing for raw punishing many moves, while also having great use in both neutral and combos, and airborne on frame 2, making it hard to challenge with recoil reversals.
|
- Poor air game: Nako's jump is quite floaty and her jump normals are very shallow, making it easy to anti-air her on the ground or challenge her in the air with long range air-to-airs.
- Short range: Nako lacks midscreen and far-range normals, forcing her to take risks to close the distance.
- Lack of invincible reversal: Lacking an invincible move means shes very easy to pressure once she is knocked down, and despite how good her antiairs are she wont be able to stop the better aerial attacks in the game.
- Low damage: Nako's damage is below average whenever she is not in rage, forcing her to keep pressure on the opponent whenever possible.
|
Gameplan
Neutral
Nako relies greatly on her speed as she can just get in, to take a health lead and just run. The for sure hit and run style play, great for players that would like to chip out health slowly and be consistently mobile and have fast reaction, instead of throwing for high damage and looking for big recoveries. Some of her key moves being the following:
- 5A/2A/66A super fast and just cancel into 412A to get some small damages stacked up. Or link into WFT and make people wonder if that actually worked.
- 66A/66B into bird cling (214D), to bait up a move from her opponent, if the move is big enough she can then punish it with her bird cling heavy into Kamui Mutsube (BC), or just 2D for a knock down and safe damage (Can usually bait out something on block).
- 66D as being the arguably the best slide out of the ones that still does knock down, hard to punish when spaced correctly, keeping the opponent on check for their toes. A great harassment and apply damages slowly.
- 214S her bird is still good for applying pressure in close range. It air resets opponent, good for anti airing.
- 412S especially the light one, super hard to punish on block, can be a quick punish tool for everything, also useful to set up for a deflect or dodging a throw. Very useful to bring down guard meter and set up for a guard crush!
Okizeme
She has quite a few good mix for Oki, so she aims to get a knock down.
- Safejump j.C
- Spaced/meaty 66D
- 6D can sideswitch on forward roll.
- 5D cancels a total frame trap for people to make a move when she can just do something and catch you off guard.
- 214D her bird cling is a deadly high / low mix up tool on wake up, as she can quickly 2D out of the bird and make a low move.
Normal Moves
Far Slashes
5A
5A
|
| Damage
|
Guard
|
Startup
|
Active
|
Recovery
|
Total
|
Hit Adv
|
Block Adv
|
Guard Dmg
|
Cancel
|
Recoil
|
Deflectable
|
Unarmed
|
| 40
|
Mid
|
7
|
-
|
-
|
22
|
-3
|
-5
|
5
|
Yes
|
Yes
|
Yes
|
No
|
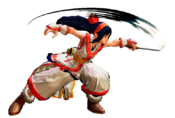
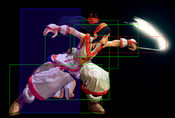
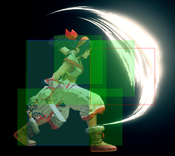
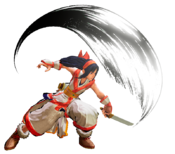
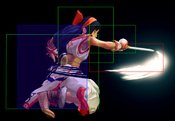
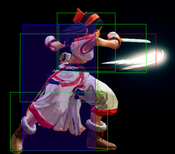
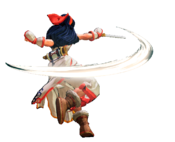
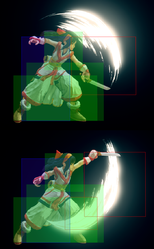
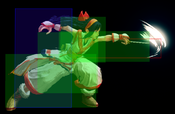
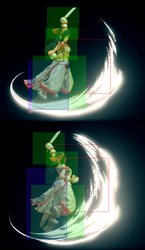
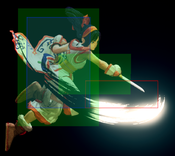
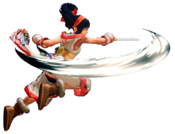
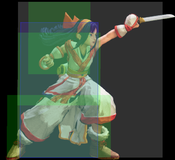
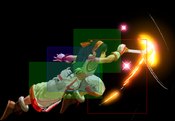
One of her main buttons, a quick lunging slash with good range. Useful for punishing attacks with minor pushback and recovery. Combos into 236A, 412A and Weapon flipping technique
|
|
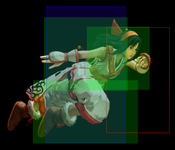
Toggle Hitboxes Toggle Hitboxes
|
5B
5B
|
| Damage
|
Guard
|
Startup
|
Active
|
Recovery
|
Total
|
Hit Adv
|
Block Adv
|
Guard Dmg
|
Cancel
|
Recoil
|
Deflectable
|
Unarmed
|
| 100
|
Mid
|
10
|
-
|
-
|
35
|
-5
|
-12
|
10
|
Yes
|
Yes
|
Yes
|
No
|
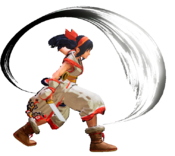
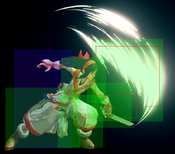
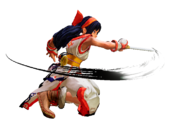
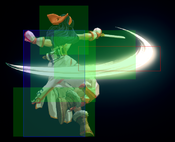
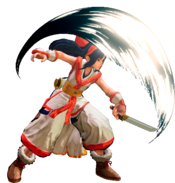
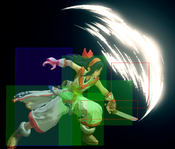
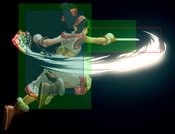
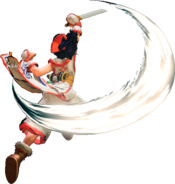
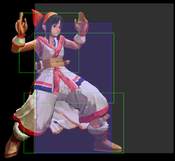
Versatile attack with about as much range as Nakoruru gets for a normal. Has a surprisingly large, disjointed hitbox in front of her that makes it useful for zoning out an opponent approaching from the ground or counter-poking Tam-Tam 5B spam. Combos into 236C or 412C for big damage and corner carry. On hit or block, it is possible to option-select into a quick combo input first and then recoil cancel into whatever special you'd like (e.g., 5B xx 236C xx 214D).
|
|
Toggle Hitboxes Toggle Hitboxes
|
5C
5C
|
| Damage
|
Guard
|
Startup
|
Active
|
Recovery
|
Total
|
Hit Adv
|
Block Adv
|
Guard Dmg
|
Cancel
|
Recoil
|
Deflectable
|
Unarmed
|
| 240
|
Mid
|
15
|
-
|
-
|
56
|
-2
|
-16
|
25
|
No
|
Yes
|
Yes (Disarms)
|
No
|
This is the most damaging single hit normal Nakoruru has. Combos after throw. Significant pushback on hit. Be careful when using this to punish due to its short range compared to other characters' 5Cs. Use 66C, 66C+D, 236S, or 412S at range instead when appropriate.
Less range than 5B for some reason but its fast for a heavy attack. Good for when you are going for the finishing blow without giving them a chance to Rage Explode (compared to a combo where they can RE after the first hit), and to stop the advance of overly impatient players. Its also a decent antiair against people who jump from far away.
On block it allows for really advantageous recoil cancels (Eg: recoil cancelling into 412A has no gap inbetween so the opponent cant press anything at all)
|
|
Toggle Hitboxes Toggle Hitboxes
|
2A
2A
|
| Damage
|
Guard
|
Startup
|
Active
|
Recovery
|
Total
|
Hit Adv
|
Block Adv
|
Guard Dmg
|
Cancel
|
Recoil
|
Deflectable
|
Unarmed
|
| 30
|
Mid
|
6
|
-
|
-
|
18
|
0
|
-5
|
5
|
Yes
|
Yes
|
Yes
|
No
|
Check slash for close-quarters situations when you are at neutral. Poor range, but it is quick to come out and recover, so it doesn't matter if it whiffs in most situations. Combos into 236A or 412A if you know it'll hit. If you try to input this attack while walking backwards, there is a high chance that 412A will come out instead, so use 3A for the input in this situation instead.
|
|
Toggle Hitboxes Toggle Hitboxes
|
2B
2B Nako the Hedgehog Nako the Hedgehog
|
| Damage
|
Guard
|
Startup
|
Active
|
Recovery
|
Total
|
Hit Adv
|
Block Adv
|
Guard Dmg
|
Cancel
|
Recoil
|
Deflectable
|
Unarmed
|
| 90 (30*3)
|
Low
|
12
|
-
|
-
|
43
|
+1
|
-12
|
10
|
No
|
Yes
|
No
|
No
|
Her only armed low.
Undeflectable, recoil cancellable and places you out of throw range if blocked.
On hit its +1 which means you get to press buttons first, so you can risk it by frametrapping them with Close 5A, or go for anything else depending on how the opponent reacts.
Could be useful for stopping people trying to run at you, but it doesnt travel far enough to make this more useful.
Can also be used as an antiair and because of the forward movement it can lead into an ambiguous left/right situation afterwards.
|
|
Toggle Hitboxes Toggle Hitboxes
|
2C
2C
|
| Damage
|
Guard
|
Startup
|
Active
|
Recovery
|
Total
|
Hit Adv
|
Block Adv
|
Guard Dmg
|
Cancel
|
Recoil
|
Deflectable
|
Unarmed
|
| 160
|
Mid
|
13
|
-
|
-
|
48
|
-8
|
-28
|
25
|
No
|
Yes
|
Disarm
|
No
|
Her best antiar yet its still a very risky button since you are in crouching state, so mistiming it means you take a full jump combo.
Despite that it has a very good hitbox which even reaches behind her (only if the opponent presses a button to extend their hurtbox tough), and most surprisingly its a good whiff punish button on the ground since it appears to have a small hurtbox, so for example it would let you hit players who are spamming 2D to keep you away (and in this scenario Far 5C would get interrupted because of its bigger horizontal hurtbox, same for Far 5B)
|
|
Toggle Hitboxes Toggle Hitboxes
|
Near Slashes
n.5A
n.5A
|
| Damage
|
Guard
|
Startup
|
Active
|
Recovery
|
Total
|
Hit Adv
|
Block Adv
|
Guard Dmg
|
Cancel
|
Recoil
|
Deflectable
|
Unarmed
|
| 30
|
Mid
|
5
|
-
|
-
|
16
|
+1
|
-5
|
5
|
Yes
|
Yes
|
Yes
|
No
|
Really fast and cancellable. Best button for close range light punishes. It also combos into Weapon Flip
|
|
Toggle Hitboxes Toggle Hitboxes
|
n.5B
n.5B
|
| Damage
|
Guard
|
Startup
|
Active
|
Recovery
|
Total
|
Hit Adv
|
Block Adv
|
Guard Dmg
|
Cancel
|
Recoil
|
Deflectable
|
Unarmed
|
| 80
|
Mid
|
7
|
-
|
-
|
29
|
-2
|
-12
|
10
|
Yes
|
Yes
|
Yes
|
No
|
Pretty fast cancellable normal, although you have to be somewhat close to trigger the close version, so even a slightly spaced overhead, even when blocked might get you Far 5B instead.
Can cancel into strong versions of specials like 236C or 421CC for large chunks of damage on punishes.
When the opponent is unnarmed, the cancel window on block is incredibly small.
|
|
Toggle Hitboxes Toggle Hitboxes
|
n.5C
n.5C
|
| Damage
|
Guard
|
Startup
|
Active
|
Recovery
|
Total
|
Hit Adv
|
Block Adv
|
Guard Dmg
|
Cancel
|
Recoil
|
Deflectable
|
Unarmed
|
| 180 [100,80]
|
Mid
|
14
|
-
|
-
|
53
|
+2
|
-28
|
25
|
No
|
Yes
|
Yes (Disarms)
|
No
|
While this attack's damage on is on the lower end when compared to other characters, it makes up for this by being positive on hit and relatively fast for a C button. This combination of factors is potent after disarming an opponent since weapon recoil is not possible in this situation, allowing her to maintain advantage (and deal chip damage) when blocked.
|
|
Toggle Hitboxes Toggle Hitboxes
|
Kicks
5D
5D
|
| Damage
|
Guard
|
Startup
|
Active
|
Recovery
|
Total
|
Hit Adv
|
Block Adv
|
Guard Dmg
|
Cancel
|
Recoil
|
Deflectable
|
Unarmed
|
| 50
|
Mid
|
11
|
-
|
-
|
24
|
-1
|
-4
|
5
|
Yes
|
-
|
No
|
Yes
|
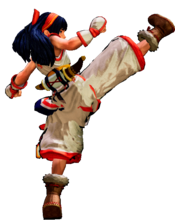
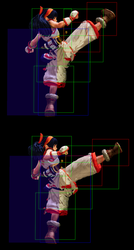
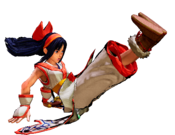
Nakoruru performs a spinning crescent kick that hits above and in front of her. Will hit crouching opponents at close range but will whiff on crouchers from tip. Special-cancelling this attack will put Nakoruru at +9, allowing follow-ups like 421A to become frame traps, 214A/B to force a trade, or clinging on mamahaha before a light attack can even touch you. Do note that 5D has some push back, making a 421A cancel whiff when 5D is blocked at tip range, so take spacing into consideration when choosing what to cancel this attack into.
|
|
Toggle Hitboxes Toggle Hitboxes
|
6D
6D
|
| Damage
|
Guard
|
Startup
|
Active
|
Recovery
|
Total
|
Hit Adv
|
Block Adv
|
Guard Dmg
|
Cancel
|
Recoil
|
Deflectable
|
Unarmed
|
| 60 [20*3]
|
Mid
|
11
|
-
|
-
|
34
|
KD(+103)
|
-11
|
5 [1*2,3]
|
-
|
No
|
No
|
Yes
|
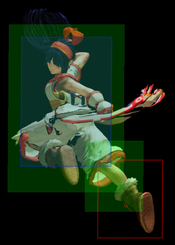
Nakoruru's trademark "walking up their body" attack. The first and third hits knock down on hit with plenty of time to set up okizeme afterwards. 6D recovers the instant she lands after the flip, which throws off whiff-punish timings despite having such a vulnerable looking animation. Spacing does affect whether all three hits connect since there is no "vacuum" effect, so keep that in mind when using it at a distance. Also moves Nakoruru slightly backwards while jumping, making it possible to set up side switches on forward rolling opponents. Do note that the jumping portion of this attack occurs late, so it can't be used to clear attacks that hit low to the ground right away.
If done meaty on the opponent's wakeup, it can avoid various character's stance breaks since she is high enough in the air by the time the stance break comes out.
If done on a cornered opponent she will be close enough to get punished with a light attack and similarly fast moves.
|
|
Toggle Hitboxes Toggle Hitboxes
|
2D
2D
|
| Damage
|
Guard
|
Startup
|
Active
|
Recovery
|
Total
|
Hit Adv
|
Block Adv
|
Guard Dmg
|
Cancel
|
Recoil
|
Deflectable
|
Unarmed
|
| 20
|
Low
|
6
|
-
|
-
|
18
|
0
|
-3
|
5
|
-
|
No
|
No
|
Yes
|
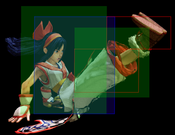
One of Nakoruru's fastest lows, tied with 66D. Does not knock down, but is safer in comparison. Lowers her hurtbox, but also extends it forward, which means that opponents will hit her with ground-based attacks or even throws that would normally whiff entirely were she just crouching.
|
|
Toggle Hitboxes Toggle Hitboxes
|
3D
3D
|
| Damage
|
Guard
|
Startup
|
Active
|
Recovery
|
Total
|
Hit Adv
|
Block Adv
|
Guard Dmg
|
Cancel
|
Recoil
|
Deflectable
|
Unarmed
|
| 70
|
Low
|
12~17
|
6
|
20~15
|
37
|
KD(+99)
|
-9~-4
|
5
|
No
|
No
|
No
|
Yes
|
Sweep move, knocks down on hit. Can be spaced/meatied to become -4 on block, but in the end its a worse version of 66D.
However, unlike 66D, her hurtbox shrinks even further during the attack so she could low profile under certain moves, and even allow her to antiair (sadly its also a crouching attack so you'll die if you fail to antiair with it)
|
|
Toggle Hitboxes Toggle Hitboxes
|
Dash Normals
66A
66A
|
| Damage
|
Guard
|
Startup
|
Active
|
Recovery
|
Total
|
Hit Adv
|
Block Adv
|
Guard Dmg
|
Cancel
|
Recoil
|
Deflectable
|
Unarmed
|
| 30
|
Mid
|
4
|
-
|
-
|
20
|
-4
|
-19
|
5
|
Yes
|
Yes
|
Yes
|
No
|
One of her main "get in" tools, with a 4 frame startup making it the fastest attack in the game outside front throw.
Mix it with 66D to avoid getting deflected.
Being cancellable lets Nakoruru stick a combo in the tiniest of gaps, and even combos into Weapon Flip for punishing opponents at a distance. The only special cancels that combo are 236A, 412A and 421A (although this last one is really hard to cancel into except on a sideswitch situation), and while most of this combos actually deal less damage than just doing 66C, it is way more safe since you can recoil option select the special move so in only comes out if the 66A hits.
Also being both -4 on hit and having such fast recovery and little pushback, It can be used for tick throws without making yourself too obvious.
|
|
Toggle Hitboxes Toggle Hitboxes
|
66B
66B
|
| Damage
|
Guard
|
Startup
|
Active
|
Recovery
|
Total
|
Hit Adv
|
Block Adv
|
Guard Dmg
|
Cancel
|
Recoil
|
Deflectable
|
Unarmed
|
| 100
|
Mid
|
9
|
-
|
-
|
36
|
-7
|
-35
|
10
|
No
|
yes
|
Yes (Disarms)
|
No
|
Not very fast, -7 on hit and its a dashing medium so the recoil cancel window is very bad and getting deflected means you lose your weapon.
However it's still worth using this button sometimes because its her longest reaching run normal.
Since its stays active for a while, its a decent button to get in, but in a different way than 66A and 66D, since you would want to whiff this preemptively to stop opponents who try to check you with their own run normals (which is likely to work since most characters have longer reaching run normals than Nakoruru).
|
|
Toggle Hitboxes Toggle Hitboxes
|
66C
66C
|
| Damage
|
Guard
|
Startup
|
Active
|
Recovery
|
Total
|
Hit Adv
|
Block Adv
|
Guard Dmg
|
Cancel
|
Recoil
|
Deflectable
|
Unarmed
|
| 140
|
Mid
|
9
|
-
|
-
|
57
|
KD(+92)
|
-18
|
20
|
No
|
No
|
Yes (Disarms)
|
No
|
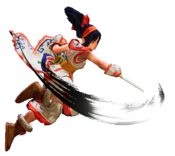
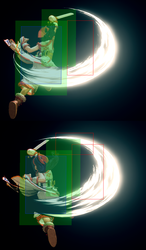
A forward-sweeping slash that knocks down, also same startup as 66B. Go-to punish normal when 5C won't reach. Not particularly useful as an anti-air despite its animation (its not nearly as good as Rimururu's 66C). The opponent has to be in the first few frames of their jump for this to intercept, and frequently loses to some crossups (Eg: Iroha's j.C)
|
|
Toggle Hitboxes Toggle Hitboxes
|
66D
66D
|
| Damage
|
Guard
|
Startup
|
Active
|
Recovery
|
Total
|
Hit Adv
|
Block Adv
|
Guard Dmg
|
Cancel
|
Recoil
|
Deflectable
|
Unarmed
|
| 70
|
Low
|
6~12
|
7
|
18~12
|
30
|
KD(+100)
|
-8~-2
|
5
|
No
|
No
|
No
|
Yes
|
Her most important run normal. Very fast low with slightly shrinked hurtbox (not nearly as much as 3D) that can be landed spaced/meaty to make it safe and lead to small mindgames.
However, the range is really bad and will get beaten by run normals with better range, so if possible its best used in the mid/close range and to chase the opponent's wakeup and keep with the pressure.
|
|
Toggle Hitboxes Toggle Hitboxes
|
Air Normals
j.A
j.A
|
| Damage
|
Guard
|
Startup
|
Active
|
Recovery
|
Total
|
Hit Adv
|
Block Adv
|
Guard Dmg
|
Cancel
|
Recoil
|
Deflectable
|
Unarmed
|
| 30
|
High
|
5
|
-
|
-
|
-
|
-
|
-
|
5
|
No
|
-
|
No
|
No
|
A quick diagonally-downward aimed slash. It is not particularly active, meaning this short-range attack is outclassed by her other jumping attacks.
|
|
Toggle Hitboxes Toggle Hitboxes
|
j.B
j.B
|
| Damage
|
Guard
|
Startup
|
Active
|
Recovery
|
Total
|
Hit Adv
|
Block Adv
|
Guard Dmg
|
Cancel
|
Recoil
|
Deflectable
|
Unarmed
|
| 100
|
High
|
6
|
-
|
-
|
-
|
-
|
-
|
10
|
No
|
-
|
No
|
No
|
Excellent air-to-air attack due to its horizontal reach and fast start-up, so fast that it can be used on reaction to deal with jump-ins from an opponent. The vertical area of the attack is limited, but it can hit as a jump-in if timed exactly.
|
|
Toggle Hitboxes Toggle Hitboxes
|
j.C
j.C
|
| Damage
|
Guard
|
Startup
|
Active
|
Recovery
|
Total
|
Hit Adv
|
Block Adv
|
Guard Dmg
|
Cancel
|
Recoil
|
Deflectable
|
Unarmed
|
| 150
|
High
|
10
|
-
|
-
|
-
|
-
|
-
|
20
|
No
|
-
|
No
|
No
|
A premium jumping attack. Covers the area in front and above Nakoruru while being one of the fastest jumping C attacks in the game. Most used button for jump-ins, but can also air-to-air thanks to its hitbox covering the ideal space for the situation too.
|
|
Toggle Hitboxes Toggle Hitboxes
|
j.D
j.D
|
| Damage
|
Guard
|
Startup
|
Active
|
Recovery
|
Total
|
Hit Adv
|
Block Adv
|
Guard Dmg
|
Cancel
|
Recoil
|
Deflectable
|
Unarmed
|
| 30
|
High
|
9
|
-
|
-
|
-
|
-
|
-
|
5
|
No
|
-
|
No
|
Yes
|
The most downward-reaching jump-in that Nakoruru has. Can also cross-up against wide bodies like Tam-Tam and Jubei when aimed at their back shoulder, but does not yield much advantage in this situation. If done as a deep jump-in, can guarantee follow-up damage. Has the most active frames of any jumping attack of hers.
|
|
Toggle Hitboxes Toggle Hitboxes
|
Unarmed Normals
u.5S
u.5S
|
| Damage
|
Guard
|
Startup
|
Active
|
Recovery
|
Total
|
Hit Adv
|
Block Adv
|
Guard Dmg
|
Cancel
|
Recoil
|
Deflectable
|
Unarmed
|
| 50
|
Mid
|
9
|
-
|
-
|
31
|
-2
|
-7
|
5
|
No
|
No
|
No
|
Only
|
Nako thrusts her fist forward. Quite slow and unsafe on block, overshadowing it in favor of better normals, namely 66D and u.66A
|
|
Toggle Hitboxes Toggle Hitboxes
|
u.2S
u.2S
|
| Damage
|
Guard
|
Startup
|
Active
|
Recovery
|
Total
|
Hit Adv
|
Block Adv
|
Guard Dmg
|
Cancel
|
Recoil
|
Deflectable
|
Unarmed
|
| 50
|
Mid
|
6
|
-
|
-
|
28
|
-2
|
-7
|
5
|
No
|
No
|
No
|
Only
|
Practially similar to u.5A but the startup is good. Still not that much better.
|
|
Toggle Hitboxes Toggle Hitboxes
|
ju.S
ju.S
|
| Damage
|
Guard
|
Startup
|
Active
|
Recovery
|
Total
|
Hit Adv
|
Block Adv
|
Guard Dmg
|
Cancel
|
Recoil
|
Deflectable
|
Unarmed
|
| 50
|
High
|
8
|
-
|
-
|
-
|
-
|
-
|
5
|
No
|
No
|
No
|
Only
|
Not really worth using with j.D being available, but it does deal more damage and might prove easier for doing unnarmed jump in combos.
|
|
Toggle Hitboxes Toggle Hitboxes
|
u.66S
u.66S
|
| Damage
|
Guard
|
Startup
|
Active
|
Recovery
|
Total
|
Hit Adv
|
Block Adv
|
Guard Dmg
|
Cancel
|
Recoil
|
Deflectable
|
Unarmed
|
| 50
|
Mid
|
9
|
-
|
-
|
27
|
KD
|
-3
|
5
|
No
|
No
|
No
|
Only
|
- Knocks down on hit, providing a good opportunity to retrieve Nakoruru's weapon.
- Its -3 on block so you can bait for a blade catch after.
|
|
Toggle Hitboxes Toggle Hitboxes
|
Universal Mechanics
Guard Break
Guard Break (Throw)
4/5/6C+D Neutral/Forward Throw Neutral/Forward Throw Back Throw Back Throw
|
| Version
|
Damage
|
Guard
|
Startup
|
Active
|
Recovery
|
Total
|
Hit Adv
|
Block Adv
|
Guard Dmg
|
Cancel
|
Recoil
|
Deflectable
|
Unarmed
|
| Neutral/Forward
|
0
|
No
|
3
|
-
|
71
|
74
|
+20
|
-
|
-
|
-
|
-
|
-
|
Yes
|
Universal throw. Scales followup attacks down to 80% damage.
|
| Back
|
0
|
No
|
5
|
-
|
69
|
74
|
+25
|
-
|
-
|
-
|
-
|
No
|
Yes
|
Universal throw. Scales followup attacks down to 80% damage.
|
|
Toggle Hitboxes Toggle Hitboxes
|
Surprise Attack
Surprise Attack (Overhead)
5B+C
|
| Version
|
Damage
|
Guard
|
Startup
|
Active
|
Recovery
|
Total
|
Hit Adv
|
Block Adv
|
Guard Dmg
|
Cancel
|
Recoil
|
Deflectable
|
Unarmed
|
| Armed
|
80
|
High
|
20
|
1
|
24
|
44
|
+1
|
-12
|
10
|
No
|
-
|
No
|
No
|
Upward slashing universal overhead. Can hop over low-height attacks and projectiles nearly right after pressing the input. Spikes airborne opponents.
Worth using since Nakoruru mostly has low attacks, so people are used to block low against her.
Seems to start being airborne around frame 4
|
| Unarmed
|
60
|
High
|
30
|
9
|
-
|
50
|
KD
|
-8~0
|
10
|
No
|
-
|
No
|
Only
|
Front-flipping stomp kick universal overhead. Poor range. Knocks down the opponent, but can be reacted to. Will crossup at point blank if the opponent stays crouched for some reason.
|
|
Toggle Hitboxes Toggle Hitboxes
|
Dodge
Dodge
5A+B
|
| Damage
|
Guard
|
Startup
|
Active
|
Recovery
|
Total
|
Hit Adv
|
Block Adv
|
Guard Dmg
|
Cancel
|
Recoil
|
Deflectable
|
Unarmed
|
| -
|
-
|
1
|
16
|
22
|
38
|
-
|
-
|
-
|
-
|
-
|
-
|
Yes
|
Universal dodge. Invulnerable to all attacks frames 1-10, still dodges strikes frames 10-16
|
|
Stance Break
Stance Break
A+B during Just Defense
|
| Damage
|
Guard
|
Startup
|
Active
|
Recovery
|
Total
|
Hit Adv
|
Block Adv
|
Guard Dmg
|
Cancel
|
Recoil
|
Deflectable
|
Unarmed
|
| 0
|
Mid
|
5
|
-
|
-
|
52
|
KD
|
-24
|
-
|
No
|
-
|
-
|
Yes
|
Universal Stance Break, has very short range, making it an unreliable stance break at times.
|
|
Toggle Hitboxes Toggle Hitboxes
|
Counter / Blade Catch
Counter / Blade Catch
236A+B Counter Counter Blade Catch Blade Catch
|
| Version
|
Damage
|
Guard
|
Startup
|
Active
|
Recovery
|
Total
|
Hit Adv
|
Block Adv
|
Guard Dmg
|
Cancel
|
Recoil
|
Deflectable
|
Unarmed
|
| Armed
|
0
|
N/A
|
2
|
11
|
34
|
46
|
+35~+59
|
-
|
-
|
-
|
-
|
-
|
No
|
Universal counter. Allows you to follow up with a guaranteed attack of your own. The amount of time you have to followup depends on the strength of the attack you counter, with heavy attacks staggering the opponent for the longest amount of time. Additionally you counter a heavy slash or a running slash, your opponent will be disarmed.
|
| Unarmed
|
0
|
N/A
|
2
|
12
|
9
|
22
|
KD
|
-
|
-
|
-
|
-
|
-
|
Only
|
Universal counter. While disarmed, your counter will disarm and knock away your opponent regardless of slash level countered.
|
|
Toggle Hitboxes Toggle Hitboxes
|
Rage Explosion
Rage Explosion
5A+B+C
|
| Damage
|
Guard
|
Startup
|
Active
|
Recovery
|
Total
|
Hit Adv
|
Block Adv
|
Guard Dmg
|
Cancel
|
Recoil
|
Deflectable
|
Unarmed
|
| 0
|
Unblockable
|
21
|
1
|
-
|
58
|
0
|
-
|
-
|
-
|
-
|
-
|
No
|
Unblockable, invulnerable pushback move that can be used while in hitstun.
|
|
Toggle Hitboxes Toggle Hitboxes
|
Lightning Blade
Lightning Blade (Issen)
5A+B+C during Rage Explosion
|
| Damage
|
Guard
|
Startup
|
Active
|
Recovery
|
Total
|
Hit Adv
|
Block Adv
|
Guard Dmg
|
Cancel
|
Recoil
|
Deflectable
|
Unarmed
|
| 300~709
|
Mid
|
9
|
-
|
-
|
-
|
KD
|
-44
|
-
|
-
|
-
|
No
|
No
|
|
|
|
Toggle Hitboxes Toggle Hitboxes
|
Command Moves
Kamuyhum Kesupu
Kamuyhum Kesupu
j.1/2/3D
|
| Damage
|
Guard
|
Startup
|
Active
|
Recovery
|
Total
|
Hit Adv
|
Block Adv
|
Guard Dmg
|
Cancel
|
Recoil
|
Deflectable
|
Unarmed
|
| 40
|
High
|
13
|
-
|
-
|
-
|
KD
|
-
|
5
|
-
|
-
|
-
|
Yes
|
Overhead kick that knocks down on hit.
|
|
Toggle Hitboxes Toggle Hitboxes
|
Rera Kishima Tek
Rera Kishima Tek
(close in air)6D
|
| Damage
|
Guard
|
Startup
|
Active
|
Recovery
|
Total
|
Hit Adv
|
Block Adv
|
Guard Dmg
|
Cancel
|
Recoil
|
Deflectable
|
Unarmed
|
| 112
|
No
|
4
|
-
|
-
|
-
|
KD
|
-
|
-
|
No
|
-
|
No
|
Yes
|
Airthrow. Probably a better alternative to JA since its the same startup but way more damage and caused a knockdown.
Can combo on opponents in hitstun in the air e.g. from a reflected projectile.
|
|
Toggle Hitboxes Toggle Hitboxes
|
Wall Jump
Wall Jump
(near wall)9 Nature Ninja Training Nature Ninja Training
|
| Damage
|
Guard
|
Startup
|
Active
|
Recovery
|
Total
|
Hit Adv
|
Block Adv
|
Guard Dmg
|
Cancel
|
Recoil
|
Deflectable
|
Unarmed
|
| -
|
-
|
-
|
-
|
-
|
-
|
-
|
-
|
-
|
-
|
-
|
-
|
Yes
|
Nakoruru can jump off walls. Doing so will increase jump height and change the landing trajectory, making it difficult for the opponent to position and time an anti-air.
|
|
Special Moves
Annu Mutsube
Annu Mutsube
412S Nakocar Nakocar
|
| Version
|
Damage
|
Guard
|
Startup
|
Active
|
Recovery
|
Total
|
Hit Adv
|
Block Adv
|
Guard Dmg
|
Cancel
|
Recoil
|
Deflectable
|
Unarmed
|
| A
|
80
|
Low
|
10
|
-
|
-
|
46
|
KD
|
-14
|
20
|
No
|
-
|
No
|
No
|
| B
|
100
|
Low
|
16
|
-
|
-
|
59
|
KD
|
-18
|
20
|
No
|
-
|
No
|
No
|
| C
|
120
|
Low
|
24
|
-
|
-
|
83
|
KD
|
-23
|
20
|
No
|
-
|
No
|
No
|
| Rage
|
180 [36,36,36,72]
|
Low
|
17
|
-
|
-
|
76
|
KD
|
-23
|
27
|
No
|
-
|
No
|
No
|
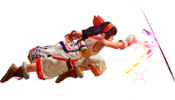
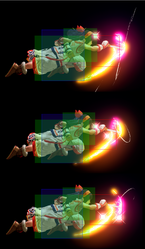
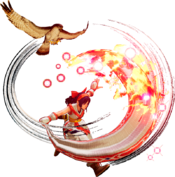
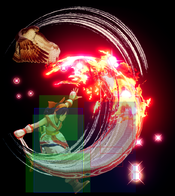
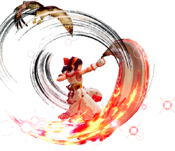
Low-hitting ground slide and Nakoruru's whiff punisher at distances where her normals can't reach.
Light version travels about half screen, Medium version travels about 3/4ths screen, and Heavy/Rage versions travel fullscreen.
Note for the Rage version that at very far ranges, fewer hits will land, reducing the damage at range.
Because of the motion its a good move to do when crouch blocking, and pretty nice for whiff punishing although the A version deal somewhat low damage. It hits low so you can catch them offguard sometimes, specially if they come running at you.
All versions can go under some fireballs and normals.
|
|
Toggle Hitboxes Toggle Hitboxes
|
Rera Mutsube
Rera Mutsube
236S Nakomissile Nakomissile
|
| Version
|
Damage
|
Guard
|
Startup
|
Active
|
Recovery
|
Total
|
Hit Adv
|
Block Adv
|
Guard Dmg
|
Cancel
|
Recoil
|
Deflectable
|
Unarmed
|
| A
|
100
|
Mid
|
9
|
-
|
-
|
60
|
KD
|
-33
|
22
|
No
|
-
|
No
|
No
|
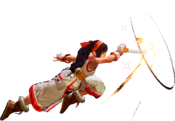
Rising Nako missile that knocks down on hit. Don't think too hard about the physics of this one.
- Despite its appearance its actually not a great antiair as its not invincible (except the rage version) and has a small hitbox which makes it likely to trade or get beaten, but despite that you can still use it this way.
- Light version travels almost half screen
- This move can go over certain moves with vertically small hitboxes (eg: haomaru's fireball). The light version is best at this because of its fast startup
|
| B
|
120
|
Mid
|
14
|
-
|
-
|
73
|
KD
|
-41
|
22
|
No
|
-
|
No
|
No
|
- Travels about 3/4ths screen
|
| C
|
140
|
Mid
|
16
|
-
|
-
|
93
|
KD
|
-71
|
22
|
No
|
-
|
No
|
No
|
- Travel fullscreen.
- Best used in combos since 236C always combos from 5B unlike 412C, the corner carry is just barely less and it deals more damage.
|
| Rage
|
170 [30*3,80]
|
Mid
|
16
|
-
|
-
|
93
|
KD
|
-71
|
12
|
No
|
-
|
No
|
No
|
- Invulnerable to air attacks on startup. Because it deals multiple hits, trades are unfavorable as you only get to land the first hit.
|
|
Toggle Hitboxes Toggle Hitboxes
|
Kamui Rimuse
Kamui Rimuse
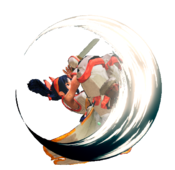
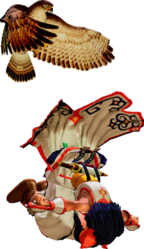
421S Is it a cape? Is it a sash? Is it a cape? Is it a sash?
|
| Version
|
Damage
|
Guard
|
Startup
|
Active
|
Recovery
|
Total
|
Hit Adv
|
Block Adv
|
Guard Dmg
|
Cancel
|
Recoil
|
Deflectable
|
Unarmed
|
| A
|
80
|
Mid
|
11
|
-
|
-
|
33
|
-6
|
-13
|
5
|
No
|
-
|
No
|
Yes
|
| B
|
110 [60,50]
|
Mid
|
12
|
-
|
-
|
50
|
-7
|
-14
|
10 (5*2)
|
No
|
-
|
No
|
Yes
|
| C
|
140 [60,40,40]
|
Mid
|
18
|
-
|
-
|
70
|
-8
|
-15
|
15 (5*3)
|
No
|
-
|
No
|
Yes
|
Reflects projectiles, very active but startup is a bit slow. The different versions attack 1/2/3 times.
B and A version can be used to frametrap from 5Dxx 421A/B, C version for the most optimal combo of Close 5B into C towel+followup, although you need to be at point blank for all hits of the towel to land
All versions are very unsafe on block so be very careful.
|
|
Toggle Hitboxes Toggle Hitboxes
|
Kamui Rimuse Return
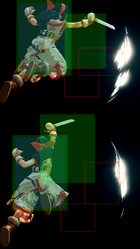
Kamui Rimuse Return
S or D after Kamui Rimuse Whatever it is, it's not over yet Whatever it is, it's not over yet
|
| Damage
|
Guard
|
Startup
|
Active
|
Recovery
|
Total
|
Hit Adv
|
Block Adv
|
Guard Dmg
|
Cancel
|
Recoil
|
Deflectable
|
Unarmed
|
| 50
|
Mid
|
6
|
-
|
-
|
-
|
KD(+103)
|
-17
|
10
|
No
|
-
|
No
|
Yes
|
After the last attack of Kamui Rimuse, you can input another button to do one final swipe that steps forward and that knocks down on hit.
- The gap to do the followup is so small that it can be hard to bait people into pressing buttons.
- The followup is still capable of reflecting projectiles.
- Very unsafe on block.
|
|
Toggle Hitboxes Toggle Hitboxes
|
Amube Yatoro
Amube Yatoro
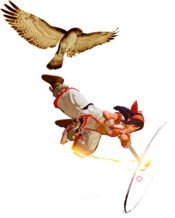
214S Bird of Prey Bird of Prey
|
| Version
|
Damage
|
Guard
|
Startup
|
Active
|
Recovery
|
Total
|
Hit Adv
|
Block Adv
|
Guard Dmg
|
Cancel
|
Recoil
|
Deflectable
|
Unarmed
|
| A
|
70
|
Mid
|
21~30
|
10
|
-
|
51
|
-13~-4
|
-14~-5
|
5
|
No
|
-
|
No
|
Yes
|
| B
|
70
|
Mid
|
23~33
|
11
|
-
|
51
|
-11~-1
|
-12~-2
|
5
|
No
|
-
|
No
|
Yes
|
| C
|
70
|
Mid
|
25~45
|
21
|
-
|
51
|
~+11
|
-10
|
5
|
No
|
-
|
No
|
Yes
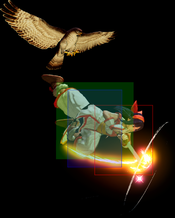
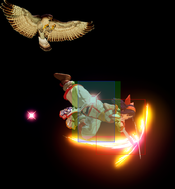
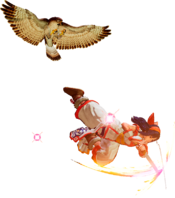
|
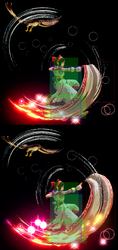
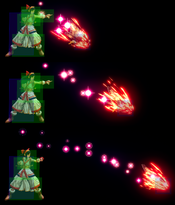
Flying bird that cannot be reflected. Will cancel out other projectiles, but the attack from Mamahaha is then negated while continuing to travel to its determined destination. While Mamahaha is returning to Nakoruru, no specials that involve the bird, including her WFT and SSM, can be used. Once Nakoruru has pointed during her startup animation, the bird will always attack, creating many trade situations.
Light version strikes just in front of Nakoruru, Medium version strikes slightly further than midscreen and it travels the fastest, and Heavy version strikes just short of fullscreen.
With good timing you are able to use the attack again shortly before Mamahaha fully returns to her original position behind Nakoruru, increasing the range slightly. This does let the Heavy version hit fullscreen. You can also hit opponents jumping over you since the fireball already becomes active when behind you.
this move extends nako's hurtbox forward a decent amount, so you'll get hit by things that look like they shouldnt reach you sometimes.
Since version 2.10, it no longer knocks down opponent, and allows potential combos follow up.
|
|
Toggle Hitboxes Toggle Hitboxes
|
Cling to Mamahaha
Cling to Mamahaha
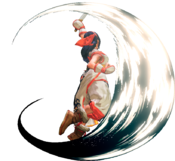
214D Don't think too hard about the physics of THIS one either Don't think too hard about the physics of THIS one either
|
| Damage
|
Guard
|
Startup
|
Active
|
Recovery
|
Total
|
Hit Adv
|
Block Adv
|
Guard Dmg
|
Cancel
|
Recoil
|
Deflectable
|
Unarmed
|
| -
|
-
|
-
|
-
|
-
|
-
|
-
|
-
|
-
|
-
|
-
|
-
|
Yes
|
Bird Cling. Doesnt look that fast at first glance but its an excellent option for recoil cancelling, so much so that after certain attacks you can recoil cancel fast enough to avoid light attacks and even stance breaks.
How long you can stay on the bird is determined by some sort of invisible timer, which seems to go down faster if you attack.
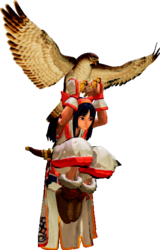
Finally, it gives access to unique cancellable normal attacks while on the bird and one special moves which is basically a diving 412S.
|
|
Mamahaha Attack
Mamahaha Attack
S during Cling to Mamahaha Still have one hand free Still have one hand free
|
| Version
|
Damage
|
Guard
|
Startup
|
Active
|
Recovery
|
Total
|
Hit Adv
|
Block Adv
|
Guard Dmg
|
Cancel
|
Recoil
|
Deflectable
|
Unarmed
|
| A
|
30
|
High
|
5
|
-
|
-
|
-
|
-
|
-
|
5
|
Yes
|
No
|
No
|
No
|
| B
|
100
|
High
|
6
|
-
|
-
|
-
|
-
|
-
|
10
|
Yes
|
No
|
No
|
No
|
| C
|
150
|
High
|
7
|
-
|
-
|
-
|
-
|
-
|
20
|
Yes
|
No
|
No
|
No
|
| Unarmed S
|
50
|
High
|
-
|
-
|
-
|
-
|
-
|
-
|
10
|
No
|
No
|
No
|
Only
|
Normal air attacks while hanging onto the bird. All of them are shorter ranged than their normal jumping counterparts, but the Heavy version is faster than jump C (so much so you can punish someone for whiffing a Far 5A after blocking) and can be special cancelled into Kamui Mutsube(BC) or Kamuyhum Kesupu(2D) for high damage combo.
A and B attacks dont seem very useful. They are much faster than C and have more horizontal range (and really bad vertical range, which kinda beats the point of placing yourself above the opponent), but its still not nearly enough to stop someone jumping at you since pretty much everyone has longer reaching jump attacks.
So, for the most part, stick to Cling C which will prove a very hard to deal button when they are in the corner.
|
|
Toggle Hitboxes Toggle Hitboxes
|
Drop from Mamahaha
Drop from Mamahaha
4D or D or 6D during Cling to Mamahaha Drop from Mamahaha Drop from Mamahaha
|
| Damage
|
Guard
|
Startup
|
Active
|
Recovery
|
Total
|
Hit Adv
|
Block Adv
|
Guard Dmg
|
Cancel
|
Recoil
|
Deflectable
|
Unarmed
|
| N/A
|
-
|
-
|
-
|
-
|
-
|
-
|
-
|
-
|
-
|
-
|
-
|
Yes
|
Drop off the hawk. The direction used influences where Nakoruru drops down.
|
|
Kamui Mutsube
Kamui Mutsube
B+C during Cling to Mamahaha Death From Above Death From Above
|
| Version
|
Damage
|
Guard
|
Startup
|
Active
|
Recovery
|
Total
|
Hit Adv
|
Block Adv
|
Guard Dmg
|
Cancel
|
Recoil
|
Deflectable
|
Unarmed
|
| Normal
|
140
|
High
|
6
|
-
|
-
|
-
|
-
|
-16~-13
|
0
|
-
|
-
|
-
|
No
|
| Rage
|
192 [48*4]
|
High
|
6
|
-
|
-
|
-
|
-
|
-16~-13
|
12
|
No
|
-
|
No
|
No
|
Leave the hawk diagonally diving. Very fast overhead that knocks down and is useful for whiff punishing, but is unsafe on block and prone to trading hits.
Its biggest advantage is being cancellable from her cling buttons making for a very damaging combo, specially with full rage.
When you get the opponent in the corner and you are harassing them with Cling C, you can more or less visually confirm into the dive, but its very risky as the move if very unsafe on block, so practice this a lot very trying.
|
|
Toggle Hitboxes Toggle Hitboxes
|
Kamuyhum Kesupu
Kamuyhum Kesupu
1/2/3D during Cling to Mamahaha
|
| Damage
|
Guard
|
Startup
|
Active
|
Recovery
|
Total
|
Hit Adv
|
Block Adv
|
Guard Dmg
|
Cancel
|
Recoil
|
Deflectable
|
Unarmed
|
| 40
|
High
|
13
|
-
|
-
|
-
|
-
|
-
|
5
|
-
|
-
|
-
|
Yes
|
If you input 1/2/3D while holding on the hawk, you'll drop with her j.2D attack. Blockstun varies slightly based on the height dropped from.
Same spin kick as its standalone version, with the major differences that it can be down much closer to the ground, and you can cancel it from your Cling normals.
Cancelling Cling C into this move will create a true blockstring, so its the perfect move to safely land if you dont think you'll get a chance to land C xx B+C.
|
|
Toggle Hitboxes Toggle Hitboxes
|
Supers
Weapon Flipping Technique
Elelyu Kamui Rimuse
236B+C
|
| Damage
|
Guard
|
Startup
|
Active
|
Recovery
|
Total
|
Hit Adv
|
Block Adv
|
Guard Dmg
|
Cancel
|
Recoil
|
Deflectable
|
Unarmed
|
| 408(476)
|
Mid
|
1+7
|
-
|
-
|
67
|
KD
|
-91~-88
|
-
|
-
|
-
|
-
|
No
|
Nakoruru hops onto the hawk and then does a diving attack similar to Kamui Mutsube, proceeds to do Kamui Rimuse and finishes with an explosive Amube Yatoro. At 8 frames of startup, this is the fastest WFT in the game. When you combine that with the fact that she's airborne during it, and you have a rather nasty punish tool. Available only during Max Rage or Rage Explosion. Disarms on hit.
Most interesting though is the way it can antiair. Because when it hits it stuns the opponent and proceeds to do a canned animation, and it doesnt matter if the opponent is in the air, but it can take some practice to land it.
Best of all is that if it trades in this situation the attack will miss and you lose all your rage, but the opponent will be stunned long enough for you to perform a Super special Move.
|
|
Toggle Hitboxes Toggle Hitboxes
|
Super Special Move
Ar Retar Kamuyhum Makiri
641236C+D I'm sorry, but I have to kill you I'm sorry, but I have to kill you
|
| Damage
|
Guard
|
Startup
|
Active
|
Recovery
|
Total
|
Hit Adv
|
Block Adv
|
Guard Dmg
|
Cancel
|
Recoil
|
Deflectable
|
Unarmed
|
| 650
|
Mid
|
10+20
|
-
|
-
|
-
|
KD
|
-55
|
-
|
No
|
-
|
No
|
No
|
Available only once per match. Nakoruru somewhat dashes forward about half screen. If she hits her opponent she backflips off their body up to Mamahaha, who proceeds to build speed and throws Nakoruru blade-first into the opponent. Naturally, as the good girl that she is, she apologizes for any inconvenience.
It connects regardless of the opponent being on ground or air.
If the opponent has jump attacks that dont hit right below, you could try baiting a jump in the corner and antiair them with SSM.
|
|
Toggle Hitboxes Toggle Hitboxes
|
Combos
Theory
Most of your damage will come from Nakoruru's fast pokes and whiff punishing with her specials, but when it comes to combos it revolves around her 5B, which is special cancellable both in its near and far versions.
Landing either 5B lets you 236C for maximum damage, even outside of Rage. This is not possible with any other special cancellable starter and does more damage with Rage enhancement than even raw 5Cs in Rage.
However, this comes with the same caveat as other characters with rising specials: The 236S moves are extremely unsafe (SSM punishable at worst) on block and whiff. If you are uncertain about your confirms in a particular match, you can end your combos with the grounded 412S moves. In Rage, 5B 412C combos properly as well.
Midscreen
-
- Hard to confirm, but does combo. Less damage than B starter.
- 236A, 412A or 421A(hardest one)
- 236B+C
-
- C version works in Rage state only
- WFT combo.
-
- C version works in Rage state only.
- WFT combo.
- Knocks down nearby.
- Only from deep j.C obviously
- Unarmed combo (from j.D) for knock down.
-
- WFT combo.
-
- Max meter-less damage.
- For slightly less damage, but knockdown and corner carry.
- WFT combo.
- Unarmed combo for knockdown.
Corner
-
- For damage.
- Throw scaling makes n.5C do less damage than this with no knockdown if you end up too close to the opponent after your throw, so be mindful of your spacing.
- WFT combo.
- Unarmed combo for knockdown.
Guard Crush
- n.5C...
Combo from second hit...
- WFT
More damage than just WFT.
- Lighting Blade
Universal Issen combo, combo from second hit.
- 5C...
After recovery...
- 5B xx 236C / WFT
Standard follow up.
- n.5C...
Cancel second hit...
- 214D...
Cling to Mamahaha...
- C xx BC
Heavy Attack from Mamahaha and combo into Kamui Mutsube, most damaging combo after near 5C without rage.
- 5C...
Cancel recovery...
- Lighting Blade
Universal Issen combo.
- 421A...
Light towel whiff... (5C has to guard crush from far away for towel to whiff)
- SSM
SSM follow up. (Be careful with opponent bursting to avoid it)
Safe Jumps
Unless specified otherwise, these setups assume that you are buffering every whiffed normal/special so that it comes out on the earliest possible frame. Also every j.c safe jump setup doubles as a stance-break bait on their wakeup. Each setup has 2 stages after the Knockdown(KD). First stage is doing certain normals/specials to get close to the knockdowned opponent, and the second stage is the actual safe jump, where you have to read/guess which direction the opponent will roll(forward/back/no roll).
- Midscreen WFT (KD) ~ 5k xx 412A, neutral jump C (forward roll)
- Corner WFT (KD) ~ 412B...
- neutral jump C (back roll)
- back jump C (forward roll)
- Corner 421C+followup (KD) ~ forward jump...
- combo forward jump C (back roll)
- combo back jump C (forward roll)
- Corner WFT (KD)/421C+follow-up ~ 5k xx 421b...
- neutral jump C (No roll)
- back jump C (Forward roll)
- 66C (KD) ~ Forward Jump...
- combo back jump C (forward roll)
- combo neutral jump C (no roll)
- combo jump forward C (back roll)
- 412S (KD) ~ forward jump, 5A...
- back jump C (forward roll)
- neutral jump C (no roll)
- forward jump C (back roll)
- 236A (KD) ~ forward jump...
- combo forward jump C (back roll)
- combo back jump C (forward roll)
- Midscreen 236C (KD)...
- 5A, neutral jump C (forward roll)
- 6D, forward jump C (no roll)
Tech
Assorted Twitter/discord tech links
Wakeup DP bait against Charlotte
https://twitter.com/KingFossil1/status/1558895759931621382
66k oki setups/wake up dodge counter - inspired by tahichi
https://imgur.com/dfzB8dH
Walldive oki
https://gfycat.com/ethicalspectacularbeauceron
Corner oki
https://twitter.com/chocosynthesize/status/1188866060960710656
Grab Baits
https://twitter.com/chocosynthesize/status/1175722982238384128
Stance Break Left/Right
https://twitter.com/chocosynthesize/status/1198707471923073024
Anti Air 2b Left/Right
https://twitter.com/chocosynthesize/status/1198016289572130816
Raged 236C cross up JK safe jump setup (no roll)
https://www.youtube.com/watch?v=LdVCOvohjnY
Sideswitch DP bait
https://twitter.com/KingFossil1/status/1225964152885252114?s=20
Videos
Colors
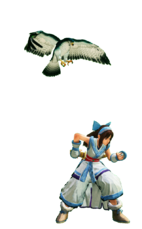
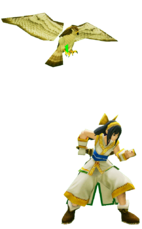
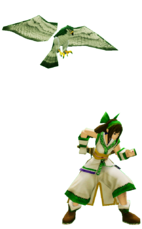
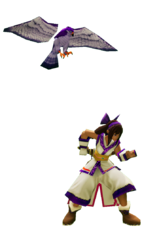
Note: For Color 5, you need to press Light Slash before selecting Nakoruru. Then, Color 4 will become Color 5.
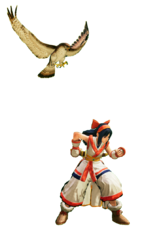
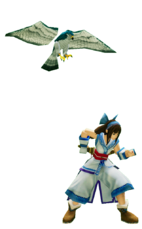
Default
3D Retro Costume
External Links
