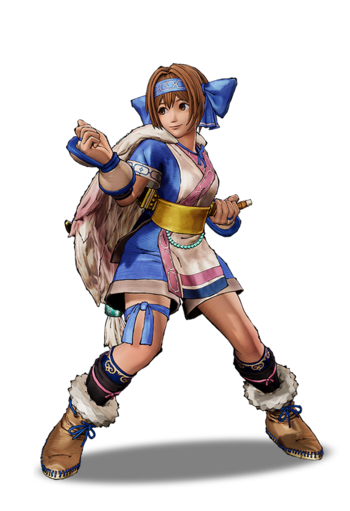
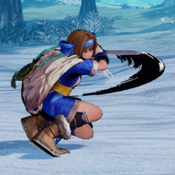
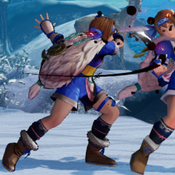
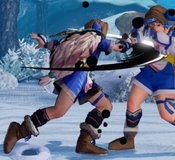
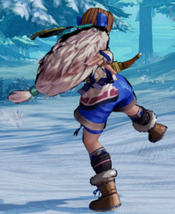
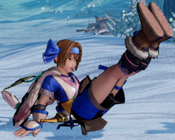
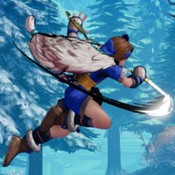
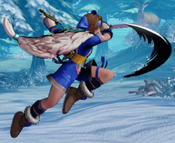
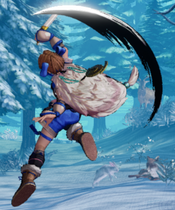
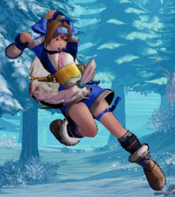
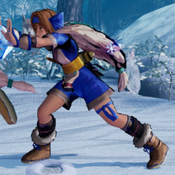
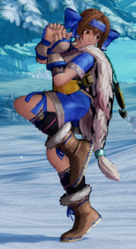
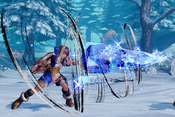
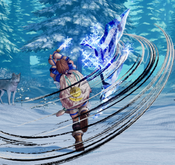
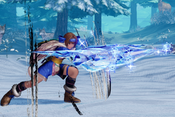
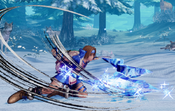
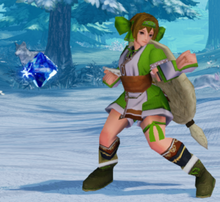
Samurai Shodown/Rimururu
|
リムルル, Rimururu |
|
Introduction
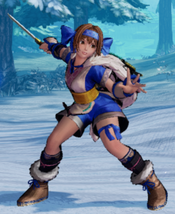
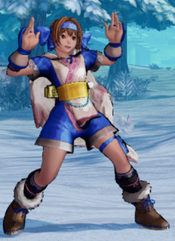
In her transition from SamSho 5 Special, she kept her specials but lost some important aspects of her game plan: no more 236C crossups, pursuit combos, seizure-inducing WFT, etc. Nevertheless, she still plays a very different game compared to the rest of the cast and excels at frustrating and pissing off her opponents.
| Strengths | Weaknesses |
|---|---|
|
|
Gameplan
Overview
Rimururu's game plan is dependent on the style, screen positioning, and phase of the game. Broadly speaking, her goal is to provoke her opponent to act and punish those decisions, whether in neutral or okizeme. With each successful punish, Rimururu gains a bit of space and will eventually push her opponent to the corner where she can run her corner pressure. Observation and conditioning is key to playing Rimururu well, as she does not have particularly good mixups outside of a knockdown situation and hard reads are sometimes needed.
Her dashing normals (66A, 66B, 66C, 66D) are her main attack options:
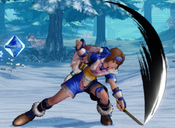
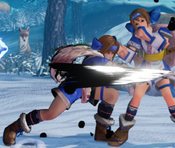
- 66A is your fastest and longest-reaching poke that combos into 623S on hit. Best used as a punish tool or attacking your opponent's dash.
- 66B is a slower but more active poke that is relatively safe on block when spaced correctly, does a decent amount of damage, and cannot be deflected. It is best used as a counter poke as the active frames let you stuff your opponents' attacks. On hit it gives a very good amount of plus frames and if performed meaty against a wakeup or air reset, it lets you link into a 66A xx 623S combo.
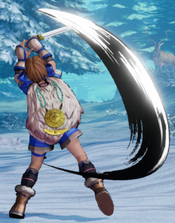
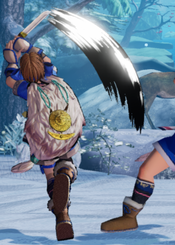
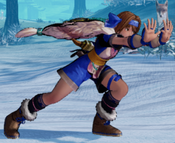
- 66C is your main anti-air and best punish when chasing back-dashes, it can also be used when crossing over/under your opponent's rolls and air resets for a simple left/right mix. It is also a decent option as a whiff punish tool as it is about as fast as 66A with a bigger hitbox. In fact, the hitbox is so cursed that often you will be able to anti-air someone that has already landed behind you.
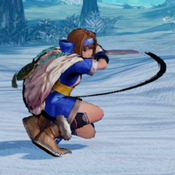
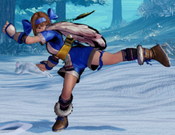
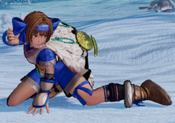
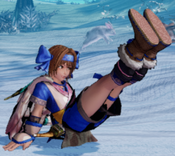
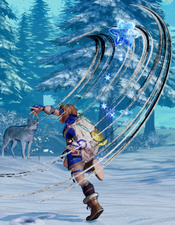
- 66D is a decent slide that grants a knockdown (being one of the few remaining knockdown 66Ds in the Season 3 patch), but mainly serves as a key move that leads to interesting mixups with its backflip and ability to cancel into a platform. It is quite punishable on block so use it with caution. Because dashing attacks are generally unsafe, it is best to use them when you anticipate an action from your opponent.
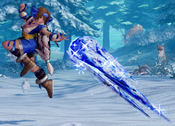
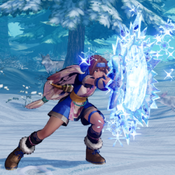
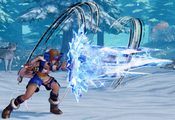
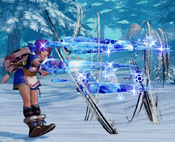
Rimururu's signature 236S (tondeke!) is used to control space on the ground, which can help her approach her opponent, mix them up, or lock them down for additional pressure. It is her primary tool for okizeme. At fullscreen, 236C can condition opponents to jump forward which you can answer with 66C, which has a great hitbox and can autocorrect if you dash under them. If they're prone to jump-ins, use any of your several anti-airs (623S, 214A, 66C, etc).
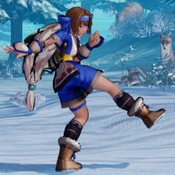
If you want to get in by air, her j.D has short startup and is active for a very long time, allowing it to stuff most air normals and even some A/B DP startups.
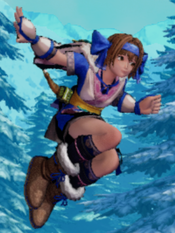
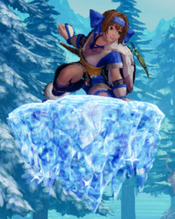
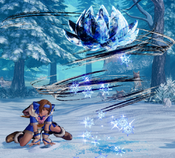
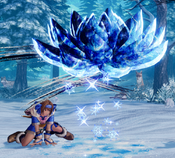
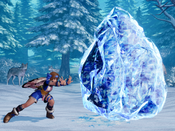
A big part of Rimururu's air neutral is her j.2S ice platform. You can jump in any direction after successfully setting up a platform and it is important to keep your opponent guessing. Ice platforms are helpful to take some heat off from projectile spam or to encourage opponents to make a move. Opponents who DP, will often trade with the ice block but you can pre-emptively neutral jump or approach with a well-timed forward j.D. Additionally, setting up the ice block right on top of them will often provoke a run in any direction or to eat up a free mixup on taller characters (on wakeup). Condition your opponent into thinking you'll set up a platform on neutral and then anti-air when they guess wrong.
Theory
Since Rimururu's best attacks are ones that start from her dash and her arsenal of anti-airs, it is important to keep your opponents moving. This means that she works best when operating on a life lead. Once you lose the life lead, things become more difficult for her as there is no incentive for the opponent to take risks chasing after you. With this in mind, there are several rules of thumb to keep in mind when playing Rimururu:
- Never fight an opponent with rage. Even if they are cornered and knocked down or you have your own rage, it's best to back off and stall until their rage runs out.
- Chill on a life lead. Rimururu has way better defensive/evasive tools than offensive ones. Don't chase after a kill, let them come to you instead and play the clock.
- Fight for the corner. If you expect a burst coming from your opponent relatively soon (last round and their HP being in the orange), you should start working towards the corner where Rimururu has the best chance to survive an Issen by combining her air platform with her wall jump to make herself difficult to anti-air. You don't want to be caught in the mid-screen on a platform, as anti-air Issen is relatively easy to land here. Either back up or find a way to side-switch depending on which corner is closest. Beware of characters with extremely vertical WFTs (Hanzo, Wu, etc.), as they can completely shut down Rimu's corner air platform game with ease.
Playstyles
Rimururu can be played in several styles that provoke different responses by focusing on specific parts of her kit in neutral.
Zoning Style
Key moves: 2C, 66C, 236C, UOH, Throw
This style is the most obvious playstyle that most would likely gravitate towards when first picking up Rimururu. It involves mainly using her 236C to control ground space and running behind it to approach her opponent. This provokes her opponent to jump over the ice ball, which Rimururu can anti-air using 66C. If her opponent tries to pre-emptively jump by guessing the 236C timing, Rimururu can knock them out of the sky with her variety of anti-airs. If her opponent decides not to jump and opts to block, Rimururu can simply follow behind the ice ball and enjoy the plus frames as she goes for a 2C/UOH/Throw mix upon getting in range. A good tactic is to 5C just before the ice ball impact which creates a true block string and sets up for an easy Guard Crush. As Rimururu approaches while denying any tempts to jump, the opponent will be slowly pushed to the corner where she can run her corner pressure.
Strengths:
- Simple and effective game plan
- Effective against characters without a projectile or reflect, with a normal/floaty jump, and/or players that love to jump.
- Guard Crush works well with this style as the ice ball allows Rimururu to lockdown her opponent and force them to block which reduces their GC value.
Weaknesses:
- Predictable rhythm and sequence
- Needs specific spacing and timing, loses to good jump ins
- Weak against good just defense and stance breaks
- Weak against characters with moves that either cancel out the ice ball or completely bypasses it.
- Vulnerable to long range WFTs/SSMs, moves that hop over grounded projectiles
- Becomes completely useless when Issen is on the table.
When to use it:
This style is effective at most points in the game but does require Rimururu to be at mid to fullscreen distance from her opponent as 236C has a long start up time, it becomes very risky if Rimururu is backed up against the wall in the corner. It could also be used defensively to zone out your opponent if you have the life lead.
Rushdown Style
Key moves: 5A, 66A, 5B, 66B, 2D, 3D, 5D, 6D, 66D, 623S, 236A/B, 214S, Throw, UOH
A very aggressive style that focuses on attacks, trades, and counters: it relies heavily on reads and exploits frame data to overwhelm the opponent. Taking advantage of Rimururu's good run speed and fast normals, the idea is to get your opponent caught up in your rhythm and provoke them into pressing buttons against your recoil and blocked attacks. Through the use of 66A, 66B, 66C, and 66D, Rimururu can often stuff her opponent's approach or whiff punish their attempts to keep you out. Dash in and out to condition and bait out reactions to be punished.
When you get in, pressure your opponent with 5A, 5B, 2D, 3D, 5D and 6D. These options are all relatively safe on block and Rimururu can also cancel into her specials to serve as traps, which is the core concept of this style. Against a Light mashing player, you can go into deflect (236A+B) for a massive punish. Against Medium/Heavy, 623S will usually stuff their attempt. Her kicks 5D, 6D, and 3D, all have cancel windows and deceptively safe animations. Her 6D in particular is a great frame trap tool as just about any special you cancel from it will trap against just about any response. Her 5D can not only be cancelled from, you can also opt not to cancel and it is only -1f on block, which is great as a tick throw tool. Tick throwing is used amidst the pressure if the opponent does not respond and chooses to continue blocking.
The trademark of this style however, is the unorthodox strategy based on trades and abare. Despite technically being minus on block for most normals, some adopters of this style will mash out normals in succession and combo off of a hit confirm. Some common strings are:
- 5A > 5B
- 5A > 66C
- 5D > 66A
- Meaty 66B > 5A
- 66B > 66B
- 2D > 2D > 5B
(Note none of these are true block strings, they can jab out of them but if you read the jab you can always deflect)
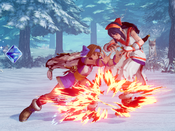
A crazier strategy is to cancel your pokes into a non-KD ice special, hoping that their opponent will attack and trade, get frozen by the special and allow you to combo from it. 236A/B is commonly used as it provides the most amount of hitstun and could potentially lead to an SSM. Other trade options include 214B, 22S, and 421S.
Strengths:
- With the constant attacks, frame traps, tick throws, with added high low mixes, you can easily overwhelm your opponent.
- This style racks up Guard Crush quickly as it is very aggressive with the constant barrage of attacks.
- Big damage very quickly damage if things work in your favor.
- Trade setups are very clip worthy
Weaknesses:
- Against patient players with good reads and characters with long/fast fast, this style will find it difficult to get things done.
- Characters with invincible reversals can blow through your offense so you can't be too aggressive.
- Rimururu doesn't have high defense to be constantly trading hits and may find herself taking more than she can dish out.
- The trade setups can be easily defused by knocking her down, it doesn't matter if the trade happened if Rimururu can't follow up.
- Gimmicky and Random
When to use it:
This style is best used when your opponent is in the corner with nowhere to go but can be used anywhere as long as you manage to get in. It pairs quite well with okizeme play as you'd want to maintain pressure and get that knockdown to apply okizeme again. It is not recommended to start a round with this strategy or even when you have a life lead as you may find yourself losing the life lead right away. It may be better used as a way to amp up the pressure to try and regain a lost life lead instead. In the End Game, where Issen is usually on the table, it's generally not a good idea to be too active.
Platform Style
Key moves: j.2S "Ice platform", j.D, 2D, 3D, 66D, 623S, UOH, Throw
A very annoying, defensive, and lame style that's basically death by a thousand cuts (or kicks) that defines what makes Rimururu frustrating to play against. The concept of this style is to take advantage of Rimururu's air space control with her godly jump kick j.D and her j.2S ice platforms, and baiting your opponents into chasing her while stumbling along the way and lose more and more of their life trying. It is quite common to win just by waiting out the clock than actually killing your opponent, which adds insult to injury.
The primary objective is to gain a life lead and keep it by running away, so it is important to not overextend. There is absolutely no problem with spending half of the round time jumping around on platforms, for this style it is what neutral is suppose to look like. Change your jump trajectory and slowly creep across the screen by inching your platforms forward, you want to bait your opponent into trying to air to air only and have them crash into the ice. As you jump off the ice, use j.D to stuff any attack attempts and prepare to jump again.
If you manage to get close, consider offensive platforms by jumping over them and placing a platform directly above their head. From here you have several options:
Assuming they don't move
- Neutral jump off and land a jump attack on top of them, which will be followed by the platform crashing down on them. This gives you plus frames to continue pressuring.
- Neutral jump off and immediately throw them before the platform hits them.
- Neutral jump off and go for UOH or 2C/2D. 2D will combo with the platform if it hits.
If they back-dash
- Neutral jump off and enjoy the space gained.
- Forward jump off and j.D (or any jump attack) to pressure.
- Backward jump off, less space gained but safer.
If they dash forward
- Neutral jump off and enjoy the space gained.
- Forward jump off and side switch, sometimes preferred especially if you're looking to gain the corner.
- Backward jump off, potentially nailing them with a j.D or an attack on landing, knocking them into the ice for a combo.
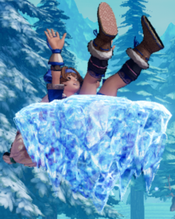
You don't exactly have a lot of time to wait and see, considering if they hit the platform with you on it, you will fall on your bum and suffer a massive counter attack. These are based on reads and information gathered from neutral. Sometimes you can just mix between the options to confused your opponent. This offensive platforming is essentially your primary mixup tool, so it's best not to repeat the same sequence for the opponent to get used to. The majority of your damage will come from either them running to the platform, or you kicking them into it.
When you have successfully gained the life lead, just run away, platform, and side switch whenever possible. You want to defensive platform and run the clock down and don't take any unnecessary risks while keeping the life lead. Use active duration of the platform to get away and plan your next move. While they are blocking the platform you can even jump over them and run to the other side of the screen. If you are cornered, combine platforms with your wall-jump for a quick escape and return to neutral. If you opponent starts to read your platform timing, mix it up by simply not platforming and stuffing their air to air with a j.D, 66C, or pre-emptively 623S their attempt. If you have your WFT, you can even use it to anti-air if they attempt to jump.
Strengths:
- Great for time-scamming on a life lead
- Great against characters that have relatively short or slow air to airs, works quite well against a good chunk of the cast.
- Genuinely irritating and inflicts psychological damage, provoking more rash approaches causing even more damage
- Relatively low risk
- Great meme potential, especially if you win with a platform and fall on your ass
Weaknesses:
- Ineffective in certain matchups, characters with long ranged air attacks/anti-air moves can easily knock you off/prevent the platform.
- Strong players can space their jump attacks or time dashing attacks to catch your dismount
- Not as effective in reclaiming the life lead, as the damage output just isn't fast enough or big enough, unless you get a wild combo off the platform.
- If you mistime a dismount and fall from the platform, be prepared to get blown up
When to use it:
This style can be used at any place on the screen but is more effective in the midscreen at the start of the round and more effective in the corner at the end of the round. It is a great choice to go for at the beginning of the round as it is quite safe if done correctly and it can be troublesome for your opponent if you gained a life lead. Towards the end of the game, it is also the best style to survive against Issen, as Rimururu in the corner on a platform is more difficult to Issen with wall-jump being a factor. It's quite common for our opponent to miss their Issen attempt and die to your platform in the process.
Techniques
Okizeme
Rimururu's greatest asset is her ice based okizeme, as this is the source of her biggest damage. The basic concept of Rimururu setups is to either land an attack that will knock the opponent into an ice move, or have them wake up into it. Her ice specials provide additional blockstun for you to go for a mix or continue your pressure, while on hit they allow you continue or extend your combos. You can be quite creative with how you go about doing this, a lot of what Rimururu's setups are simply happy accidents. Whenever you have your opponent cornered and knocked down, it is important to setup some sort of okizeme and it should be part of your arsenal regardless of which playstyle you choose to adopt.
Rimururu has 3 ice moves used for oki:
236S (tondeke!)
This is Rimururu's main move for okizeme, it offers the most hitstun and blockstun, making it ideal for pressure and combo extensions. If it connects, the hitstun is long enough for you confirm into just about anything, including her SSM. The idea is to throw the ice for the opponent to roll into, or throw it behind them and knock them into it.
The main version used is 236A, as it provides you with the spacing needed to do a left/right crossover mixup by running past the opponent's forward roll. 236B is used for pressure, as generally it is too far to do a crossover. It is typically used in the corner when you expect your opponent to neutral wake up instead of rolling forward. Against back roll, 236C is used so that it rolls into them as they get up, allowing you to continue pressure.
j.2S (ice platform)
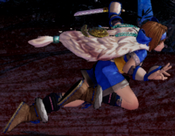
This is Rimururu's secondary move for okizeme, it deals more damage than 236S and is used in her most damaging oki combos. The best way to apply okizeme with this move is to setup a low platform with either backdash cancel, UOH kara cancel or 66D cancel during the flip. As opponent rolls past you while you are on the platform, you can dismount and do a jump in combo off the ice hit for huge damage. If your opponent doesn't opt to forward roll, you can jump off the platform for a safe jump and use your jump attack as the okizeme. As a meme option, you can choose to stay on the platform, and it will deal double damage (you'll fall but it will also knockdown the opponent so it's even).
22S (ice puddle)
This is Rimururu's least used move overall. Theoretically you can place it on top of them as they neutral wakeup, and go for an overhead "unblockable", or place it in front of them and hope they roll into it.
Guard Crush
Rimururu is benefited the most by the newest mechanism added in season 3. She can safely work for a guard crush opportunity and deal massive damage from a successful guard crush.
Pressure a wake up with tondeke or platform, on block Rimu can hit a 5C without having to worry about deflect. For recoil cancel, DP would be the fastest option. If the opponent hits a button, they will get stuffed by it. On block, Rimu can deal an additional 20% GC damage, but she would be punished afterward and lose health. Recoiling mirror 421S is similar to DP, on hit it deals more damage than DP, on block it deals less GC damage but its two hits can catch disrespectful opponents be hit by the second hit. It would be punished the same as DP after the second hit. Another option would be 214B, it has good horizontal reach and is a bit safer on block than the previous option, and if you delay it a little, it can trade with something and leads to a combo. Last but not least is to recoil 6SSSS, its long start up making it not a good option if the opponent might be hitting a button, but on block it is virtually unpunishable and deals good GC damage depending on the strength. It can be punished hard if the opponent forward jumps over Rimu, SSM punishable. Not recoiling anything or a universal weapon deflect also works.
People can take 100 guard damage in total, when it's at 25 or below, one can be guard crushed by a standing heavy. 5C and 2C deal 25 guard damage, blocking three would put one in guard crush state and they will glow red. When the opponent is in GC state, Rimu can use tondeke to make the opponent block a 5C to trigger guard crush. Among successfully GC'd she can follow up with GC combos for massive damage. Platform pressure can go for one addtional set up. Keep track of the opponent's GC meter and put them in between 26-35. Place a platform above them and jump back or neutral jump off and don't hit anything. If they block the platform they will be in GC state and quickly follow up with a 5C is impossible to react. One can also use the fear of the opponent of being GC'd to deal more damage on their run aways.
The risk reward ratio of Rimu's GC attempts is greatly in her favor. It is highly practical with this character.
Wall Platforming
Rimururu's corner survival and time-scam capability owe largely to her ability to platform and wall jump. By timing your wall jumps, you can give yourself more height or increase the number of platforms to stay in the air longer.
Wall Jump Platform
By quickly inputting 79 while standing near the wall, you will do a quick wall jump that lets you place a platform at a near unreachable height. Another way, especially if you are further away from the wall, is to delay your wall jump until you see Rimururu's toes point down before launching off.
Double Platforming
You can set 2 platforms before touching the floor with the help of a wall jump. The trick is to delay your wall jump for as long as you can so that the first platform breaks just before you cast the second one. This requires precision and is quite difficult to do consistently. However, if you are considering wall jumping again after dismounting from the platform anyway, you might as well give it a shot.
Knowledge Traps
Rimururu has quite a lot misleading animations and frame data. They are good to trap an opponent unaware of them.
- 5D by its animation, looks slow. It has a long start up, but on block it is -1, it's not punishable by anything. So it can set up a deflect to trap a button or use dodge to trap a grab.
- 6D is a low that can combo into 623C. It's hard to be punished on block. Cancel into 214B is a frame trap.
- 3D can be plus on block when spaced right. It is special cancellable, cancel into DP and 214B as frame traps. Setup for deflect or dodge.
- 66B is -9~-1 on block, when hit from the last frame, it's also not punishable by anything. Setup for deflect or dodge.
- UOH, despite the animation, it is not considered as airborne. It will trade or beat out a move with air invul only.
- 6SSSS has quite a bit of push back and it has low disadvantage on block -5/-7/-9, it is very difficult to punish, trap for deflect or dodge if the opponent likes to run up grab punish.
- WFT is not SSM punishable on block, it is -22, any attack with a longer start up than 22f will be blocked and anything longer than 24f can be trapped by a deflect.
Gimmicks
The Carpet Special
Named after the late CarpetFromAladdin who popularized this method of finishing your opponent off in a flashy unexpected way. You need to be at near fullscreen before throwing the 236C (tondeke!).
Mirror Trading
If your opponent pokes you from behind while your 421S (mirror) is active and their extended hurtbox overlaps into the mirror, you can get a combo and potentially an SSM.
Mirror Trapping
When frame trapping using 421S (mirror), you can delay it a little so that it trades and leads into a combo.
Mirror Juggling
If you opponent's air attack hits you and the mirror at the same time, you can recover in time to juggle. If done near the corner, you can potentially SSM.
Icicle Trading
When frame trapping using 214B (icicle), you can delay it a little so that it trades and leads into a combo.
5C Trading
Sometimes, a 5C trade will let you get a combo.
DP Trade Juggle
If your opponent hits you from behind while your 623S (DP) is just starting up and their extended hurtbox overlaps into the DP, you can juggle off of the launch. Earthquake can even be ssm'd off this juggle.
Tondeke Trade Burst Confirm
Bursting after getting hit out of your 236B (tondeke!) will push your opponent into it and allow you to Issen them.
KD Removal
Getting frozen will sometimes remove the knockdown property of some moves, allowing you to combo.
Neutral Crouch Low Profiling
Rimururu has a low neutral crouch hurtbox, allowing to low profile against certain attacks strangely.
Normal Moves
Far Slashes
5A
5A
|
|---|
5B
5B
|
|---|
5C
5C
|
|---|
2A
2A
|
|---|
2B
2B
|
|---|
2C
2C
|
|---|
Near Slashes
n.5A
n.5A
|
|---|
n.5B
n.5B
|
|---|
n.5C
n.5C
|
|---|
Kicks
5D
5D
|
|---|
6D
6D
|
|---|
2D
2D
|
|---|
3D
3D
|
|---|
Dash Normals
66A
66A
|
|---|
66B
66B
|
|---|
66C
66C
|
|---|
66D
66D
|
|---|
Air Normals
j.A
j.A
|
|---|
j.B
j.B
|
|---|
j.C
j.C
|
|---|
j.D
j.D
|
|---|
Unarmed Normals
u.5S
u.5S
|
|---|
u.2S
u.2S
|
|---|
ju.S
ju.S
|
|---|
u.66S
u.66S
|
|---|
u.66D
u.66D
|
|---|
Universal Mechanics
Guard Break
Guard Break (Throw) 4/5/6C+D Forward Throw Forward Throw Back Throw Back Throw
|
|---|
Surprise Attack
Surprise Attack (Overhead)
5B+C |
|---|
Dodge
Dodge
5A+B |
|---|
Stance Break
Stance Break
A+B during Just Defense |
|---|
Deflect / Blade Catch
Deflect / Blade Catch 236A+B Deflect Deflect Blade Catch Blade Catch
|
|---|
Rage Explosion
Rage Explosion
5A+B+C |
|---|
Lightning Blade
Lightning Blade (Issen)
5A+B+C during Rage Explosion |
|---|
Command Moves
Wall Jump
Wall Jump
9 (near wall) |
|---|
Special Moves
Konru Mem
Konru Mem 22S - -
|
|---|
Konru Shiraru
Konru Shiraru j.1/2/3S - -
|
|---|
Kamui Shtokke
Kamui Shtokke
421S |
|---|
Konril Nonril
Konril Nonril 623S / 623C (Rage) Regular DP Regular DP Rage DP Rage DP
|
|---|
Lupu Kuare Nishi
Lupu Kuare・Nishi 236A/B A Tondeke A Tondeke B Tondeke B Tondeke
|
|---|
Lupu Kuare Tu Tu
Lupu Kuare・Tu Tu 236C C Tondeke C Tondeke
|
|---|
Upun Orb
Upun Orb
6SSSS |
|---|
Rupu Tum
Rupu Tum 214S 214A 214A 214B 214B 214C 214C
|
|---|
Supers
Weapon Flipping Technique
Rupu Kamui Emyu・Tu Tu
236B+C |
|---|
Super Special Move
Poro Konru Tursere
641236C+D |
|---|
Combos
Front/Back Throw Starter
-> 2C (Sub-optimal but easiest to time)
-> f.5C (Most damage if you don't want to microstep, but provides no knockdown)
-> f.5B > 214C (Sets Rimururu up for oki)
-> f.5B > 623S (If you want to land all hits then a microstep is needed for the non-rage version)
->f.5B > WFT (Best damage, can be punished by rage explosion)
->WFT (Going directly into WFT avoids being rage explosion punished but yields less damage)
Jump C
-> n.2B -> 623S (Nets a lot of damage overall without resources from a jump-in. May need to substitute far B if opponent is slightly too far)
-> n.2B -> WFT (High damage and disarm with resources)
-> n.2B -> 214C (If you want oki instead of damage)
-> 5C (if you're not confident of being in the range of your B buttons, this can be a decent alternative but not recommended for general use)
236S (tondeke!)
Note: The ice toss you use doesn't matter, but the point is how to confirm if you see them get hit.
-> 66C (In a pinch this is reliable due to it's speed, but not recommended when you're confident in confirming)
-> 66A > 623S (Easy followup and nets Rimururu decent damage)
-> 5B or 2B > 623S or 214C (If you can run up in time during hitstun this is ideal but requires quick reaction or prediction)
Meaty Links
Meaty 5D -> 2B > 623S/WFT (properly time a 66B against a waking or air reset opponent)
Meaty 66B -> 66A > 623S (properly time a 66B against a waking or air reset opponent)
Guard Crush (5C against Red GC state)
-> 236A > 2B > (236A hit) > 5C (Easy GC combo with decent damage and low risk of dropping)
-> 236A > 2B > (236A hit) > WFT (Easy WFT combo off GC)
-> 236A > SSM (Easy SSM combo off GC)
-> 236A > 2B > (236A hit) > 236C > 2B > 623S (Corner only)
-> 236A > 2B > (236A hit) > 236C > 2B > WFT (Corner only)
-> 236B > 2B > (236B hit) > Dash > 2B > 623S (Standard midscreen combo off GC)
-> 236B > 2B > (236B hit) > Dash > 2B > WFT (Standard midscreen WFT combo off GC)
-> 236B > 2B > (236B hit) > Dash > SSM (Tight midscreen SSM combo off GC)
-> 236B > 66A > (236B hit) > j.C > 2B > 623S (Tight GC jump in combo, best damage without rage/ssm but risks dropping)
-> 236B > 66A > (236B hit) > j.C > 2B > WFT (Tight GC jump in combo, best damage without ssm but risks dropping)
Character Specific Punishes
-> 236A > (walk back one step) > (236A hit) > j.C > 2B > 623S or WFT (Punish vs Jubei DP when he doesn't have rage) Demonstration
-> 236B > (dash into a jump) > (236B hit) > j.C > 2B > 623S or WFT (Punish vs Jubei DP while Raged) Demonstration
-> Dash in > nj.C > 2B > 623S or WFT (Punish vs Shizumaru Heavy DP) Demonstration
-> B+C canceled into j.2S > jump forward > (j.2S hit) > j.C > 2B > 623S or WFT (Punish vs Haohmaru Heavy DP, difficult timing but massive reward second only to SSM) Demonstration
-> 236B > 5A > (236B hit) > j.C > 2B > 623S or WFT (Punish vs Charlotte Heavy DP, tight timing) Demonstration
Videos
- Rimururu tutorial and combos by LegendaryWolf Shirou
- Rimururu combo video by LegendaryWolf Shirou
- HellaPlus vs ShinChie at Kit 2021
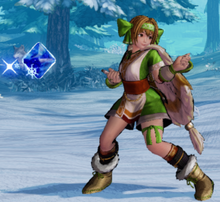
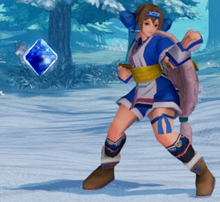
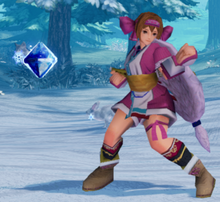
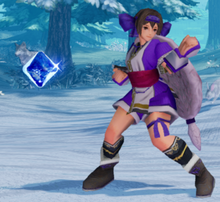
Colors
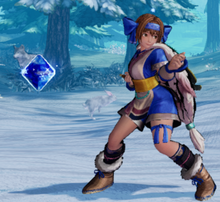
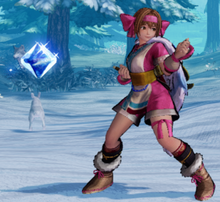
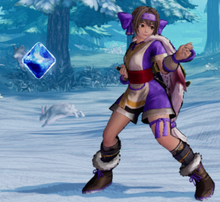
Default
3D Retro Costume
External Links
- Twitter hashtag: #SS_RI
