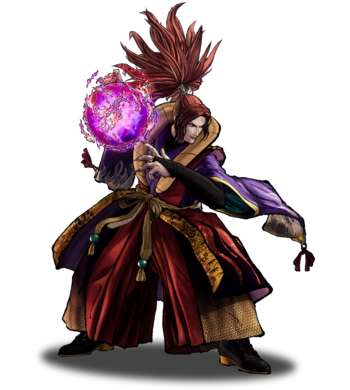
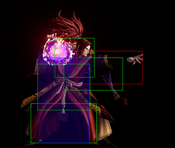
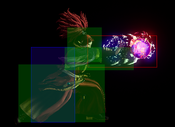
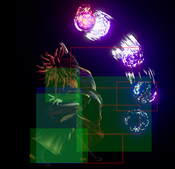
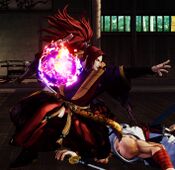
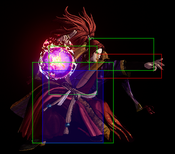
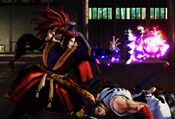
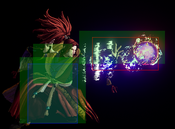
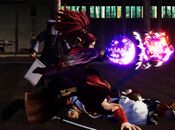
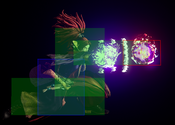
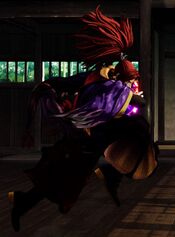
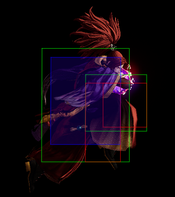
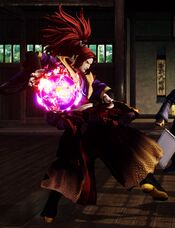
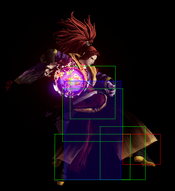
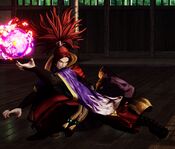
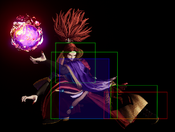
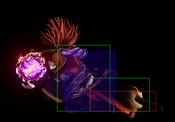
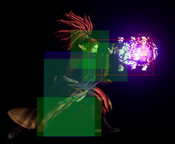
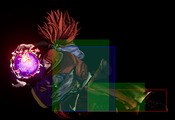
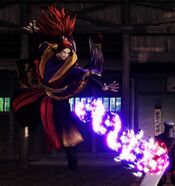
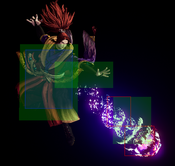
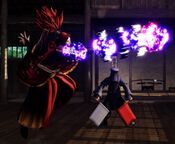
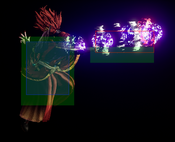
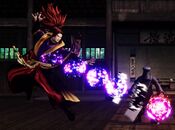
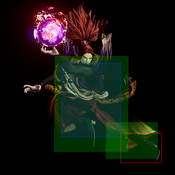
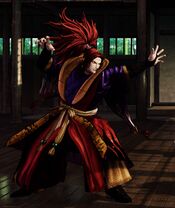
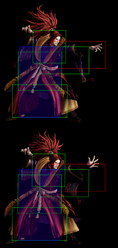
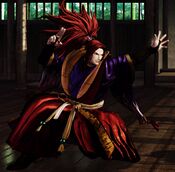
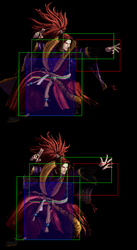
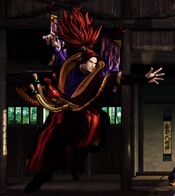
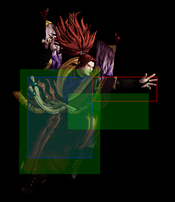
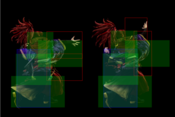
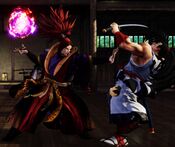
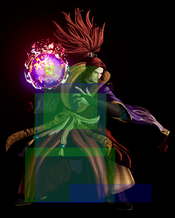
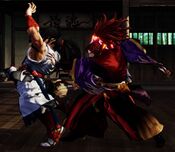
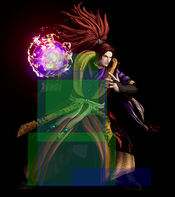
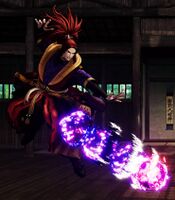
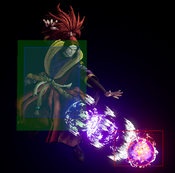
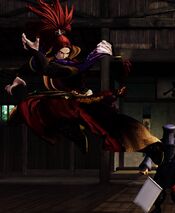
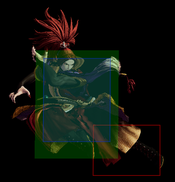
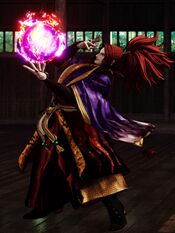
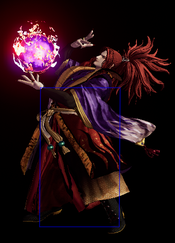
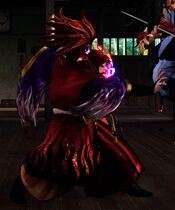
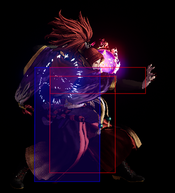
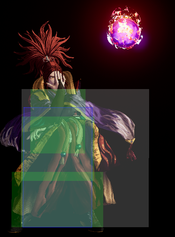
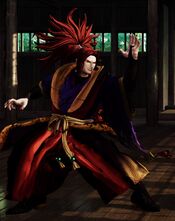
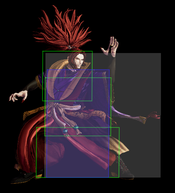
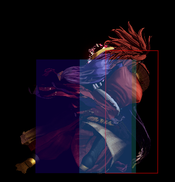
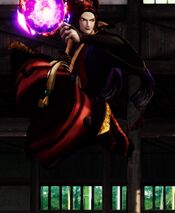
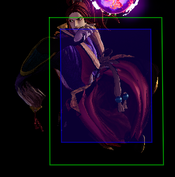
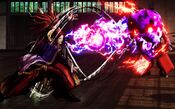
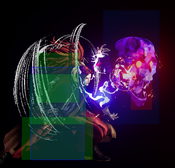
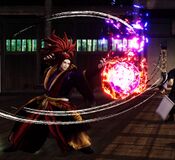
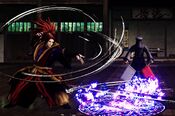
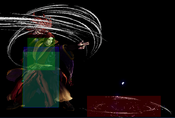
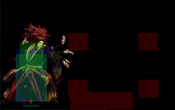
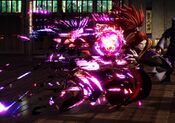
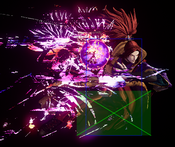
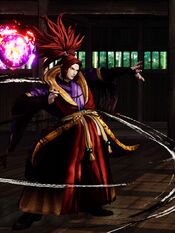
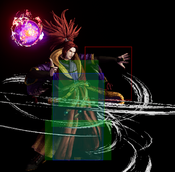
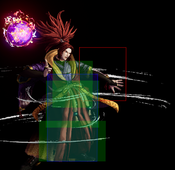
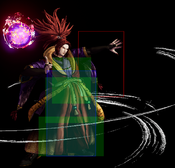
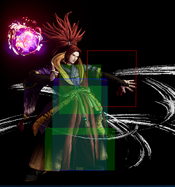
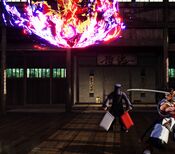
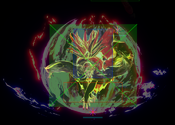
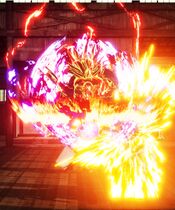
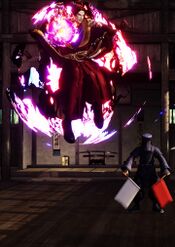
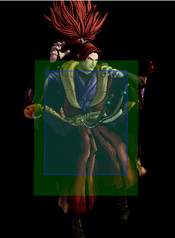
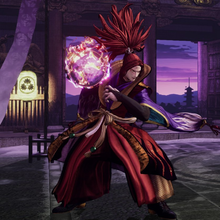
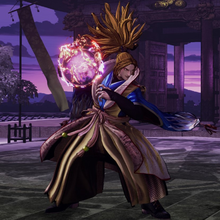
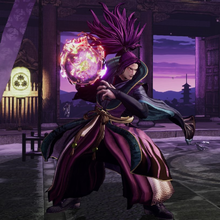
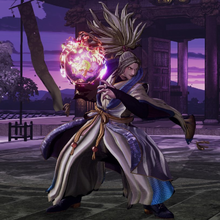
Shiro Tokisada Amakusa
天草四郎時貞, Amakusa Shirō Tokisada
|
- Damage Taken: 105%
- Rage Factor: 0.32
- Rage Duration: 8 seconds
- Jump: 61 frames (Extremely Slow)
- Forward Walk Speed: 0.3 (Average)
- Back Walk Speed: 0.23 (Average)
- Dash Speed: 1.0 (Very Slow)
- Back Dash: 27 frames
- Weapon Pickup / Drop: 40 / 57 frames
|
Introduction
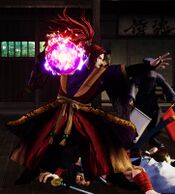
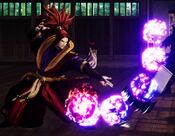
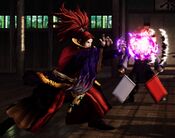
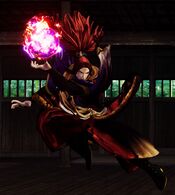
The villain of SamSho 4, Amakusa, returns to slap his opponents silly, annoy them with his magic 8-ball and the spread the good word of the lord and savior Jesus Christ.
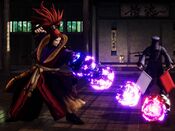
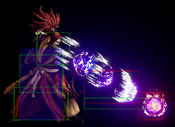
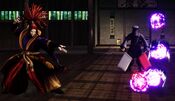
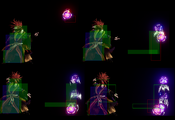
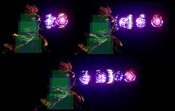
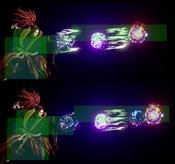
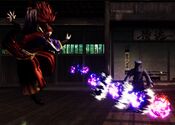
Amakusa is basically the Dhalsim function of the game. He is a keepaway zoner to the max who pesters opponents by smacking them with his orb and shooting fireballs from the end of the screen. His basic fireball Holy Spirit Slicer is one of the best in the game, with multiple speeds and a tall hitbox as well as knocking down on both hit and block. He has access to some of the longest normals in the game from almost anywhere on the screen, including at short range where his massive light slash normals make approaches very difficult. His anti-air game has many strong options including 66A, cl.5B, cl.5C, far 5B and 5A and many disjointed long-ranged jump normals that make reaction air-to-airing trivial and highly rewarding. He also has some nifty movement options that allow him to keep opponents on their toes and circumvent other fireball games, including his wall jump, grounded Evil Hornet Gouger teleport and the bizarre character tracking and projectile-invulnerable Dark Destroyer teleport.
Amakusa is also well-known for having incredibly strong mix-up and oki tools.
Playstyle
 Shiro Tokisada Amakusa is a zoner with powerful, long-range pokes, unconventional movement options and a devilish mix-up game. Shiro Tokisada Amakusa is a zoner with powerful, long-range pokes, unconventional movement options and a devilish mix-up game.
|
| Strengths |
Weaknesses
|
- Great normals: Amakusa has some of the longest grounded and airborne normals in the game. He also has great closer-range pokes for keeping attackers off such as 5D, 6D, 2D and n.5B.
- Strong zoning game: Amakusa has a great fireball with good screen coverage that also knocks down and leads to his excellent oki game.
- Good high-low game: Amakusa has rewarding 50/50 setups using his 214S specials that he can set up easily via meaty 236C and air resets from anti-airs. These are also safe from far distance, allowing punishes from antsy jumps or forward rolling. His 66B and B+C are also solid overheads, and he can mix these with his strong slide.
- Good ranged anti-airs and air to airs: n.5C and 66A are strong close-range AAs but Amakusa's AA game really shines from full screen, where his far 5B and j.C make his zoning game very hard to jump over safely.
|
- Extremely floaty: Amakusa has one of the slowest jumps in the game, making defensive jumping incredibly risky and jumping pressure non-viable. His jump normals do not hit well directly under him and he is vulnerable to run-under punishes and cross-unders.
- Unsafe: Amakusa's longest normals have huge recovery as well as significant grounded blind spots and are very unsafe on block. The slightest spacing mistake can lead to a huge deep jump punish, so there is little room for error. His far A and B normals also do not recoil, making him vulnerable to raw punishes.
- Deadzones on normals: Some of his normals have deadzones on them that do not have an active hitbox, forcing Amakusa to choose his buttons in neutral carefully.
- Slow normals: All his far normals have a higher than average startup, severely limiting what he can and can't use to punish from a distance compared to other characters.
|
Gameplan
Amakusa is all about staying at a distance, where his far buttons work the best, always looking for a knockdown to allow him to do meaty heavy fireball setups to lock the opponent down so he can start his high/low shenanigans, throwing a curveball every now and then to catch them by surprise.
Neutral
Amakusa prefers to poke his opponents down with some of the furthest reaching normals in the game, which still tend to hit hard, making Amakusa a force to be reckoned with at most screen ranges. His floaty jump is rather subpar for moving around the screen, but lends itself well to shutting down approaches, meaning that Amakusa has to commit to his jumps more than most characters. Amakusa also doesn't have access to conventional deep jump-ins, making his damage ceiling rather low, but he still has solid overall damage due to his normals and grabs hitting hard enough to cover for this weakness.
Okizeme
His main okizeme options are as follows:
- 236C: Hitting 236C meaty gives Amakusa a lot of plus frames to work with and allows him to link certain moves on hit for big damage.
- 214A/B/C : Active enough to hit meaty while not being very punishable.
- 66B : Hits overhead and knocks down on hit, giving Amakusa high/low mix on approach.
- 66C : Can be used as a situational meaty attack due to its dash being able to sideswitch when right next to the opponent.
- 5C/2C : 5C and 2C hit from very far, and with 5C having recoil cancel properties, it allows Amakusa to run okizeme from almost any position on the screen.
Normal Moves
Far Slashes
5A
5A
|
| Damage
|
Guard
|
Startup
|
Active
|
Recovery
|
Total
|
Hit Adv
|
Block Adv
|
Guard Dmg
|
Cancel
|
Recoil
|
Deflectable
|
Unarmed
|
| 30
|
Mid
|
9
|
5
|
12
|
25
|
-4
|
-7
|
5
|
No
|
No
|
Yes
|
No
|
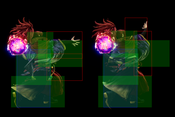
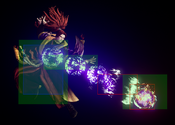
Amakusa quickly sends his orb to strike at his opponent's feet.
- Hits mid, despite the animation.
- Deflectable.
- Absurd range for a light normal while still being as fast, making it one of his main fast poke tools to keep the opponent away.
- While it's not a low unlike 2A which brings the risk of getting deflected, it's better in almost every other regard, from advantage on hit/block to not having a deadzone upclose like 2A does.
- It is advisable to cycle between 2A and 5A to keep the opponent from trying to read into an upcoming 5A and attempt to deflect.
|
|
Toggle Hitboxes Toggle Hitboxes
|
5B
5B
|
| Damage
|
Guard
|
Startup
|
Active
|
Recovery
|
Total
|
Hit Adv
|
Block Adv
|
Guard Dmg
|
Cancel
|
Recoil
|
Deflectable
|
Unarmed
|
| 100
|
Mid
|
15,19
|
2,7
|
25
|
50
|
-11~-6
|
-16~-11
|
10
|
No
|
No
|
Yes
|
No
|
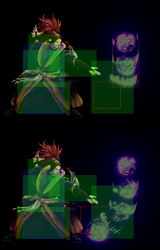
Amakusa's orb drops down from above then moves back to him along the ground.
- Extremely long ranged button that can also hit high enough to antiair people from afar, and also hits on the way back.
- Has a huge extended hurtbox which makes it a huge risk to whiff this attack, specially against characters with fireballs or long ranged attacks without extended hurtboxes (eg: Basara's far 5C).
- It has 2 frame gap between 1st and 2nd hitbox.
|
|
Toggle Hitboxes Toggle Hitboxes
|
5C
5C
|
| Damage
|
Guard
|
Startup
|
Active
|
Recovery
|
Total
|
Hit Adv
|
Block Adv
|
Guard Dmg
|
Cancel
|
Recoil
|
Deflectable
|
Unarmed
|
| 240
|
Mid
|
25
|
5
|
41
|
70
|
-6~-4
|
-16
|
25
|
No
|
Yes
|
Disarm
|
No
|
Amakusa briefly grabs the orb before sending it forward at high speeds.
- His hardest hitting long range normal.
- No extended hurtbox.
- A very important button since Amakusa lacks a cancellable running normal to punish, yet its startup is just slow enough that he might not be able to punish certain moves on situations where other characters would be able to.
- Active enough to land it meaty without risking a wakeup deflect.
- The only normal to give him safe recoil cancel options.
|
|
Toggle Hitboxes Toggle Hitboxes
|
2A
2A
|
| Damage
|
Guard
|
Startup
|
Active
|
Recovery
|
Total
|
Hit Adv
|
Block Adv
|
Guard Dmg
|
Cancel
|
Recoil
|
Deflectable
|
Unarmed
|
| 30
|
Low
|
8
|
5
|
17
|
29
|
-9~-8
|
-12~-11
|
5
|
No
|
No
|
No
|
No
|
Amakusa sends his orb forward a short distance while crouching.
- Very long ranged light attack that hits low.
- Very good keepaway poke at first glance, however it has a deadzone next to Amakusa, making it risky to throw out constantly.
|
|
Toggle Hitboxes Toggle Hitboxes
|
2B
2B
|
| Damage
|
Guard
|
Startup
|
Active
|
Recovery
|
Total
|
Hit Adv
|
Block Adv
|
Guard Dmg
|
Cancel
|
Recoil
|
Deflectable
|
Unarmed
|
| 90
|
Mid
|
15
|
4
|
25
|
43
|
-8~-6
|
-13~-11
|
10
|
No
|
No
|
Yes
|
No
|
Amakusa launches his orb forward while crouching.
- Long poke with extended hurtbox, just like standing f.5B, but faster and harder to hit.
- Has a deadzone infront of him.
- Long recovery like his f5B and is a crouching normal, which nets the opponent a heavy punish on a good read. Avoid throwing out mindlessly.
|
|
Toggle Hitboxes Toggle Hitboxes
|
2C
2C
|
| Damage
|
Guard
|
Startup
|
Active
|
Recovery
|
Total
|
Hit Adv
|
Block Adv
|
Guard Dmg
|
Cancel
|
Recoil
|
Deflectable
|
Unarmed
|
| 150
|
Low
|
20
|
7
|
33
|
59
|
KD(+85)
|
-16~-11
|
25
|
No
|
No
|
No
|
No
|
Amakusa grips his orb briefly and sends it out full force along the ground.
- Has no extended hurtbox, just like f.5C.
- Hits low.
- Unlike f.5C, does not recoil on block, but has huge pushback, making it difficult to punish when blocked.
- Knocks down on hit, giving Amakusa an opportunity to run his okizeme at most ranges, due to its huge range.
- Does less damage, but is slightly faster and goes a bit further than f.5C, making it Amakusa's best long range punish.
|
|
Toggle Hitboxes Toggle Hitboxes
|
Near Slashes
n.5A
n.5A
|
| Damage
|
Guard
|
Startup
|
Active
|
Recovery
|
Total
|
Hit Adv
|
Block Adv
|
Guard Dmg
|
Cancel
|
Recoil
|
Deflectable
|
Unarmed
|
| 30
|
Mid
|
5
|
5
|
10
|
19
|
-2
|
-5
|
5
|
Yes
|
No
|
No
|
No
|
Amakusa backhands the opponent.
- Special cancellable.
- Fast and reliable button that combos into 623D.
- While it gets punished by other close lights on block, a little spacing to trigger the opponent's far light attacks instead will give room to cancel on block into moves like 623S to escape a light punish, or 623D for a potential frametrap.
|
|
Toggle Hitboxes Toggle Hitboxes
|
n.5B
n.5B
|
| Damage
|
Guard
|
Startup
|
Active
|
Recovery
|
Total
|
Hit Adv
|
Block Adv
|
Guard Dmg
|
Cancel
|
Recoil
|
Deflectable
|
Unarmed
|
| 80
|
Mid
|
8
|
4
|
18
|
29
|
-1
|
-13
|
10
|
Yes
|
Yes
|
Yes
|
No
|
Amakusa shoves his orb into his opponent's face with both hands.
- Standard close range combo starter.
- Can also work as mediocre antiair option since its hitbox seems to be slightly high. However, its hitbox doesn't reach all the way to the ground so it can miss entirely on certain characters who can low profile under specific circumstances, so it's better to use n.2B instead.
|
|
Toggle Hitboxes Toggle Hitboxes
|
n.5C
n.5C
|
| Damage
|
Guard
|
Startup
|
Active
|
Recovery
|
Total
|
Hit Adv
|
Block Adv
|
Guard Dmg
|
Cancel
|
Recoil
|
Deflectable
|
Unarmed
|
| 200
|
Mid
|
15
|
2
|
28
|
44
|
-2
|
-28
|
25
|
No
|
Yes
|
Disarm
|
No
|
Amakusa swings his orb upwards.
- While it's far from his best anti-air(slow and doesn't reach really high), it is the most damaging, which can deter opponents from jumping from too close.
- Best used against characters with short/higher-hitting jump-ins.
|
|
Toggle Hitboxes Toggle Hitboxes
|
n.2A
n.2A
|
| Damage
|
Guard
|
Startup
|
Active
|
Recovery
|
Total
|
Hit Adv
|
Block Adv
|
Guard Dmg
|
Cancel
|
Recoil
|
Deflectable
|
Unarmed
|
| 30
|
Mid
|
5
|
4
|
10
|
18
|
-1
|
-4
|
5
|
Yes
|
No
|
No
|
No
|
Amakusa does a crouching backhand.
- Special cancellable.
- Combos into 623D.
- A safer version of close 5A, with the tradeoff of having shorter range.
|
|
Toggle Hitboxes Toggle Hitboxes
|
n.2B
n.2B
|
| Damage
|
Guard
|
Startup
|
Active
|
Recovery
|
Total
|
Hit Adv
|
Block Adv
|
Guard Dmg
|
Cancel
|
Recoil
|
Deflectable
|
Unarmed
|
| 80
|
Mid
|
7
|
5
|
17
|
28
|
-1
|
-13
|
10
|
Yes
|
Yes
|
Yes
|
No
|
Amakusa does a crouching strike with his orb.
- Serves the same function as n.5B, but doesn't anti air, is one frame faster and won't miss on characters who can low profile n.5B in weird circumstances.
|
|
Toggle Hitboxes Toggle Hitboxes
|
n.2C
n.2C
|
| Damage
|
Guard
|
Startup
|
Active
|
Recovery
|
Total
|
Hit Adv
|
Block Adv
|
Guard Dmg
|
Cancel
|
Recoil
|
Deflectable
|
Unarmed
|
| 150
|
Mid
|
19
|
5
|
28
|
51
|
-5
|
-28
|
25
|
Yes
|
Yes
|
Disarm
|
No
|
Amakusa shoves his orb into his opponent's legs with both hands.
- Quite slow but special cancellable, leading to big damage if you can land it.
- Recoil cancellable.
- Can be combo'd into from forward throw while the opponent is in the corner, or from backthrow while in the corner.
|
|
Toggle Hitboxes Toggle Hitboxes
|
Kicks
5D
5D
|
| Damage
|
Guard
|
Startup
|
Active
|
Recovery
|
Total
|
Hit Adv
|
Block Adv
|
Guard Dmg
|
Cancel
|
Recoil
|
Deflectable
|
Unarmed
|
| 50
|
Mid
|
12
|
6
|
12
|
29
|
-5
|
-8
|
5
|
No
|
-
|
-
|
Yes
|
Amakusa does a hopping knee strike. Deceptively fast.
- Has foot invulnerable from frame 12 to 20.
- Despite the animation, Amakusa is not considered airborne during this attack.
- Useful for situational crossunders during the opponent's jump-in.
|
|
Toggle Hitboxes Toggle Hitboxes
|
6D
6D
|
| Damage
|
Guard
|
Startup
|
Active
|
Recovery
|
Total
|
Hit Adv
|
Block Adv
|
Guard Dmg
|
Cancel
|
Recoil
|
Deflectable
|
Unarmed
|
| 30
|
Low
|
7
|
5
|
12
|
23
|
-4
|
-7
|
5
|
Yes
|
-
|
-
|
Yes
|
Amakusa does a kick aimed at the opponent's ankles.
- Standard 6D - standing low, slightly slower than 2D with more range.
- If special cancelled as soon as possible, gives his specials additional range.
- Pushes Amakusa away if whiffed near a knocked down opponent for some reason.
|
|
Toggle Hitboxes Toggle Hitboxes
|
2D
2D
|
| Damage
|
Guard
|
Startup
|
Active
|
Recovery
|
Total
|
Hit Adv
|
Block Adv
|
Guard Dmg
|
Cancel
|
Recoil
|
Deflectable
|
Unarmed
|
| 20
|
Low
|
5
|
4
|
9
|
17
|
0
|
-3
|
5
|
No
|
-
|
-
|
Yes
|
Amakusa does a crouching low kick.
|
|
Toggle Hitboxes Toggle Hitboxes
|
3D
3D
|
| Damage
|
Guard
|
Startup
|
Active
|
Recovery
|
Total
|
Hit Adv
|
Block Adv
|
Guard Dmg
|
Cancel
|
Recoil
|
Deflectable
|
Unarmed
|
| 70
|
Low
|
12
|
9
|
32
|
52
|
KD(+84)
|
-18~-11
|
5
|
No
|
-
|
-
|
Yes
|
Amakusa does a sliding low kick.
- Standard 3D.
- Knocks down.
|
|
Toggle Hitboxes Toggle Hitboxes
|
Dash Normals
66A
66A
|
| Damage
|
Guard
|
Startup
|
Active
|
Recovery
|
Total
|
Hit Adv
|
Block Adv
|
Guard Dmg
|
Cancel
|
Recoil
|
Deflectable
|
Unarmed
|
| 50
|
Mid
|
5
|
7
|
17
|
28
|
-1
|
-8
|
5
|
No
|
No
|
No
|
No
|
Amakusa slaps the opponent.
- Very fast and hits extremely high in the air.
- Probably his best anti-air, although the damage is very low.
|
|
Toggle Hitboxes Toggle Hitboxes
|
66B
66B
|
| Damage
|
Guard
|
Startup
|
Active
|
Recovery
|
Total
|
Hit Adv
|
Block Adv
|
Guard Dmg
|
Cancel
|
Recoil
|
Deflectable
|
Unarmed
|
| 80
|
High
|
15
|
4
|
27
|
45
|
KD(+71)
|
-14
|
10
|
No
|
No
|
Disarm
|
No
|
Amakusa does a running downward swing with his orb.
- Hits overhead.
- Knocks down even on air hit, making it good for calling out backdash attempts.
|
|
Toggle Hitboxes Toggle Hitboxes
|
66C
66C
|
| Damage
|
Guard
|
Startup
|
Active
|
Recovery
|
Total
|
Hit Adv
|
Block Adv
|
Guard Dmg
|
Cancel
|
Recoil
|
Deflectable
|
Unarmed
|
| 140
|
Mid
|
20
|
5
|
33
|
57
|
KD(+90)
|
-19
|
20
|
No
|
No
|
Disarm
|
No
|
Amakusa slides forward and shoves his orb into the opponent with both hands.
- He keeps moving forward and switches sides if he passes the opponent by frame 10, but the side-switch is very slow and reactable, and the trigger range for the side-switch is very short and dooesn't switch if the opponent is against the corner. Best used during okizeme to prevent getting poked out of it for this reason
- If used properly it can even bait opponents into landing attacks on the wrong side during wakeup, although the timing is strict.
|
|
Toggle Hitboxes Toggle Hitboxes
|
66D
66D
|
| Damage
|
Guard
|
Startup
|
Active
|
Recovery
|
Total
|
Hit Adv
|
Block Adv
|
Guard Dmg
|
Cancel
|
Recoil
|
Deflectable
|
Unarmed
|
| 70
|
Low
|
10
|
11
|
21
|
41
|
-9~+1
|
-13~-3
|
5
|
No
|
-
|
-
|
Yes
|
Amakusa does a sliding low kick.
|
|
Toggle Hitboxes Toggle Hitboxes
|
Air Normals
j.A
j8.A
|
| Damage
|
Guard
|
Startup
|
Active
|
Recovery
|
Total
|
Hit Adv
|
Block Adv
|
Guard Dmg
|
Cancel
|
Recoil
|
Deflectable
|
Unarmed
|
| 50
|
High
|
10
|
4
|
-
|
-
|
-
|
-
|
5
|
-
|
-
|
-
|
No
|
Amakusa sends down his orb at a 30 degree angle.
- Can only be performed while neutral jumping
- Useful for catching jumps preemptively and smacking opponents trying to run into your deadzone.
- Due to Amakusa's floaty jump, it leaves him wide open for quick attacks and reversals if he hits an opponent out of their jump startuph while rising, as Amakusa won't recover in time to block.
|
|
Toggle Hitboxes Toggle Hitboxes
|
j.A
j7/9.A
|
| Damage
|
Guard
|
Startup
|
Active
|
Recovery
|
Total
|
Hit Adv
|
Block Adv
|
Guard Dmg
|
Cancel
|
Recoil
|
Deflectable
|
Unarmed
|
| 50
|
High
|
7
|
4
|
-
|
-
|
-
|
-
|
5
|
-
|
-
|
-
|
No
|
Amakusa sends his orb out in front of him.
- Can only be done while forward/back jumping
- Amakusa's go-to air-to-air option as it covers the most horizontal air space and is the fastest out of his air normals.
- Only the orb has hitbox during 3th and 4th active frames.
|
|
Toggle Hitboxes Toggle Hitboxes
|
j.B
j.B
|
| Damage
|
Guard
|
Startup
|
Active
|
Recovery
|
Total
|
Hit Adv
|
Block Adv
|
Guard Dmg
|
Cancel
|
Recoil
|
Deflectable
|
Unarmed
|
| 100
|
High
|
11
|
4
|
-
|
-
|
-
|
-
|
10
|
-
|
-
|
-
|
No
|
Amakusa sends his orb out below him at 45 degrees.
- His main jump-in normal, due to jC's deadzone not hitting opponents in front of him.
- Solid air-to-ground button, used in situations where jC is too slow while covering a similar area.
- Only the orb has hitbox during 3th and 4th active frames.
|
|
Toggle Hitboxes Toggle Hitboxes
|
j.C
j.C
|
| Damage
|
Guard
|
Startup
|
Active
|
Recovery
|
Total
|
Hit Adv
|
Block Adv
|
Guard Dmg
|
Cancel
|
Recoil
|
Deflectable
|
Unarmed
|
| 160
|
High
|
15
|
6
|
-
|
-
|
-
|
-
|
20
|
-
|
-
|
-
|
No
|
Amakusa lobs his orb downwards at a 45 degree angle.
- Air-to-ground poke with huge range and decent damage. Covers the same area as jB but goes slightly further and does more damage.
- Has a deadzone in front of Amakusa, which means it won't hit opponents who are close to him.
- Due to said deadzone, Amakusa does not have access to conventional deep jump-ins, crippling his jump-in damage output severely.
- Can still hit deep, but combos out of it are very limited and hitting it requires you to hit the opponents feet for it to count as a deep jump-in.
- On successful deep hit, combos into:
- 214B
- WFT at certain ranges
- 2C
- n.2B (only if the 1st active frame hits deep)
|
|
Toggle Hitboxes Toggle Hitboxes
|
j.D
j.D
|
| Damage
|
Guard
|
Startup
|
Active
|
Recovery
|
Total
|
Hit Adv
|
Block Adv
|
Guard Dmg
|
Cancel
|
Recoil
|
Deflectable
|
Unarmed
|
| 30
|
High
|
8
|
7
|
-
|
-
|
-
|
-
|
5
|
-
|
-
|
-
|
Yes
|
Amakusa does an air kick.
|
|
Toggle Hitboxes Toggle Hitboxes
|
Unarmed Normals
u.5S
u.5S
|
| Damage
|
Guard
|
Startup
|
Active
|
Recovery
|
Total
|
Hit Adv
|
Block Adv
|
Guard Dmg
|
Cancel
|
Recoil
|
Deflectable
|
Unarmed
|
| 50[25,25]
|
Mid
|
6,16
|
7,3
|
-
|
34
|
+2
|
-3
|
5[3,2]
|
No
|
-
|
-
|
Only
|
Amakusa slaps the opponent twice.
- Hits twice, unlike most unarmed normals.
- Not special cancellable, but slightly plus on hit.
|
|
Toggle Hitboxes Toggle Hitboxes
|
u.2S
u.2S
|
| Damage
|
Guard
|
Startup
|
Active
|
Recovery
|
Total
|
Hit Adv
|
Block Adv
|
Guard Dmg
|
Cancel
|
Recoil
|
Deflectable
|
Unarmed
|
| 50[25,25]
|
Mid
|
6,16
|
7,3
|
-
|
34
|
0
|
-6
|
5[3,2]
|
No
|
-
|
-
|
Only
|
Amakusa does two crouching slaps.
- Functionally the same as the standing version.
|
|
Toggle Hitboxes Toggle Hitboxes
|
ju.S
ju.S
|
| Damage
|
Guard
|
Startup
|
Active
|
Recovery
|
Total
|
Hit Adv
|
Block Adv
|
Guard Dmg
|
Cancel
|
Recoil
|
Deflectable
|
Unarmed
|
| 50
|
High
|
6
|
8
|
-
|
-
|
-
|
-
|
5
|
-
|
-
|
-
|
Only
|
Standard jumping unarmed strike.
|
|
Toggle Hitboxes Toggle Hitboxes
|
u.66S
u.66S
|
| Damage
|
Guard
|
Startup
|
Active
|
Recovery
|
Total
|
Hit Adv
|
Block Adv
|
Guard Dmg
|
Cancel
|
Recoil
|
Deflectable
|
Unarmed
|
| 50
|
Mid
|
5
|
7
|
-
|
28
|
KD(+104)
|
-8
|
5
|
No
|
-
|
-
|
Only
|
Amakusa slaps his opponent.
- Standard running unarmed normal. Functionally the same as armed 66A, but knocks down on hit.
|
|
Toggle Hitboxes Toggle Hitboxes
|
Universal Mechanics
Guard Break
Guard Break (Throw)
5/6C+D / 4C+D Neutral / Forward Throw Neutral / Forward Throw Back Throw Back Throw
|
| Version
|
Damage
|
Guard
|
Startup
|
Active
|
Recovery
|
Total
|
Hit Adv
|
Block Adv
|
Guard Dmg
|
Cancel
|
Recoil
|
Deflectable
|
Unarmed
|
| Neutral / Forward
|
0
|
Throw
|
3
|
1
|
71
|
74
|
+20
|
N/A
|
N/A
|
No
|
No
|
No
|
Yes
|
Universal throw. Can be followed up with an attack.
|
| Back
|
0
|
Throw
|
5
|
1
|
69
|
74
|
+25
|
N/A
|
N/A
|
No
|
No
|
No
|
Yes
|
Universal throw. Can be followed up with an attack.
|
|
Toggle Hitboxes Toggle Hitboxes
|
Surprise Attack
Surprise Attack (Overhead)
5B+C Armed Armed Unarmed Unarmed
|
| Version
|
Damage
|
Guard
|
Startup
|
Active
|
Recovery
|
Total
|
Hit Adv
|
Block Adv
|
Guard Dmg
|
Cancel
|
Recoil
|
Deflectable
|
Unarmed
|
| Armed
|
70
|
High
|
21
|
2
|
-
|
45
|
+1
|
-12
|
10
|
-
|
-
|
-
|
No
|
Universal overhead with decent range. Airborne from frame 11 to 36.
|
| Unarmed
|
70
|
High
|
21
|
2
|
-
|
40
|
KD(+104)
|
-7
|
10
|
-
|
-
|
-
|
Only
|
Amakusa does a downwards hop kick. Airborne from frame 6 to 38.
- Universal unarmed overhead.
- Knocks down on hit.
|
|
Toggle Hitboxes Toggle Hitboxes
|
Dodge
Dodge
5A+B
|
| Damage
|
Guard
|
Startup
|
Active
|
Recovery
|
Total
|
Hit Adv
|
Block Adv
|
Guard Dmg
|
Cancel
|
Recoil
|
Deflectable
|
Unarmed
|
| 0
|
N/A
|
1
|
16
|
22
|
38
|
N/A
|
N/A
|
-
|
N/A
|
-
|
N/A
|
Yes
|
Universal dodge. Avoids all attacks for a brief moment, and is mainly used to avoid throws.
Complete invincibility from frames 1 to 10. Strike invincibility from frames 11 to 16.
|
|
Toggle Hitboxes Toggle Hitboxes
|
Stance Break
Stance Break
A+B during Just Defense
|
| Damage
|
Guard
|
Startup
|
Active
|
Recovery
|
Total
|
Hit Adv
|
Block Adv
|
Guard Dmg
|
Cancel
|
Recoil
|
Deflectable
|
Unarmed
|
| 0
|
Mid
|
5
|
10
|
-
|
52
|
KD
|
-24
|
-
|
No
|
-
|
-
|
Yes
|
Universal Stance Break. Very short range.
|
|
Toggle Hitboxes Toggle Hitboxes
|
Counter / Blade Catch
Counter / Blade Catch
236A+B Counter Counter Blade Catch Blade Catch
|
| Version
|
Damage
|
Guard
|
Startup
|
Active
|
Recovery
|
Total
|
Hit Adv
|
Block Adv
|
Guard Dmg
|
Cancel
|
Recoil
|
Deflectable
|
Unarmed
|
| Armed
|
0
|
N/A
|
2
|
11
|
34
|
46
|
+35~+59
|
N/A
|
N/A
|
N/A
|
N/A
|
N/A
|
No
|
Universal counter. Allows you to follow up with a guaranteed attack of your own. The amount of time you have to followup depends on the strength of the attack you counter, with heavy attacks staggering the opponent for the longest amount of time. Additionally, if you counter a heavy slash or a running slash, your opponent will be disarmed.
|
| Disarmed
|
0
|
N/A
|
2
|
12
|
9
|
22
|
KD
|
N/A
|
N/A
|
N/A
|
N/A
|
N/A
|
Yes
|
Universal counter. While disarmed, your counter will disarm and knock away your opponent regardless of slash level countered.
|
|
Toggle Hitboxes Toggle Hitboxes
|
Rage Explosion
Rage Explosion
5A+B+C
|
| Damage
|
Guard
|
Startup
|
Active
|
Recovery
|
Total
|
Hit Adv
|
Block Adv
|
Guard Dmg
|
Cancel
|
Recoil
|
Deflectable
|
Unarmed
|
| 0
|
Unblockable
|
21
|
3
|
-
|
58
|
0
|
-
|
-
|
-
|
-
|
-
|
No
|
Unblockable pushback attack.
|
|
Toggle Hitboxes Toggle Hitboxes
|
Lightning Blade
Lightning Blade (Issen)
5A+B+C during Rage Explosion
|
| Damage
|
Guard
|
Startup
|
Active
|
Recovery
|
Total
|
Hit Adv
|
Block Adv
|
Guard Dmg
|
Cancel
|
Recoil
|
Deflectable
|
Unarmed
|
| 300~709
|
Mid
|
9
|
8
|
-
|
-
|
KD
|
-44
|
-
|
No
|
No
|
No
|
No
|
Has full invincibility and can anti-air. Damage scales up based on remaining health.
|
|
Toggle Hitboxes Toggle Hitboxes
|
Command Moves
Wall Jump
Wall Jump
9 (near wall) Wall Jump Wall Jump
|
| Damage
|
Guard
|
Startup
|
Active
|
Recovery
|
Total
|
Hit Adv
|
Block Adv
|
Guard Dmg
|
Cancel
|
Recoil
|
Deflectable
|
Unarmed
|
| -
|
-
|
-
|
-
|
-
|
-
|
-
|
-
|
-
|
-
|
-
|
-
|
Yes
|
Standard wall jump.
- Worth noting is that his second jump is faster than his initial jump, about the same speed as average jump speeds, giving Amakusa some decent maneuverability to make up for his floaty jumps.
|
|
Toggle Hitboxes Toggle Hitboxes
|
Special Moves
Holy Spirit Slicer
Holy Spirit Slicer
236S
|
| Version
|
Damage
|
Guard
|
Startup
|
Active
|
Recovery
|
Total
|
Hit Adv
|
Block Adv
|
Guard Dmg
|
Cancel
|
Recoil
|
Deflectable
|
Unarmed
|
| A
|
60
|
Mid
|
15
|
-
|
-
|
62
|
KD(+84)
|
-19
|
5
|
-
|
-
|
-
|
No
|
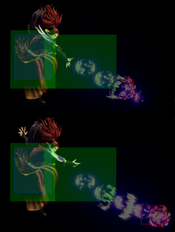
Amakusa sends out a fiery skull from his orb.
- Knocks down on hit.
- One of Amakusa's space control tools, decent for zoning.
- His main recoil cancel option and one of his main oki tools.
- Travels full screen.
- Despite the different startups and travel times, all versions have the same total amount of frames, which means that aware opponents only need to react to the startup of the fireball to avoid it.
- Only one fireball can be on screen at a time, meaning that, should you use a slower version, you won't be able to send out another one until the initial fireball has disappeared or hit its target.
- A version has the fastest startup and travel time.
|
| B
|
60
|
Mid
|
18
|
-
|
-
|
62
|
KD(+87)
|
-16
|
5
|
-
|
-
|
-
|
No
|
- B version has more startup and travels slightly slower than the A version.
- Useful in situations where you want to mess with the opponent's punish timing on recoil cancel.
|
| C
|
60
|
Mid
|
26
|
-
|
-
|
62
|
KD(+95)
|
-8
|
5
|
-
|
-
|
-
|
No
|
- C version has the slowest startup and travel time.
- This version is most commonly used for oki, as landing it meaty allows for oki setups.
|
| Rage
|
102[119] (12[14]*6, 30[35])
|
Mid
|
27
|
-
|
-
|
62
|
KD(+120)
|
-18
|
8
|
Yes*
|
-
|
-
|
No
|
- Rage version hits an additional 2 times and does additional damage
- Rage version can't be reflected.
- Links into 5B, 2B, 214B, WFT and Issen if spaced properly.
- Travels faster than his C version, therefore removing his meaty fireball setups until the rage bar empties.
Bracketed is Rage Explosion numbers.
|
|
Toggle Hitboxes Toggle Hitboxes
|
Phoenix Flash
Phoenix Flash
214S
|
| Version
|
Damage
|
Guard
|
Startup
|
Active
|
Recovery
|
Total
|
Hit Adv
|
Block Adv
|
Guard Dmg
|
Cancel
|
Recoil
|
Deflectable
|
Unarmed
|
| A
|
110 (10,100)
|
High
|
24
|
13
|
-
|
56
|
KD(+91)
|
-14
|
5
|
-
|
-
|
-
|
No
|
Amakusa sends out his orb to trap his opponent in a pillar of dark energy that launches them into the air.
- Hitgrab that gives a generous knockdown on hit, allowing Amakusa to run his oki.
- Distance of the orb depends on button strength used.
- Hits airborne opponents and can be used as a situational anti-air.
- Can be combo'd into from his close B and C normals.
- Decent damage on hit, making it worth looking out for in mixup and recoil cancel situations
- A version hits overhead.
- Amakusa sends the orb out right in front of him.
- Pretty punishable if blocked since it hits right in front of Amakusa.
- Active enough to hit meaty.
|
| B
|
110 (10,100)
|
High
|
24
|
13
|
-
|
56
|
KD(+91)
|
-14
|
5
|
-
|
-
|
-
|
No
|
- B version hits overhead.
- Amakusa sends the orb out at halfscreen range.
- Much less dangerous on block due to the distance.
- Active enough to hit meaty.
- Visually, looks similar to his f.5B.
|
| C
|
130 (30,100)
|
Low
|
17
|
10
|
-
|
56
|
KD(+91)
|
-21
|
5
|
-
|
-
|
-
|
No
|
Amakusa casts a portal on the ground a character's length away in front of him.
- Hits low.
- Not as active as the A and B versions.
- Good for catching reckless dash-in attempts.
|
|
Toggle Hitboxes Toggle Hitboxes
|
Evil Hornet Gouger
Evil Hornet Gouger
236D/214D
|
| Damage
|
Guard
|
Startup
|
Active
|
Recovery
|
Total
|
Hit Adv
|
Block Adv
|
Guard Dmg
|
Cancel
|
Recoil
|
Deflectable
|
Unarmed
|
| -
|
-
|
14
|
0~25
|
20
|
33~58
|
-
|
-
|
-
|
-
|
-
|
-
|
Yes
|
Amakusa dashes forward or backwards a set distance.
- Stops early if Amakusa touches the edge of the screen.
- Upper body invulnerable during the dashing part, and fully invulnerable to projectiles.
- Can be cancelled into SSM at any point (SSM input can be done either forward or backwards for some reason). Useful for post-guard crush SSMs.
- Long startup, making it risky to be used as an escape tool when the opponent is right next to you.
|
|
Toggle Hitboxes Toggle Hitboxes
|
Judgement Blow
Judgement Blow
623D
|
| Damage
|
Guard
|
Startup
|
Active
|
Recovery
|
Total
|
Hit Adv
|
Block Adv
|
Guard Dmg
|
Cancel
|
Recoil
|
Deflectable
|
Unarmed
|
| 170 (10,5*20,60)
|
Mid
|
10,20,30,40
|
3,3,3,3
|
-
|
70
|
KD(+93)
|
-15
|
8 (2*4)
|
-
|
-
|
-
|
Yes
|
Amakusa assaults the opponent with a flurry of slaps before smacking them away.
- Hitgrab.
- Very fast startup, allowing it to be combo'd into from his light normals on hit.
- Amakusa strikes in fixed directions, starting above his head.
- Hits airborne opponents.
- If cancelled into from 6D as soon as possible, it gains additional range.
- Can also be used to anti-air, even though the hitbox on Amakusa's hand is pretty tiny, and because the hitbox moves to where his hand is you will have to anti-air on the first active frames of the move when Amakusa's hand is placed above his head.
- Behaves similarly to Yoshitora's Asagao, where the move will remain active for a short while even on whiff. Should it connect during its active frame window, it will transition into the full attack animation, regardless of when it hit.
|
|
Toggle Hitboxes Toggle Hitboxes
|
Dark Destroyer
Dark Destroyer
623S
|
| Damage
|
Guard
|
Startup
|
Active
|
Recovery
|
Total
|
Hit Adv
|
Block Adv
|
Guard Dmg
|
Cancel
|
Recoil
|
Deflectable
|
Unarmed
|
| 150
|
-
|
24
|
10~38
|
-
|
33~61
|
KD
|
-
|
-
|
-
|
-
|
-
|
No
|
Amakusa soars into the air, encasing himself in a fiery sphere.
- Ascent arc depends on the slash strength used.
- While ascending:
- Light slash goes straight up.
- Medium slash travels up in a 30 degree angle.
- Heavy slash travels up to a halfscreen position.
- Amakusa becomes airborne from frame 7, and able to begin descending from frame 34.
- Projectile invincible during active frames.
- The hitbox is smaller than it looks and can be hit out of the air if you react fast enough.
- The hitbox is only on the lower half of the orb encasing Amakusa, so he can be hit cleanly from above.
- Amakusa can be hit out of the ascent.
- Amakusa has an active hitbox and hurtbox while sitting inside the sphere, which can trade with certain air attacks, forcing him out early.
- Situational escape tool.
.
|
|
Toggle Hitboxes Toggle Hitboxes
|
Judgement Blow (Attack)
Judgement Blow (Attack)
During 623S, S
|
| Damage
|
Guard
|
Startup
|
Active
|
Recovery
|
Total
|
Hit Adv
|
Block Adv
|
Guard Dmg
|
Cancel
|
Recoil
|
Deflectable
|
Unarmed
|
| 150
|
Mid
|
1
|
-
|
29(landing)
|
-
|
KD(+85)
|
-17
|
10
|
-
|
-
|
-
|
No
|
Amakusa crashes down into the opponent.
- Projectile invincible during active frames.
- Different slashes determine the descent arc.
- Light slash makes Amakusa descend forward at a 10 degree angle. (doesn't auto switch sides if the opponent is behind)
- Medium slash descends forward at a 45 degree angle. (doesn't auto switch sides if the opponent is behind)
- Heavy slash tracks the opponent. (does auto switch sides)
- Takes at least 8/10 frames to hit standard standing/crouching opponent.
- If nothing is pressed after Amakusa ascends, at frame 62 Amakusa will default to the heavy slash descent, which tracks the opponent.
- Can hit airborne opponents. Also hits cross-up, usually by medium slash version.
- Deals a decent amount of chip damage, making it ideal for closing the round if the opponent is within chip kill range.
|
|
Toggle Hitboxes Toggle Hitboxes
|
Judgement Blow (Descent)
Judgement Blow (Descent)
During 623S, D
|
| Damage
|
Guard
|
Startup
|
Active
|
Recovery
|
Total
|
Hit Adv
|
Block Adv
|
Guard Dmg
|
Cancel
|
Recoil
|
Deflectable
|
Unarmed
|
| -
|
-
|
-
|
-
|
6(landing)
|
32
|
-
|
-
|
-
|
-
|
-
|
-
|
No
|
Amakusa falls straight down out of the orb without attacking.
|
|
Toggle Hitboxes Toggle Hitboxes
|
Supers
Weapon Flipping Technique
Repent for your sins! But Ask Me Not For Forgiveness
236B+C
|
| Damage
|
Guard
|
Startup
|
Active
|
Recovery
|
Total
|
Hit Adv
|
Block Adv
|
Guard Dmg
|
Cancel
|
Recoil
|
Deflectable
|
Unarmed
|
| 350(420,470)
|
Mid
|
1+13
|
5
|
-
|
70
|
KD(+41)
|
-24~-22
|
-
|
-
|
-
|
-
|
No
|
Amakusa sends out his orb to assault his opponent before retrieving it and shoving it into the opponent with a big blast.
- Not SSM punishable on block unlike other WFTs, since it's only -24 on block.
- Combos from his close B and C normals.
- Can be linked into after a meaty Rage fireball for good damage.
- Has no extended hurtbox.
- Goes up to halfscreen distance and is decently fast, making it a good, hard-hitting punish in certain situations.
- Hits airborne opponents, making it a good situational anti-air.
|
|
Toggle Hitboxes Toggle Hitboxes
|
Super Special Move
Atonement for your sins! But Ask Me Not For Forgiveness
641236C+D
|
| Damage
|
Guard
|
Startup
|
Active
|
Recovery
|
Total
|
Hit Adv
|
Block Adv
|
Guard Dmg
|
Cancel
|
Recoil
|
Deflectable
|
Unarmed
|
| 650
|
Low
|
10+18
|
4
|
-
|
103
|
KD(+88)
|
-43
|
-
|
-
|
-
|
-
|
No
|
Amakusa traps his opponent in a vortex of dark energy, slowly shrinking it before collapsing it onto the opponent, making them explode.
- Hits low.
- Can be done easily after a guard crush, due to 236/214D's SSM cancel property.
- Fast enough to hit even after light deflects, making Amakusa's deflects extra scary.
|
|
Toggle Hitboxes Toggle Hitboxes
|
Combos
List combos, use numpad notation.
Midscreen
- (n.5A / n.2A) xx 623D
Quick close range combo.
- (n.5B / n.2B) xx 236S / 214C / 623D / WFT
Has to be very close or 623D will whiff.
- n.2C xx 236S / 214C / 623D / WFT
Close range combo.
- 6D xx 623D
Combo starting from a low. Can be done unarmed
- 5CD...
- (n.5B / n.2B) xx 236S / 214C / WFT
Microwalk in order to get the close version.
- 6D xx 623D
slightly less damage than n5B xx 214C, but easier and gives better spacing
- 2C
Easy follow up for knock down.
- 4CD...
- (n.5B / n.2B) xx 236S / 214C / 623D / WFT
Has to walk quite a bit for 623D to connect..
- 2C
Easy follow up for knock down.
Corner
- (5CD/4CD)...
- n.2C xx 236S / 214C / 623D / WFT
Corner throw combo for the most damage.
Guard Crush
- n.5C...
After recovery...
- SSM
SSM follow up. (Be careful with opponent bursting to avoid it)
- (n.5B / n.2B) xx 236S / 214C / 623D / WFT
Has to be very close or 623D will whiff.
- n.5C / 5C...
Cancel recovery...
- Lighting Blade
Universal Issen combo.
- Far 5C...
Cancel hit...
- 236D xx SSM
long range SSM conversion.
Tech
Assorted Twitter/discord tech links
Meaty 214A/B and 5C on forward roll https://twitter.com/KingFossil1/status/1409705720195411968?s=20
Meaty heavy fireball into 214B/214C (forward roll) https://twitter.com/KingFossil1/status/1429859784065486850?s=20
- Midscreen 214S (KD)...
- backdash, 236C, 6D xx214B
- backdash, 236C, 6D xx214c
Done correctly (timing is tight), fireball into 214C is a true blockstring, and can't jump to avoid 214B
Left/Right DP setup (forward roll)
- Midscreen 623D (KD)...
- dodge, 623C, A or C followup
Videos
Colors
External Links
Link to docs hosted in other sites.
